This topic describes how to use Cloud Architect Design Tools (CADT) to detect your existing resources in the cloud and automatically generate an architecture for visualized O&M management.
Prerequisites
Cloud Config is activated.
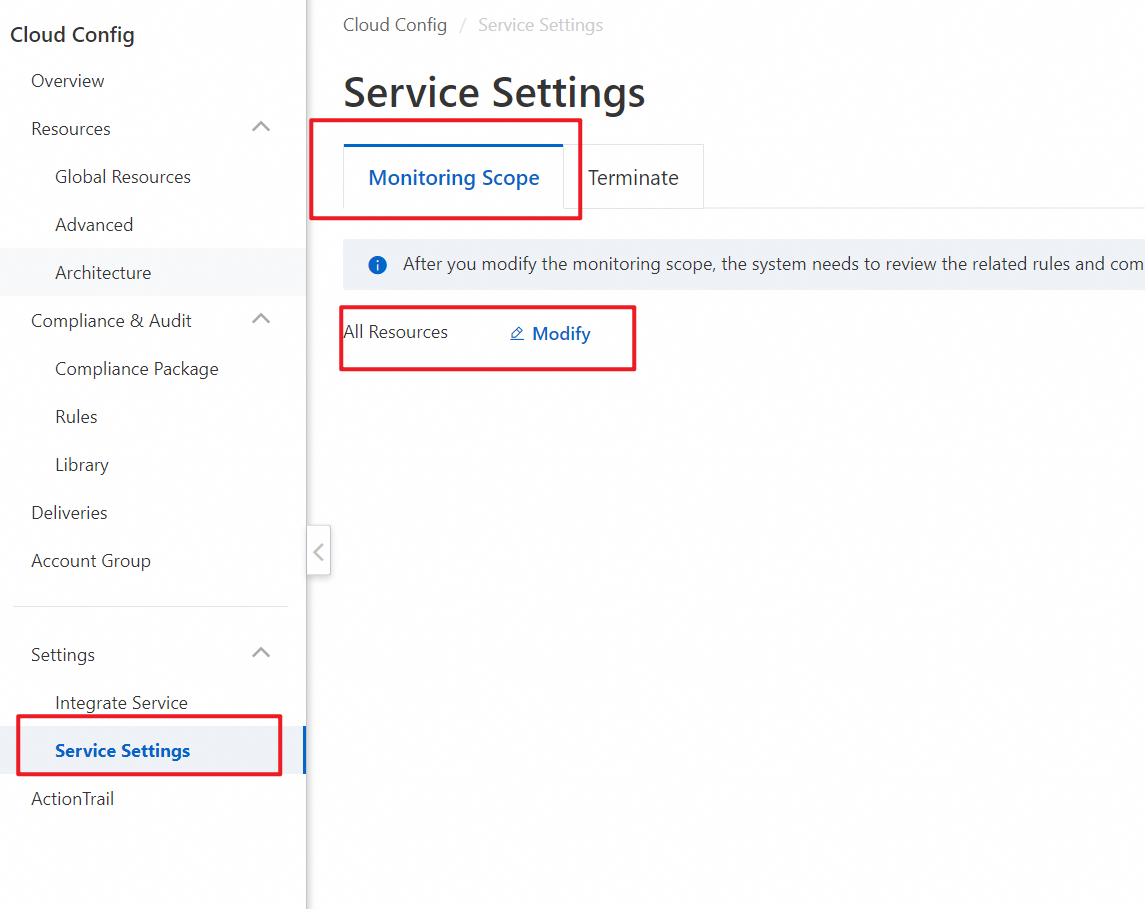
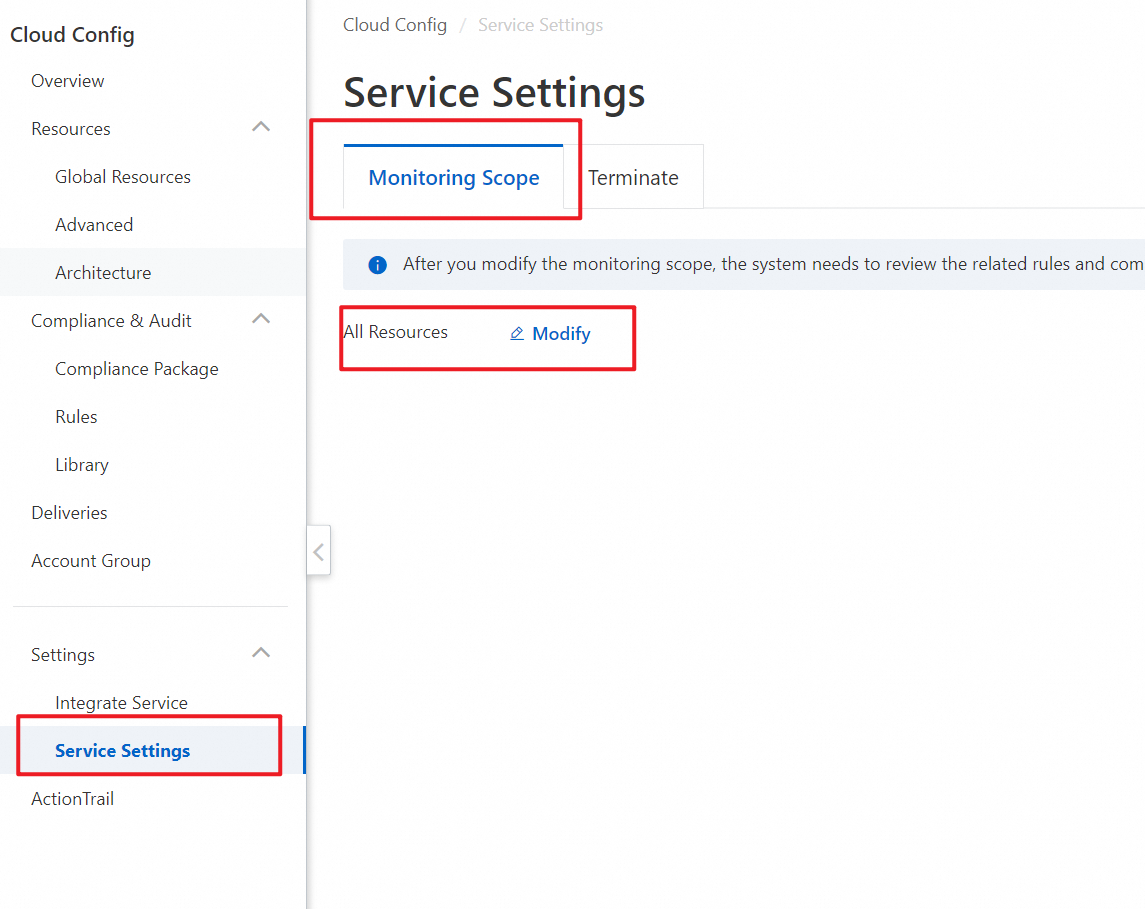
All Resources is specified on the Monitoring Scope tab of the Service Settings page in the Cloud Config console.
Activate Cloud Config
Log on to the CADT console.
In the top navigation bar, choose Resources > Resource Profiling.

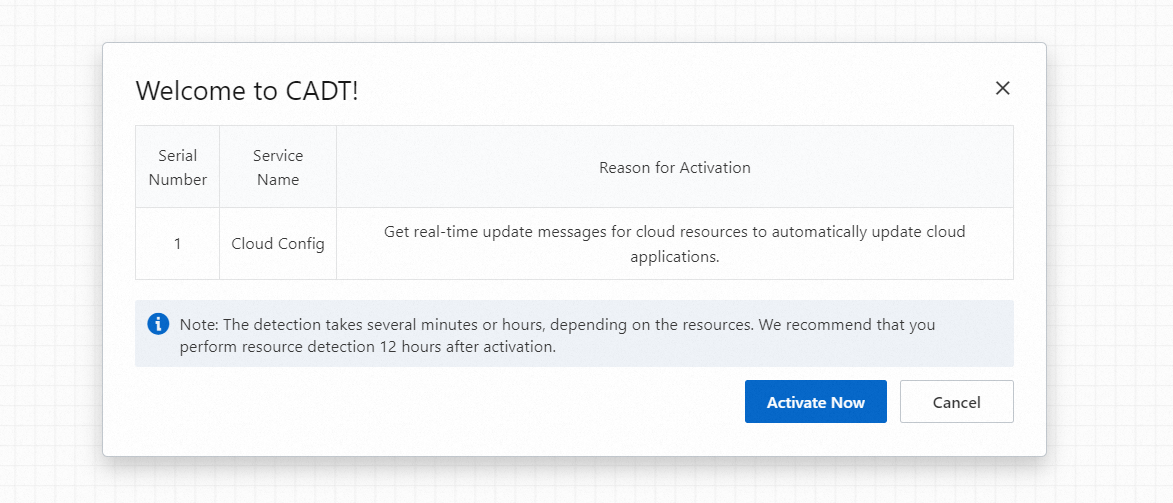
In the dialog box that appears, click Activate Now.
 Important
The resource profiling feature is not immediately available after Cloud Config is activated. Wait until Cloud Config scans all of your resources and generates a resource list. The amount of time that is consumed to scan the resources and generate the resource list varies based on the amount of the resources. In most cases, it takes 30 to 60 minutes.
After you activate Cloud Config, go to the Service Settings page and specify All Resources on the Monitoring Scope tab.
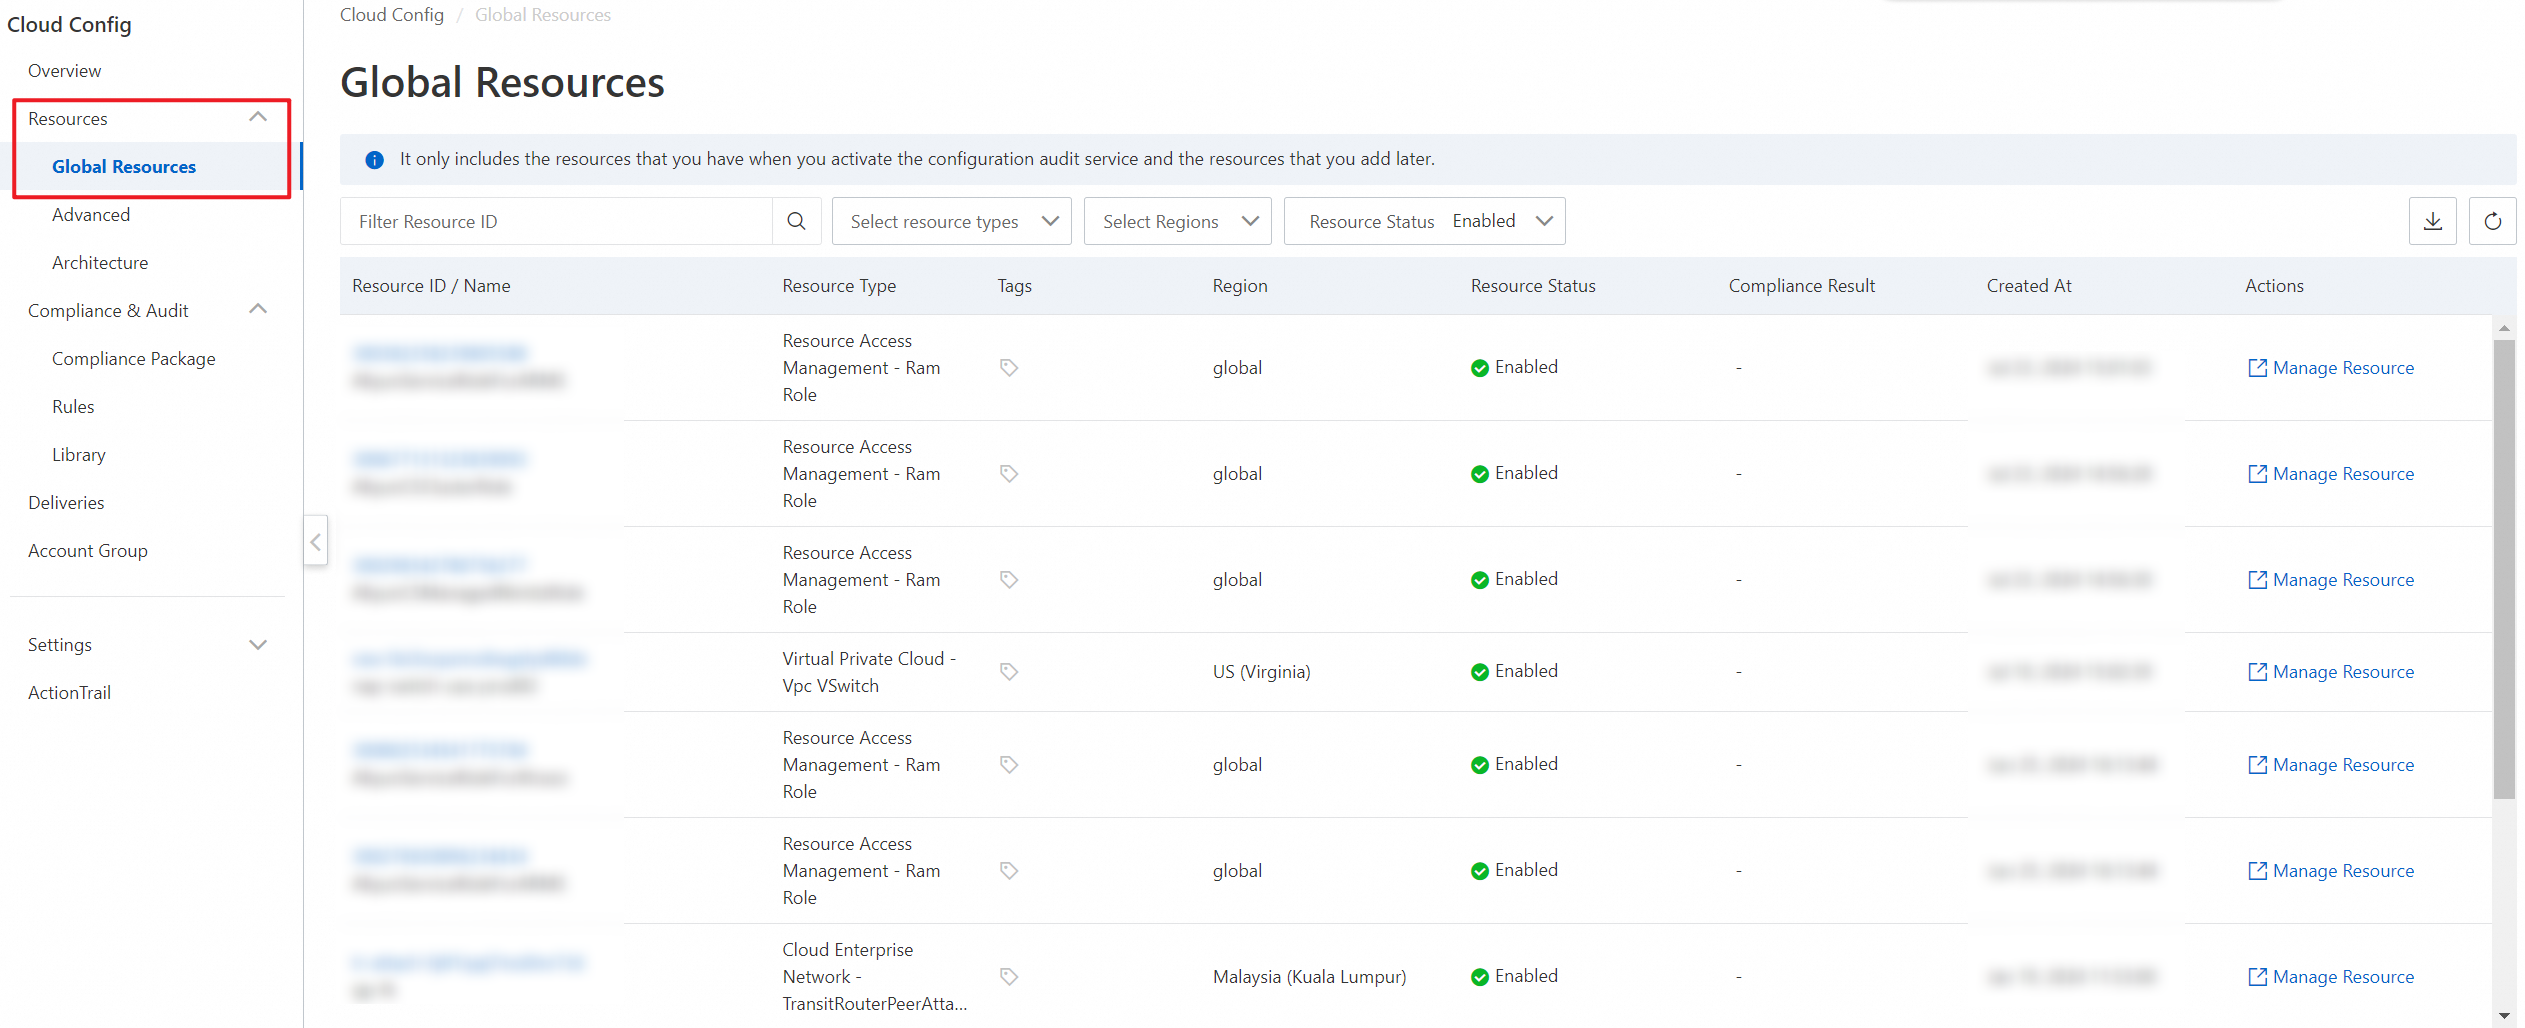
After 30 to 60 minutes, log on to the Cloud Config console. In the left-side navigation pane, choose Resources > Global Resources. On the Global Resources page, verify that all of your resources are displayed. Then, you can use the resource profiling feature of CADT.
Detect resources
Before you begin
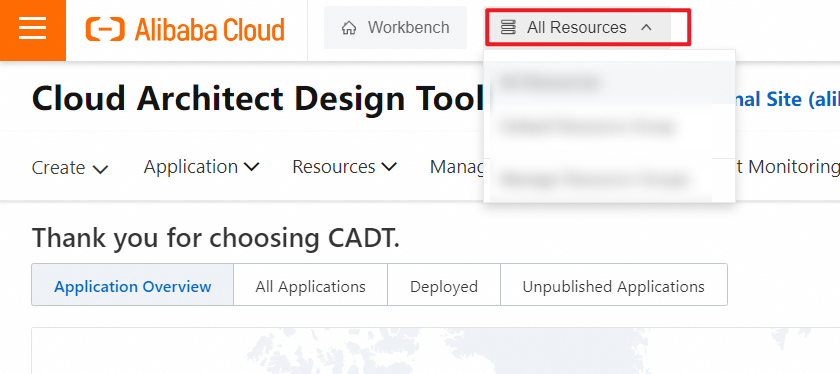
Select All Resources from the resource scope drop-down list as the resource scope. This operation prevents inconsistency in detection results.
Procedure
Log on to the CADT console.
In the top navigation bar, choose Resources > Resource Profiling.

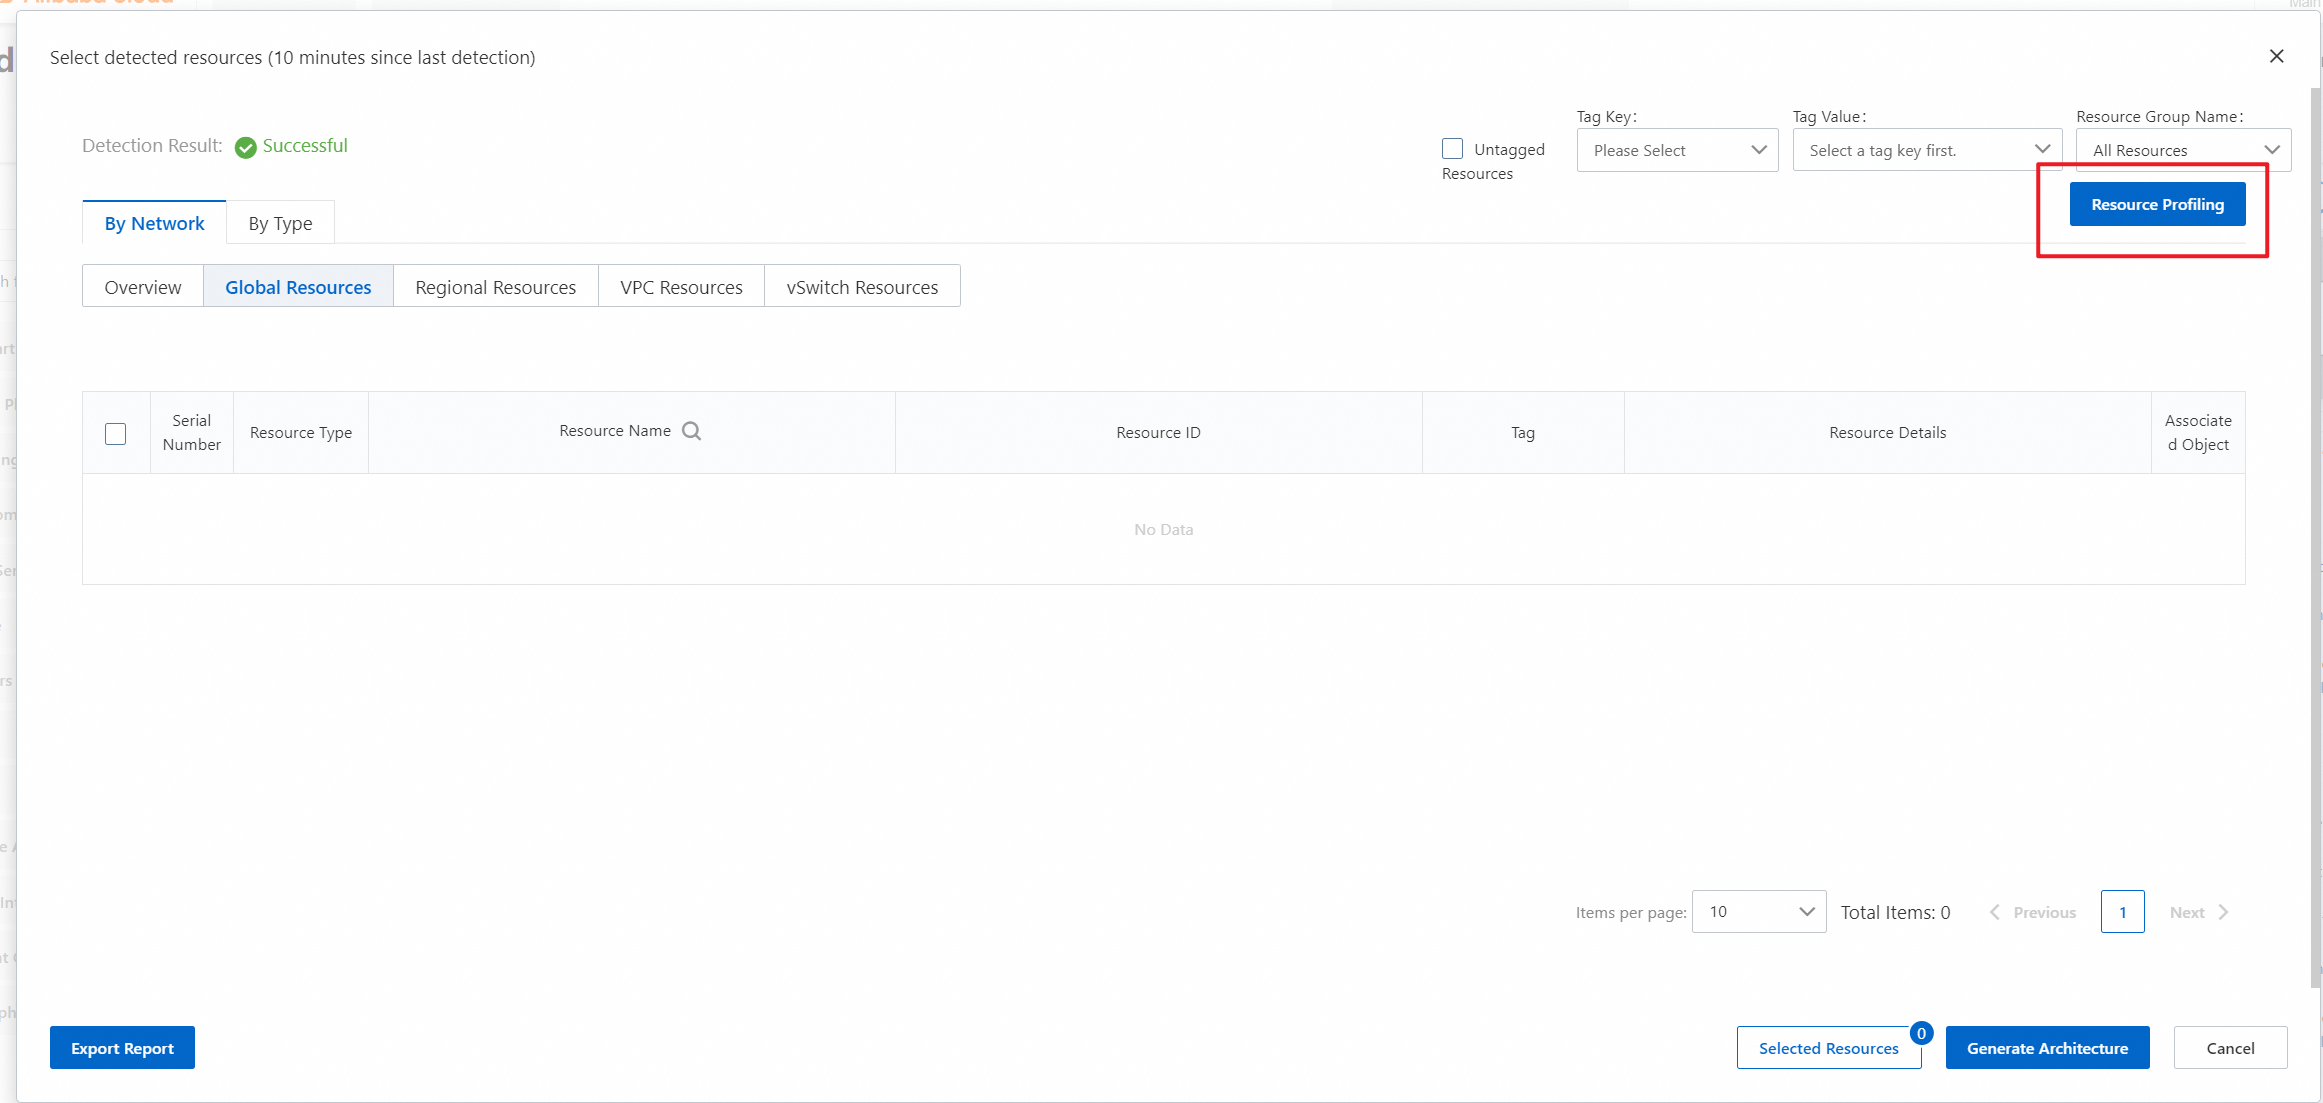
In the Select detected resources dialog box, click Resource Profiling.
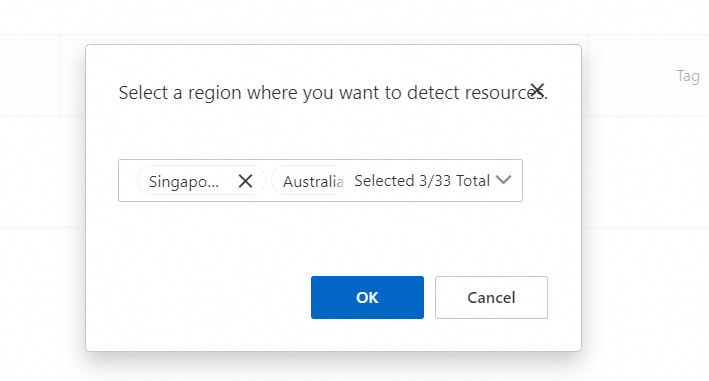
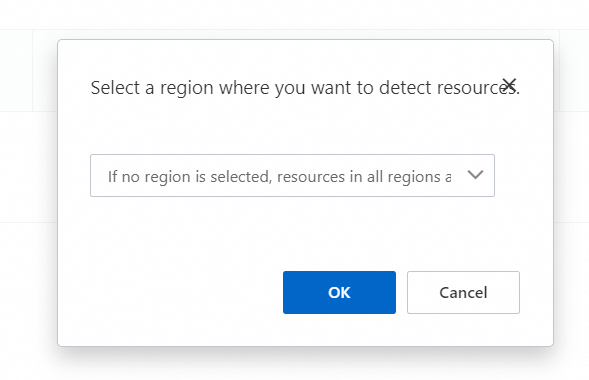
In the dialog box that appears, select a region in which you want to detect resources from the drop-down list. You can select multiple regions at a time. If no region is selected, resources in all regions are detected. Then, click OK. In this example, resources in all regions are detected.
You can select multiple regions in which you want to detect resources.
If no region is selected, resources in all regions are detected.
Wait until the resources are detected. The amount of time that is consumed to detect the resources varies based on the amount of your resources.
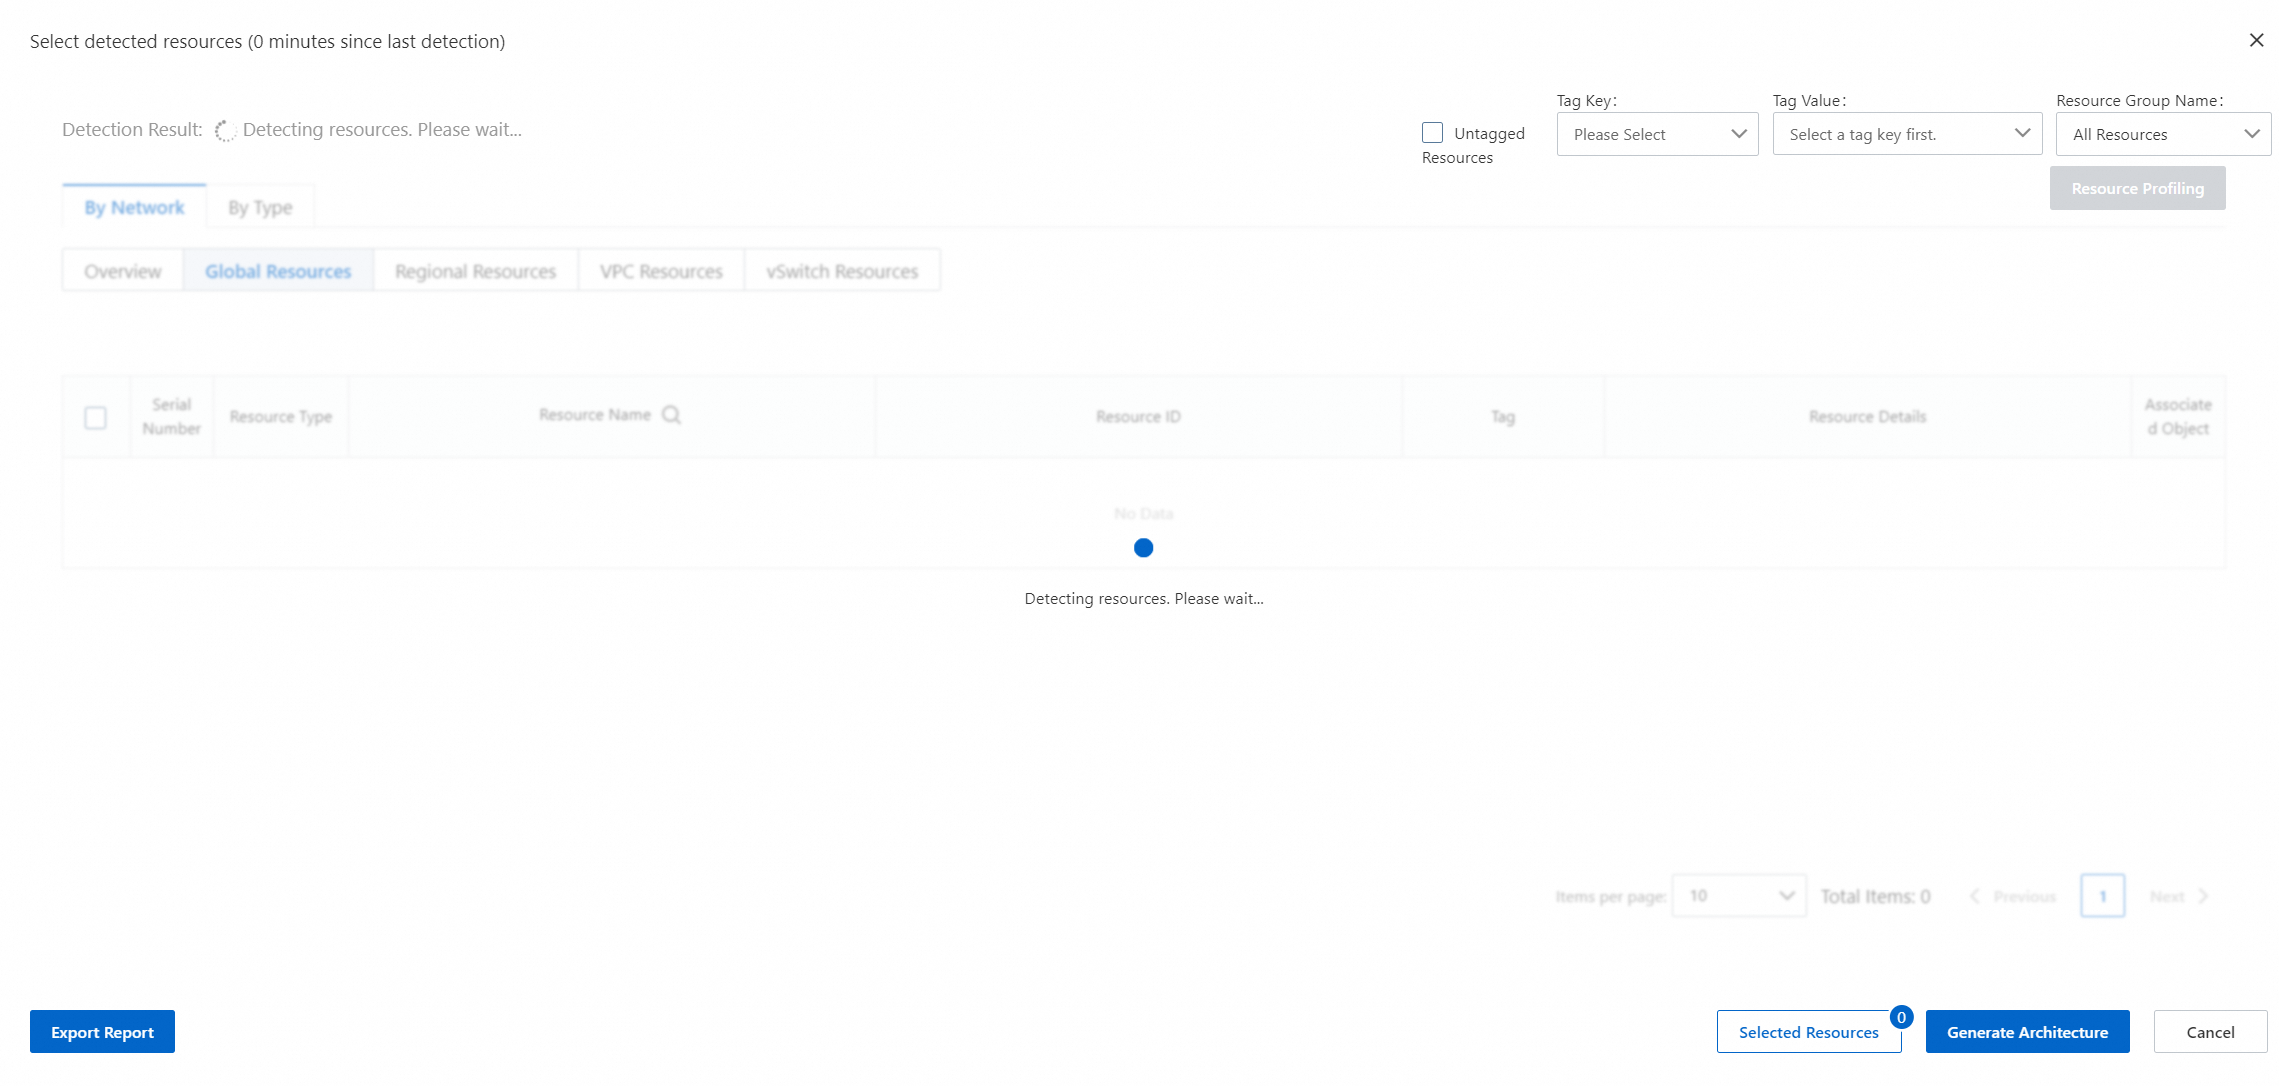
You can view the detection results on the By Network and By Type tabs. You can also search for the resources by using tags based on your business requirements. For more information, see Tag.
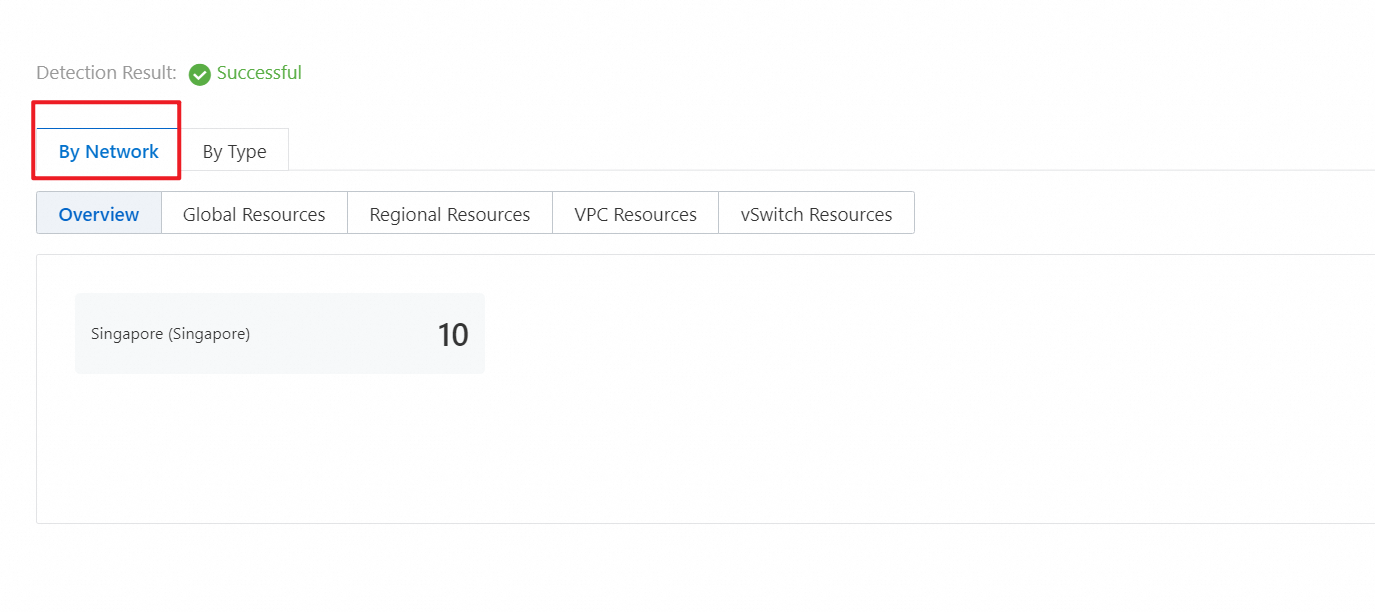
On the By Network tab, resources are displayed at different network levels, including global resources, regional resources, virtual private cloud (VPC) resources, and vSwitch resources.

Overview: displays the number of resources in each region. You can click the number of resources in a region to view the resources that reside in the region.
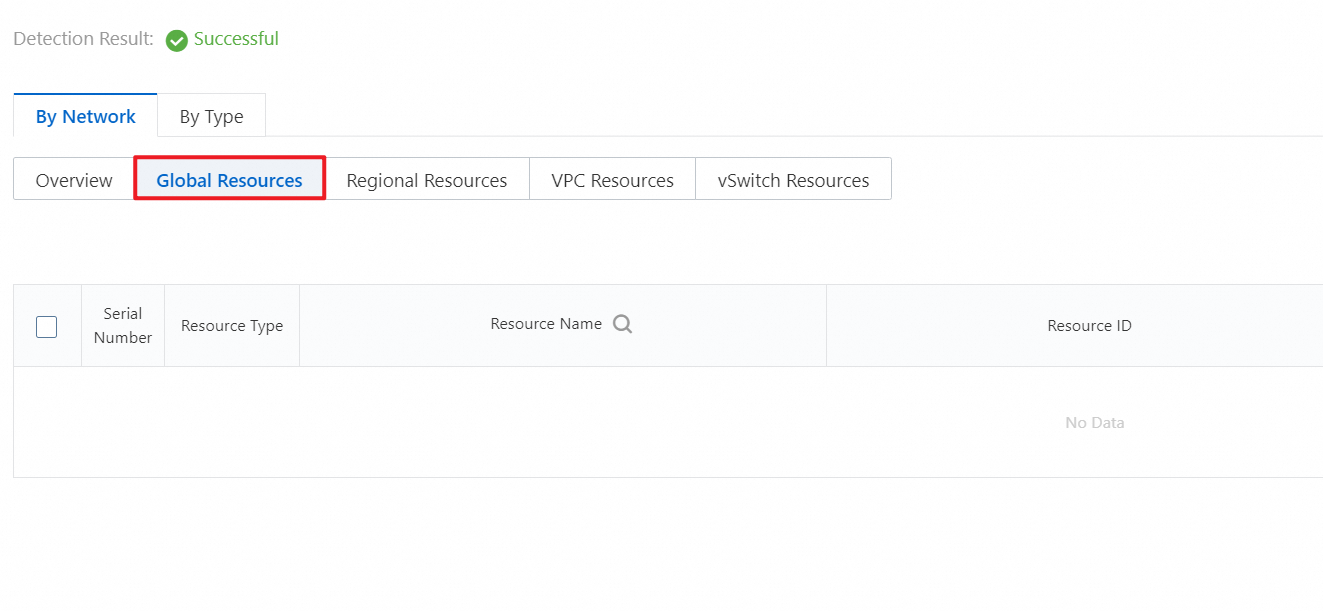
Global Resources: displays the resources at the global level.
Regional Resources: displays the resources in a specific region. You can search for the resources that reside in a specific region by selecting the region.

VPC Resources: displays the resources in a specific VPC.

vSwitch Resources: displays the resources in a specific vSwitch.

On the By Type tab, resources are displayed based on the resource type.
Overview: displays the number of resources of each resource type.

Resource Search: allows you to select a resource type to view the resources of this resource type.

Tag Key and Tag Value: CADT allows you to filter the detected resources by using tags. Tags are used to identify resources. Tags allow you to categorize, search for, and aggregate resources that have the same characteristics from different dimensions. This facilitates resource management. For more information, see Tag.
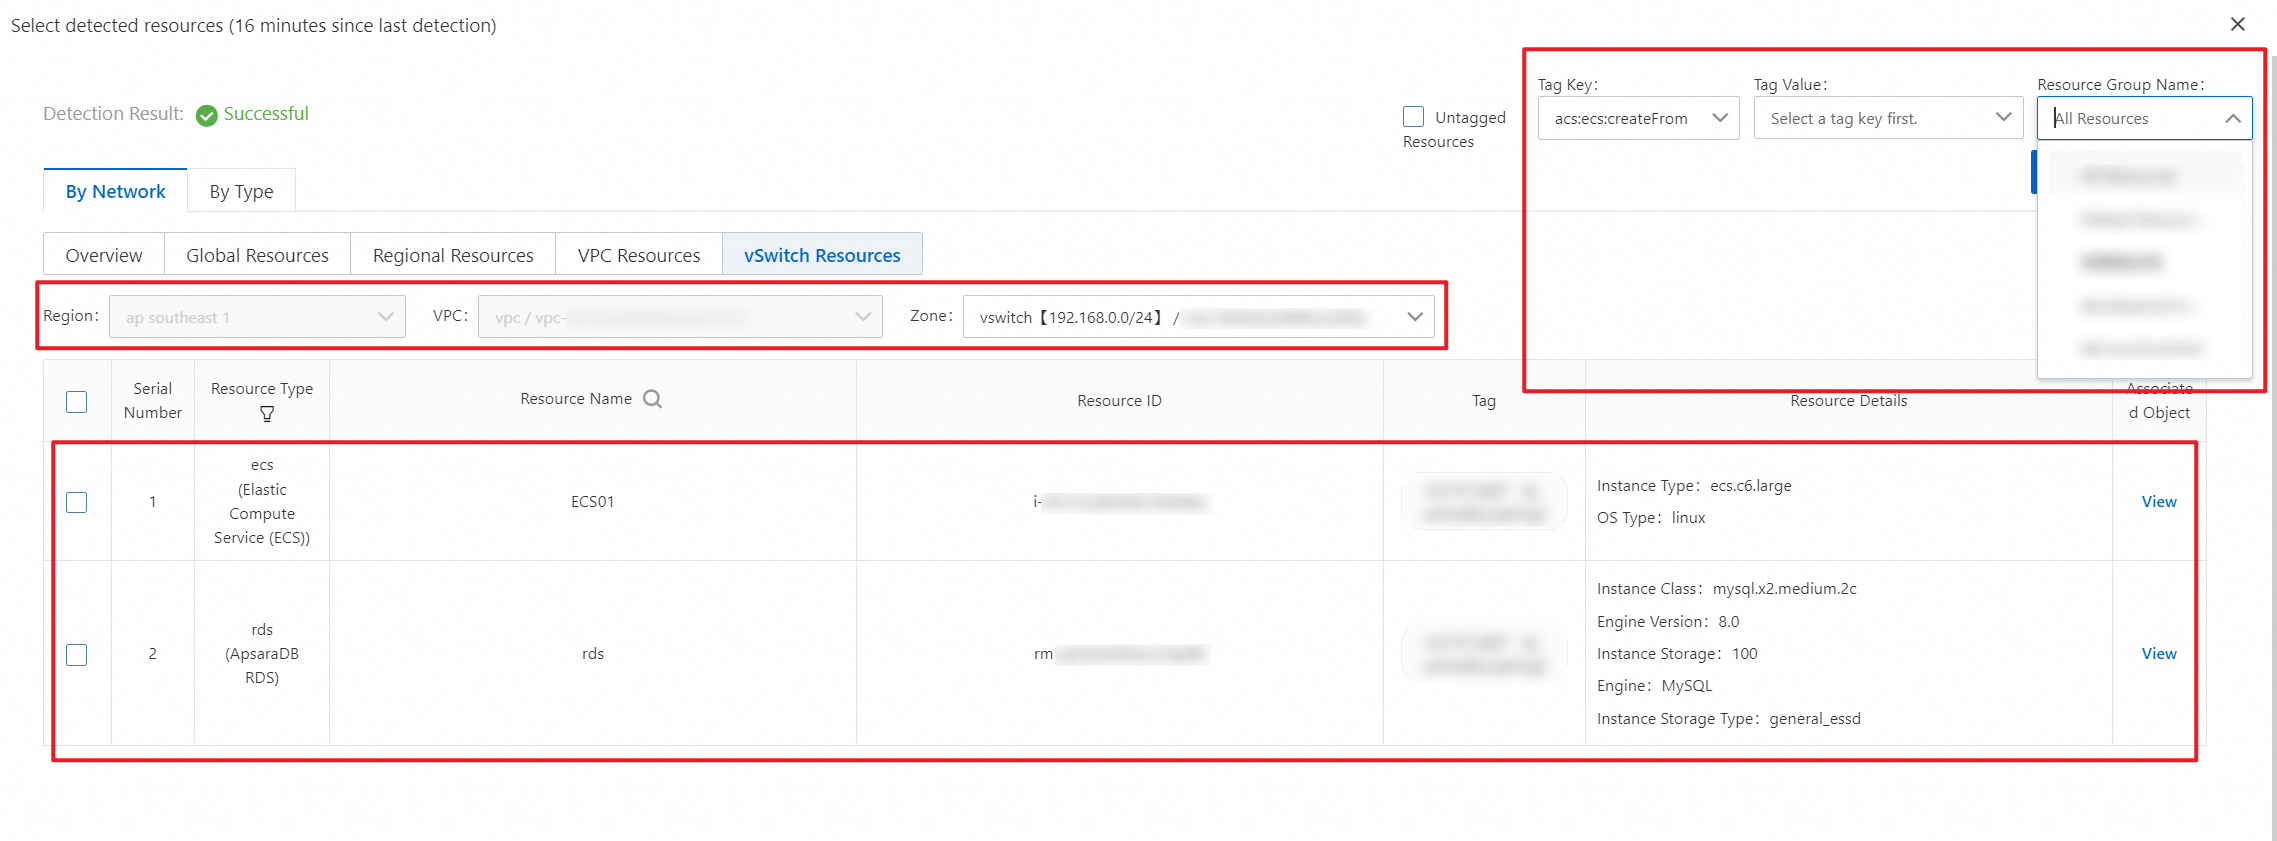
Resource Group Name: CADT allows you to filter the detected resources by selecting a resource group. You can select a resource group from the Resource Group Name drop-down list. Then, you can view the resources that belong to this resource group.
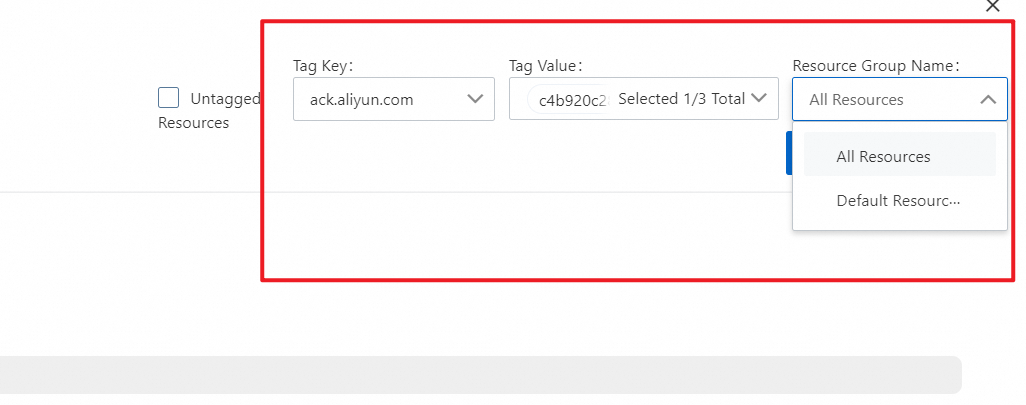
You can search for the resources by network level or resource type in combination with a tag or resource group.
Generate an architecture
After resource profiling is complete, you can use CADT to generate an architecture based on the existing resources that are detected. This makes O&M management more intuitive and convenient.
Select the resources that you want to use to generate the architecture. You can search for the resources by network level or resource type in combination with a tag. For example, if you want to generate an architecture based on the Elastic Compute Service (ECS) and ApsaraDB RDS resources in a specific zone of a specific region, select a region, a VPC, and a zone in sequence in the vSwitch Resources section of the By Network tab. Then, the resources that meet the conditions are displayed in the resource list.
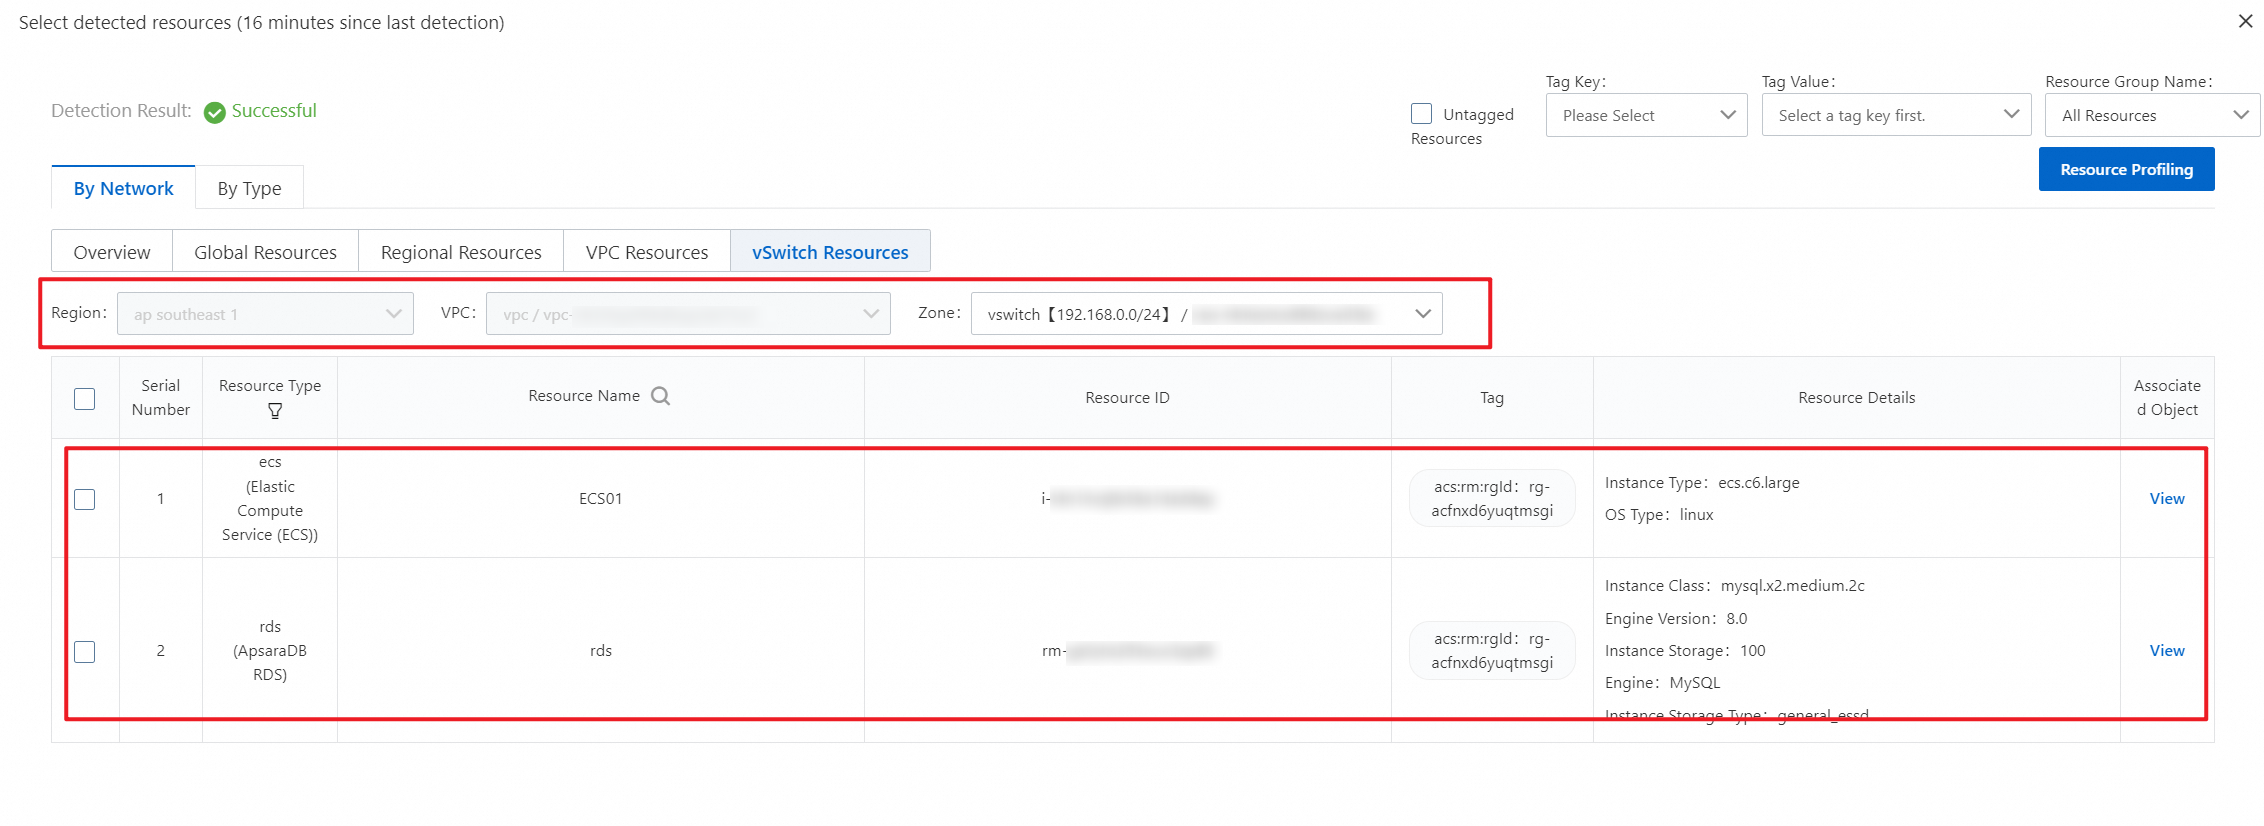
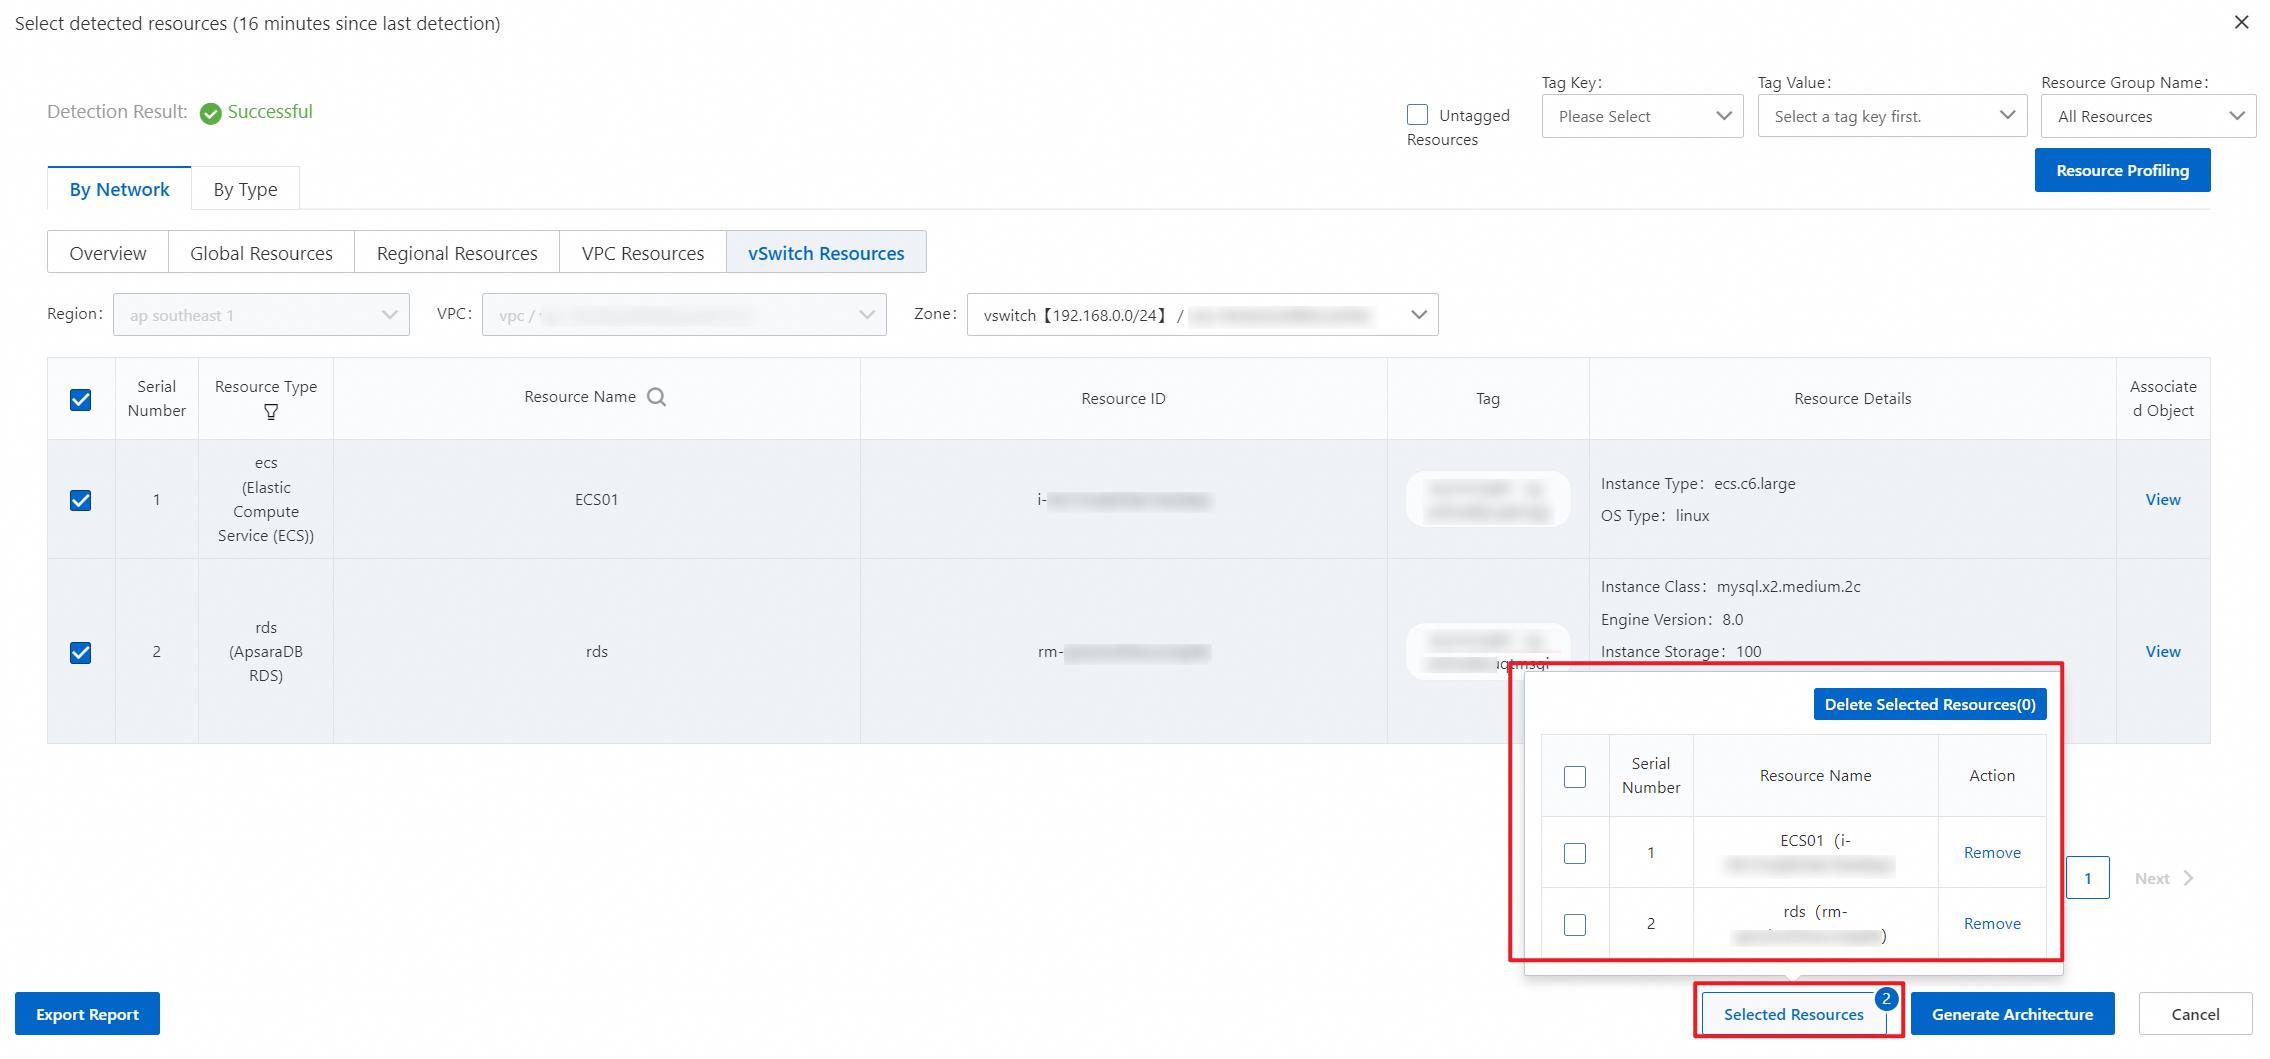
Select the resources in the resource list and click Generate Architecture in the lower-right corner.
NoteMove the pointer over Selected Resources to view the selected resources. If you want to remove a resource that is selected, click Remove in the Action column of the resource.

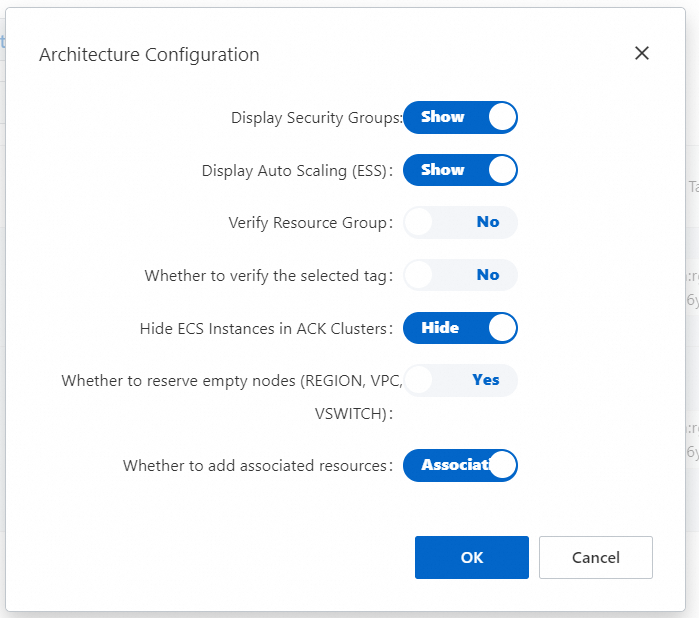
In the Architecture Configuration dialog box, configure the following parameters and click OK.
Display Security Groups: specifies whether to display the security groups to which the ECS resources belong in the architecture. We recommend that you hide the security groups if you select a large number of ECS resources. Otherwise, the architecture may look messy.
Display Auto Scaling (ESS): specifies whether to display Auto Scaling resources in the architecture.
Verify Resource Group: specifies whether to verify resource groups. If you turn on this switch, the resource groups to which the resources belong are verified when the architecture is generated. Only the resources that belong to the selected resource group are displayed in the architecture.
Whether to verify the selected tag: specifies whether to verify the tags added to resources. If you turn on this switch, the tags added to the resources are verified when the architecture is generated. Only the resources to which the selected tag is added are displayed in the architecture.
Hide ECS Instances in ACK Clusters: specifies whether to hide the ECS instances that make up the Container Service for Kubernetes (ACK) cluster in the architecture.
Whether to reserve empty nodes (REGION, VPC, VSWITCH): specifies whether to display the region, VPC, and vSwitch nodes that do not have any resources in the architecture.
Wait until the architecture is generated.
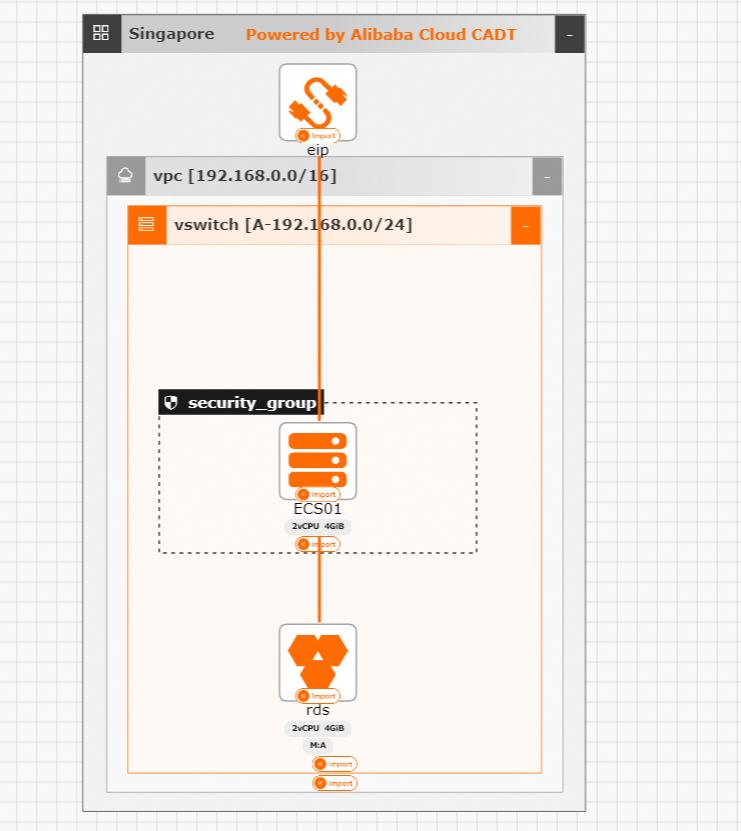
Import resources
After the architecture is generated, each resource is marked with Import. At this time, the architecture does not contain actual resources. You must import the corresponding resources into the architecture before you can manage those resources in the architecture.
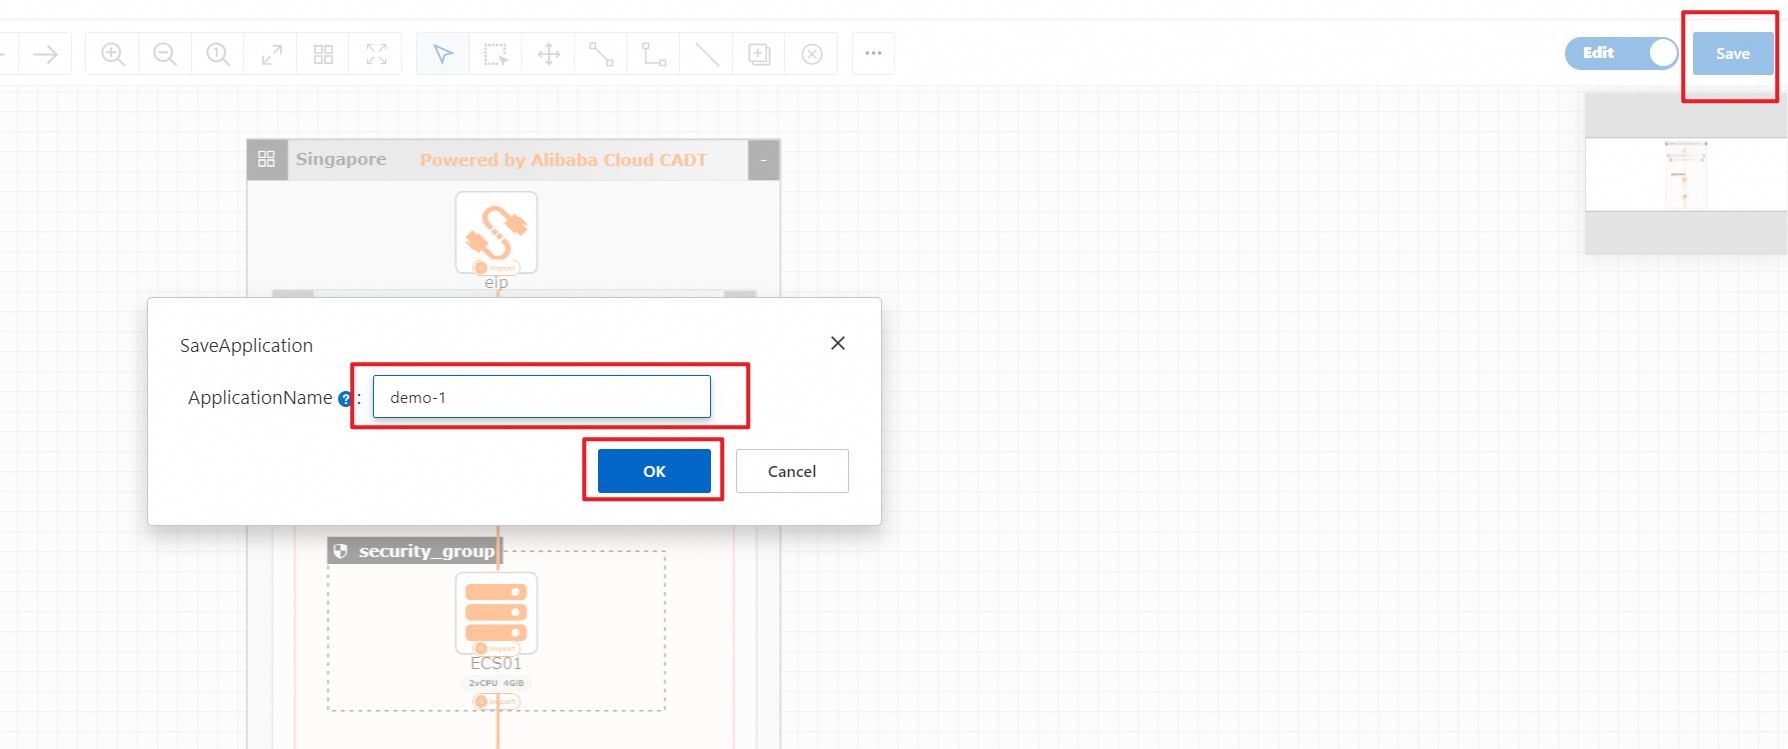
Before you import resources, enable the Edit mode and save the generated architecture as an application.
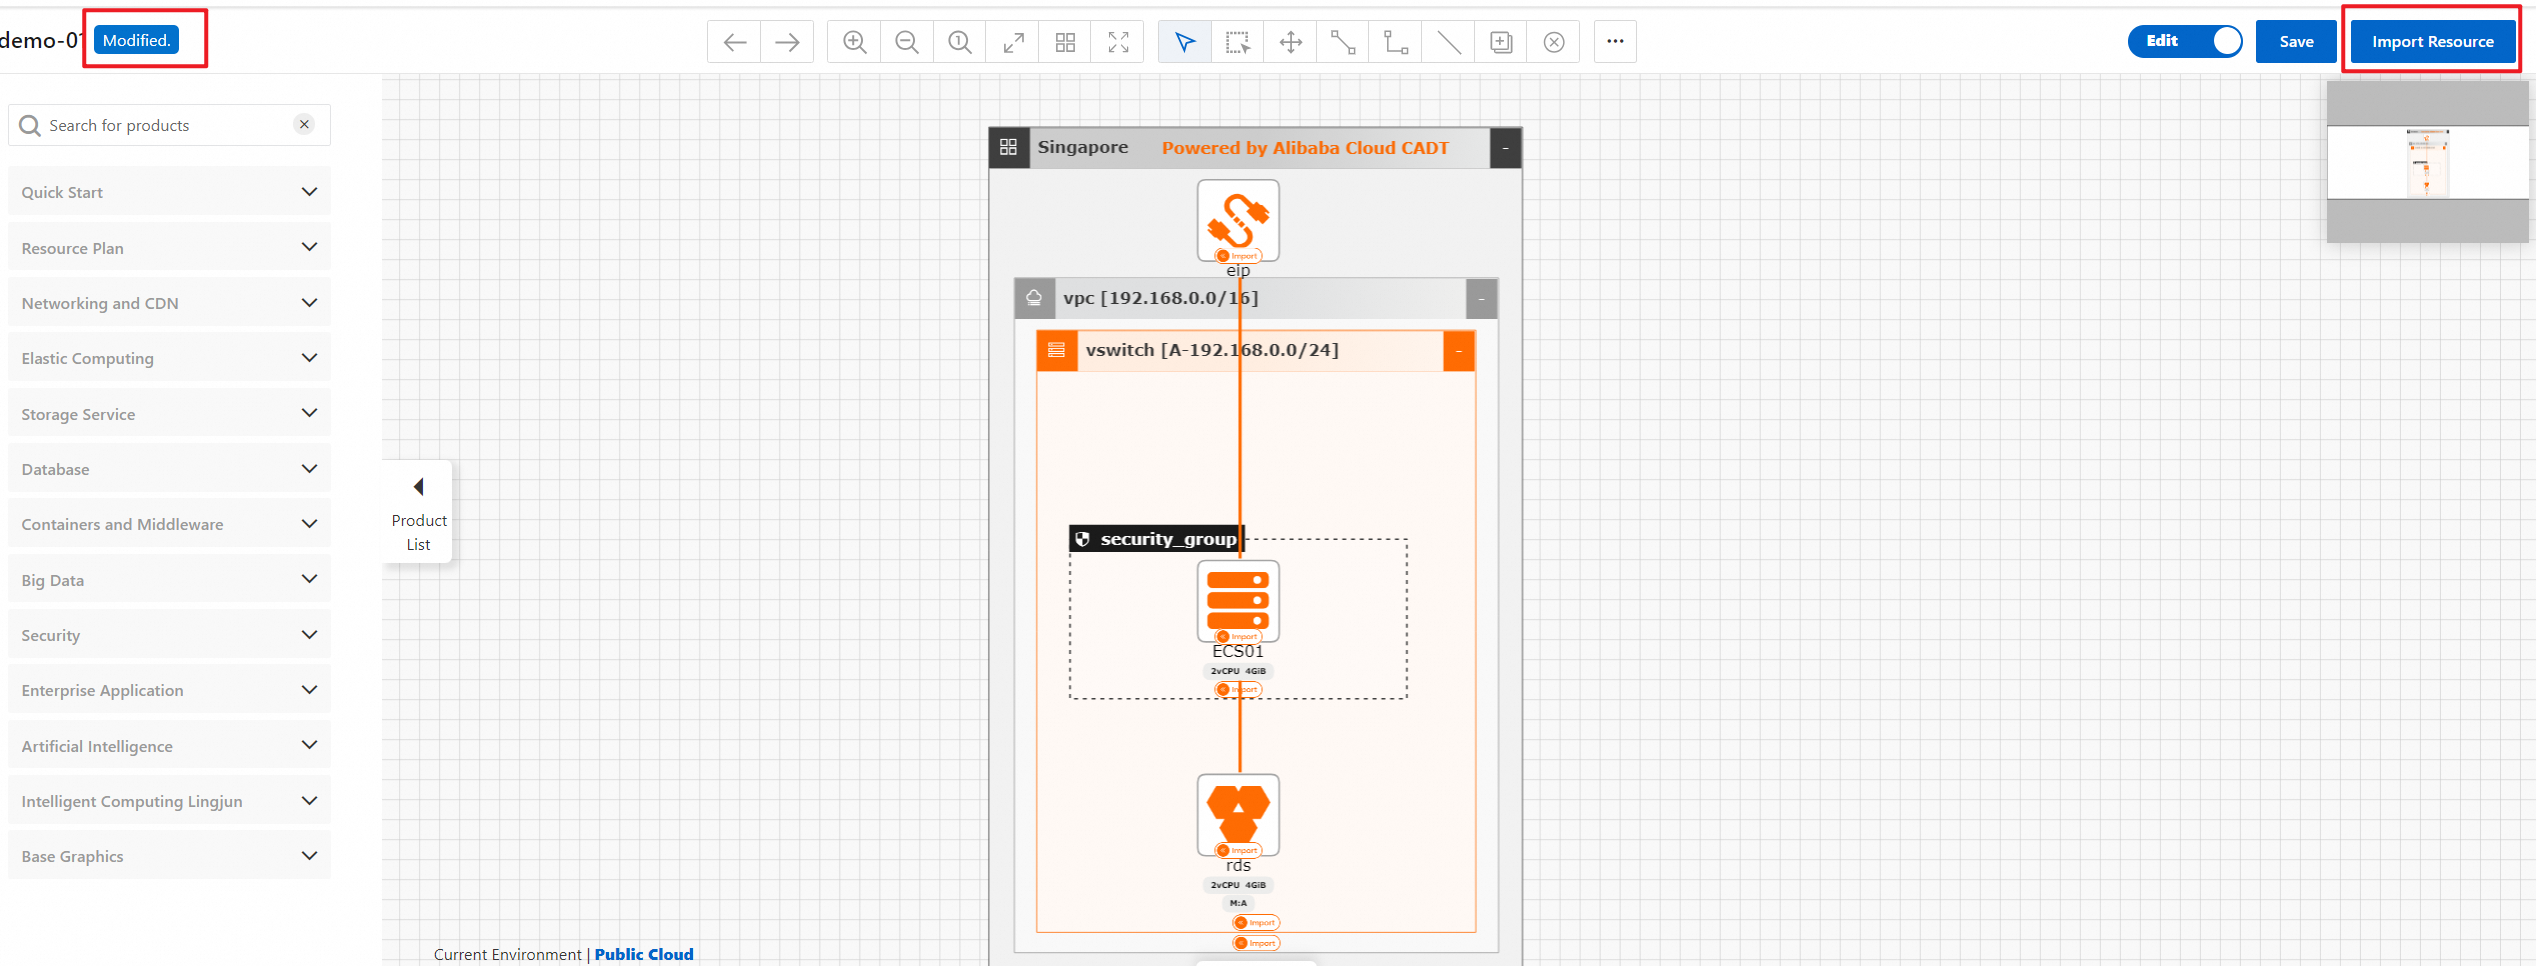
The state of the application changes to Modified. Then, click Import Resource in the upper-right corner.
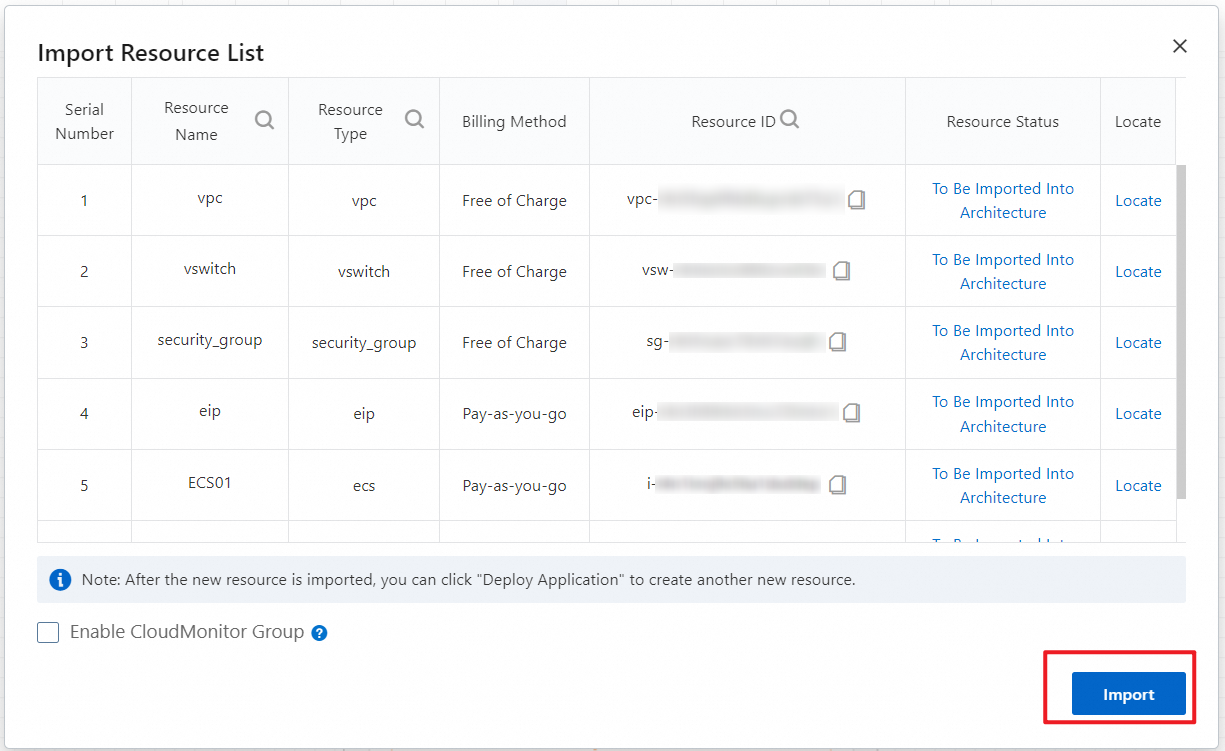
In the Import Resource List dialog box, all the existing resources to be imported are listed. Confirm the information and click Import.
NoteWhen you check the resources to be imported, you can enable cloud monitoring for the application.
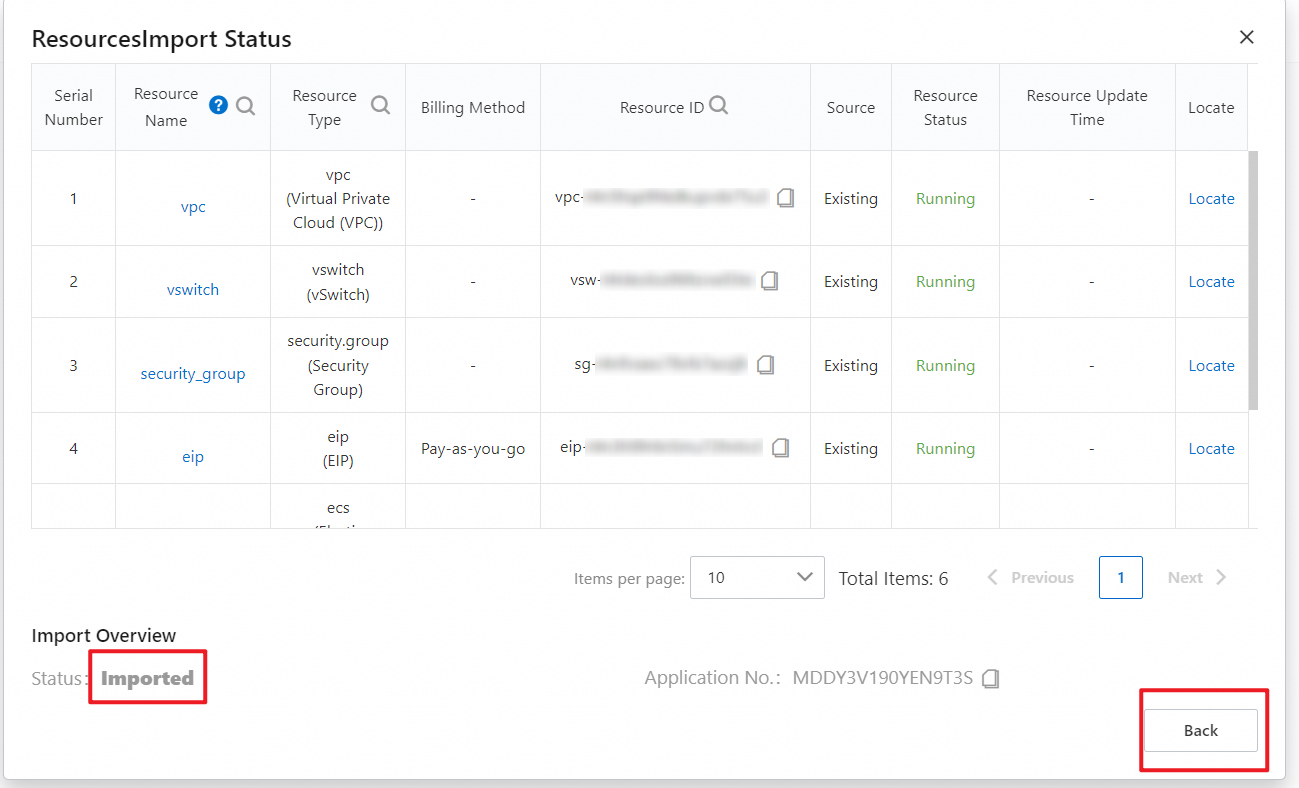
Wait until the resources are imported. Then, click Back to return to the CADT application page.
On the CADT application page, a green tick is displayed next to each resource, which indicates that the resource is imported. Then, you can manage the application in a visualized manner by using the architecture.
