Auto Scaling automatically adjusts the number of computing resources (the number of instances required by business workloads) based on your predefined policies, enabling efficient handling of workload fluctuations, improving resource utilization, and reducing costs. For predictable business workloads, you can configure scheduled tasks to enable Auto Scaling to adjust the number of Elastic Compute Service (ECS) instances at specified time points.
Scenario
Description
If your workloads exhibit predictable fluctuations with identifiable peak and off-peak hours, you can configure scheduled tasks in the Auto Scaling console to adjust the number of ECS instances at specified time points.
For example, a game company observes a consistent increase in business workloads from 18:00:00 to 23:00:00 nightly, requiring additional servers during this period. Outside of this period, only a fixed number of servers are needed to support regular operations.

Solution
You can create scheduled tasks to align with business fluctuations. These tasks trigger the automatic execution of scaling rules, enabling server auto-scaling.

Benefits
No initial costs for resource setup
Auto Scaling creates and releases ECS instances based on your business requirements, eliminating the need for any upfront costs related to resource setup. You only need to reserve computing resources for regular business traffic.
Automatic scaling
Scheduled tasks enable automatic scaling at specified time points, optimizing resource usage and reducing O&M costs while meeting business requirements.
Prerequisites
The first time you use Auto Scaling, you must complete Resource Access Management (RAM) user authorization.
The AliyunServiceRoleForAutoScaling service-linked role is created. For more information, see Service-linked role.
If you use Auto Scaling as a RAM user, the RAM user must be granted the AliyunESSFullAccess policy. For more information, see Grant permissions to a RAM user.
Step 1: Create a scaling group
A scaling group refers to a group of instances that meet your business requirements and serves as the fundamental unit of Auto Scaling. Auto Scaling adds instances to or removes instances from scaling groups.
Go to the Scaling Groups page.
Log on to the Auto Scaling console.
In the left-side navigation pane, click Scaling Groups.
In the top navigation bar, select the region where Auto Scaling is activated.
In the upper-left corner of the Scaling Groups page, click Create.
On the Create by Form tab, configure the scaling group and click Create.
The following table describes the parameter settings used in this example. Use the default settings for parameters that are not included in the table. For information about how to create a scaling group, see Create scaling groups.
Parameter
Example
Description
Scaling Group Name
test
Enter a name for the scaling group. The name must follow the format requirements displayed on the UI.
Type
ECS
Select ECS, which specifies that the scaling group contains ECS instances.
Instance Configuration Source
Create from Scratch
Do not specify a template used to automatically create ECS instances. After the scaling group is created, you can proceed to create a scaling configuration.
Minimum Number of Instances
1
Specify the minimum instance limit. If the number of instances in the scaling group is less than the value of this parameter, Auto Scaling adds ECS instances to the scaling group until the number of ECS instances in the scaling group reaches the lower limit.
Maximum Number of Instances
5
Specify the maximum instance limit. If the number of instances in the scaling group is greater than the value of this parameter, Auto Scaling removes ECS instances from the scaling group until the number of ECS instances in the scaling group drops below the upper limit.
VPC
vpc-bp1jmxxau0lur929p****
Select a VPC for the ECS instances in the scaling group.
vSwitch
vsw-2zeknnyw2ewufbs4z****
vsw-2zesy03h8eaf9fe0l****
Select one or more vSwitches for the ECS instances in the scaling group. We recommend that you select multiple vSwitches to improve the success rate of scale-out events.
Step 2: Create a scaling configuration and enable the scaling configuration and scaling group
A scaling configuration is a template used to create ECS instances during scale-out events, containing information such as the billing method, instance type, storage, and network settings. After you create a scaling configuration, you can enable the scaling configuration and then enable the scaling group.
Find the desired scaling group and use one of the following methods to open the scaling group details page.
Click the ID of the scaling group in the Scaling Group Name/ID column.
Click Details in the Actions column.
In the upper part of the details page, click the Instance Configuration Sources tab.
On the Scaling Configurations tab, click Create Scaling Configuration.
On the Create Scaling Configuration page, configure parameters to create a scaling configuration and then click Create.
The following table describes the parameter settings used in this example. Use the default settings for parameters that are not included in the table. For more information about how to create a scaling configuration, see Create a scaling configuration of the ECS type.
Section
Parameter
Example
Description
Basic Information
Scaling Configuration Name
test
Enter a name for the scaling configuration. The name must follow the format requirements displayed on the UI.
Billing Method
Pay-as-you-go
Auto Scaling is free of charge. However, you are charged for the ECS instances that are created during scale-out events. In this example, the pay-as-you-go billing method is used. For more information, see Billing overview.
Instance and Image
Instance Configuration Mode
Specify Instance Pattern
Select Specify Instance Pattern to select specifications for ECS instances.
Instance Attribute Combination
2 vCPUs, 4 GiB Memory, and Enterprise Level
Specify the number of vCPUs and the memory size of ECS instances based on your business requirements.
Select Image
Public Image: Alibaba Cloud Linux 3.2104 LTS 64-bit
Select an image to deploy ECS instances. In this example, a public image is used. In actual business scenarios, you can select the custom image of your application.
Storage
System Disk
Enterprise SSD (ESSD), 40 GiB, and PL0
Select a system disk for ECS instances.
Network and Security Group
Public IP Address
Assign Public IPv4 Address, Pay-by-bandwidth, and 1 Mbit/s bandwidth
Specify whether to assign public IP addresses to ECS instances. You are charged for the outbound public bandwidth. The bandwidth fees are included in your ECS instance fees.
Security Group
sg-bp18kz60mefsicfg****
Select an existing security group. For information about how to create a security group, see Create a security group.
Management Settings
Logon Credentials
Set Later
Select Set Later, which requires you to manually configure passwords for ECS instances after you create the instances.
In the Preview Scaling Configuration dialog box, confirm the information and click Create.
In the The scaling configuration is created message, click Enable.
In the Enable Scaling Configuration dialog box, click OK.
NoteIn a scaling group, you must enable one scaling configuration. After you enable a scaling configuration, the scaling configuration enters the Active state.
In the Enable Scaling Group message, click OK.
After you enable the scaling group, Auto Scaling triggers automatic instance scaling based on your business requirements.
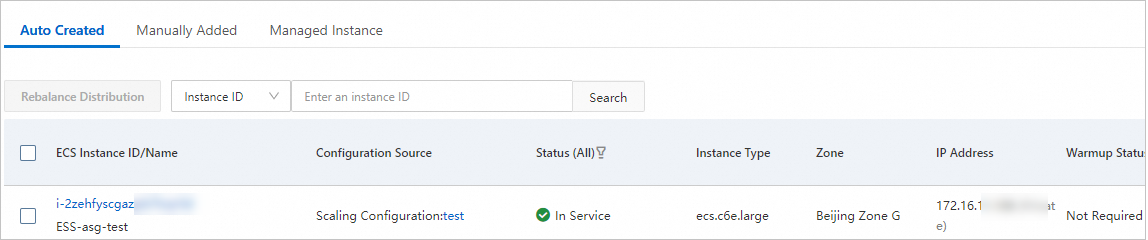
In this example, the Minimum Number of Instances parameter is set to 1. In this case, Auto Scaling automatically creates one ECS instance based on the scaling configuration in the scaling group after you enable the scaling group. You can go to the Instances tab of the scaling group details page and check the instance information on the Auto Created tab.
Step 3: Create scaling rules
A scaling rule specifies whether to add instances to or remove instances from a scaling group.
On the details page of the scaling group, click the Scaling Rules and Event-triggered Tasks tab. Then, click the Scaling Rules tab.
Click Create Scaling Rule, configure parameters to create the scaling rule, and then click OK.
In this example, simple scaling rules are created. For more information about how to create a scaling rule, see Configure scaling rules.
Parameter
Description
Rule Name
Enter a name for the scaling rule. The name must follow the format requirements displayed on the UI.
Rule Type
In this example, simple scaling rules are created. For more information about scaling rules, see Overview.
Operation
Specify the number of instances to add or remove when the scaling rule is executed. The number of instances to add or remove during each scaling event cannot exceed 1,000.
Cooldown Time
Optional. Specify the period of time during which the scaling rule is cooled down. Unit: seconds. If you do not configure this parameter, the cooldown period of the scaling group takes effect. For more information, see Cooldown period.
Repeat this step to create scale-out and scale-in rules. The following table describes the configurations used in this example.
Scaling rule
Sample configuration
Scale-out rule
Rule Name: add
Rule Type: Simple Scaling Rule
Operation: Add 1 Instance
Scale-in rule
Rule Name: remove
Rule Type: Simple Scaling Rule
Operation: Remove 1 Instance.
Step 4: Create scheduled tasks
A scheduled task is a predefined task that executes a specific scaling rule at a set time point.
On the details page of the scaling group, click the Scaling Rules and Event-triggered Tasks tab. Then, click the Scheduled Tasks tab.
Click Create Scheduled Task, configure parameters based on your business requirements, and then click OK.
The following table describes the parameter settings used in this topic. Parameters that are not covered in the following table default to their default settings. For information about how to configure a scheduled task, see Overview.
Parameter
Description
Task Name
Enter a name for the scheduled task. The name must follow the format requirements displayed on the UI.
Executed At
Specift the time point when you want to trigger the task.
Scaling Method
Specifiy the scaling method that you want to use. In this example, select Select Existing Scaling Rule.
Simple Scaling Rule
Specify the scaling rule that you want to execute.
Recurrence
Specify the time interval for periodically triggering the scheduled task. For example, you can trigger the task once daily.
Repeat this step to create scheduled tasks for executing scale-out and scale-in rules. The following table describes the sample configurations used in this topic.
Scheduled task
Sample configuration
Scheduled scale-out
Task Name: scheduled-add
Executed At: May 16, 2024, 6:00 PM
Scaling Method: Select Existing Scaling Rule
Simple Scaling Rule: add
Recurrence: By Day (Execute the simple scaling rule once daily)
Scheduled scale-in
Task Name: scheduled-remove
Executed At: May 16, 2024, 11:00 PM
Scaling Method: Select Existing Scaling Rule
Simple Scaling Rule: remove
Recurrence: By Day (Execute the simple scaling rule once daily)
Verify the effect of automatic scaling
After you create the scheduled tasks, Auto Scaling triggers them at the specified time points to execute scaling rules.
This example produces the following results:
Automatically add one ECS instance to the scaling group at 18:00:00 every day
Automatically remove one ECS instance from the scaling group at 23:00:00 every day
You can use one of the following methods to verify the effect:
When the scheduled tasks are executed, go to the scaling group details page and choose Instances > Auto Created. Then, check the changes in the instance count.
When the scheduled tasks are executed, go to the scaling group details page and click the Scaling Activities tab. Then, check whether any scaling activity is generated. If a corresponding scaling activity is generated, click its ID to view the scaling activity details.