This topic describes how messaging is implemented between ApsaraMQ for MQTT clients by using the ApsaraMQ for MQTT SDK for Java.
Prerequisites
- Create resources
- An AccessKey pair is obtained.
- The integrated development environment (IDE) is installed. For more information, see IDE. You can use IntelliJ IDEA or Eclipse. In the example, IntelliJ IDEA is used.
- The Java Development Kit (JDK) is installed. For more information, see JDK.
Background information
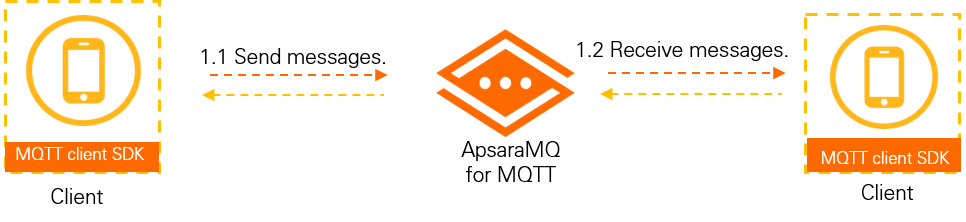
ApsaraMQ for MQTT applies to scenarios in which ApsaraMQ for MQTT clients interact with each other. In these scenarios, both producers and consumers are ApsaraMQ for MQTT clients. Each ApsaraMQ for MQTT client uses a client SDK of ApsaraMQ for MQTT to connect to the ApsaraMQ for MQTT broker for messaging.
This topic describes how to use the ApsaraMQ for MQTT SDK for Java to implement messaging between ApsaraMQ for MQTT clients over the Internet.
Endpoints
You must specify an endpoint of your ApsaraMQ for MQTT instance in the code when you call the client SDK or cloud SDK. Then, the ApsaraMQ for MQTT client or backend service application can use the endpoint to connect to ApsaraMQ for MQTT.
- Formats of endpoints for the client SDK
When you use the client SDK to connect to ApsaraMQ for MQTT, specify the endpoint in the following format:
- Public Endpoint:
ID of the ApsaraMQ for MQTT instance.mqtt.aliyuncs.com - VPC Endpoint:
ID of the ApsaraMQ for MQTT instance-internal-vpc.mqtt.aliyuncs.com
You can also view the endpoint for the client SDK on the Endpoints tab of the Instance Details page in the ApsaraMQ for MQTT console.
- Public Endpoint:
- Formats of endpoints for the cloud SDK
When you use the cloud SDK to connect to ApsaraMQ for MQTT, specify the endpoint in the following format:
Important You can use the cloud SDK to connect to only ApsaraMQ for MQTT instances whose kernel version is V3.3.0 and that are deployed in regions in the Chinese mainland.- Public Endpoint:
ID of the ApsaraMQ for MQTT instance-server-internet.mqtt.aliyuncs.com - VPC Endpoint:
ID of the ApsaraMQ for MQTT instance-server-internal.mqtt.aliyuncs.com
- Public Endpoint:
An endpoint for the client SDK or cloud SDK can be a Public Endpoint or a VPC Endpoint. A Public Endpoint is an IP address for access from the Internet and is commonly used in IoT and mobile Internet scenarios. A VPC Endpoint is an IP address for access from a private network in the cloud and is usually used by backend applications to connect to ApsaraMQ for MQTT.
- The client or backend service application uses an IP address instead of a domain name to access the service. The original IP address becomes invalid after the technical team of ApsaraMQ for MQTT updates the domain name resolution.
- A firewall policy on IP addresses is set in the network on which your ApsaraMQ for MQTT client or backend service application is running. New IP addresses are blocked due to the firewall policy after the technical team of ApsaraMQ for MQTT updates domain name resolution.
Call the SDK for Java to send and subscribe to messages
- Download a third-party open source SDK for Java. Download link: Eclipse Paho Java Client.
- Download the demo of the ApsaraMQ for MQTT SDK for Java for reference during code development. Download link: mqtt-java-demo.
- Decompress the demo project package to a specific folder.
- In IntelliJ IDEA, import the extracted files to create a project and check whether the pom.xml file contains the following dependencies:
<dependencies> <dependency> <groupId>commons-codec</groupId> <artifactId>commons-codec</artifactId> <version>1.10</version> </dependency> <dependency> <groupId>org.eclipse.paho</groupId> <artifactId>org.eclipse.paho.client.mqttv3</artifactId> <version>1.2.2</version> </dependency> <dependency> <groupId>org.apache.httpcomponents</groupId> <artifactId>httpclient</artifactId> <version>4.5.2</version> </dependency> <dependency> <groupId>com.alibaba</groupId> <artifactId>fastjson</artifactId> <version>1.2.83</version> </dependency> <dependency> <groupId>com.aliyun</groupId> <artifactId>aliyun-java-sdk-onsmqtt</artifactId> <version>1.0.3</version> </dependency> <dependency> <groupId>com.aliyun</groupId> <artifactId>aliyun-java-sdk-core</artifactId> <version>4.5.0</version> </dependency> </dependencies> - In the MQ4IoTSendMessageToMQ4IoTUseSignatureMode.java class, set the parameters based on the code comments. Most of these parameters can be set based on the ApsaraMQ for MQTT resources that you created. For more information, see Create resources. Use the main() function to run the sample code to send and receive messages. Sample code:Note Before you use the sample code to send and receive messages, you must configure environment variables to obtain the credentials that are used to access ApsaraMQ for MQTT. For information about how to configure environment variables, see Configure an access credential.
The environment variable name of the AccessKey ID that is used to access ApsaraMQ for MQTT is MQTT_AK_ENV, and the environment variable name of the AccessKey secret that is used to access ApsaraMQ for MQTT is MQTT_SK_ENV.
package com.aliyun.openservices.lmq.example.demo;

import com.aliyun.openservices.lmq.example.util.ConnectionOptionWrapper;
import java.util.concurrent.ExecutorService;
import java.util.concurrent.LinkedBlockingQueue;
import java.util.concurrent.ThreadPoolExecutor;
import java.util.concurrent.TimeUnit;
import org.eclipse.paho.client.mqttv3.IMqttDeliveryToken;
import org.eclipse.paho.client.mqttv3.MqttCallbackExtended;
import org.eclipse.paho.client.mqttv3.MqttClient;
import org.eclipse.paho.client.mqttv3.MqttException;
import org.eclipse.paho.client.mqttv3.MqttMessage;
import org.eclipse.paho.client.mqttv3.persist.MemoryPersistence;

public class MQ4IoTSendMessageToMQ4IoTUseSignatureMode {
    public static void main(String[] args) throws Exception {
        /**
         * The ID of the ApsaraMQ for MQTT instance that you created in the ApsaraMQ for MQTT console.
         */
        String instanceId = "XXXXX";
        /**
         * The endpoint of the ApsaraMQ for MQTT instance. You can obtain the endpoint on the Instance Details page in the ApsaraMQ for MQTT console.
         */
        String endPoint = "XXXXX.mqtt.aliyuncs.com";
        /**
         * The AccessKey ID that you created in the Alibaba Cloud RAM console for identity authentication.
         * The AccessKey pair of an Alibaba Cloud account can be used to access all API operations. To prevent security issues, we recommend that you use a RAM user to access API operations and perform routine O&M.
         * We strongly recommend that you do not save an AccessKey pair in the project code. Otherwise, the AccessKey pair may be leaked and all resources that are contained in your account may be exposed to potential security risks.
         * In this example, the AccessKey pair is saved in the environment variables.
         */
        String accessKey = System.getenv("MQTT_AK_ENV");
        /**
         * The AccessKey secret that you created in the Alibaba Cloud RAM console for identity authentication. The AccessKey secret is required only when the signature authentication mode is used.
         */
        String secretKey = System.getenv("MQTT_SK_ENV");
        /**
         * The globally unique ID that the system assigns to the ApsaraMQ for MQTT client. The client ID must vary based on TCP connections. If multiple TCP connections use the same client ID, exceptions occur and the connections are unexpectedly closed.
         * The value of the clientId parameter is in the GroupID@@@DeviceID format. GroupID indicates the group ID that you created in the ApsaraMQ for MQTT console and DeviceID indicates the custom ID of the device. The value of the clientId parameter can be up to 64 characters in length.
         */
        String clientId = "GID_XXXXX@@@XXXXX";
        /**
         * The parent topic that you created in the ApsaraMQ for MQTT console.
         * If you specify a topic that does not exist or a topic that the ApsaraMQ for MQTT client is not authorized to access, the ApsaraMQ for MQTT broker closes the connection.
         */
        final String parentTopic = "XXXXX";
        /**
         * ApsaraMQ for MQTT allows you to use a subtopic to filter messages. You can specify a string as the value. The following code shows an example.
         * The value of the mq4IotTopic parameter can be up to 128 characters in length.
         */
        final String mq4IotTopic = parentTopic + "/" + "testMq4Iot";
        /**
         * The quality of service (QoS) level in message transmission. Valid values: 0, 1, and 2. For more information, see Terms.
         */
        final int qosLevel = 0;
        ConnectionOptionWrapper connectionOptionWrapper = new ConnectionOptionWrapper(instanceId, accessKey, secretKey, clientId);
        final MemoryPersistence memoryPersistence = new MemoryPersistence();
        /**
         * The protocol and port that are used by the ApsaraMQ for MQTT client. The protocol and port that are used by the ApsaraMQ for MQTT client must match. If SSL encryption is used, the protocol and port must be set to ssl://endpoint:8883.
         */
        final MqttClient mqttClient = new MqttClient("tcp://" + endPoint + ":1883", clientId, memoryPersistence);
        /**
         * The timeout period during which the ApsaraMQ for MQTT client waits for a response. The timeout period prevents the ApsaraMQ for MQTT client from waiting for a response for an indefinite period of time.
         */
        mqttClient.setTimeToWait(5000);
        final ExecutorService executorService = new ThreadPoolExecutor(1, 1, 0, TimeUnit.MILLISECONDS,
            new LinkedBlockingQueue<Runnable>());
        mqttClient.setCallback(new MqttCallbackExtended() {
            @Override
            public void connectComplete(boolean reconnect, String serverURI) {
                /**
                 * The topic to which you must subscribe as soon as possible after the client connection is established.
                 */
                System.out.println("connect success");
                executorService.submit(new Runnable() {
                    @Override
                    public void run() {
                        try {
                            final String topicFilter[] = {mq4IotTopic};
                            final int[] qos = {qosLevel};
                            mqttClient.subscribe(topicFilter, qos);
                        } catch (MqttException e) {
                            e.printStackTrace();
                        }
                    }
                });
            }

            @Override
            public void connectionLost(Throwable throwable) {
                throwable.printStackTrace();
            }

            @Override
            public void messageArrived(String s, MqttMessage mqttMessage) throws Exception {
                /**
                 * The callback that is invoked to consume messages. Make sure that the callback does not throw exceptions. If a response is returned for the callback, the messages are consumed.
                 * The messages must be consumed in the specified period. If a message is not consumed within the timeout period specified by the ApsaraMQ for MQTT broker, the broker may attempt to resend the message. Make sure that deduplication is performed to ensure idempotence for message consumption.
                 */
                System.out.println(
                    "receive msg from topic " + s + " , body is " + new String(mqttMessage.getPayload()));
            }

            @Override
            public void deliveryComplete(IMqttDeliveryToken iMqttDeliveryToken) {
                System.out.println("send msg succeed topic is : " + iMqttDeliveryToken.getTopics()[0]);
            }
        });
        mqttClient.connect(connectionOptionWrapper.getMqttConnectOptions());
        for (int i = 0; i < 10; i++) {
            MqttMessage message = new MqttMessage("hello mq4Iot pub sub msg".getBytes());
            message.setQos(qosLevel);
            /**
             * The topic to which normal messages are sent. This topic must be the same as the topic to which the consumer subscribes or can be matched by using wildcards.
             */
            mqttClient.publish(mq4IotTopic, message);
            /**
             * ApsaraMQ for MQTT supports point-to point (P2P) messaging. If the producer confirms that only a consumer with a specific client ID requires the message, the producer can send a P2P message to the consumer.
             * In P2P messaging, the consumer does not need to subscribe to the topic to which the producer sends messages. This way, the consumption logic is simplified. In P2P messaging, specify a topic in the {{parentTopic}}/p2p/{{targetClientId}} format.
             */
            final String p2pSendTopic = parentTopic + "/p2p/" + clientId;
            message = new MqttMessage("hello mq4Iot p2p msg".getBytes());
            message.setQos(qosLevel);
            mqttClient.publish(p2pSendTopic, message);
        }
        Thread.sleep(Long.MAX_VALUE);
    }
}
Verify the results
After the producer sends a message and the consumer subscribes to the message, you can query the trace of the message in the ApsaraMQ for MQTT console to verify whether the message is sent and received. For more information, see Query the message traces.