ApsaraMQ for Confluent uses Schema Registry to manage schemas. This topic describes basic operations on Schema Registry in Linux.
Before you start
Purchase an ApsraMQ for Confluent instance. For more information, see Purchase and deploy instances.
Obtain the permissions to access the Kafka and Schema Registry clusters. For more information, see RBAC authorization.
Install Java 8 or 11. For information about supported Java versions, see Java.
Install Maven 3.8 or later. For more information, see Downloads.
Step 1: Prepare sample code
Run the following commands to clone the sample code and switch to the
7.9.0-postbranch.git clone https://github.com/confluentinc/examples.git cd examples/clients/avro git checkout 7.9.0-postCreate a configuration file named
java.configin the$HOME/.confluent/path, where$HOMEis your home directory. In the configuration file, configure the following items:# Required connection configs for Kafka producer, consumer, and admin bootstrap.servers={{ BROKER_ENDPOINT }} security.protocol=SASL_SSL sasl.jaas.config=org.apache.kafka.common.security.plain.PlainLoginModule required username='{{ CLUSTER_API_KEY }}' password='{{ CLUSTER_API_SECRET }}'; sasl.mechanism=PLAIN # Required for correctness in Apache Kafka clients prior to 2.6 client.dns.lookup=use_all_dns_ips # Best practice for higher availability in Apache Kafka clients prior to 3.0 session.timeout.ms=45000 # Best practice for Kafka producer to prevent data loss acks=all # Required connection configs for Confluent Cloud Schema Registry schema.registry.url=https://{{ SR_ENDPOINT }} basic.auth.credentials.source=USER_INFO basic.auth.user.info={{ SR_API_KEY }}:{{ SR_API_SECRET }}The following table describes the parameters:
Parameter
Description
Example
BROKER_ENDPOINT
The endpoint of the Kafka service.
You can obtain the endpoint on the Access Links and Ports page in the ApsaraMQ for Confluent console. If you want to use the public endpoint, you must enable Internet access. For more information, see Enable the Internet access feature. For information about security settings, see Configure network access and security settings.
pub-kafka-xxxxxxxxxxx.csp.aliyuncs.com:9092
CLUSTER_API_KEY
The username and password of the LDAP user. You can obtain the username and password on the Users page in the ApsaraMQ for Confluent console.
During testing, you can use the root account and its password. If you want to use another LDAP user, you must create the user in the ApsaraMQ for Confluent console and grant the corresponding permissions of the Kafka cluster to it. For more information, see Manage users and grant permissions to them.
root
CLUSTER_API_SECRET
******
SR_ENDPOINT
The endpoint of the Schema Registry service.
You can obtain the endpoint on the Access Links and Ports page in the ApsaraMQ for Confluent console. If you want to use the public endpoint, you must enable Internet access. For more information, see Enable the Internet access feature. For information about security settings, see Configure network access and security settings.
pub-schemaregistry-xxxxxxxxxxx.csp.aliyuncs.com:443
SR_API_KEY
The username and password of the LDAP user. You can obtain the username and password on the Users page in the ApsaraMQ for Confluent console.
During testing, you can use the root account and its password. If you want to use another LDAP user, you must create the user in the ApsaraMQ for Confluent console and grant the corresponding permissions of Schema Registry to it. For more information, see Manage users and grant permissions to them.
root
SR_API_SECRET
******
Step 2: Create a topic
In the sample code, the Topic parameter is set to transactions. During testing, you can create a topic named transactions. If you want to use another topic, replace the value of the Topic parameter with your actual topic name.
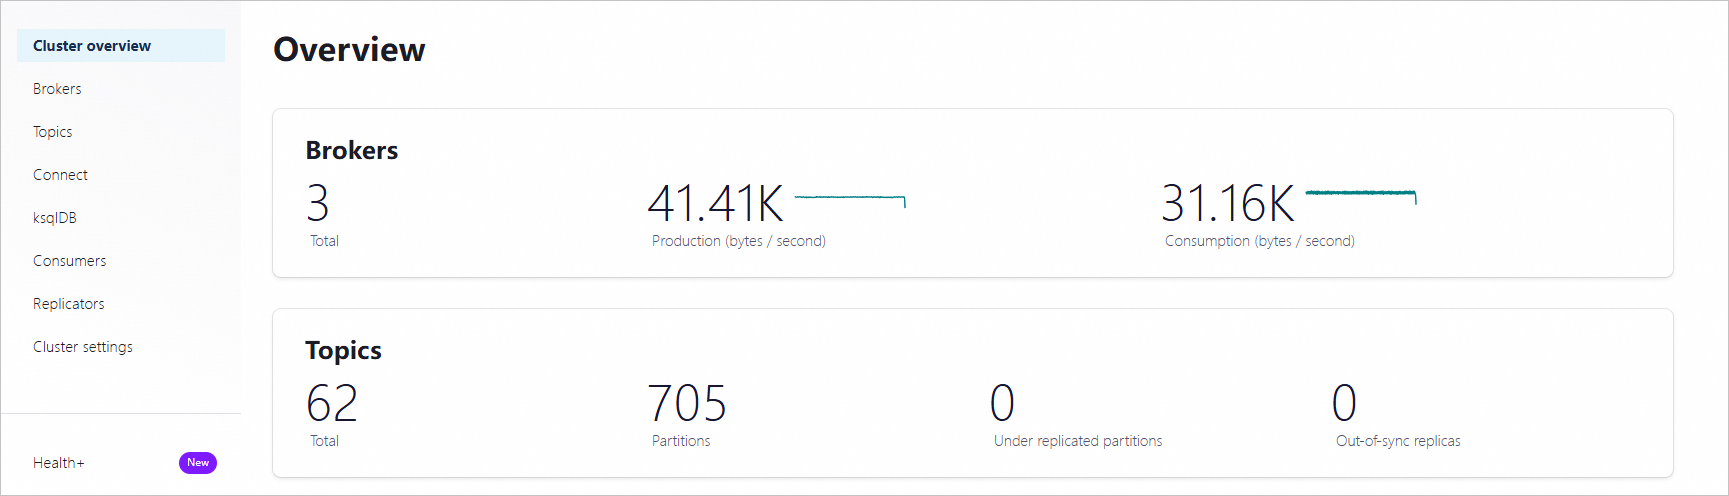
Log on to Control Center. On the Home page, click the controlcenter.clusterk card to go to the Cluster overview page.
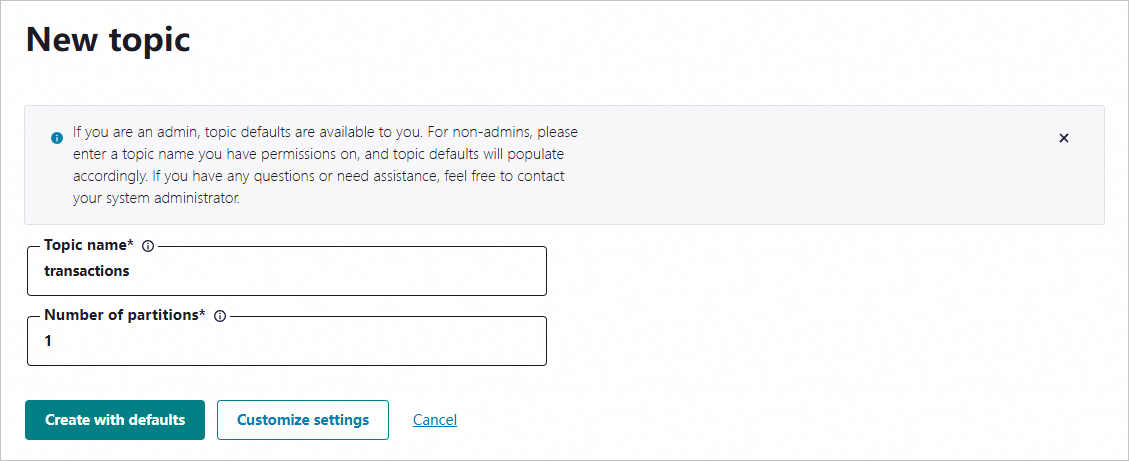
In the left-side navigation pane, click Topics. Then, in the upper-right corner of the Topics page, click + Add topic.

On the New topic page, specify the topic name and the number of partitions and click Create with defaults.
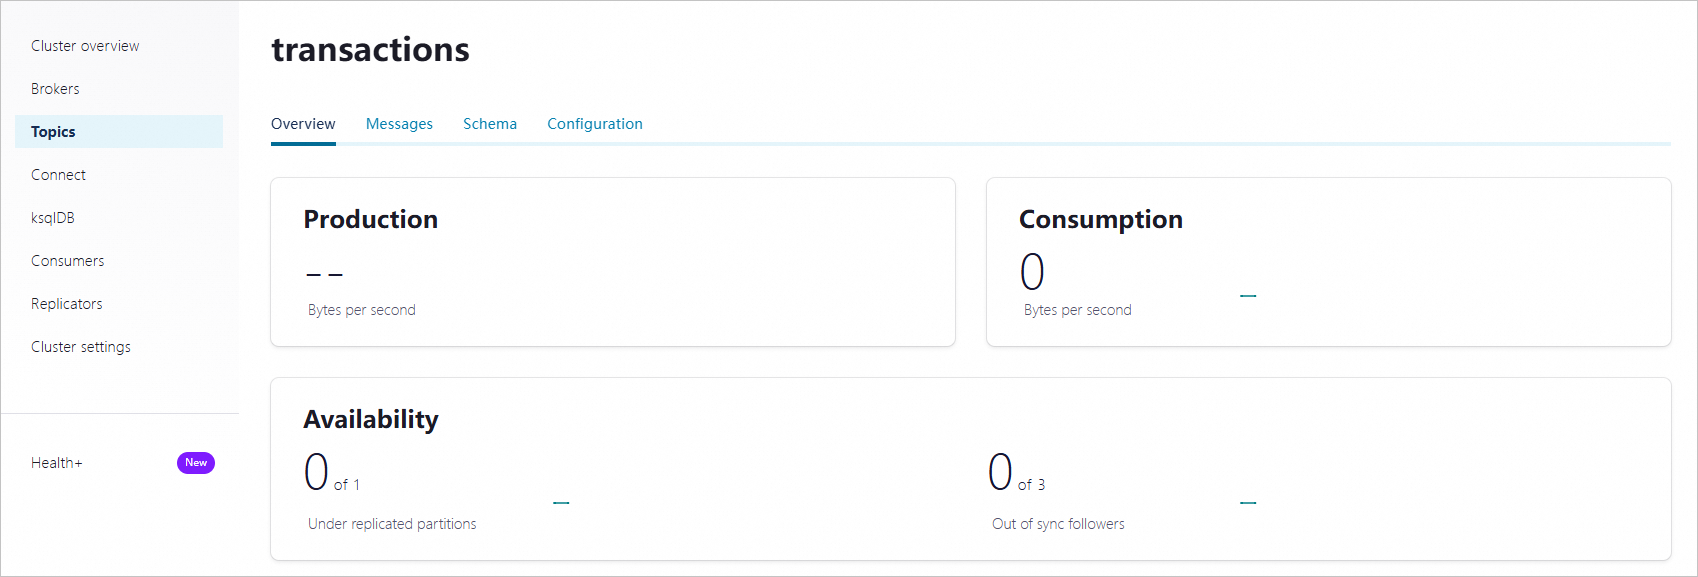
After you create the topic, go to the topic details page to view the topic details.
Step 3: Enable schema validation
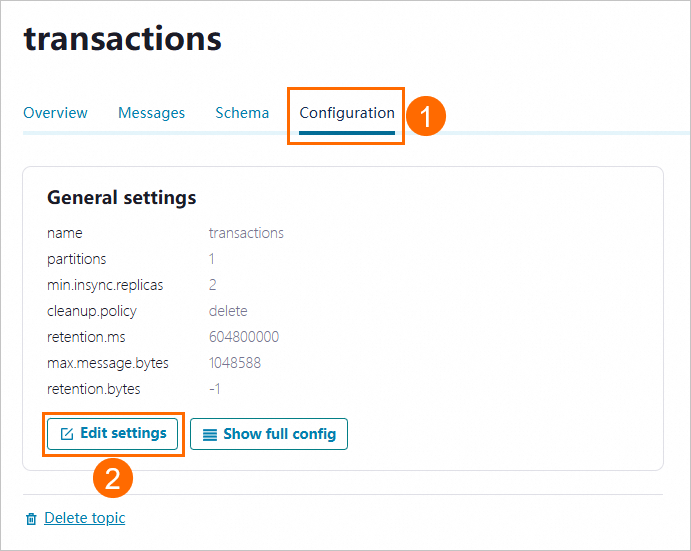
On the topic details page, click the Configuration tab. Then, click Edit settings.
Click Switch to expert mode.

Set the confluent_value_schema_validation parameter to true and click Save changes to enable schema validation for message bodies. After schema validation is enabled, the data format is validated during message sending and consumption.

Step 4: Create a schema
Go to the
examples/clients/avrodirectory of the project and run the following command to view the content of thePayment.avscfile:cat src/main/resources/avro/io/confluent/examples/clients/basicavro/Payment.avscReturned result:
{
 "namespace": "io.confluent.examples.clients.basicavro",
 "type": "record",
 "name": "Payment",
 "fields": [
     {"name": "id", "type": "string"},
     {"name": "amount", "type": "double"}
 ]
}
On the topic details page in Control Center, click Schema. Then, click Set a schema.
On the Schema tab, click Avro, enter the content of the
Payment.avscfile in the code editor and click Create.
Step 5: Send and consume messages
Send messages
If you specify Avro as the validation format when creating the schema, you must specify the KafkaAvroSerializer class as the message serialization method and configure Payment as the message value class when sending messages.
Sample code:
To send messages, perform the following steps:
Go to the
examples/clients/avrodirectory of the project and run the following command to compile the project:mvn clean compile packageRun the following code to send messages:
mvn exec:java -Dexec.mainClass=io.confluent.examples.clients.basicavro.ProducerExample \
  -Dexec.args="$HOME/.confluent/java.config"
If information similar to the following one is returned, the messages are sent.
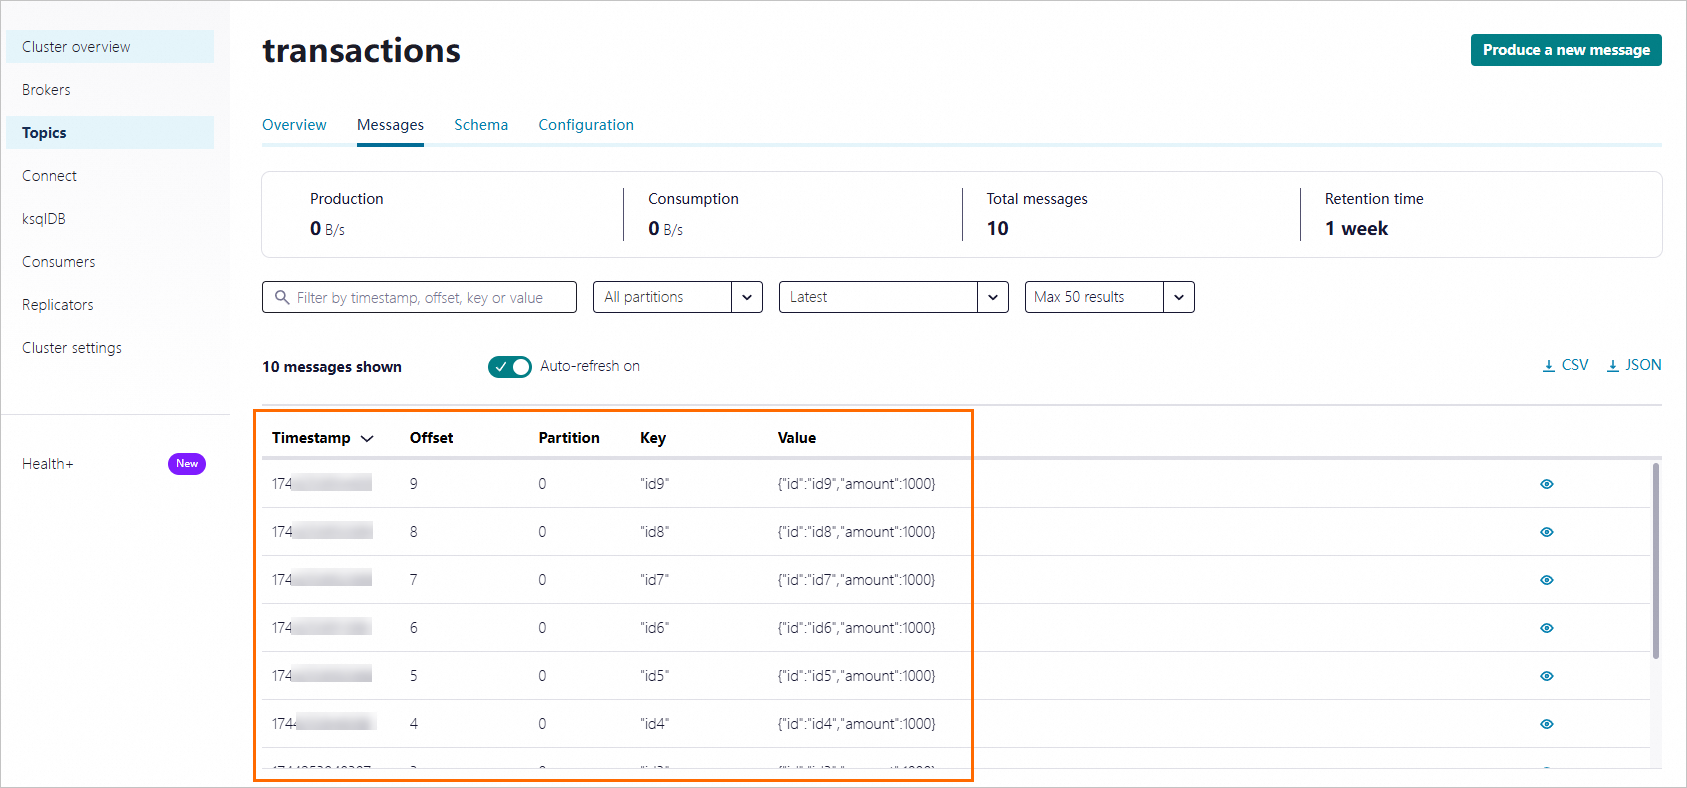
...
Successfully produced 10 messages to a topic called transactions
[INFO] ------------------------------------------------------------------------
[INFO] BUILD SUCCESS
[INFO] ------------------------------------------------------------------------
...
View the sent messages in Control Center.
Consume messages
If you specify Avro as the validation format when creating the schema, you must specify the KafkaAvroDeSerializer class as the message serialization method and configure Payment as the message value class when sending messages.
Sample code:
To consume messages, perform the following steps:
Go to the
examples/clients/avrodirectory of the project and run the following command to compile the project:mvn clean compile packageRun the following code to consume messages:
mvn exec:java -Dexec.mainClass=io.confluent.examples.clients.basicavro.ConsumerExample \
  -Dexec.args="$HOME/.confluent/java.config"
If information similar to the following one is returned, the messages are consumed.
...
key = id0, value = {"id": "id0", "amount": 1000.0}
key = id1, value = {"id": "id1", "amount": 1000.0}
key = id2, value = {"id": "id2", "amount": 1000.0}
key = id3, value = {"id": "id3", "amount": 1000.0}
key = id4, value = {"id": "id4", "amount": 1000.0}
key = id5, value = {"id": "id5", "amount": 1000.0}
key = id6, value = {"id": "id6", "amount": 1000.0}
key = id7, value = {"id": "id7", "amount": 1000.0}
key = id8, value = {"id": "id8", "amount": 1000.0}
key = id9, value = {"id": "id9", "amount": 1000.0}
...
References
For more information about Schema Registry, see Schema Registry for Confluent Platform.