This topic provides a quick guide on how to create and publish an API that uses a backend service of the HTTP type in API Gateway. This topic also describes how to call the API by using an application and an AppKey and AppSecret pair based on the Alibaba Cloud App authentication type.
Prerequisites
A virtual private cloud (VPC) environment is created. For more information, see Create a VPC with an IPv4 CIDR block and Create a VPC with an IPv6 CIDR block.
An Elastic Compute Service (ECS) instance is created. For more information, see Step 1: Create an ECS instance.
In this example, an ECS instance deployed in a VPC is used. The ECS instance resides in the same region as the API Gateway instance. In the ECS instance, Apache is deployed and uses the default port 80. For more information, see Step 4: Deploy Apache.
Process
This topic provides a step-by-step guide and starts with the creation of a backend service. The guide also covers the creation of and association between an API and an application. In addition, this topic describes how to debug the API online by using an SDK-based example and a cURL-based example.
The process consists of six steps:
Create a backend service: In this step, you configure a backend service as a resource in the region where your API Gateway instance resides. You can directly select the configured backend service when you create an API.
Create an API group: In this step, you create an API group. APIs are managed in groups based on their business types and the business organizational structure.
Create an API: In this step, you create an API in the API Gateway console.
Create an application and authorize it to call the API: In this step, you create and authorize an application that will be used as the identity to call the API.
Debug the API: In this step, you verify whether the API works as expected by using the online debugging feature provided by the API Gateway console.
Call the API: In this step, you can use an SDK provided by API Gateway or run a cURL command in a cURL command-line tool to call the API.
Step 1: Create a backend service
API Gateway allows you to configure backend services as resources of a region to simplify management. You need only to create a backend service in the API Gateway console and configure different URLs for the backend service for different environments. Then, you can directly select the configured backend service to create an API.
Log on to the API Gateway console. In the top navigation bar, select a region. In the left-side navigation pane, choose . Then, click Create Backend Service in the upper-right corner.
In the Create Backend Service dialog box, set Name to
httpd-onlineand Type toHTTP/HTTPS Serviceand click Confirm.On the Backend Services page, click the
httpd-onlinebackend service. On the Backend Service Definition page, click the Production tab and then click Create in the upper-right corner.
On the Basic Information page, enter
http://192.168.*.***:80in the Backend Service URL box and click Publish.Notehttp://192.168.*.***:80is the private IP address of the created ECS instance.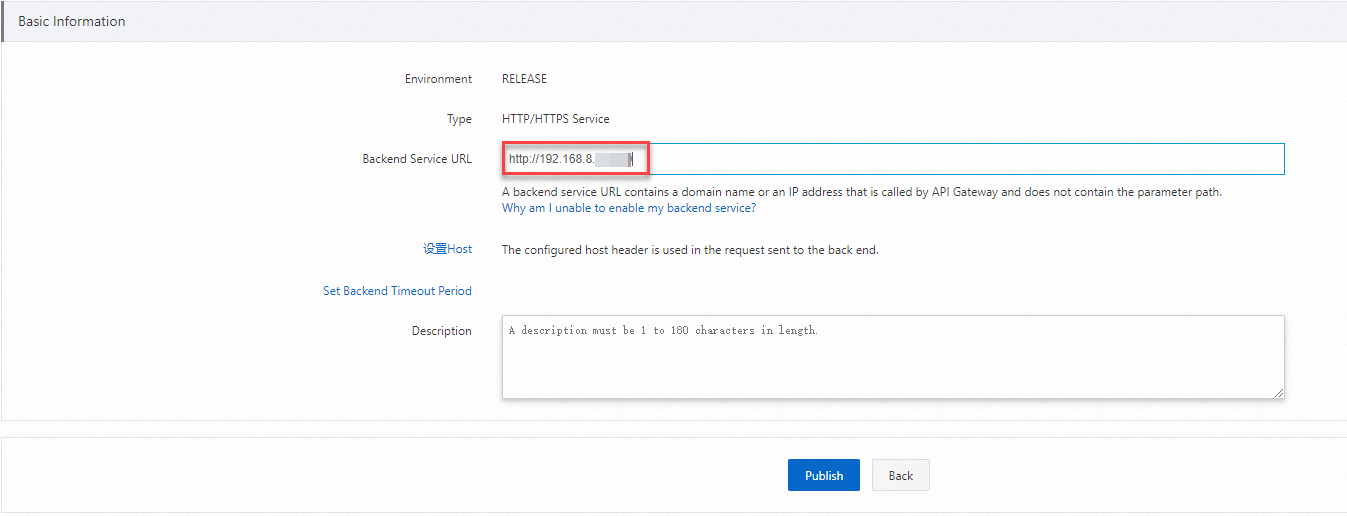
Step 2: Create an API group
APIs are managed in API groups. You must create an API group before you create an API.
On the API Groups page, view the created group and click the group name to go to the Group Details page. On the Group Details page, you can bind a domain name, modify basic information, and change the instance type for the API group.
API Gateway automatically assigns a public second-level domain name for the API group. This domain name is used only for debugging and has a limit of 100 calls per day for regions outside the Chinese mainland and 1,000 calls per day for regions in the Chinese mainland. We recommend that you bind an independent domain name after you create an API group.
In the left-side navigation pane, choose . On the API Groups page, click Create Group in the upper-right corner.
In the Create Group dialog box, select an instance from the Instances drop-down list, set Group Name to
httpd-demo, set BasePath to/, and then click Confirm.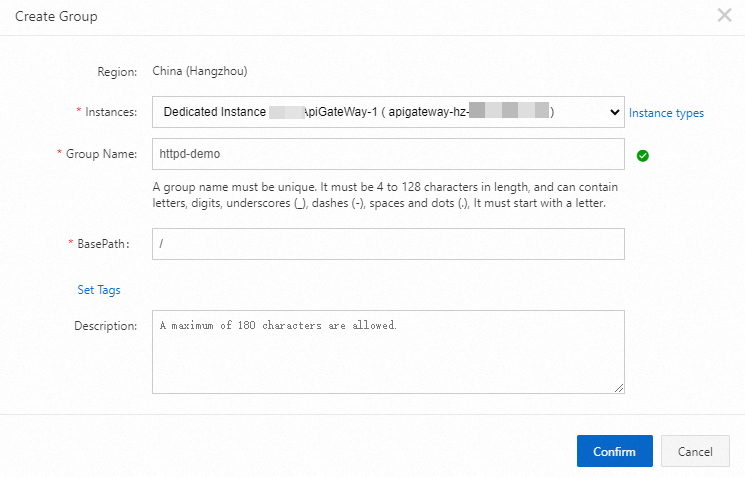
Step 3: Create an API
In the left-side navigation pane, choose . On the API Groups page, find the
httpd-demogroup that you created and click Manage APIs in the Actions column.On the APIs page, click Create API in the upper-right corner.
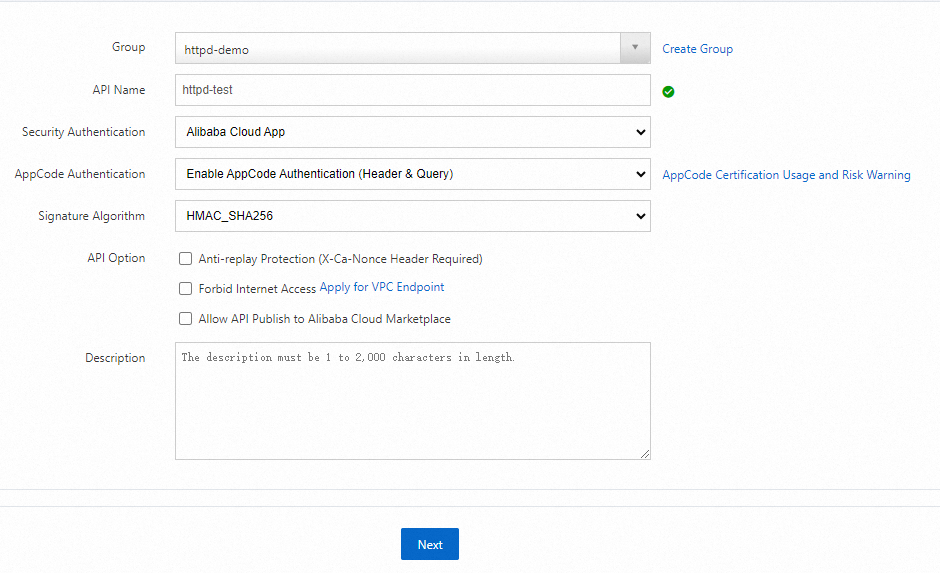
In the Basic Information step, configure the parameters and click Next. The following table describes the parameters:
Parameter
Example
Group
httpd-demo
API Name
httpd-test
Security Authentication
Alibaba Cloud App
AppCode Authentication
Enable AppCode Authentication (Header & Query)
Signature Algorithm
HMAC_SHA256
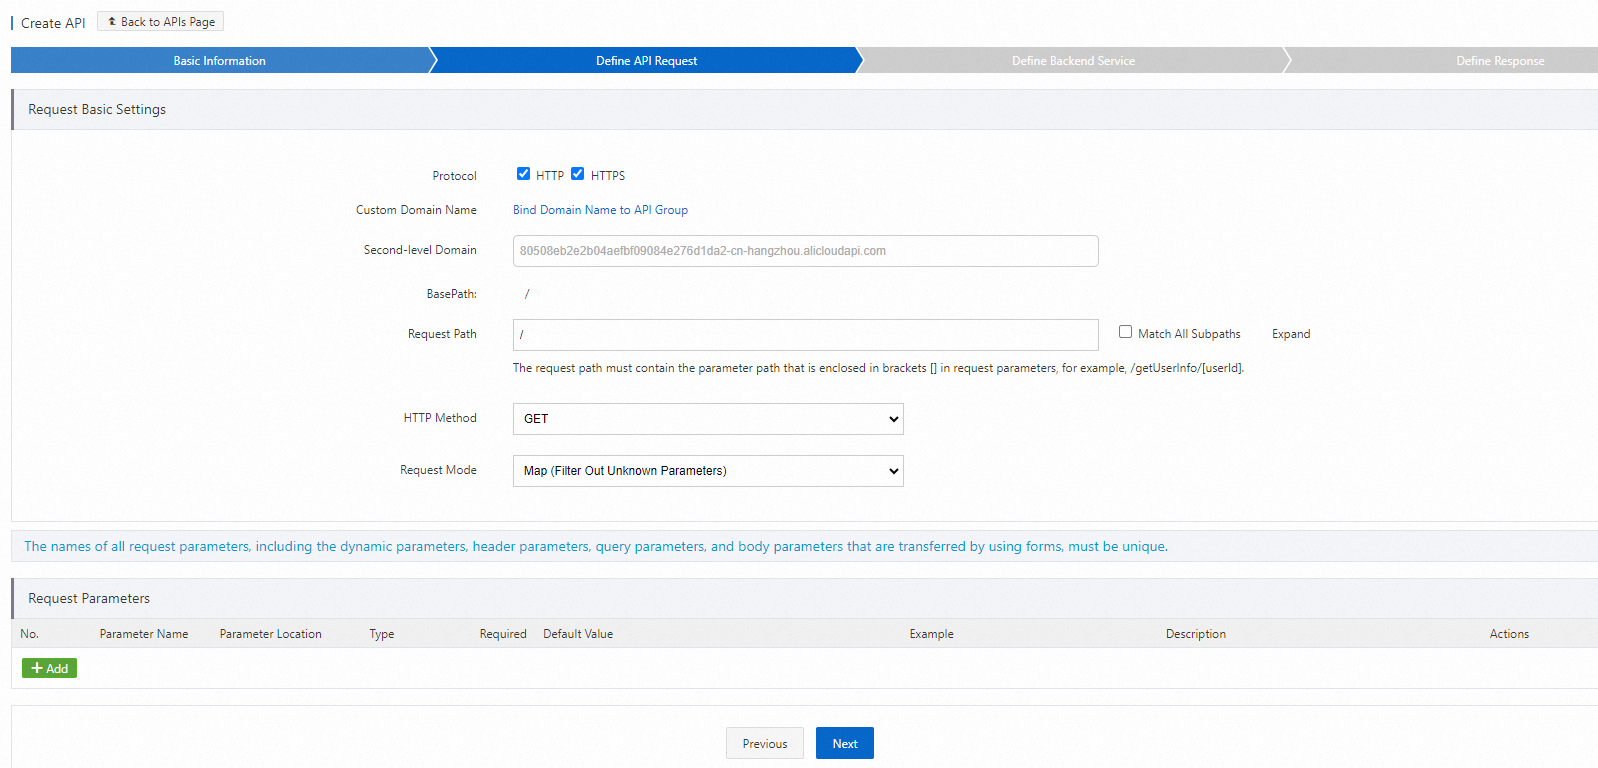
In the Define API Request step, configure the following parameters and click Next.
NoteIn this step, you define how a client, such as a web browser, mobile app, or business system, requests the API. The parameters that you need to configure in this step include Protocol, Request Path, HTTP Method, Request Mode, and the parameters in the Request Parameters section. In this example, the Request Mode parameter is set to Pass-through. This indicates that API Gateway does not process the parameters sent by the client and directly passes them to the backend.
In the Define Backend Service step, configure the following parameters and click Next.
NoteIn this step, you configure the type and URL of the backend service to which API Gateway sends the requests that are received from a client and how parameters are mapped and processed. In this example, the Backend Service Type parameter is set to HTTP/HTTPS Service.
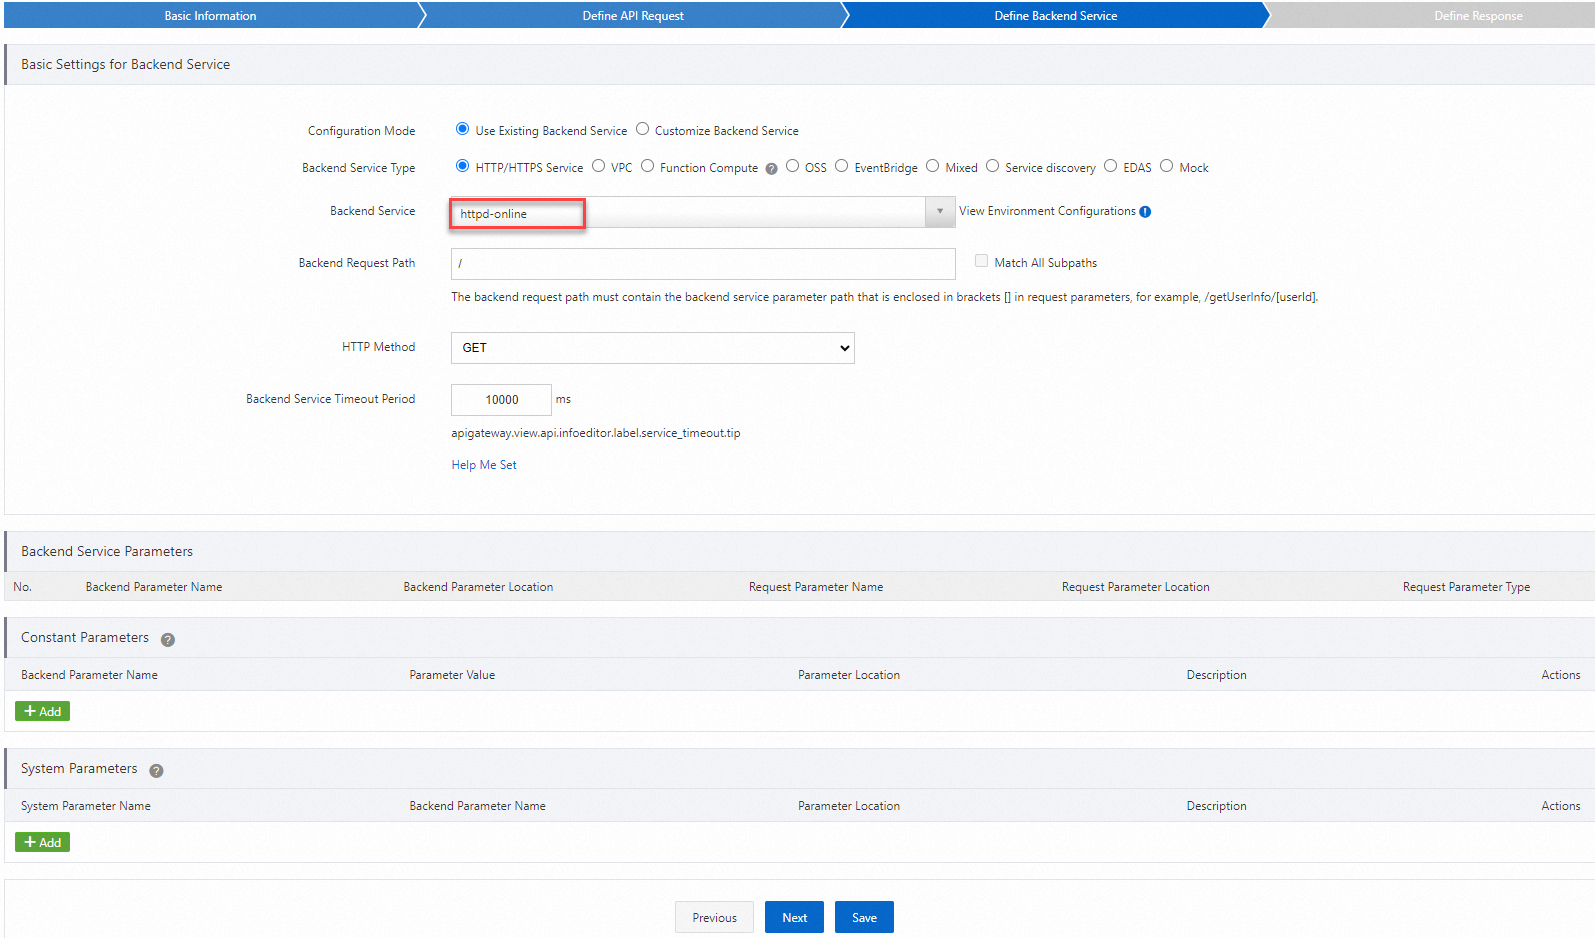
Parameter
Example
Configuration Mode
Select Use Existing Backend Service.
Backend Service Type
Select HTTP/HTTPS Service.
Backend Service
httpd-onlineBackend Request Path
/
HTTP Method
GET
Backend Service Timeout Period
10000
In the Define Response step, configure the parameters on the page based on your business requirements and then click Create.
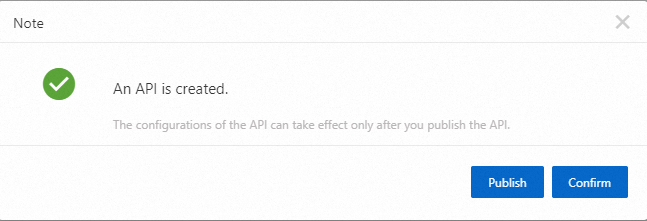
In the message that appears, click Publish.
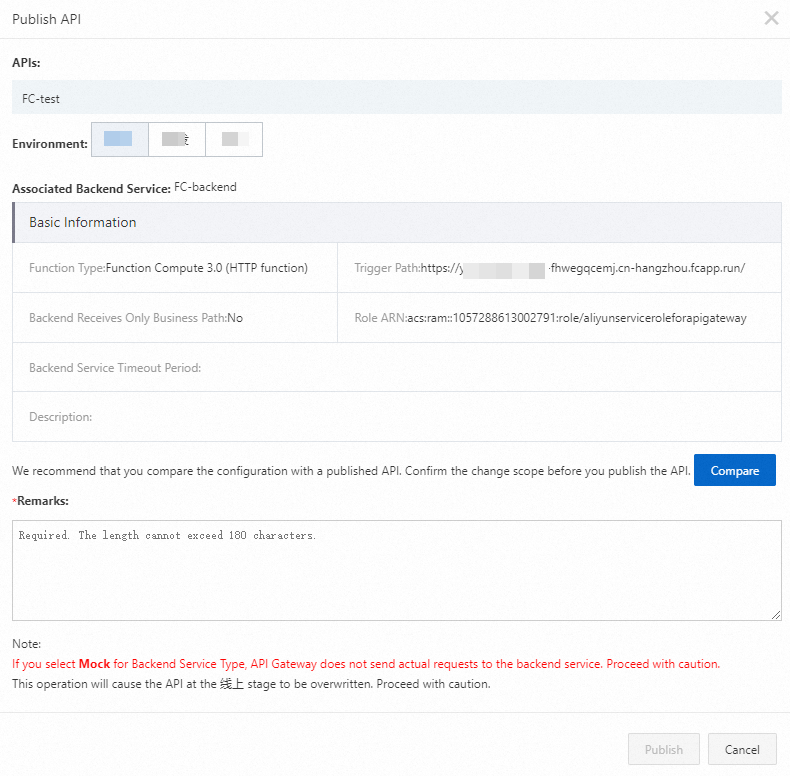
In the Publish API dialog box, set Environment to Release, enter remarks in the Remarks section, and then click Publish.
NoteAfter you modify an API, you must publish the API to the corresponding environment for the modification to take effect. API Gateway provides three built-in environments, which are test, pre-release, and production.
Step 4: Create an application and authorize it to call the API
An application is an identity that you use to call an API. In the Create an API step of this example, the authentication method is set to Alibaba Cloud App. Therefore, after the API is published, you must create an application and grant the application the permissions to call the API.
Create an application
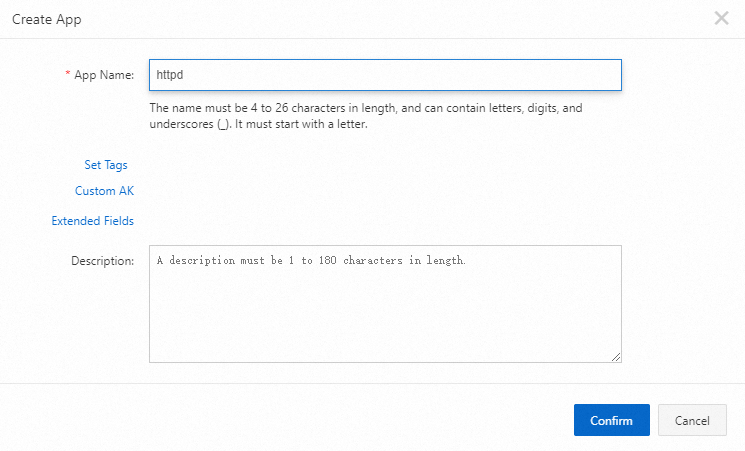
In the left-side navigation pane, choose . On the Apps page, click Create App in the upper-right corner.
Enter an application name in the App Name field and click Confirm. In this example, httpd is entered as the application name.
On the Apps page, click the
httpdapplication that you created. On the App Details page, you can see that two authentication methods are available:AppKeyandAppCode. TheAppKeymethod includes a pair ofAppKeyandAppSecret, which works similarly to a pair of username and password. When you call the API, you must pass theAppKeyas a parameter. TheAppSecretis used to calculate signatures. API Gateway verifies the AppKey-AppSecret pair to authenticate your identity.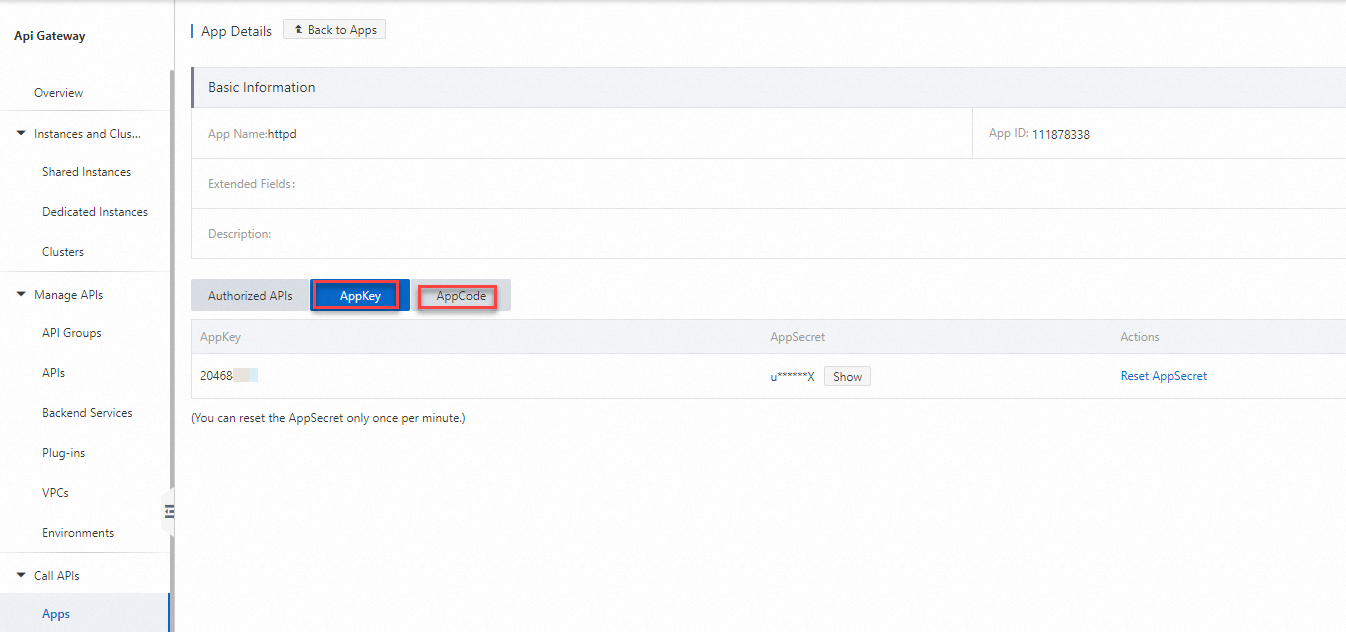
Authorize the application to call the API
In the left-side navigation pane, choose . On the APIs page, find the
http-testAPI and click > Authorize in the Actions column.
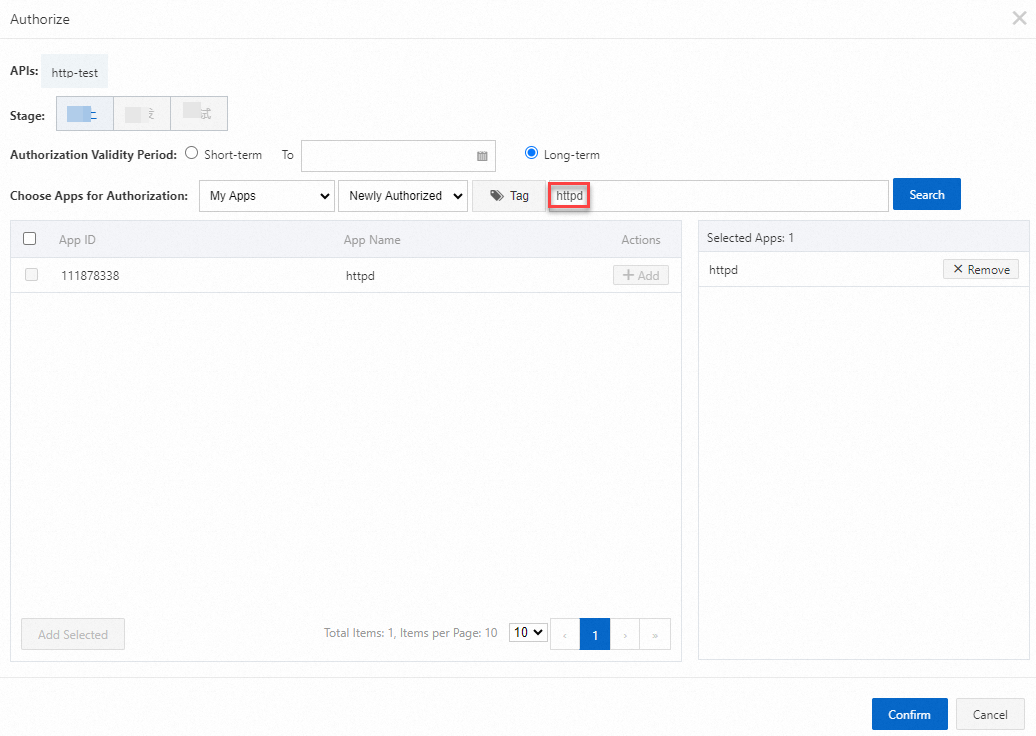
 On the Authorize page, set the Stage parameter to Production. Enter the name of the application you created in the search bar of the Choose Apps for Authorization section. In the search result, select the created application, click Add in the Actions column, and then click Confirm. A message appears to inform you that the application is authorized to call the API.
Step 5: Debug the API
API Gateway supports online debugging. We recommend that you use this feature to check whether an API is correctly configured before you call this API on clients.
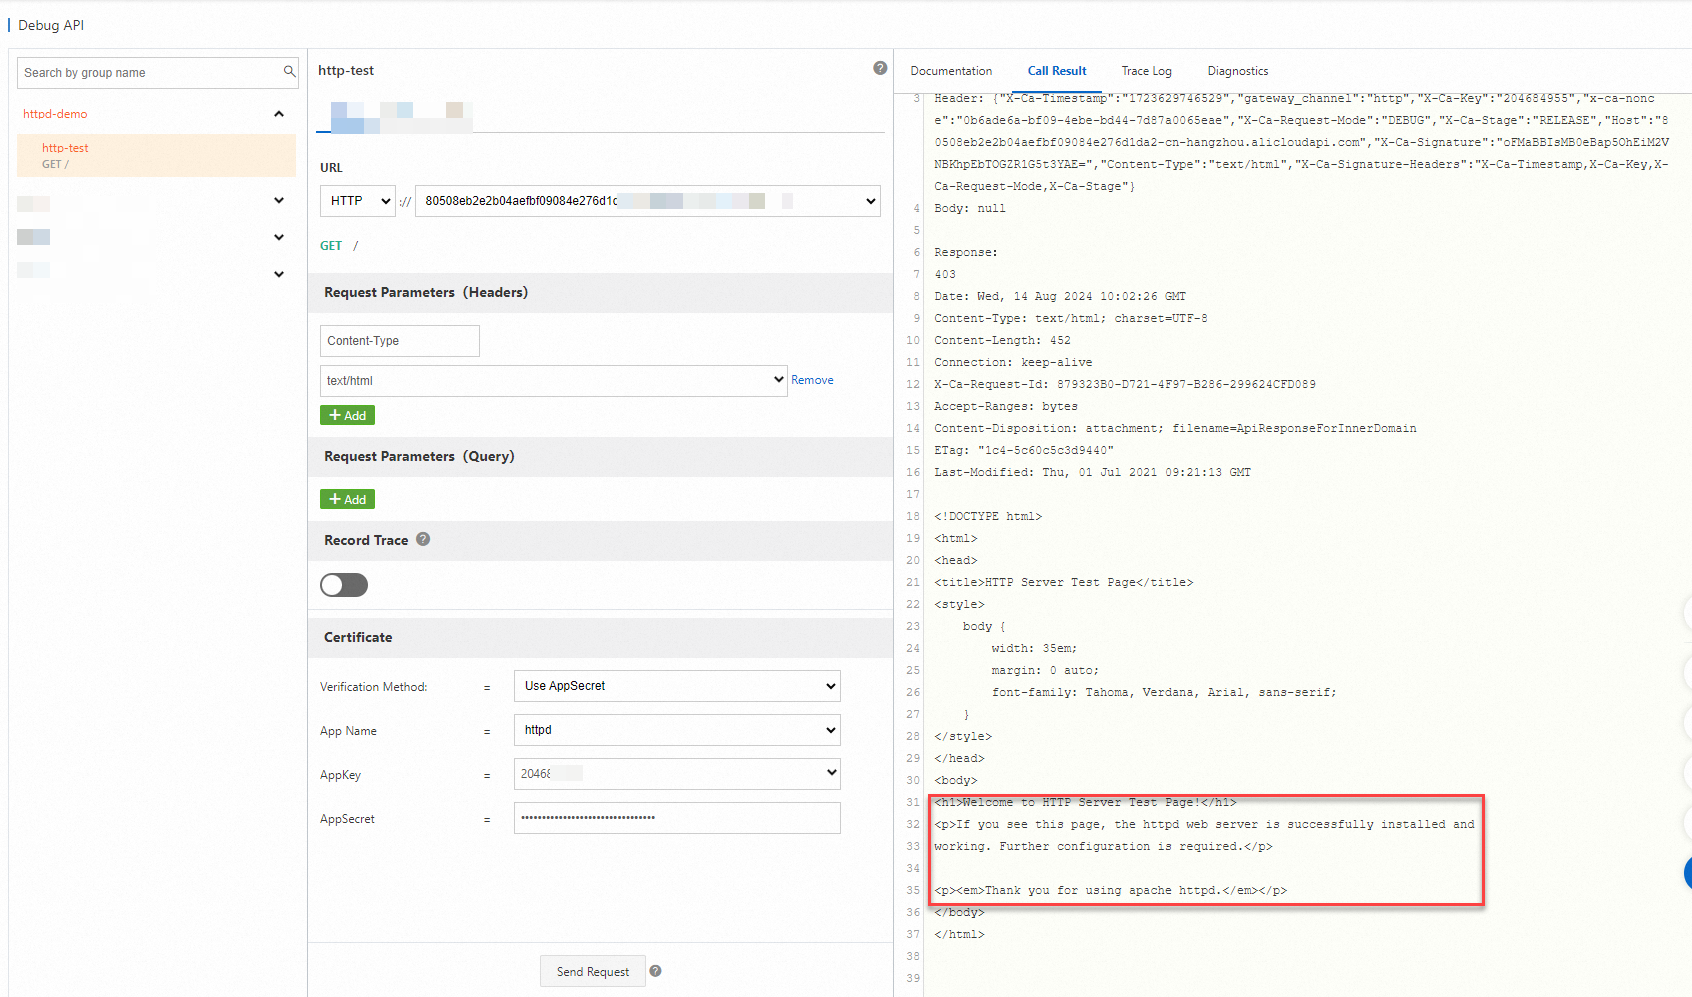
In the left-side navigation pane, choose . On the Debug API page, select the
httpd-testAPI, set Verification Method to Use AppSecret, and then click Send Request.If you see the following result, the API passes debugging.
Step 6: Call the API
By performing the preceding steps, you created and published the API, created and authorized an application to call the API, and debugged the API. In this step, SDKs provided by API Gateway can be used to call a published API from a business system.
Use an SDK
In the left-side navigation pane, choose . In the Sample Code for Node.js Signature in Other Languages section, select a language, for example, Node.js, and click View Sample Code for Node.js.
Run the
$ npm install aliyun-api-gateway -Scommand to use nmp to install the sample SDK for Node.js.In the following code snippet, set
YOUR_APP_KEYandYOUR_APP_SECRETto the AppKey and AppSecret of the application created in this example.// Import the SDK for Node.js that you downloaded. const Client = require('aliyun-api-gateway').Client; // Create an instance for the authorized application. Specify the AppKey and AppSecret of the authorized application. const client = new Client('YOUR_APP_KEY','YOUR_APP_SECRET'); async function get() { // Use the domain name of the API group to which the API that you want to call belongs. You can use the public second-level domain name provided by API Gateway to test API calls. However, a limit is imposed on the number of API calls. We recommend that you bind an independent domain name to the API Group. var url = 'YOUR_GROUP_DOMAIN'; var result = await client.get(url, { // Specify the request header. Some APIs can return data formats based on the specified response type. We recommend that you manually define the request header based on your business requirements. headers: { accept: 'application/json' }, }); console.log(JSON.stringify(result)); } get().catch((err) => { console.log(err.stack); });
Use cURL
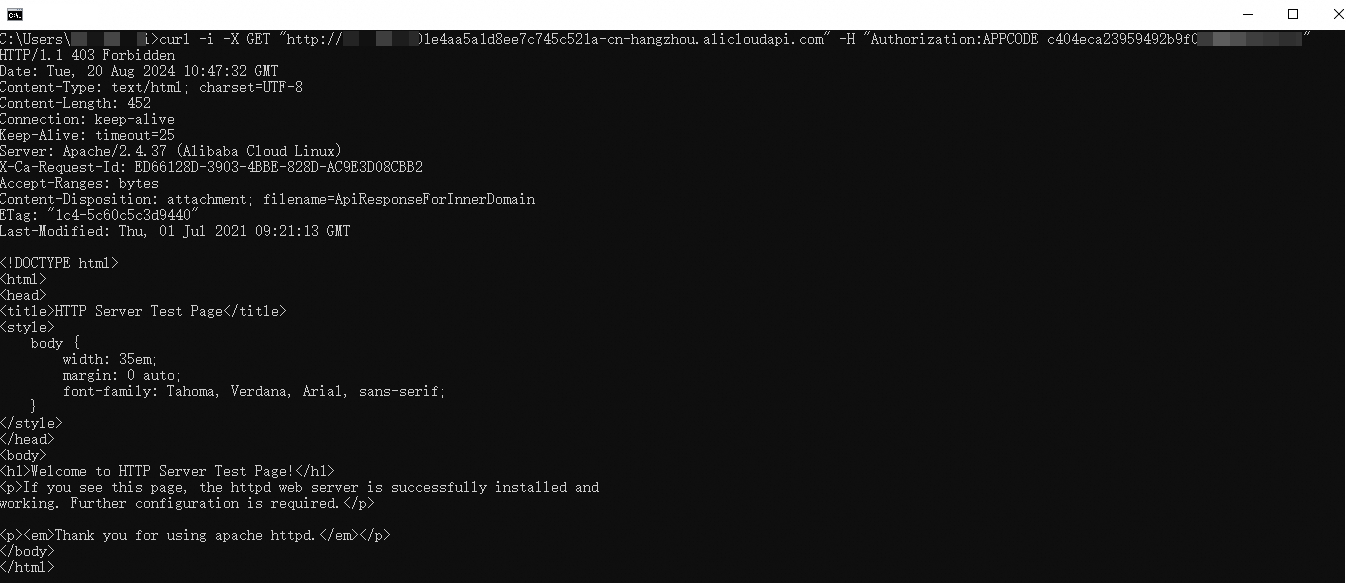
In the left-side navigation pane, choose Call APIs > Apps. On the Apps page, click the authorized application and obtain its AppCode on the page that appears. Then, use the following sample code to call the API:
curl -i -X GET "http://3fbf0648d01e4aa5a1d*******-cn-hangzhou.alicloudapi.com" -H "Authorization:APPCODE c404eca23959492b9f0e4d4d15****"