If you want to migrate data from a self-managed MySQL instance to an ApsaraDB RDS for MySQL instance and the data volume is relatively small or long downtime is acceptable for your business, you can use the mysqldump extension. This method facilitates the easy migration of your data. The mysqldump extension can export both the schema and the data of a self-managed database to a text file. This file includes SQL statements that are required to create tables and insert data. This ensures data integrity and consistency.
Prerequisites
IP address whitelists are configured, a public endpoint is obtained, and databases and accounts are created for the RDS instance. For more information, see General workflow to use ApsaraDB RDS for MySQL.
Background information
ApsaraDB RDS for MySQL is fully compatible with open source MySQL. The process of migrating data from a self-managed MySQL instance to an RDS instance is similar to the process of migrating data from one MySQL server to another MySQL server.
Data Transmission Service (DTS) allows you to migrate data in a more convenient and efficient manner without service interruptions. We recommend that you use DTS to migrate data. For more information, see Overview of data migration methods.
For more information about the parameters of the mysqldump extension, see official MySQL documentation.
Scenarios
You want to migrate data from a self-managed MySQL instance to an ApsaraDB RDS for MySQL instance.
Usage notes
After the migration is complete, the names of all tables that are migrated from the self-managed MySQL instance are in lowercase on the RDS instance. You can use one of the following methods to check the case-sensitivity of table names for the ApsaraDB RDS for MySQL instance:
When you create an RDS for MySQL instance, set the Table Name Case Sensitivity parameter to Case-sensitive.
If you want to enable the case-sensitivity of table names for an existing RDS instance, set the lower_case_table_names parameter to 0 in the ApsaraDB RDS console. For more information, see Modify the parameters of an ApsaraDB RDS for MySQL instance.
WarningAfter you set the lower_case_table_names parameter to 0, do not change the value to 1. If you change the value of this parameter to 1, the
ERROR 1146 (42S02): Table doesn't existerror may be reported, and your workloads may be seriously affected.If your RDS instance runs MySQL 8.0, you cannot reconfigure the lower_case_table_names parameter for your RDS instance.
Procedure
In this example, a Linux server is used. You can also run the mysqldump command in Terminal on macOS or in Command Prompt on Windows.
Use the mysqldump extension to export the data, stored procedures, triggers, and functions of the self-managed MySQL instance.
ImportantWhen the export task is in progress, do not update the data. Wait until the export task is completed.
The user that is mentioned in the following steps must have the required permissions. For more information, see official MySQL documentation.
In the Linux CLI, run the following command to export the data as a file:
mysqldump -h 127.0.0.1 -u user -p --opt --default-character-set=utf8 --hex-blob <Name of the self-managed MySQL instance> --skip-triggers --skip-lock-tables > /tmp/<Name of the self-managed MySQL instance>.sqlNoteTo use mysqldump to export data from an RDS for MySQL instance, replace the database address, user name, password, and database name in the preceding command with the corresponding information of the RDS for MySQL instance.
Example:
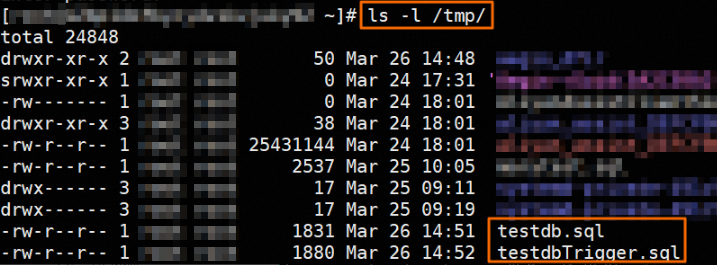
mysqldump -h 127.0.0.1 -u user -p --opt --default-character-set=utf8 --hex-blob testdb --skip-triggers --skip-lock-tables > /tmp/testdb.sqlIn the Linux CLI, run the following command to export the stored procedures, triggers, and functions as a file:
mysqldump -h 127.0.0.1 -u user -p --opt --default-character-set=utf8 --hex-blob <Name of the self-managed MySQL instance> -R | sed -e 's/DEFINER[ ]*=[ ]*[^*]*\*/*/' > /tmp/<Name of the self-managed MySQL instance> Trigger.sqlExample:
mysqldump -h 127.0.0.1 -u user -p --opt --default-character-set=utf8 --hex-blob testdb -R | sed -e 's/DEFINER[ ]*=[ ]*[^*]*\*/\*/' > /tmp/testdbTrigger.sqlNoteIf the self-managed MySQL instance does not contain stored procedures, triggers, or functions, you can skip this step.
Upload the exported files to a specified directory on an Elastic Compute Service (ECS) instance. In this example, the directory is /tmp.
NoteIf the self-managed MySQL instance resides on an ECS instance, you can skip this step.
Run the following commands to import the exported files into the RDS instance:
mysql -h <Endpoint of the RDS instance> -P <Port of the RDS instance> -u <RDS instance account> -p <Name of the RDS instance> < /tmp/<Name of the self-managed MySQL instance>.sql mysql -h <Endpoint of the RDS instance> -P <Port of the RDS instance > -u <RDS instance account> -p <Name of the RDS instance> < /tmp/<Name of the self-managed MySQL instance> Trigger.sqlNoteThe destination database on the RDS instance must be an existing database that you created. For more information about how to create a database, see Manage databases.
The account that is used to log on to the RDS instance must be a privileged account or a standard account that has the read and write permissions.
Example:
mysql -h rm-bpxxxxx.mysql.rds.aliyuncs.com -P 3306 -u testuser -p testdb  < /tmp/testdb.sql
mysql -h rm-bpxxxxx.mysql.rds.aliyuncs.com -P 3306 -u testuser -p testdb  < /tmp/testdbTrigger.sql
After the import is complete, use DMS to log on to the RDS instance and check whether the data is normal.