Container Compute Service (ACS) does not require you to have deep knowledge about the underlying hardware or manage GPU-accelerated nodes. All configurations are out-of-the-box. ACS is easy to deploy and billed on a pay-as-you-go basis. It is suitable for LLM inference services, which can efficiently reduce the inference cost. This topic describes how to deploy a model inference service with the QwQ-32B model in ACS, and use Open WebUI to display the service.
Background information
About QwQ-32B
vLLM
Open WebUI
Prerequisites
When using ACS for the first time, you must assign default roles to ACS with your Alibaba Cloud account. Only after you complete the authorization can ACS use resources in other cloud services to create clusters or store log files. These cloud services include Elastic Compute Service (ECS), Object Storage Service (OSS), Apsara File Storage NAS (NAS), Cloud Parallel File Storage (CPFS), and Server Load Balancer (SLB). See Quick start for first-time ACS users.
A kubectl client is connected to the cluster. See Obtain the kubeconfig file of a cluster and use kubectl to connect to the cluster.
GPU-accelerated instance specification and estimated cost
GPU memory is occupied by model parameters during the inference phase. The usage is calculated based on the following formula.
The model has 32 billion parameters and its precision data is 2 bytes (default 16-bit floating number/8 bits per byte).
GPU memory = 32 x 109 x 2 bytes ≈ 59.6 GiB
In addition to the memory used to load the model, you also need to consider the size of the KV cache and the GPU utilization. Typically, a proportion of memory is reserved for buffering. Therefore, the suggested specification is 1 GPU with 80 GiB of memory, 16 vCPUs, and 128 GiB of memory. You can also refer to the Table of suggested specifications and GPU models and specifications. For more information about the billing of ACS GPU-accelerated instances, see Billing overview.
Make sure that the specification of the ACS GPU-accelerated instance complies with ACS pod specification adjustment logic.
By default, an ACS pod provides 30 GiB of free EphemeralStorage. The inference image inference-nv-pytorch:25.02-vllm0.7.2-sglang0.4.3.post2-pytorch2.5-cuda12.4-20250305-serverless used in this example is 9.5 GiB in size. If you need more storage space, customize the size of the EphemeralStorage. For more information, see Add the EphemeralStorage.
Procedure
You can submit a ticket to quickly obtain the model file and view the supported GPU models.
Model file: QwQ-32B. The model file is about 120 GiB in size. It usually takes 2 to 3 hours to download and upload the model file. You can submit a ticket to copy the model files to your OSS bucket.
GPU model: Replace the variable in the
alibabacloud.com/gpu-model-series: <example-model>label with the actual GPU model supported by ACS. For more information, see Specify GPU models and driver versions for ACS GPU-accelerated pods.High-performance RDMA networks: Compared with TCP/IP, high-performance RDMA features zero copy and kernel bypass to help avoid file copy and frequent context switchover. RDMA can reduce the latency and CPU usage and increase the throughput. ACS allows you to add the
alibabacloud.com/hpn-type: "rdma"label to use RDMA. For more information about the GPU models that support RDMA, submit a ticket.
Step 1: Prepare model data
The LLM requires large amounts of disk space to store model files. We recommend that you use a NAS or OSS volume to persist the model files. In the following example, an OSS volume is used to persist the QwQ-32B model file.
Run the following command to download the QwQ-32B model.
NoteCheck whether the git-lfs plug-in is installed. If not, run
yum install git-lfsorapt-get install git-lfsto install it. For more information, see Install git-lfs.git lfs install GIT_LFS_SKIP_SMUDGE=1 git clone https://huggingface.co/Qwen/QwQ-32B.git cd QwQ-32B git lfs pullCreate an OSS directory and upload the model files to the directory.
NoteTo install and use ossutil, see Install ossutil.
ossutil mkdir oss://<your-bucket-name>/models/QwQ-32B
ossutil cp -r ./QwQ-32B oss://<your-bucket-name>/models/QwQ-32B
Create a PV and a PVC. Create a PV named
llm-modeland a PVC for the cluster. For more information, see Mount a statically provisioned OSS volume.Use the console
The following table describes the basic parameters that are used to create the PV.
Parameter
Description
PV Type
OSS
Volume Name
llm-model
Access Certificate
Specify the AccessKey ID and the AccessKey secret used to access the OSS bucket.
Bucket ID
Select the OSS bucket that you created in the previous step.
OSS Path
Select the path of the model, such as
/models/QwQ-32B.The following table describes the basic parameters that are used to create the PVC.
Parameter
Description
PVC Type
OSS
Volume Name
llm-model
Allocation Mode
In this example, Existing Volumes is selected.
Existing Volumes
Click Existing Volumes and select the PV that you created.
Use kubectl
The following code block shows the YAML template:
apiVersion: v1
kind: Secret
metadata:
  name: oss-secret
stringData:
  akId: <your-oss-ak> # The AccessKey ID used to access the OSS bucket.
  akSecret: <your-oss-sk> # The AccessKey secret used to access the OSS bucket.
---
apiVersion: v1
kind: PersistentVolume
metadata:
  name: llm-model
  labels:
    alicloud-pvname: llm-model
spec:
  capacity:
    storage: 30Gi
  accessModes:
    - ReadOnlyMany
  persistentVolumeReclaimPolicy: Retain
  csi:
    driver: ossplugin.csi.alibabacloud.com
    volumeHandle: llm-model
    nodePublishSecretRef:
      name: oss-secret
      namespace: default
    volumeAttributes:
      bucket: <your-bucket-name> # The name of the OSS bucket.
      url: <your-bucket-endpoint> # The endpoint, such as oss-cn-hangzhou-internal.aliyuncs.com.
      otherOpts: "-o umask=022 -o max_stat_cache_size=0 -o allow_other"
      path: <your-model-path> # The model path, such as /models/QwQ-32B/ in this example.
---
apiVersion: v1
kind: PersistentVolumeClaim
metadata:
  name: llm-model
spec:
  accessModes:
    - ReadOnlyMany
  resources:
    requests:
      storage: 30Gi
  selector:
    matchLabels:
      alicloud-pvname: llm-model
Step 2: Deploy a model
Run the following command to deploy the QwQ-32B model inference service that uses the vLLM framework.
The inference service exposes an OpenAI-compatible HTTP API. Run the following code to treat the model parameter file as a special dataset and mount it to the specified path (
/model/QwQ-32B) of the container that runs the inference service.--max_model_lenspecifies the maximum length of a token that can be processed by the model. You can increase the length to get higher performance. However, this also increases the usage of GPU memory.Noteegslingjun-registry.cn-wulanchabu.cr.aliyuncs.com/egslingjun/{image:tag}is the address of the public image. We recommend that you use VPC to accelerate the pulling of AI container images.kubectl apply -f- <<EOF apiVersion: apps/v1 kind: Deployment metadata: labels: app: qwq-32b alibabacloud.com/compute-class: gpu alibabacloud.com/gpu-model-series: <example-model> alibabacloud.com/hpn-type: "rdma" name: qwq-32b namespace: default spec: replicas: 1 selector: matchLabels: app: qwq-32b template: metadata: labels: app: qwq-32b alibabacloud.com/compute-class: gpu alibabacloud.com/gpu-model-series: <example-model> spec: volumes: - name: model persistentVolumeClaim: claimName: llm-model - name: dshm emptyDir: medium: Memory sizeLimit: 30Gi containers: - command: - sh - -c - vllm serve /models/QwQ-32B --port 8000 --trust-remote-code --served-model-name qwq-32b --max-model-len 32768 --gpu-memory-utilization 0.95 --enforce-eager image: egslingjun-registry.cn-wulanchabu.cr.aliyuncs.com/egslingjun/inference-nv-pytorch:25.02-vllm0.7.2-sglang0.4.3.post2-pytorch2.5-cuda12.4-20250305-serverless name: vllm ports: - containerPort: 8000 readinessProbe: tcpSocket: port: 8000 initialDelaySeconds: 30 periodSeconds: 30 resources: limits: nvidia.com/gpu: "1" cpu: "16" memory: 128G volumeMounts: - mountPath: /models/QwQ-32B name: model - mountPath: /dev/shm name: dshm --- apiVersion: v1 kind: Service metadata: name: qwq-32b-v1 spec: type: ClusterIP ports: - port: 8000 protocol: TCP targetPort: 8000 selector: app: qwq-32b EOF
Step 3: Deploy Open WebUI
Run the following command to create an Open WebUI application and service.
kubectl apply -f- << EOF
apiVersion: apps/v1
kind: Deployment
metadata:
  name: openwebui
spec:
  replicas: 1
  selector:
    matchLabels:
      app: openwebui
  template:
    metadata:
      labels:
        app: openwebui
    spec:
      containers:
      - env:
        - name: ENABLE_OPENAI_API
          value: "True"
        - name: ENABLE_OLLAMA_API
          value: "False"
        - name: OPENAI_API_BASE_URL
          value: http://qwq-32b-v1:8000/v1
        - name: ENABLE_AUTOCOMPLETE_GENERATION
          value: "False"
        - name: ENABLE_TAGS_GENERATION
          value: "False"
        image: kube-ai-registry.cn-shanghai.cr.aliyuncs.com/kube-ai/open-webui:main
        name: openwebui
        ports:
        - containerPort: 8080
          protocol: TCP
        volumeMounts:
        - mountPath: /app/backend/data
          name: data-volume
      volumes:
      - emptyDir: {}
        name: data-volume
---
apiVersion: v1
kind: Service
metadata:
  name: openwebui
  labels:
    app: openwebui
spec:
  type: ClusterIP
  ports:
  - port: 8080
    protocol: TCP
    targetPort: 8080
  selector:
    app: openwebui
EOF
Step 4: Verify the inference service
Run
kubectl port-forwardto configure port forwarding between the local environment and inference service.NotePort forwarding set up by using
kubectl port-forwardis not reliable, secure, or extensible in production environments. It is only for development and debugging. Do not use this command to set up port forwarding in production environments. For more information about networking solutions used for production in ACK clusters, see Ingress management.kubectl port-forward svc/openwebui 8080:8080Expected results:
Forwarding from 127.0.0.1:8080 -> 8080
Forwarding from [::1]:8080 -> 8080
Access
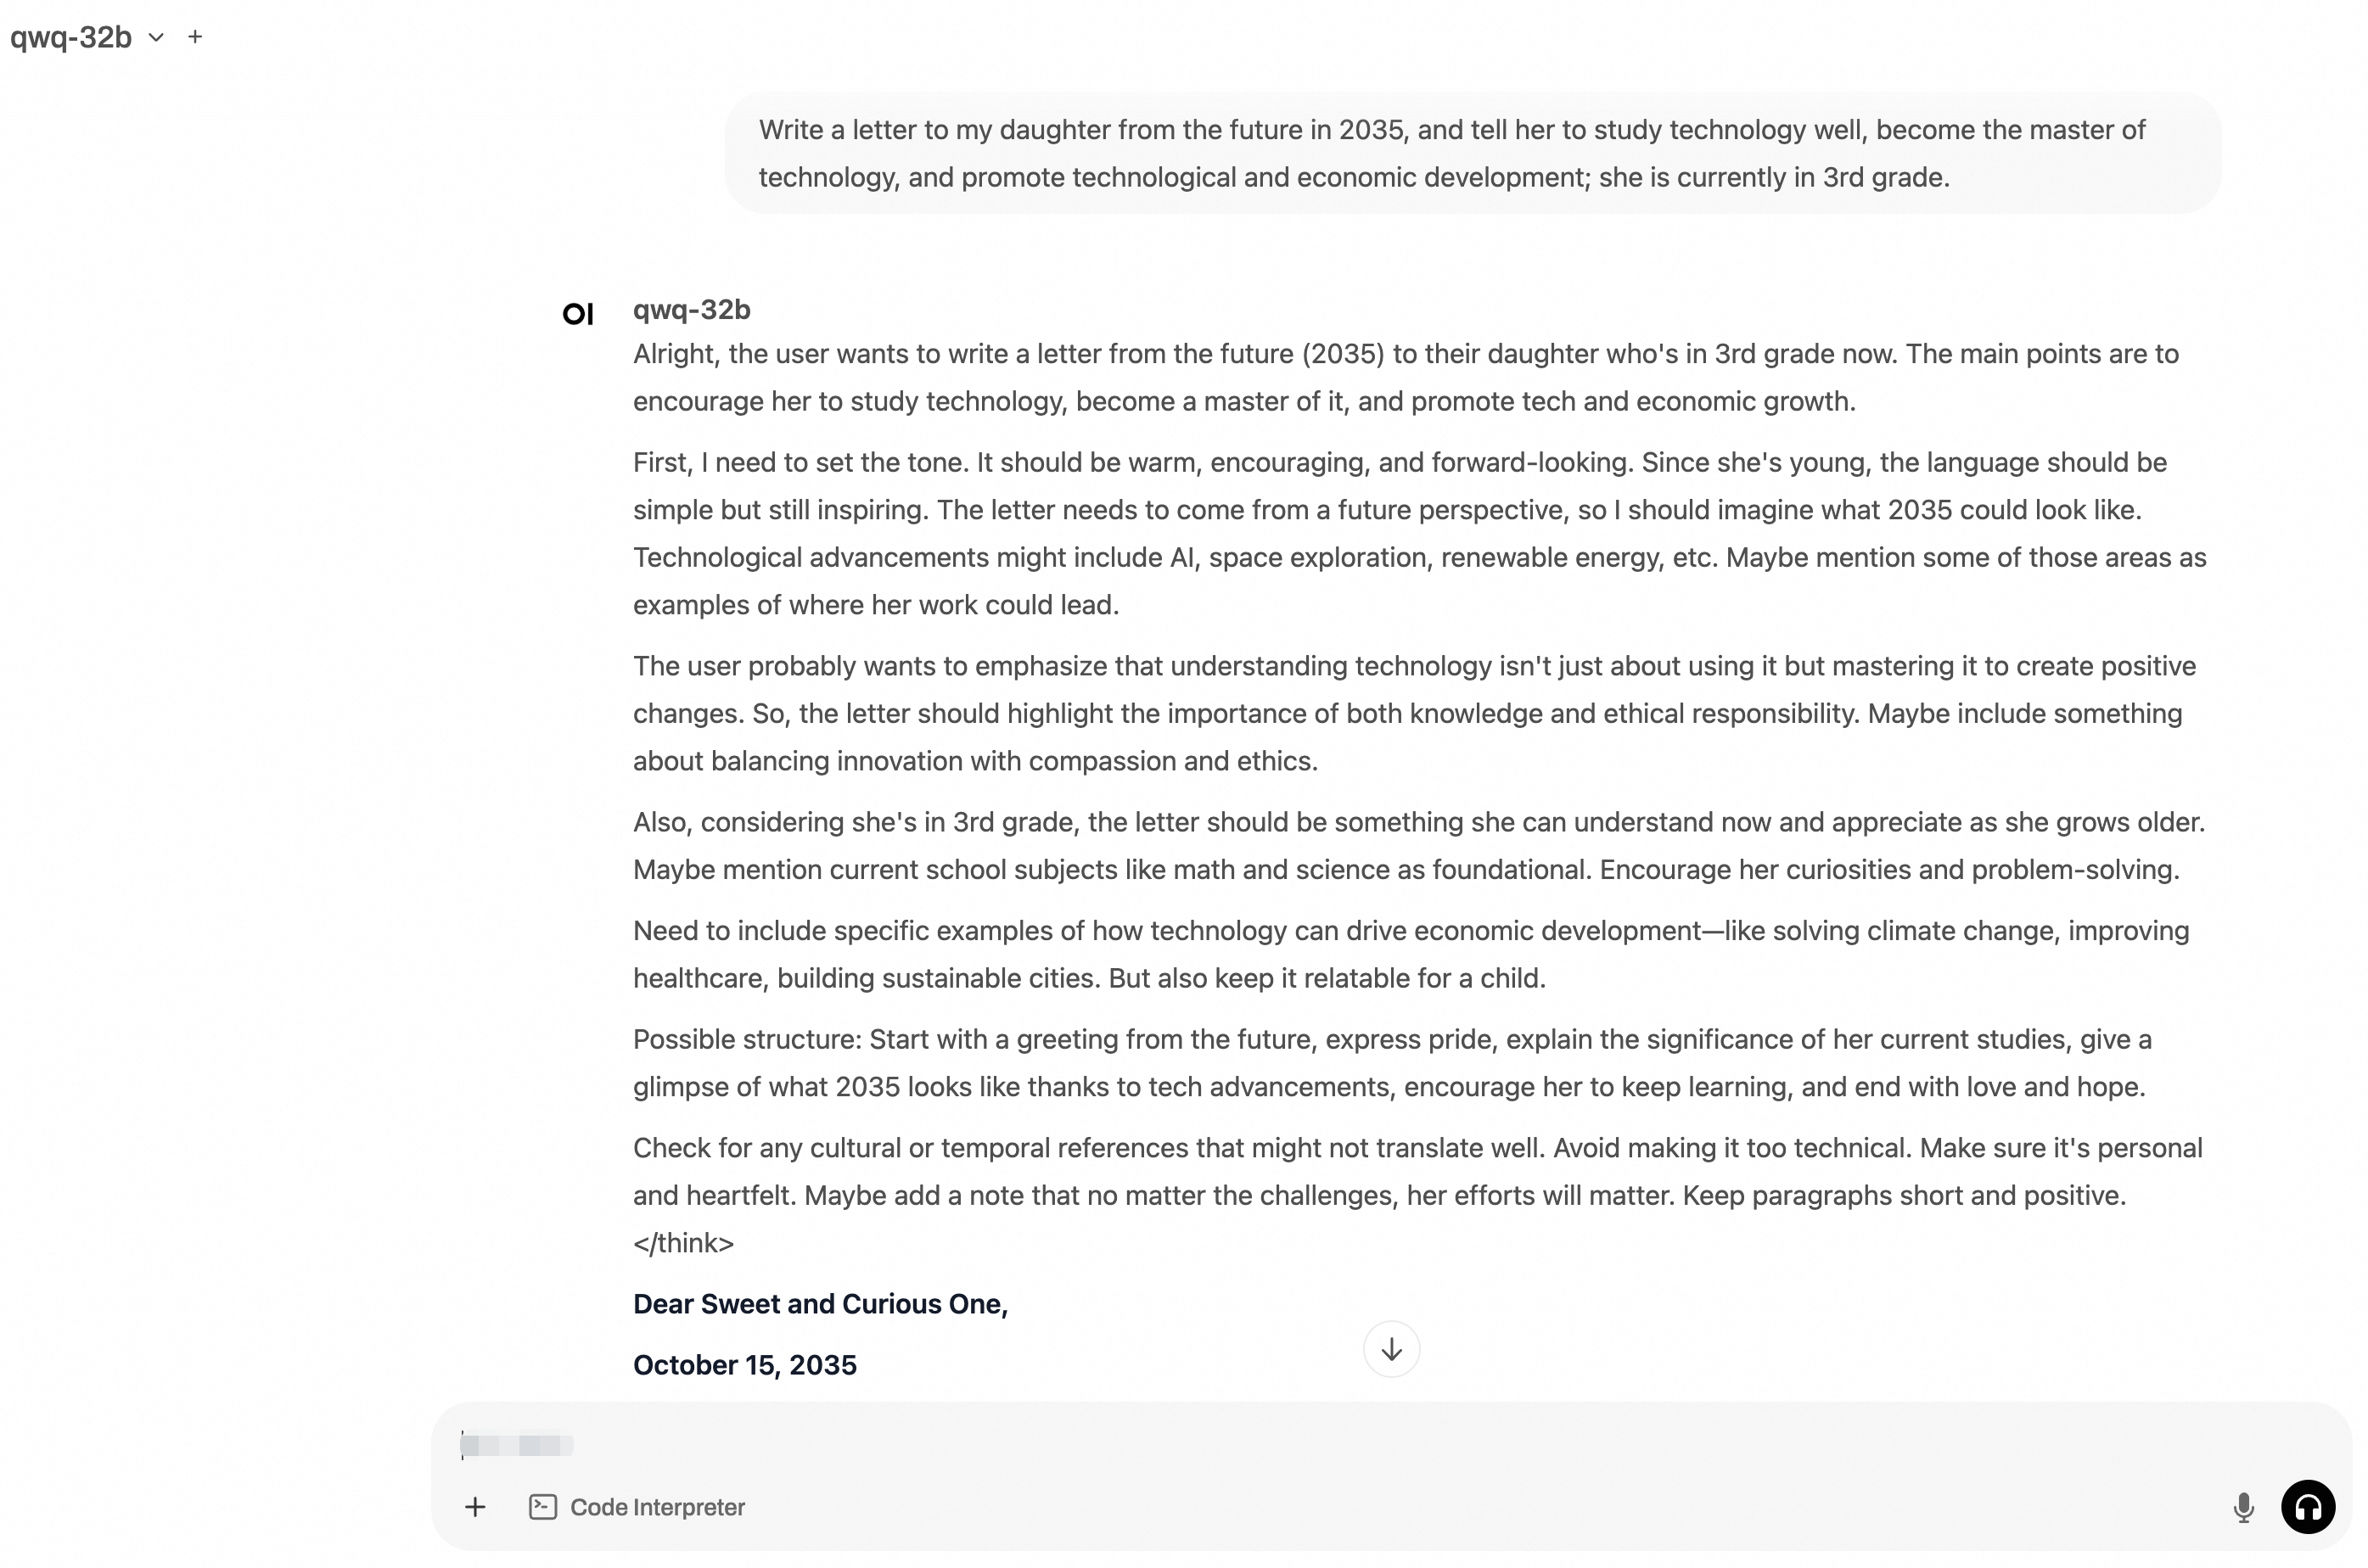
http://localhost:8080and log on to Open WebUI.You need to enter the administrator username and password during the first time you log on to Open WebUI. Enter a prompt. The following figure shows the output.
(Optional) Step 5: Run stress tests on the inference service
To download the stress test dataset, make sure that you have Internet access. For more information, see Enable Internet access for an ACS cluster or Mount an independent EIP for pods.
Run the following command to create a stress test tool.
kubectl apply -f- <<EOF
apiVersion: apps/v1
kind: Deployment
metadata:
  name: vllm-benchmark
  labels:
    app: vllm-benchmark
spec:
  replicas: 1
  selector:
    matchLabels:
      app: vllm-benchmark
  template:
    metadata:
      labels:
        app: vllm-benchmark
    spec:
      volumes:
      - name: llm-model
        persistentVolumeClaim:
          claimName: llm-model
      containers:
      - name: vllm-benchmark
        image: kube-ai-registry.cn-shanghai.cr.aliyuncs.com/kube-ai/vllm-benchmark:v1
        command:
        - "sh"
        - "-c"
        - "sleep inf"
        volumeMounts:
        - mountPath: /models/QwQ-32B
          name: llm-model
EOF
Log on to the benchmark pod and download the stress test dataset.
# Run the following command to log on to the benchmark pod.
PODNAME=$(kubectl get po -o custom-columns=":metadata.name"|grep "vllm-benchmark")
kubectl exec -it $PODNAME -- bash

# Download the stress test dataset.
pip3 install modelscope
modelscope download --dataset gliang1001/ShareGPT_V3_unfiltered_cleaned_split ShareGPT_V3_unfiltered_cleaned_split.json --local_dir /root/
Perform the stress test.
# Perform the stress test. input_length=4096,tp=4,output_lenght=512,concurrency=8,num_prompts=80
python3 /root/vllm/benchmarks/benchmark_serving.py \
--backend vllm \
--model /models/QwQ-32B \
--served-model-name qwq-32b \
--trust-remote-code \
--dataset-name random \
--dataset-path /root/ShareGPT_V3_unfiltered_cleaned_split.json \
--random-input-len 4096 \
--random-output-len 512 \
--random-range-ratio 1 \
--num-prompts 80 \
--max-concurrency 8 \
--host qwq-32b-v1 \
--port 8000 \
--endpoint /v1/completions \
--save-result \
2>&1 | tee benchmark_serving.txt
Expected results:
Starting initial single prompt test run...
Initial test run completed. Starting main benchmark run...
Traffic request rate: inf
Burstiness factor: 1.0 (Poisson process)
Maximum request concurrency: 8
100%|██████████| 80/80 [07:44<00:00,  5.81s/it]
============ Serving Benchmark Result ============
Successful requests:                     80
Benchmark duration (s):                  464.74
Total input tokens:                      327680
Total generated tokens:                  39554
Request throughput (req/s):              0.17
Output token throughput (tok/s):         85.11
Total Token throughput (tok/s):          790.18
---------------Time to First Token----------------
Mean TTFT (ms):                          10315.97
Median TTFT (ms):                        12470.54
P99 TTFT (ms):                           17580.34
-----Time per Output Token (excl. 1st token)------
Mean TPOT (ms):                          71.03
Median TPOT (ms):                        66.24
P99 TPOT (ms):                           95.95
---------------Inter-token Latency----------------
Mean ITL (ms):                           71.02
Median ITL (ms):                         58.12
P99 ITL (ms):                            60.26
==================================================
(Optional) Step 6: Clear the environment
If you no longer need the inference service, delete the environment promptly.
Delete the inference workload and service.
kubectl delete deployment qwq-32b
kubectl delete service qwq-32b-v1
kubectl delete deployment openwebui
kubectl delete service openwebui
kubectl delete deployment vllm-benchmark
Delete the PV and PVC.
kubectl delete pvc llm-model
kubectl delete pv llm-model
Expected results:
persistentvolumeclaim "llm-model" deleted
persistentvolume "llm-model" deleted
References
Container Compute Service (ACS) is integrated into Container Service for Kubernetes. This allows you to use the GPU container compute power of ACS in ACK Pro clusters.
For more information, refer to the following topics:
The AI container image of ACS is dedicated to GPU-accelerated containers in ACS clusters. For more information about the release notes of this image, see Release notes for ACS AI container images.