Server Load Balancer (SLB) is used to regulate network traffic to cloud services in Alibaba Cloud. When the traffic to ECS instances increases, we scale up with the number of instances to ease the tensions with the existing level of resources. In this scenario, SLB is needed to regulate the traffic and to check the quality of ECS instances by performing health check. In this blog we walkthrough a scenario of issues faced by a customer and learn on how it was solved.
Scenario
Stephen Koh runs a website for his jewelry shop in Singapore. For the Chinese New Year, he announced an online promotion and plans to have a different sales campaign every first week of the month. He is now anxious about the web application as there will be a huge traffic where he calculates as 4 virtual machines are needed. He wants machine number 2 to get more data requests than others. The distribution of requests for each of his machines is set to equal priority. His cloud engineer Edwin Tan also agrees the need and provides a solution.
Solution
Edwin creates 4 ECS instances and installs NGINX browser. Then he uploads the website contents in all the ECS instances. Then he uses Server Load Balancer to provide the distribution of traffic.
Procedure
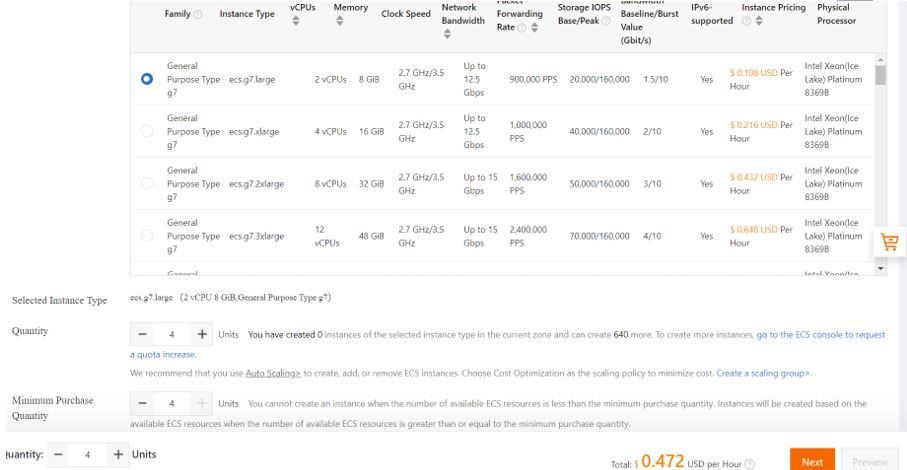
Go to ECS console and create 4 ECS instances in Singapore region.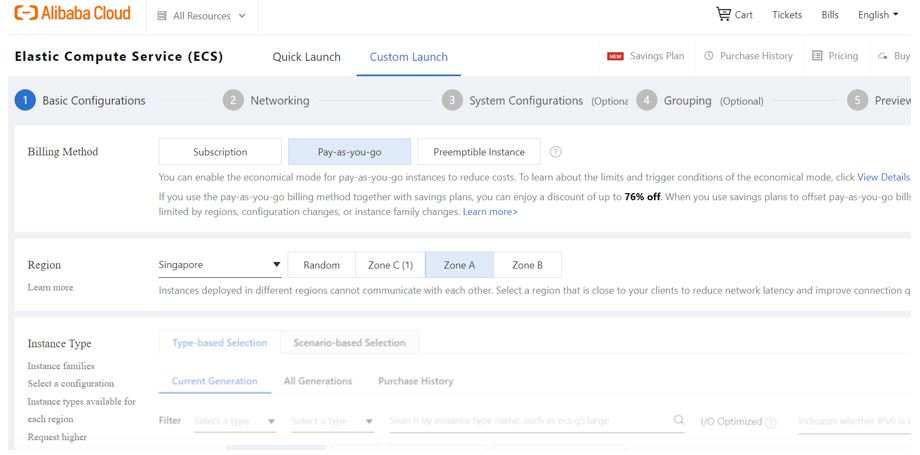
Choose Ubuntu OS and the version of your choice.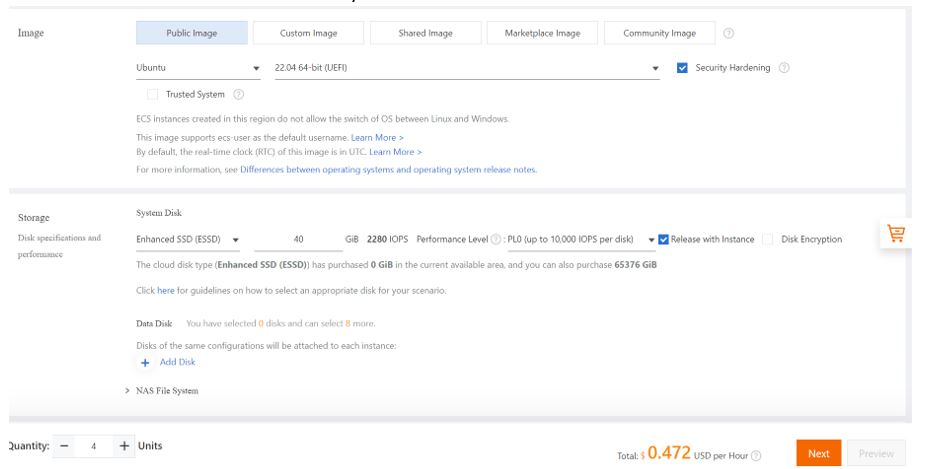
Specify the VPC they belong to. VPCs are created earlier.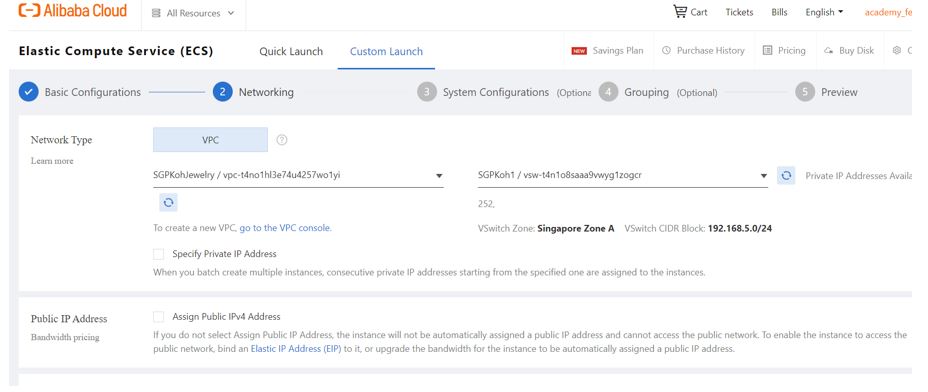
Set the log on credentials.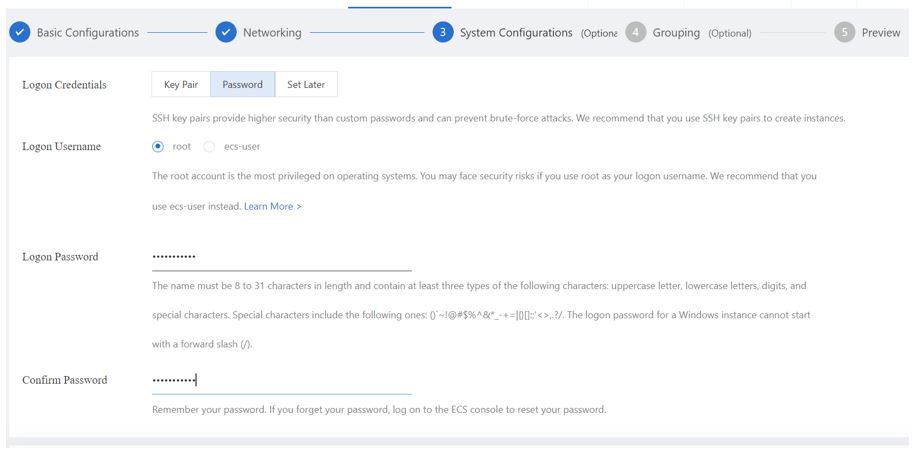
Enter appropriate details and create the ECS instances.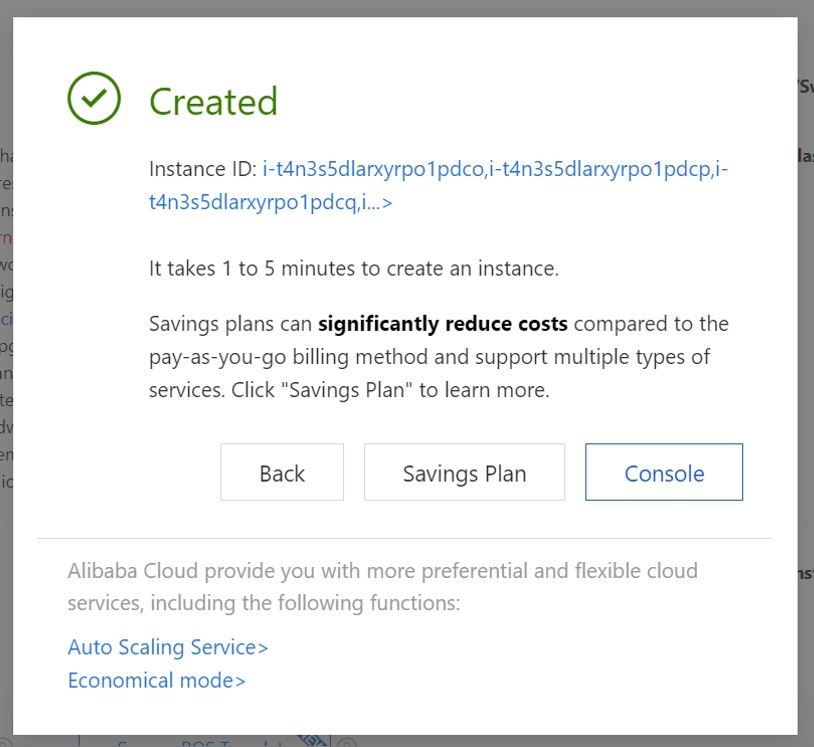
Rename the ECS instances for easy understanding.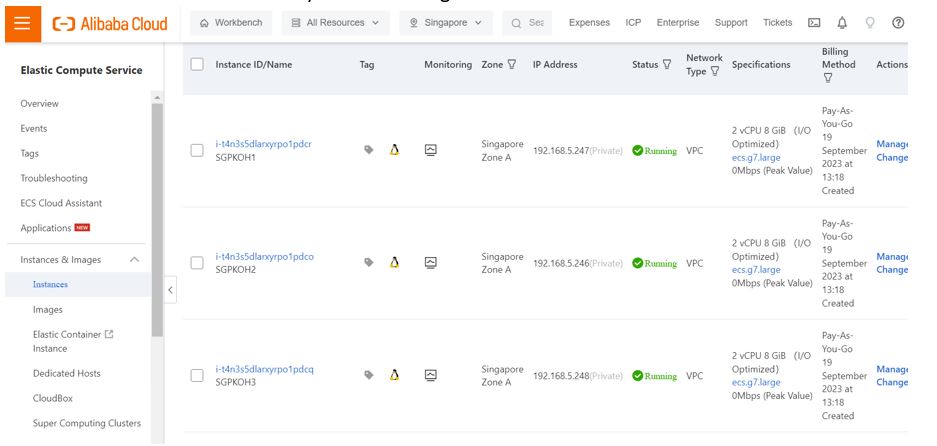
Now we need to install Nginx and install the web hosting environment. For each ECS instance, follow the steps as below. Enter the command prompt and login to the ECS instance.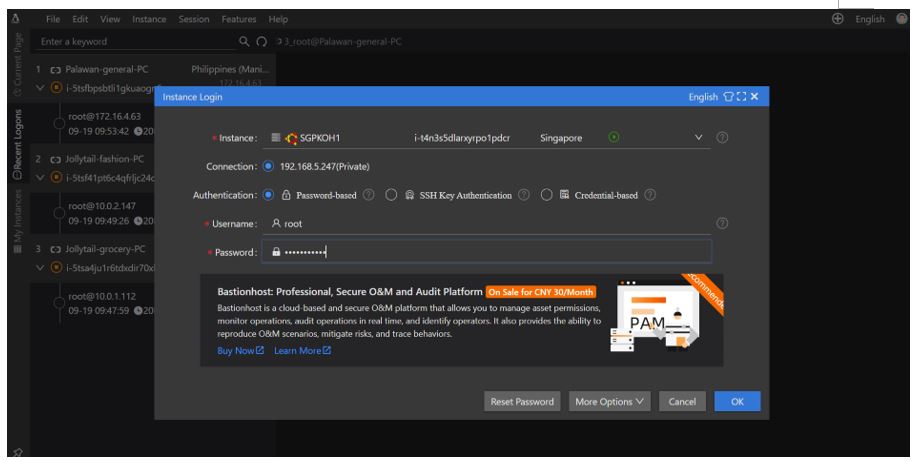
Update the linux distribution using apt update in the command prompt.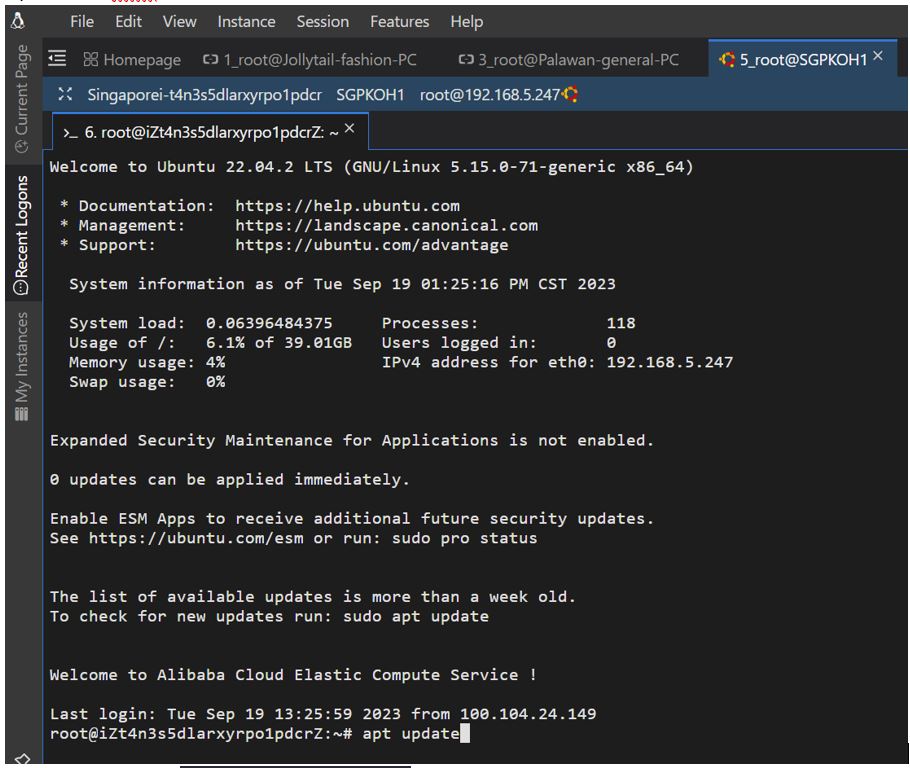
Install NGINX using apt install -y nginx .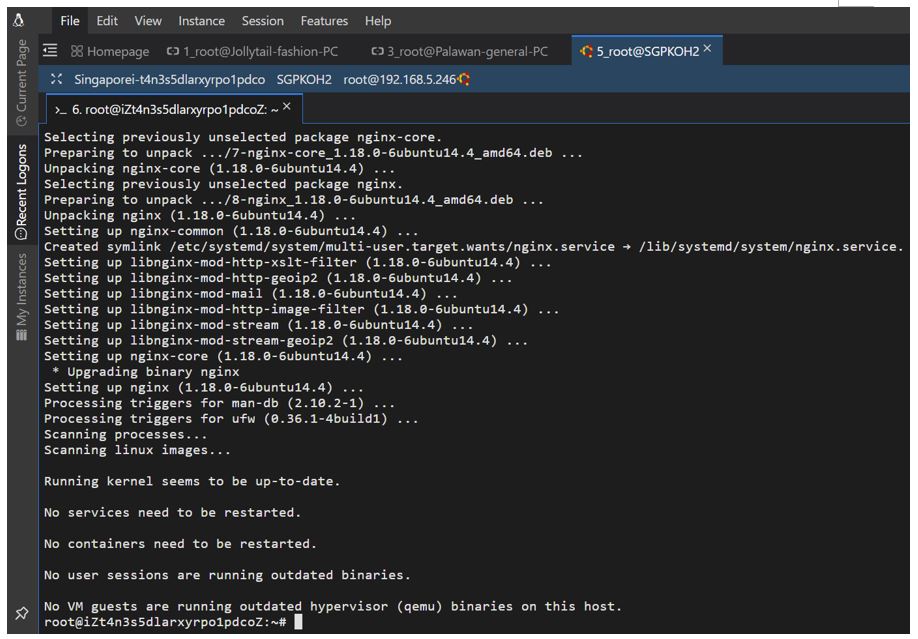
Enter the html markups using the command vim /var/www/html/index.html
The home page is available in some default name in html folder. That file could be used or a new file created and the former is removed.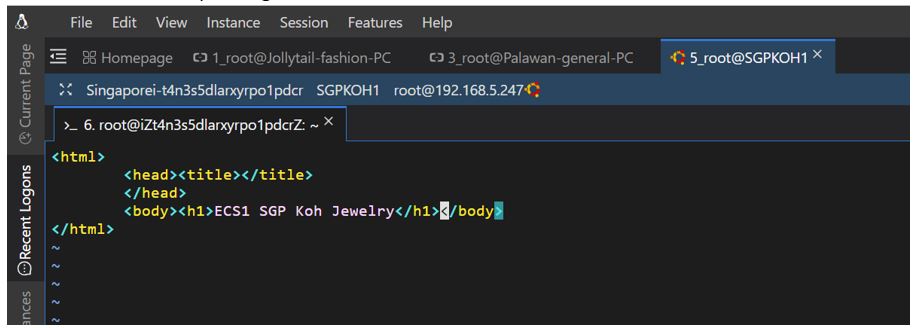
Associate an Elastic IP (EIP) with each instance. Make a purchase of sufficient number of EIPs from the console earlier.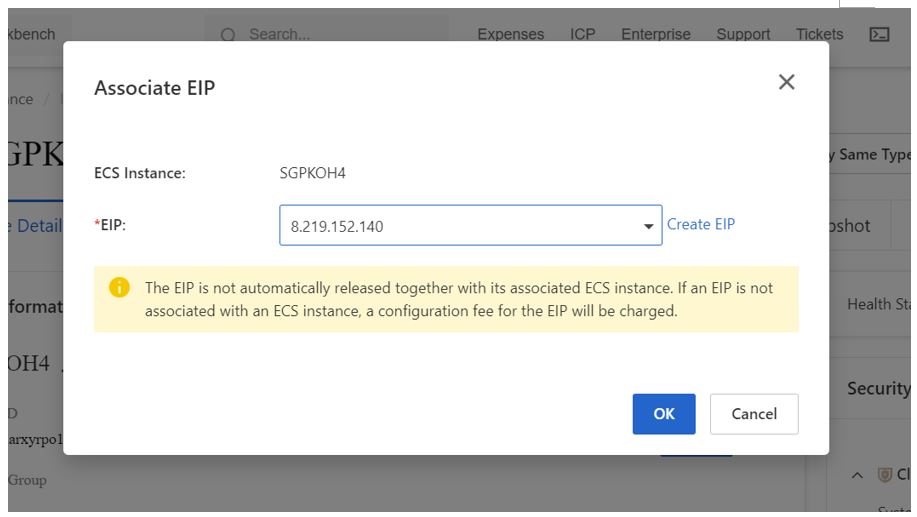
Now copy the EIPs of each ECS instance and check the browser.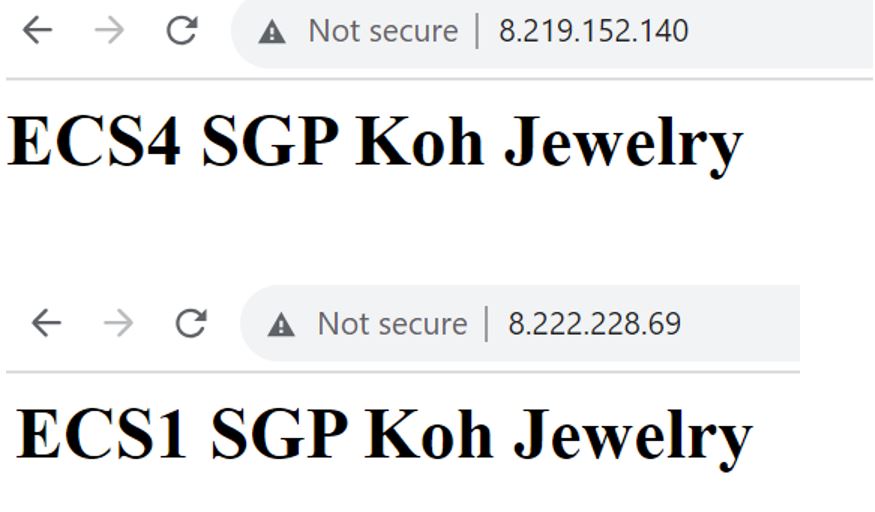
Enter into the console of Server Load Balancer.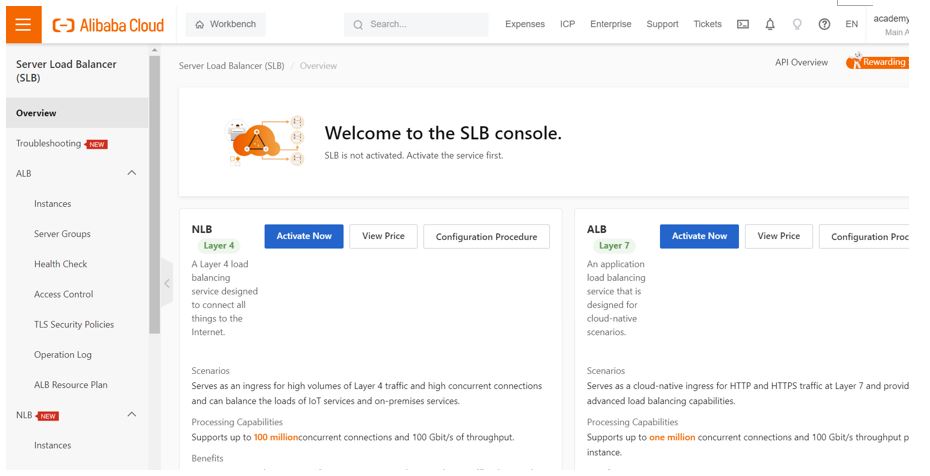
Click on to the Classic Load Balancer (CLB). This is good enough for a normal website.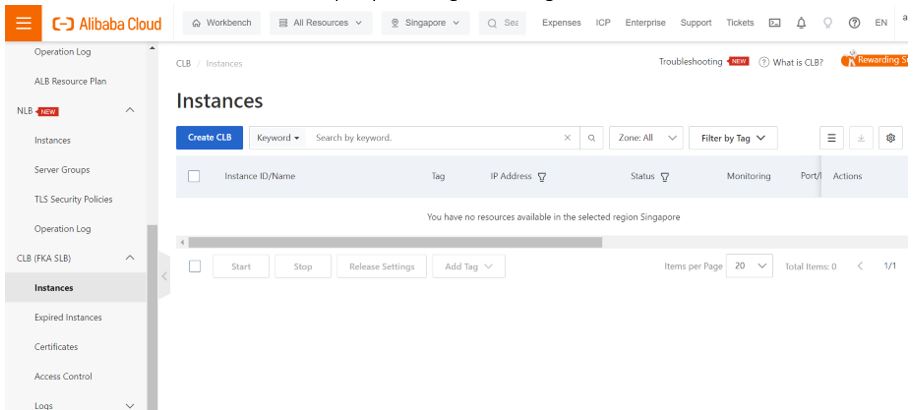
Click on Create CLB.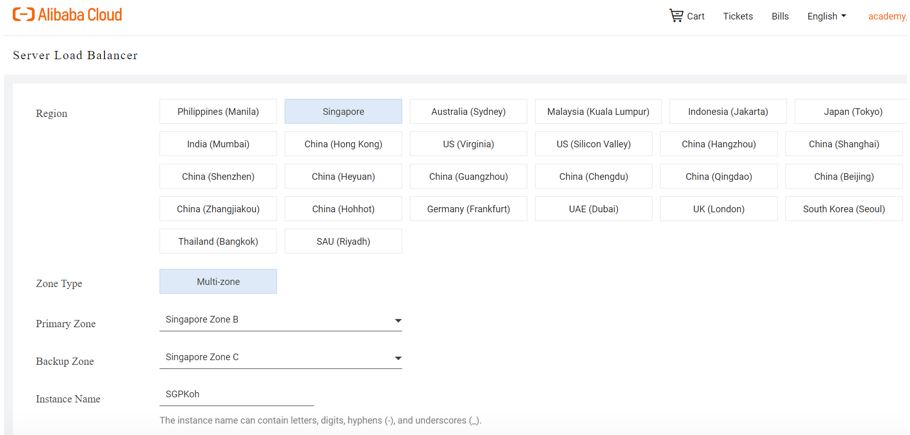
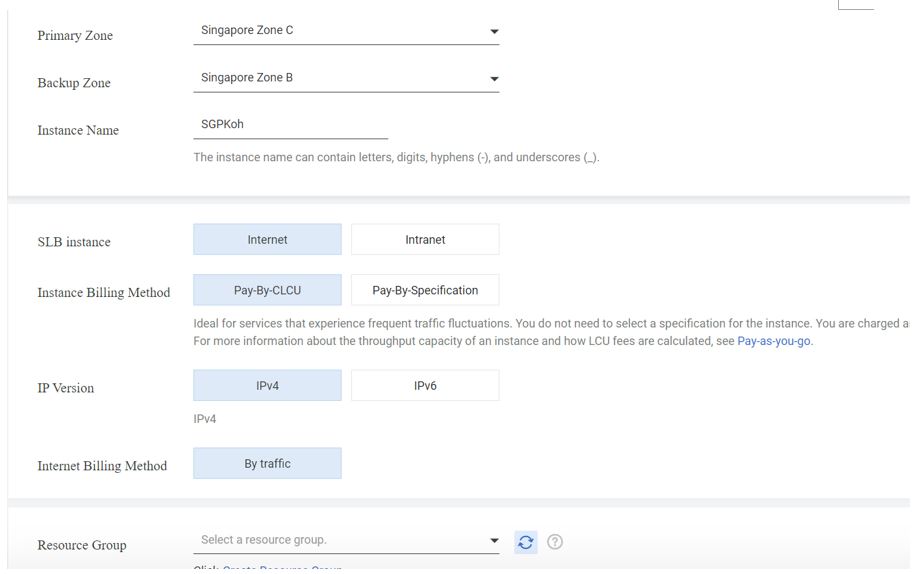
Click on “Buy Now”.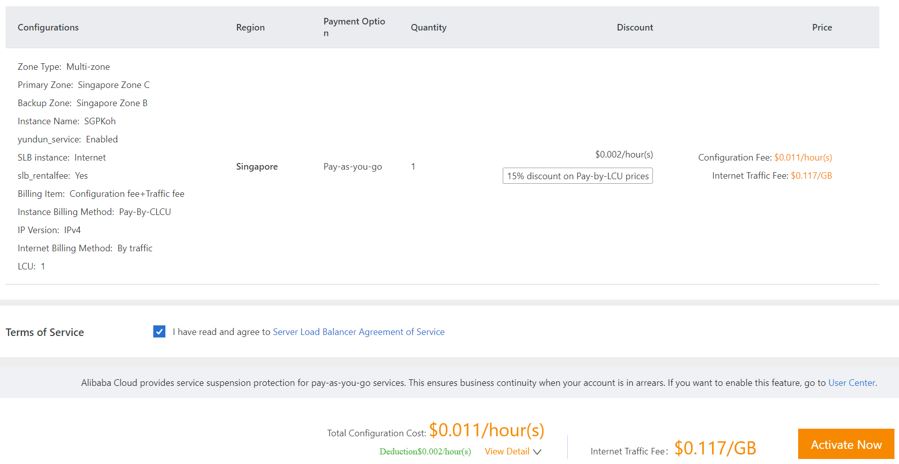
Agree to the Terms of Service and click Activate Now.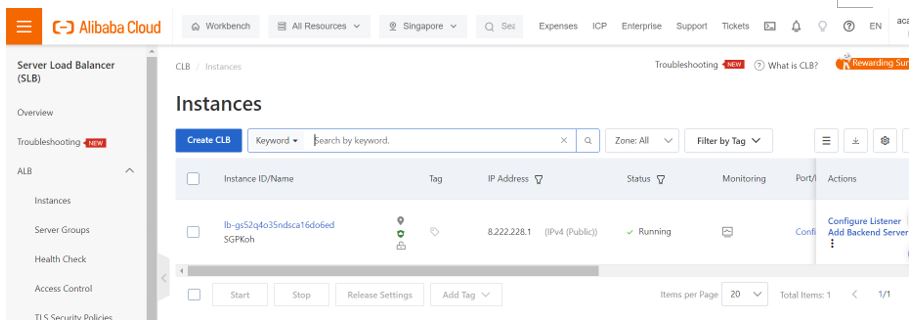
SLB is created now. Click on Add Backend Server and add ECS instances.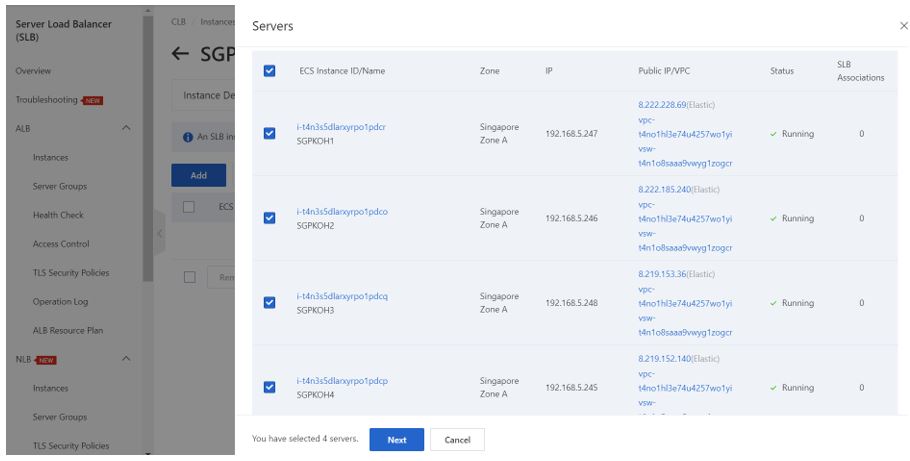
Check on the ECS instances to add and click Next.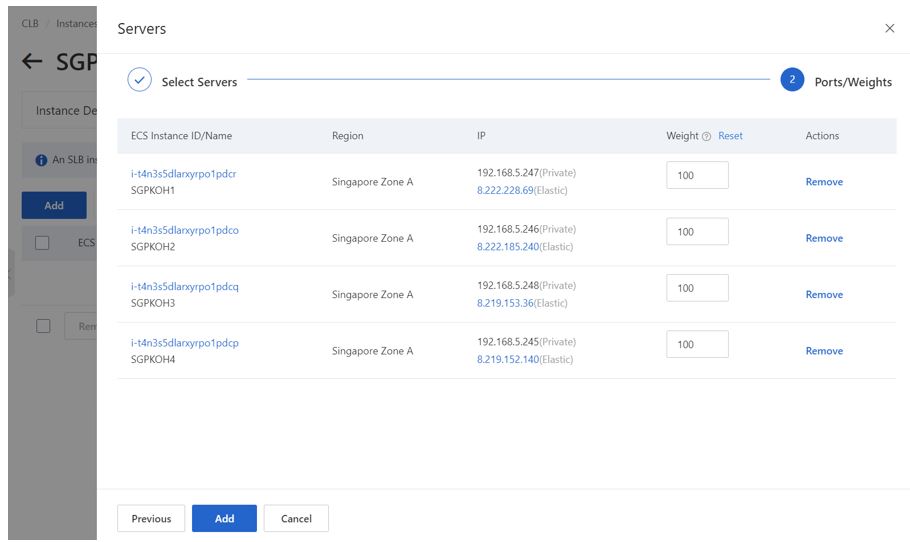
Click Add and then OK.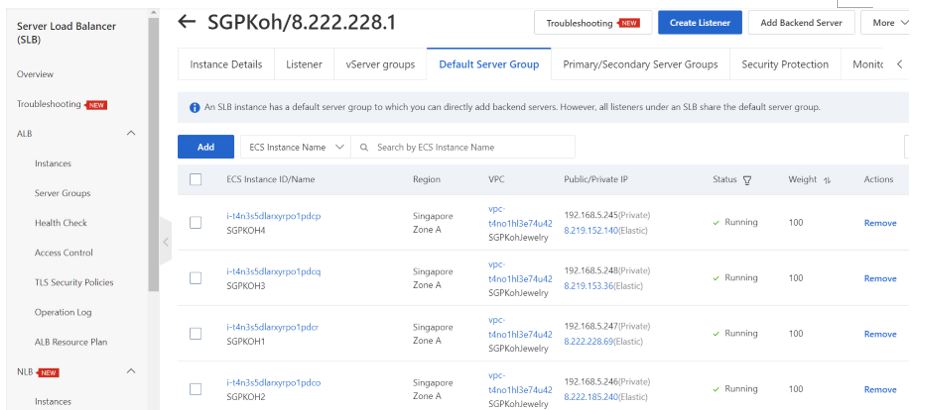
Click on Listener tab.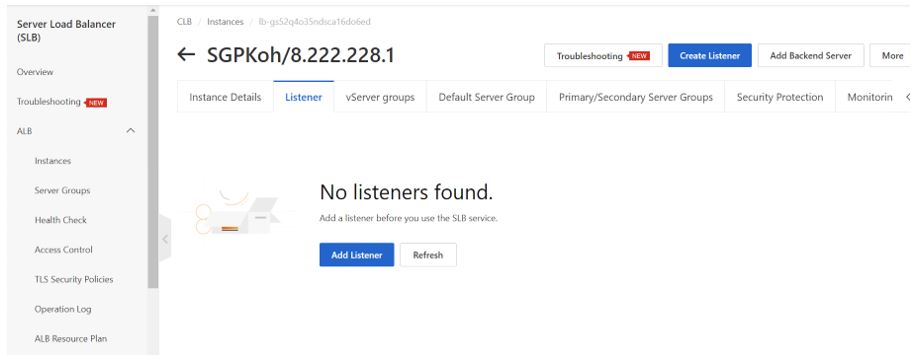
Click on Add Listener.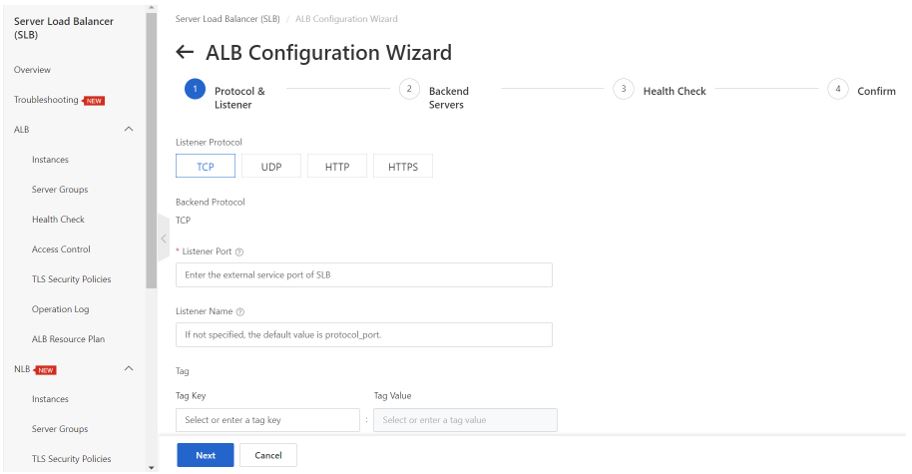
Click on HTTP and enter the listener port as 80. 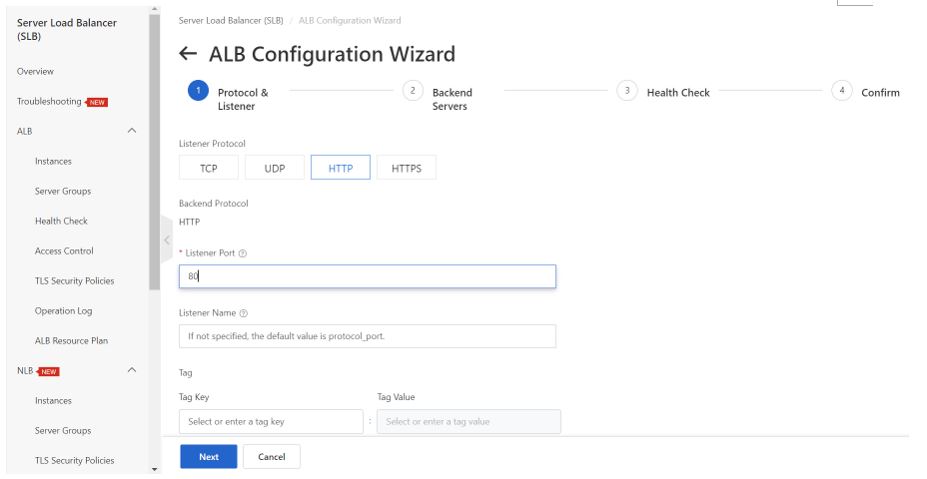
Click Next.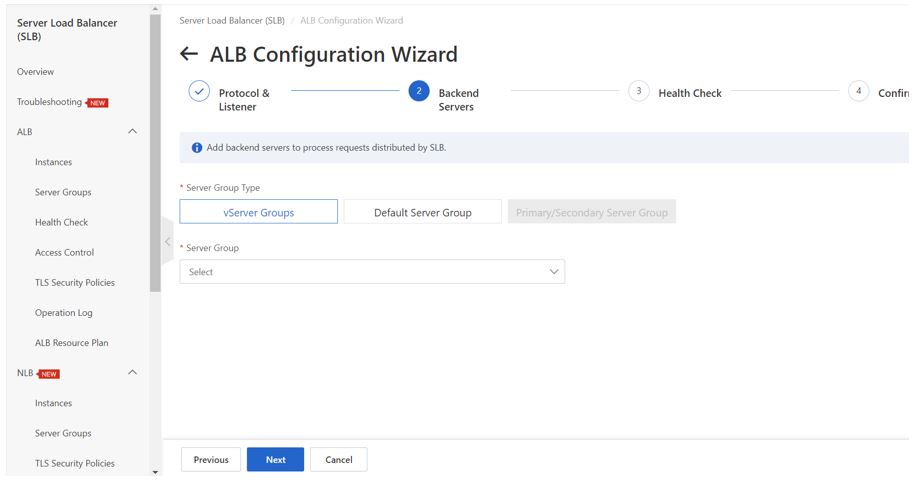
Click on Default Server Group. Enter the port number as 80 and enter the weight as listed in the scenario.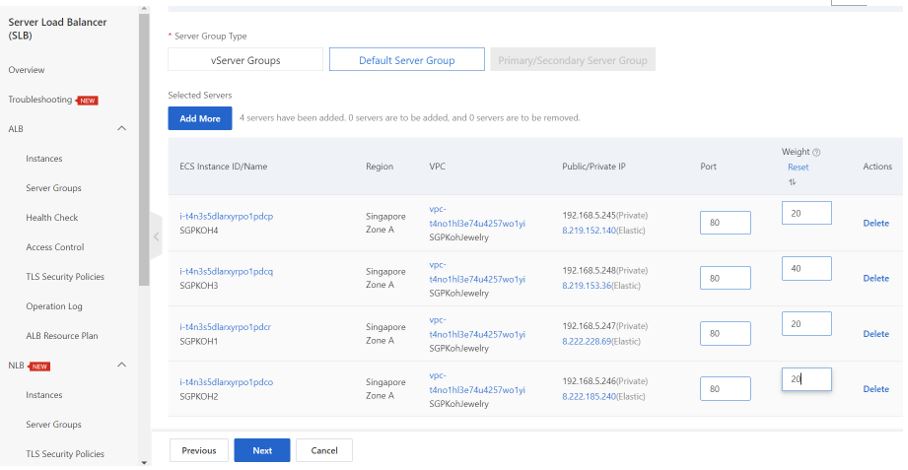
Click Next.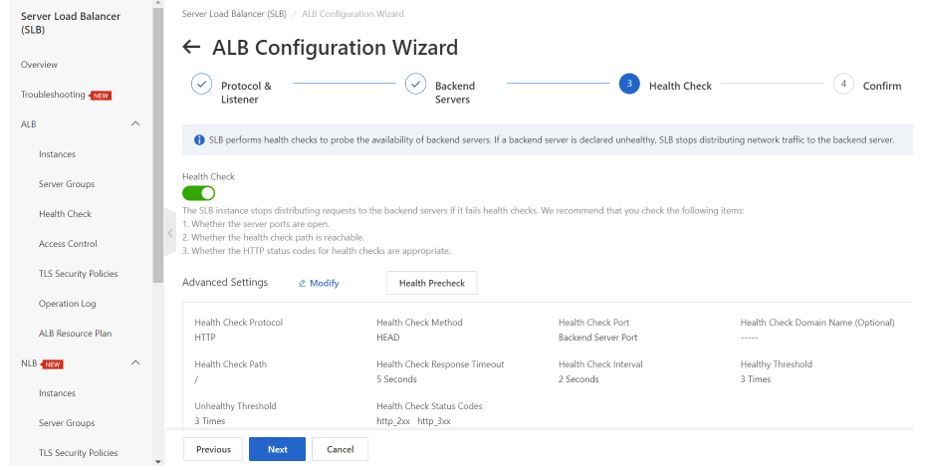
Click Next.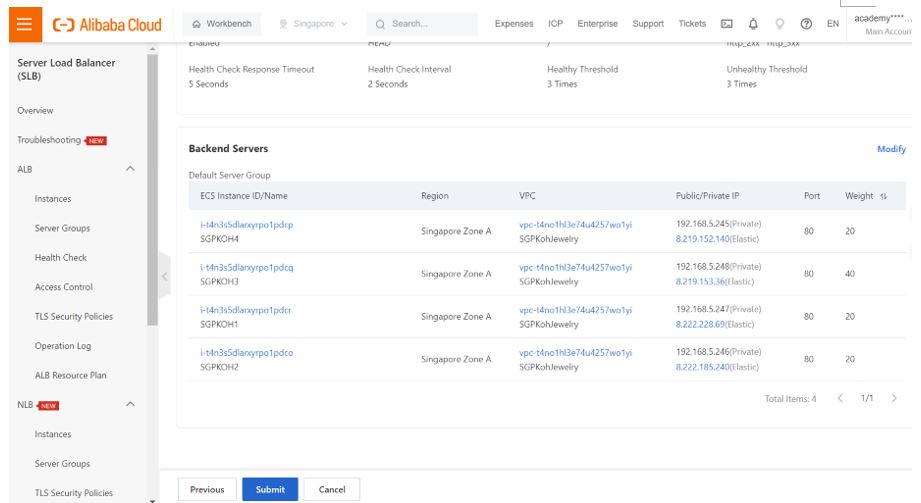
Click Submit.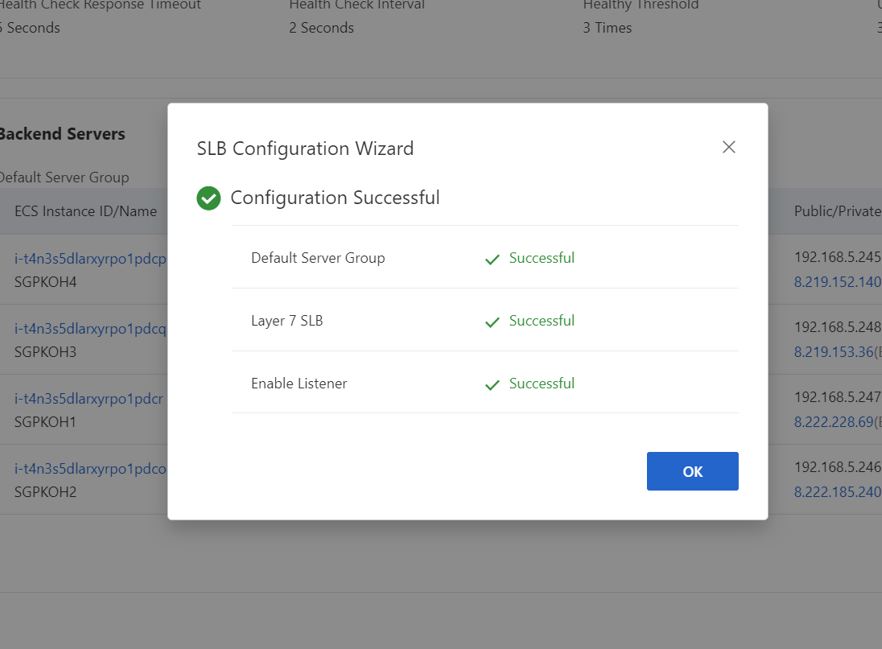
Click OK. Go to the SLB instances.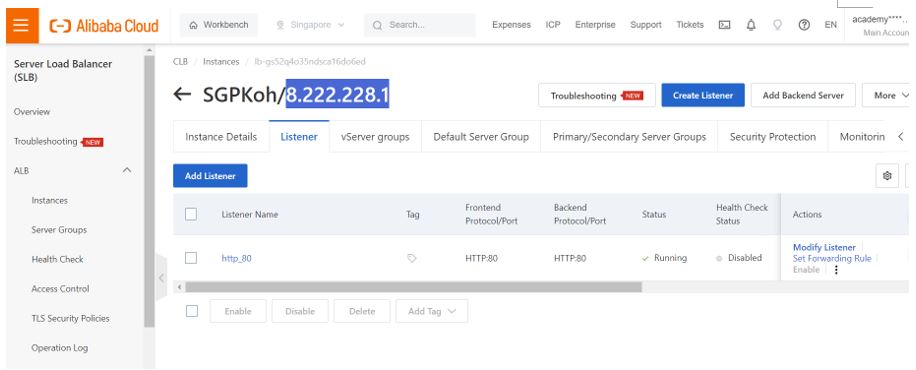
Copy the IP and enter into a browser. Refresh the page and see the pages loading from various ECS instances.
Alibaba Clouder - March 2, 2021
Alibaba Cloud Community - June 5, 2023
Jitendra - August 29, 2021
Alibaba Clouder - September 1, 2021
Alibaba Clouder - February 22, 2021
JDP - October 8, 2021
 Server Load Balancer
Respond to sudden traffic spikes and minimize response time with Server Load Balancer
Learn More ECS(Elastic Compute Service)
Elastic and secure virtual cloud servers to cater all your cloud hosting needs.
Learn More Elastic Desktop Service
A convenient and secure cloud-based Desktop-as-a-Service (DaaS) solution
Learn More Elastic High Performance Computing Solution
High Performance Computing (HPC) and AI technology helps scientific research institutions to perform viral gene sequencing, conduct new drug research and development, and shorten the research and development cycle.
Learn MoreMore Posts by ferdinjoe