By: Jeremy Pedersen
Warning: The real-time synchronization feature depends on Exclusive Resource Groups for Data Integration, which is a paid feature in DataWorks. If you already have an Exclusive Resource Group, great! You should be able to use it to try the steps in this blog. If you don't (and you'd rather not pay), just read along instead. ^_^
MaxCompute is Alibaba Cloud's data warehousing and batch data processing engine. It's a great tool for storing datasets up to petabytes (PB) in size, and can run batch processing jobs at scale.
Typically, data is read into MaxCompute on a regular schedule: say, once per day or once per hour. This is well and good for offline batch processing, but what can you do about data sources that generate new data in near-real-time, such as a Kafka queue or a MySQL database that is constantly adding new records?
Luckily, there is a solution! MaxCompute can now read data in real time from several different data sources, including MySQL, Kafka, and DataHub.
Let's look at how we can set this up for a MySQL Database.
Before we start, we will need:
You can follow along with this blog post to set up an RDS MySQL database instance, and the first half of this post to set up a DataWorks Workspace and connect it to the MySQL Database.
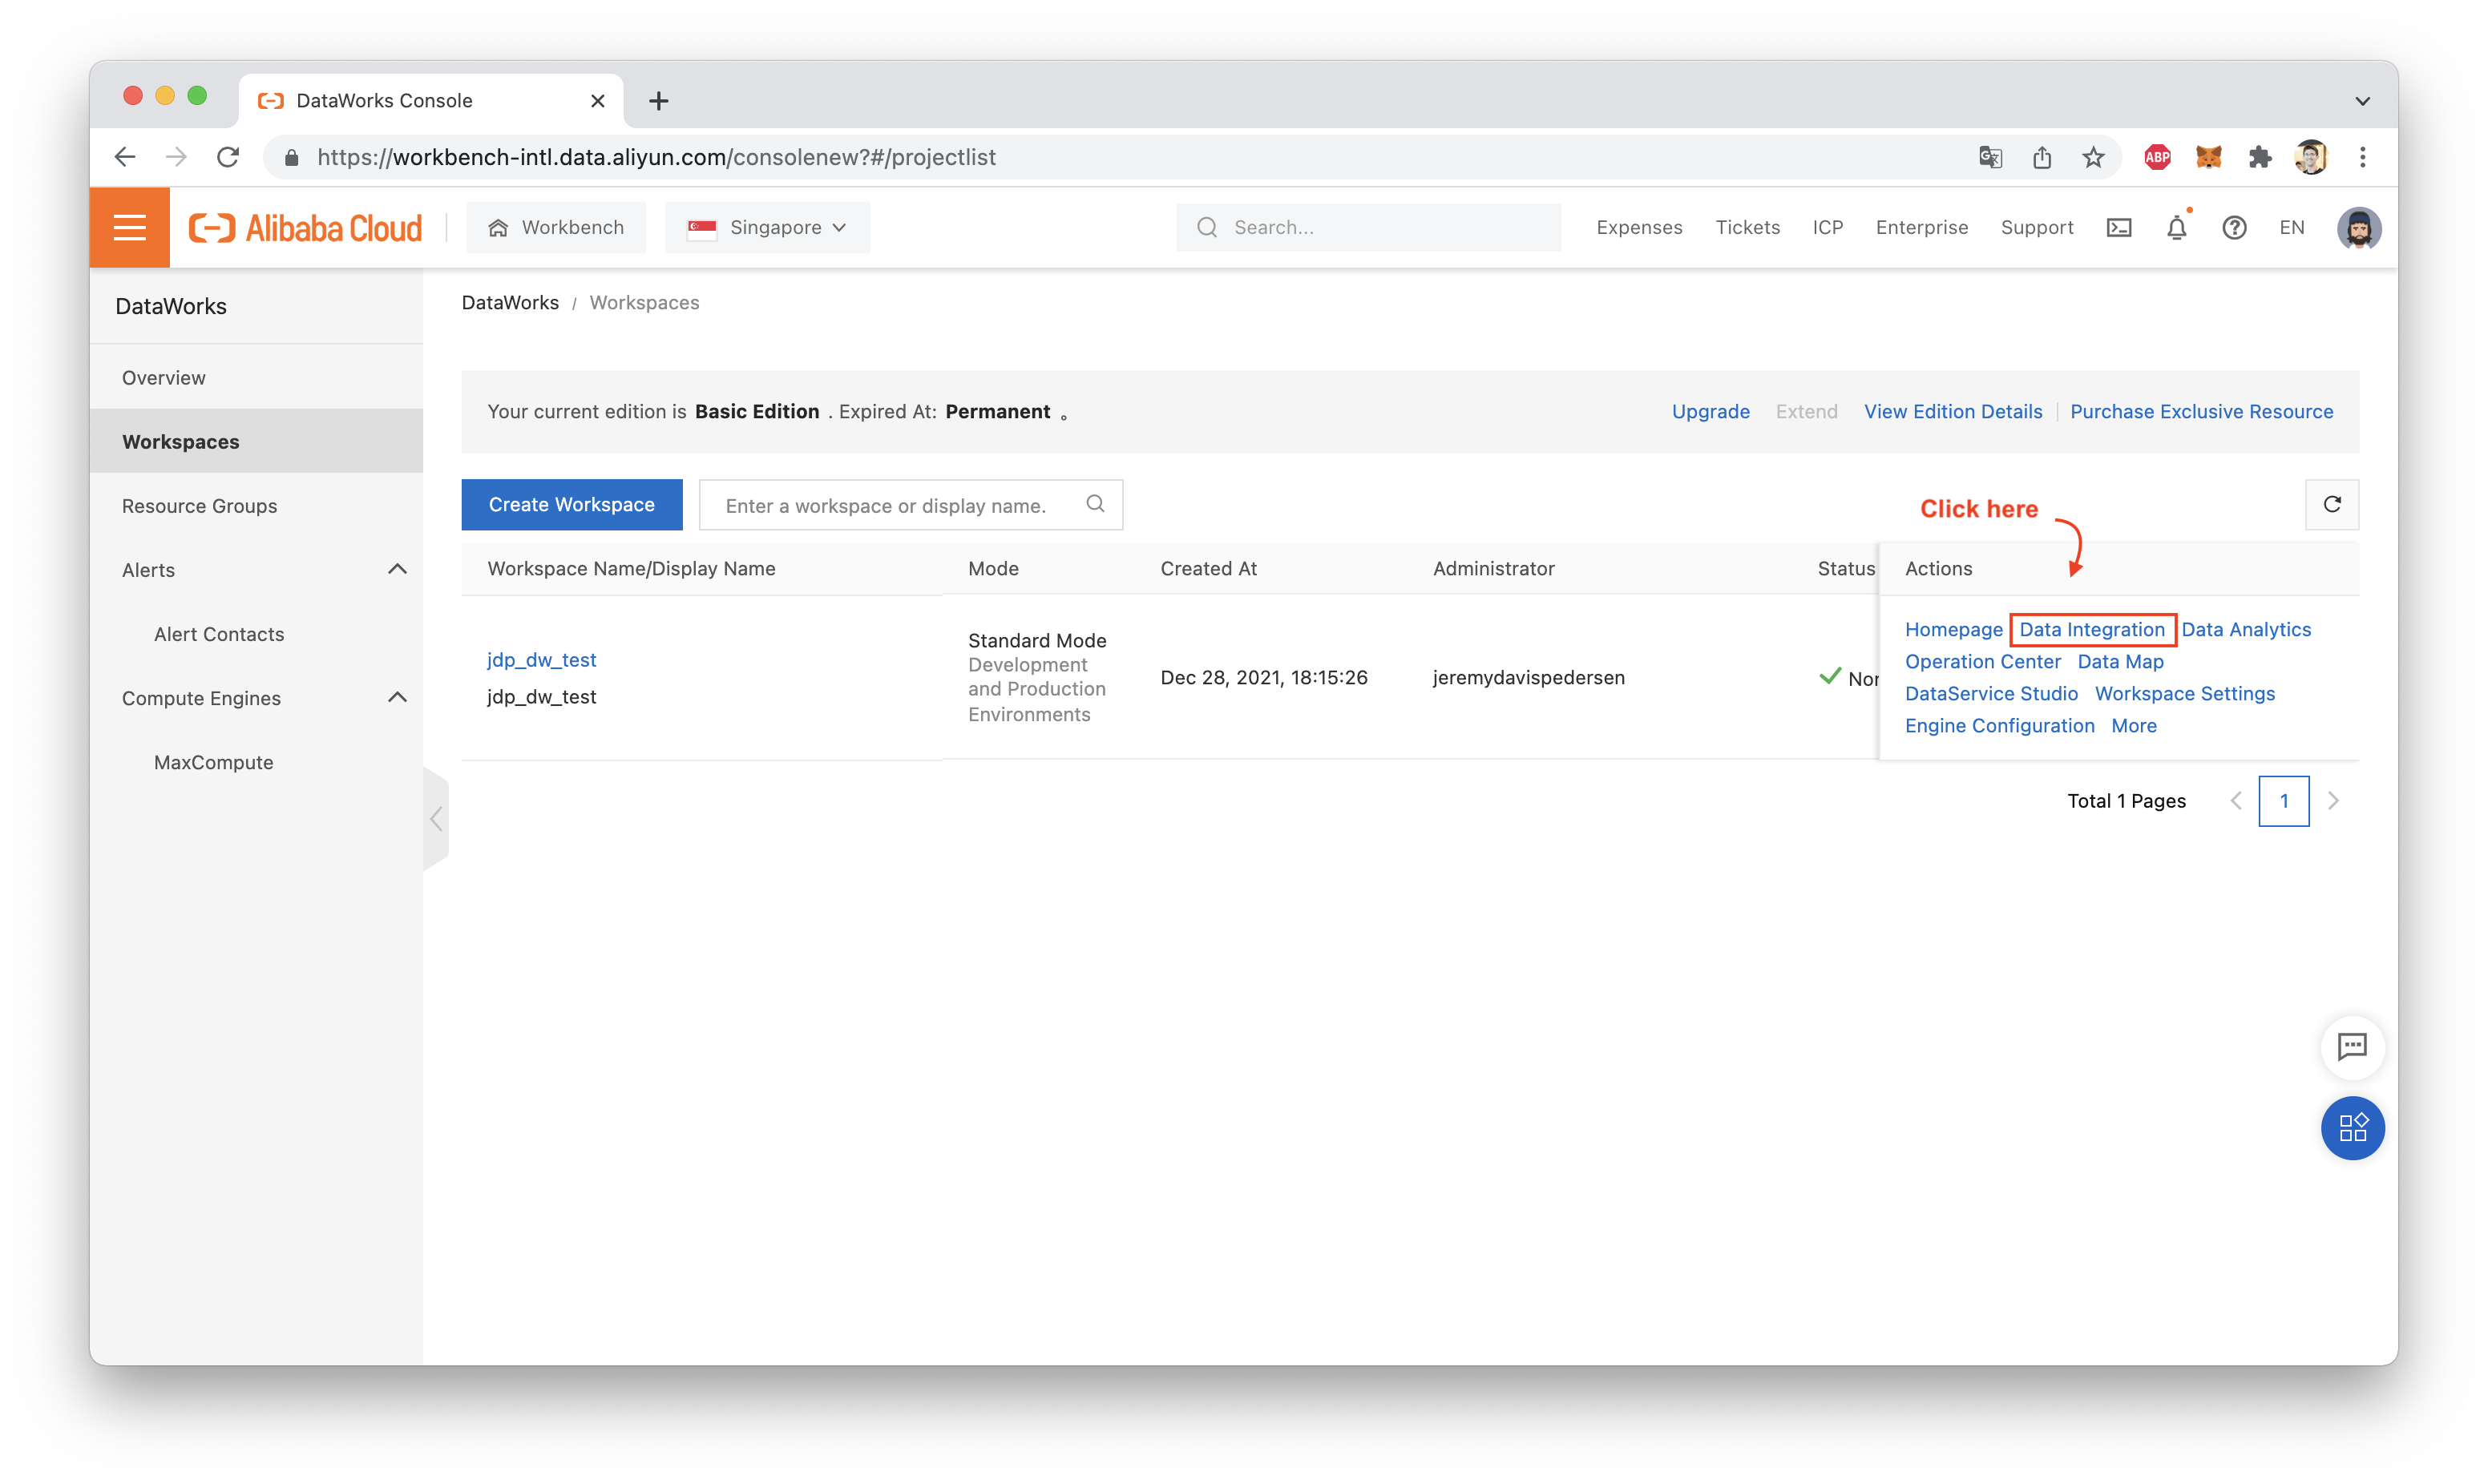
Now, we need to locate our DataWorks Workspace in the "Workspaces" list, and click on "Data Integration":
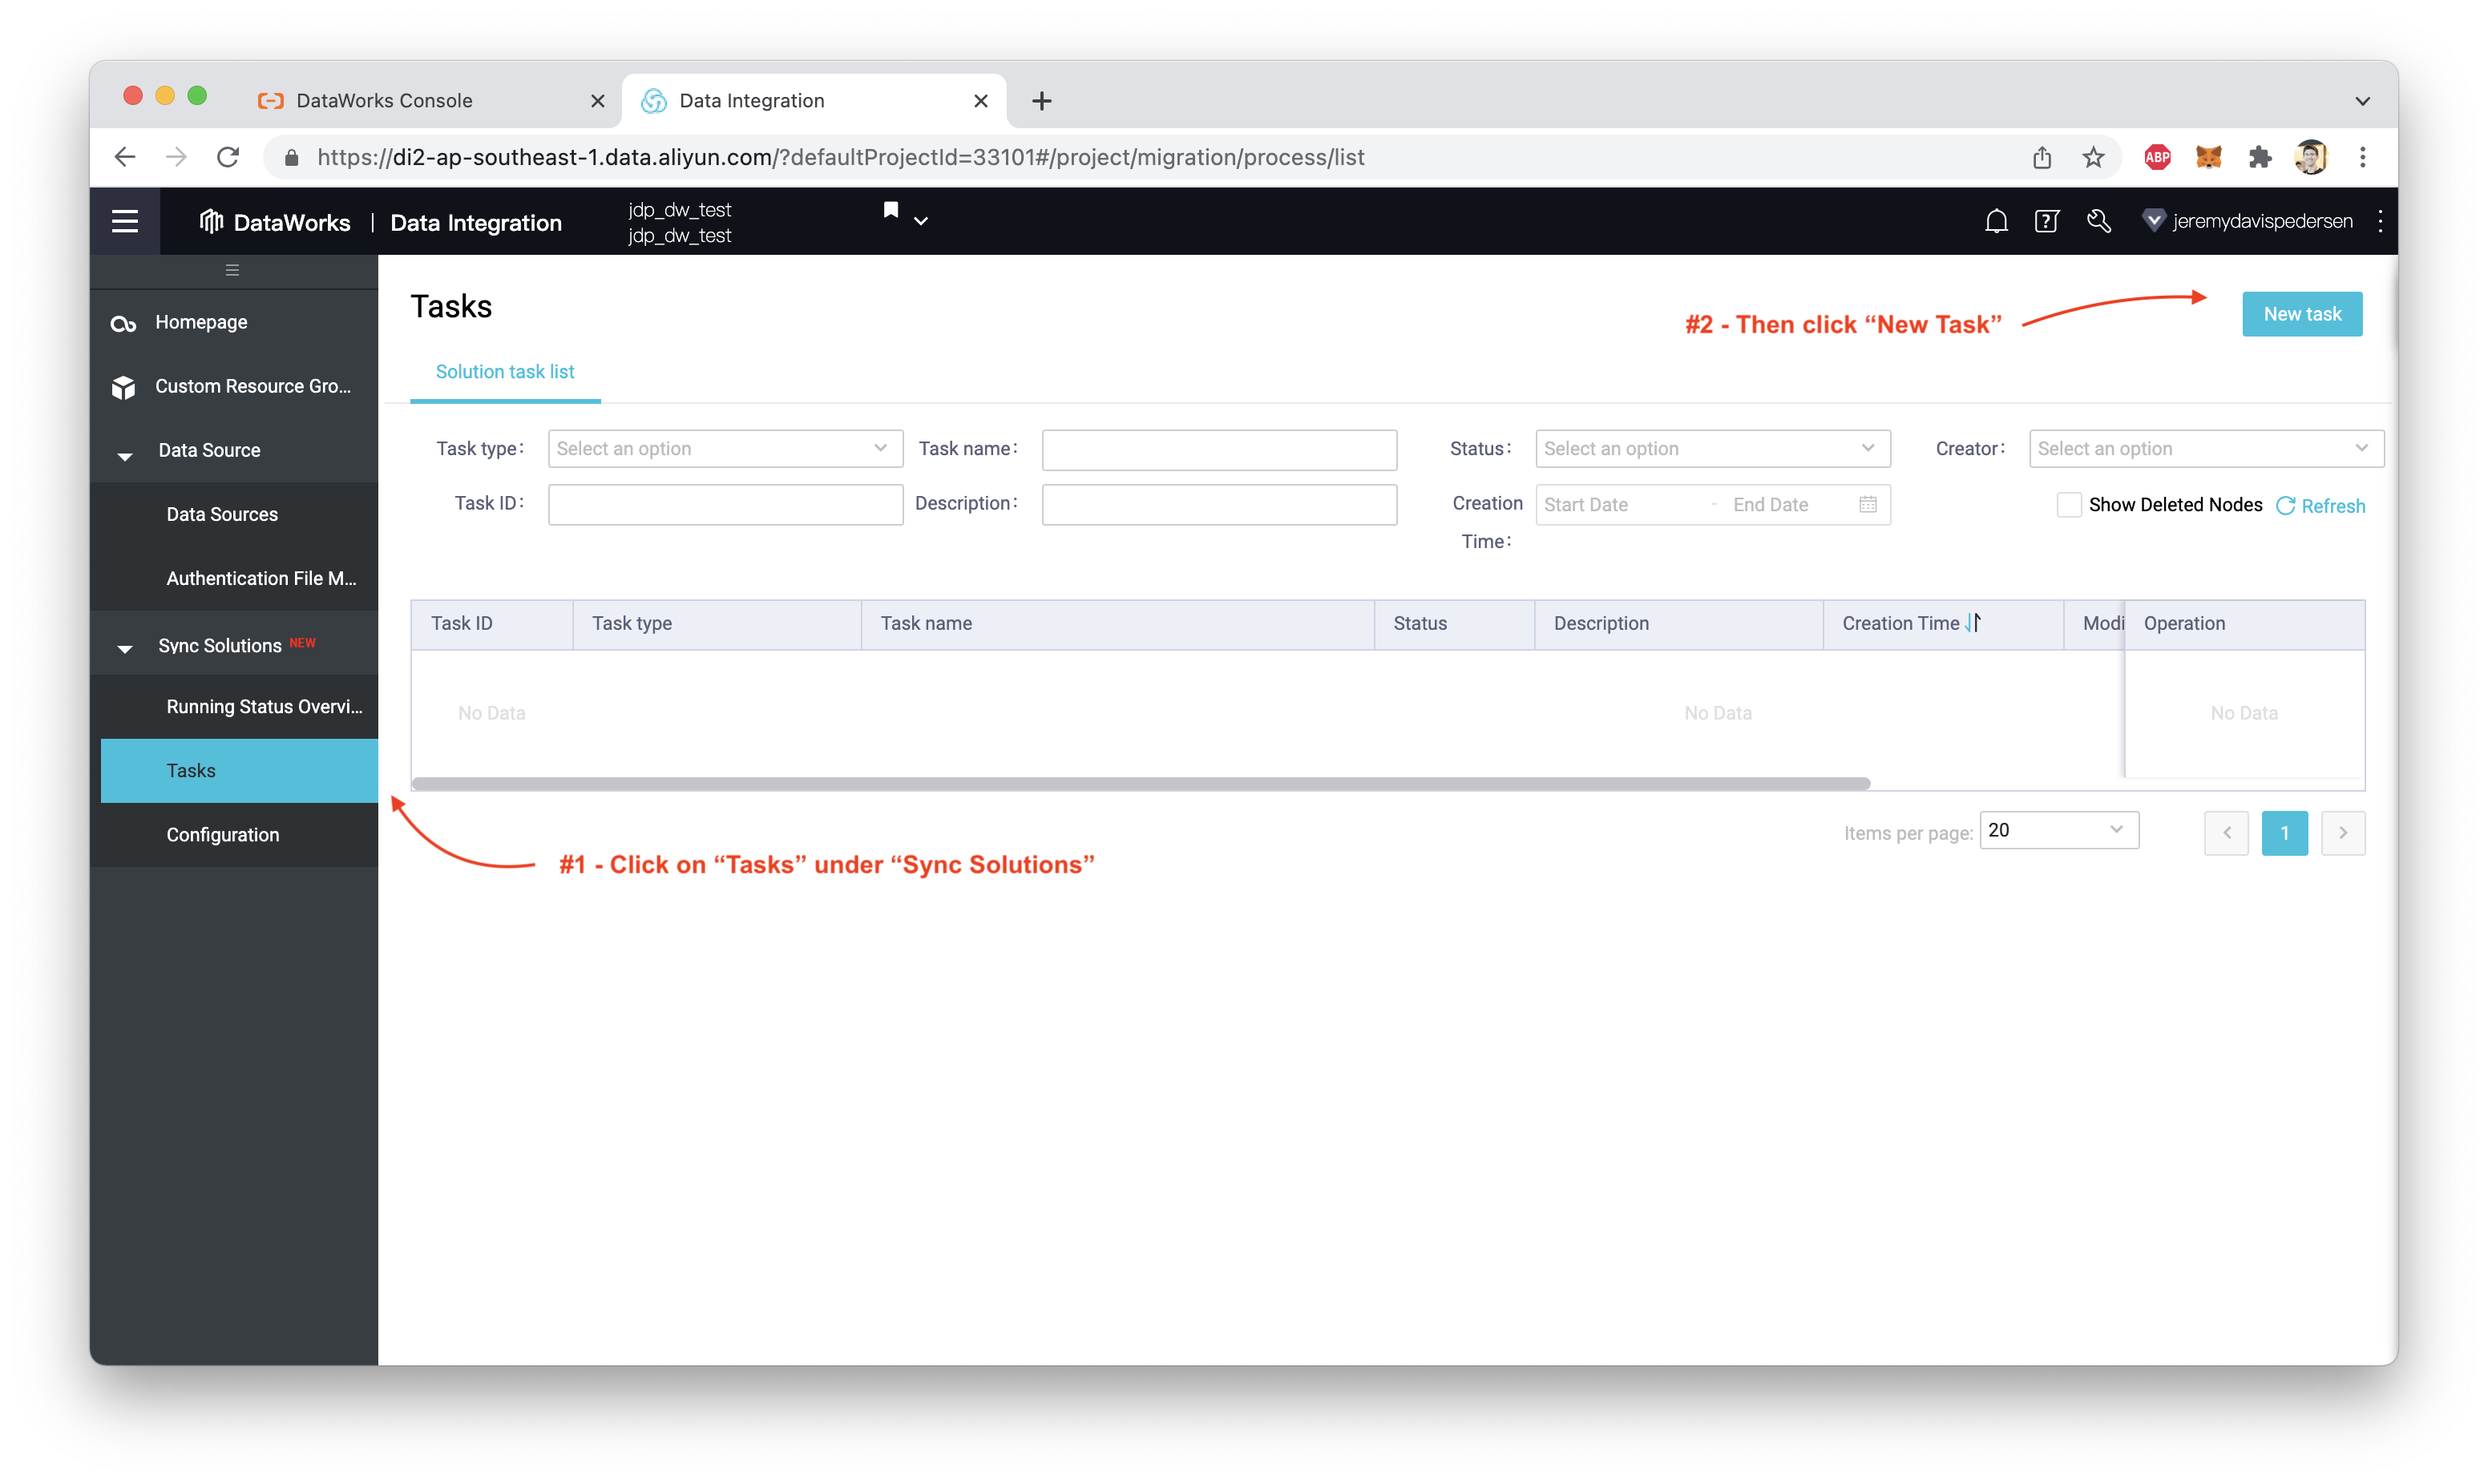
From the Data Integration console, create a new task:
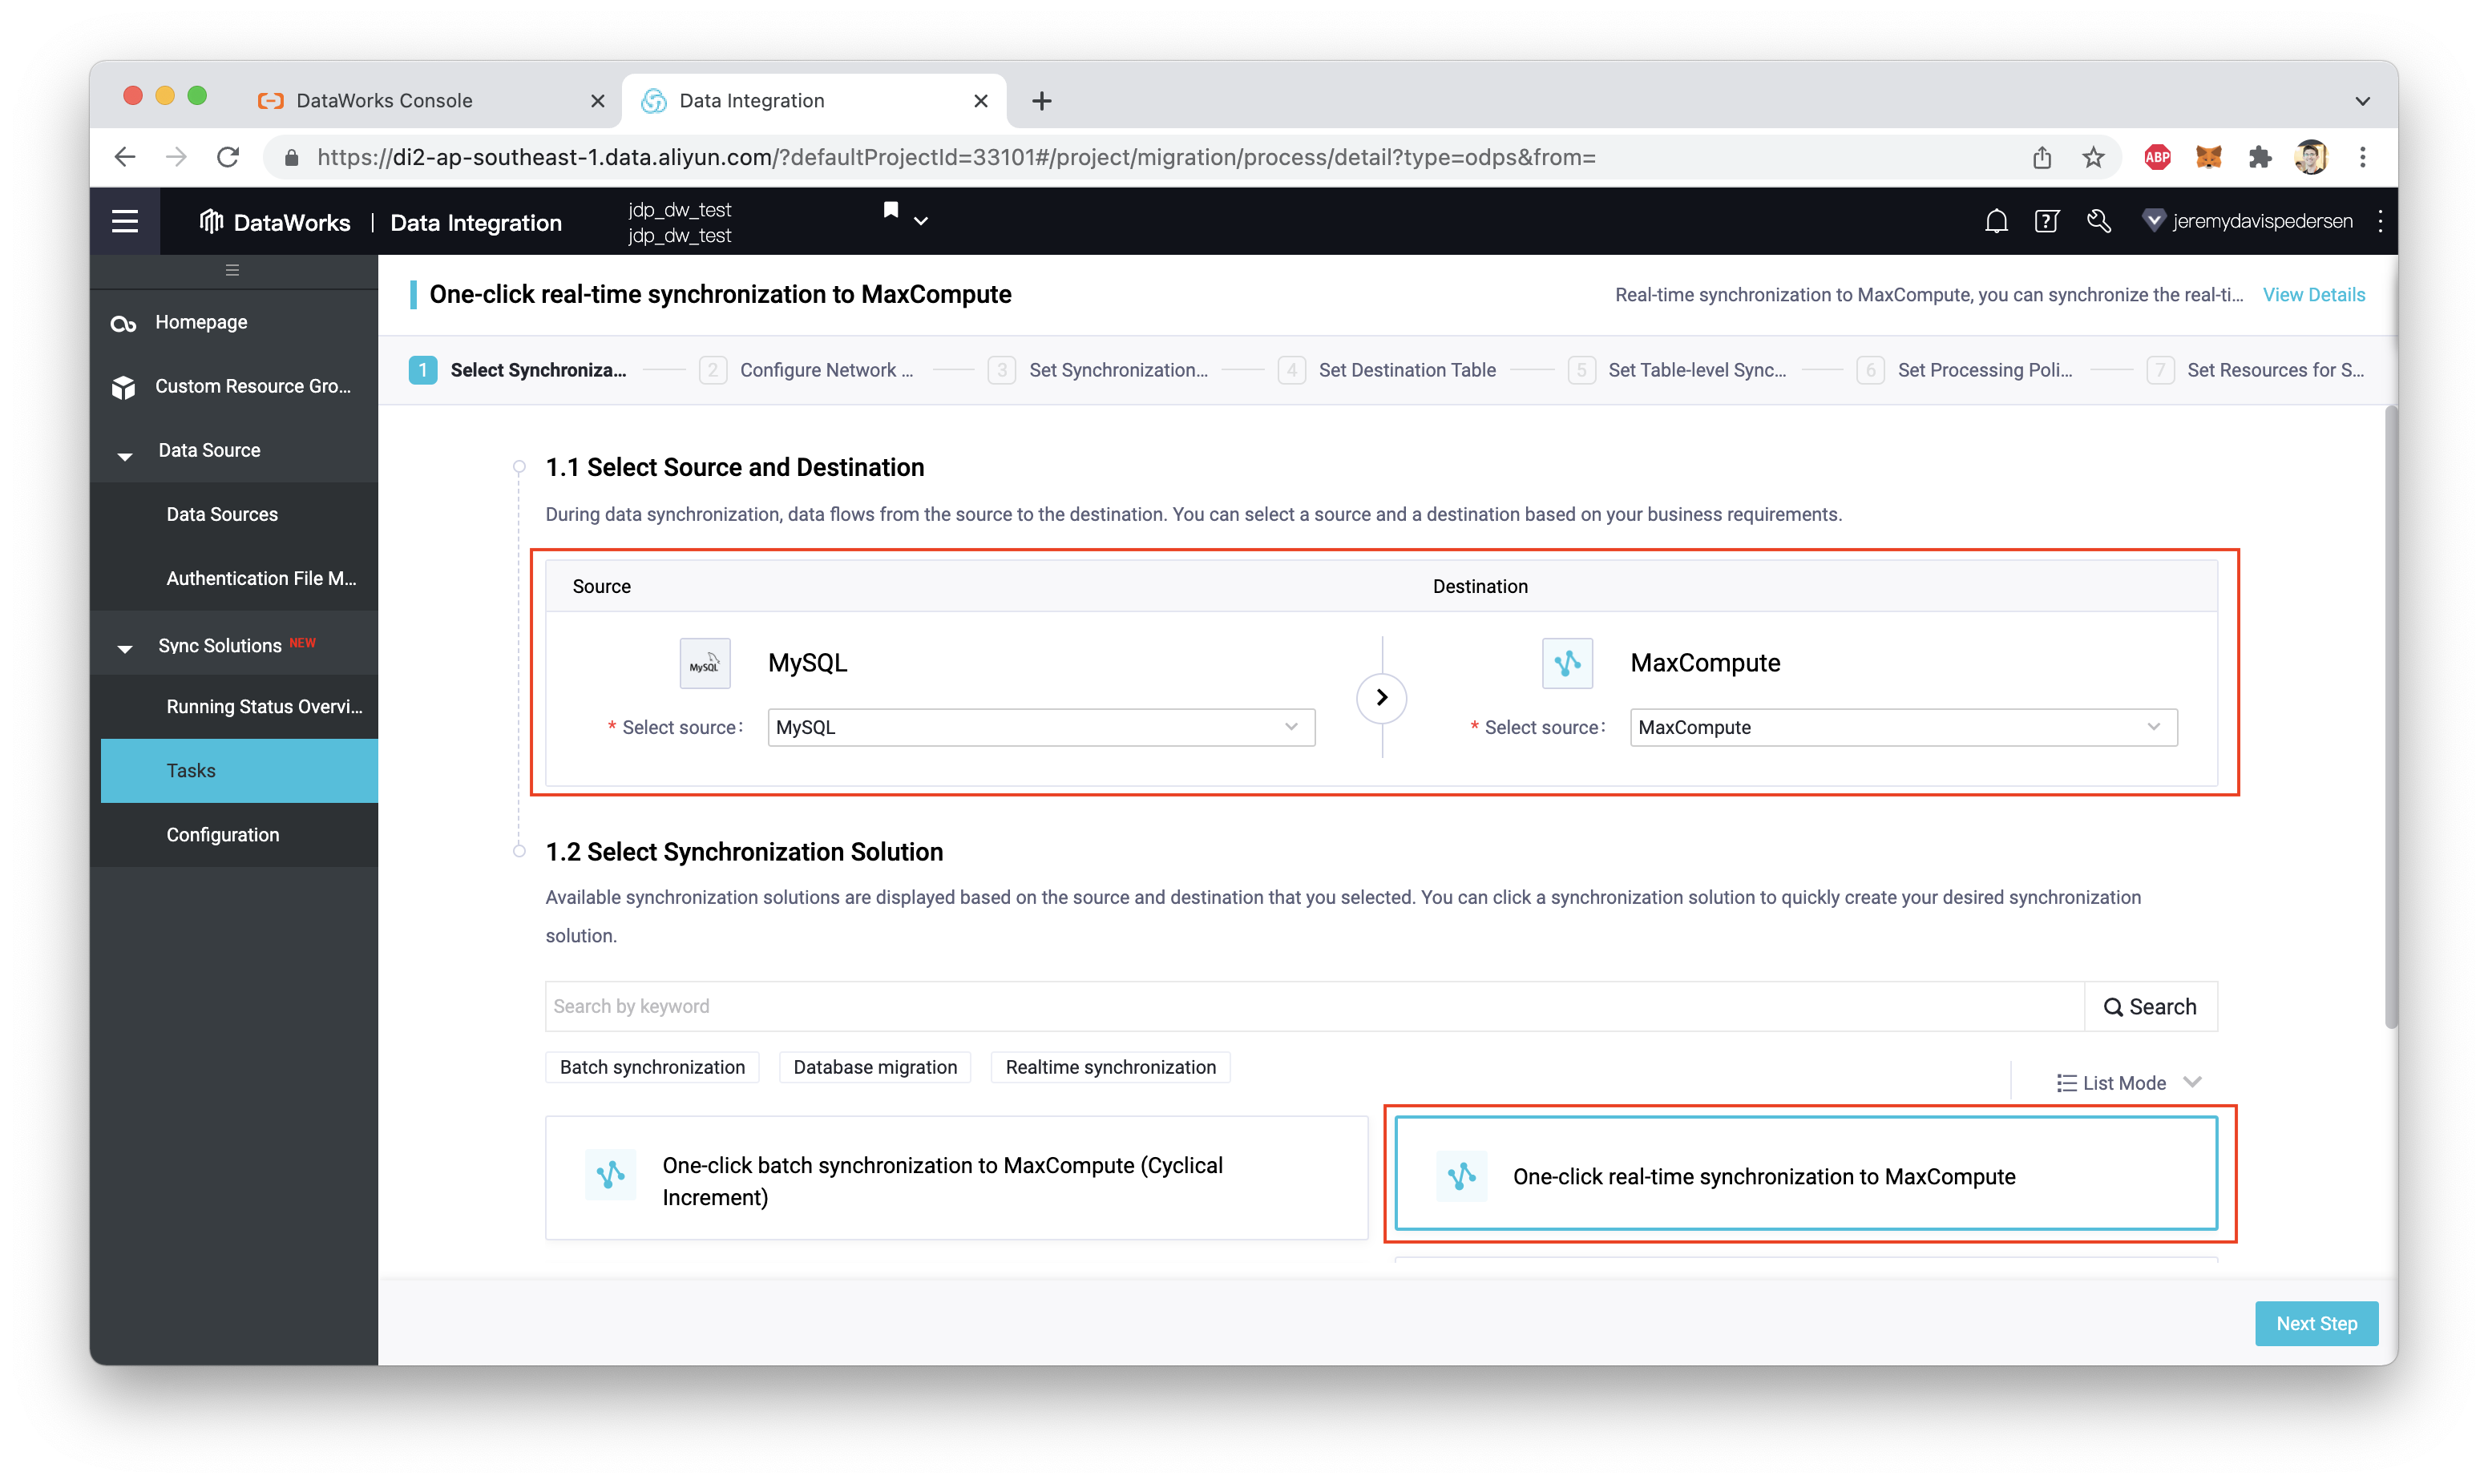
Make sure the data source is MySQL and the destination is MaxCompute (odps). Make sure the task type is "One-click real-time synchronization to MaxCompute":
Click "Next Step". Make sure the data source and destination are set correctly, and click both "Test Connectivity" buttons to make sure things are working, as shown here:
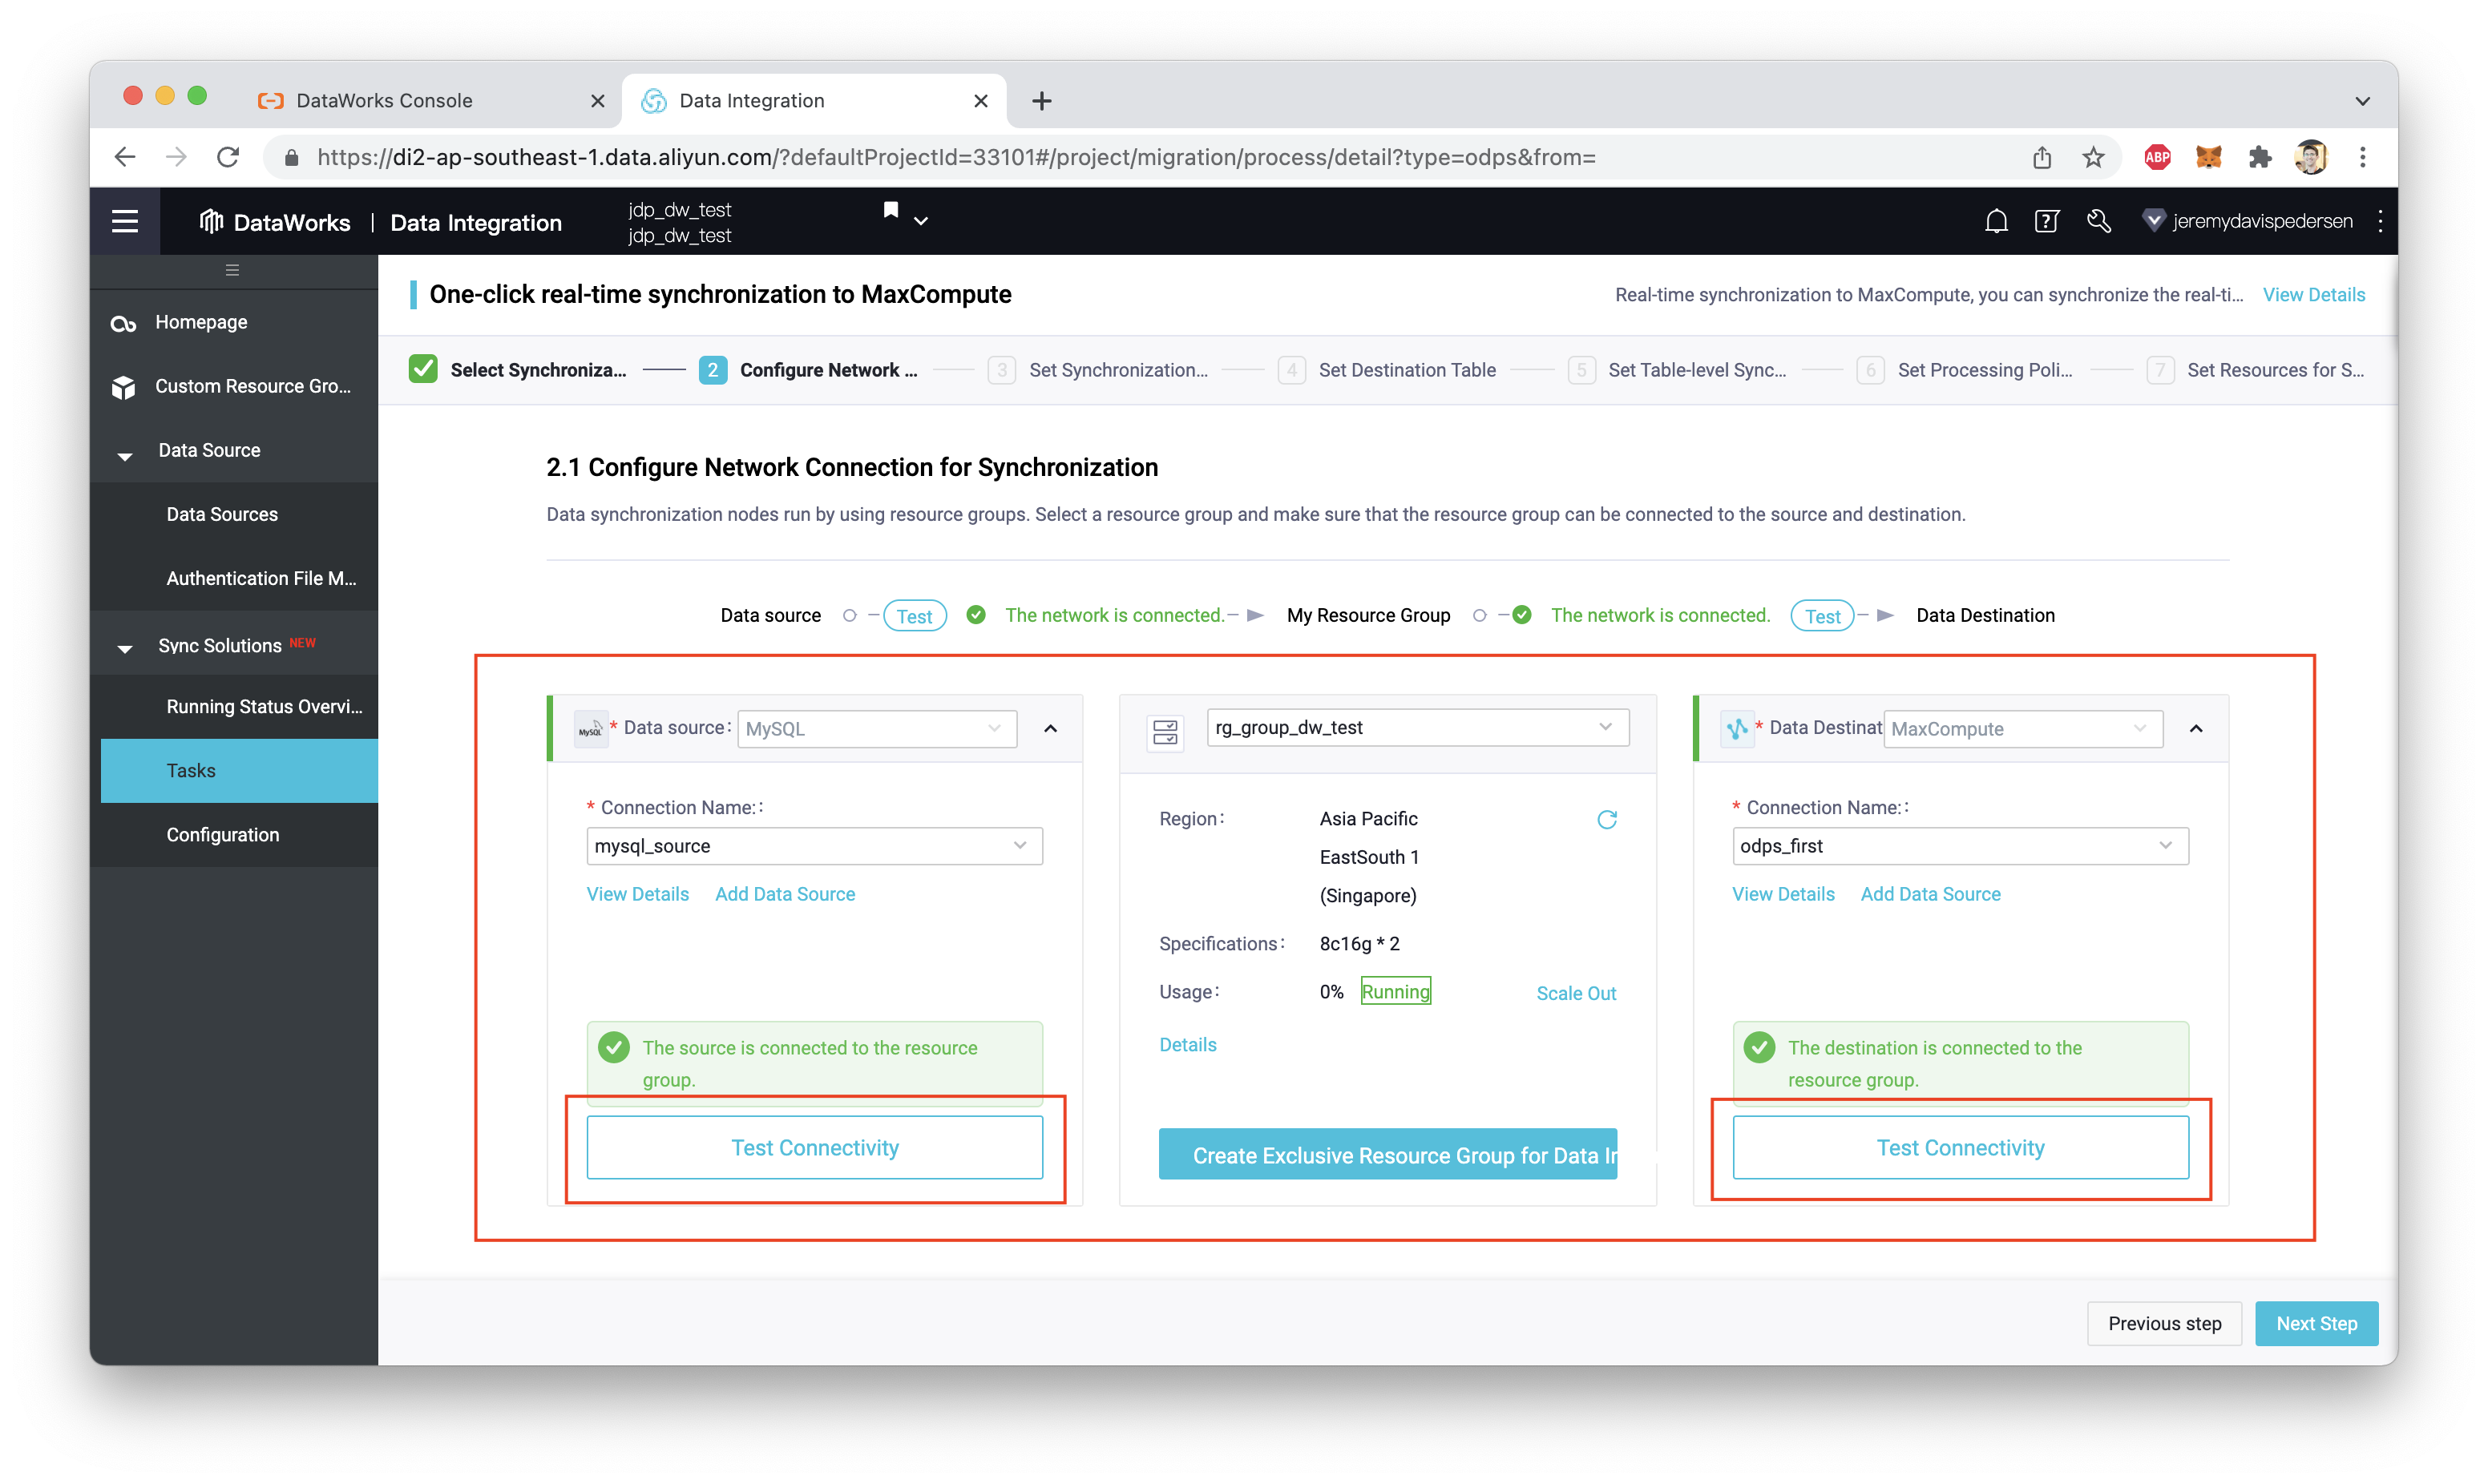
Note that if you do not have an Exclusive Resource Group for Data Integration, you will have to create one. In my case, I have an existing Exclusive Resource Group leftover from a previous test of DataWorks, which you can see in the middle of the screenshot above (rg_group_dw_test).
For the next few steps, I assume that your MySQL database contains the users, products, and orders tables (and associated data) provided in this blog post. Follow the steps in the screenshots below, to configure the users table as the one which will be synchronized in real time:
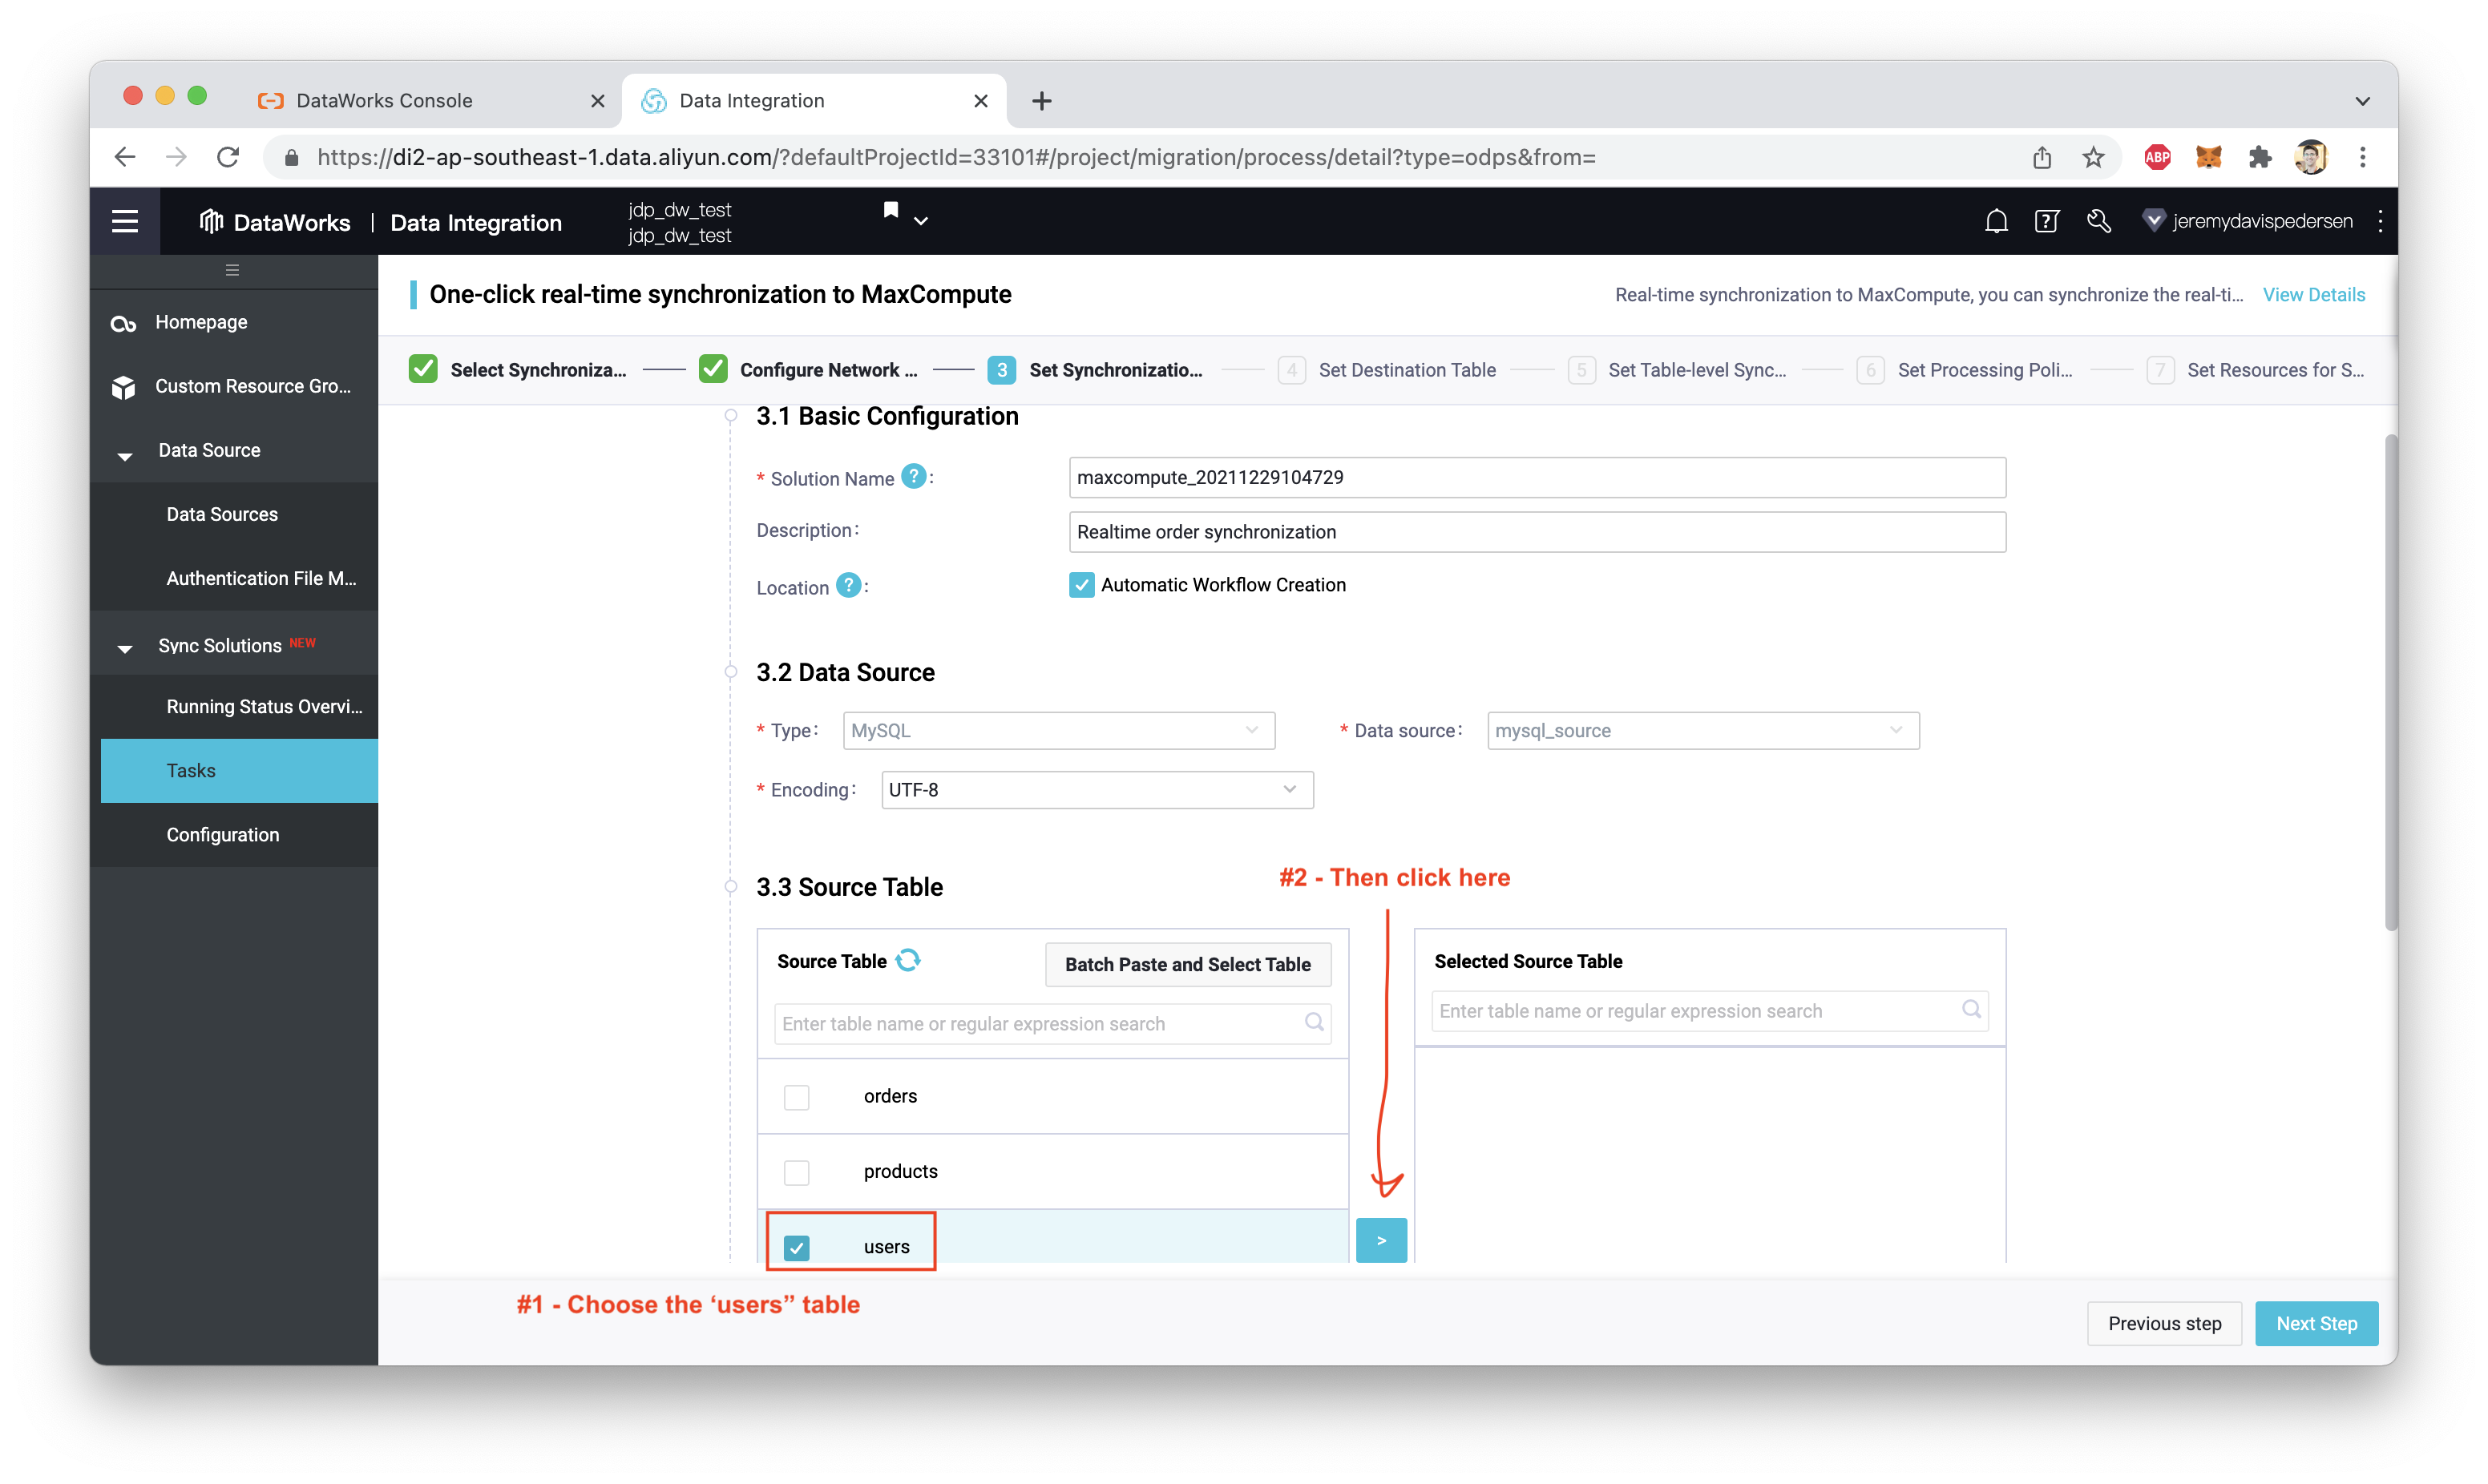
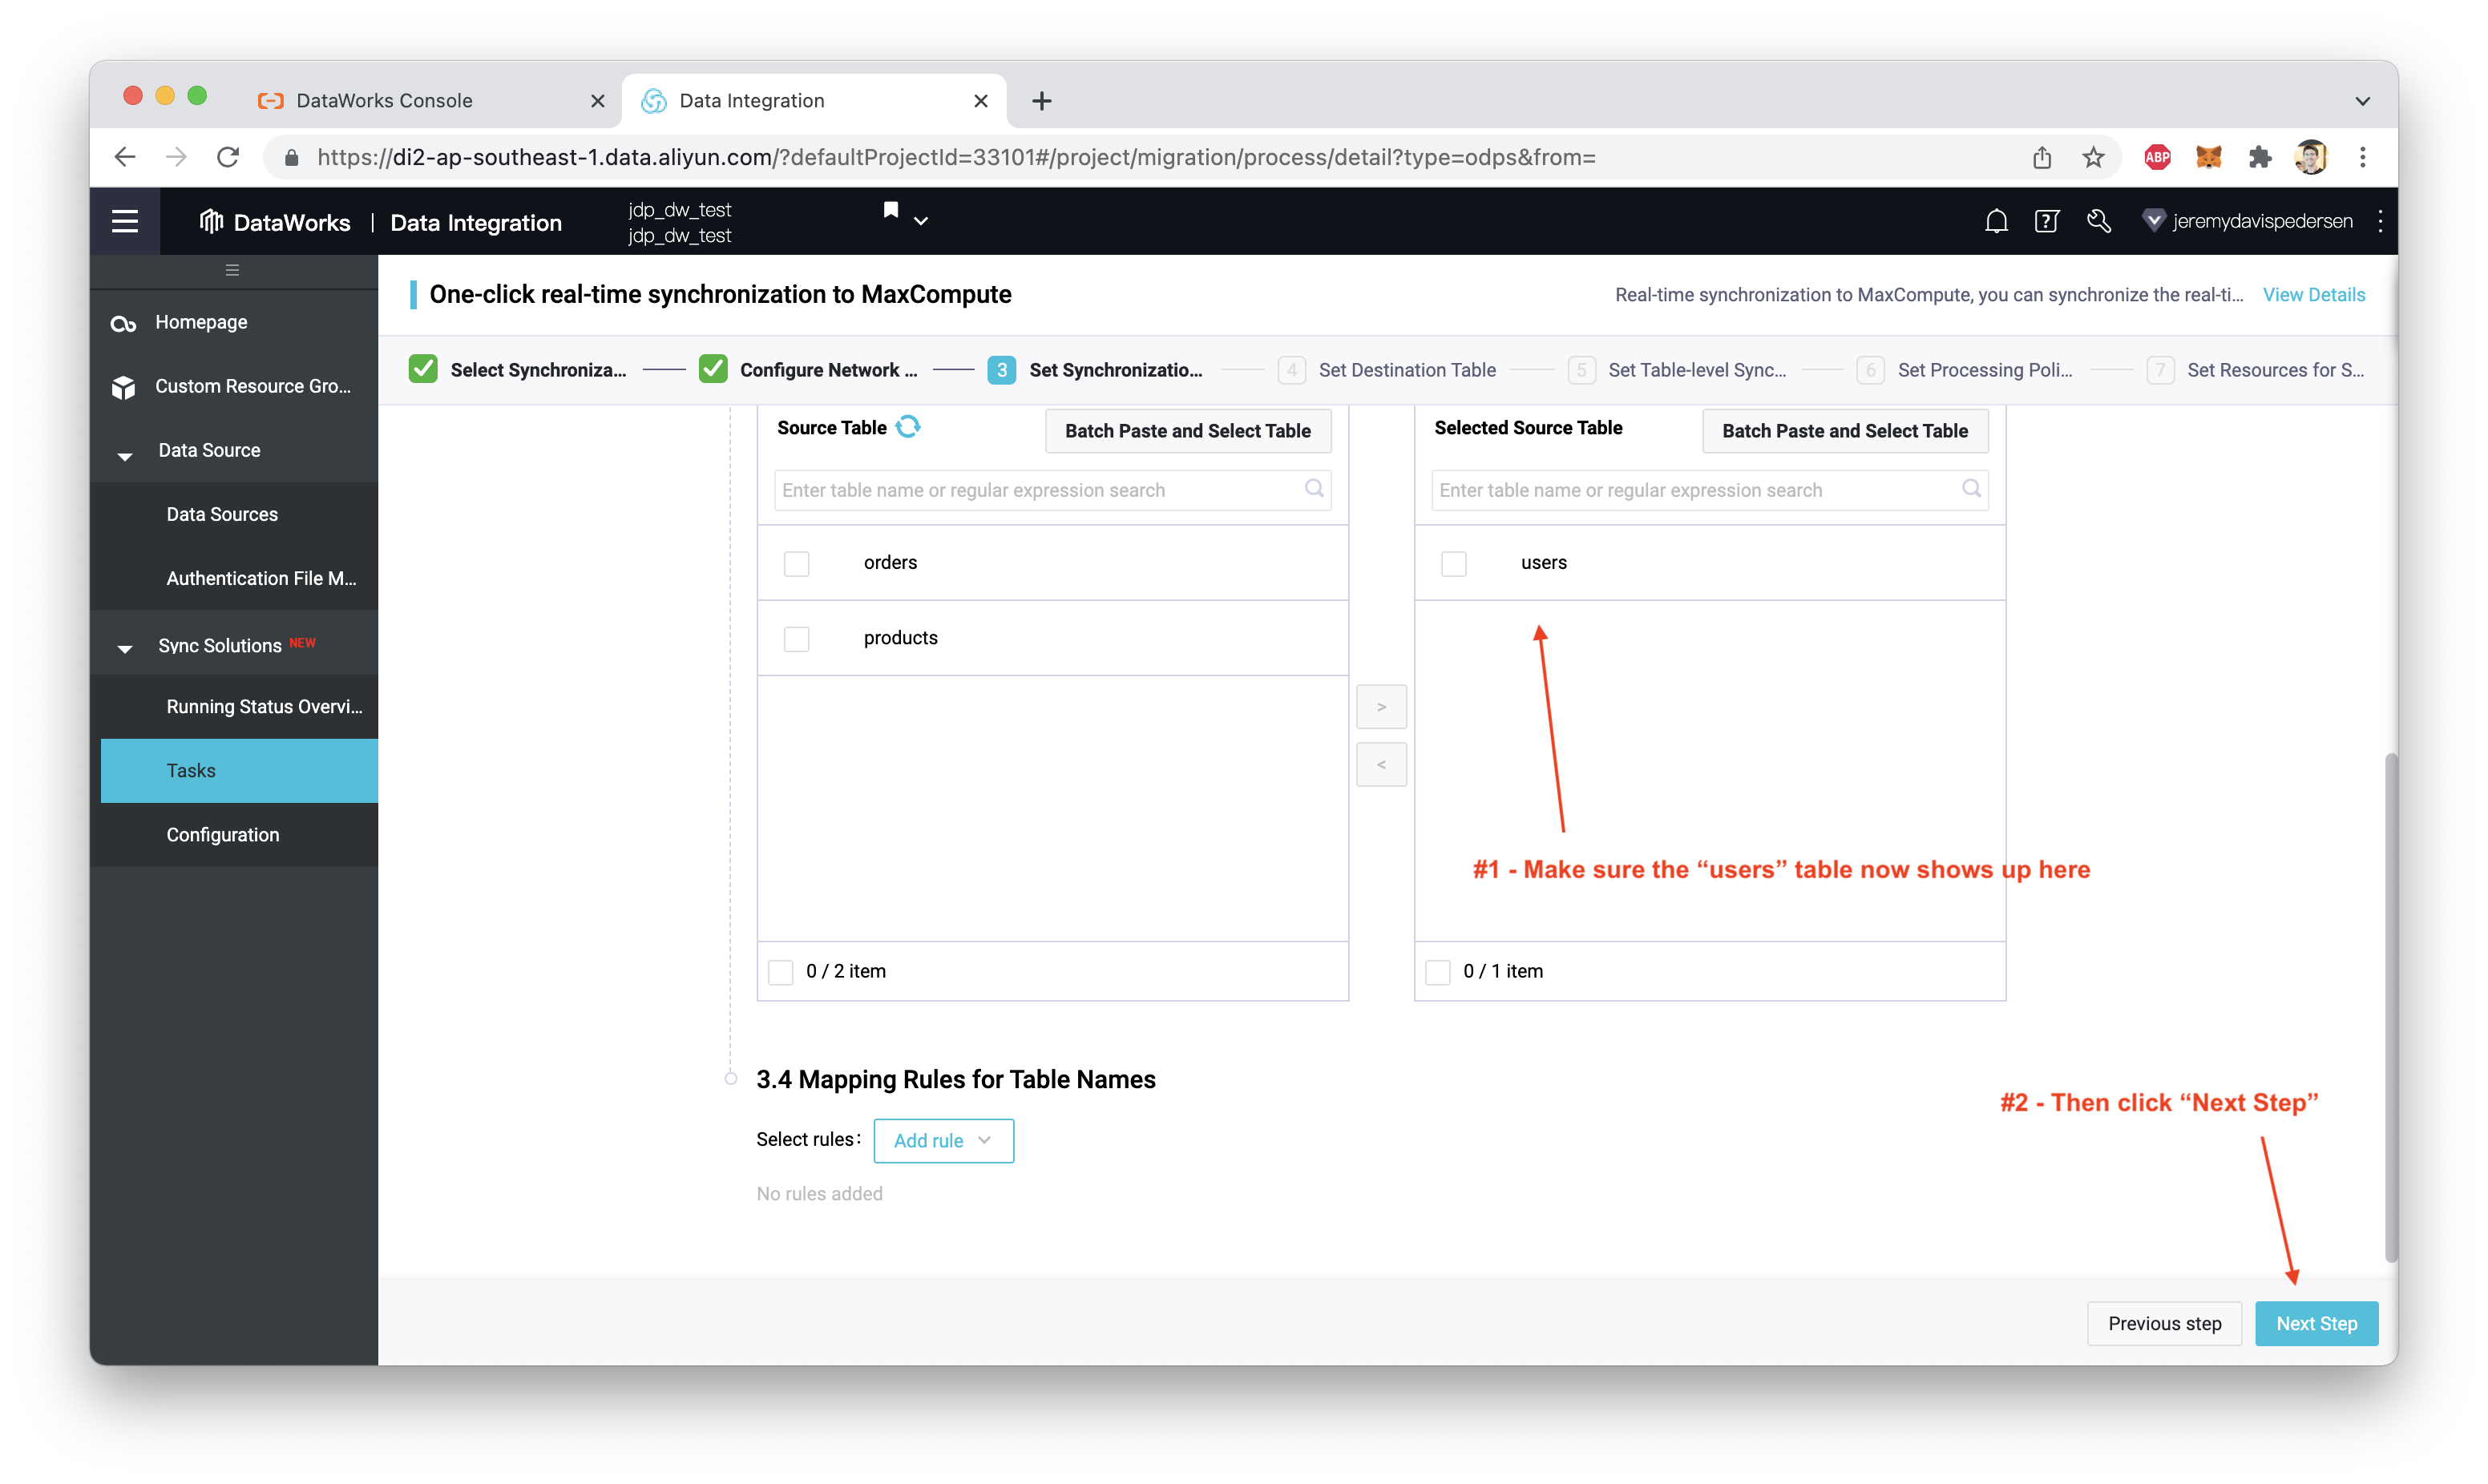
Set up the Destination Table configuration, as shown here (you may need to click on "Refresh source table and MaxCompute table mapping" to get the table mapping to load):
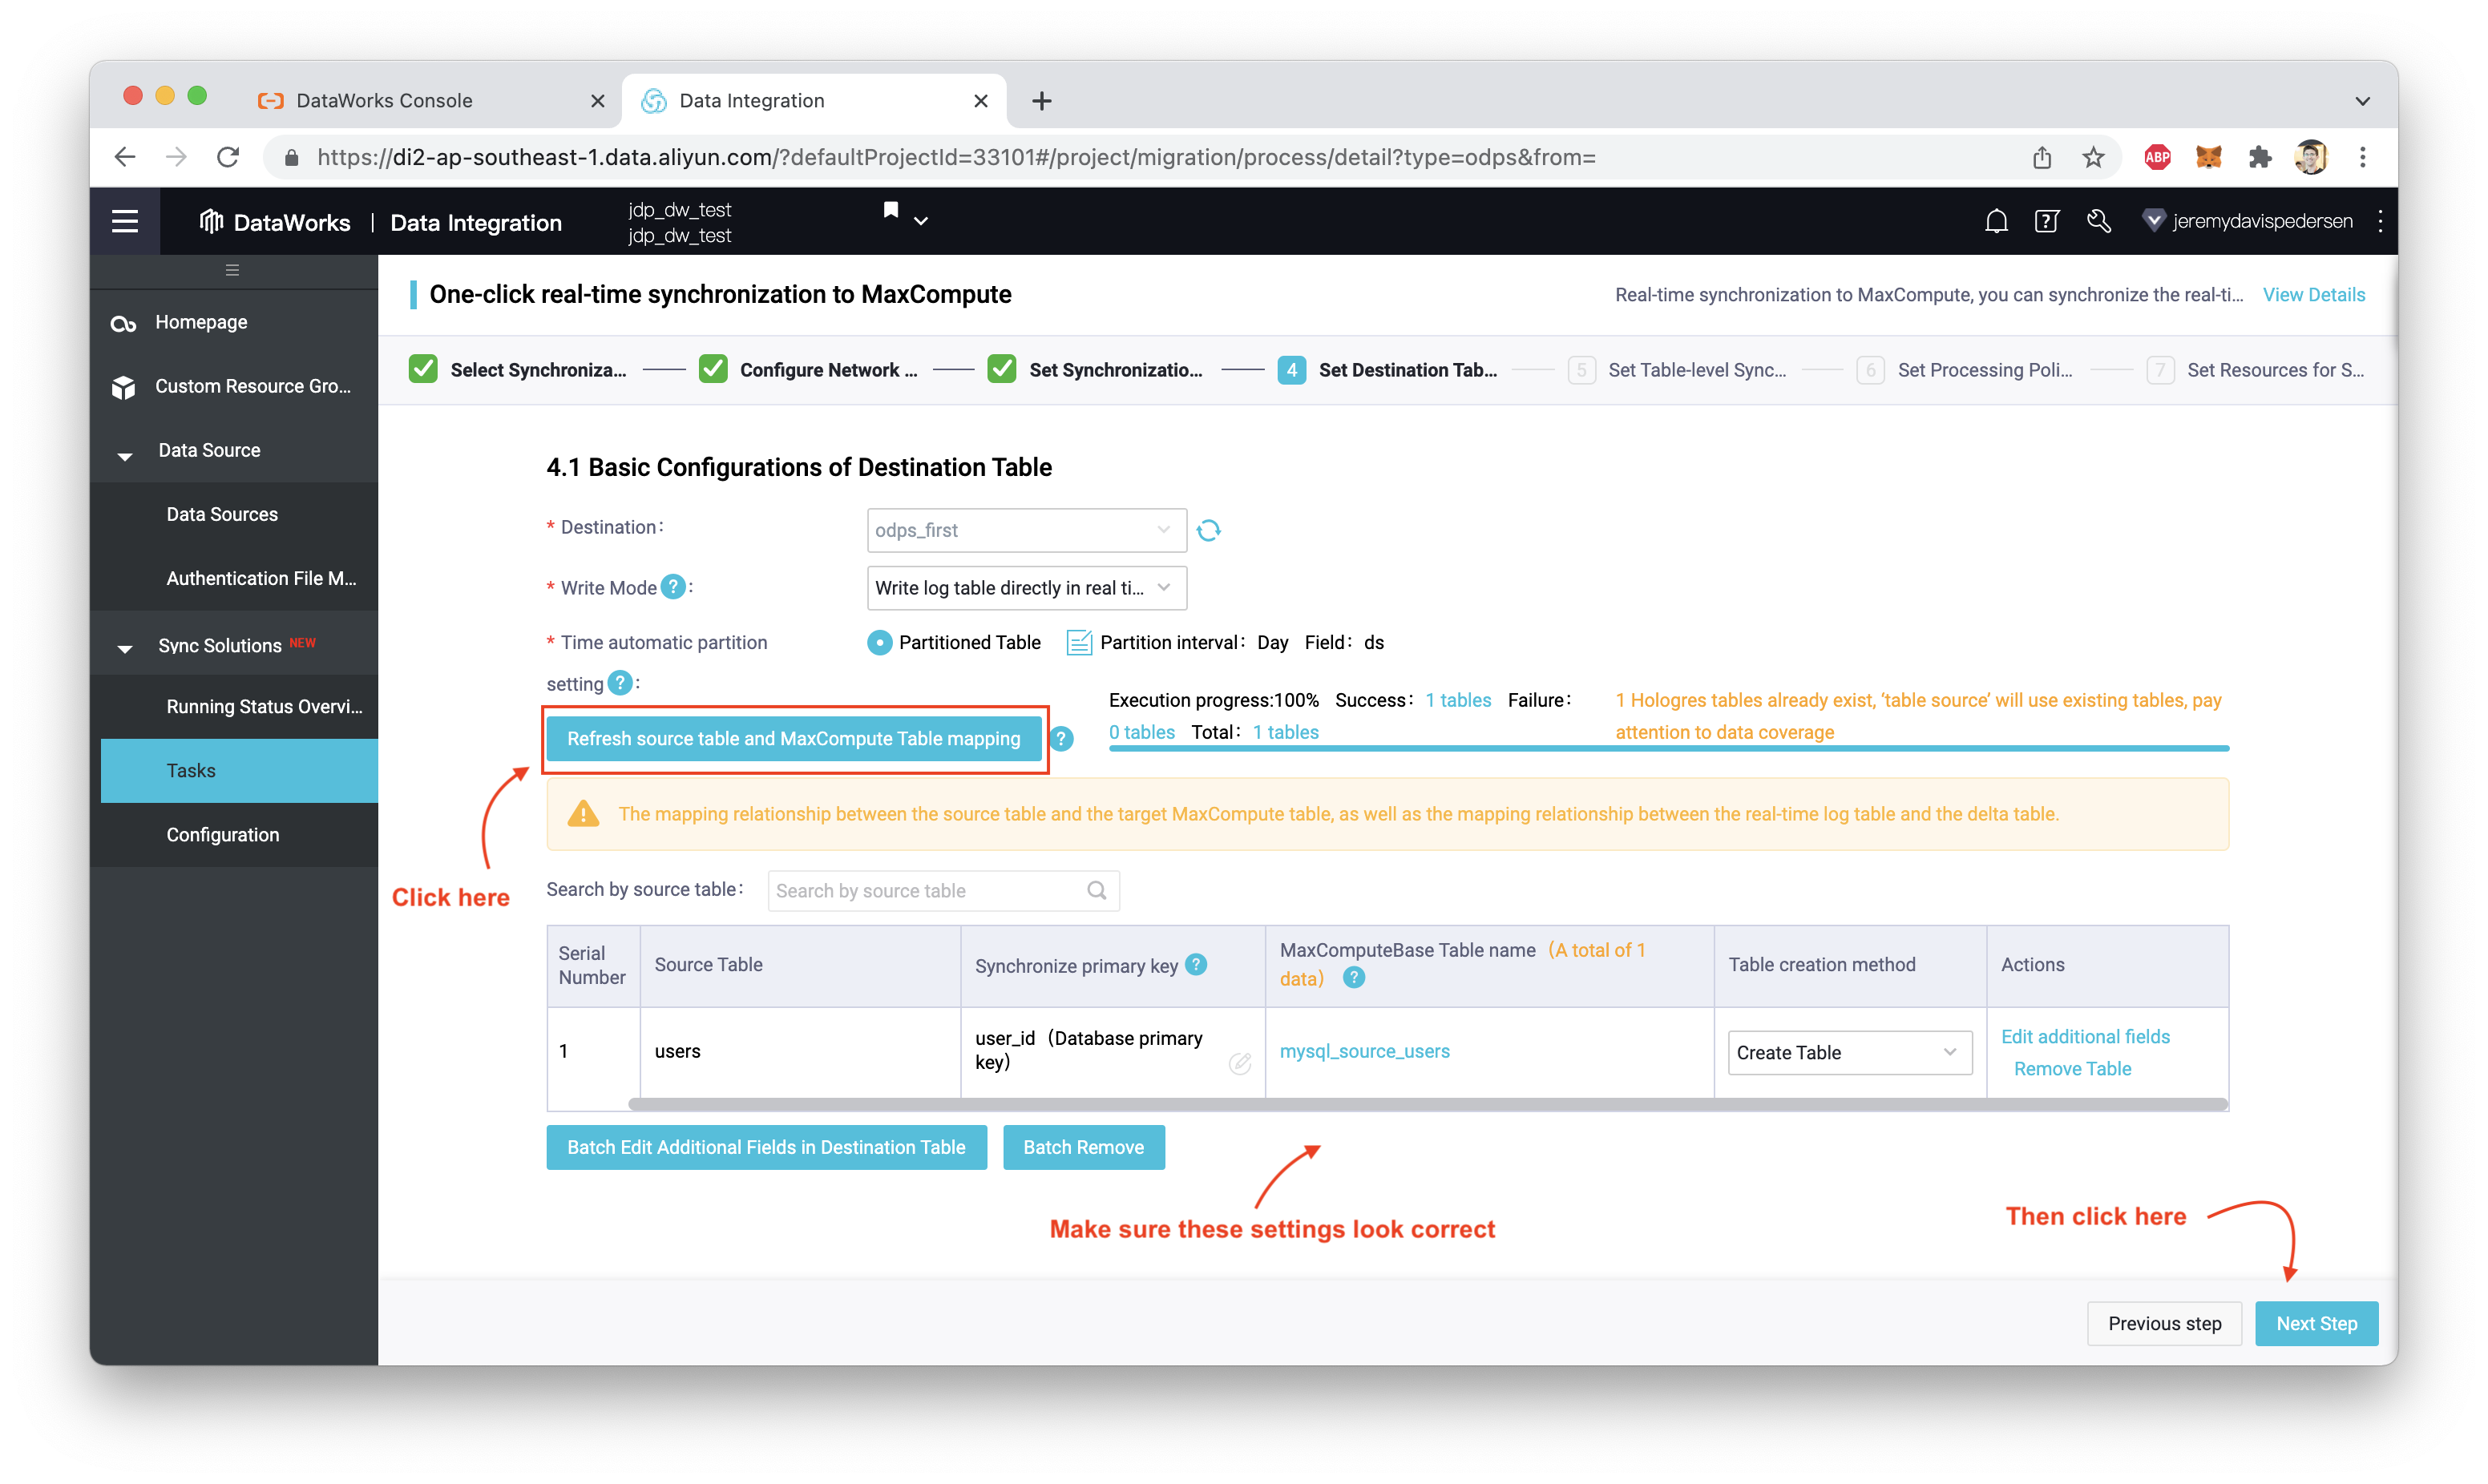
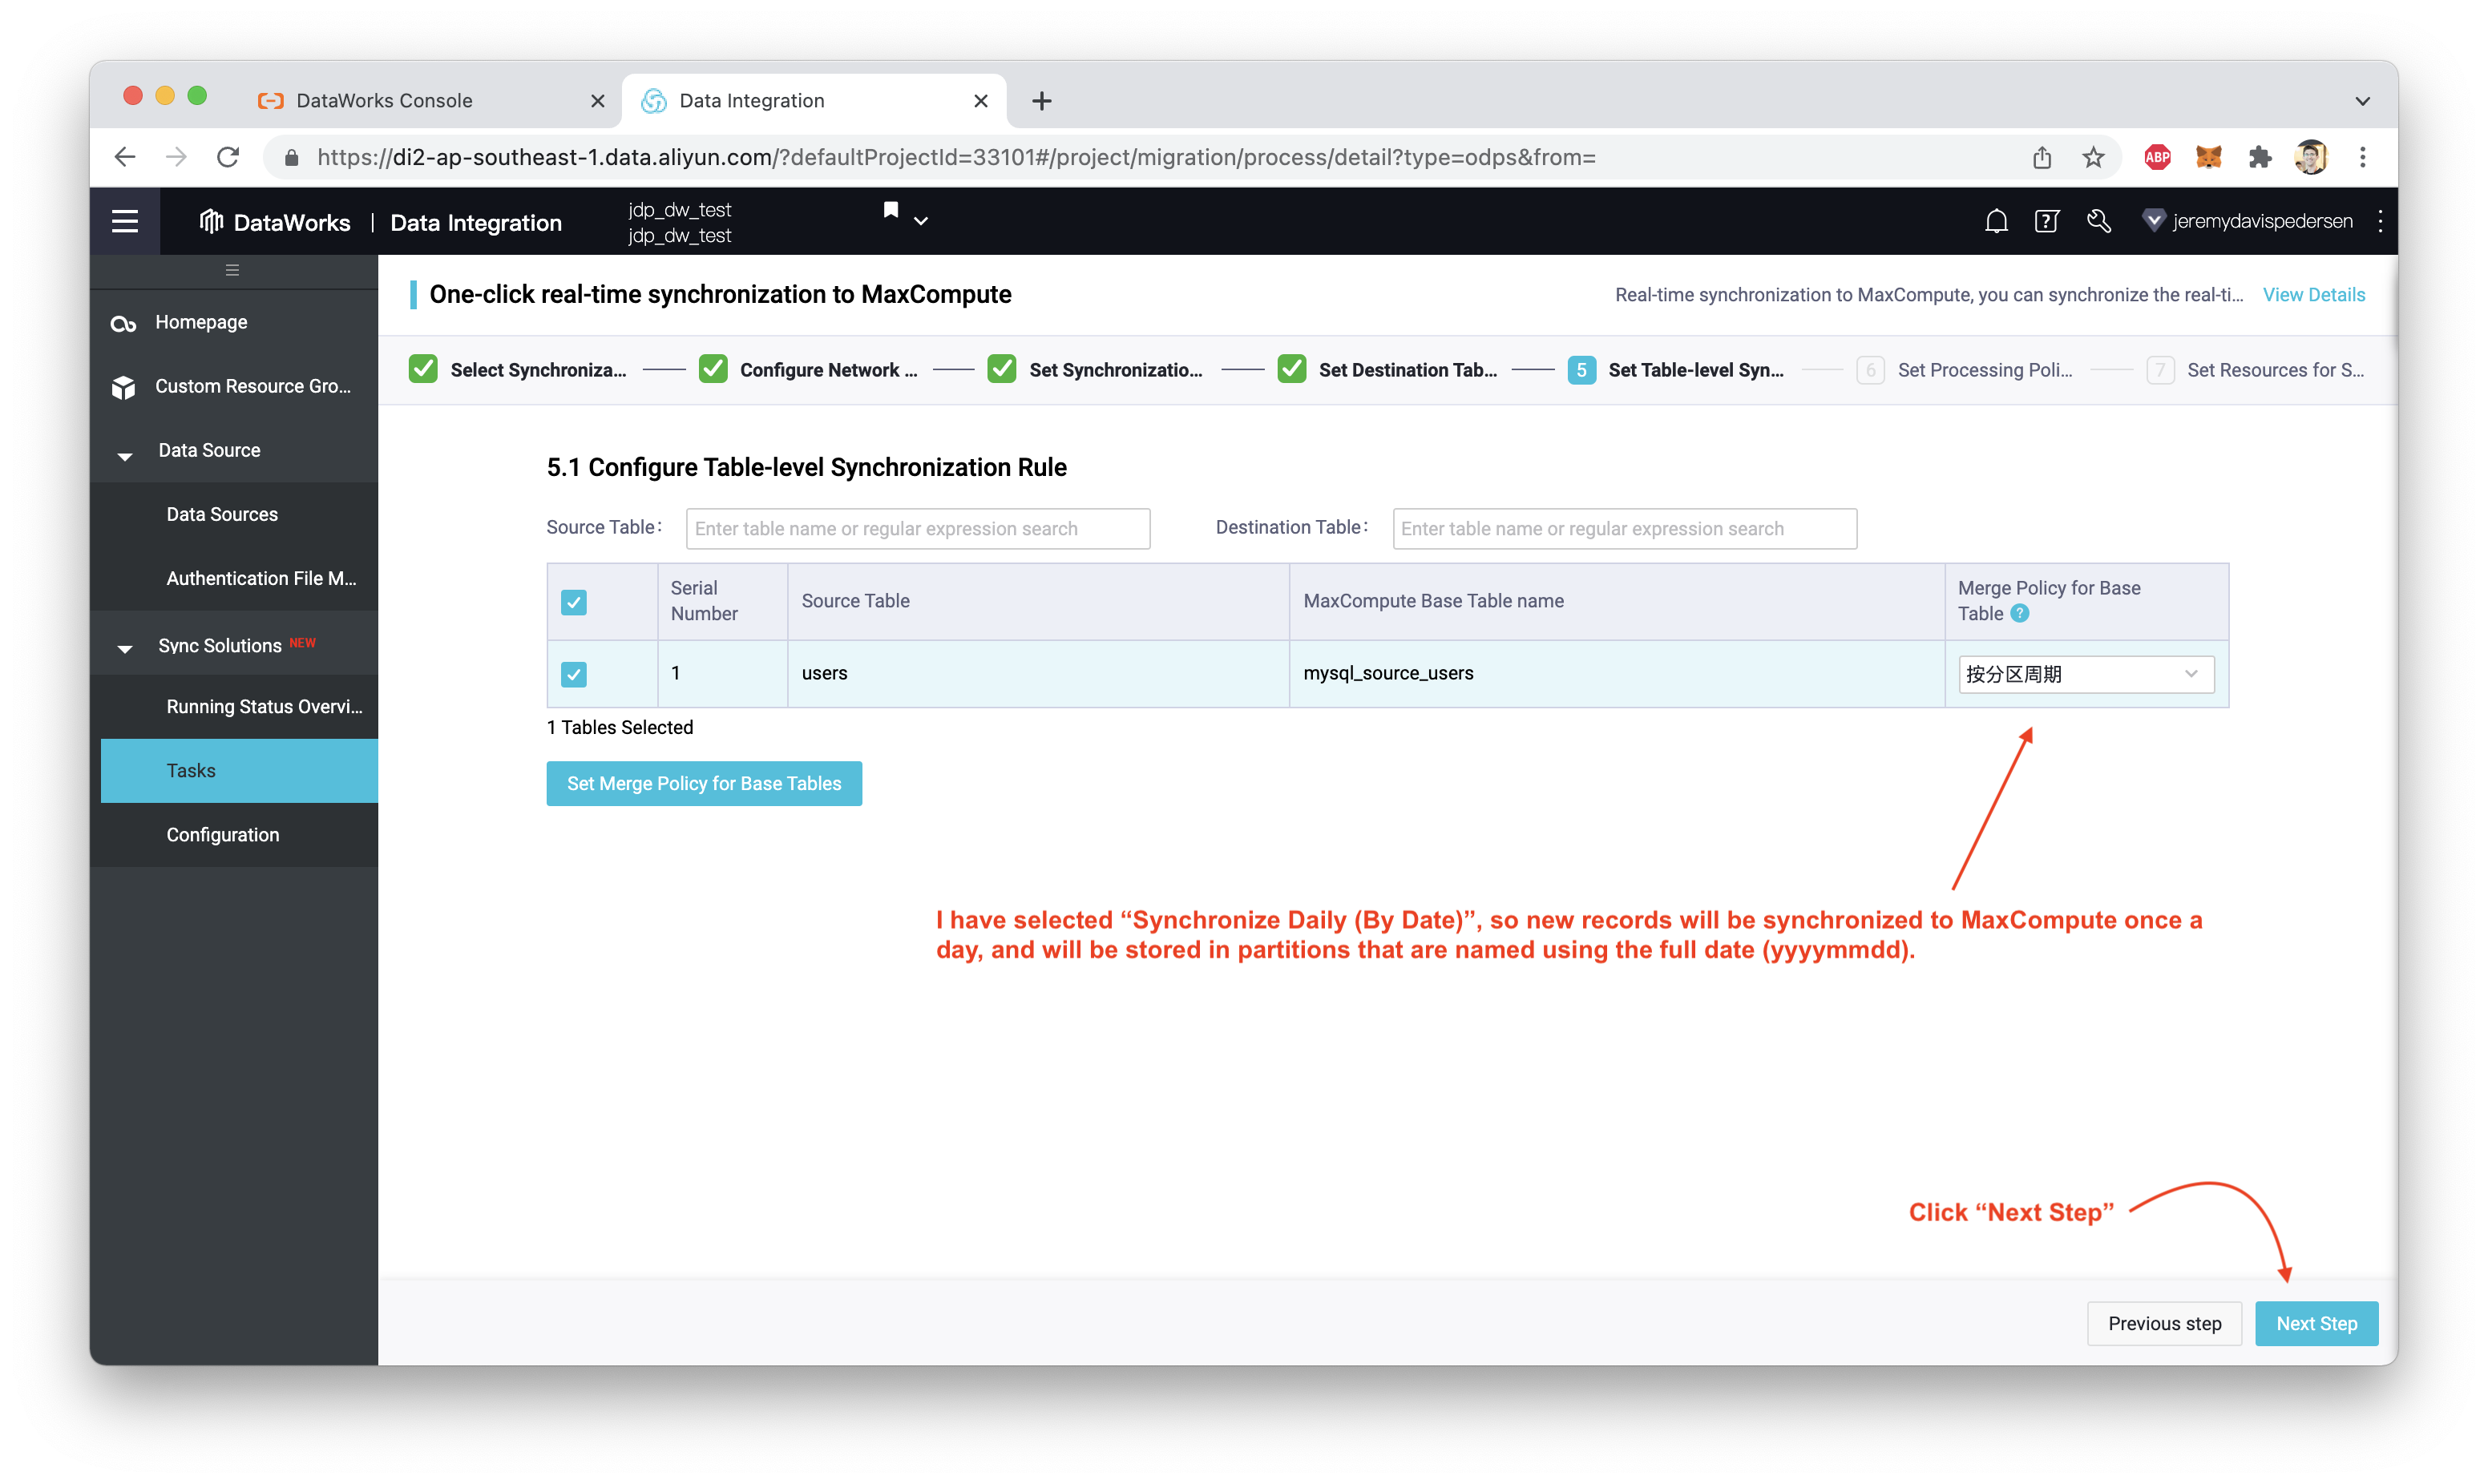
Click on "Next Step". Next, you need to configure how often records will be synchronized with your MaxCompute table.
"But wait", I hear you saying, "aren't records being imported in real time?". Yes they are, but they aren't written directly into our MaxCompute target table. They are first stored in a temporary "log" table. That table is then synchronized with our target MaxCompute table at regular intervals. I can synchronize by full date (yyyy-mm-dd), by day, or once an hour, as shown here:
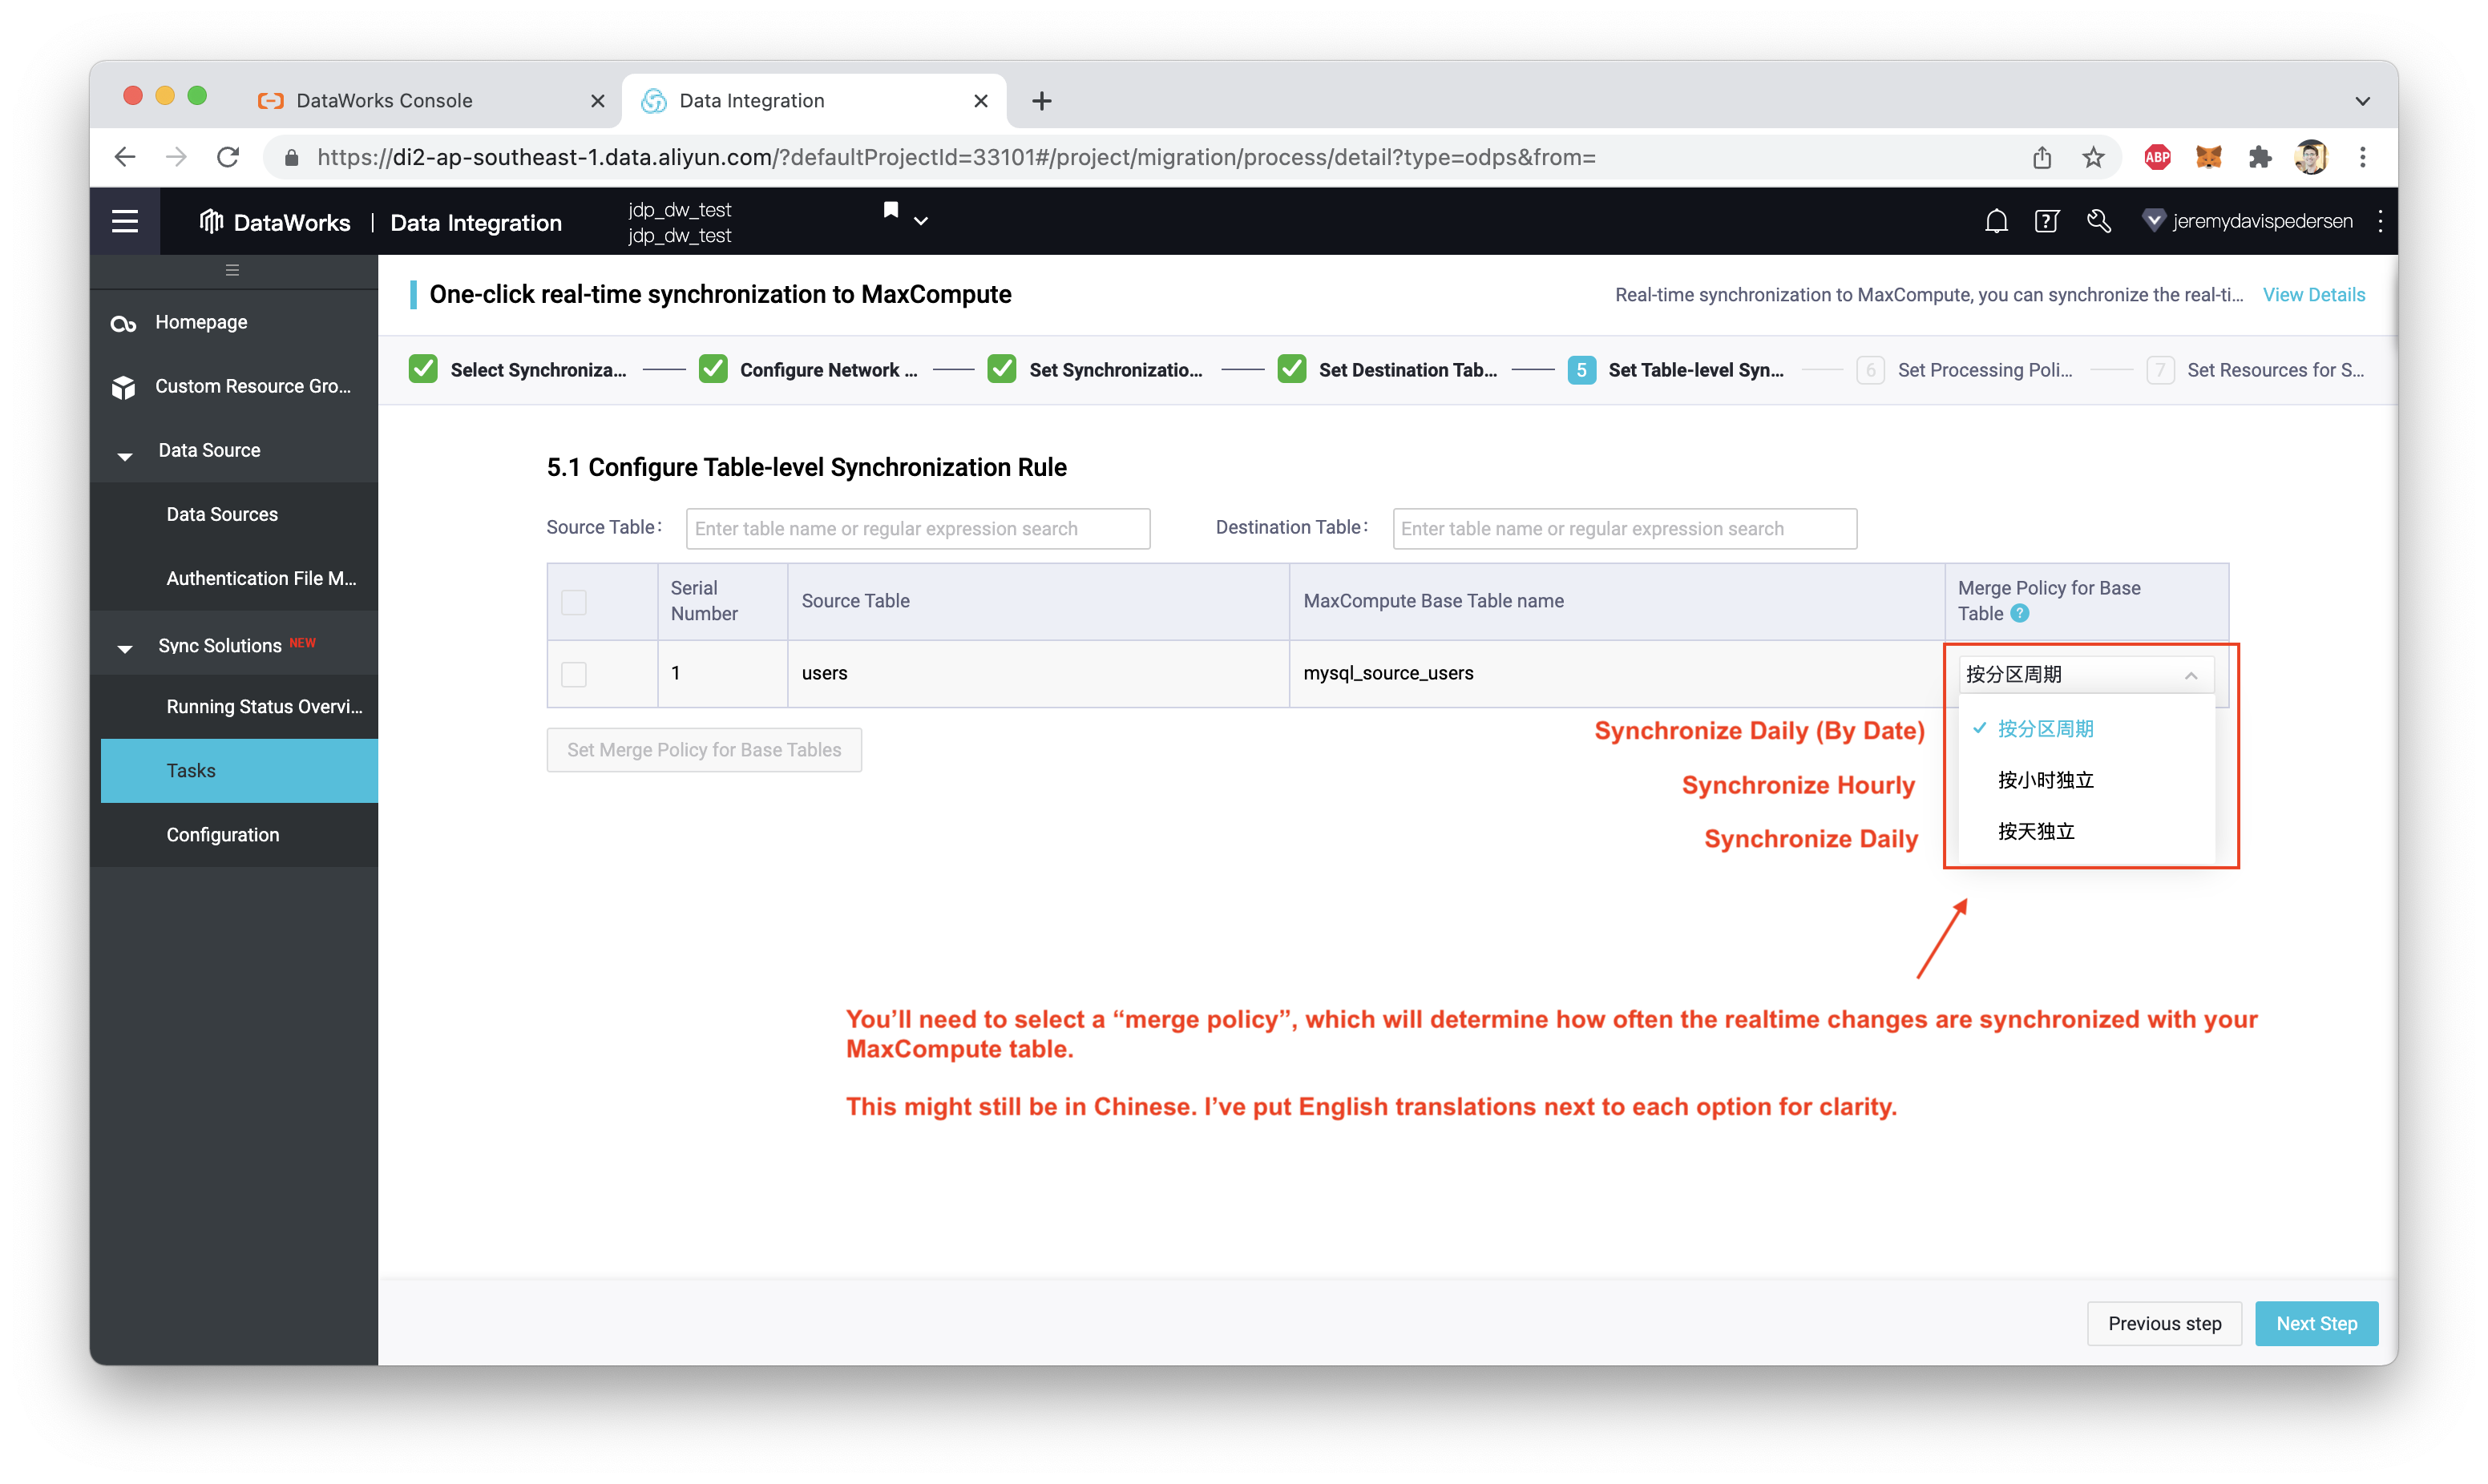
In my case, I chose to sync once a day, using the full date (yyyy-mm-dd) to partition my MaxCompute users table:
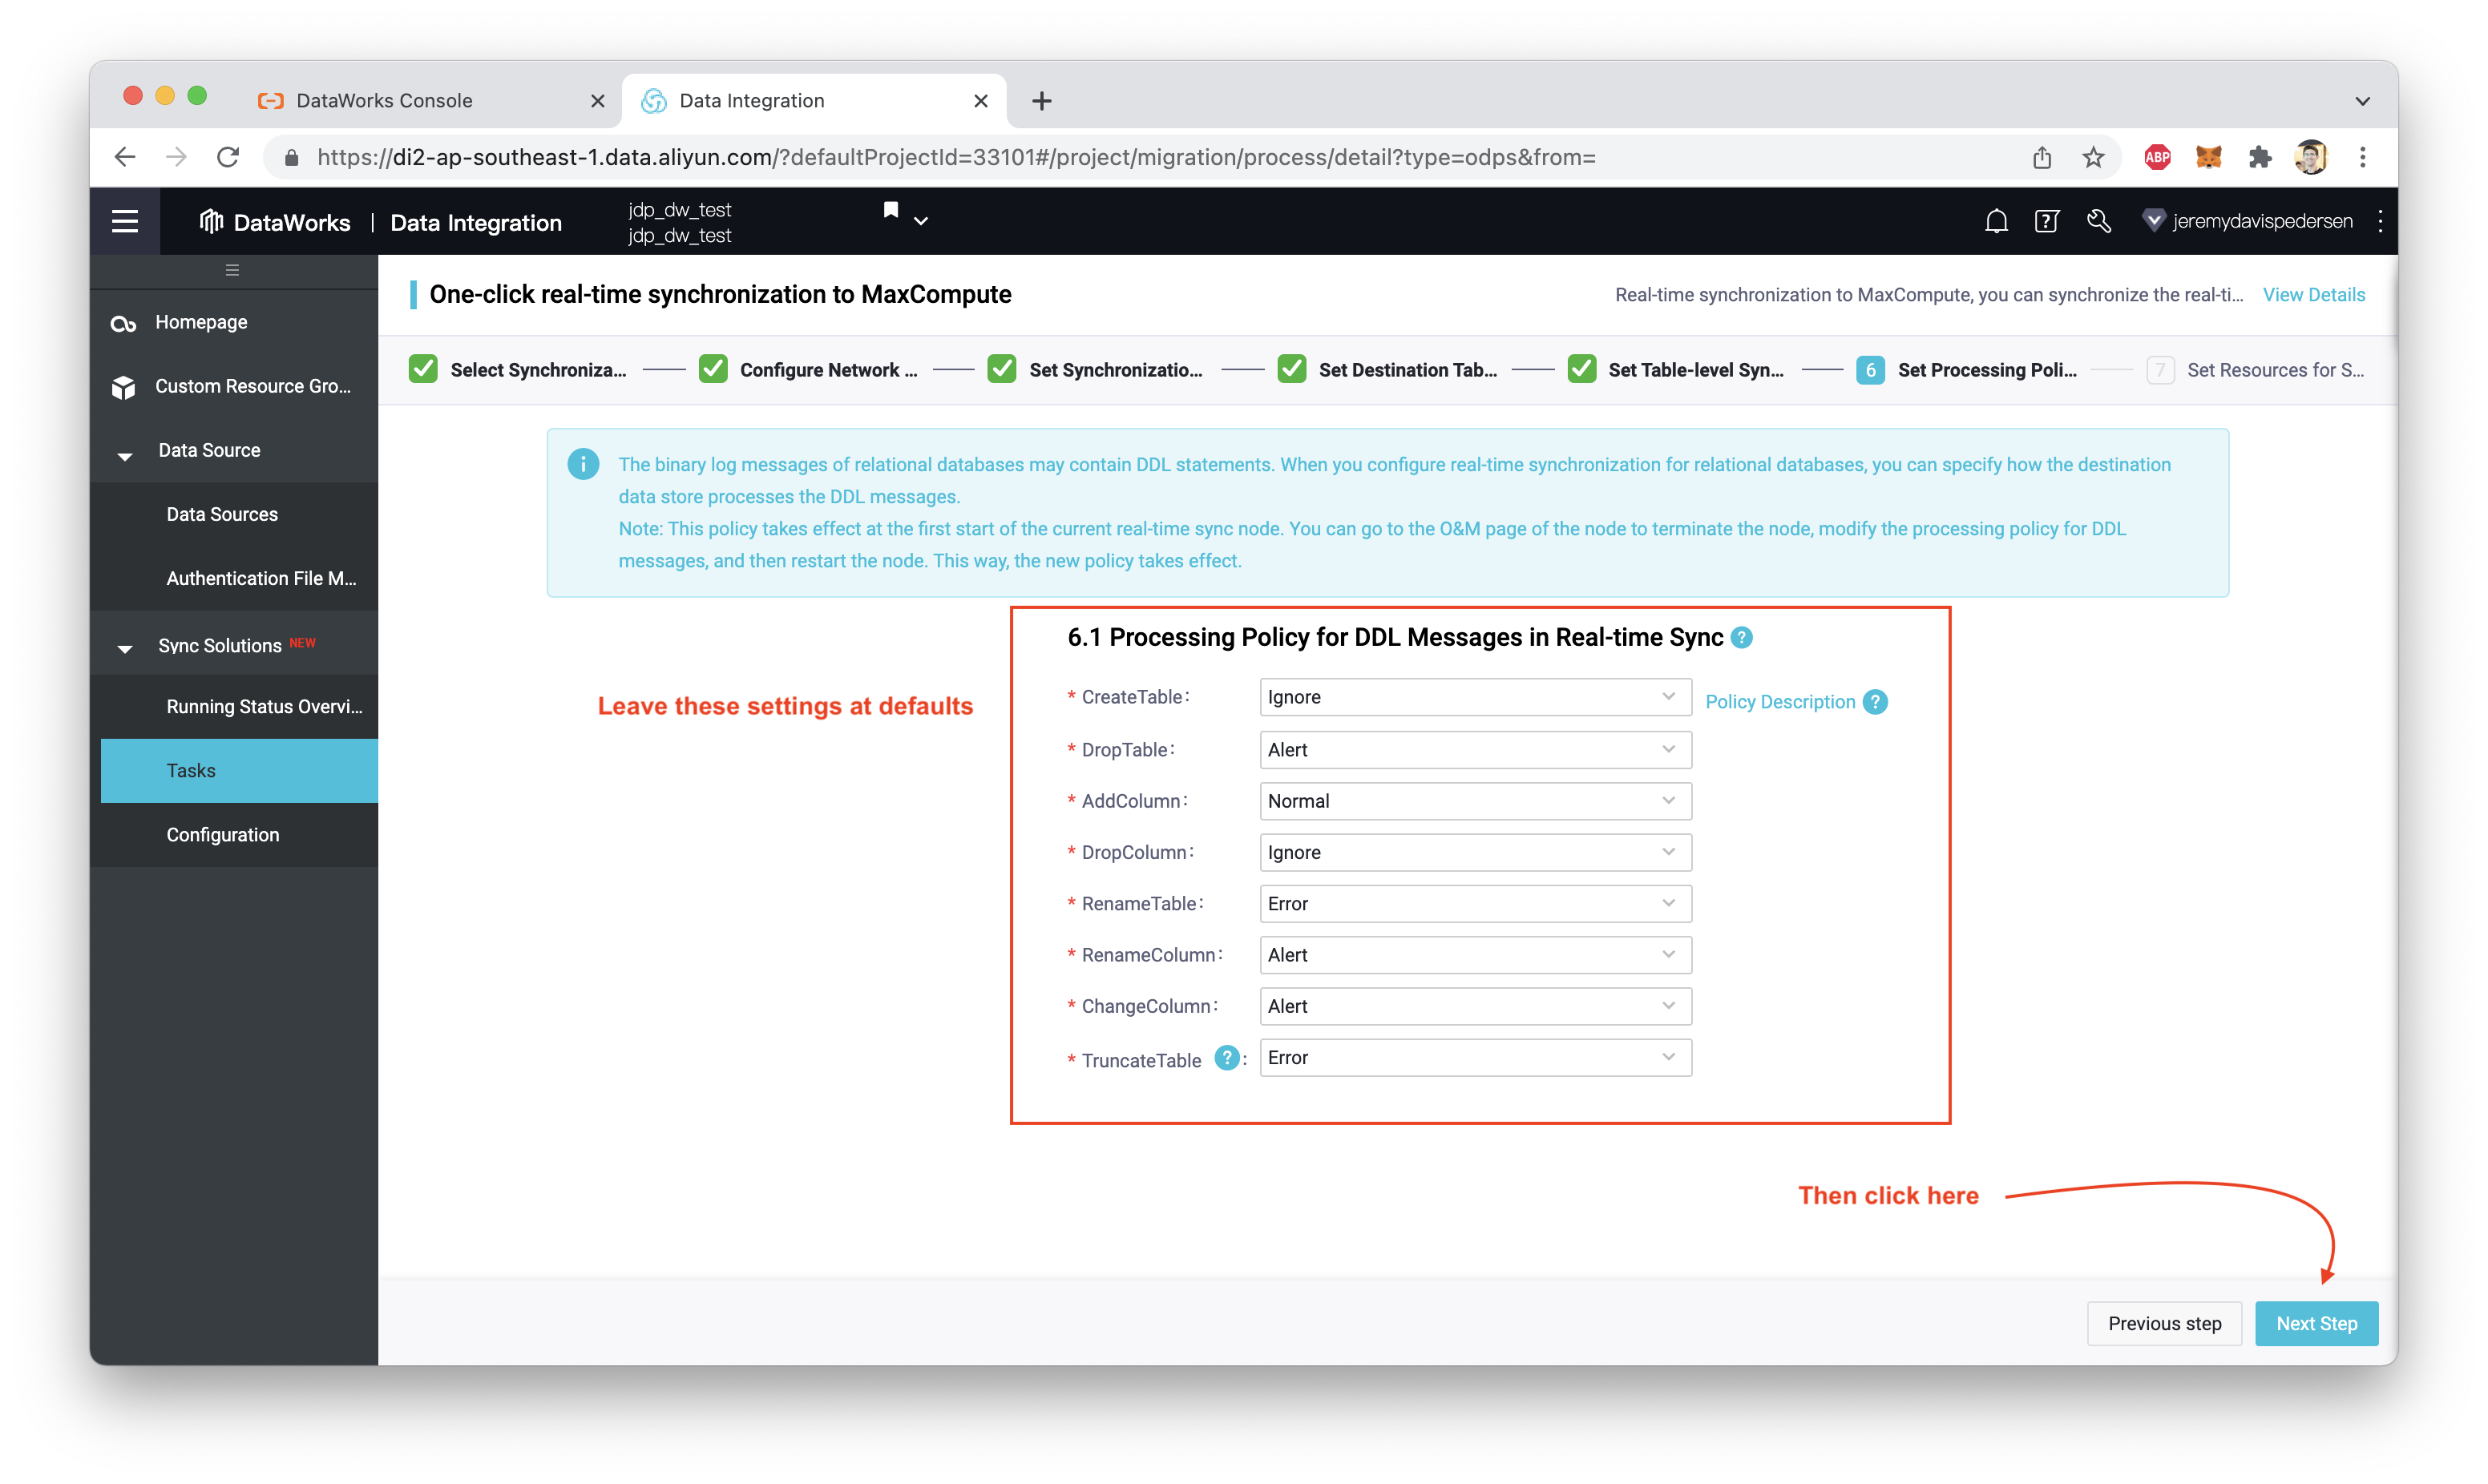
Next, we need to tell the synchronization job what to do with DDL statements, which may be contained in the binlogs that MySQL ships us. We can leave all those settings at defaults (as shown here):
Finally, we set up the synchronization task. Actually tasks: a one-time synchronization task followed by an ongoing realtime synchronization task, as shown here:
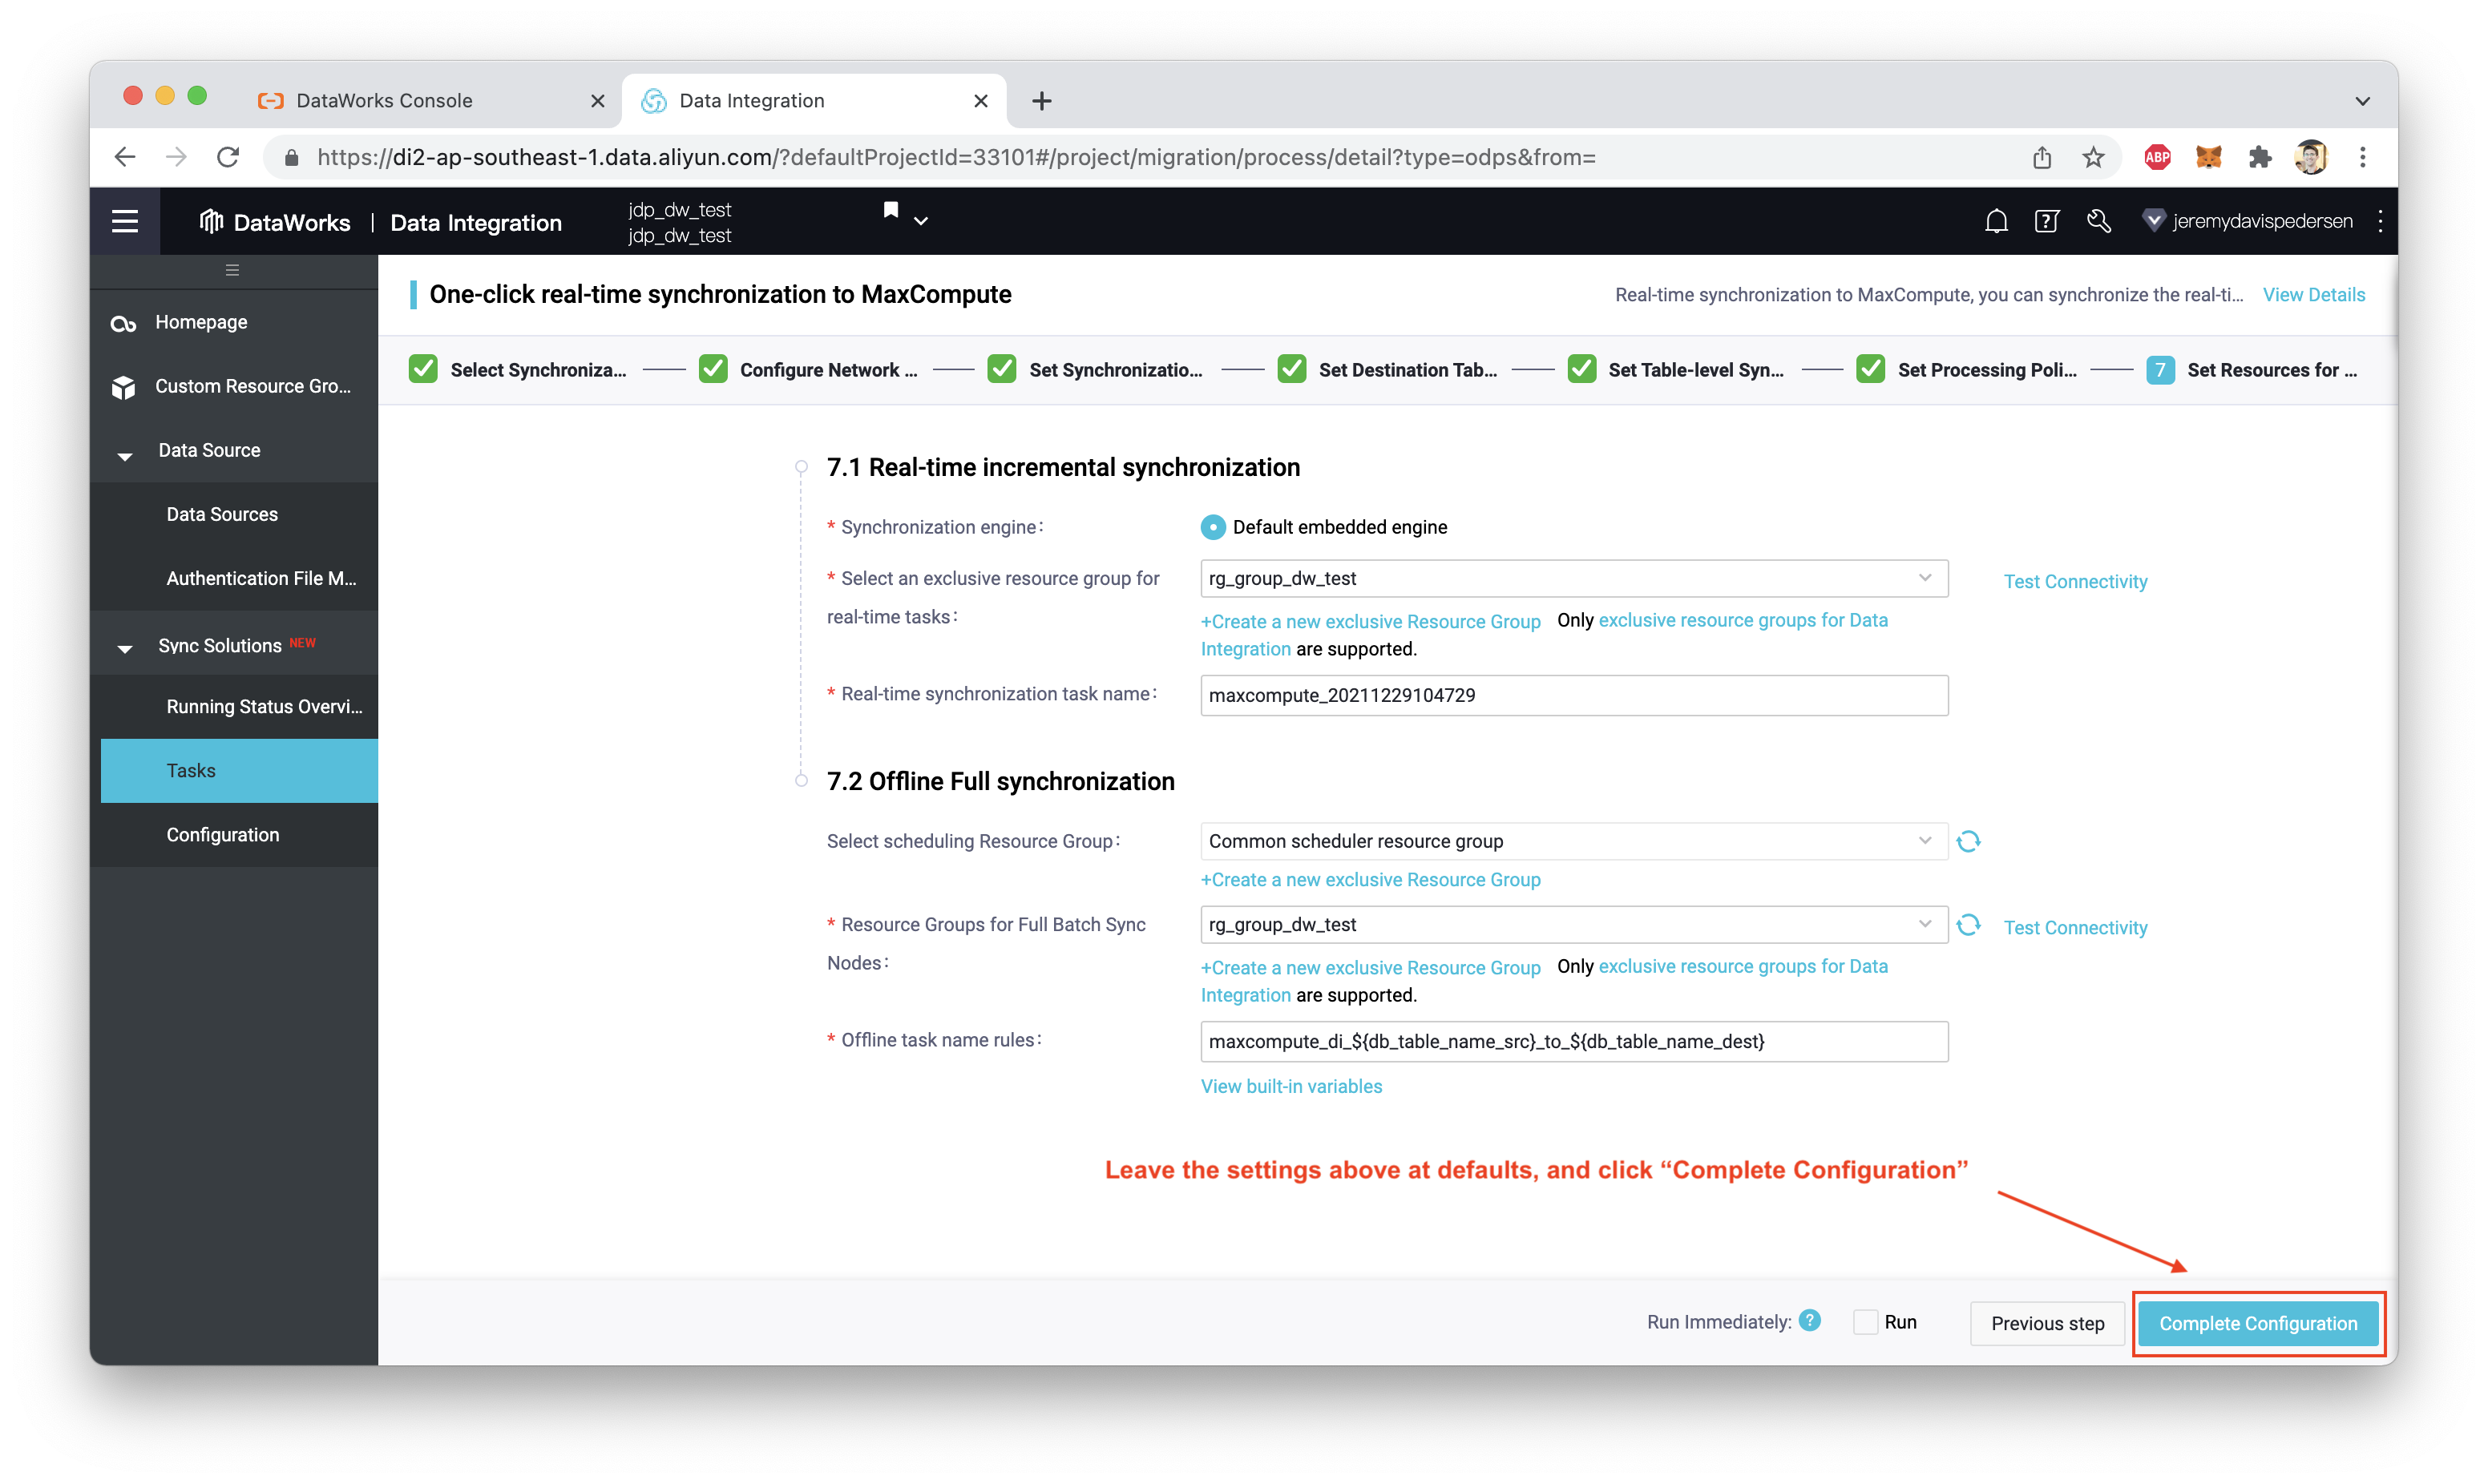
Clicking on "Complete Configuration" returns us to the "Tasks" view, where we can click on "Submit and Run" to start the migration task:
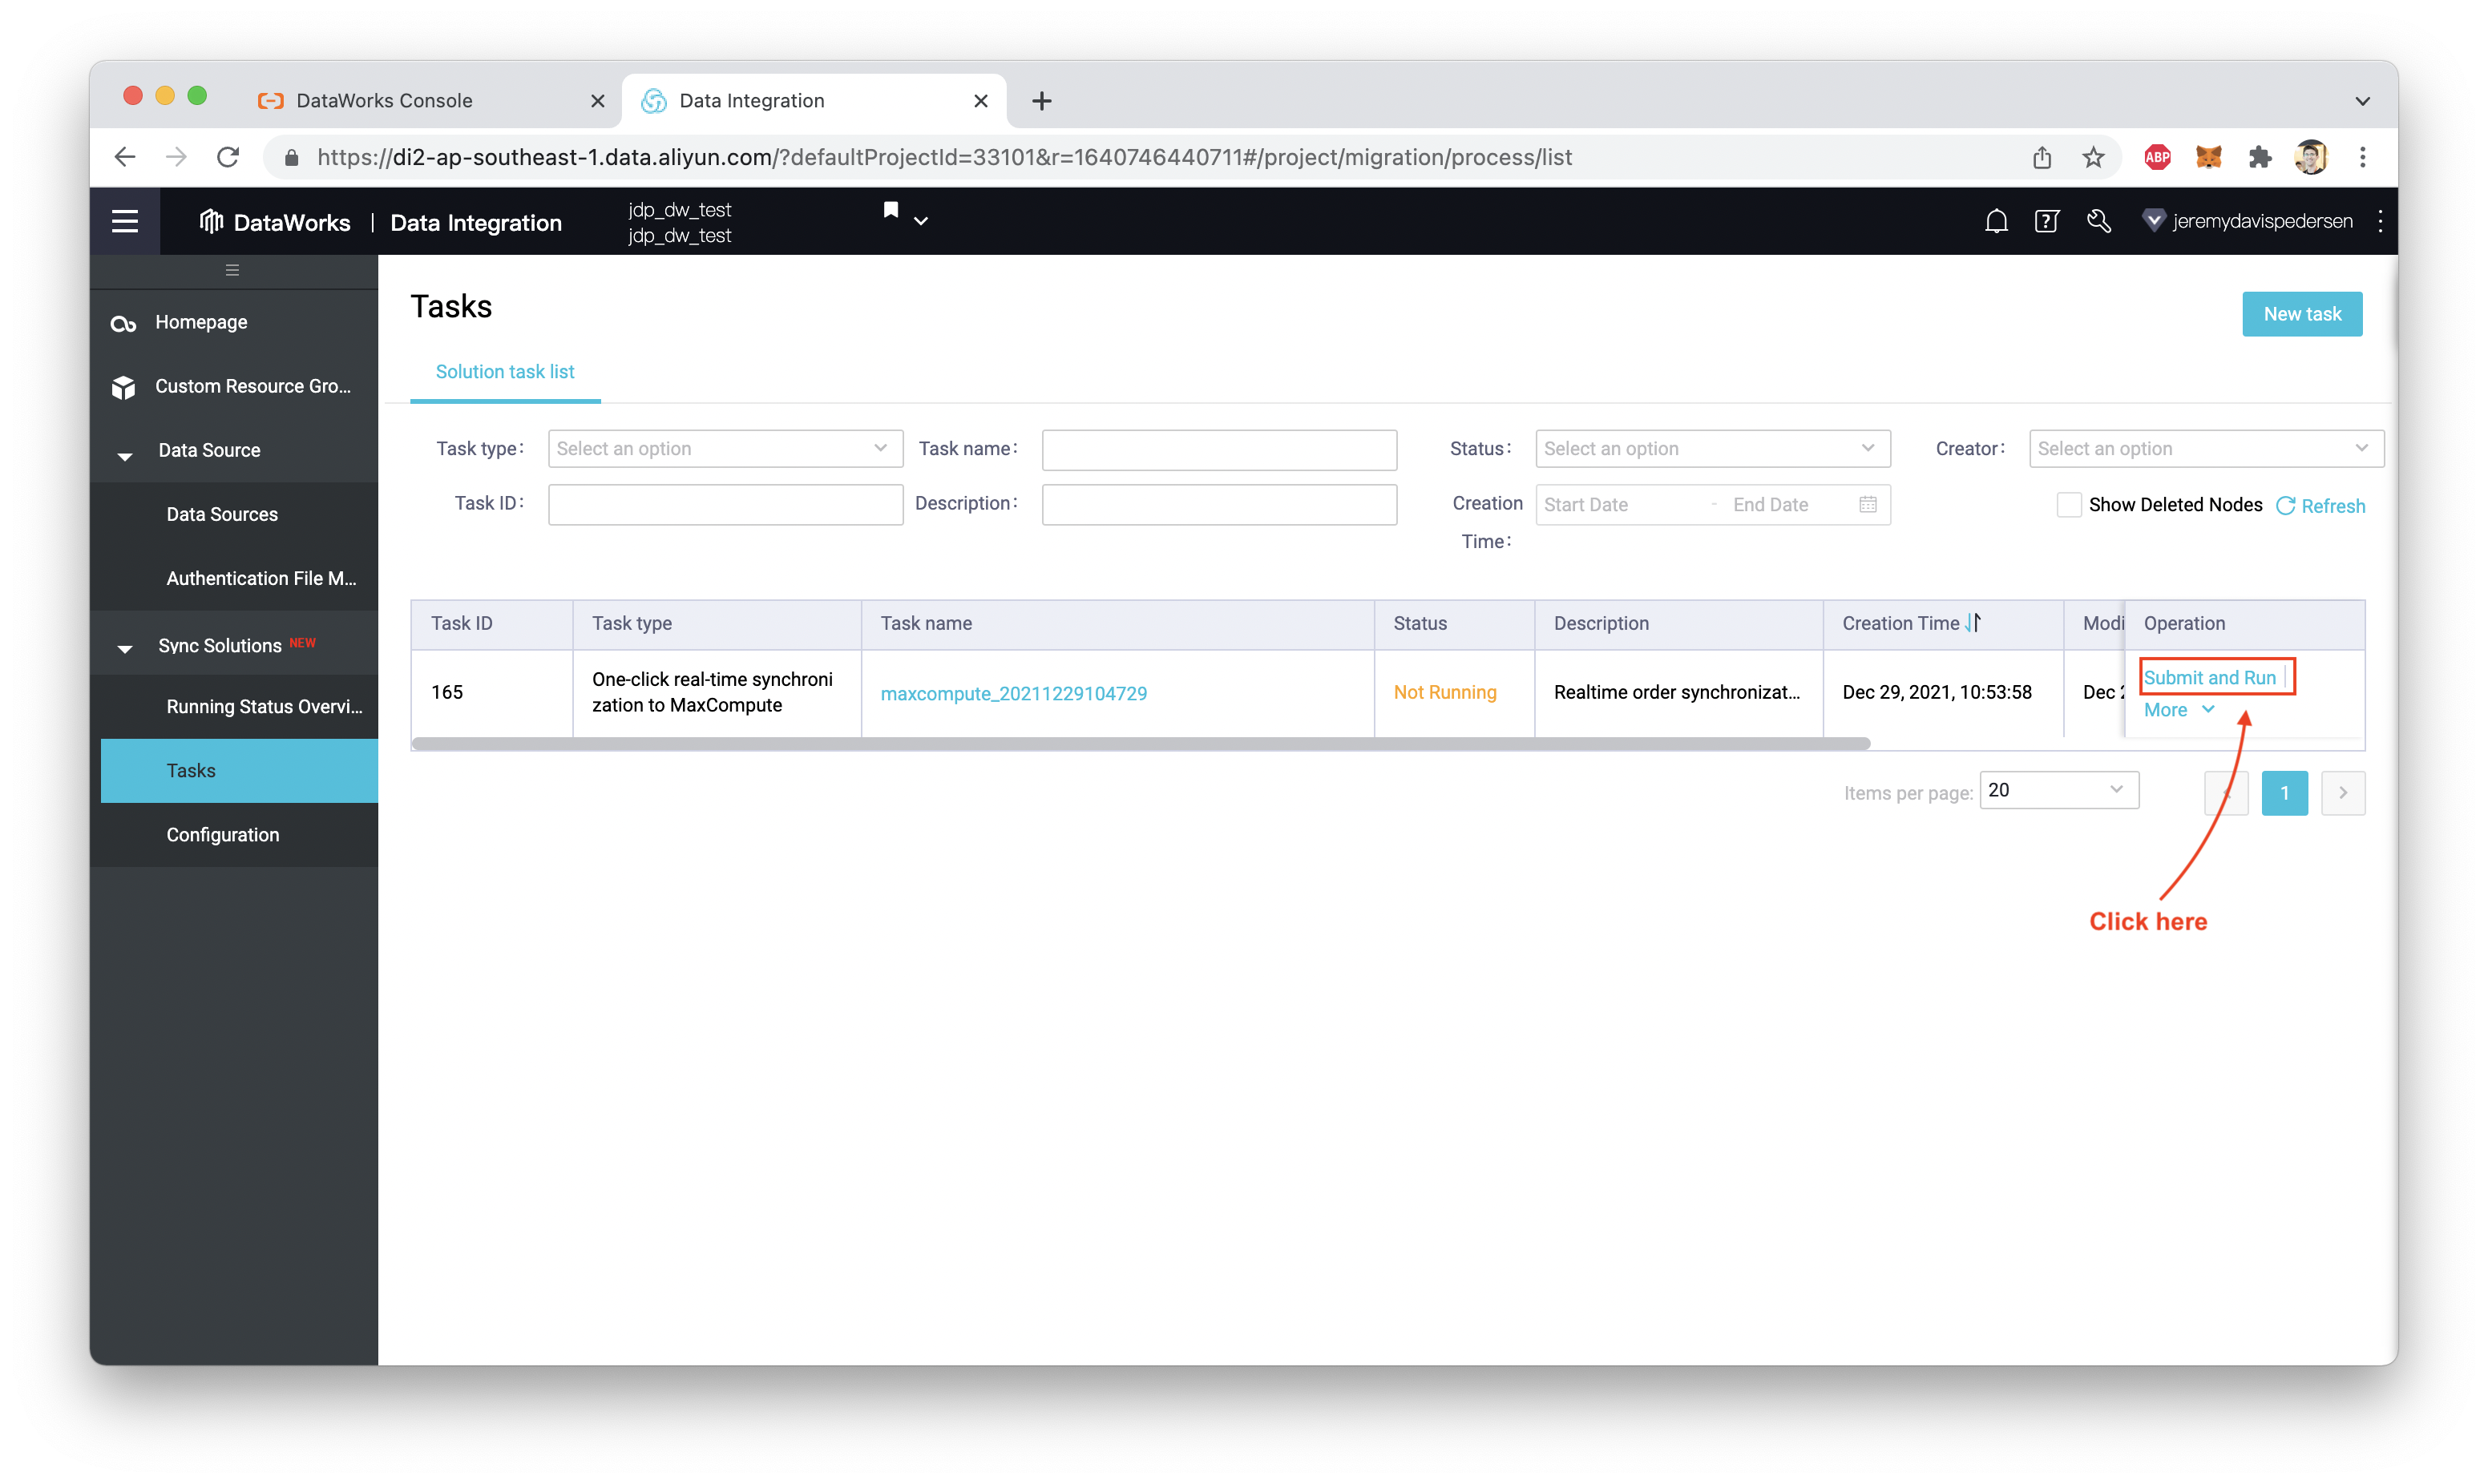
If everything is working, we should be able to click on the task and see its status (note: you might see a different status for the full migration, if it hasn't yet completed):
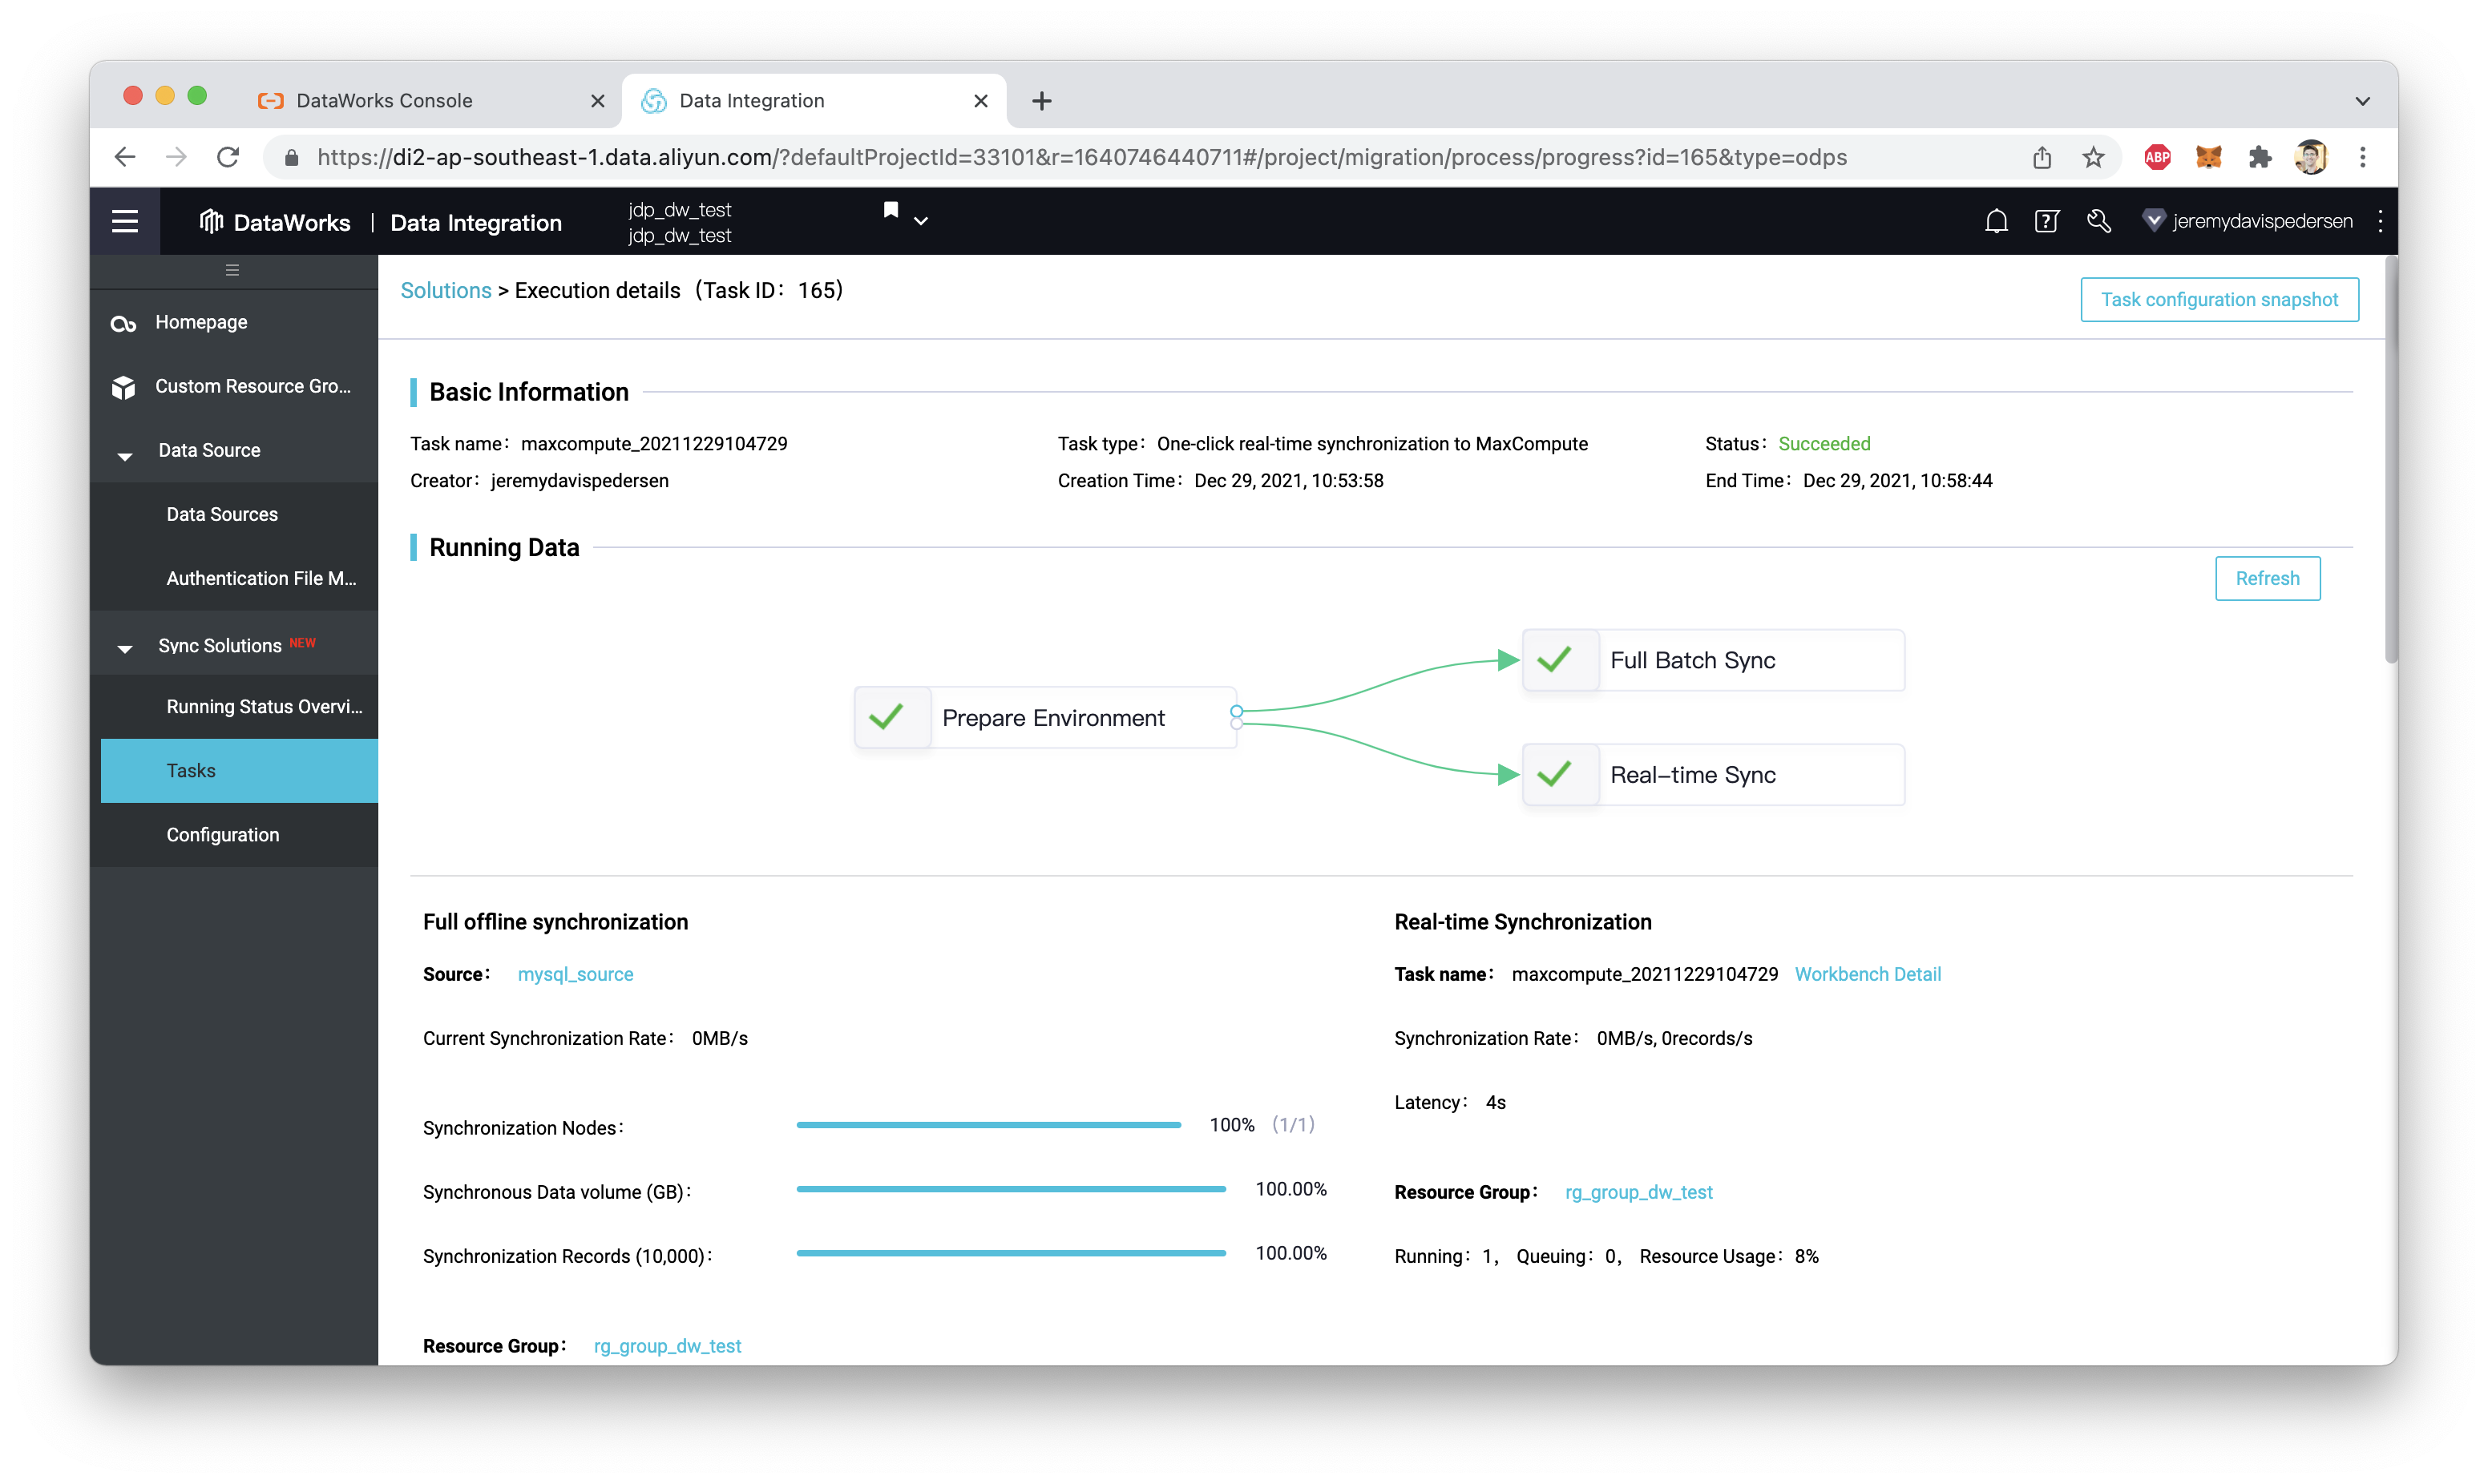
That's it! Now we are ready to add a few records to the users table in our MySQL database, and see what happens.
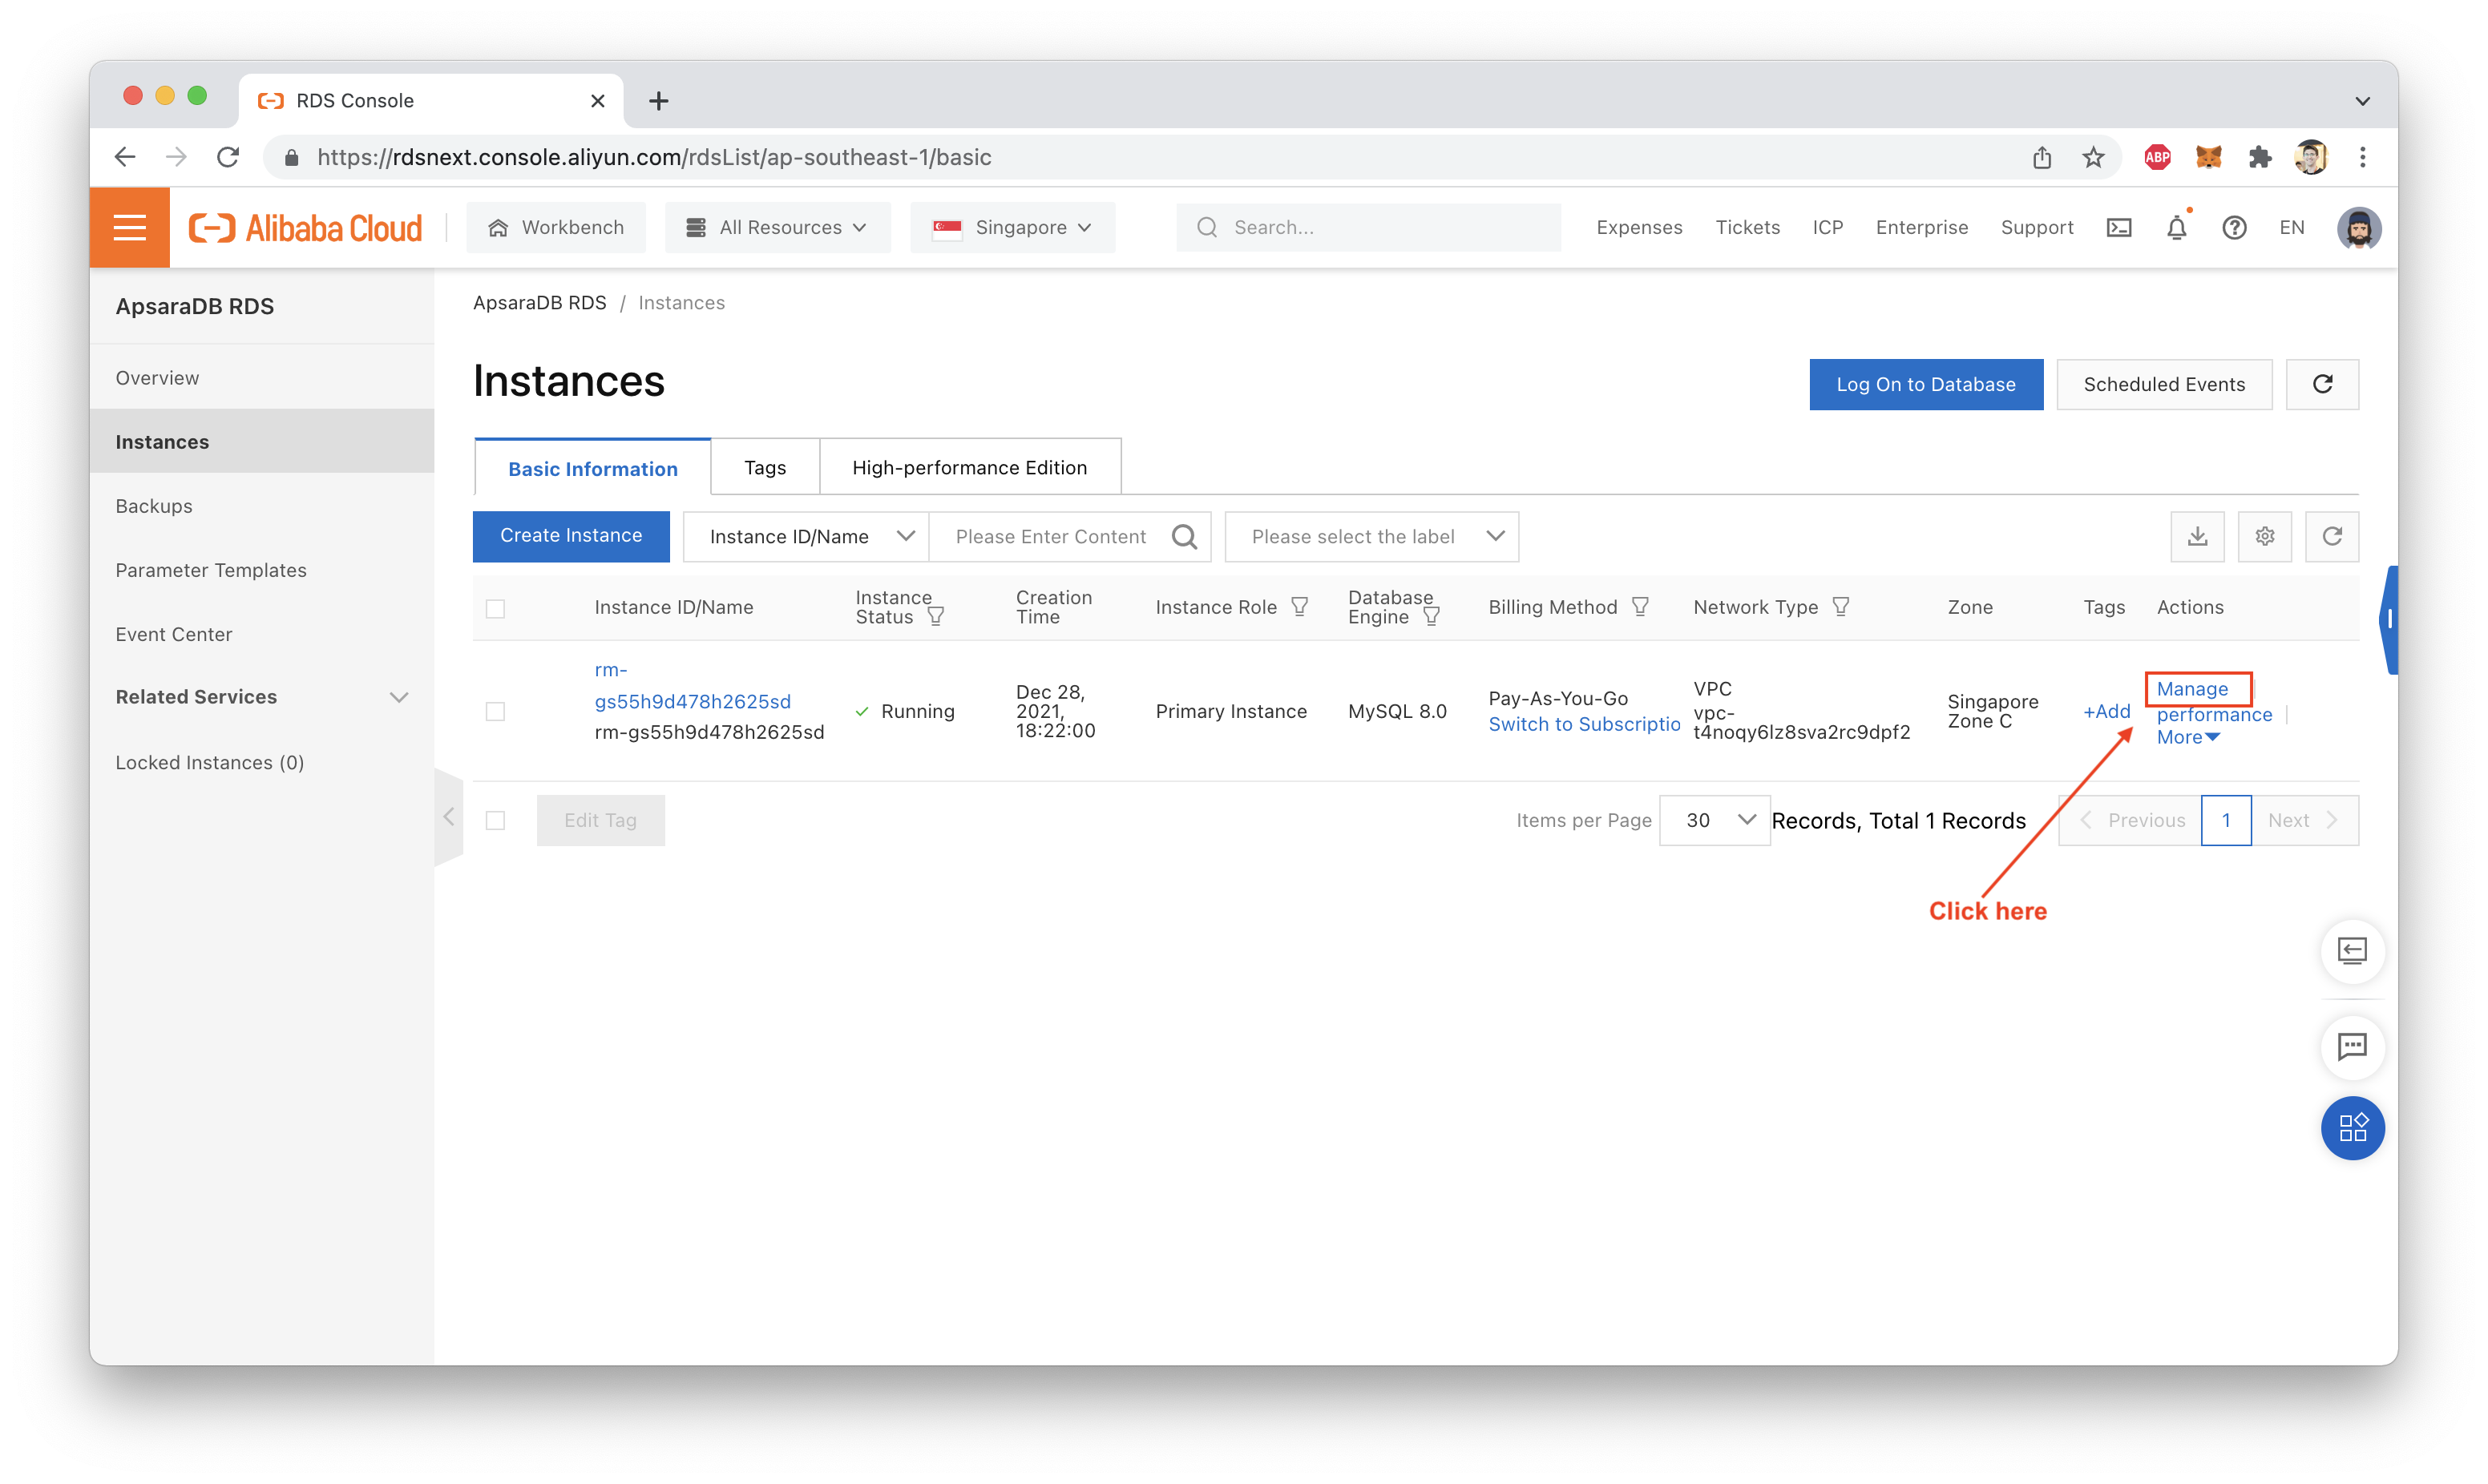
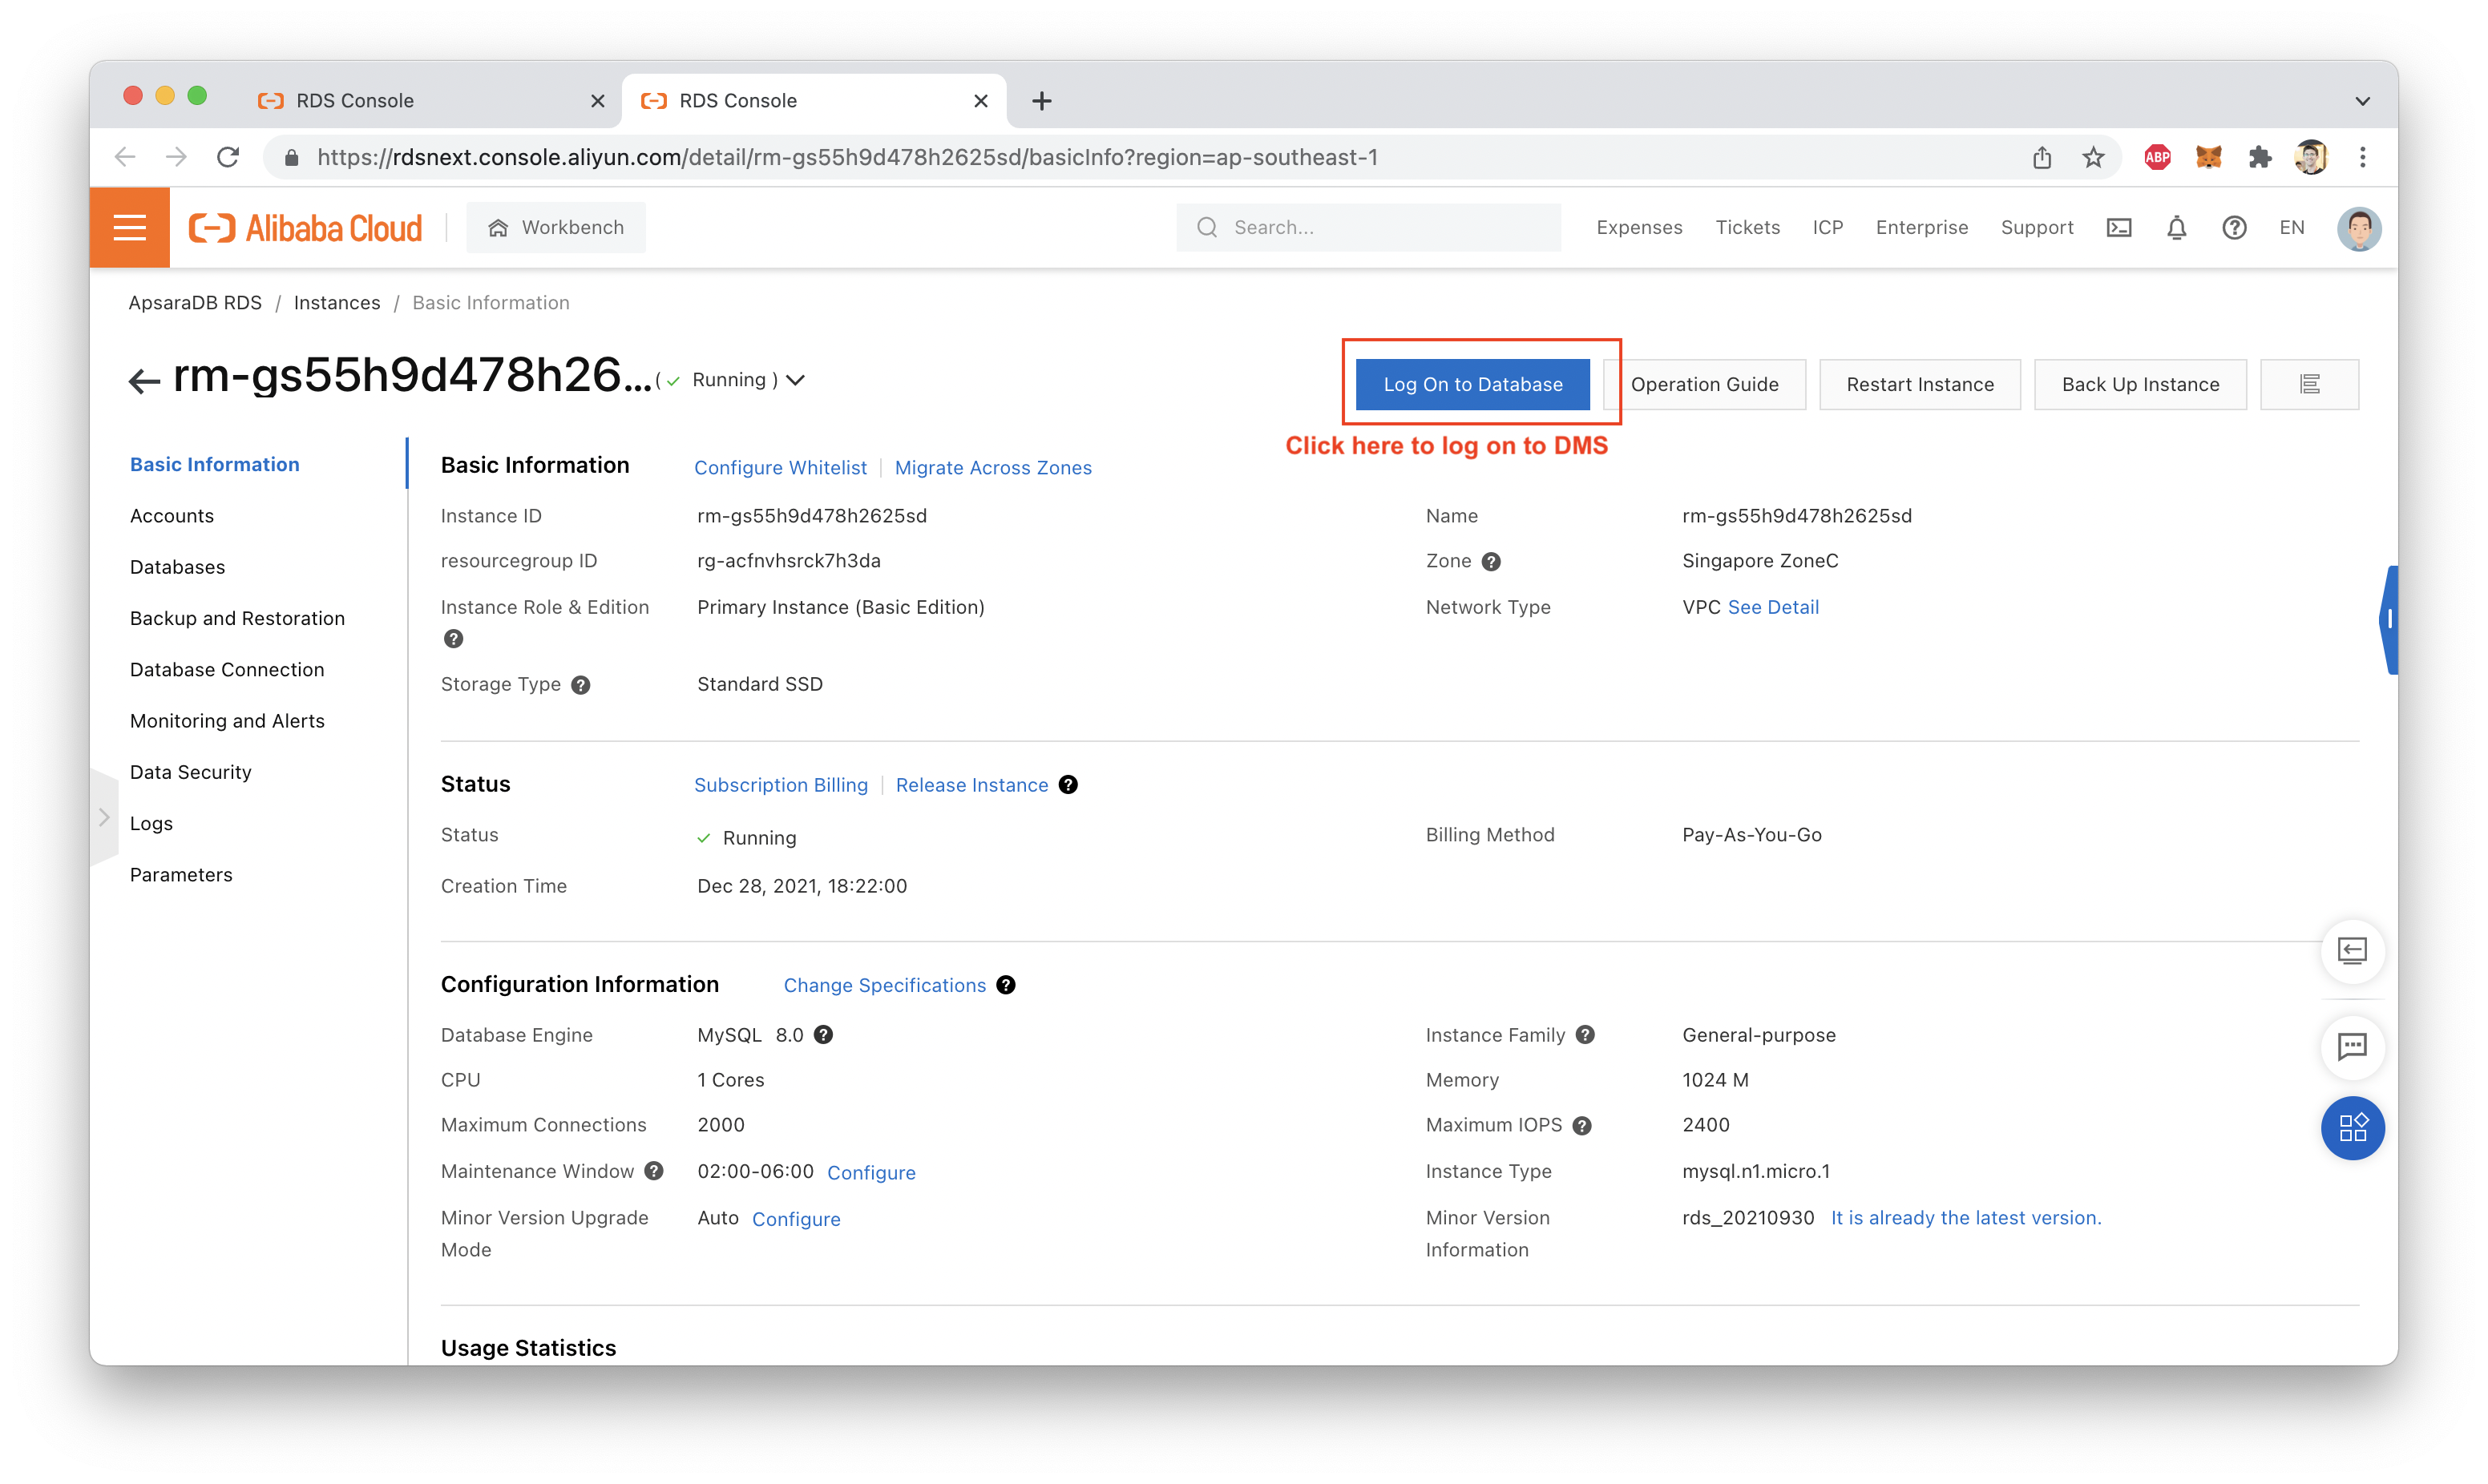
Next, let's see if it's really working! To do this, we need to navigate over to the RDS console and use DMS to log into the MySQL database:
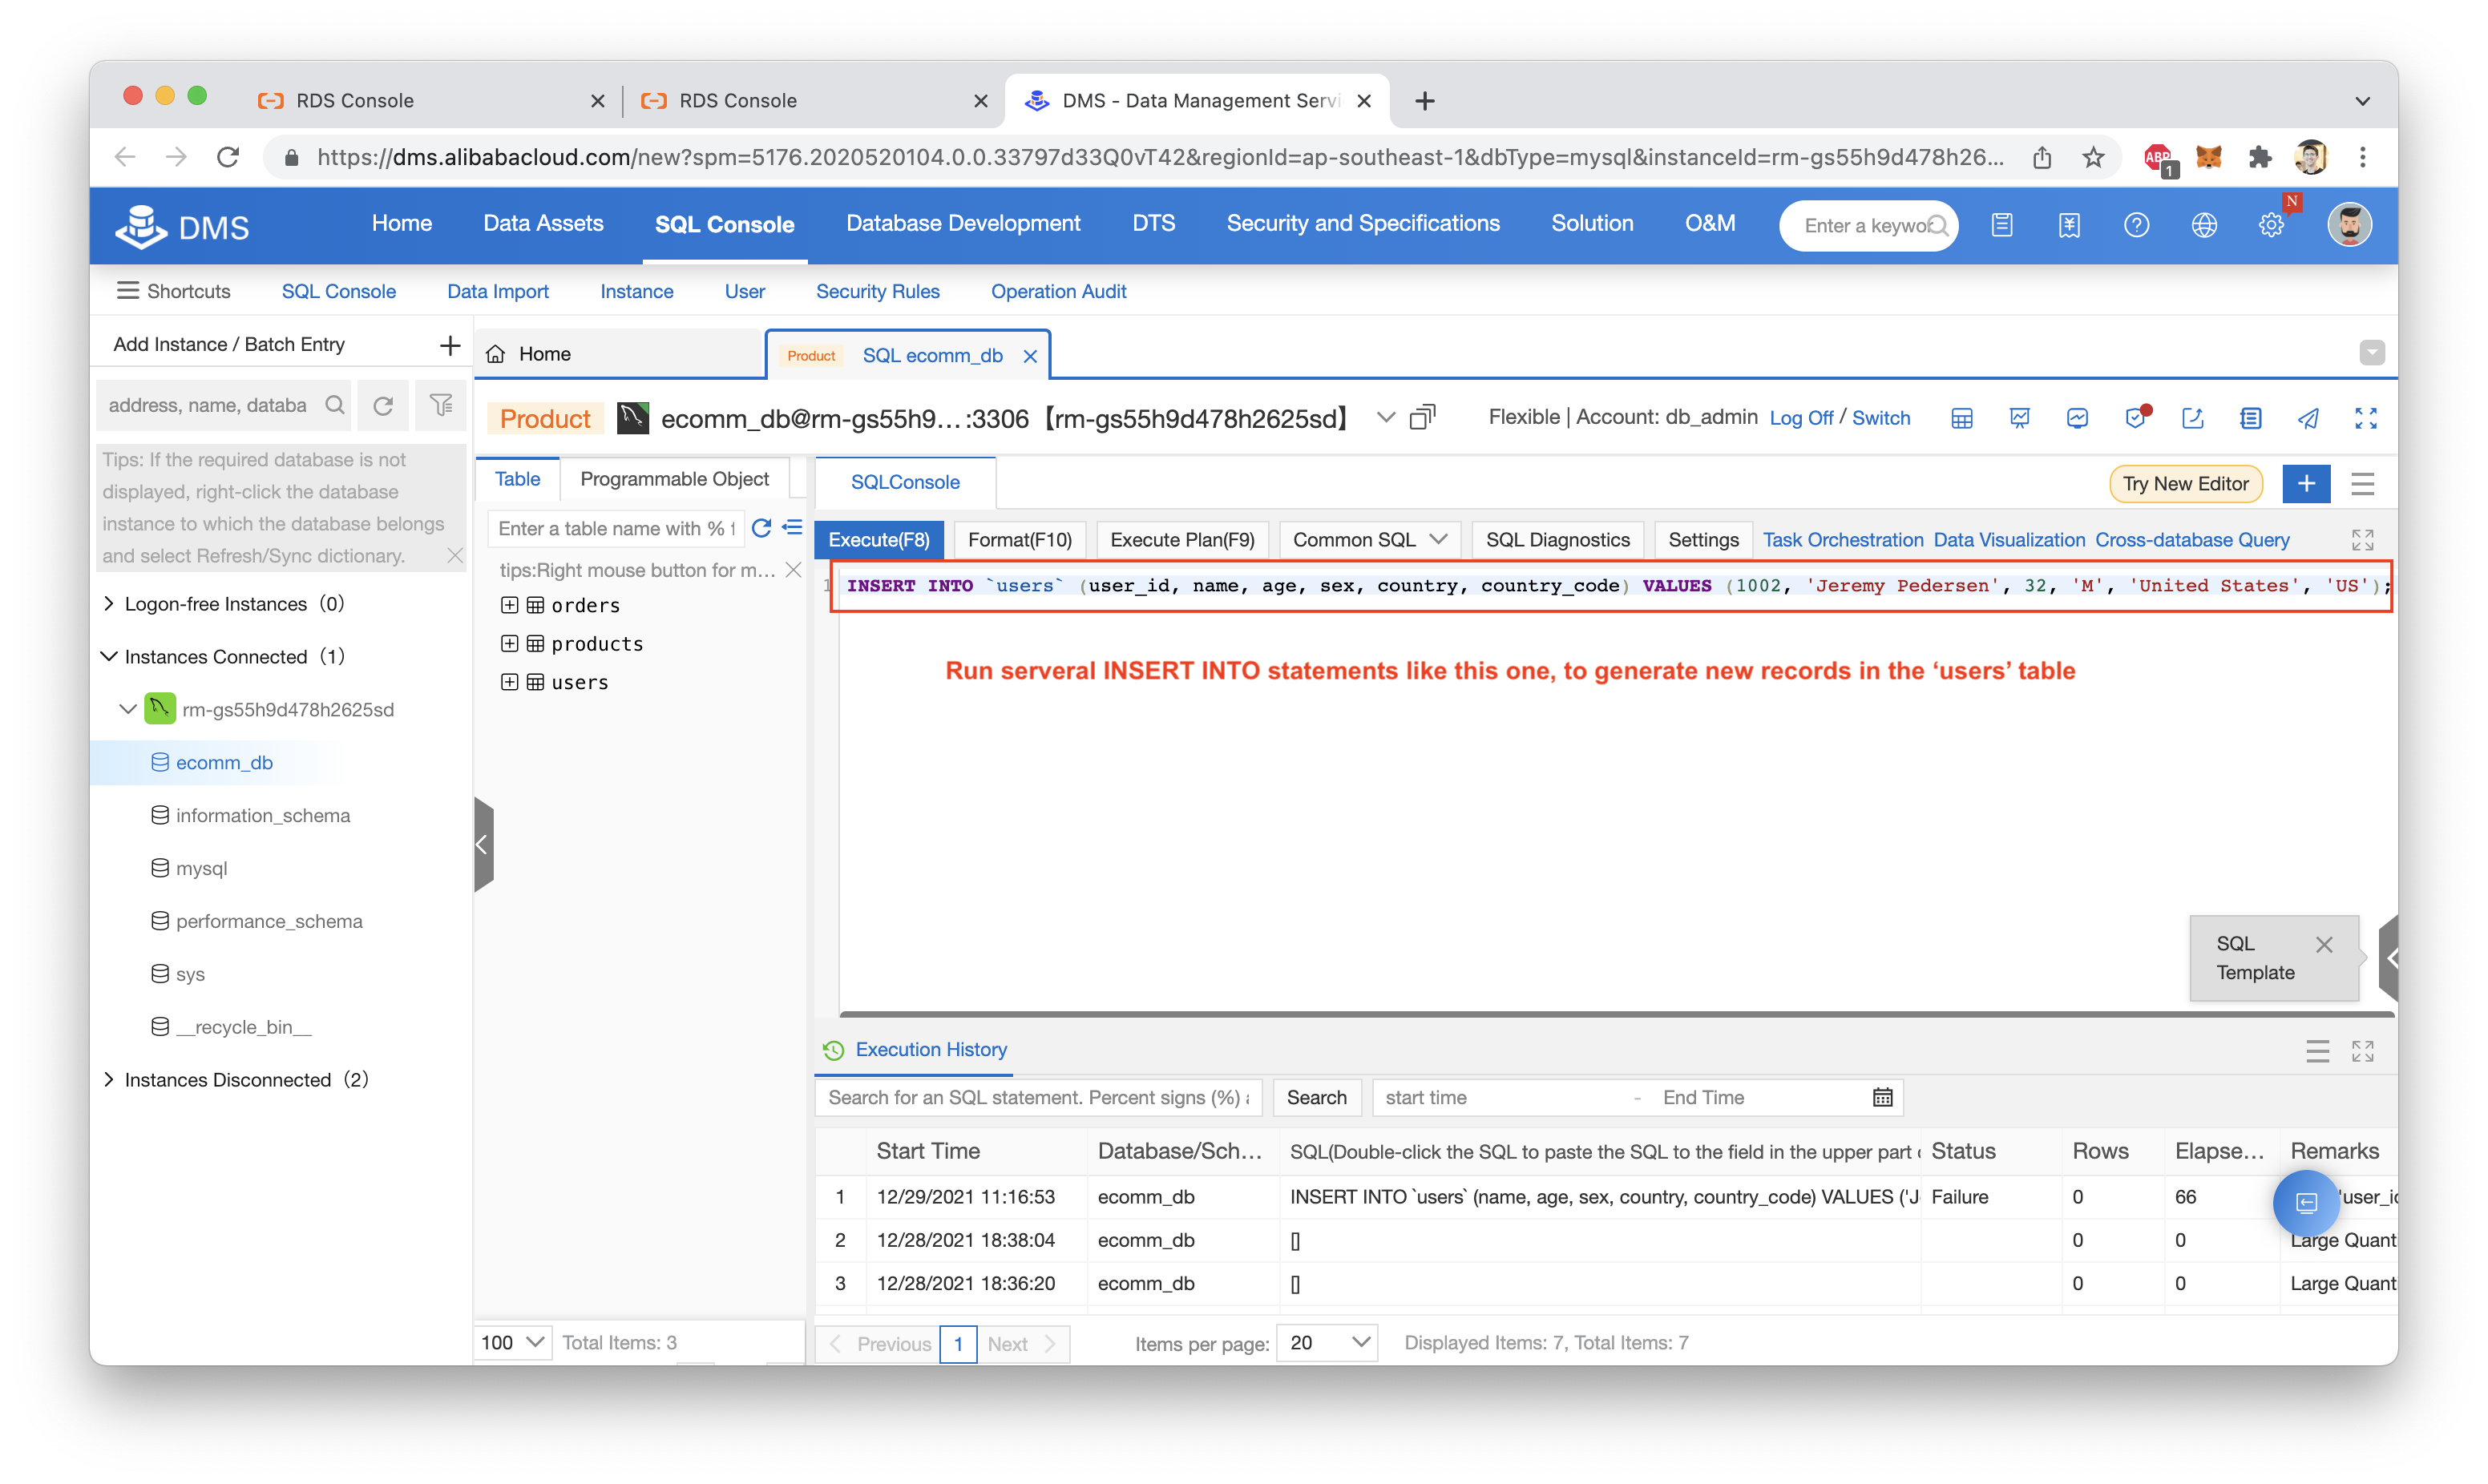
Assuming you have your MySQL database loaded with the test data from this blog post (mentioned several times above), you should be able to run these 3 INSERT INTO statements, to add some new users:
INSERT INTO `users` (user_id, name, age, sex, country, country_code) VALUES (1000, 'Kate Melgrove', 26, 'F', 'United States', 'US');

INSERT INTO `users` (user_id, name, age, sex, country, country_code) VALUES (1001, 'Gerald Rawlins', 55, 'M', 'United States', 'US');

INSERT INTO `users` (user_id, name, age, sex, country, country_code) VALUES (1002, 'Jeremy Pedersen', 32, 'M', 'United States', 'US');My MaxCompute project is called jdp_dw_test_maxp and my users table is called mysql_source_users. Let's see what happens if I attempt a full table read, looking only for users with a user ID higher than 999 (i.e. only the 3 records added above).
The SQL code for that is:
set odps.sql.allow.fullscan=true;
select * from jdp_dw_test_maxp.mysql_source_users WHERE user_id > 999;
And the results? See for yourself:
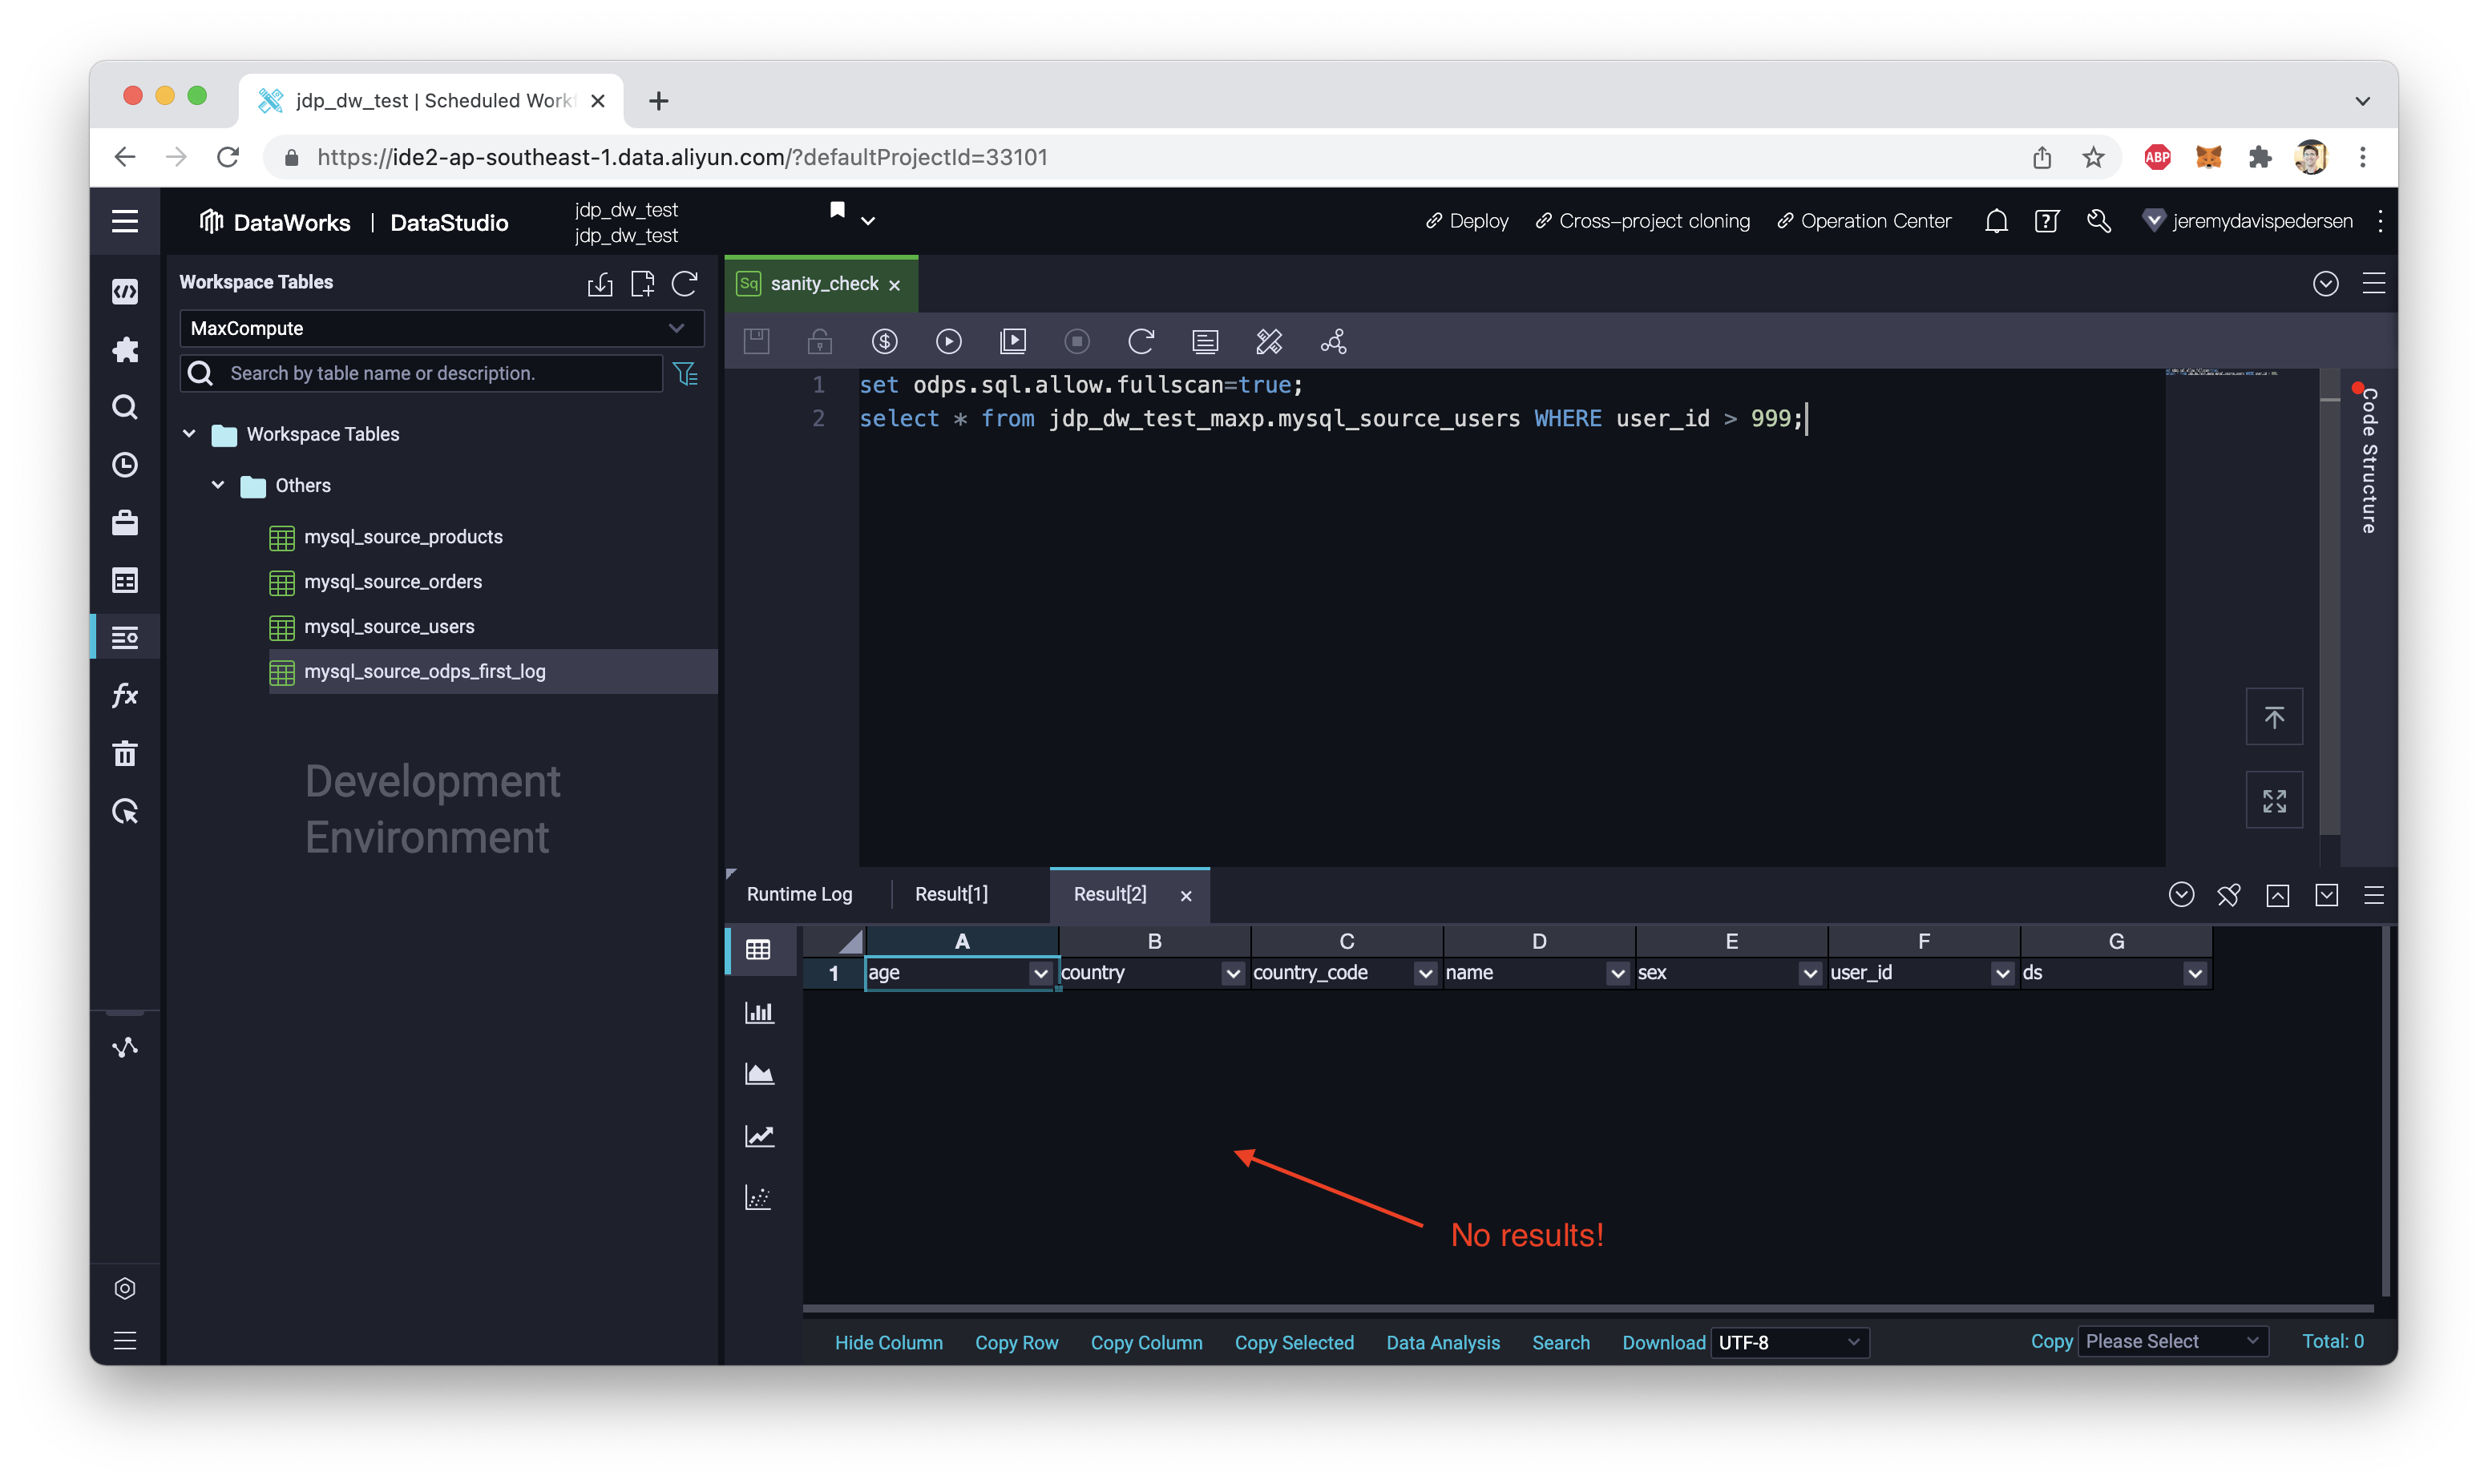
Nothing! So where is the data that we added?
Remember when we configured our real-time synchronization task, the task was set to update the MaxCompute table once a day. So where are the records going, when we add new items to users in the MySQL database? Is MaxCompute simply ignoring the changes? No. MaxCompute is reading those records in, as soon as they appear in MySQL. They are being stored temporarily in a "log" table. You can actually see that log table on the left-hand side of the DataStudio console:
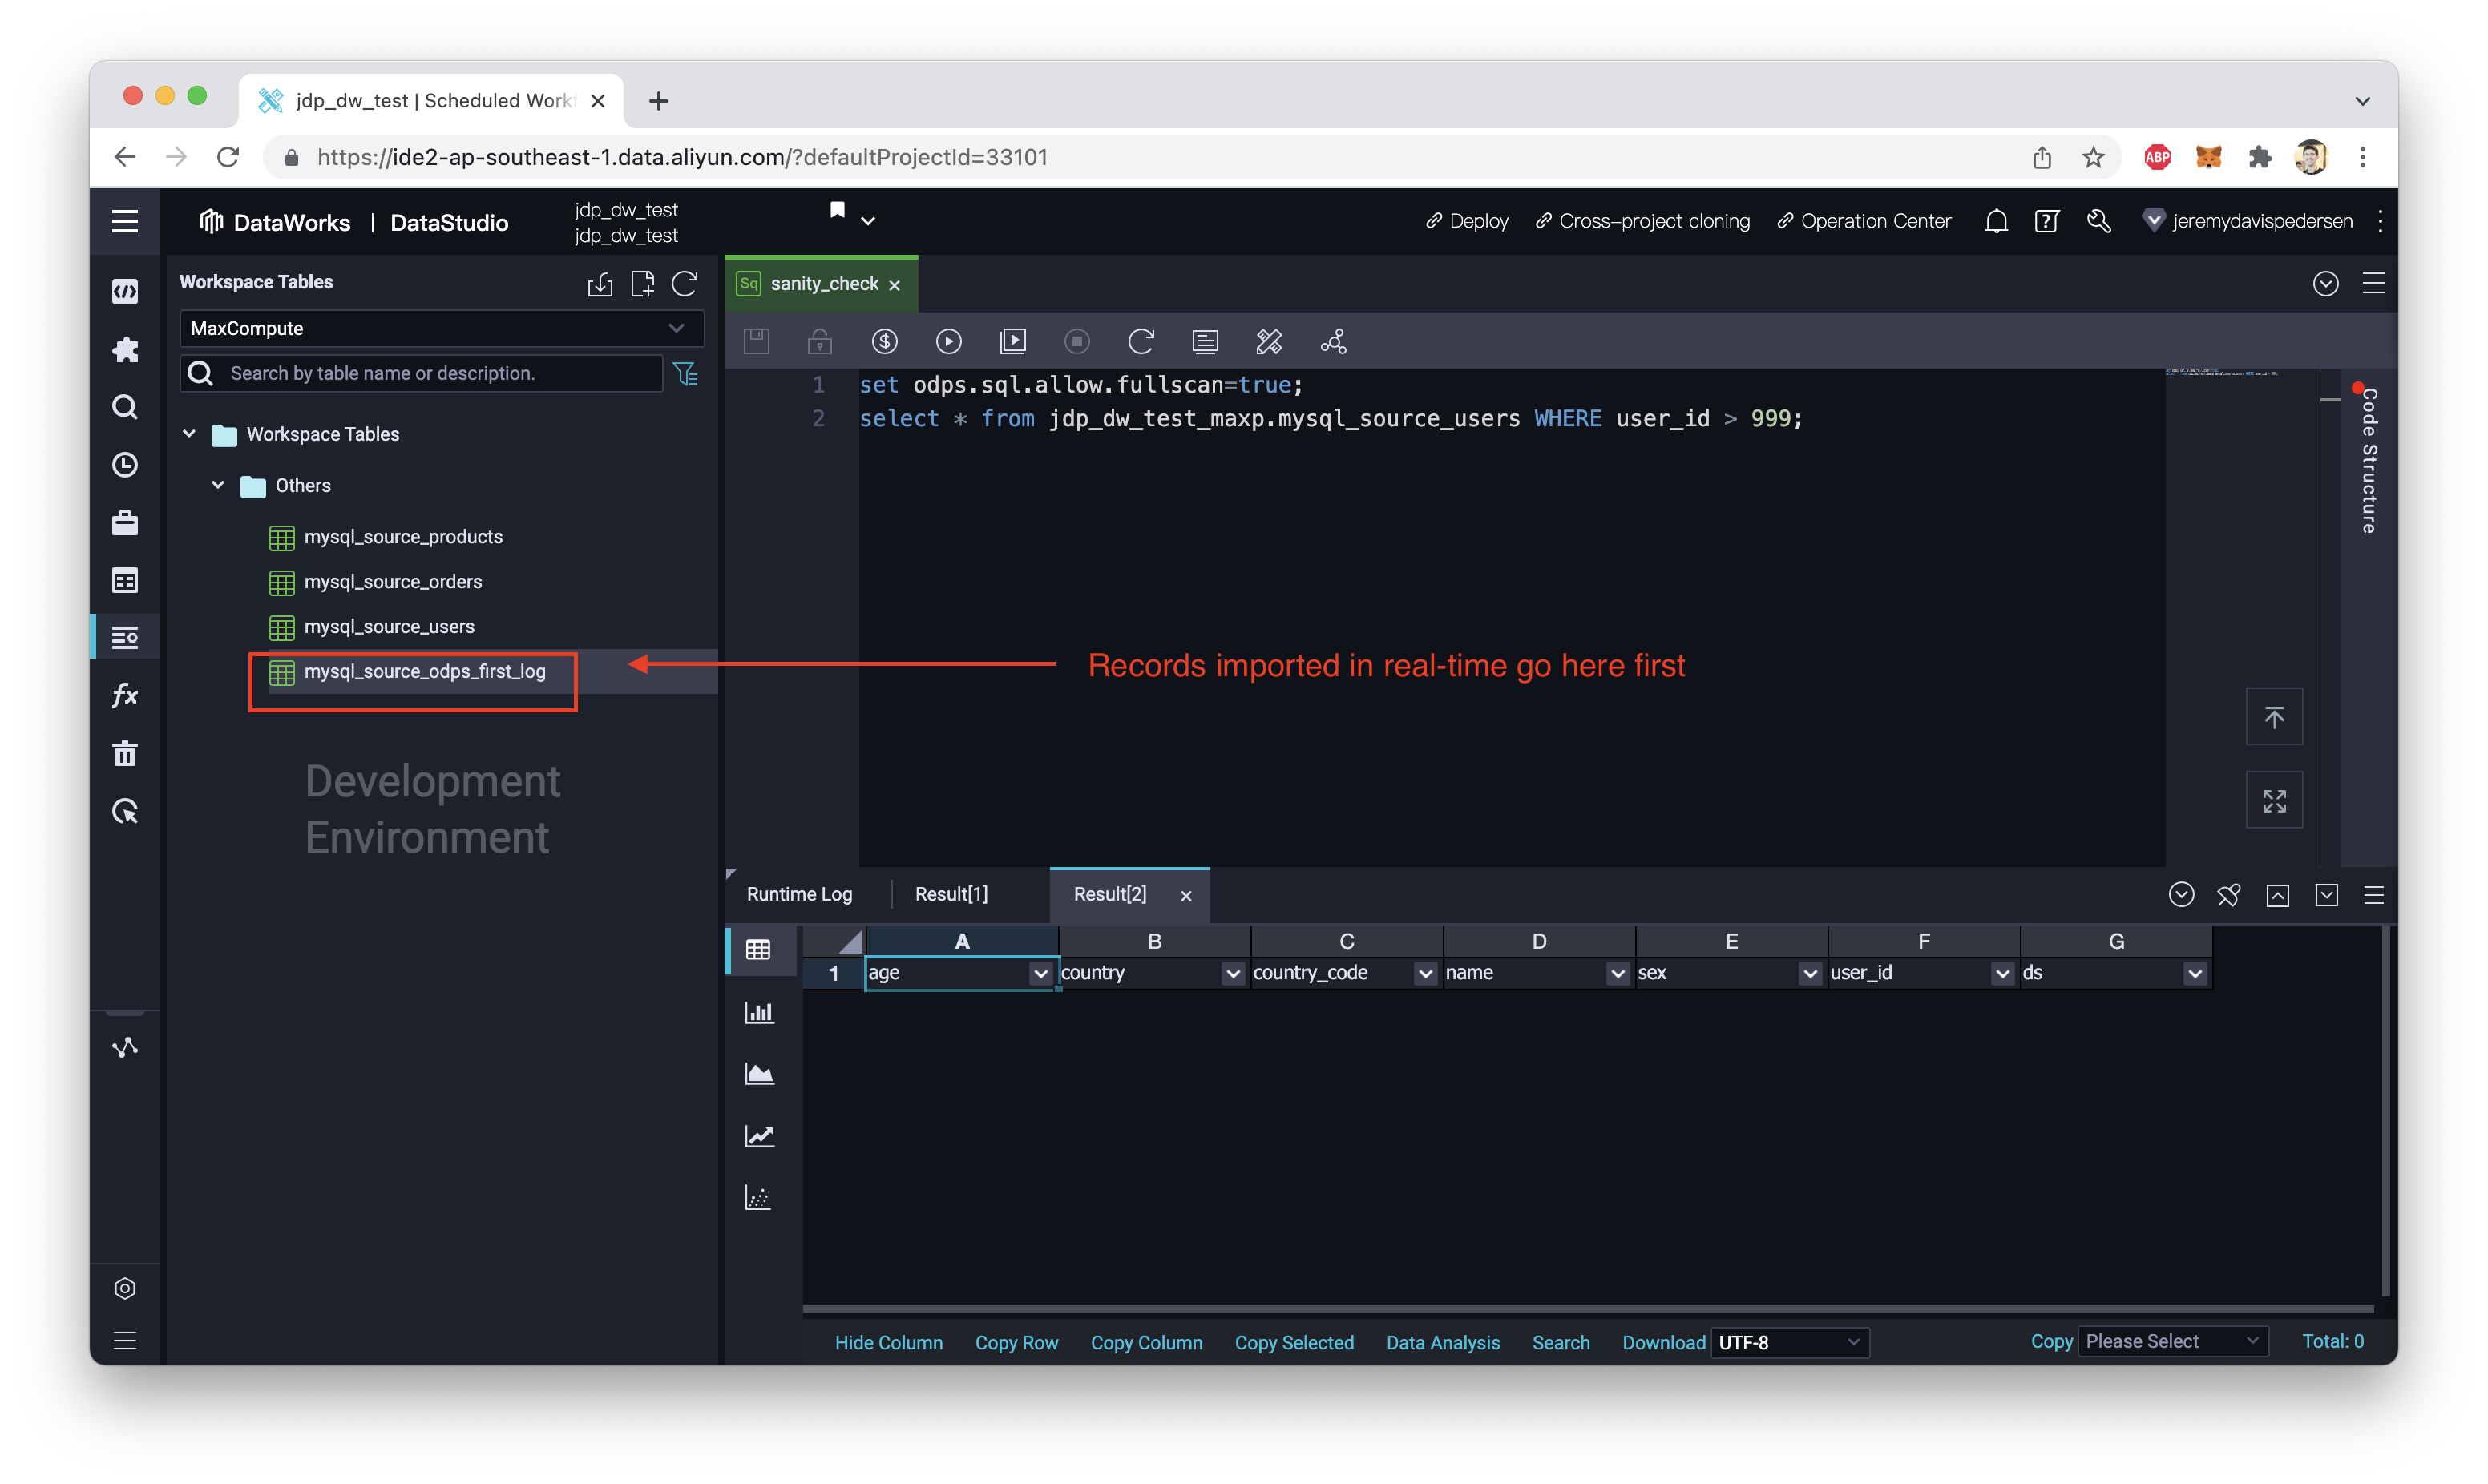
What happens if we query this table? Let's try:
set odps.sql.allow.fullscan=true;
select * from jdp_dw_test_maxp.mysql_source_odps_first_log;
So what's the result? This time, it works!
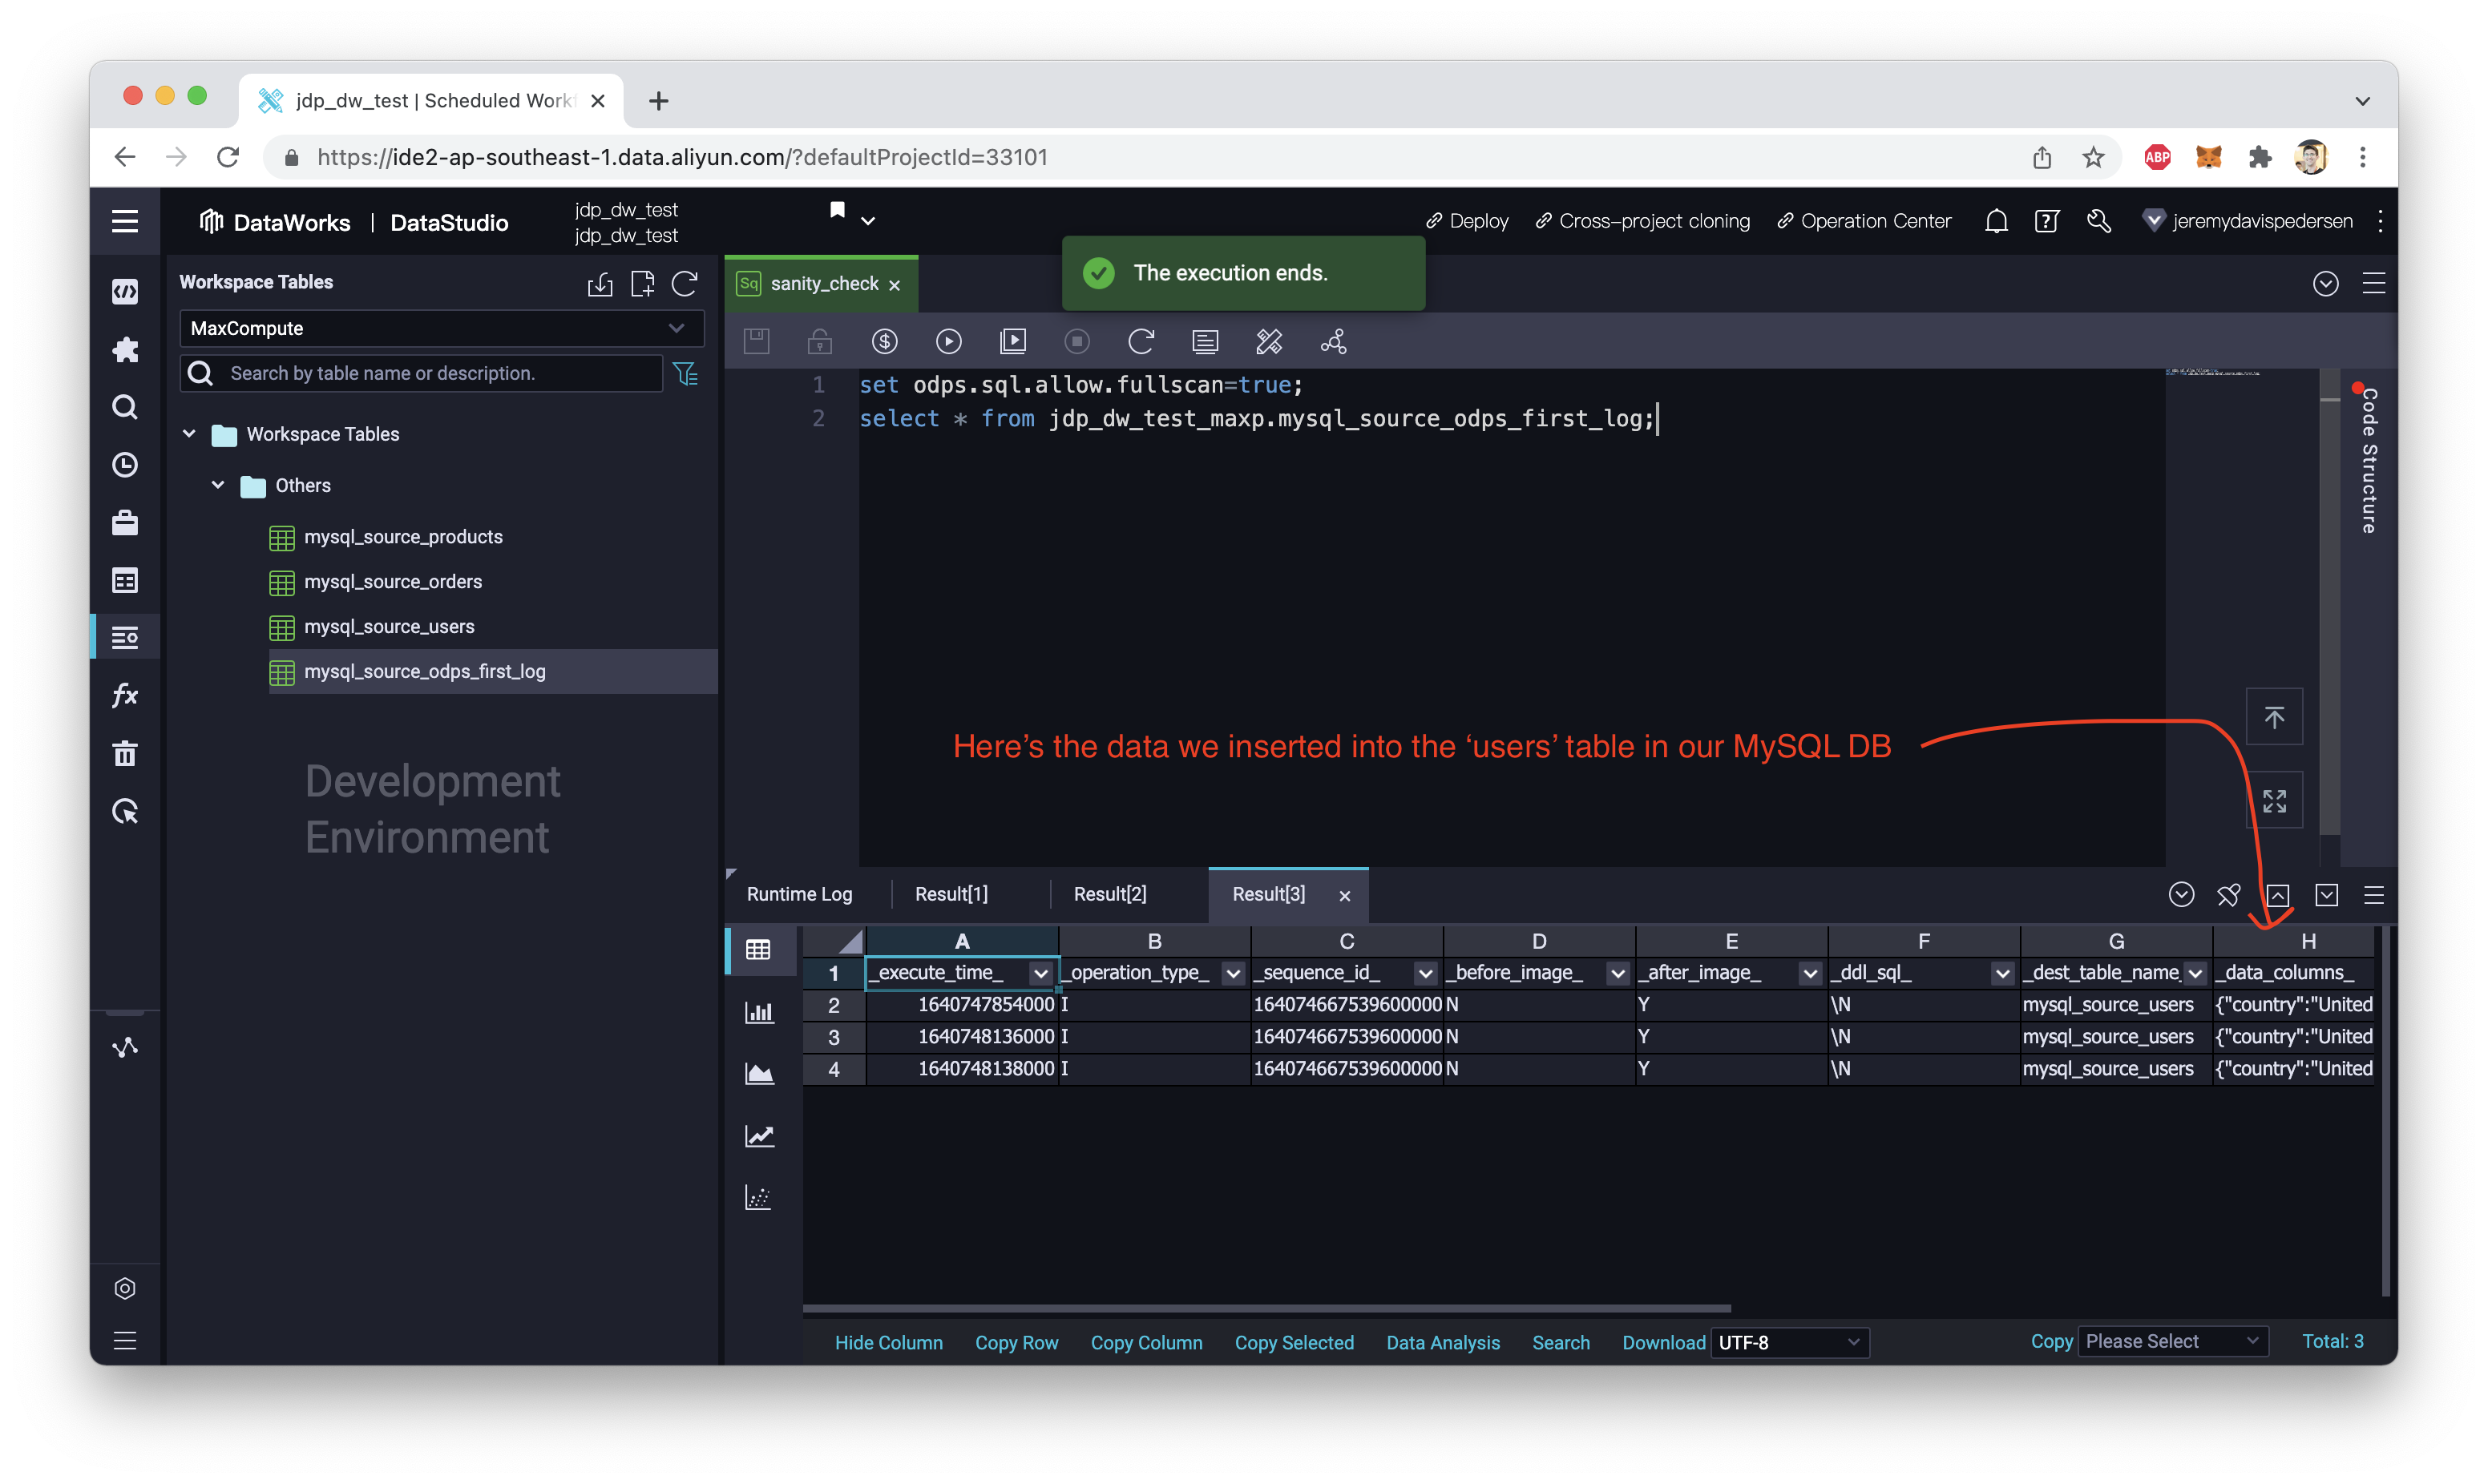
If we wait long enough, the entries in the "log" table will be added to the users table in MaxCompute, which is called mysql_source_users. I executed the INSERT INTO statements (above) on 2021-12-29, and they showed up in the _log table in MaxCompute just a few seconds later.
I then waited a few days, dear readers, and re-ran my SQL query on the mysql_source_users table, using this SQL query:
set odps.sql.allow.fullscan=true;
select * from jdp_dw_test_maxp.mysql_source_users WHERE ds = 20220103 and user_id > 999;
The result? Now the records have been added:
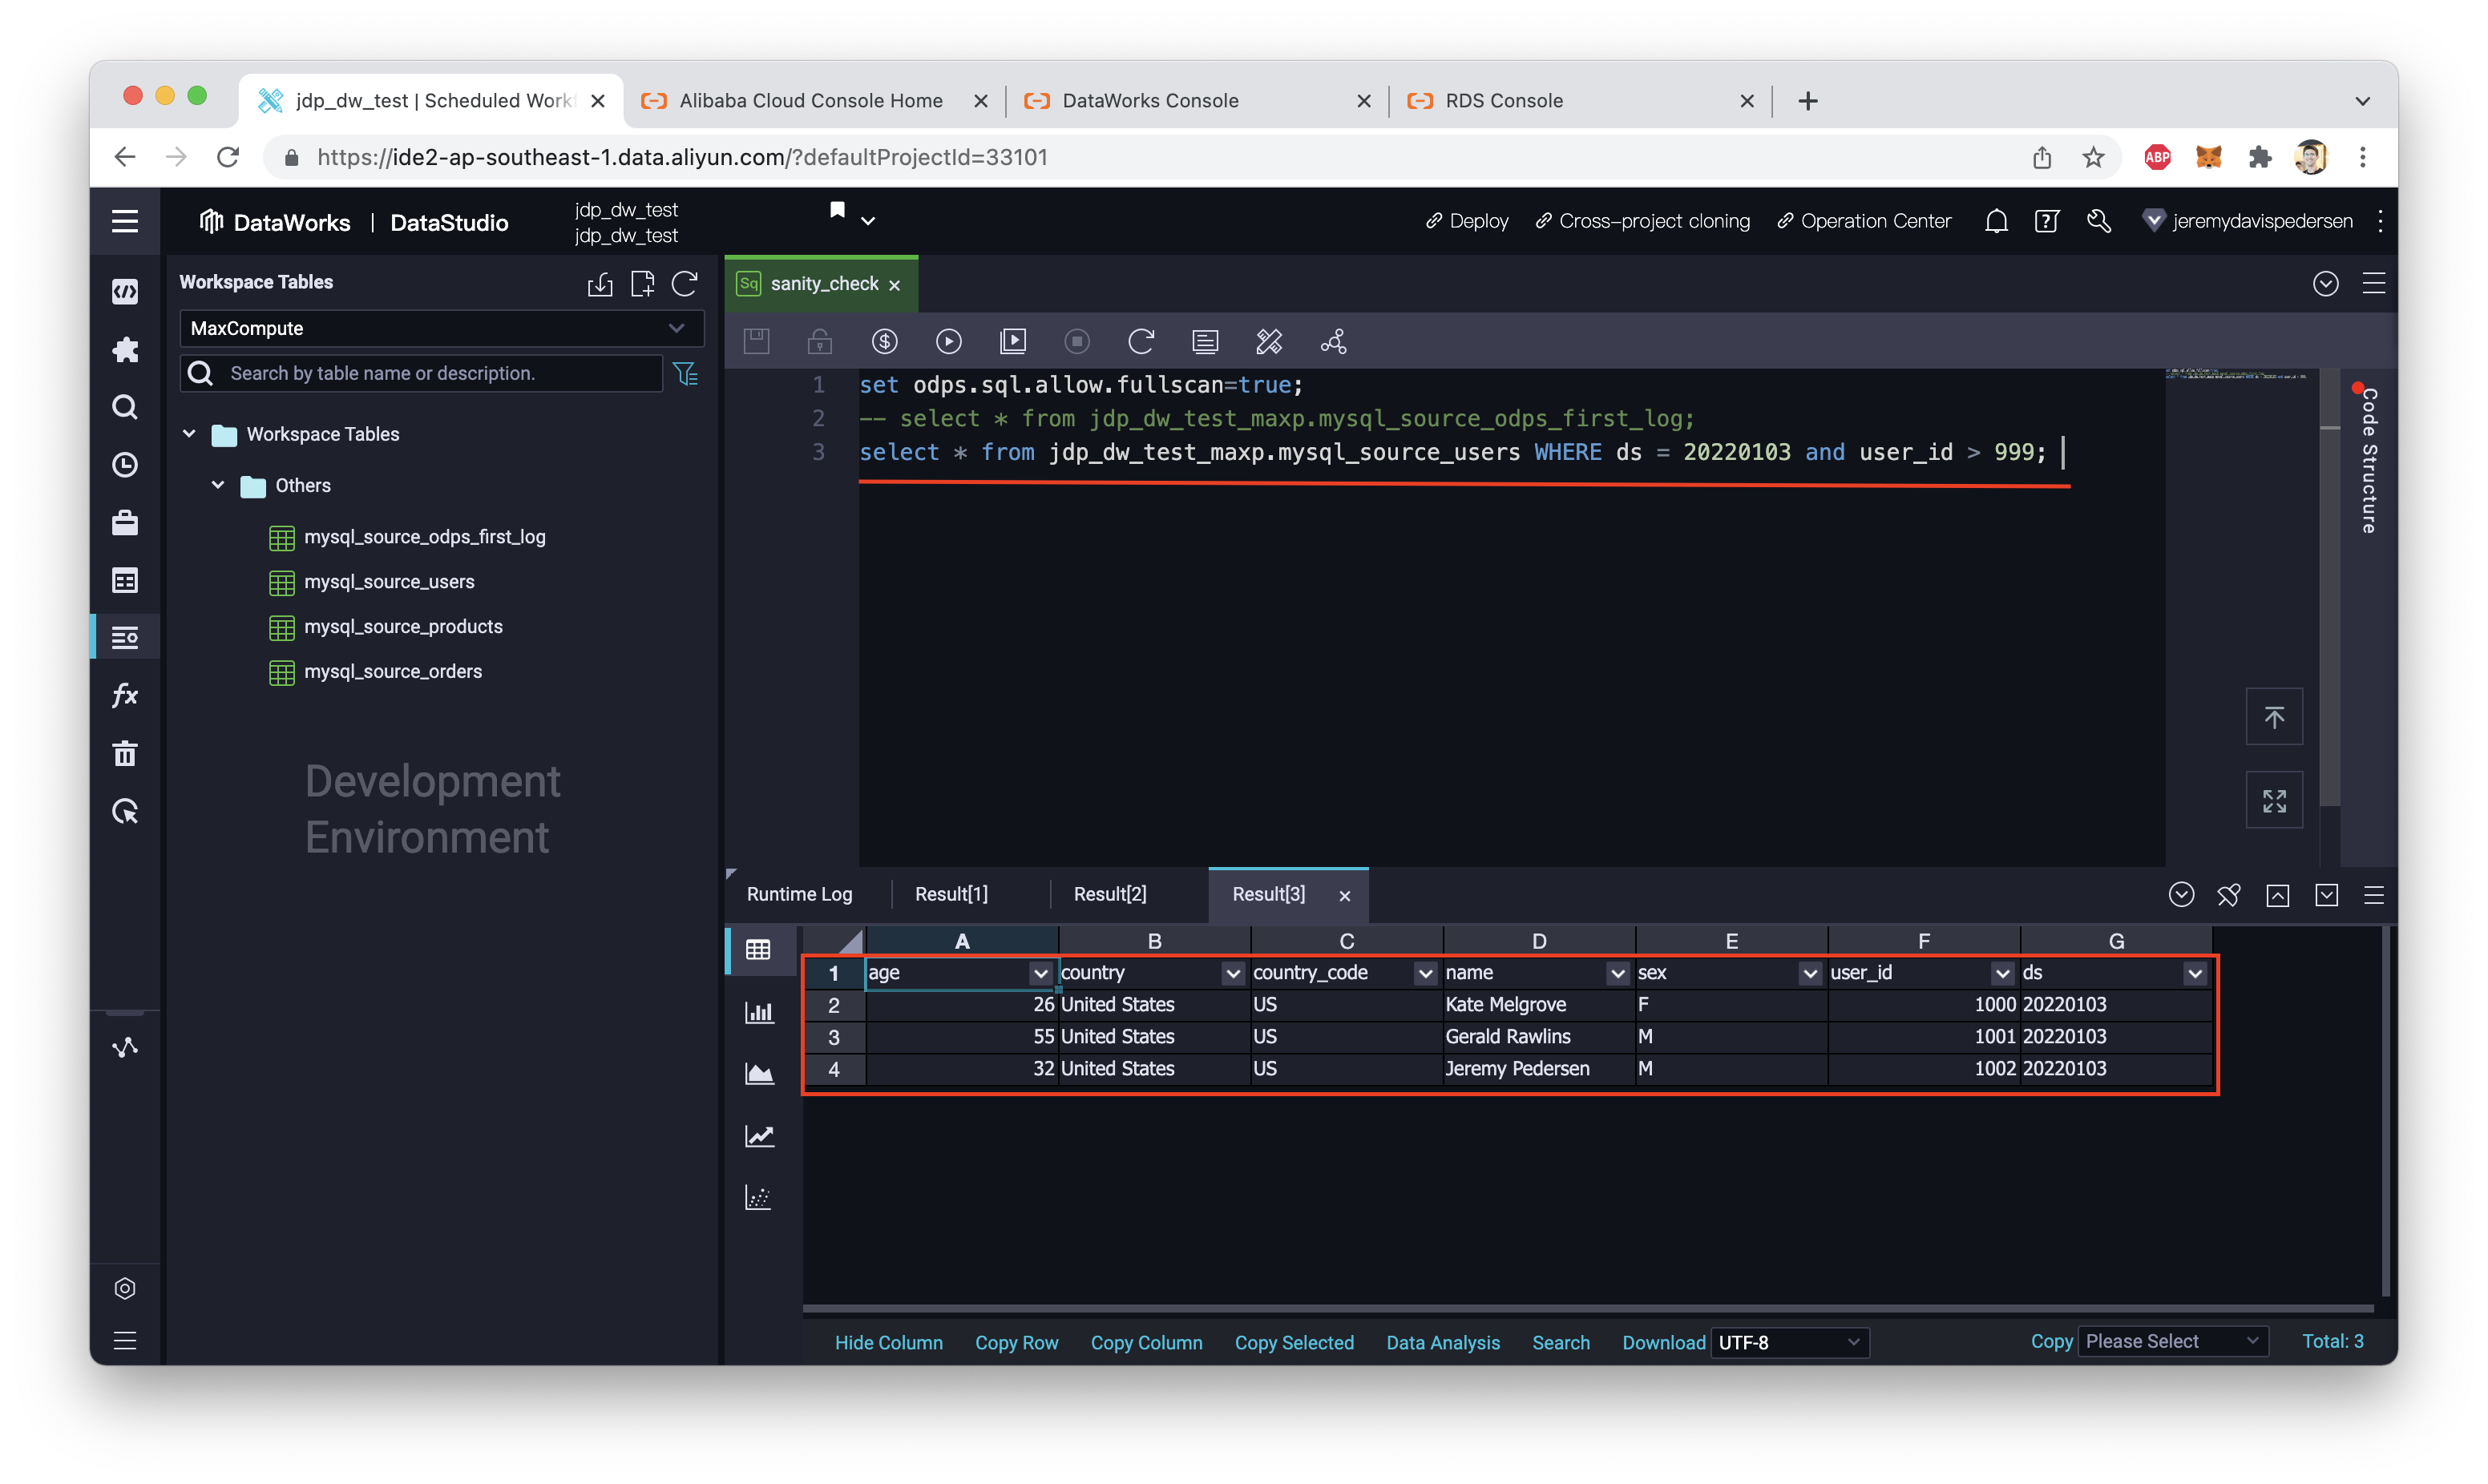
So everything is working as intended!
Now you know how to set up realtime synchronization between MySQL and MaxCompute! Use the knowledge well.
Great! Reach out to me at jierui.pjr@alibabacloud.com and I'll do my best to answer in a future Friday Q&A blog.
You can also follow the Alibaba Cloud Academy LinkedIn Page. We'll re-post these blogs there each Friday.
Dealing With Data: Batch Data Import Using DataWorks - Friday Blog - Week 41
Show Me The Money! Data Warehouse Costs With MaxCompute and DataWorks - Week 43
JDP - December 30, 2021
JDP - May 20, 2021
JDP - June 17, 2022
JDP - October 28, 2021
JDP - June 11, 2021
JDP - June 25, 2021
 MaxCompute
Conduct large-scale data warehousing with MaxCompute
Learn More Data Integration
Data Integration is an all-in-one data synchronization platform. The platform supports online real-time and offline data exchange between all data sources, networks, and locations.
Learn More Real-Time Livestreaming Solutions
Stream sports and events on the Internet smoothly to worldwide audiences concurrently
Learn More DataWorks
A secure environment for offline data development, with powerful Open APIs, to create an ecosystem for redevelopment.
Learn MoreMore Posts by JDP