By: Jeremy Pedersen
Early warning: Today's blog depends on a subscription-only feature in DataWorks Data Integration, so only follow along if you are OK spending some money. If not, please still read along so you can at least see how it all works!
This week's blog will be short, sweet, and do the point.
The scenario: You have just created a new DataWorks Workspace, and have chosen MaxCompute as the compute engine for the workspace.
The problem: You have a source database that you want to synchronize with MaxCompute. Ok, no problem! But maybe you have a few dozen or even a few hundred tables you need to import! You don't want to create synchronization nodes for all these tables, so what can you do?
The solution: use the Sync Solutions feature in DataWorks Data Integration to set up a synchronization task.
This handy feature supports a lot of different use-cases:
This is great, because it means you can perform a one time full migration of your data - across multiple tables - then follow that with regular hourly, daily, or weekly incremental imports.
For large sets of tables, this can be a lot less hassle than configuring batch synchronization nodes one-by-one in a DataWorks Worfklow.
Let's try it out!
## First Steps: Configuring A Data Source
As always, we need some data to use for testing. You can follow along with this blog post to set up an RDS MySQL database and import some imaginary E-Commerce data.
Once you've done that, you'll need to create a new DataWorks Workspace.
If you have not created a DataWorks workspace before, you can follow along with this blog post but stop when you get to the Creating Data Sources step, which is here:
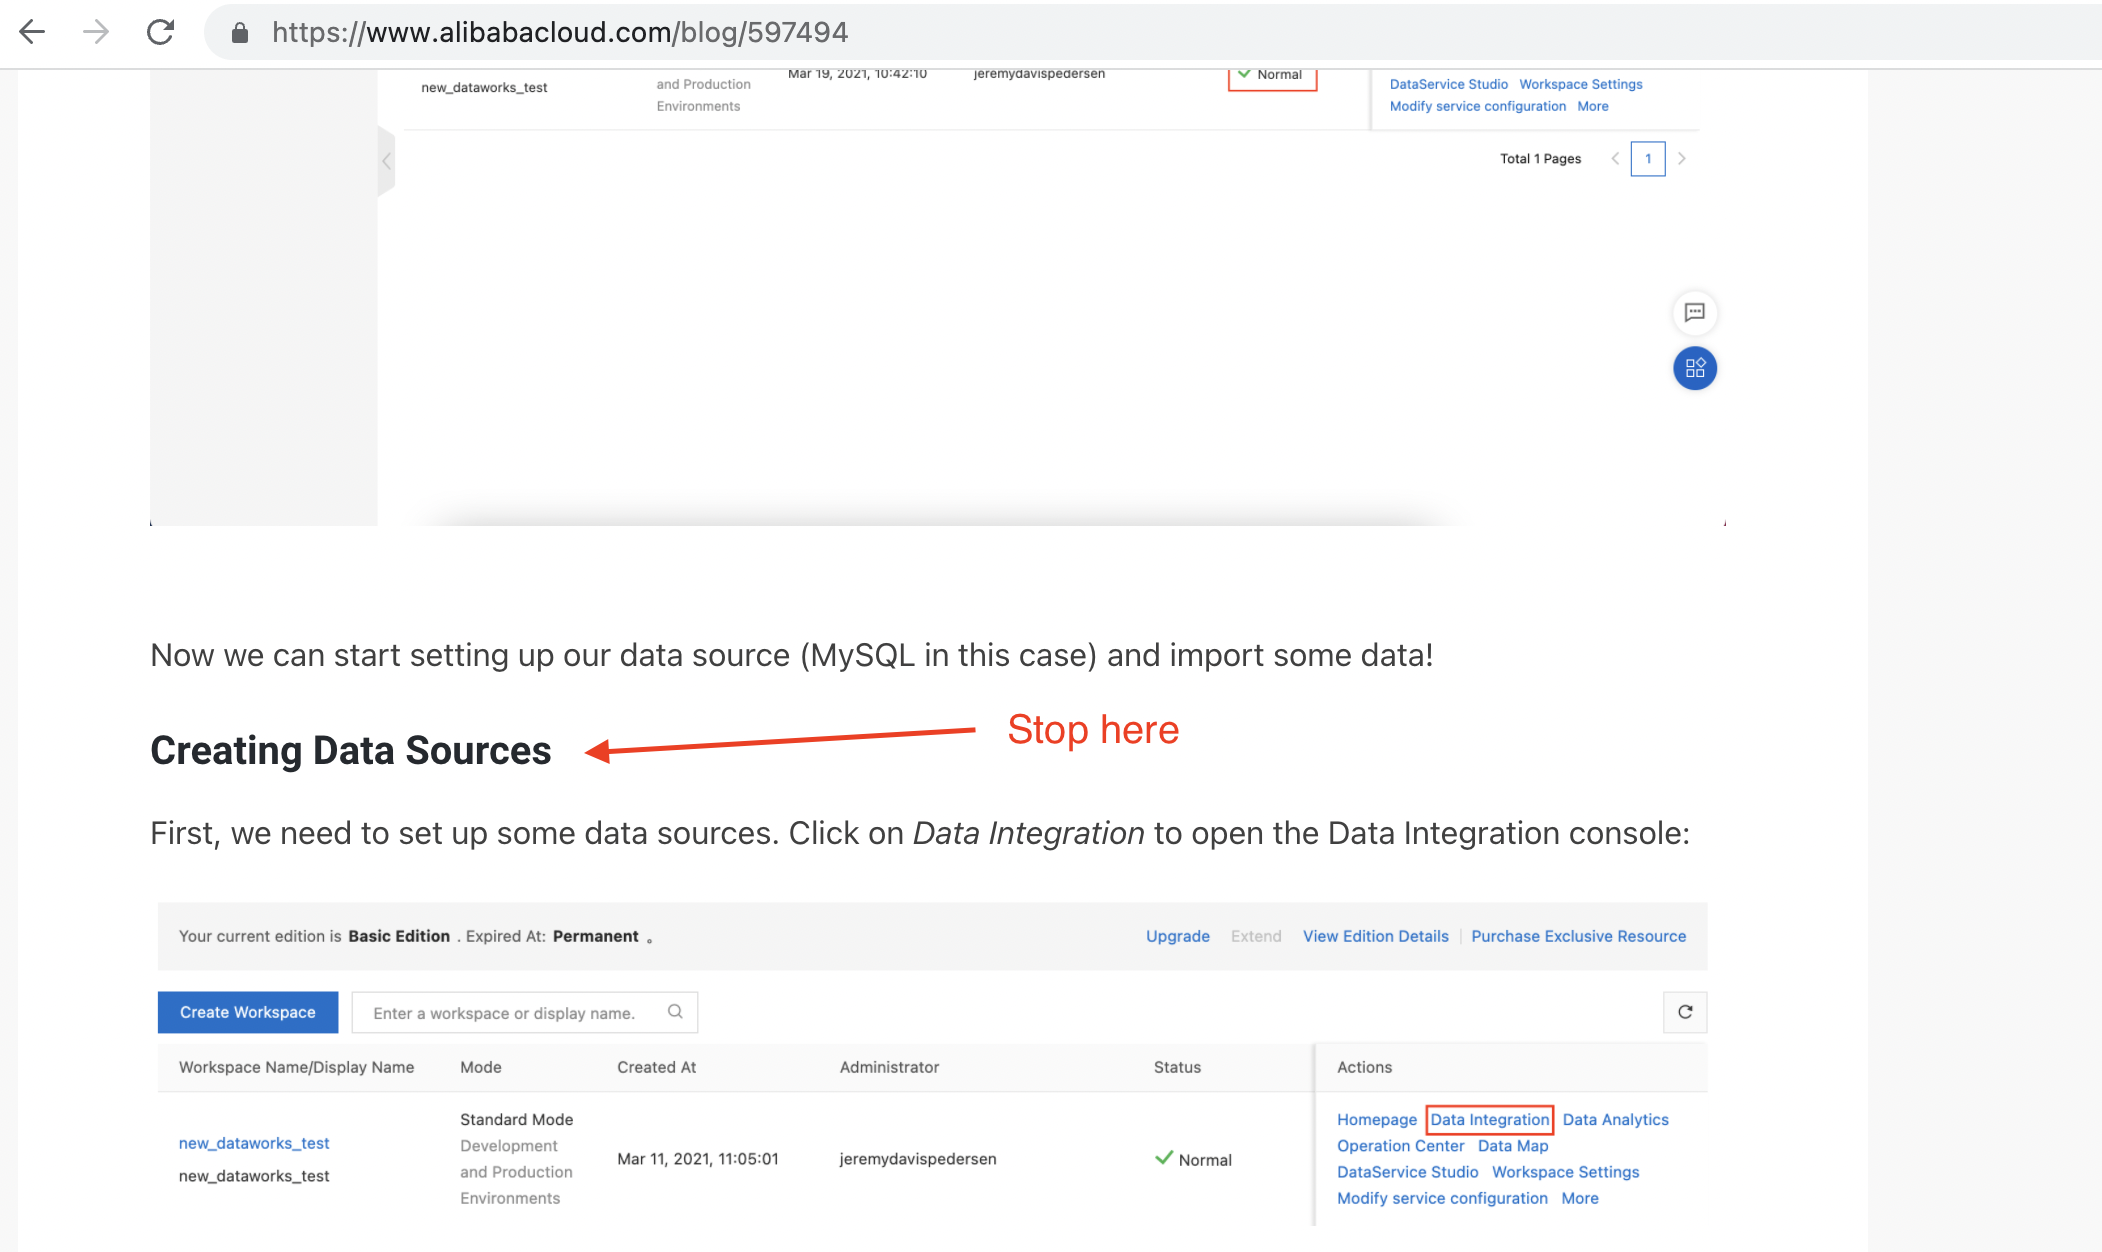
Done setting up your DataWorks Workspace? Great! Now we can move on to batch importing our data from MySQL!
## Batch Import With A "Sync Task"
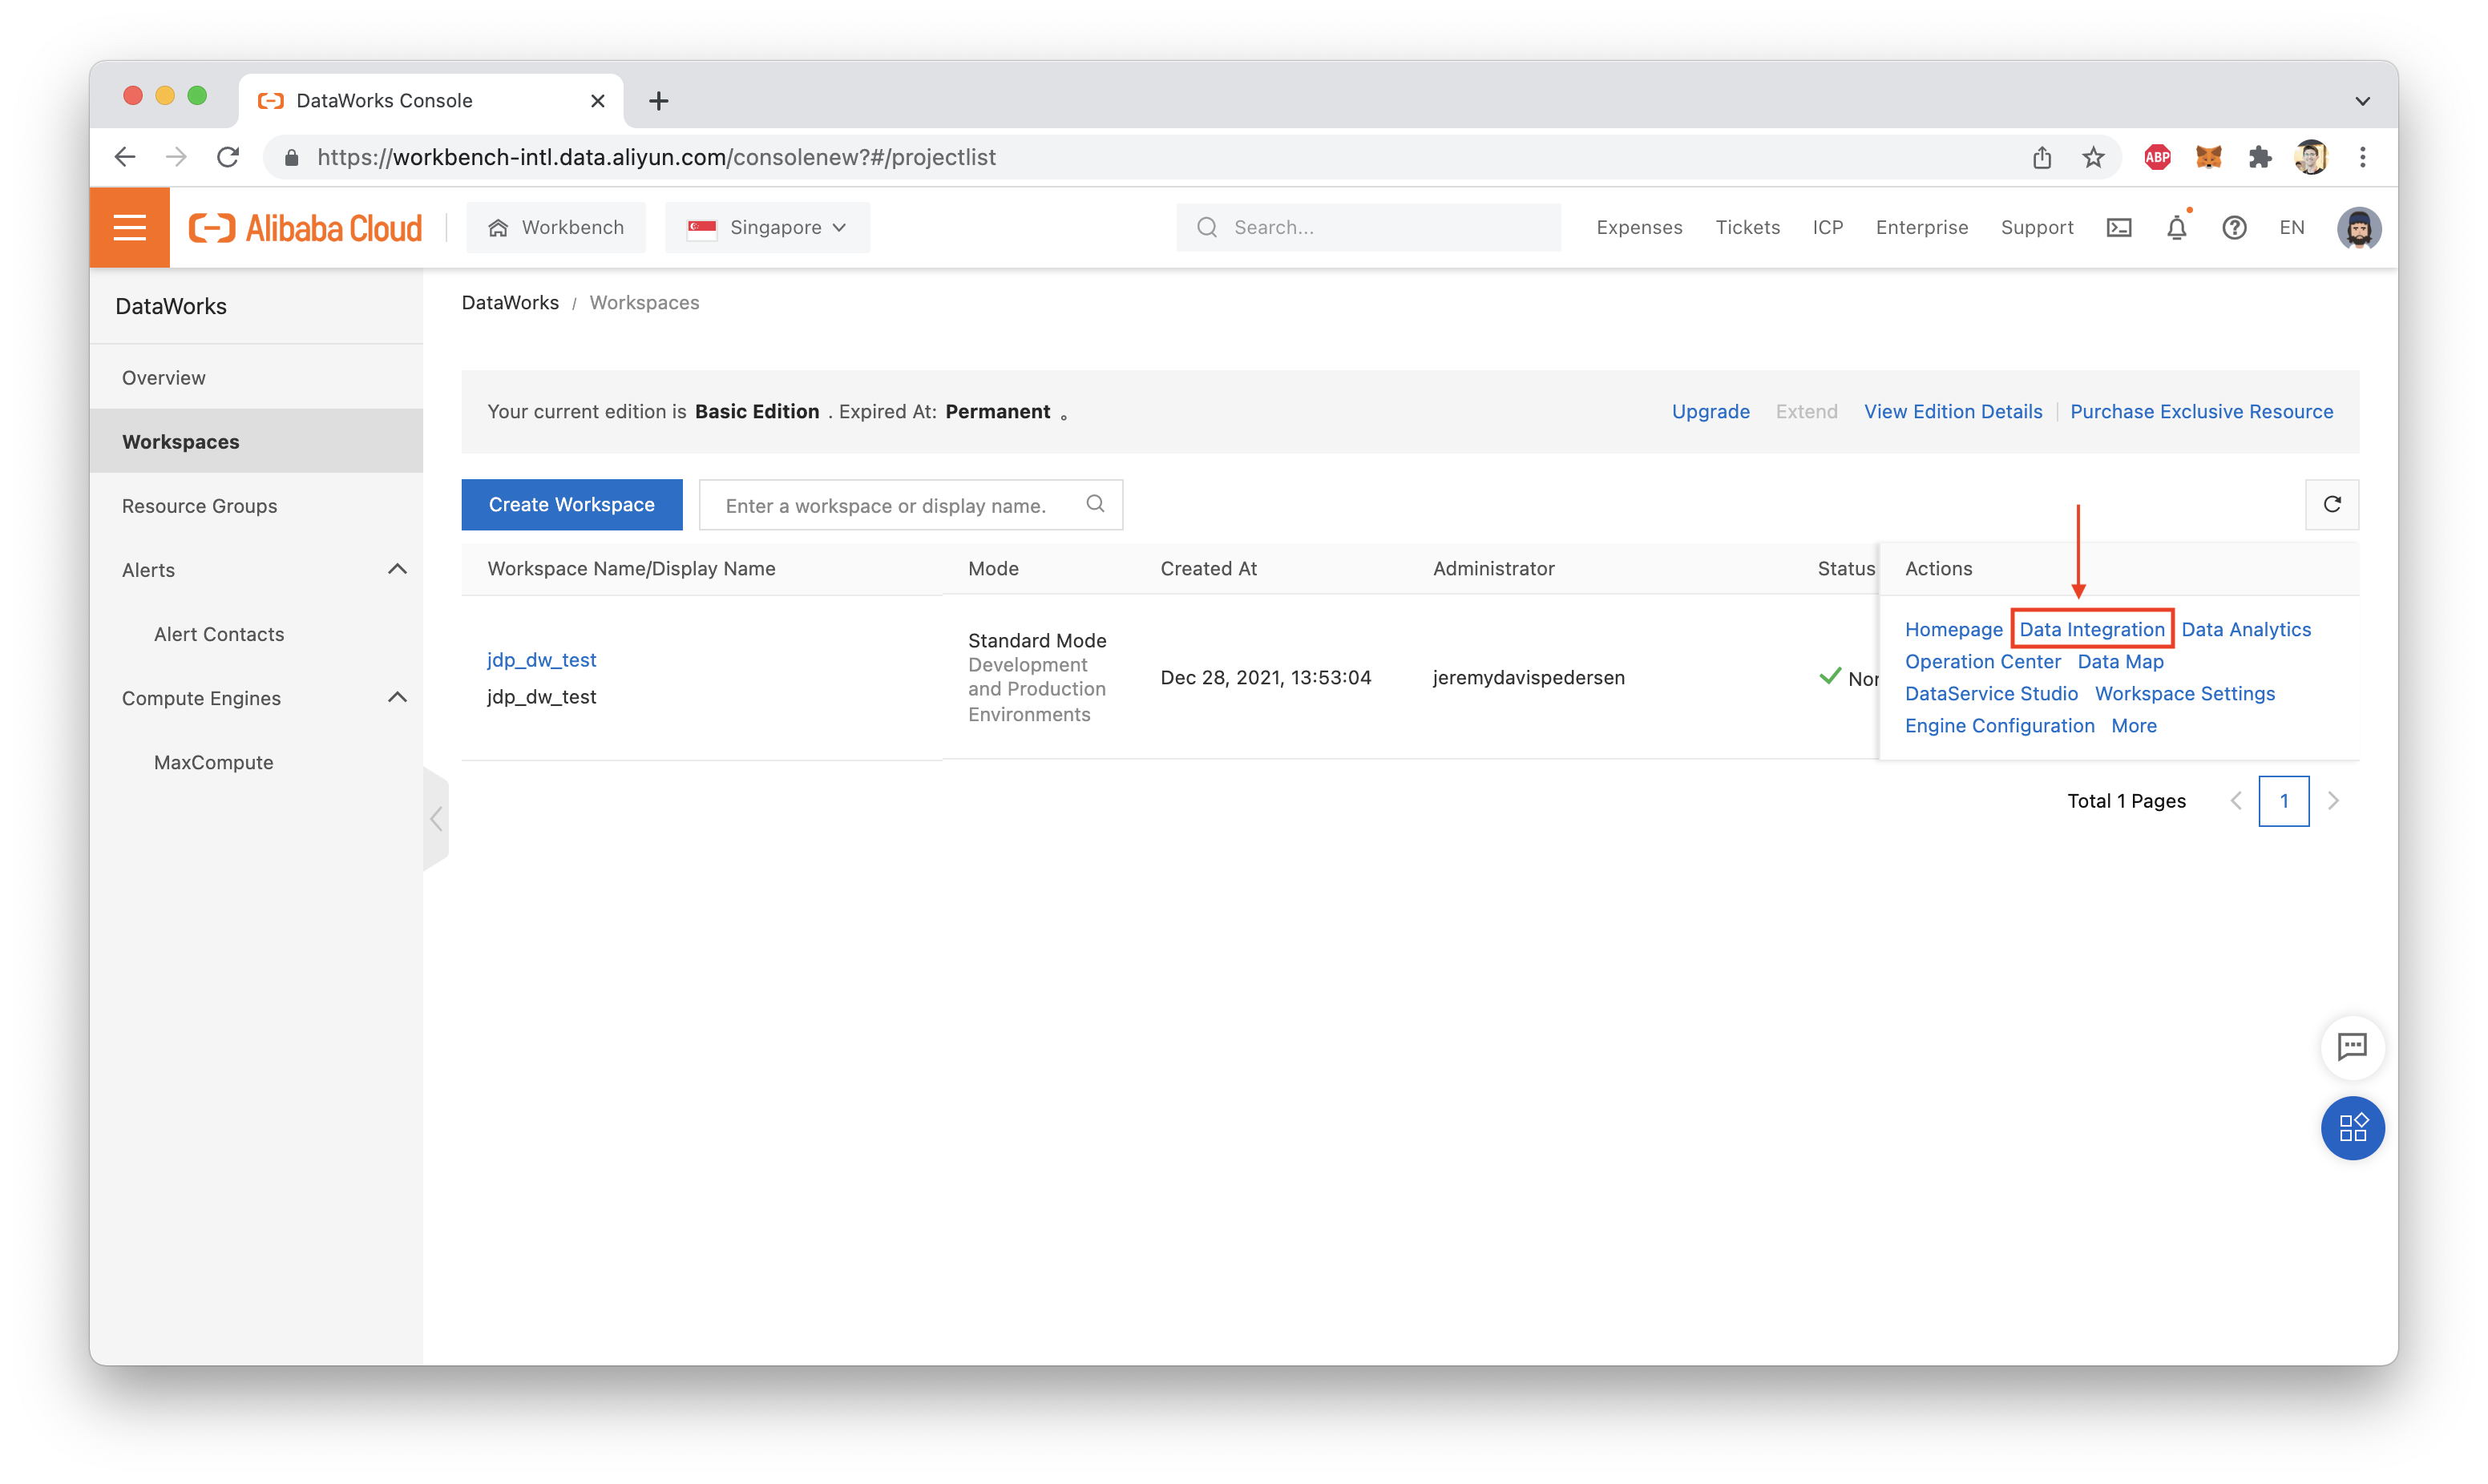
Find your DataWorks Workspace in the DataWorks console, and click on "Data Integration":
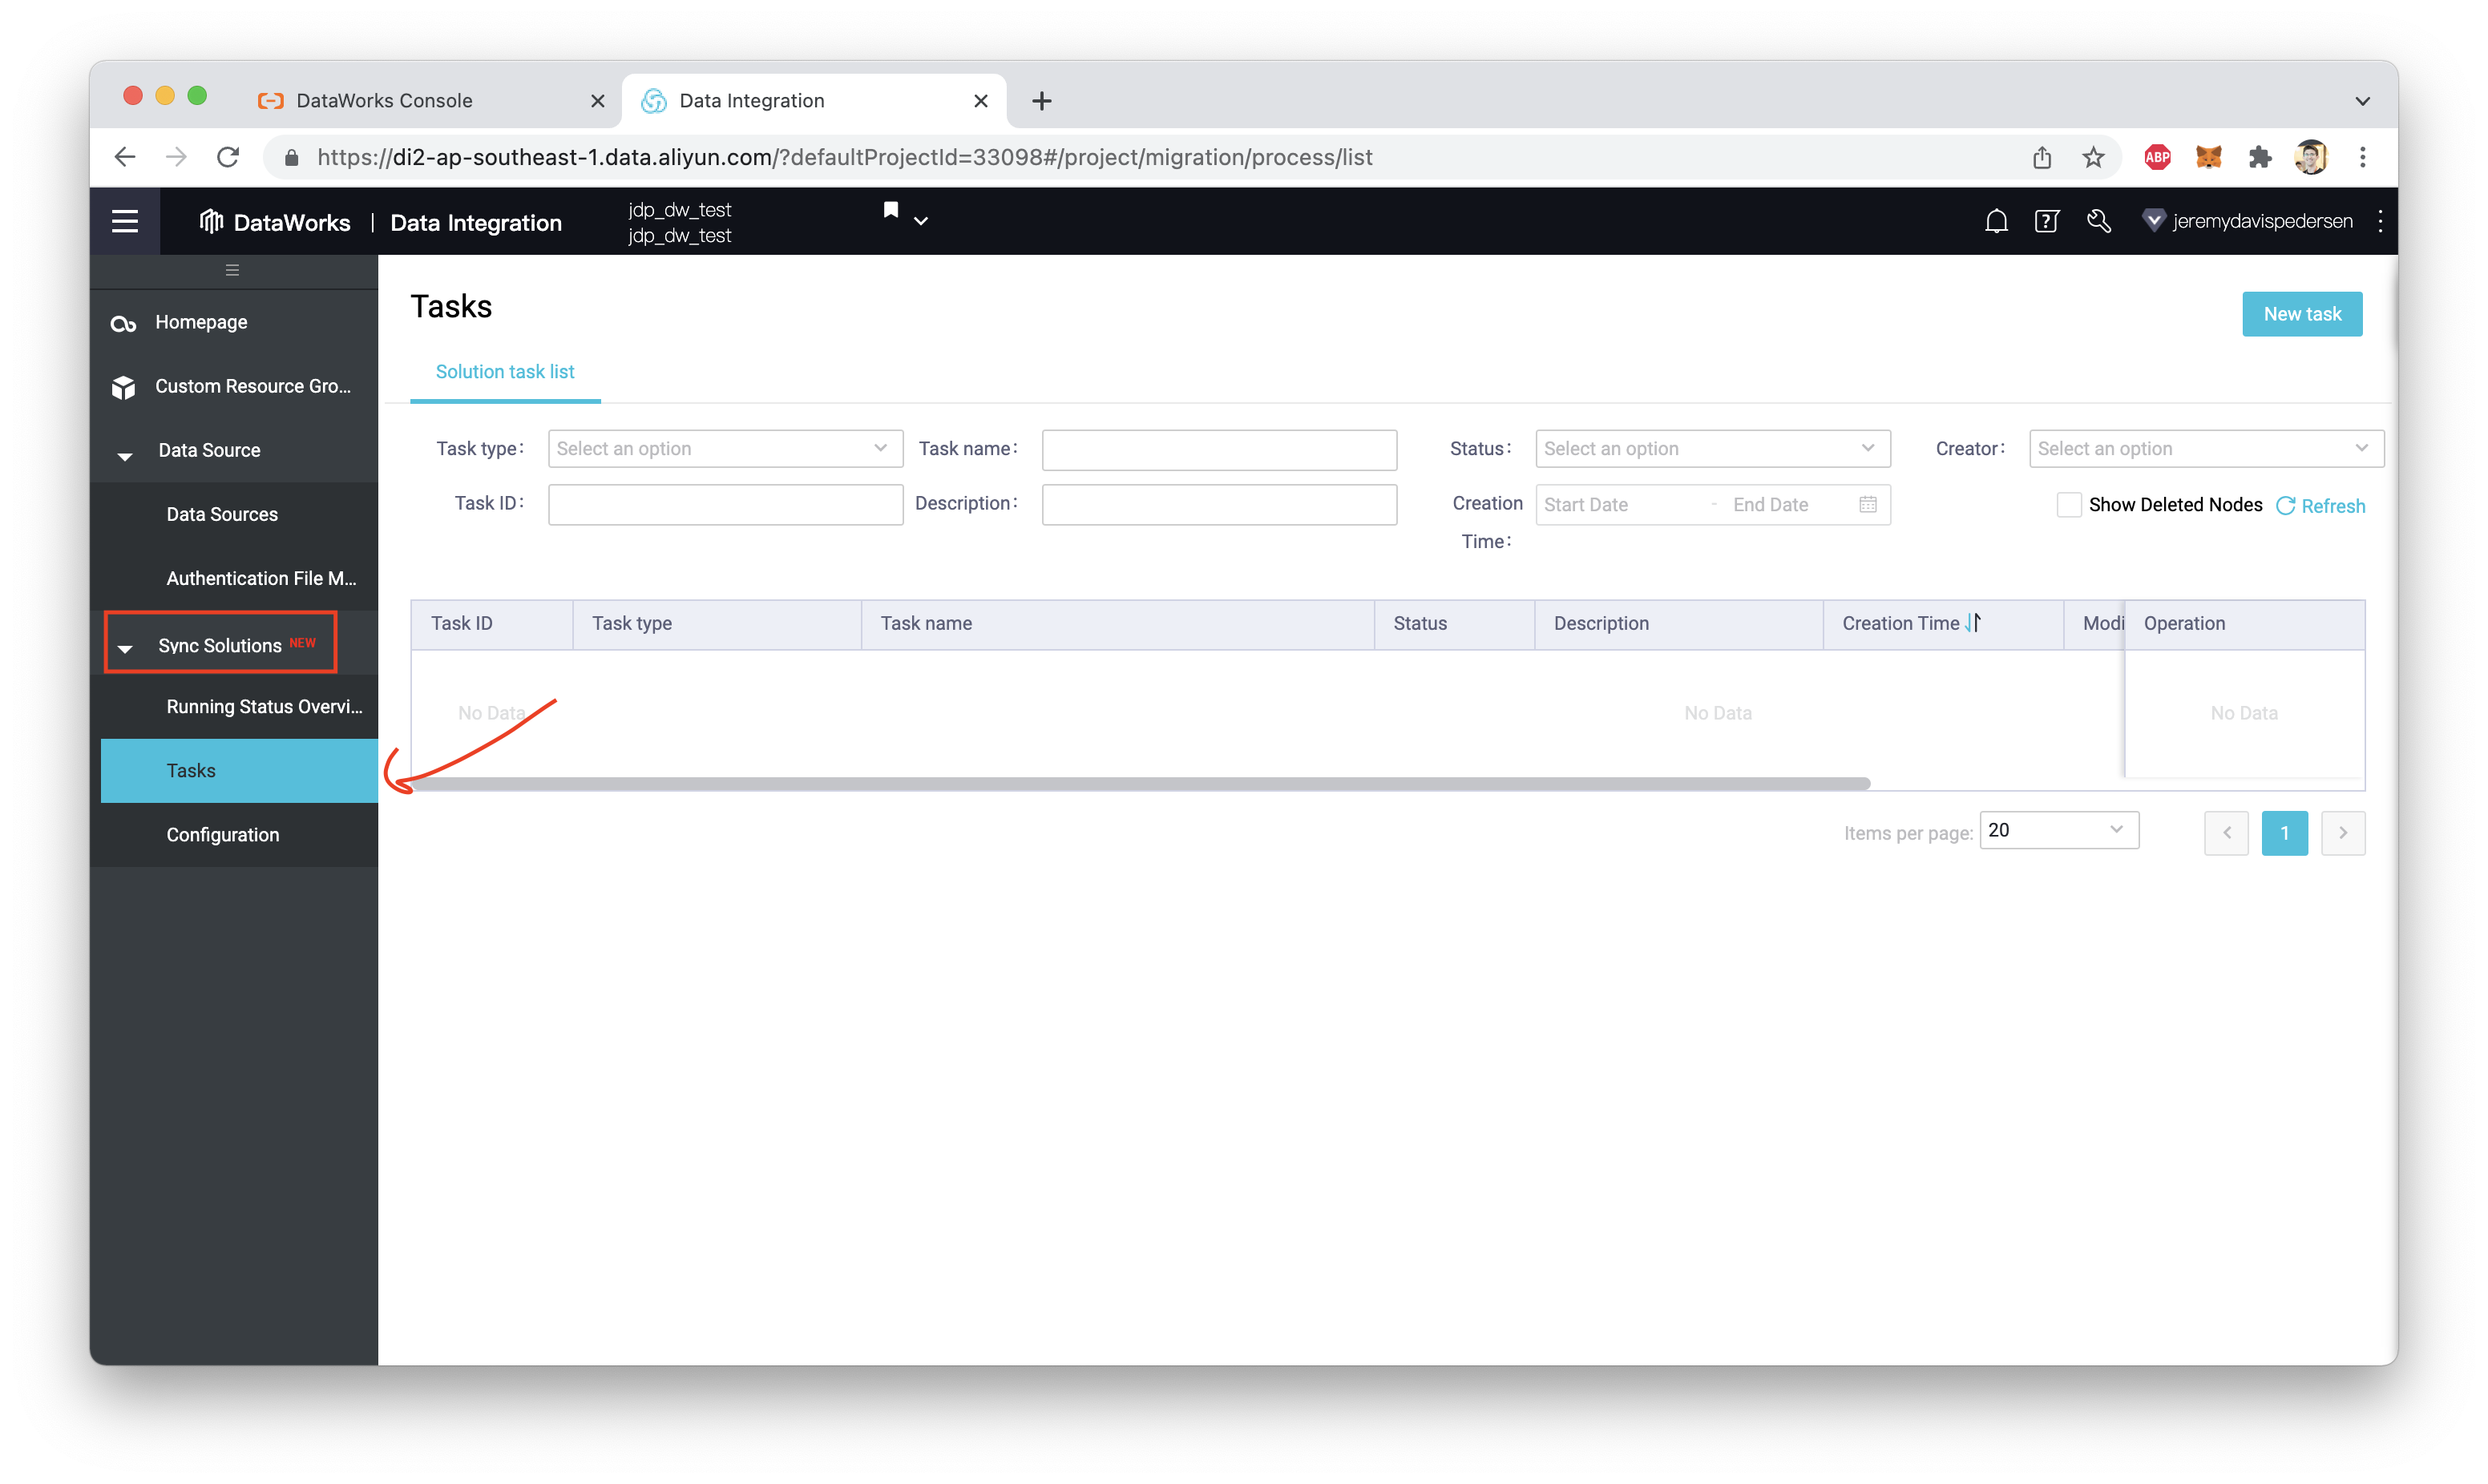
This will open up the Data Integration tab. Expand the "Sync Solutions" menu, and click on "Tasks":
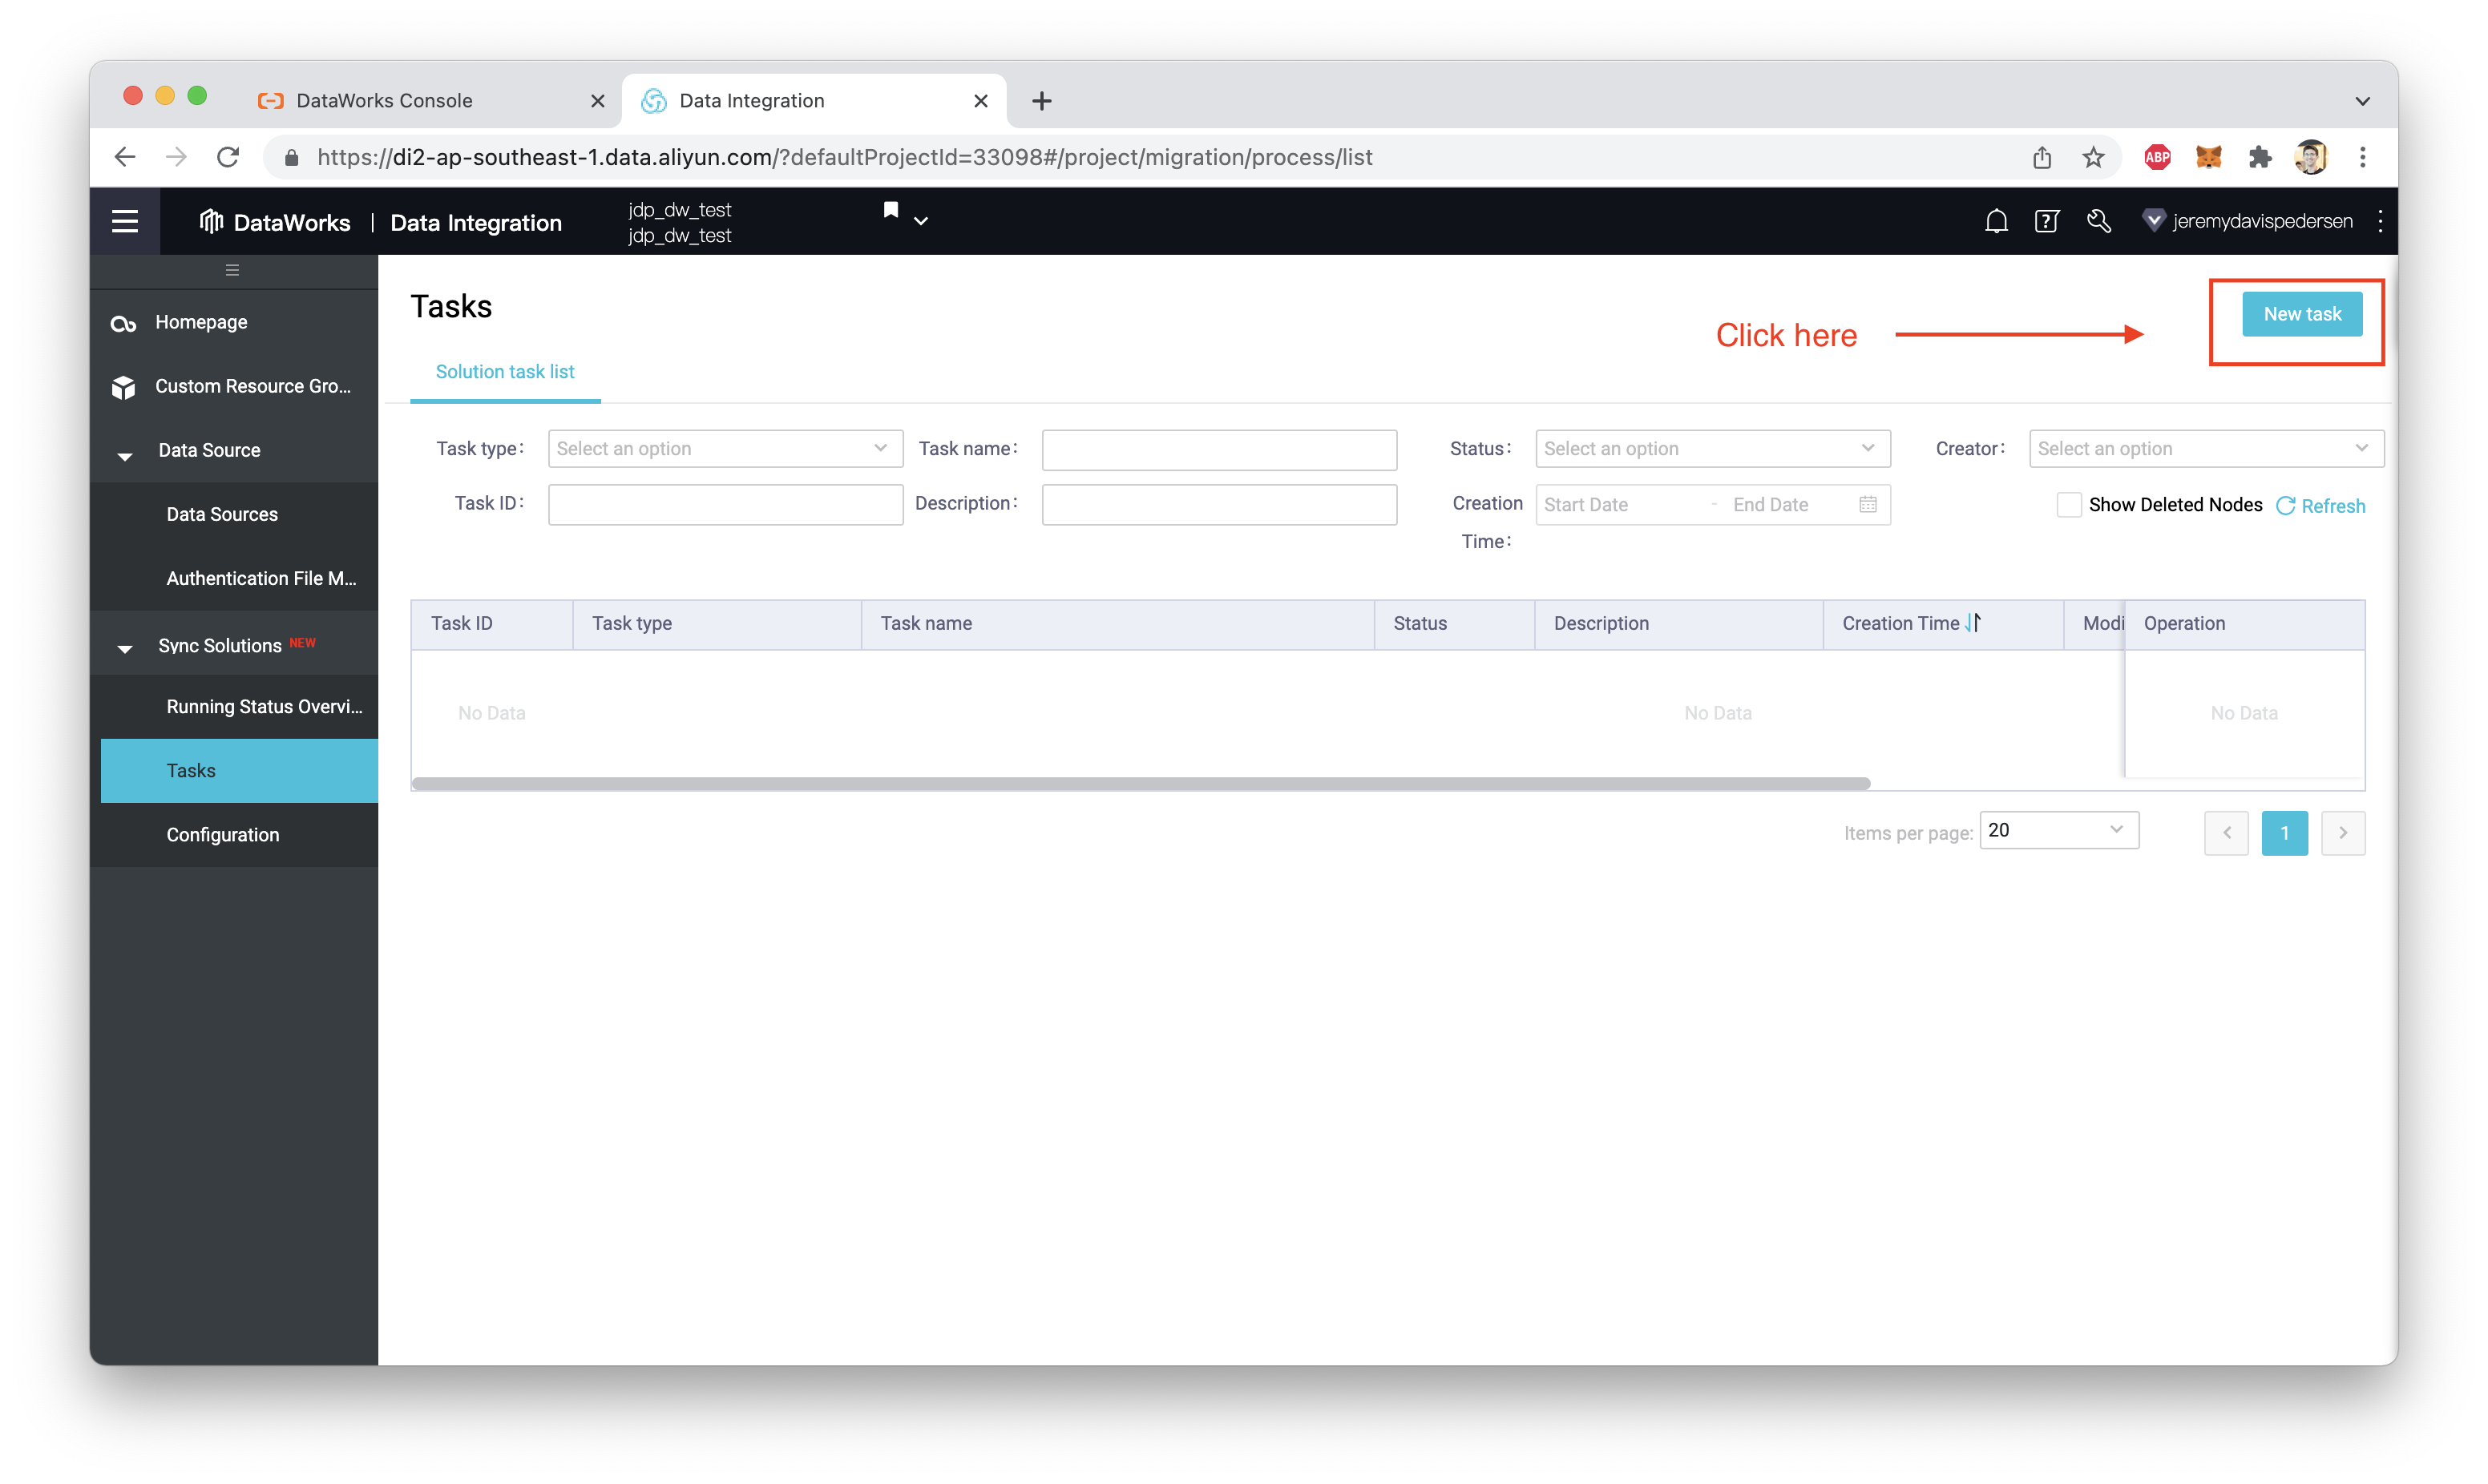
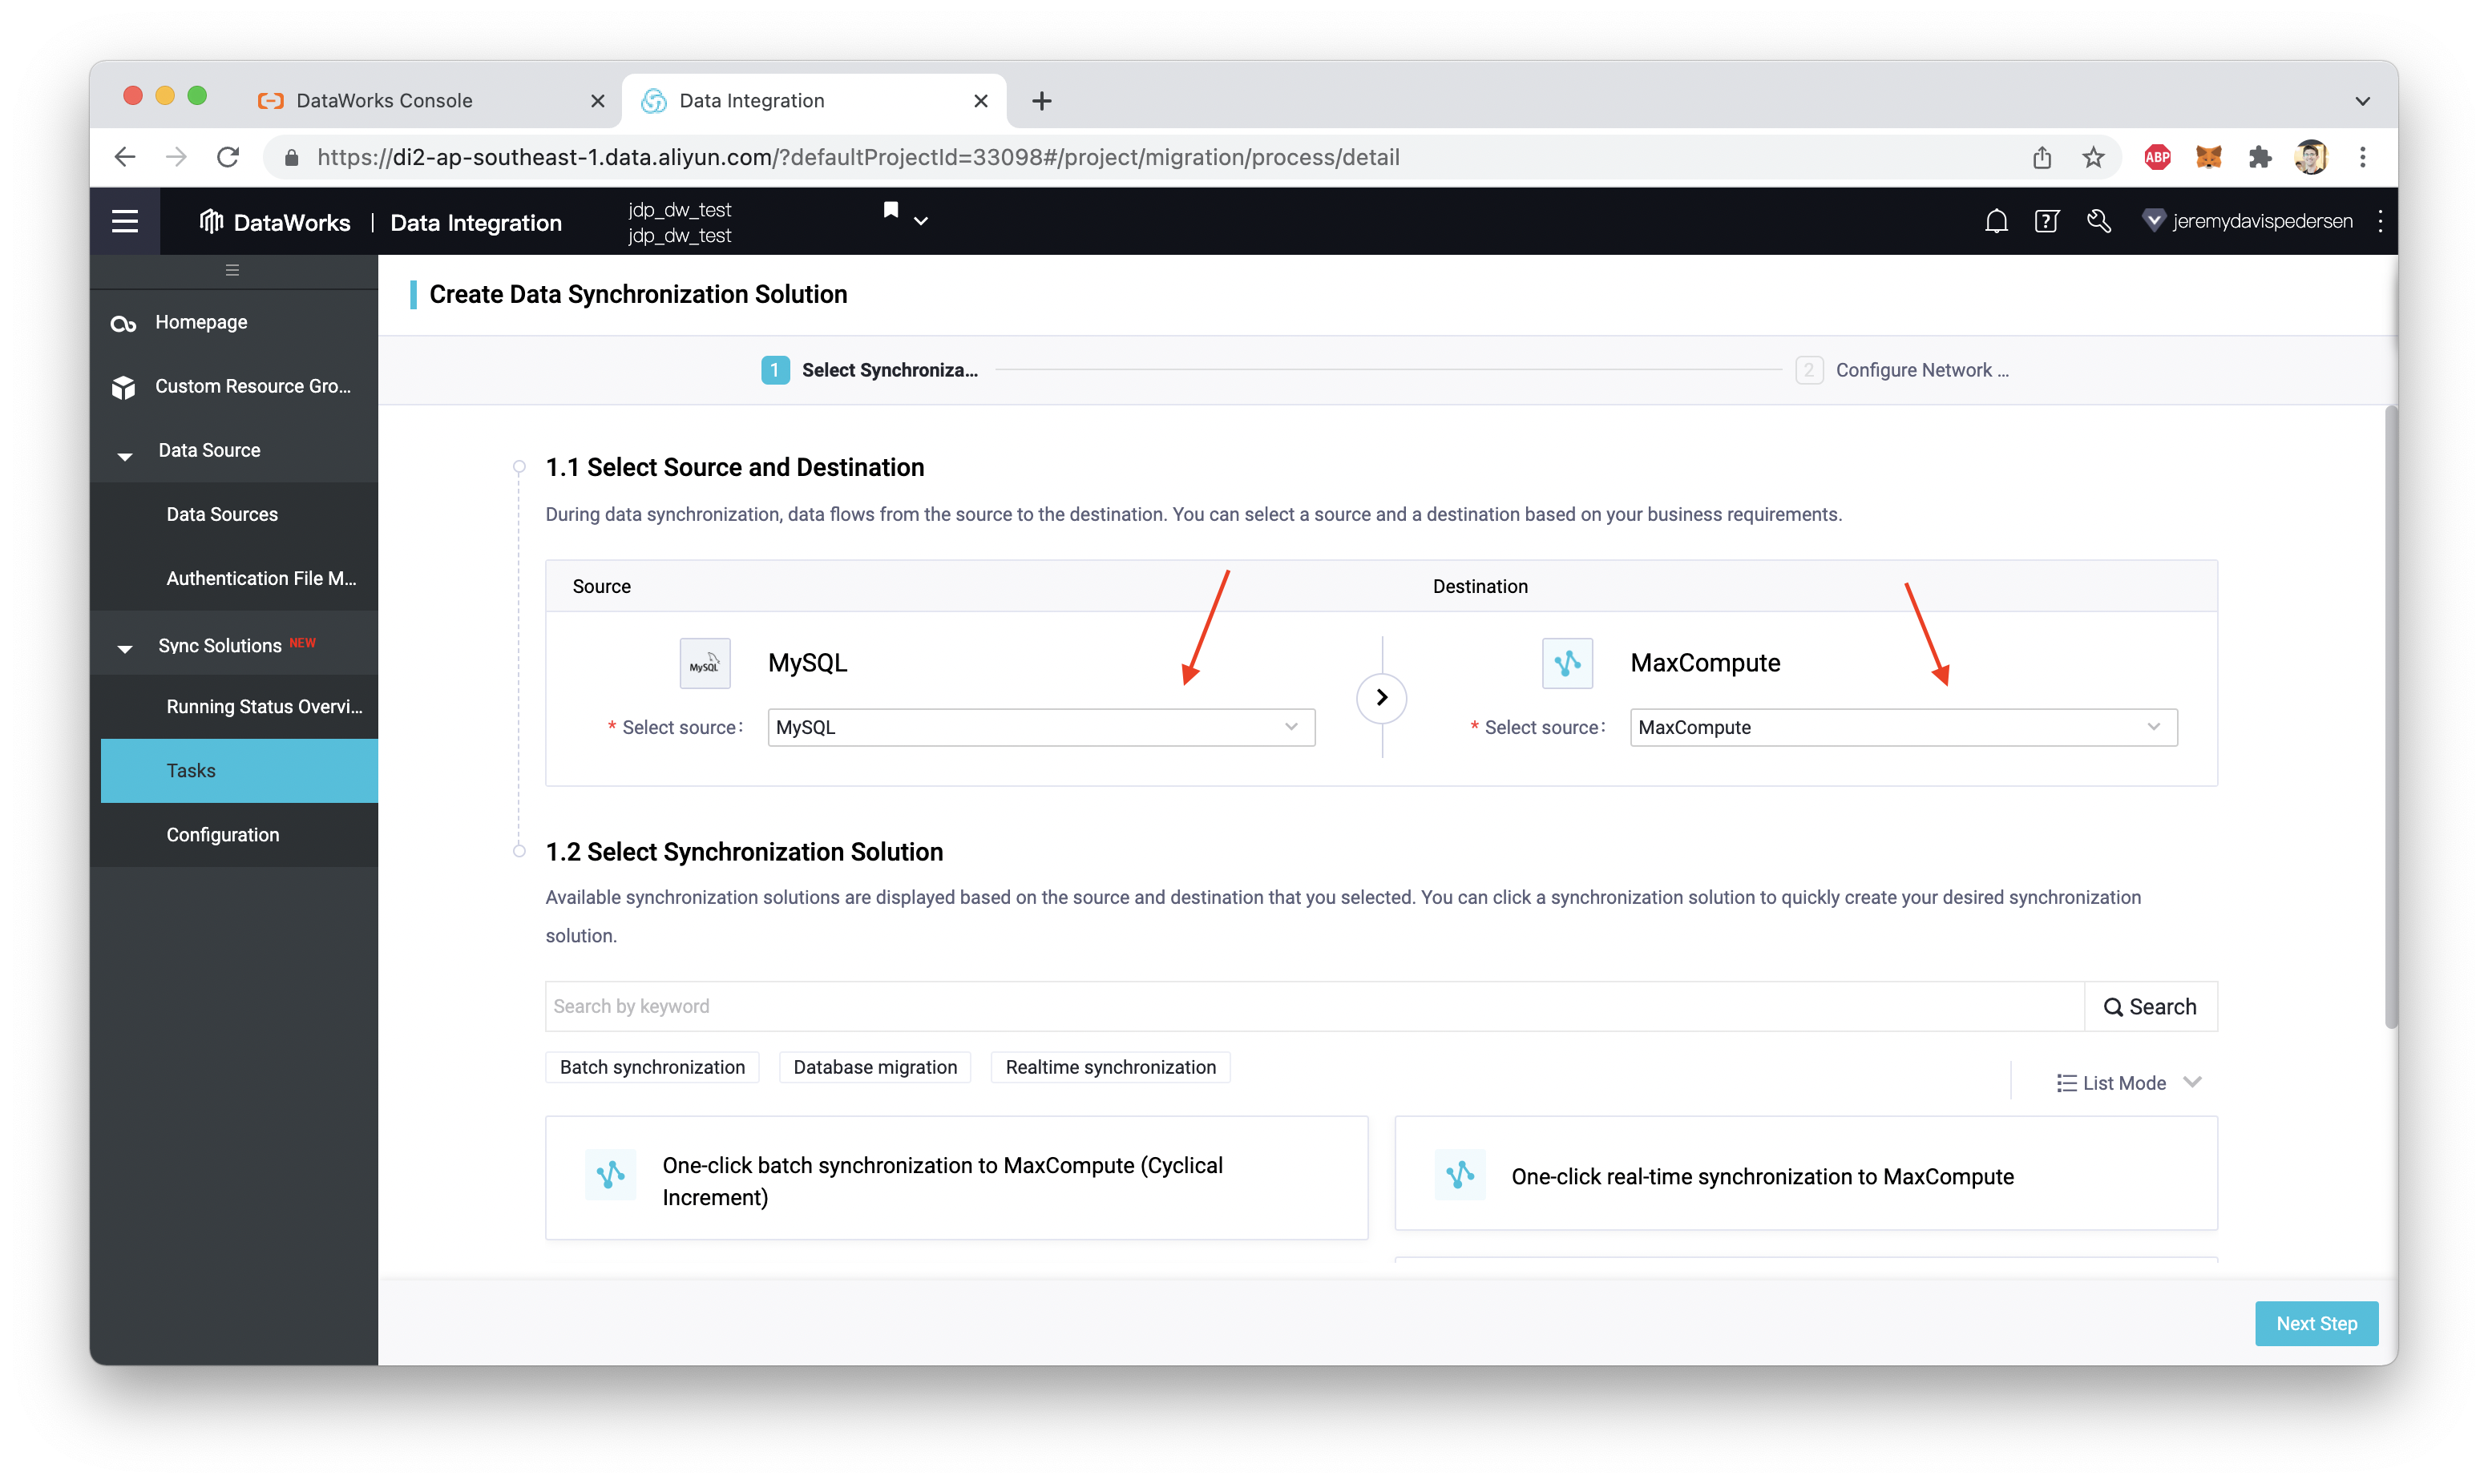
Next click on "New Task" in the upper right hand corner, which will open up the Sync Task creation dialog. Make sure you set "MySQL" as your data source, and "MaxCompute" (odps) as the destination:
Scroll down, and choose "One click batch synchronization to MaxCompute (Once Full)". This will create a one-off synchronization task. Take time to look at the other synchronization options: the Sync Solutions tool gives you a lot of flexibility in choosing what to synchronize and when to synchronize it:
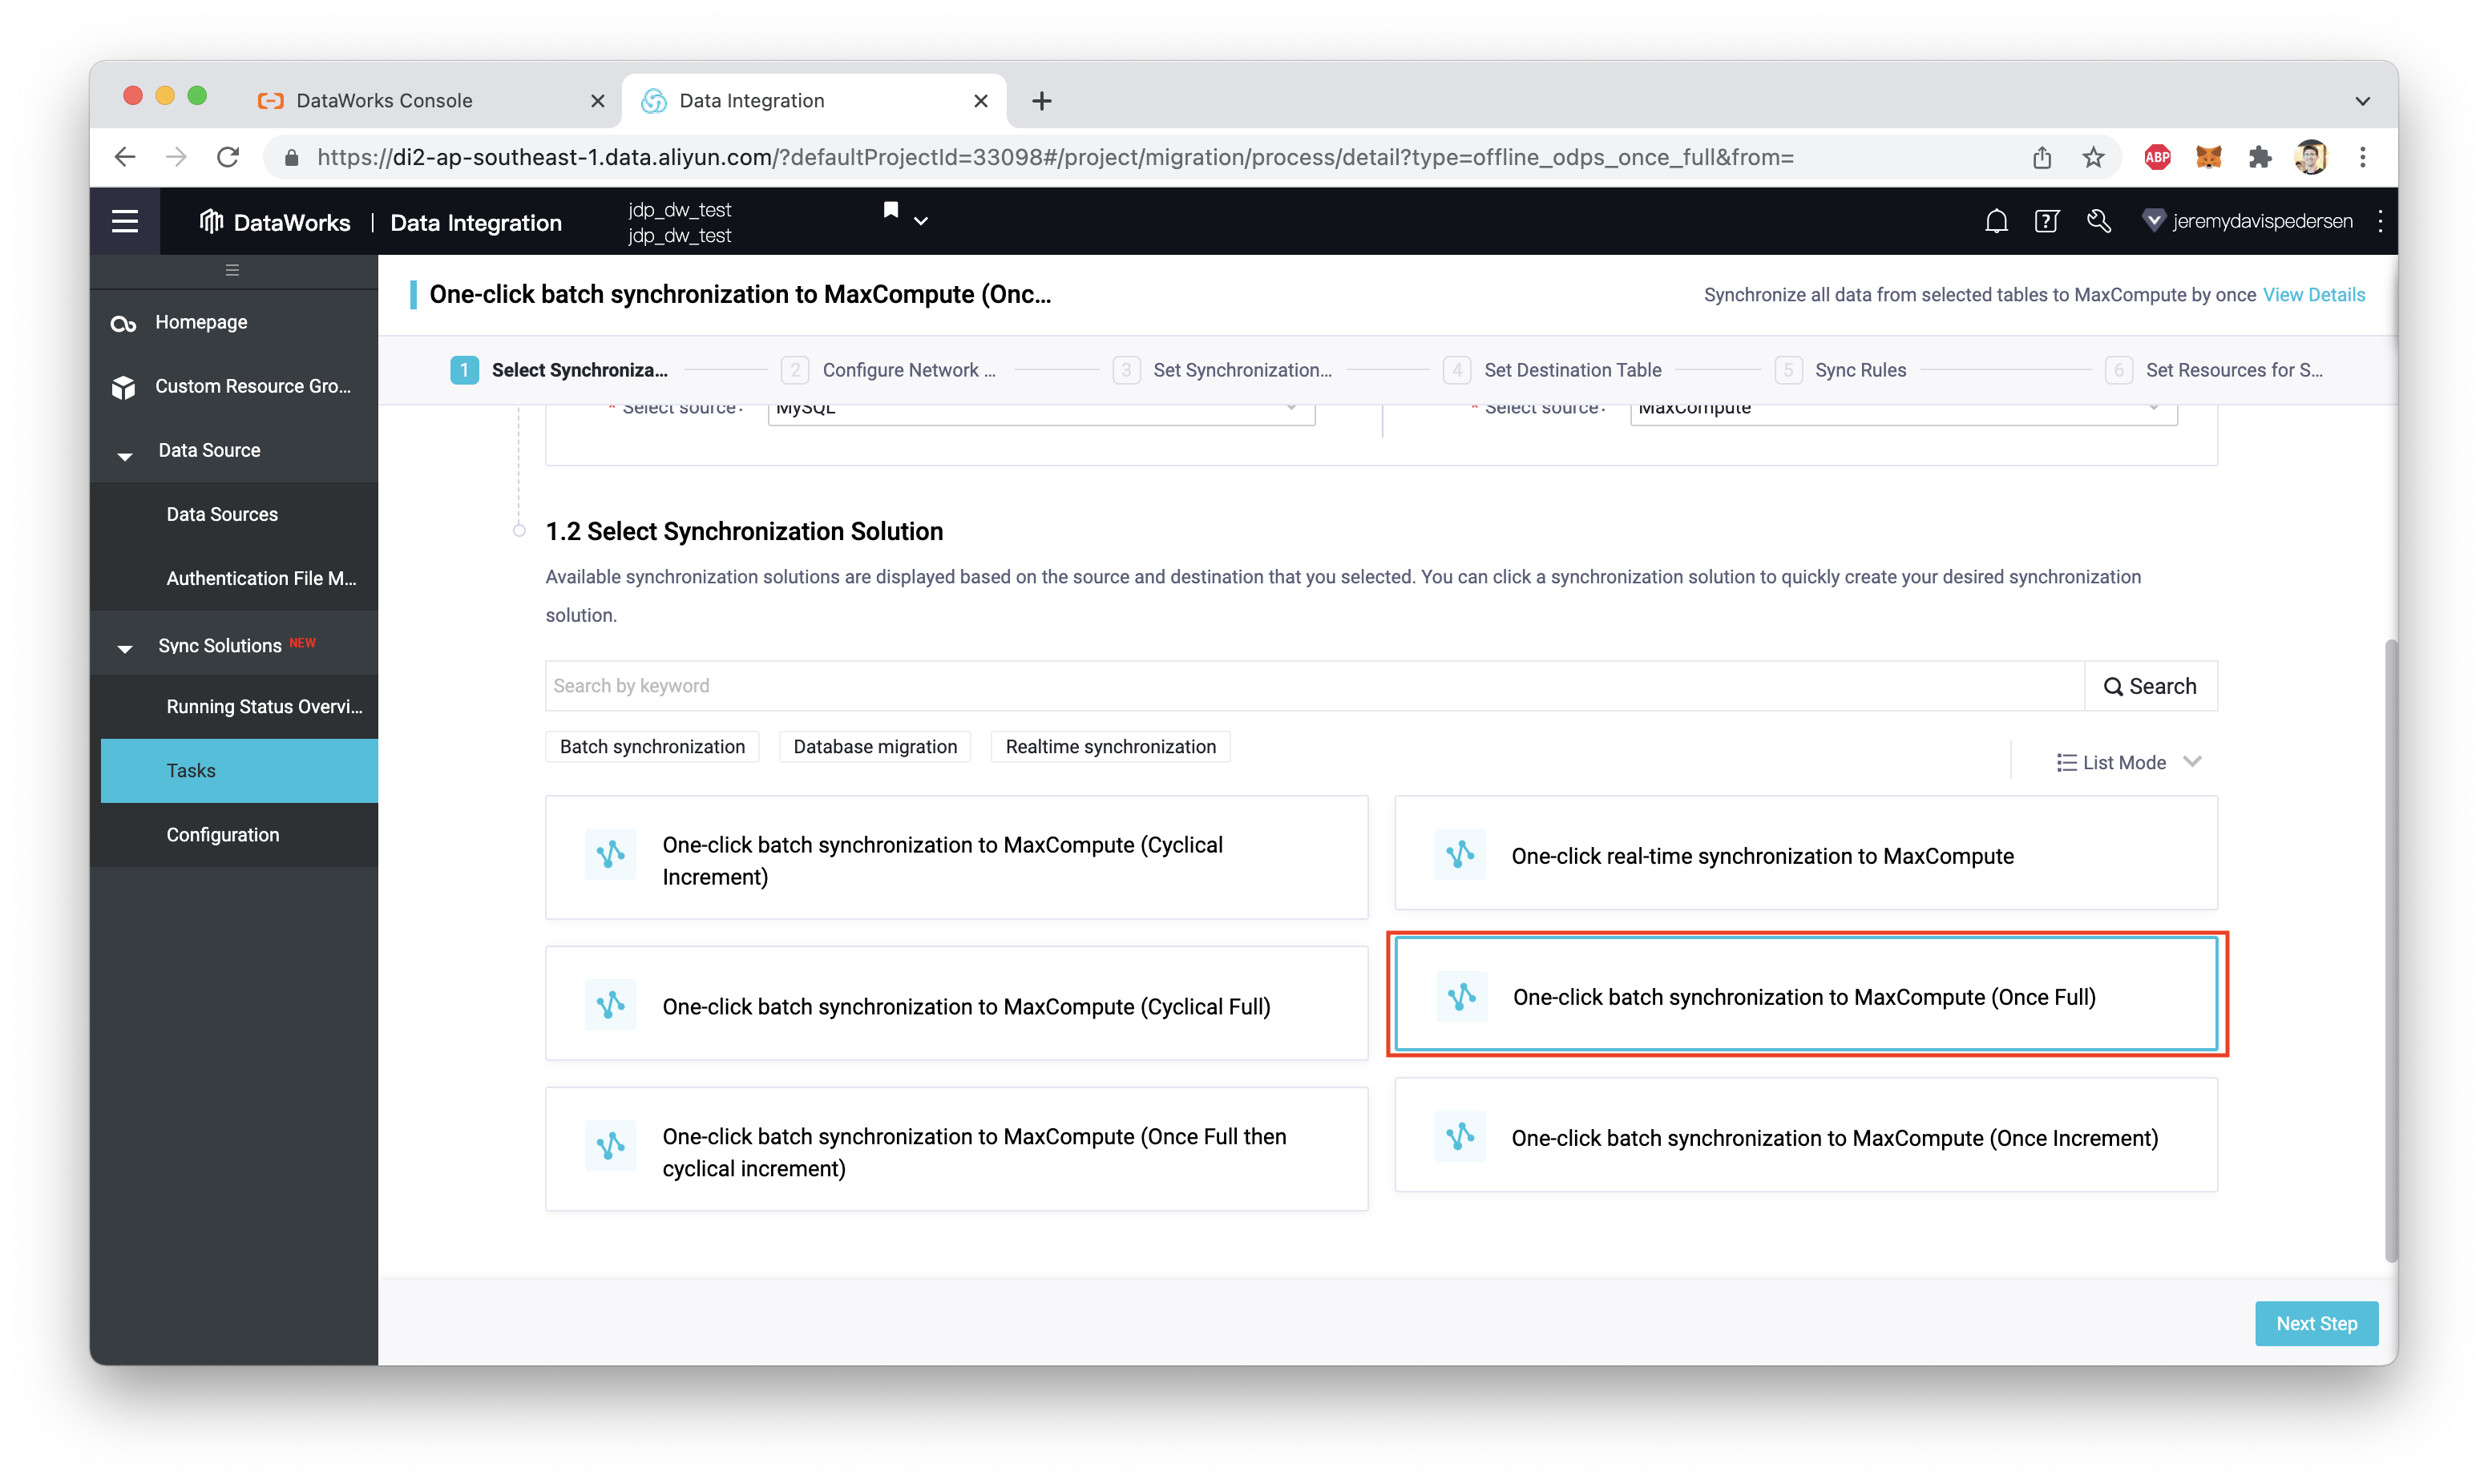
In our case, we're going to do a one-time full synchronization, rather than a scheduled task that runs on a regular basis.
### Creating Connections
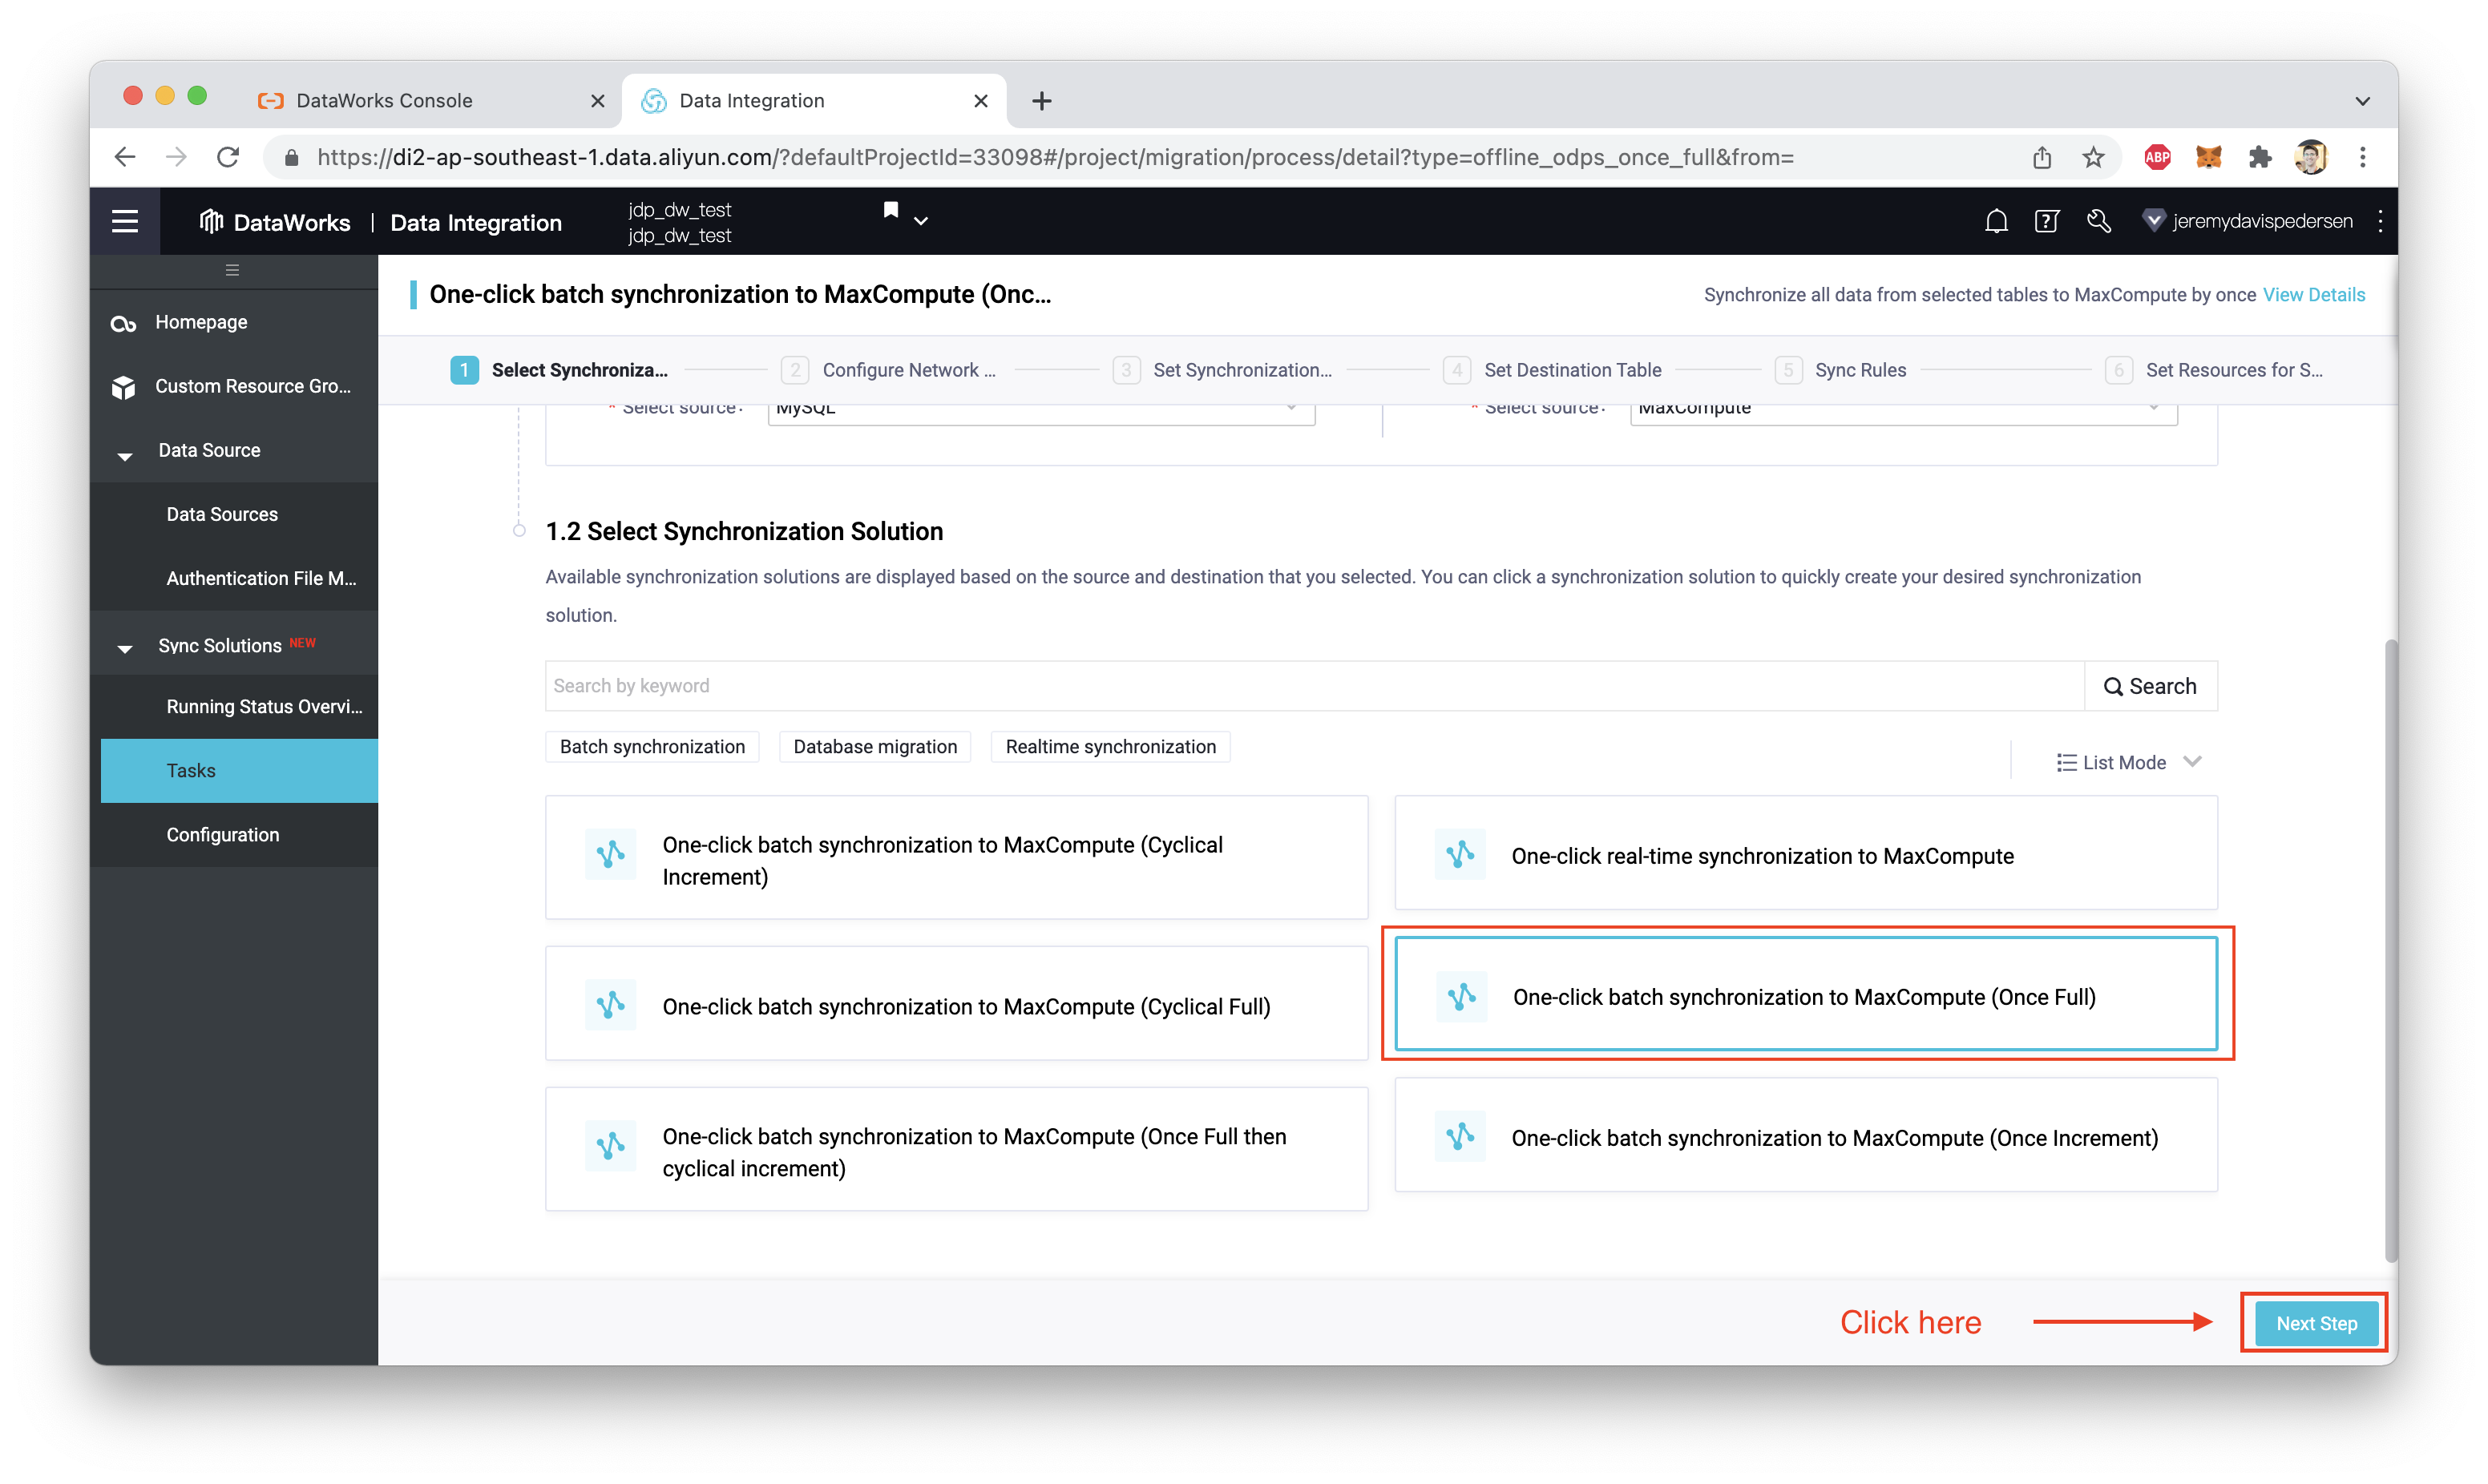
After we click on "Next Step" at the bottom-right, we immediately run into some problems:
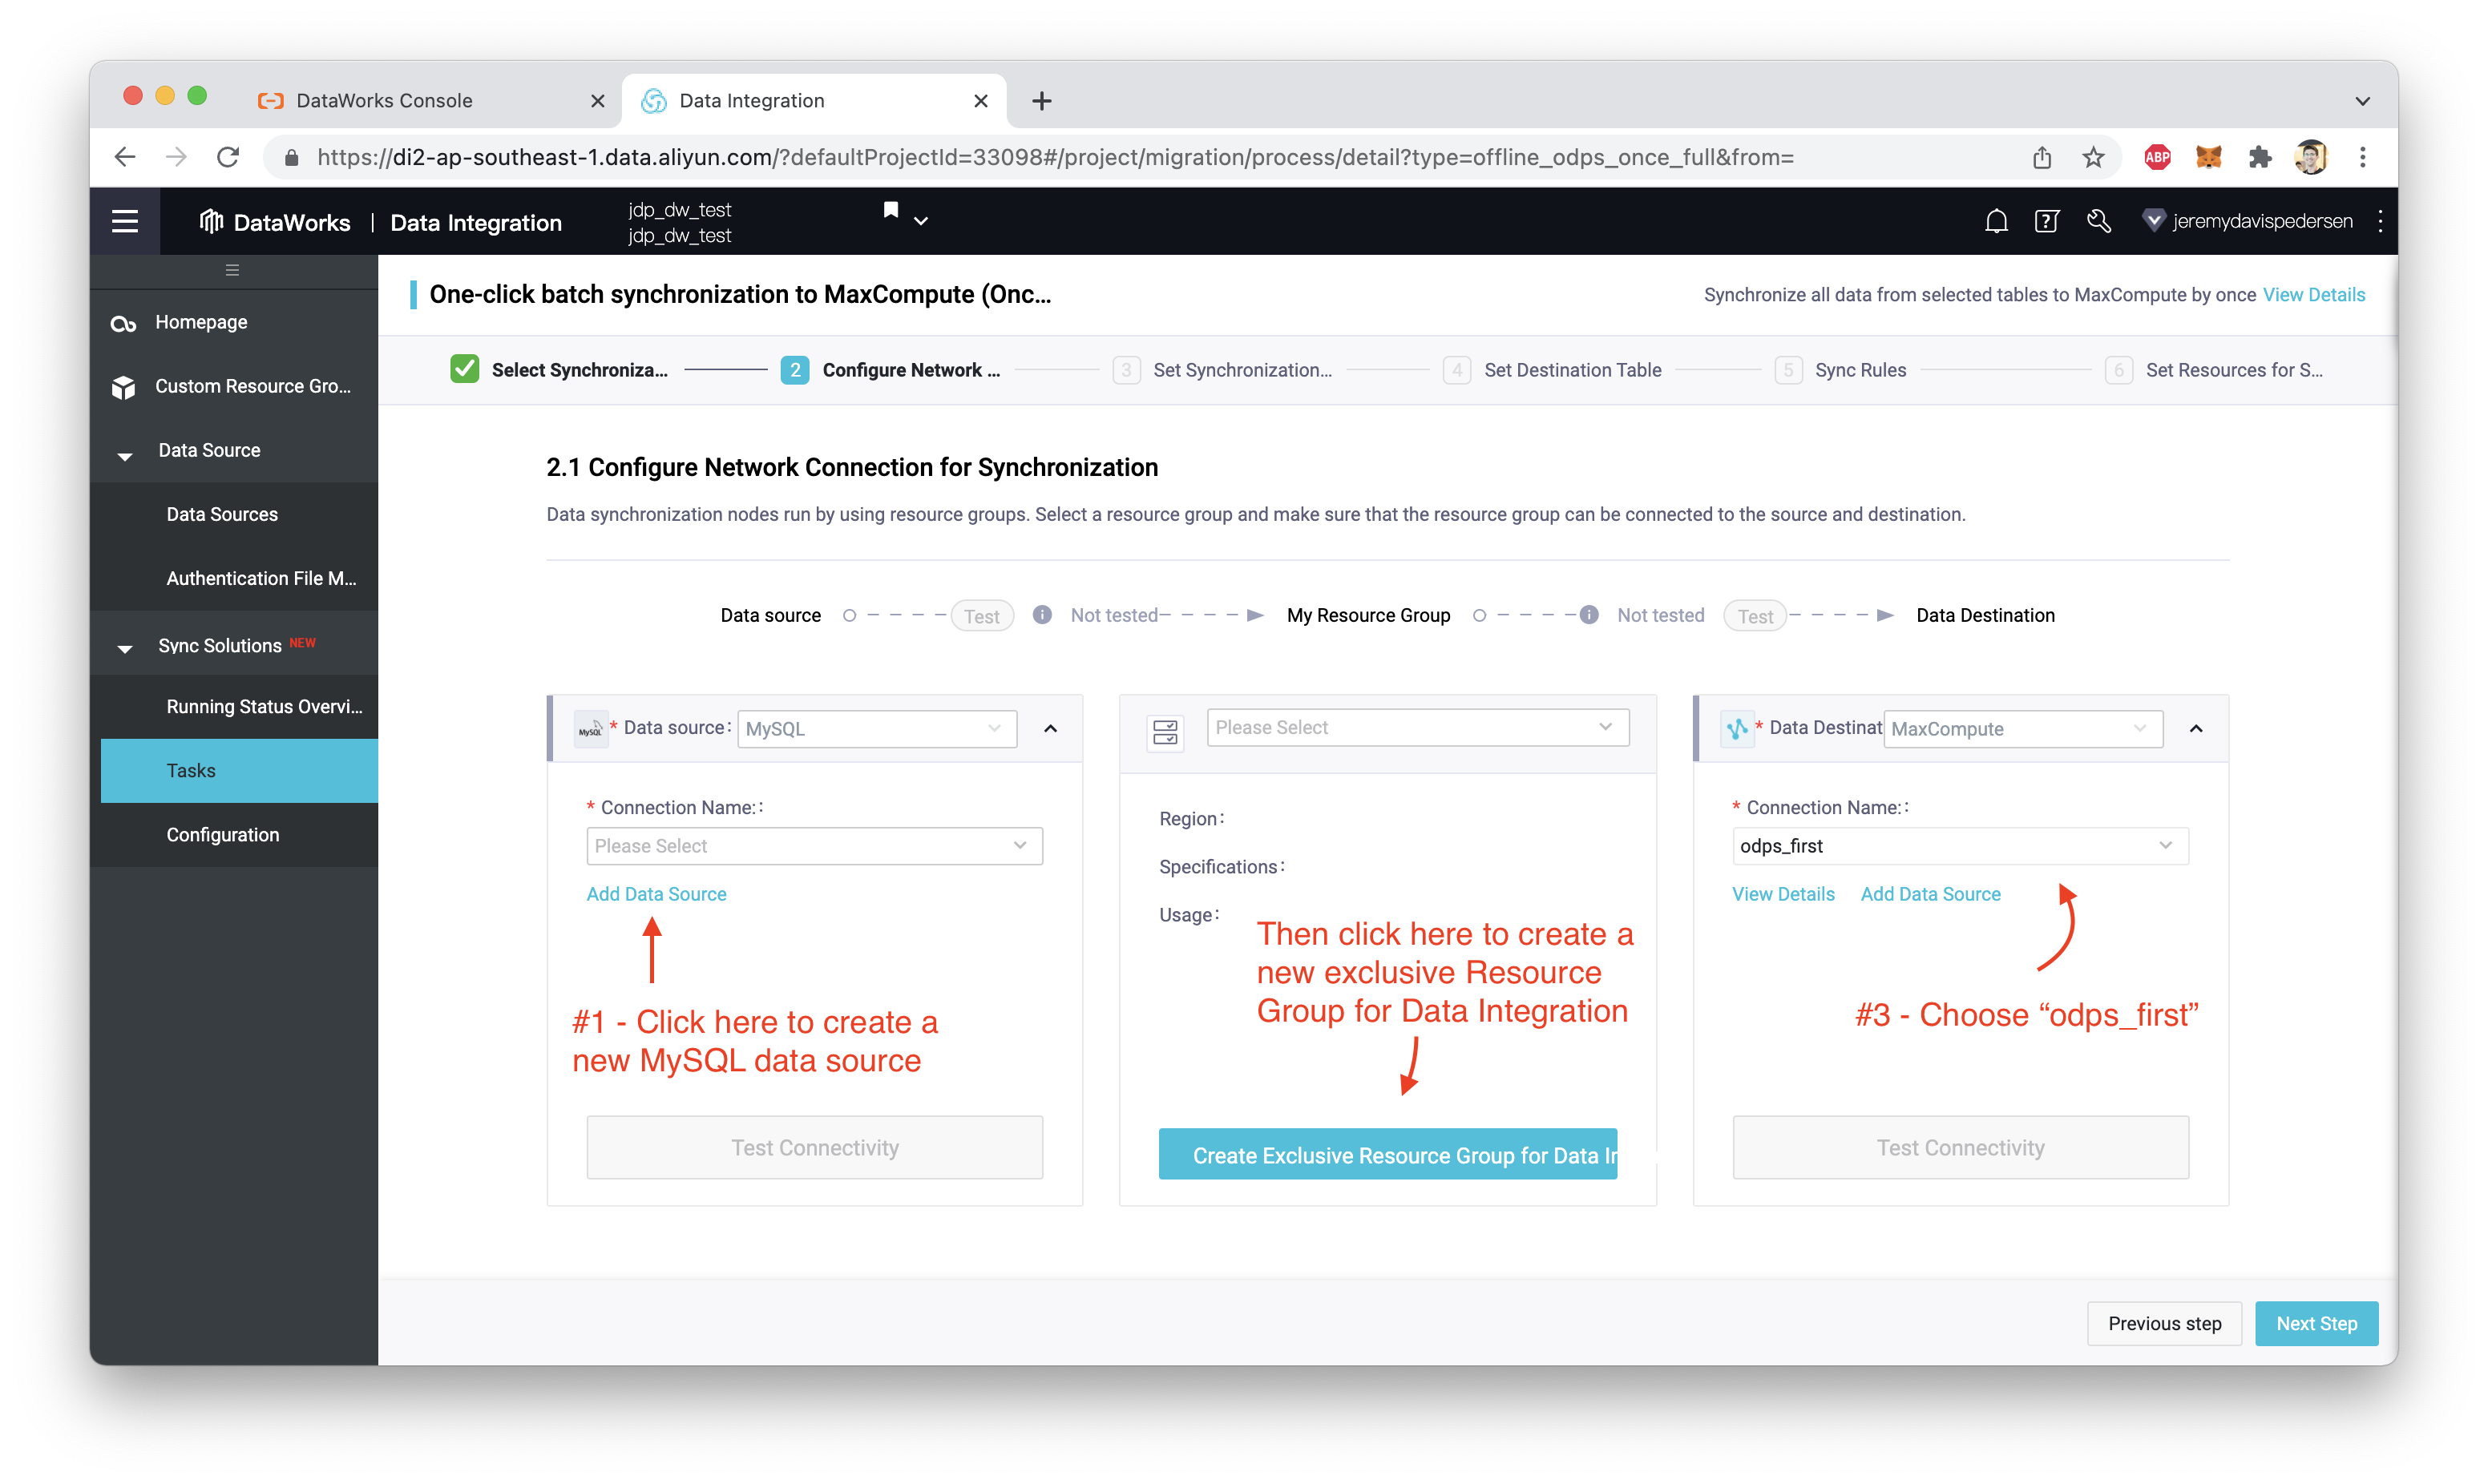
We need to do 3 things:
We can easily take care of #3 by choosing odps_first from the dropdown menu (this is the default connection to our MaxCompute project, which DataWorks has created for us).
What about #1 and #2? These will require a little more work. Let's start with #2 and work backwards.
Clicking on Create Exclusive Resource Group for Data Integration will bring up this dialog:
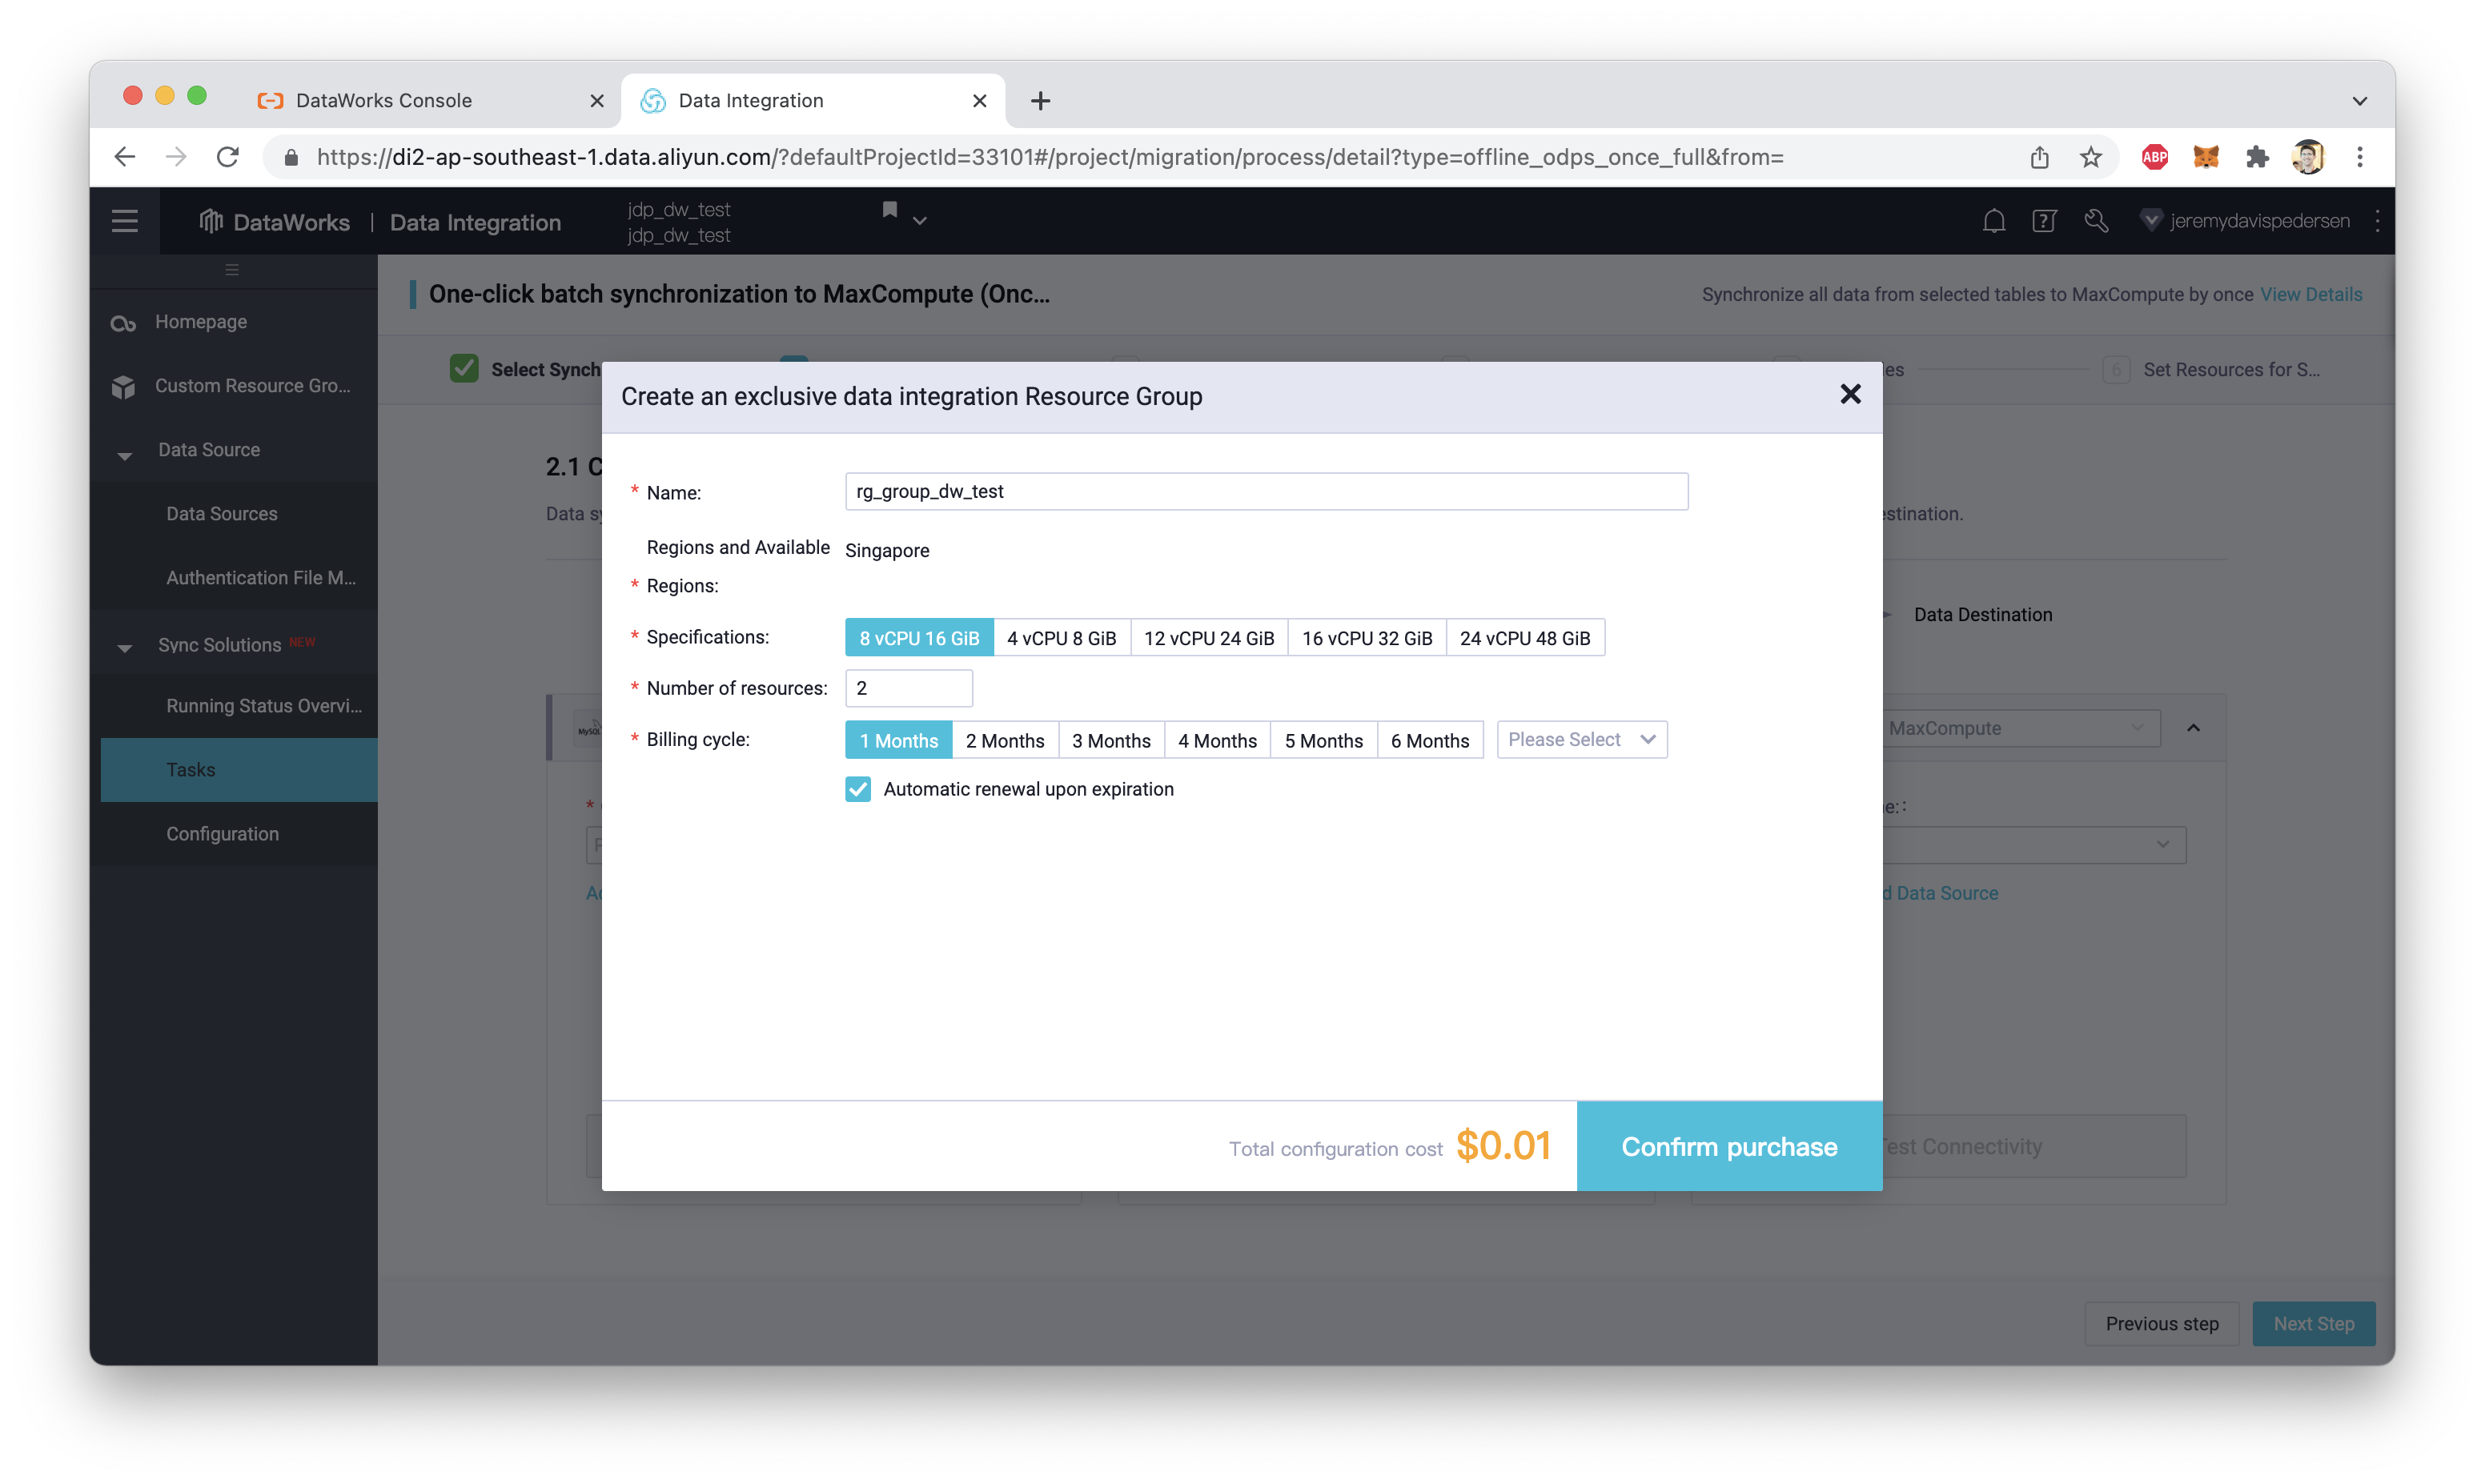
I'll leave all the settings at the defaults. My price is 0.01 USD here but it will be higher for you. As an Alibaba Cloud employee, I have access to a test account, so most products and services are discounted to 0.01 USD to make testing easier!
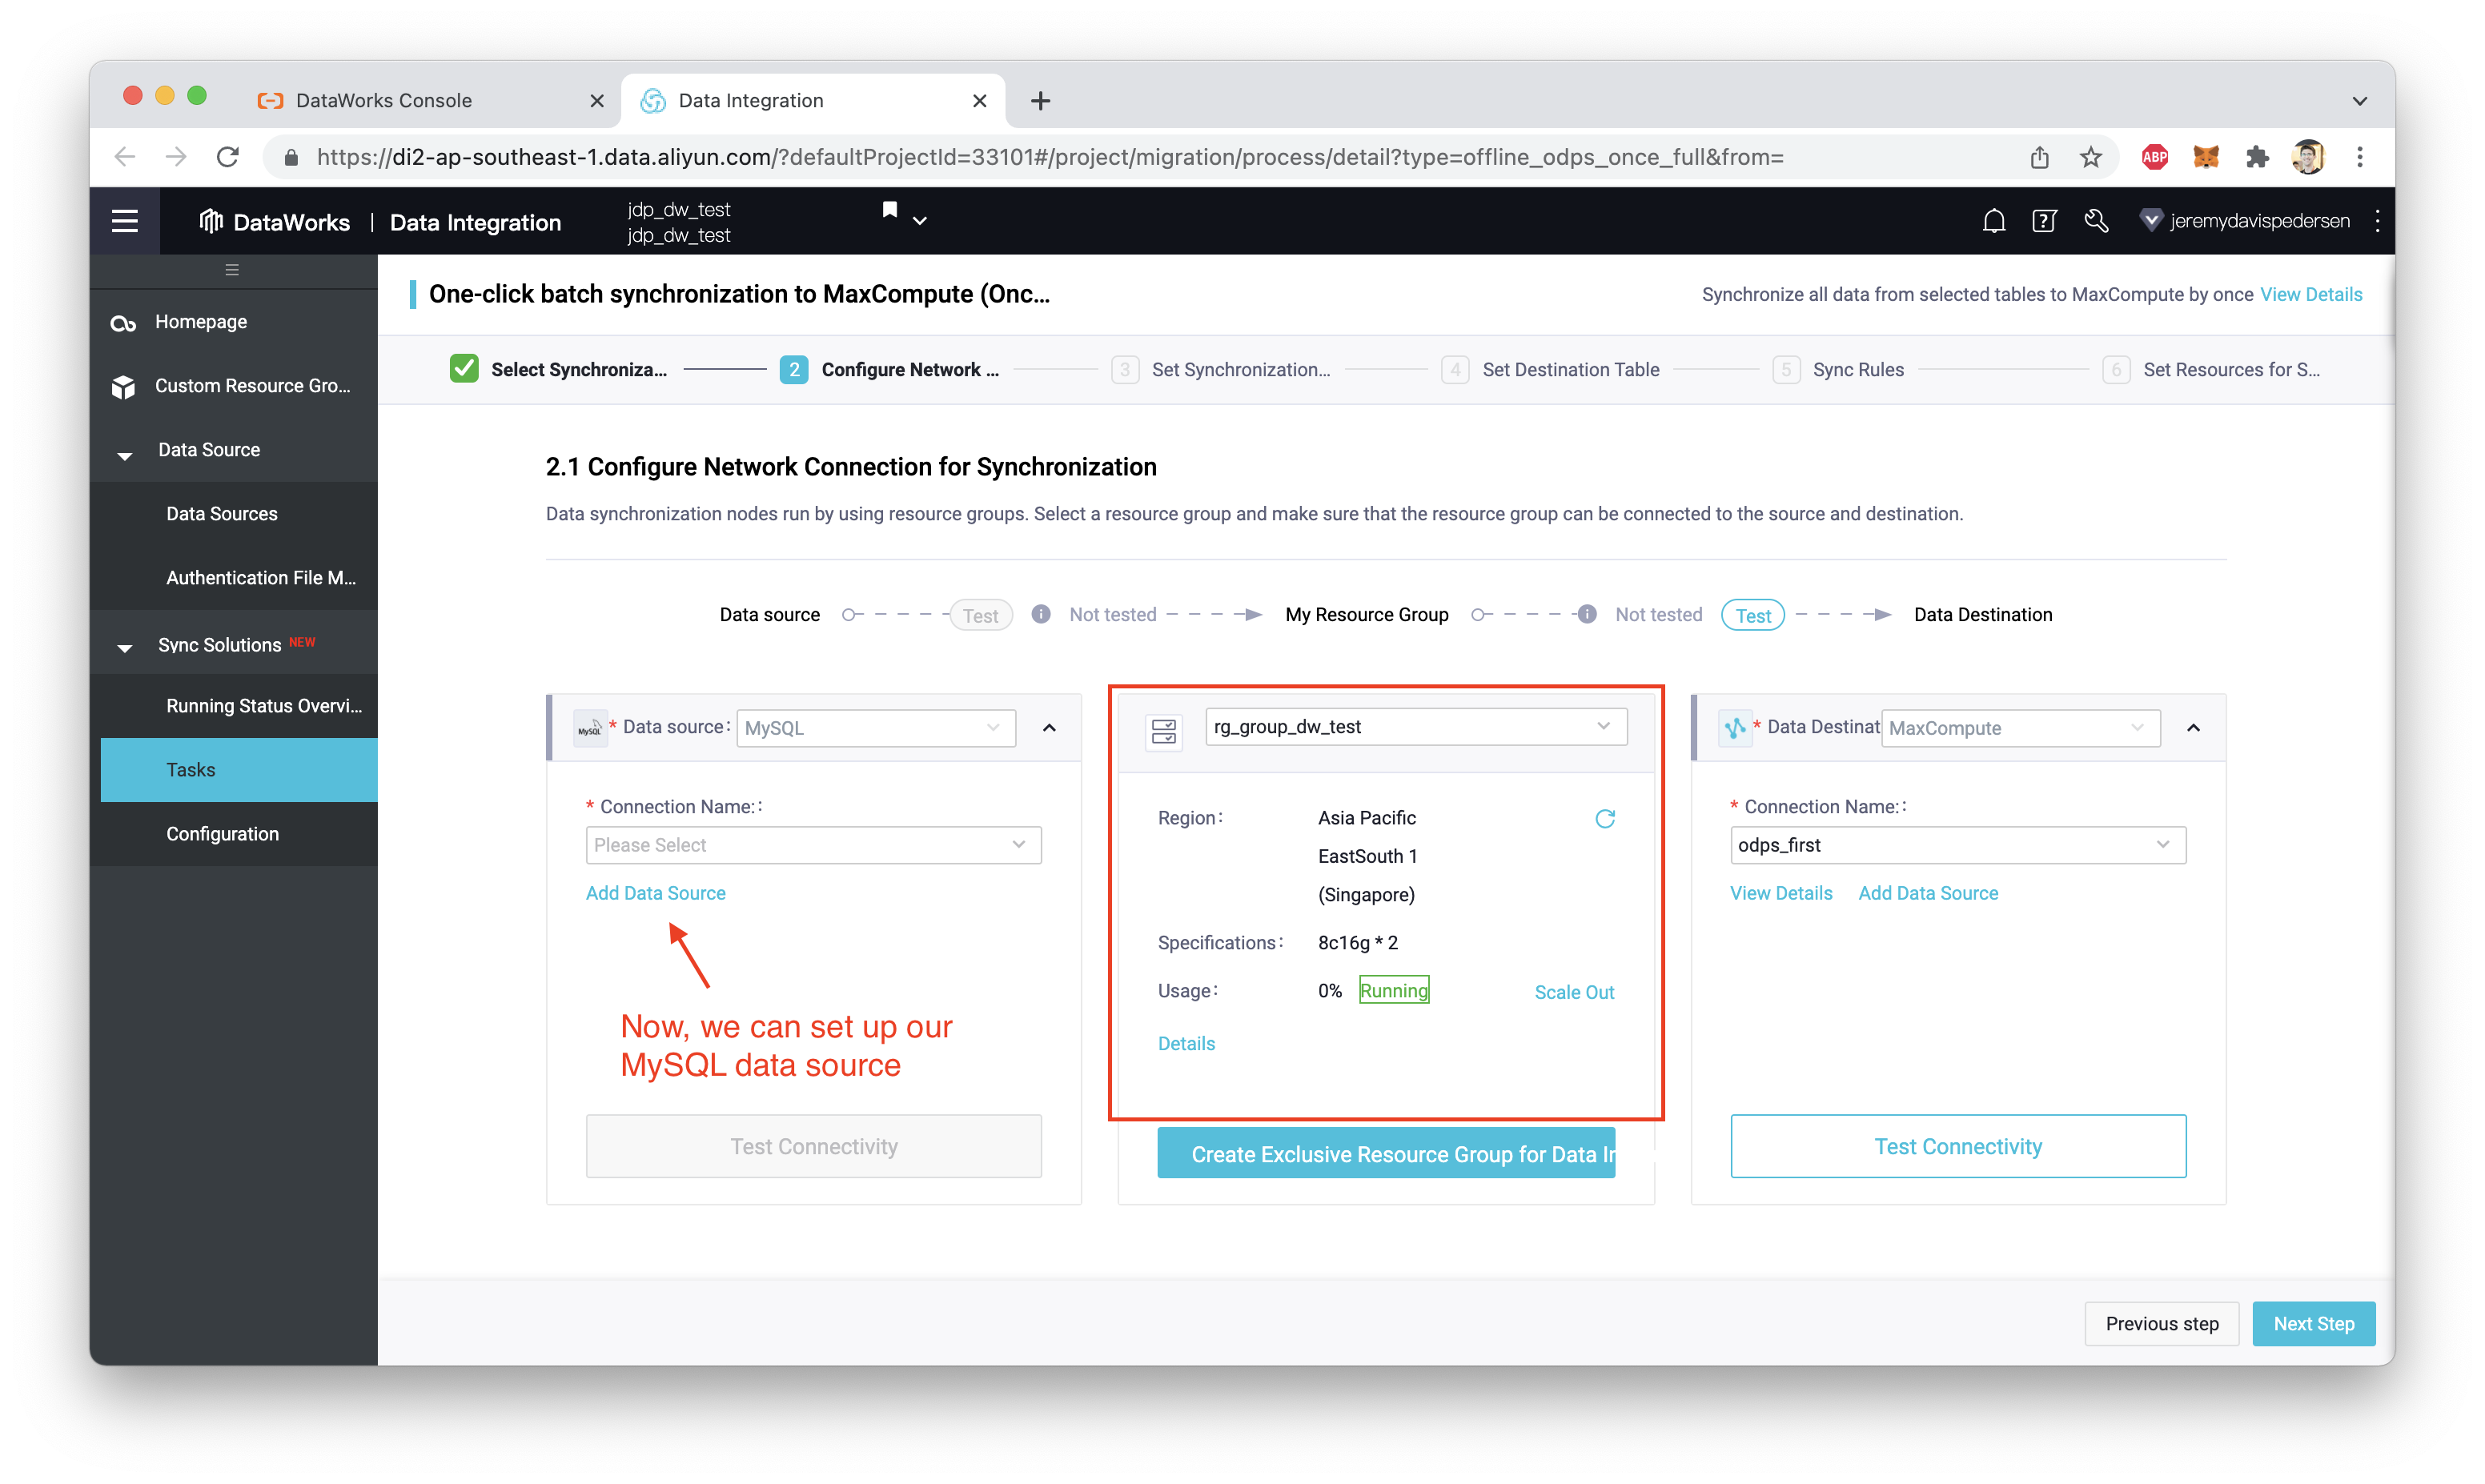
Once the Resource Group has been created and initialized (which could take a few minutes), we should be able to select it from the dropdown:
If you followed along with the blog post I mentioned earlier to set up an RDS MySQL data source, you'll want to choose the "Alibaba Cloud instance mode" option. If not, choose "Connection string mode" and use a standard JDBC URL to connect:
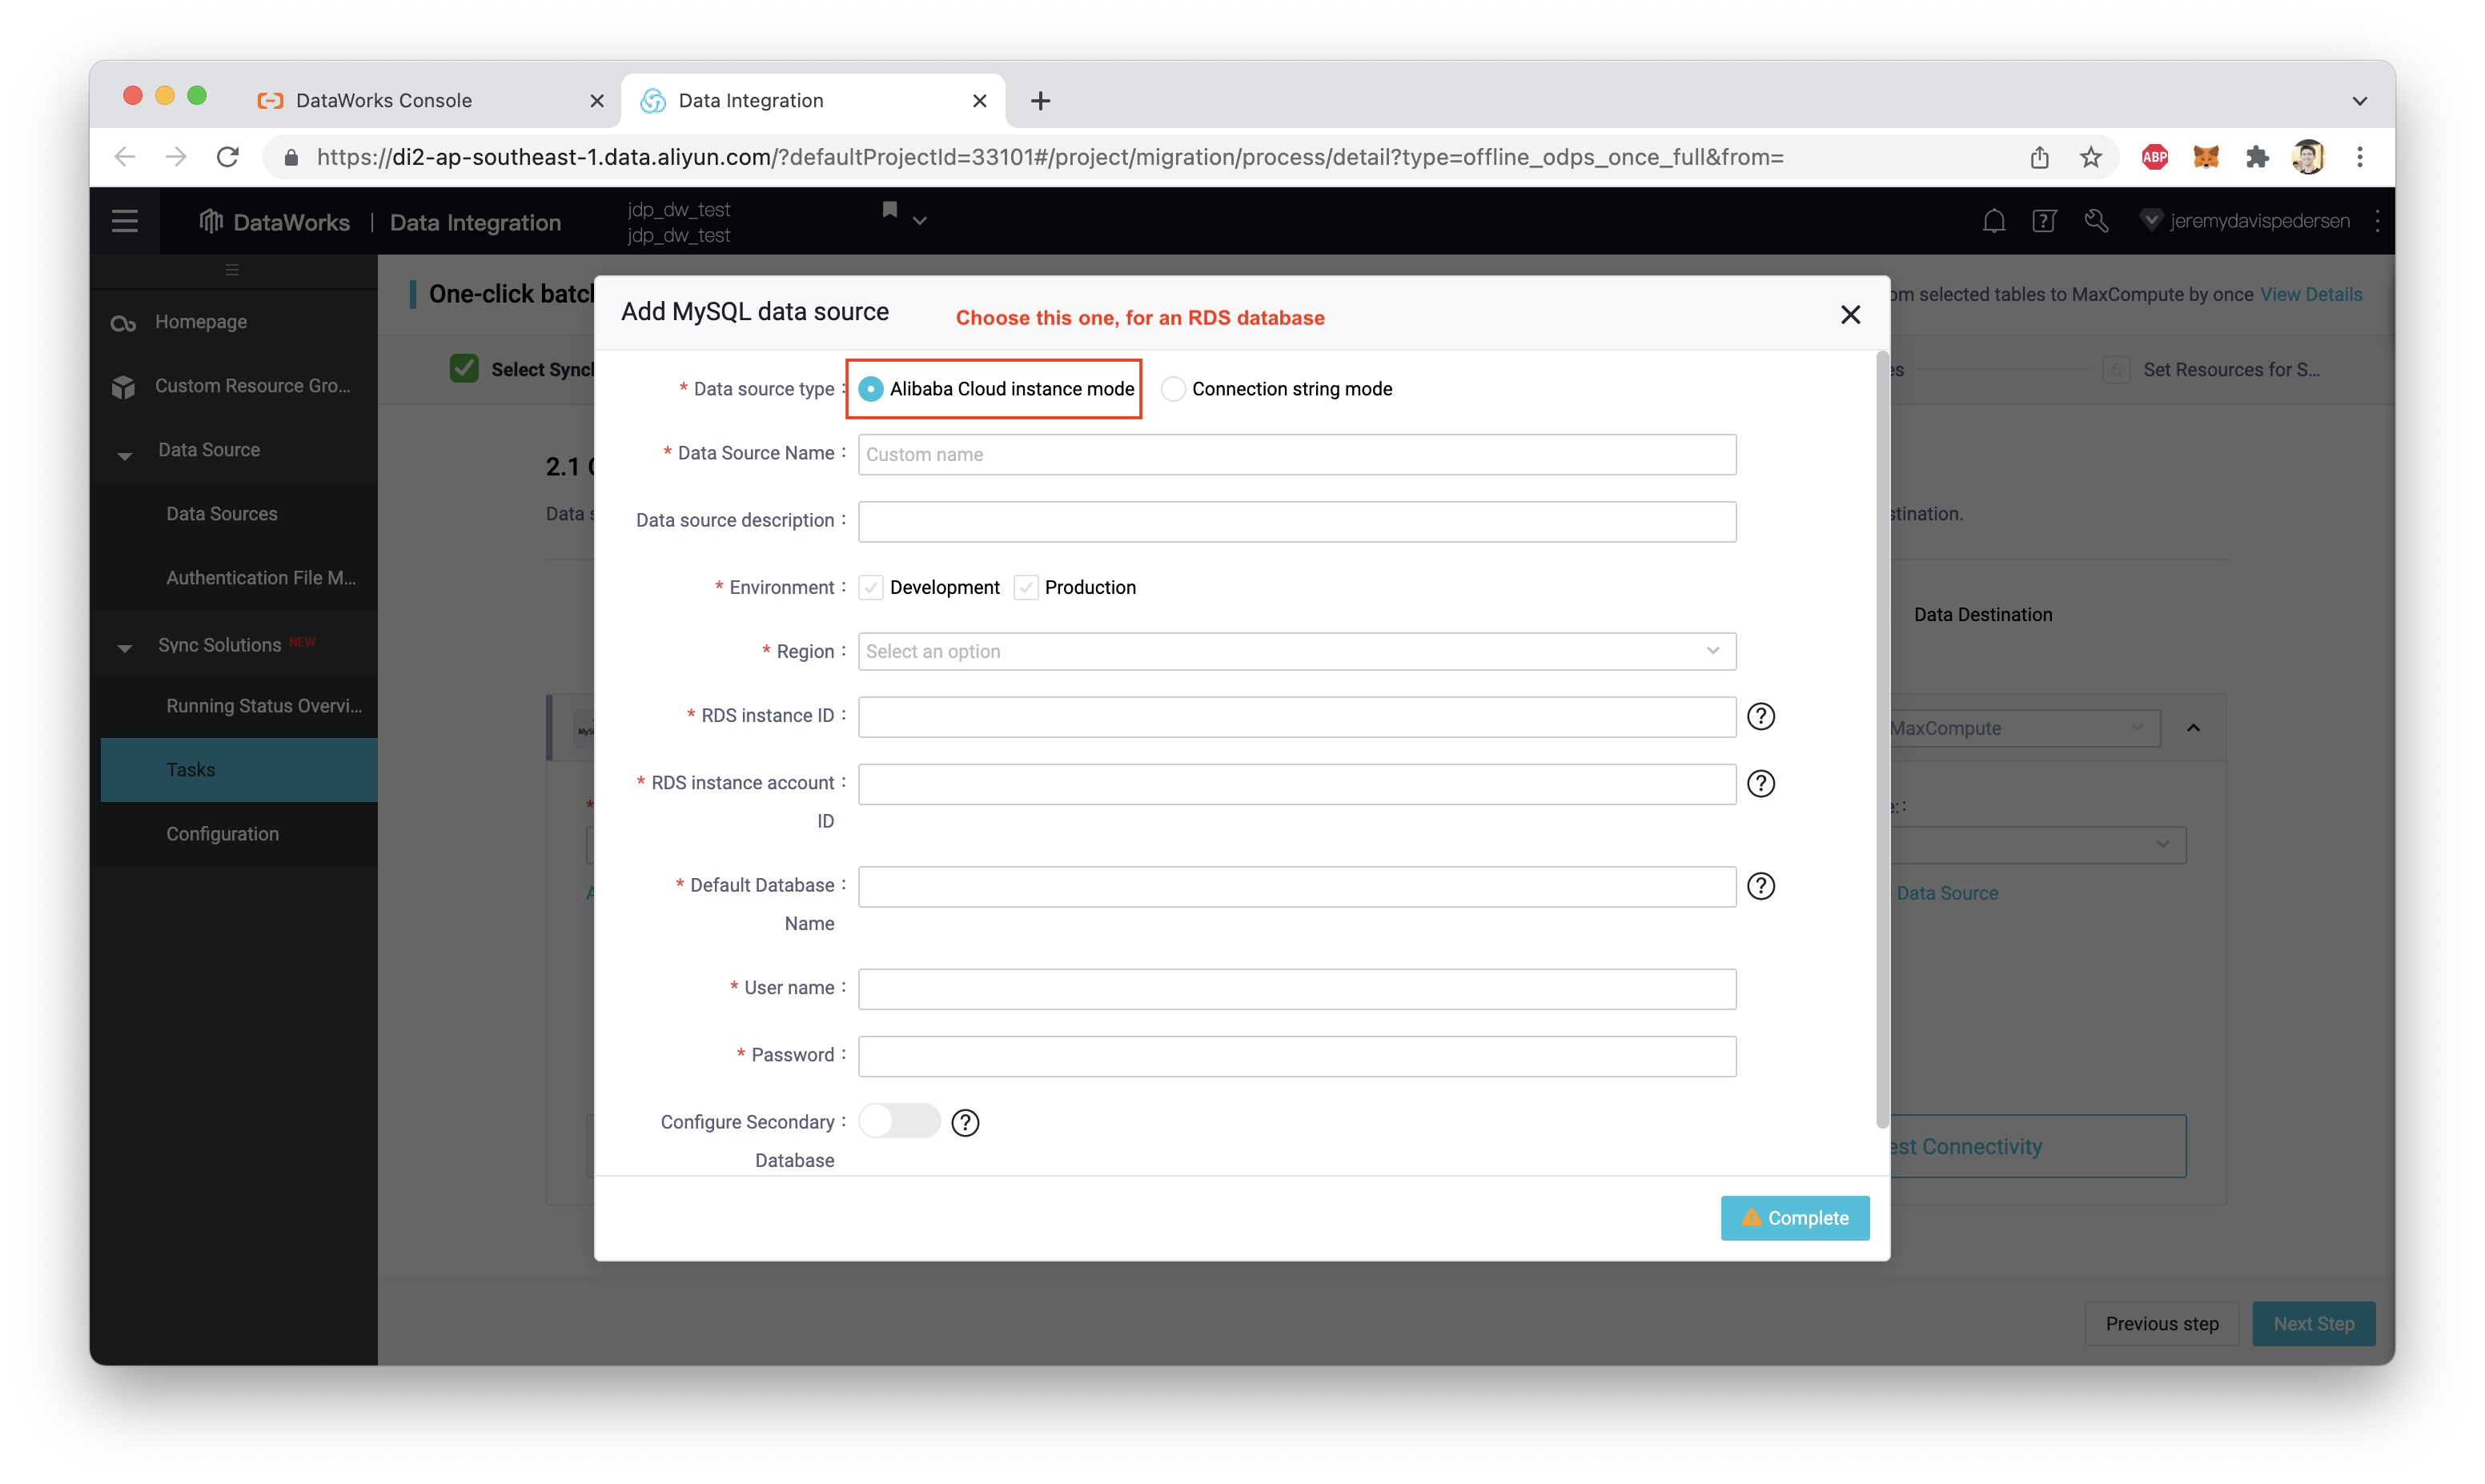
Fill in all the details, and click Complete. We now need to test the connection:
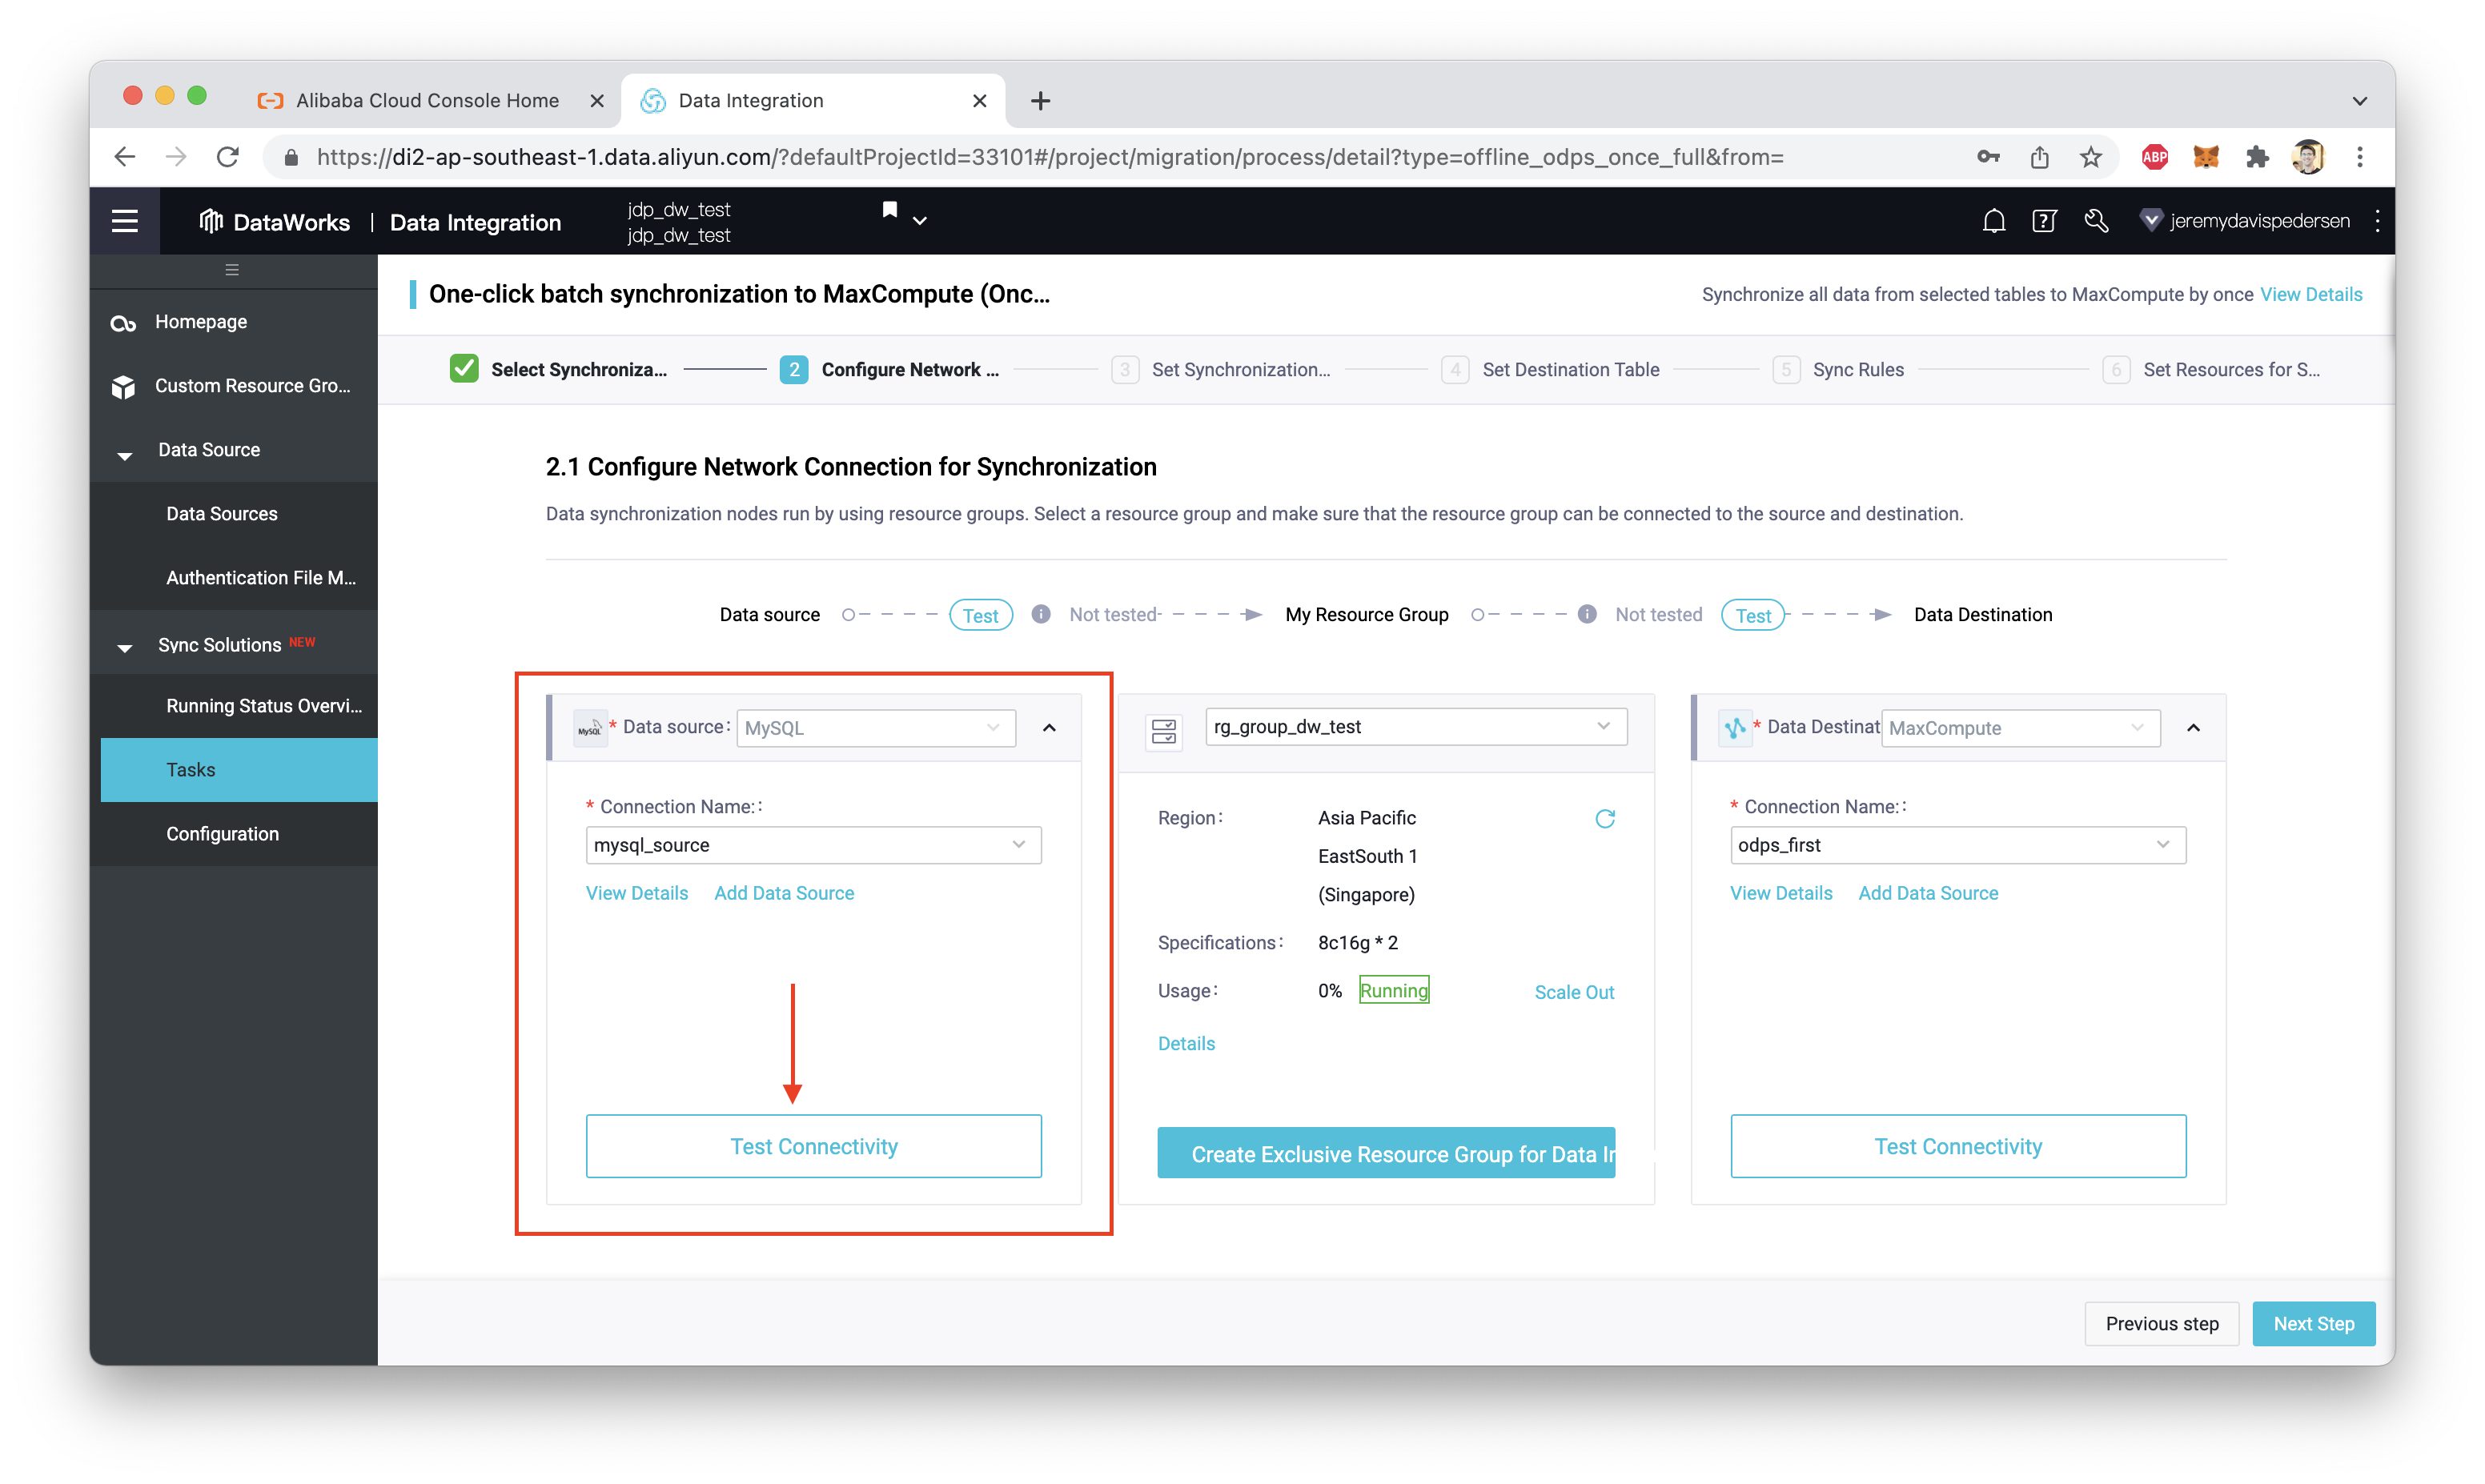
Keep in mind that this could fail:
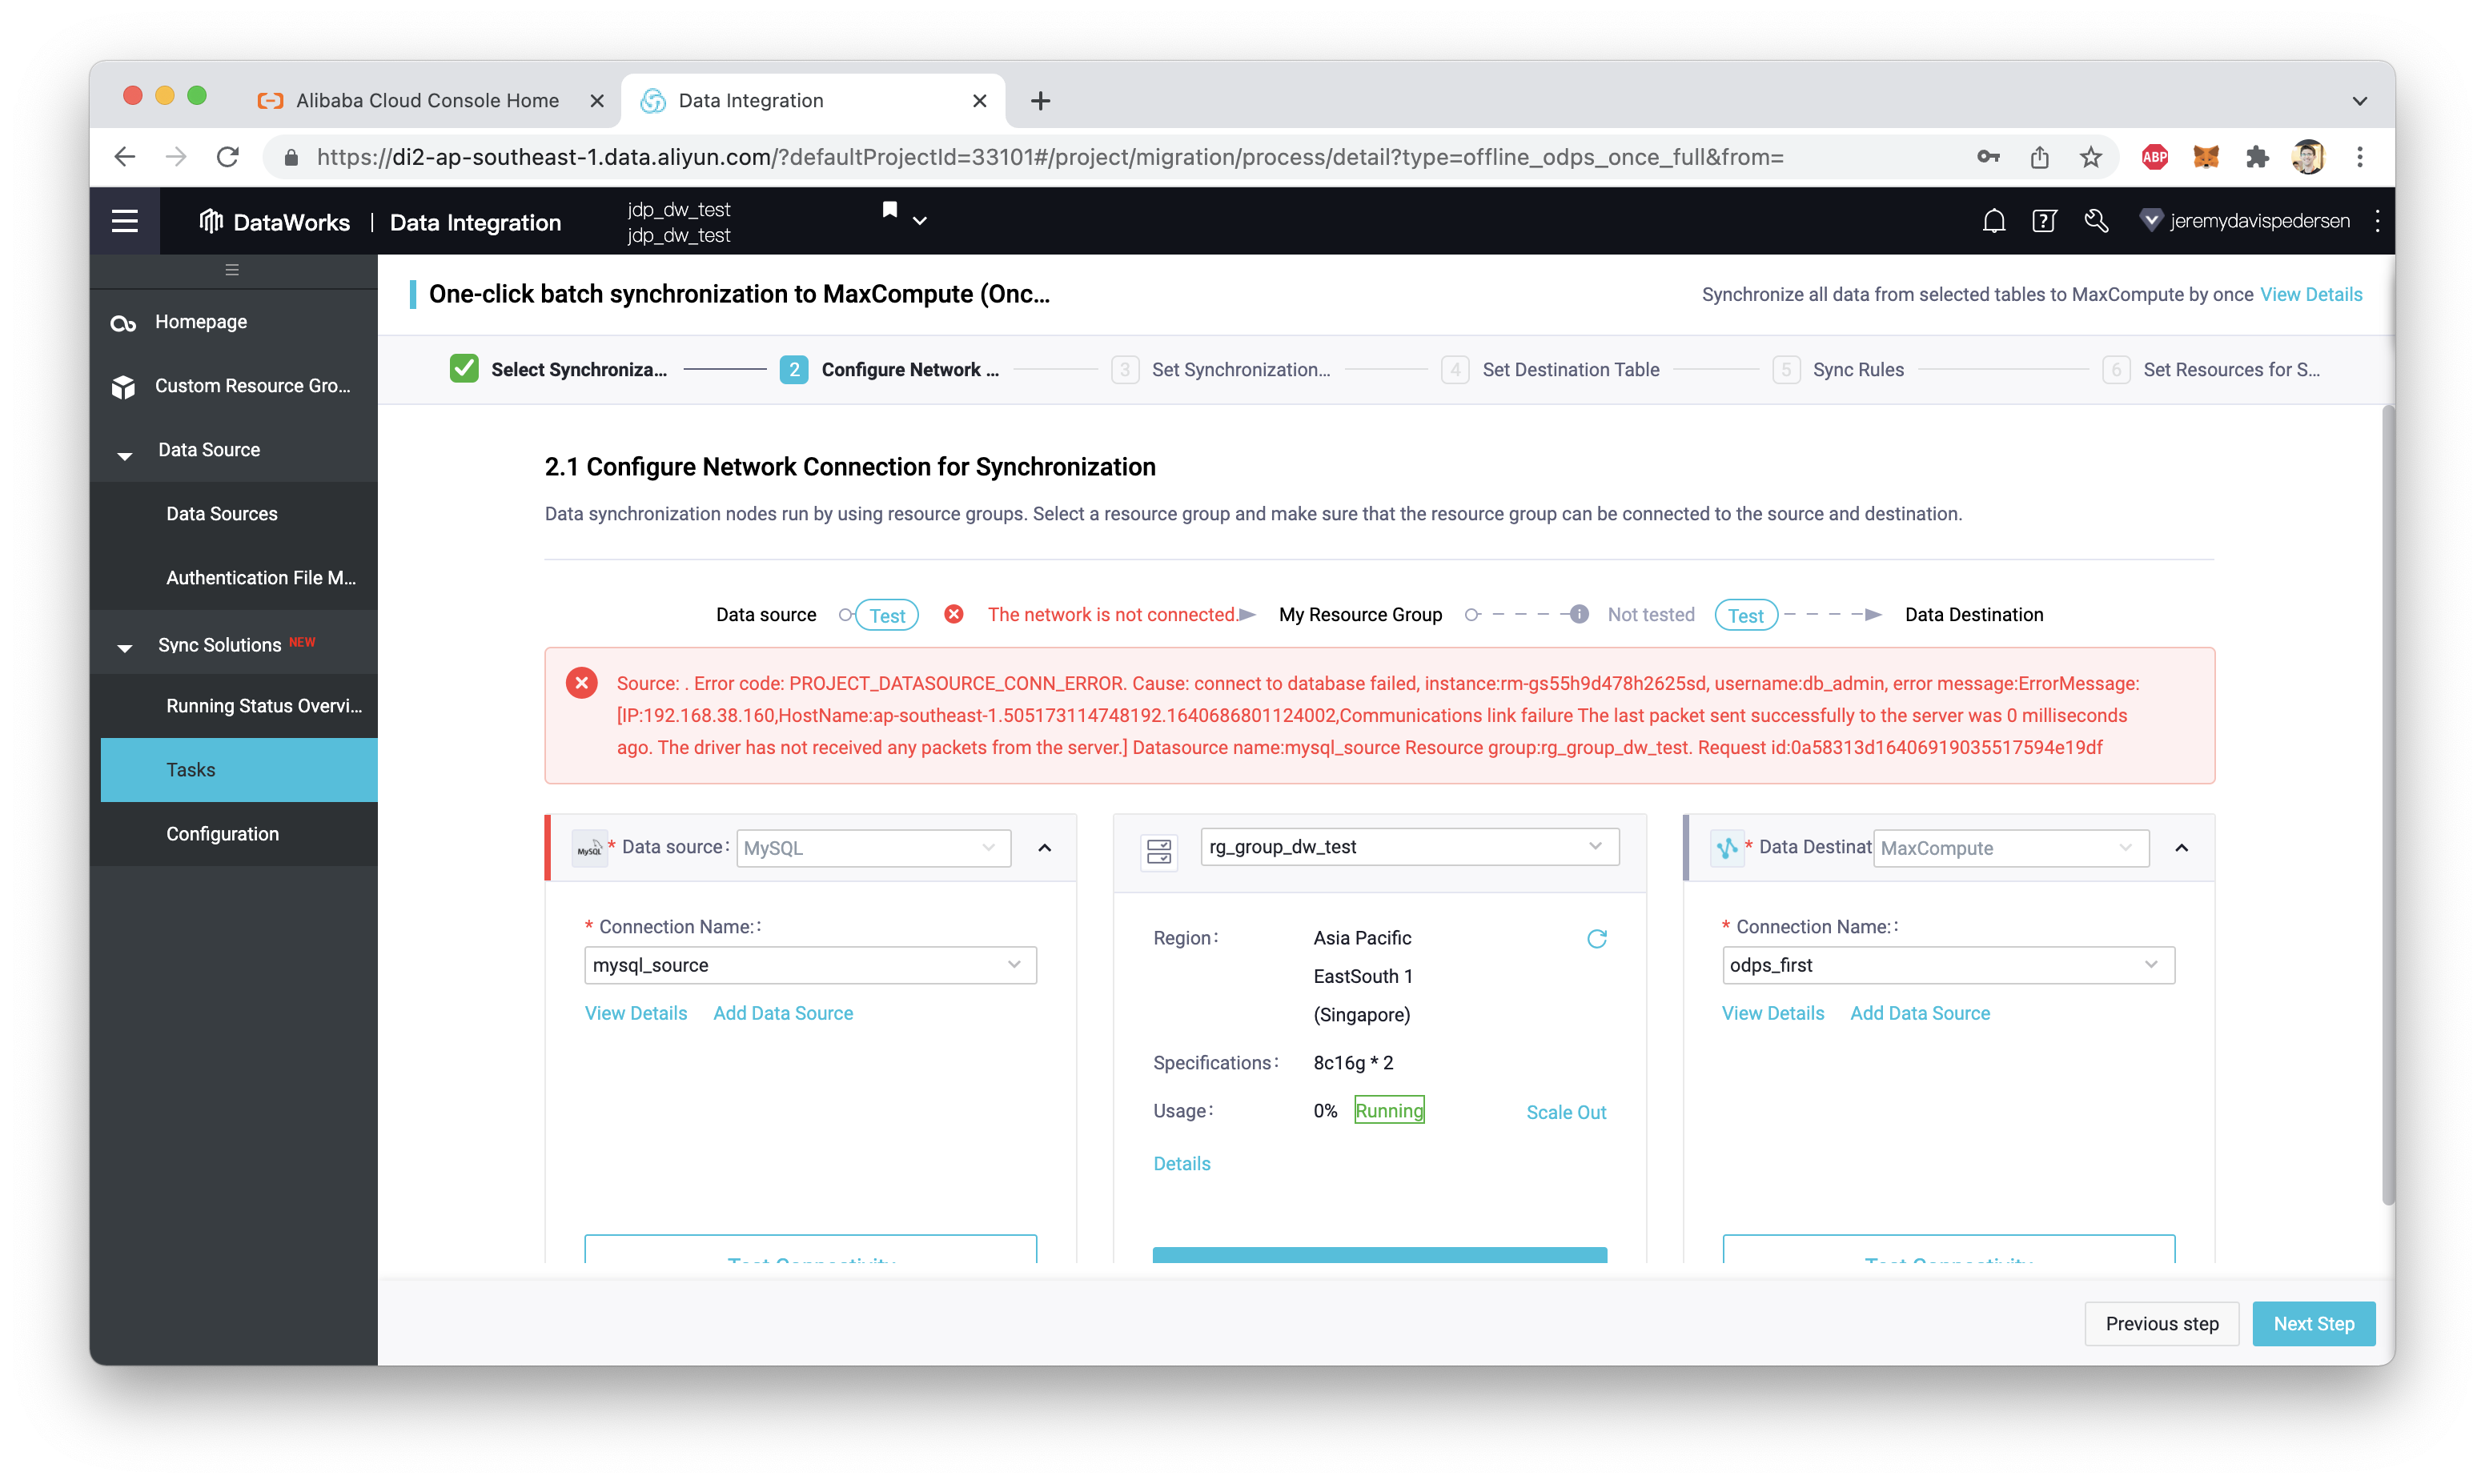
If it fails, there could be a few different reasons. The most likely reason is that we haven't attached our Exclusive Resource Group to the VPC where our RDS database is located.
Solving this problem is a multi-step process, but it isn't too difficult.
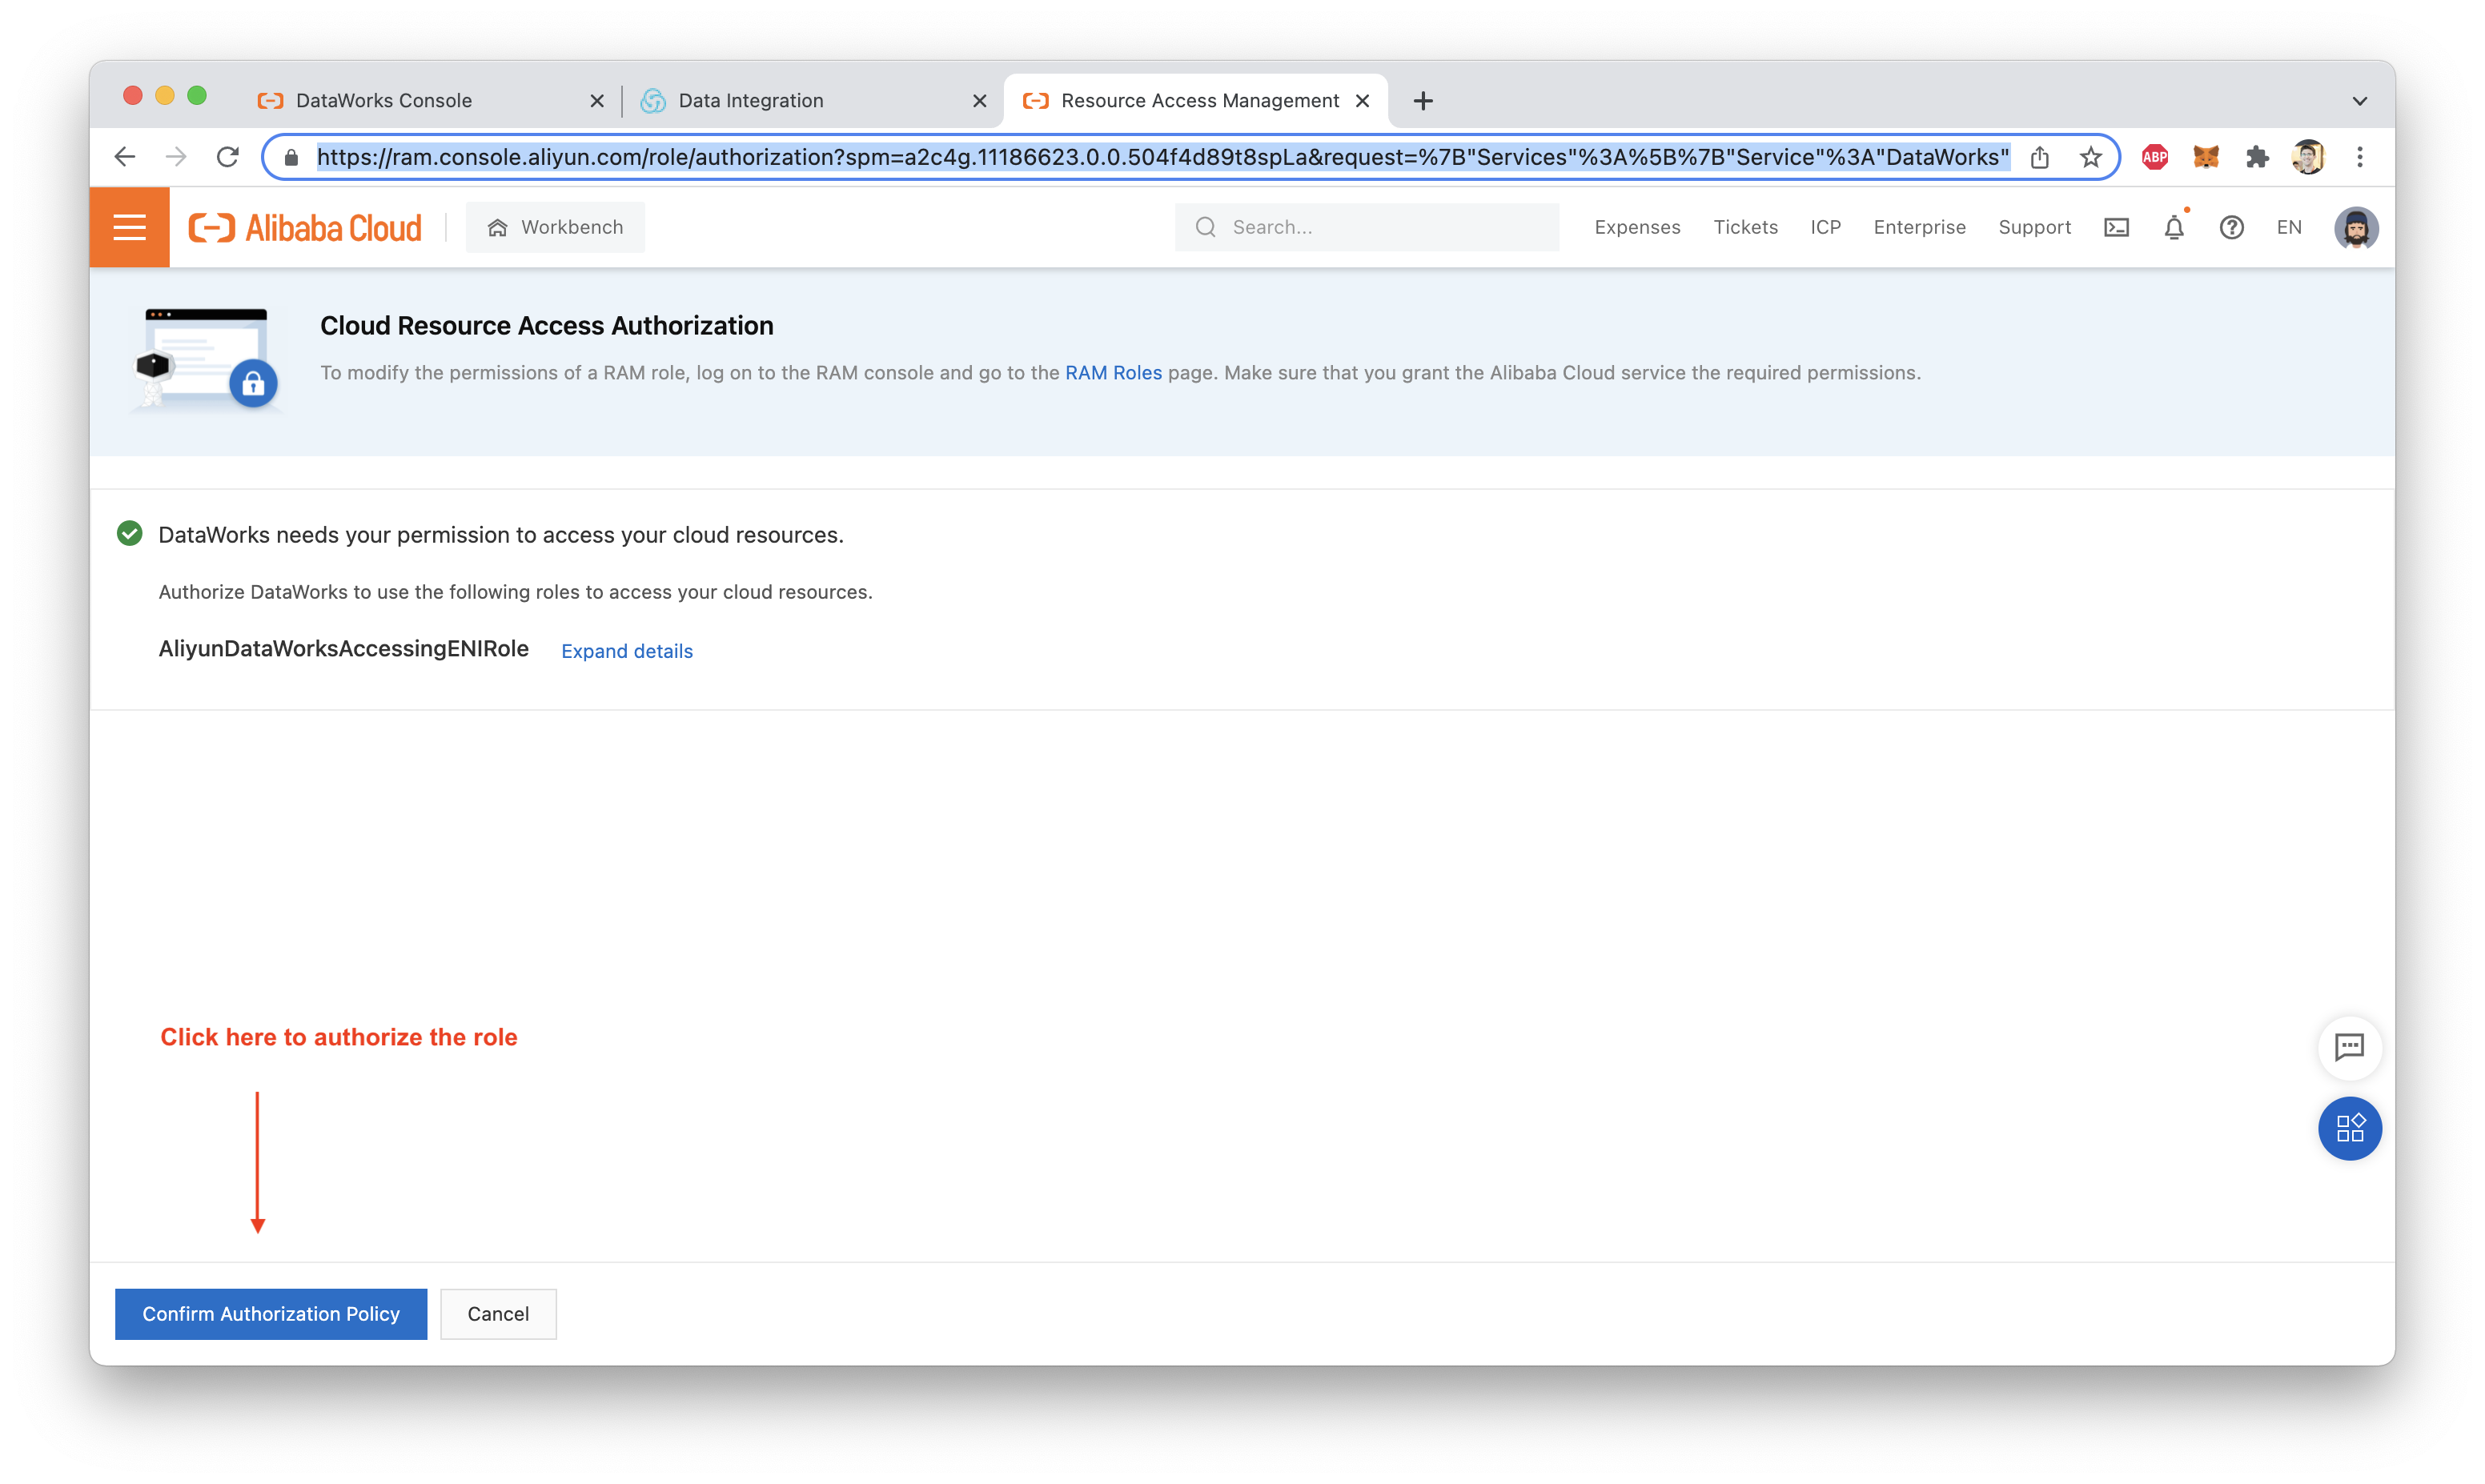
If you have never configured an Exclusive Resource Group before, you'll need to assign the AliyunDataWorksAccessingENIRole to DataWorks from the RAM (Resource Access Management) console, before you can do anything else. Clicking on this link should let you create this role automatically (the link should open a page like the one below, assuming you are already logged into your alibabacloud.com account when you click on it):
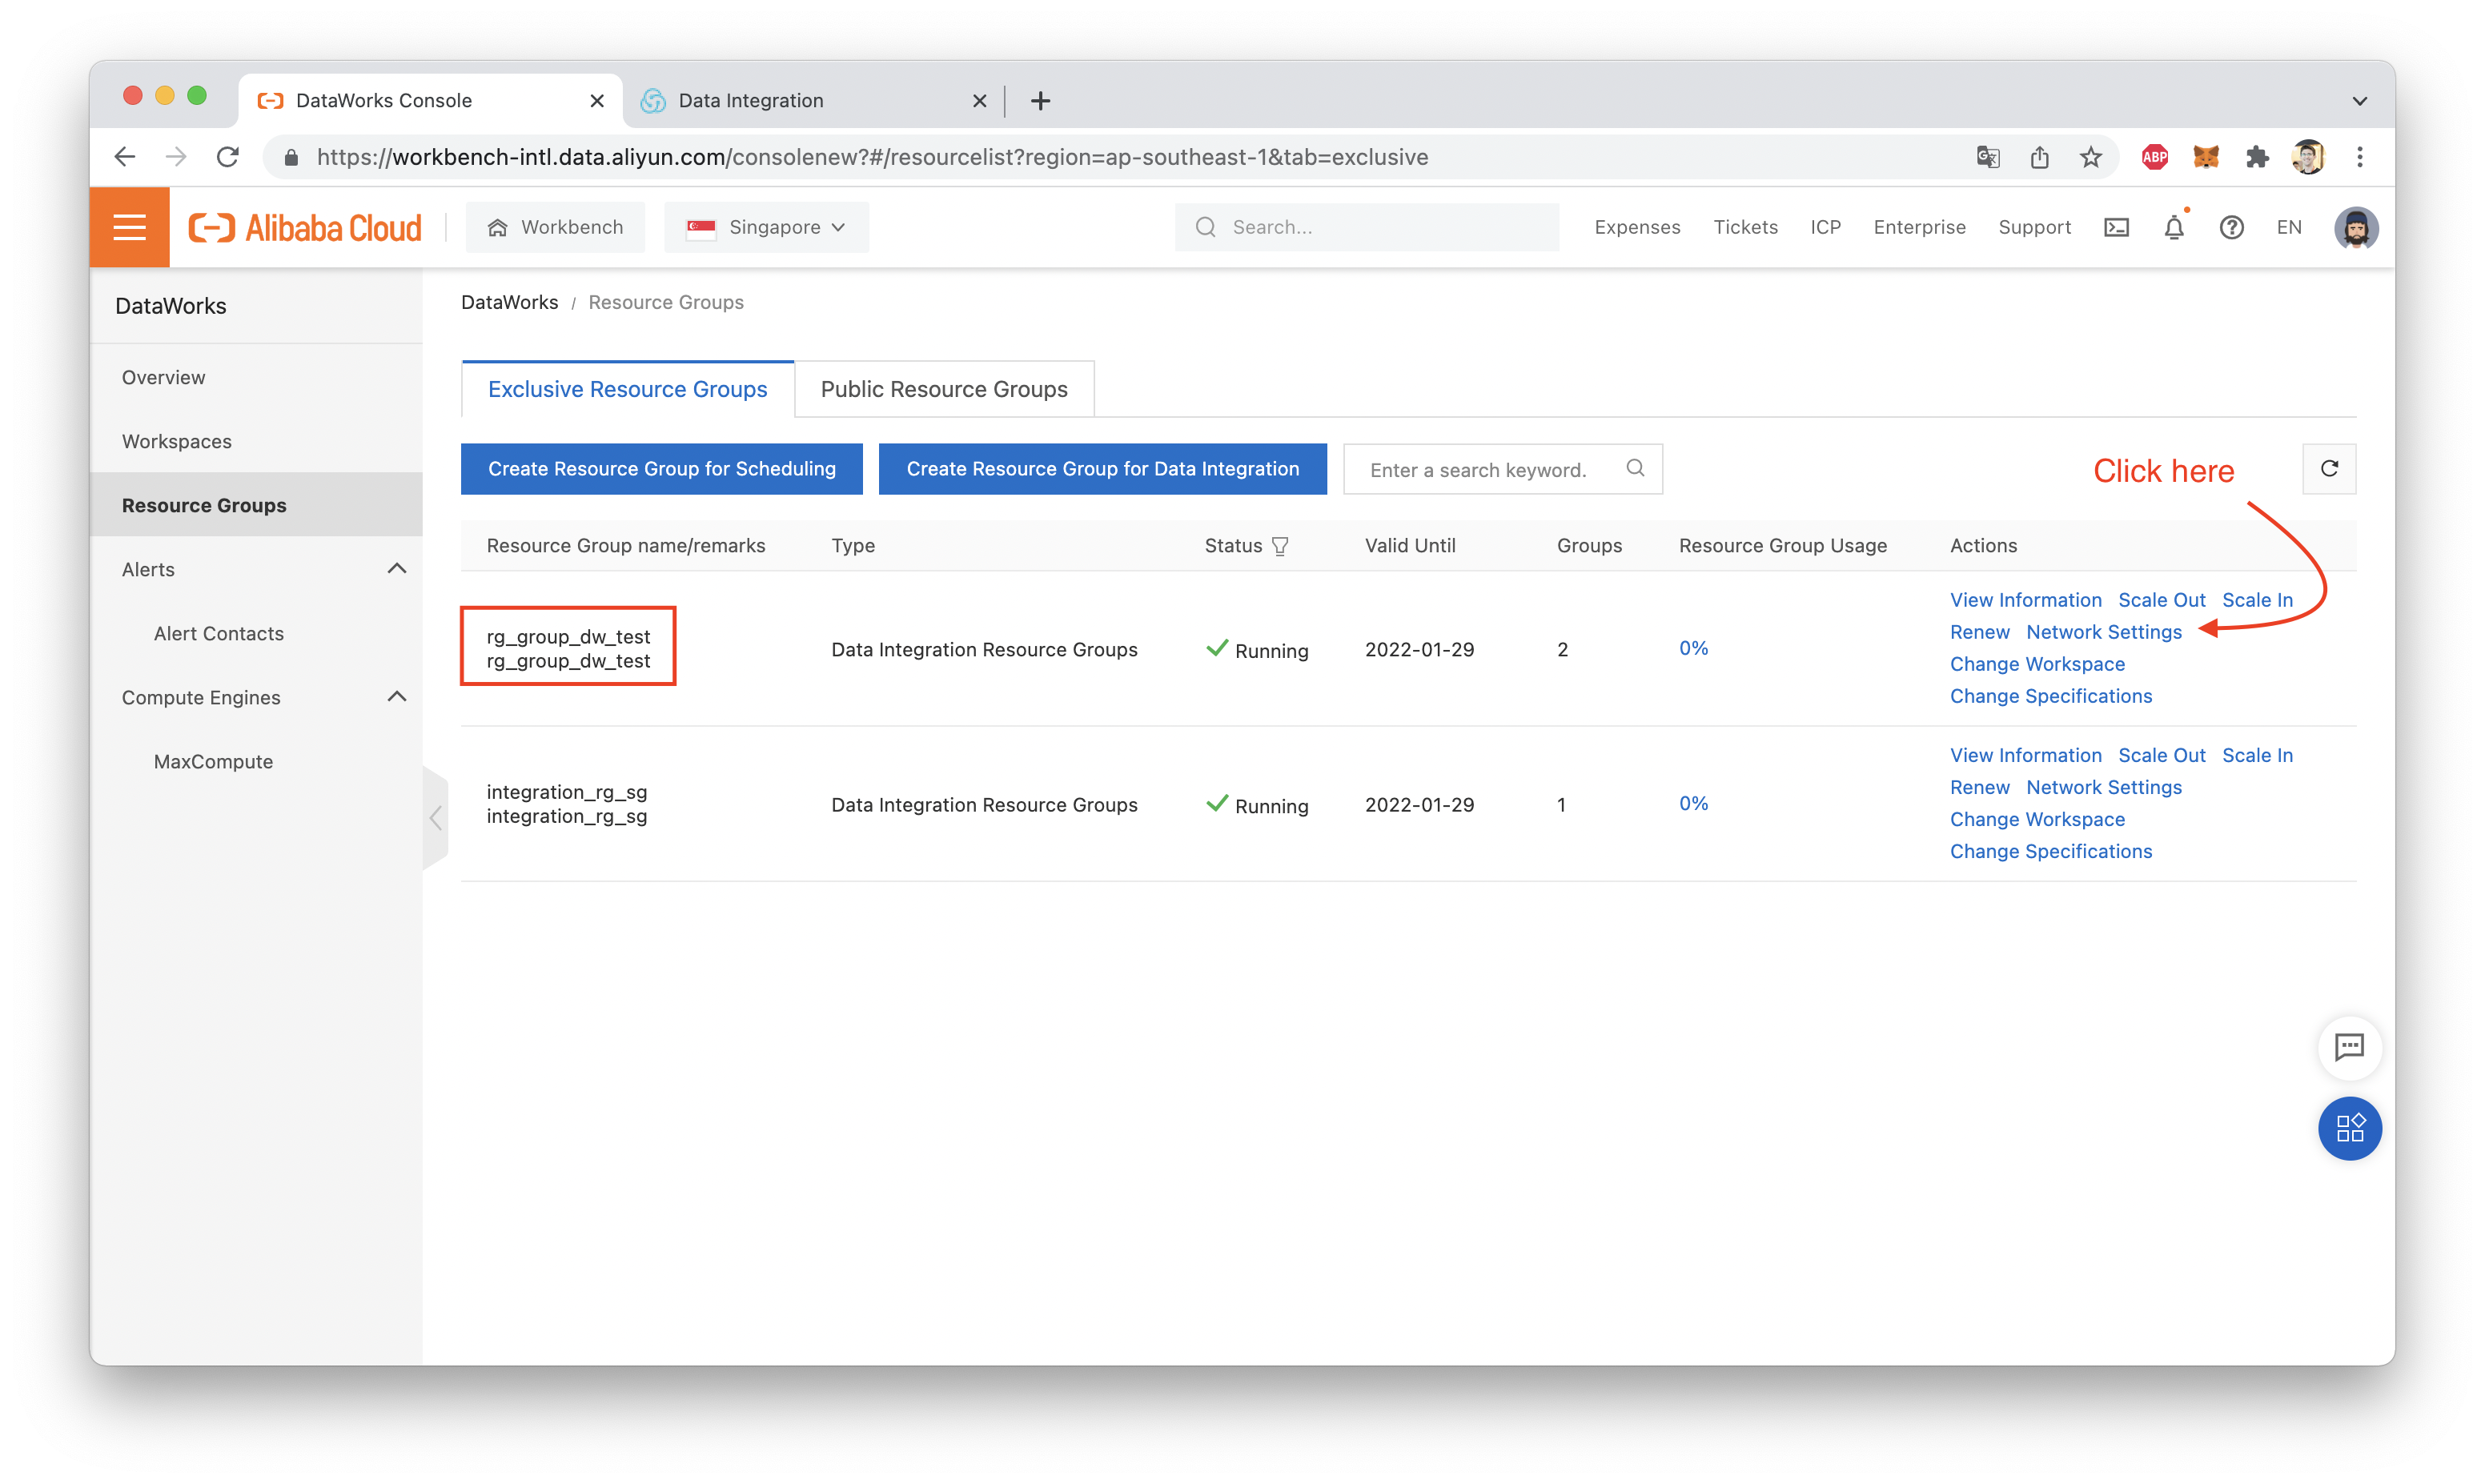
Once this step is out of the way, we can now bind the Resource Group to the VPC that holds our RDS instance. Note, your VPC name and ID will be different than what you see here:
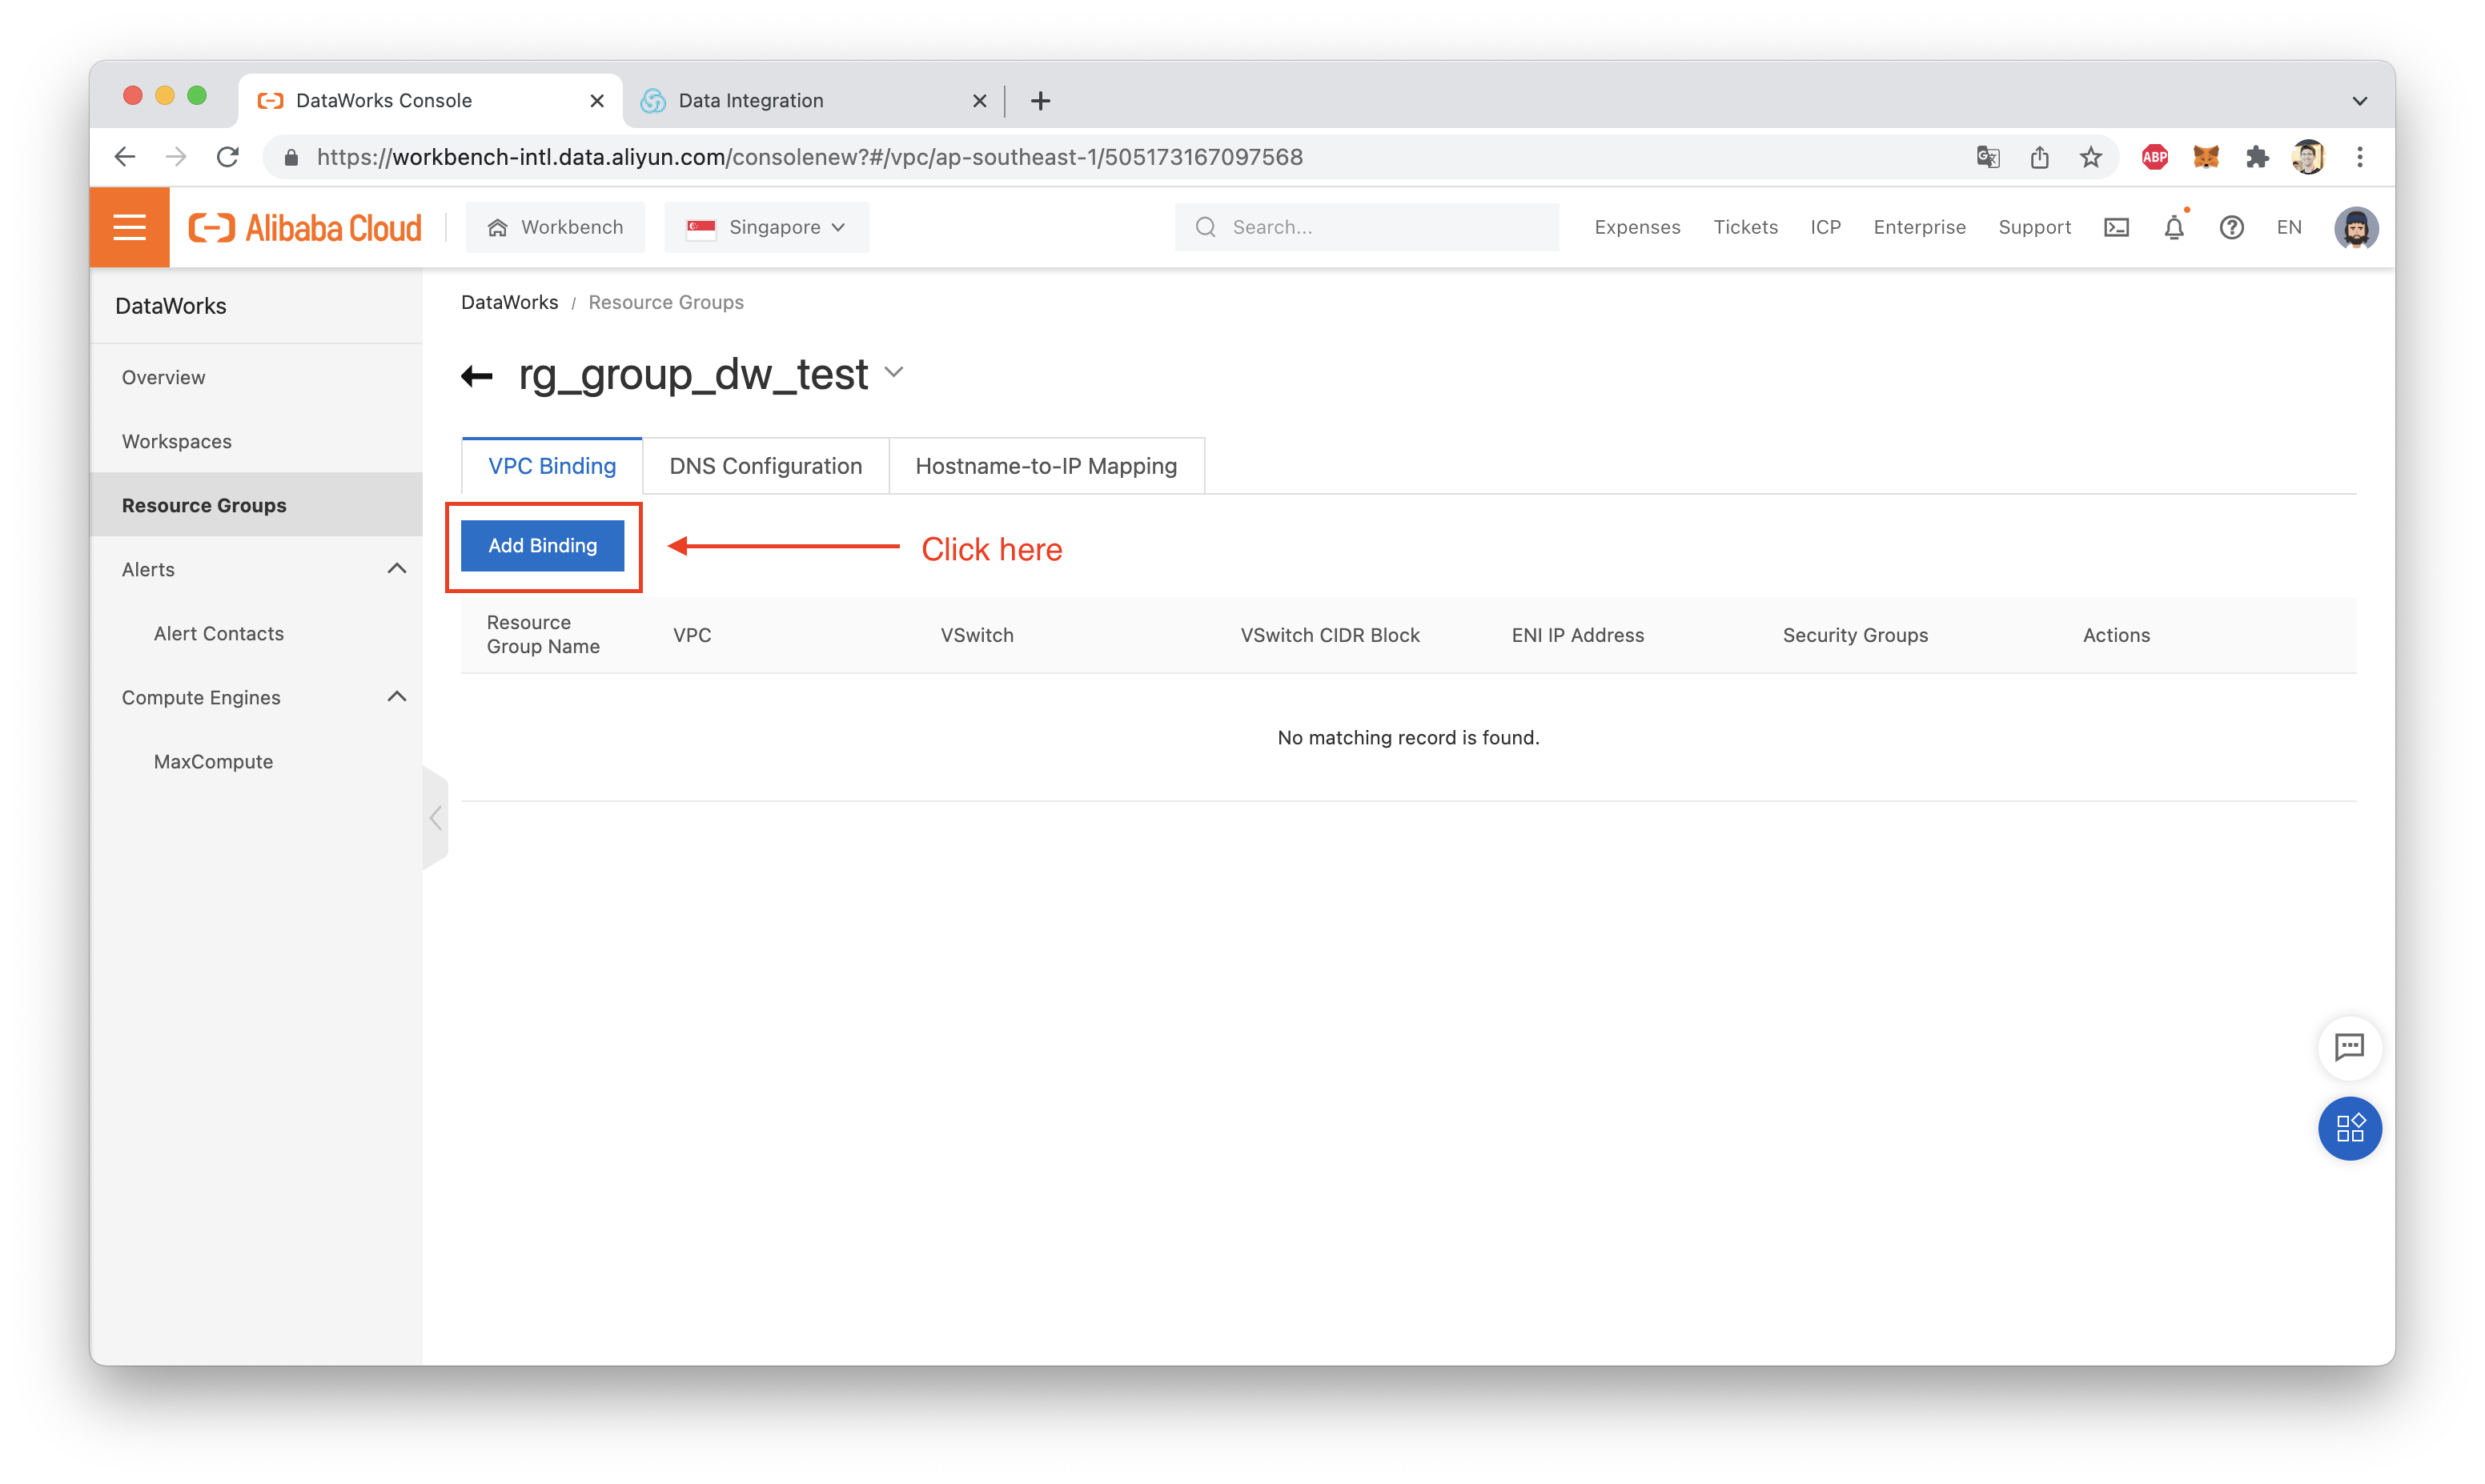
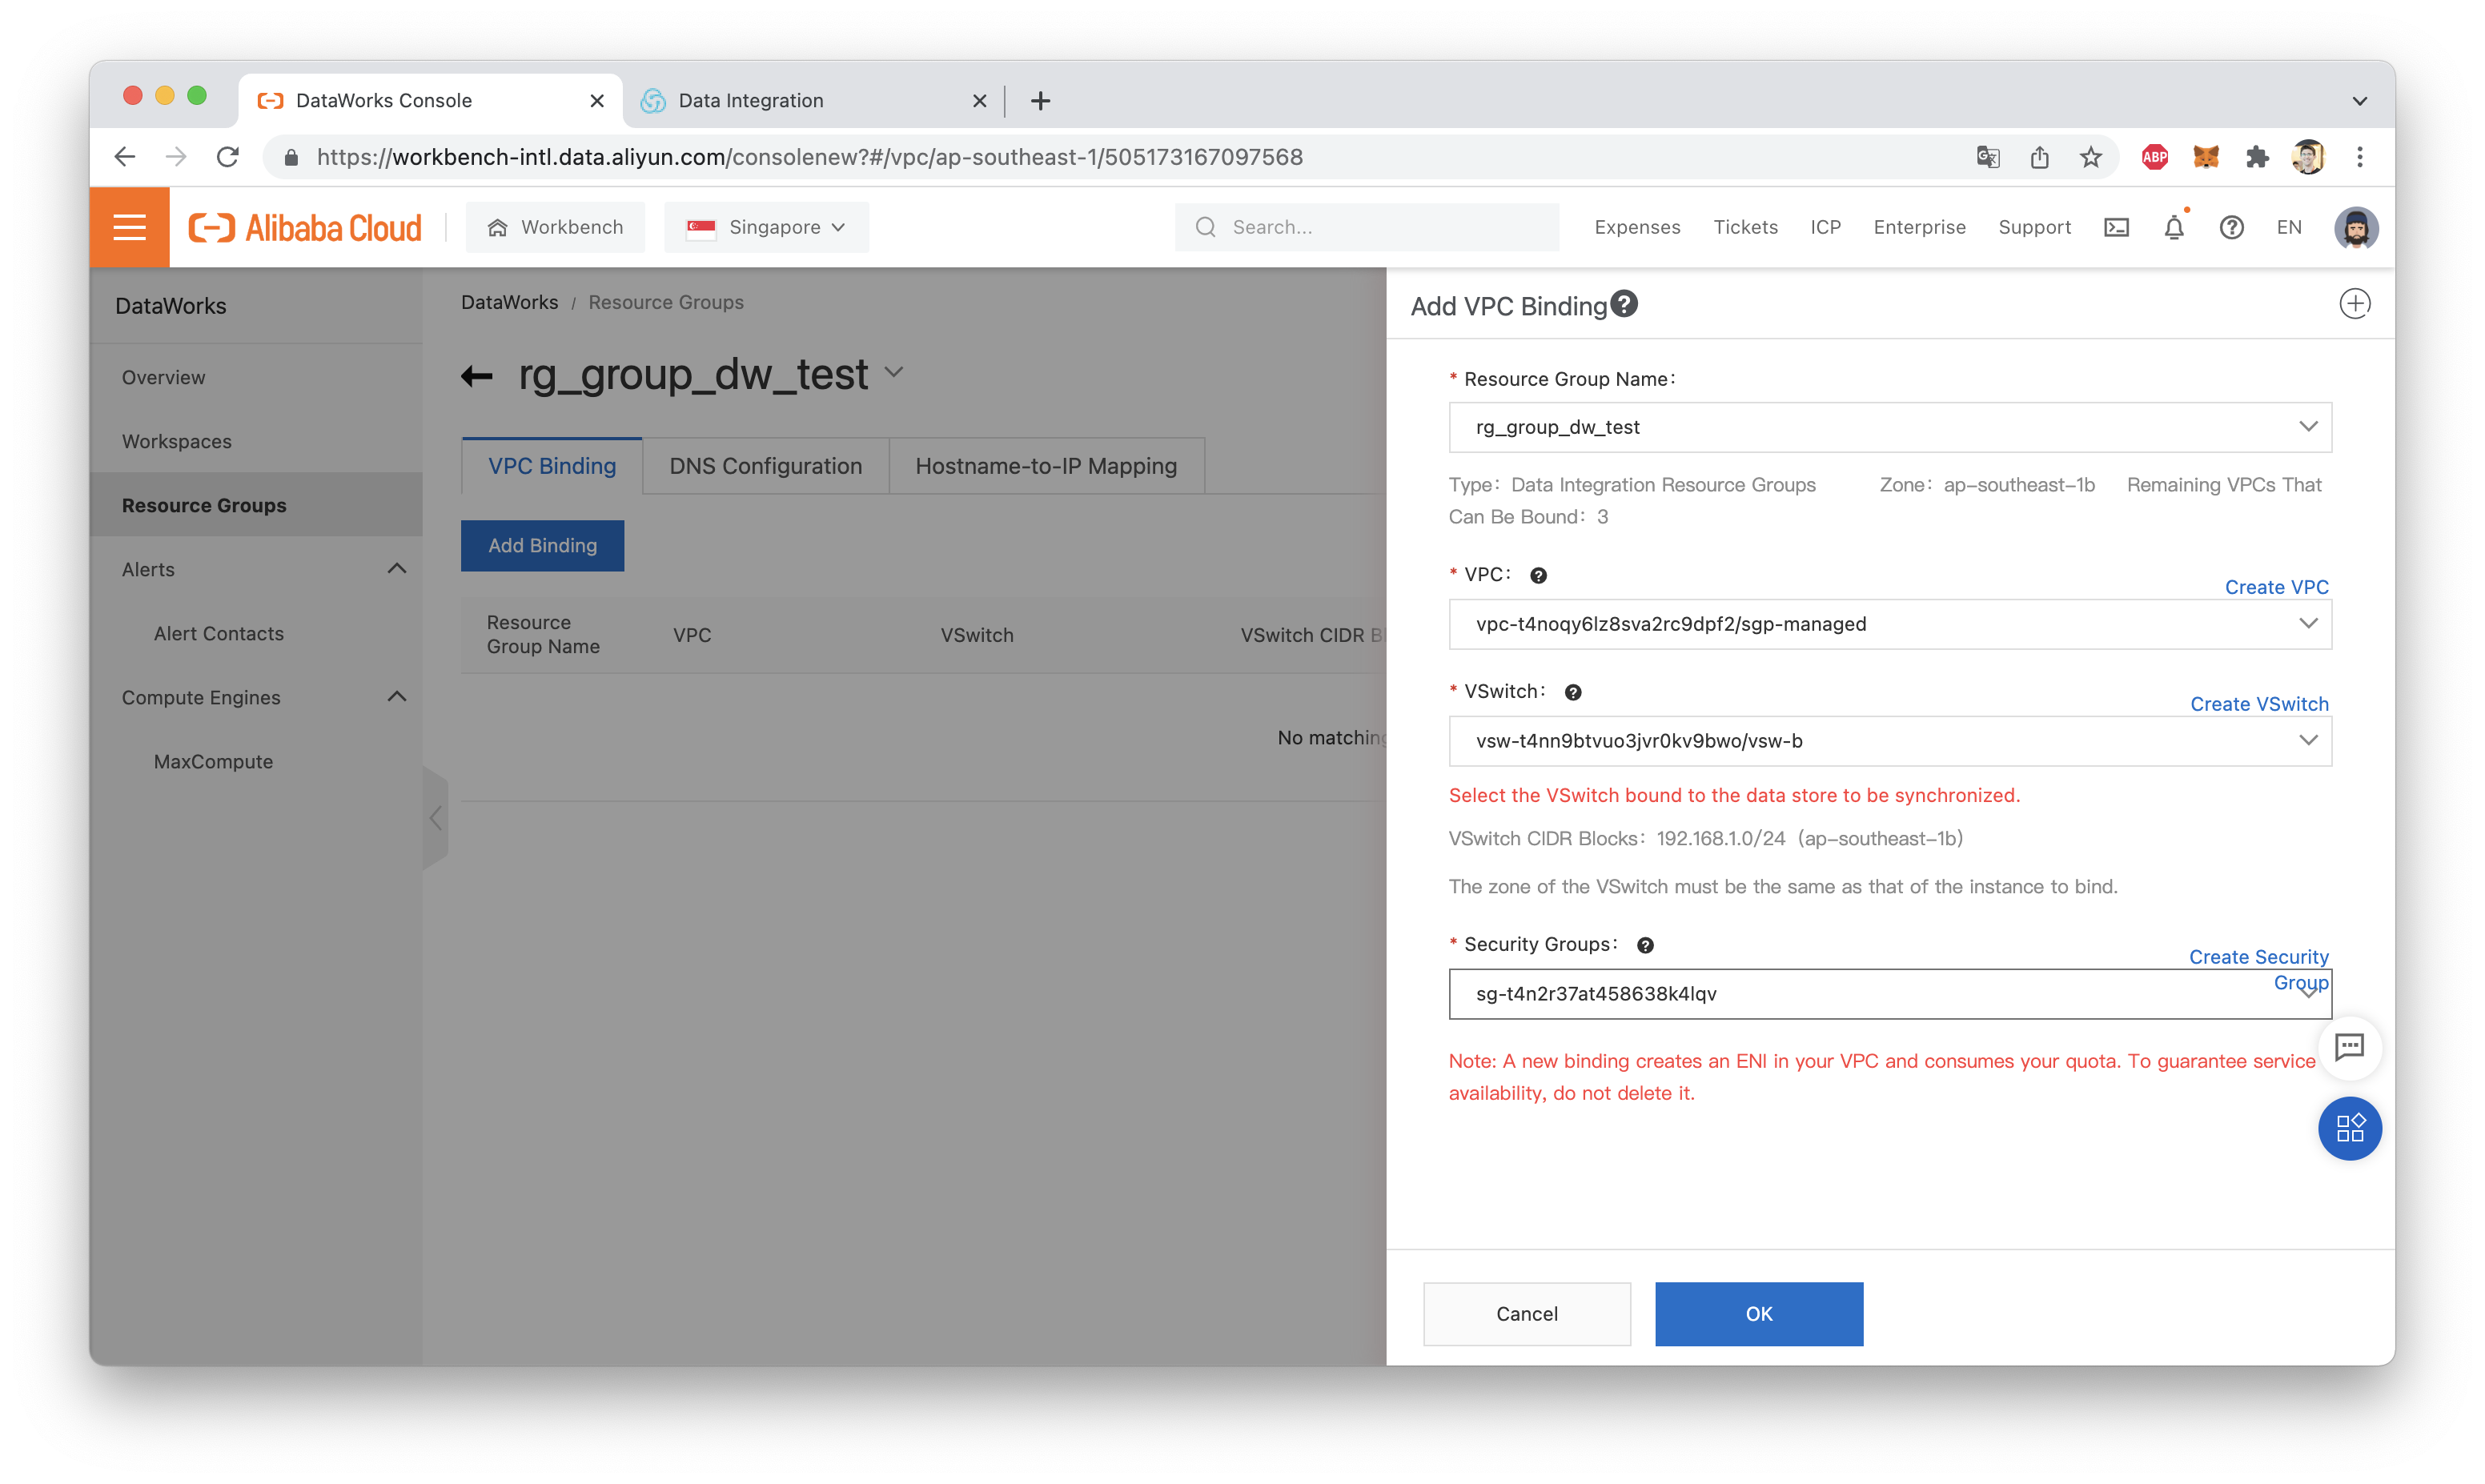
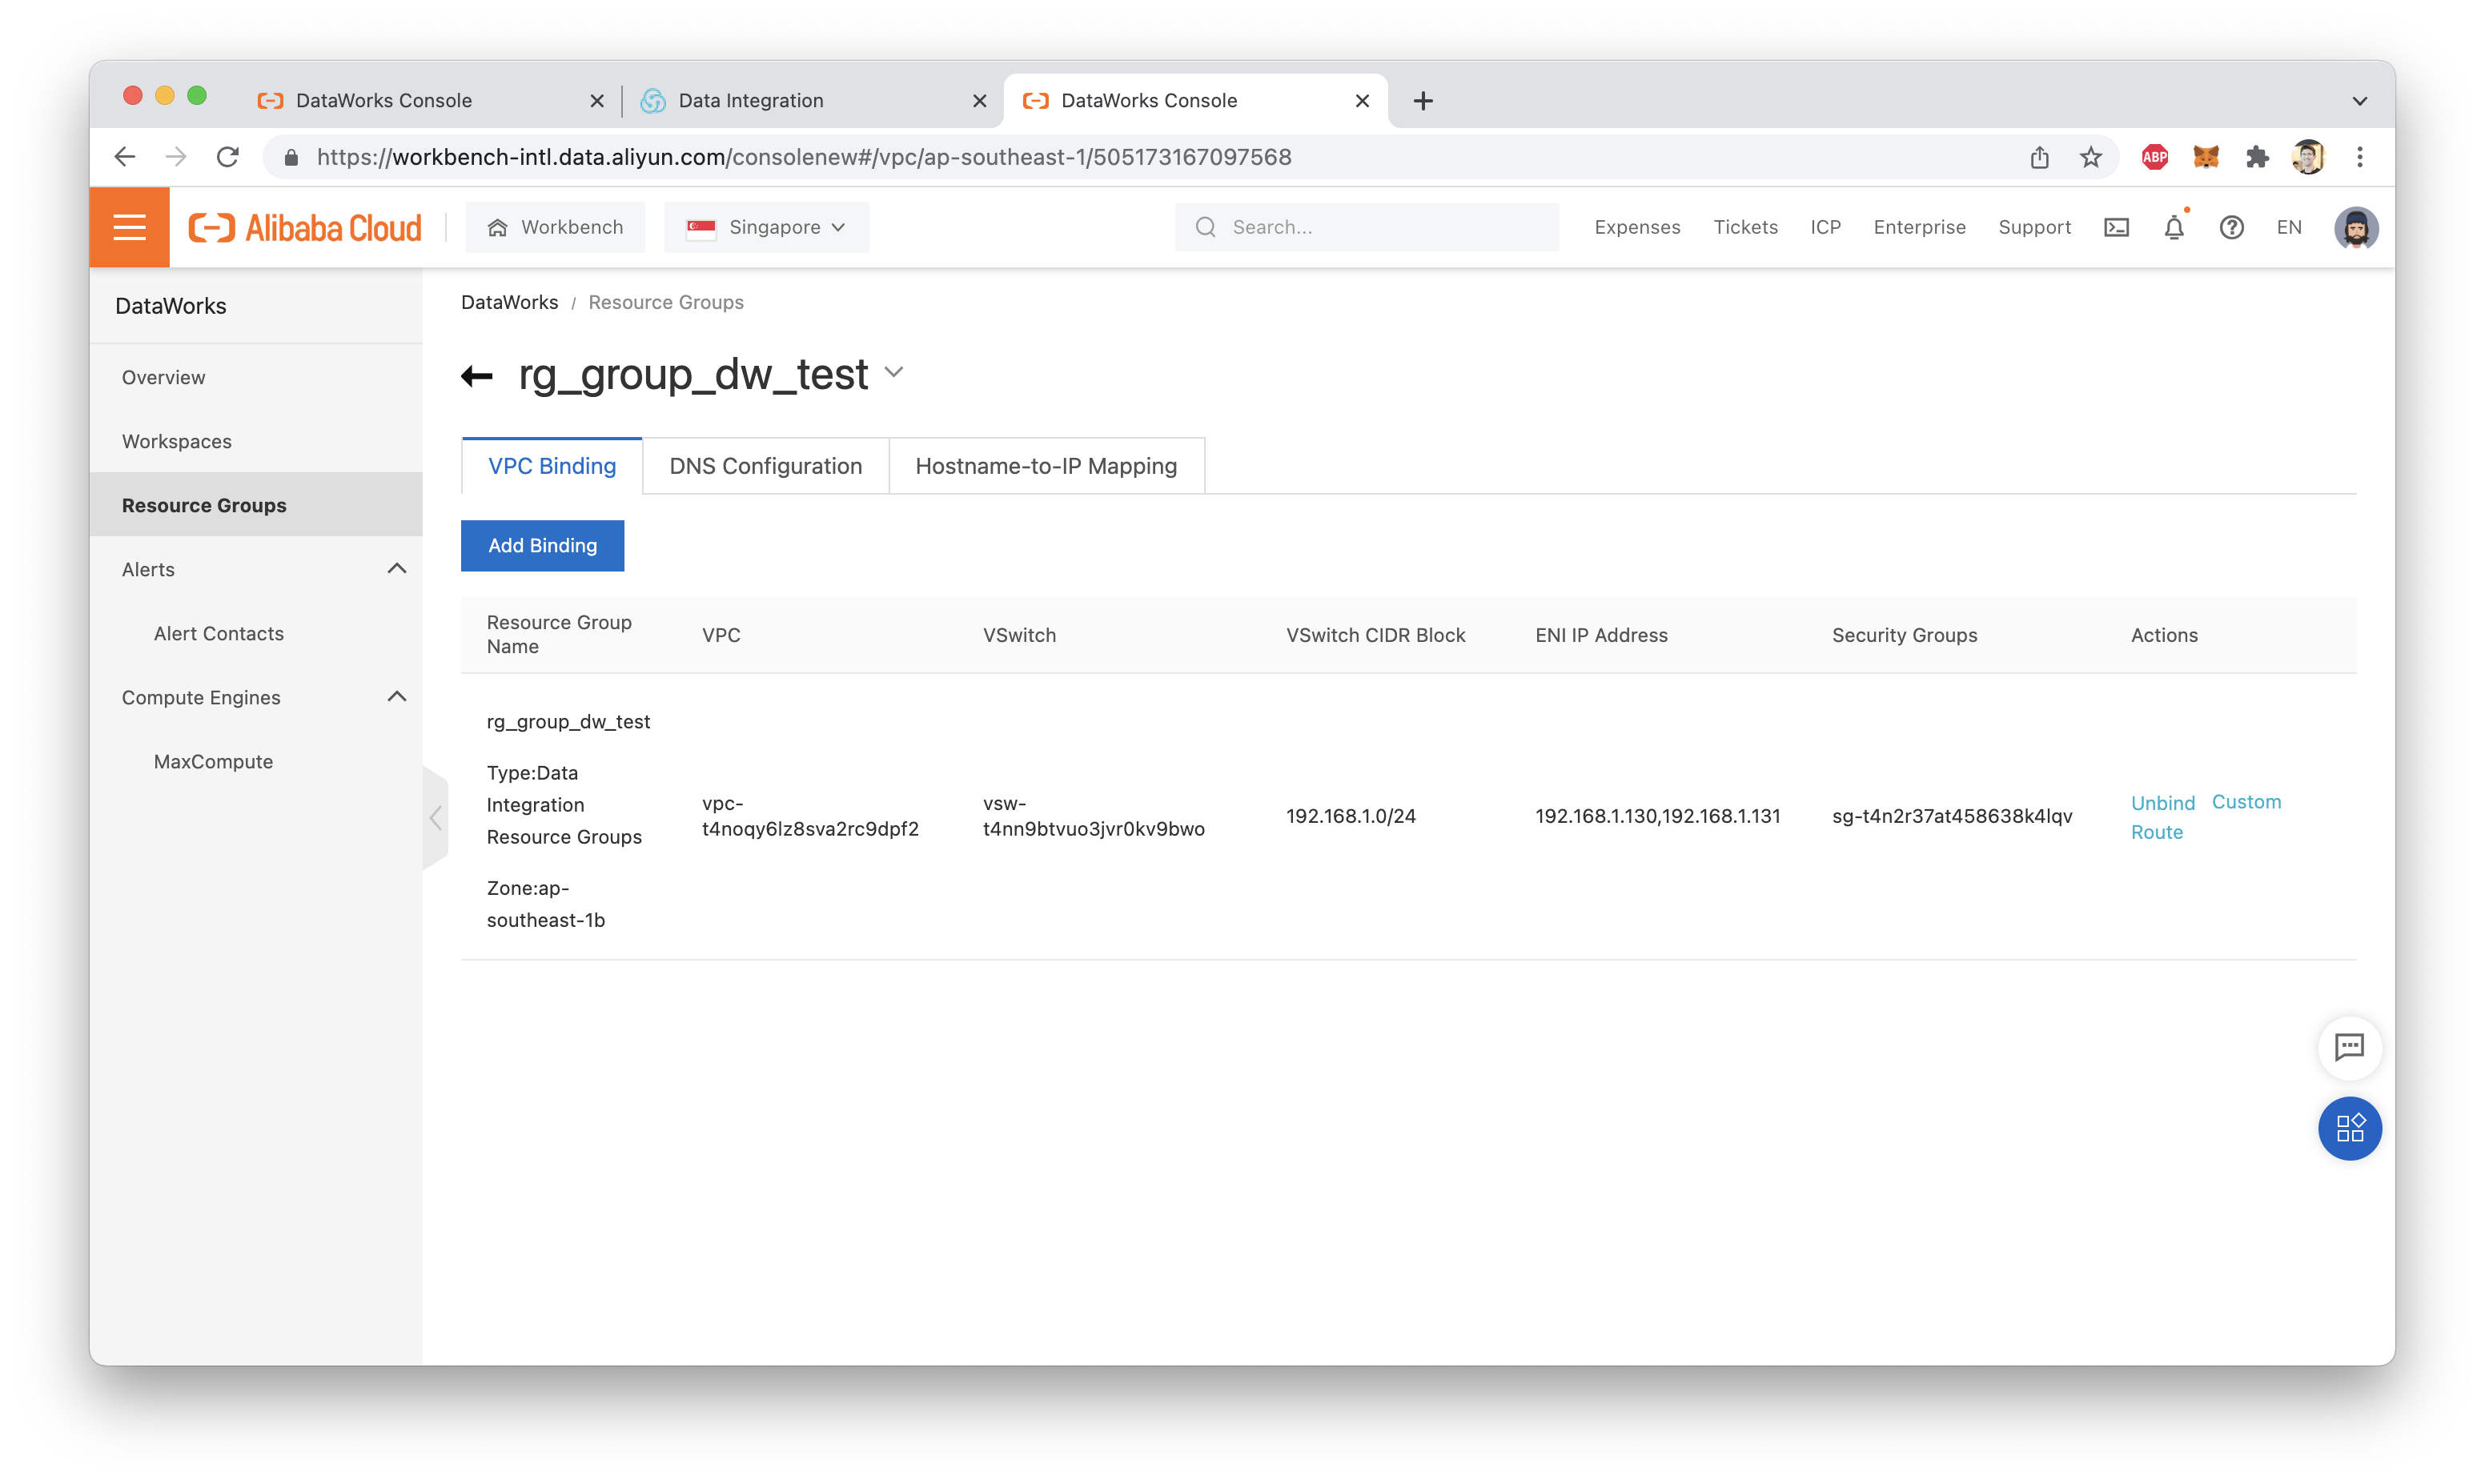
Click "OK", and you should now see your VPC showing up in the VPCs list:
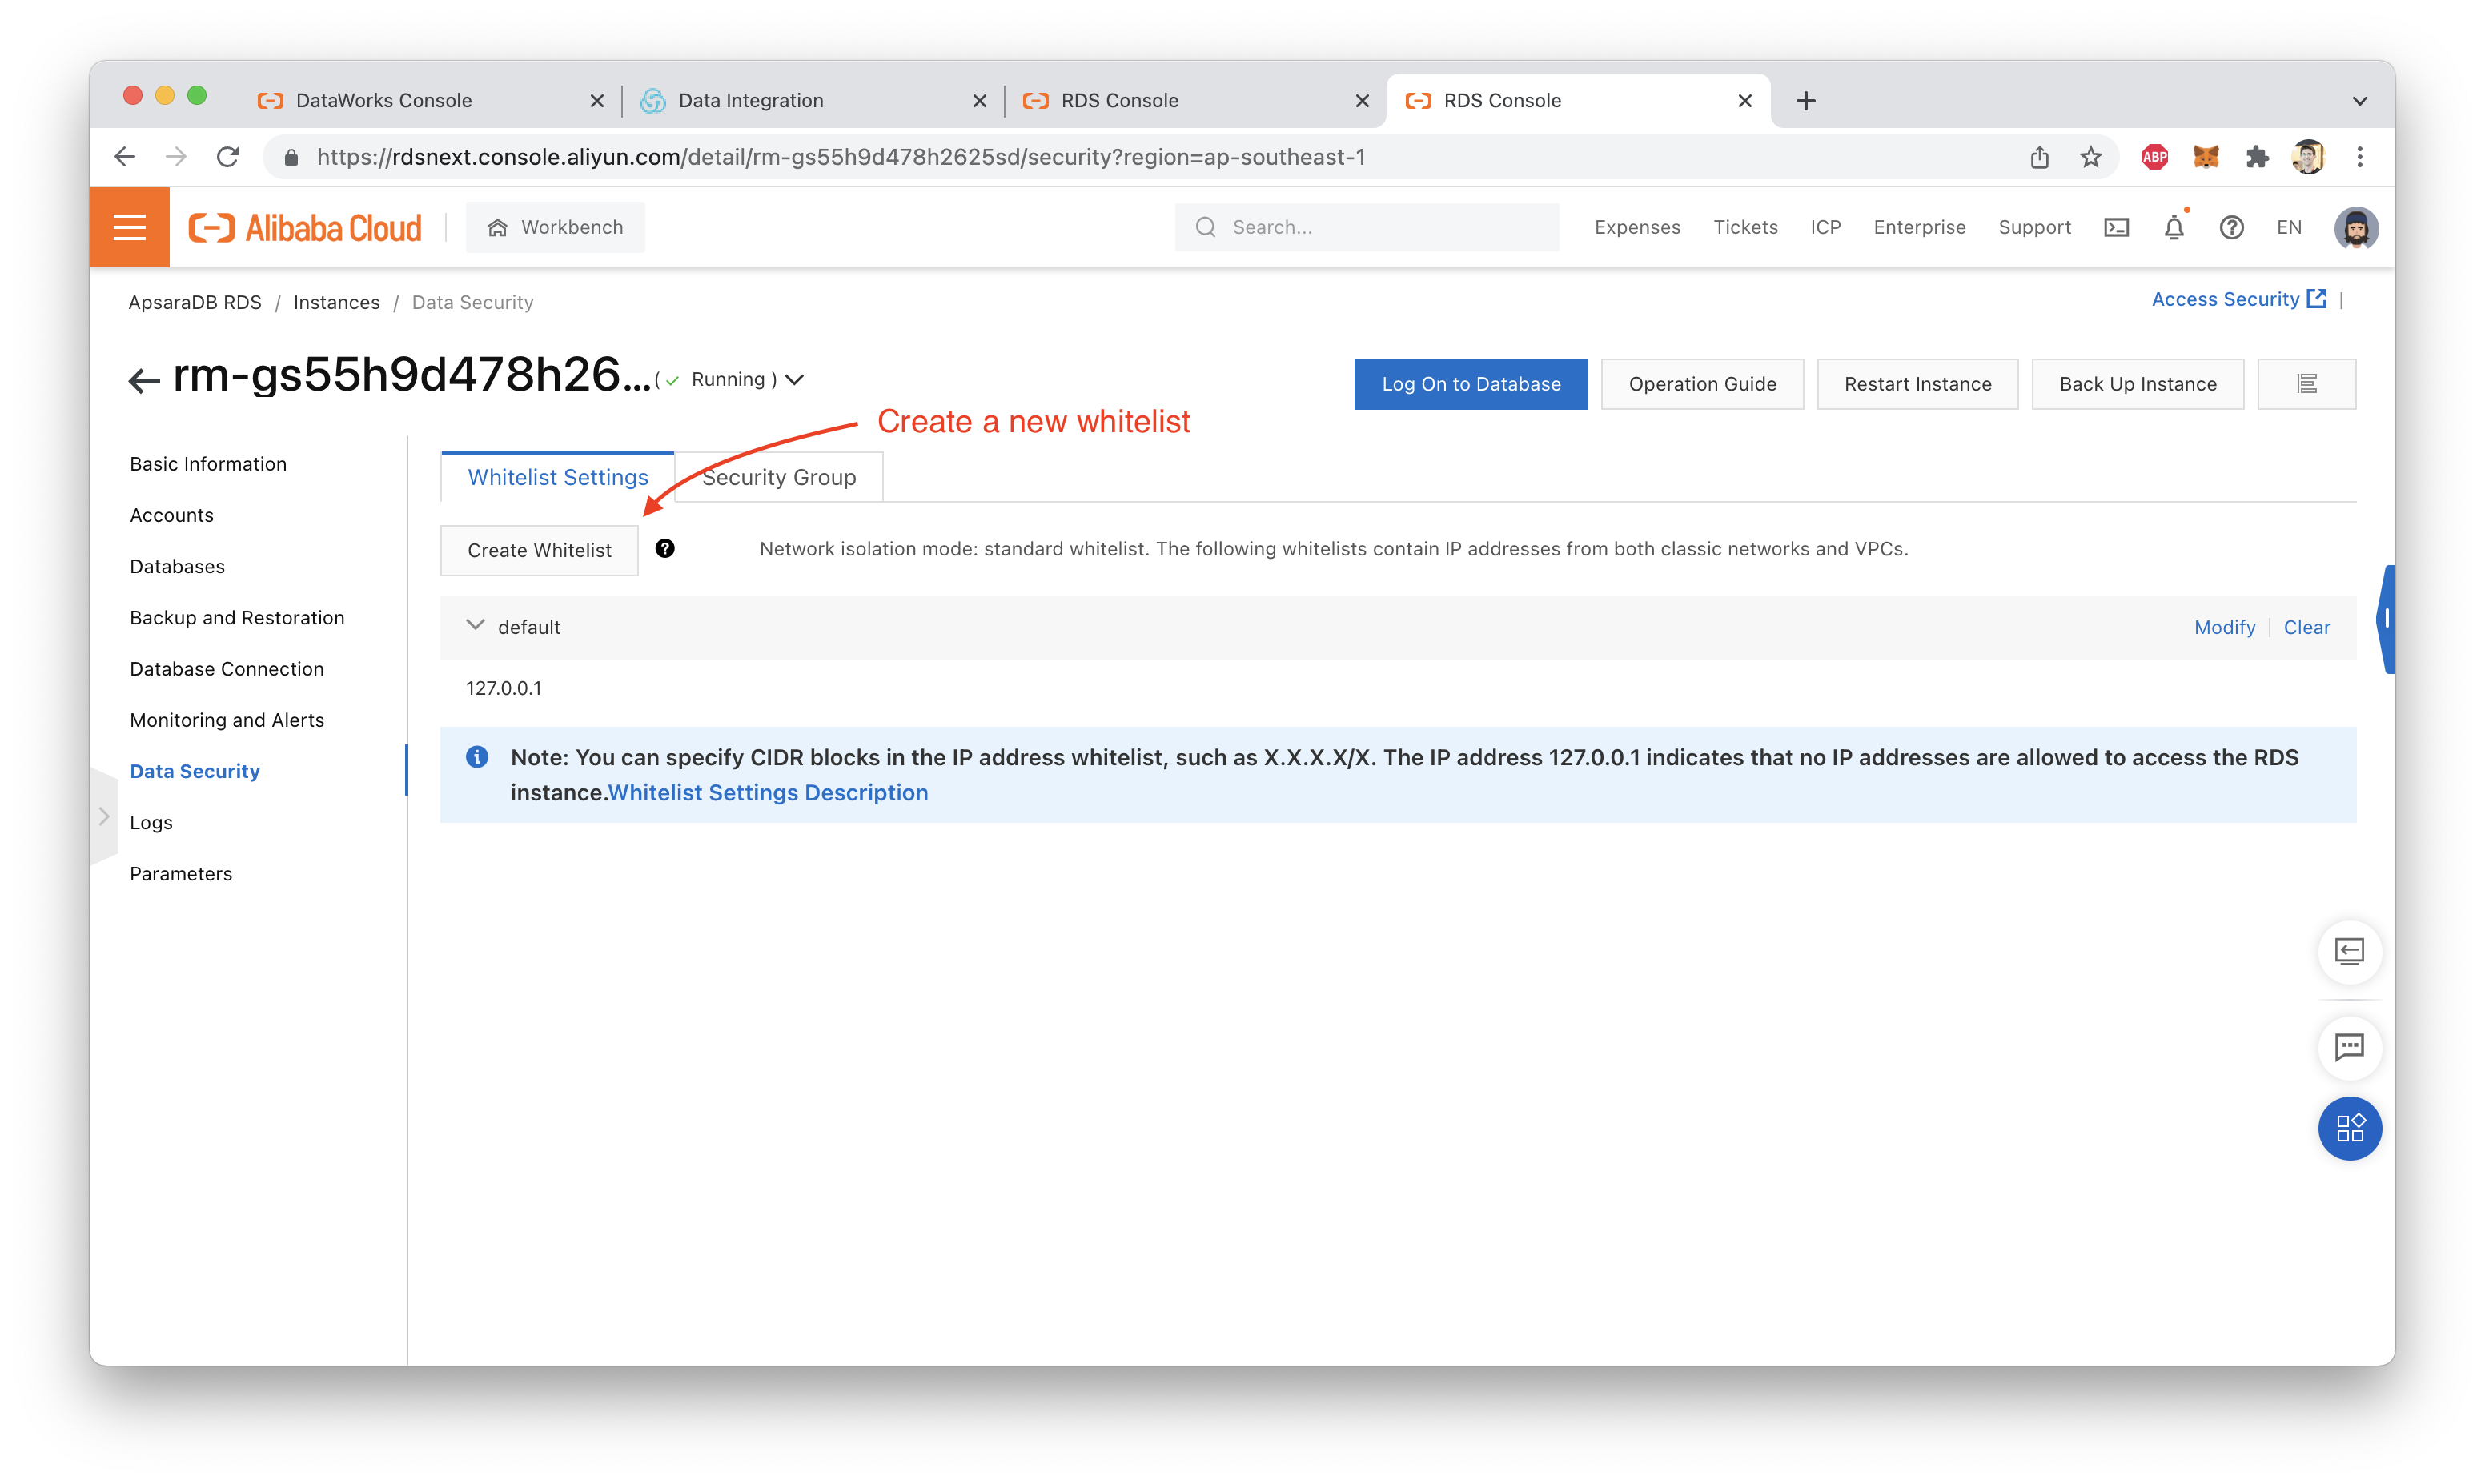
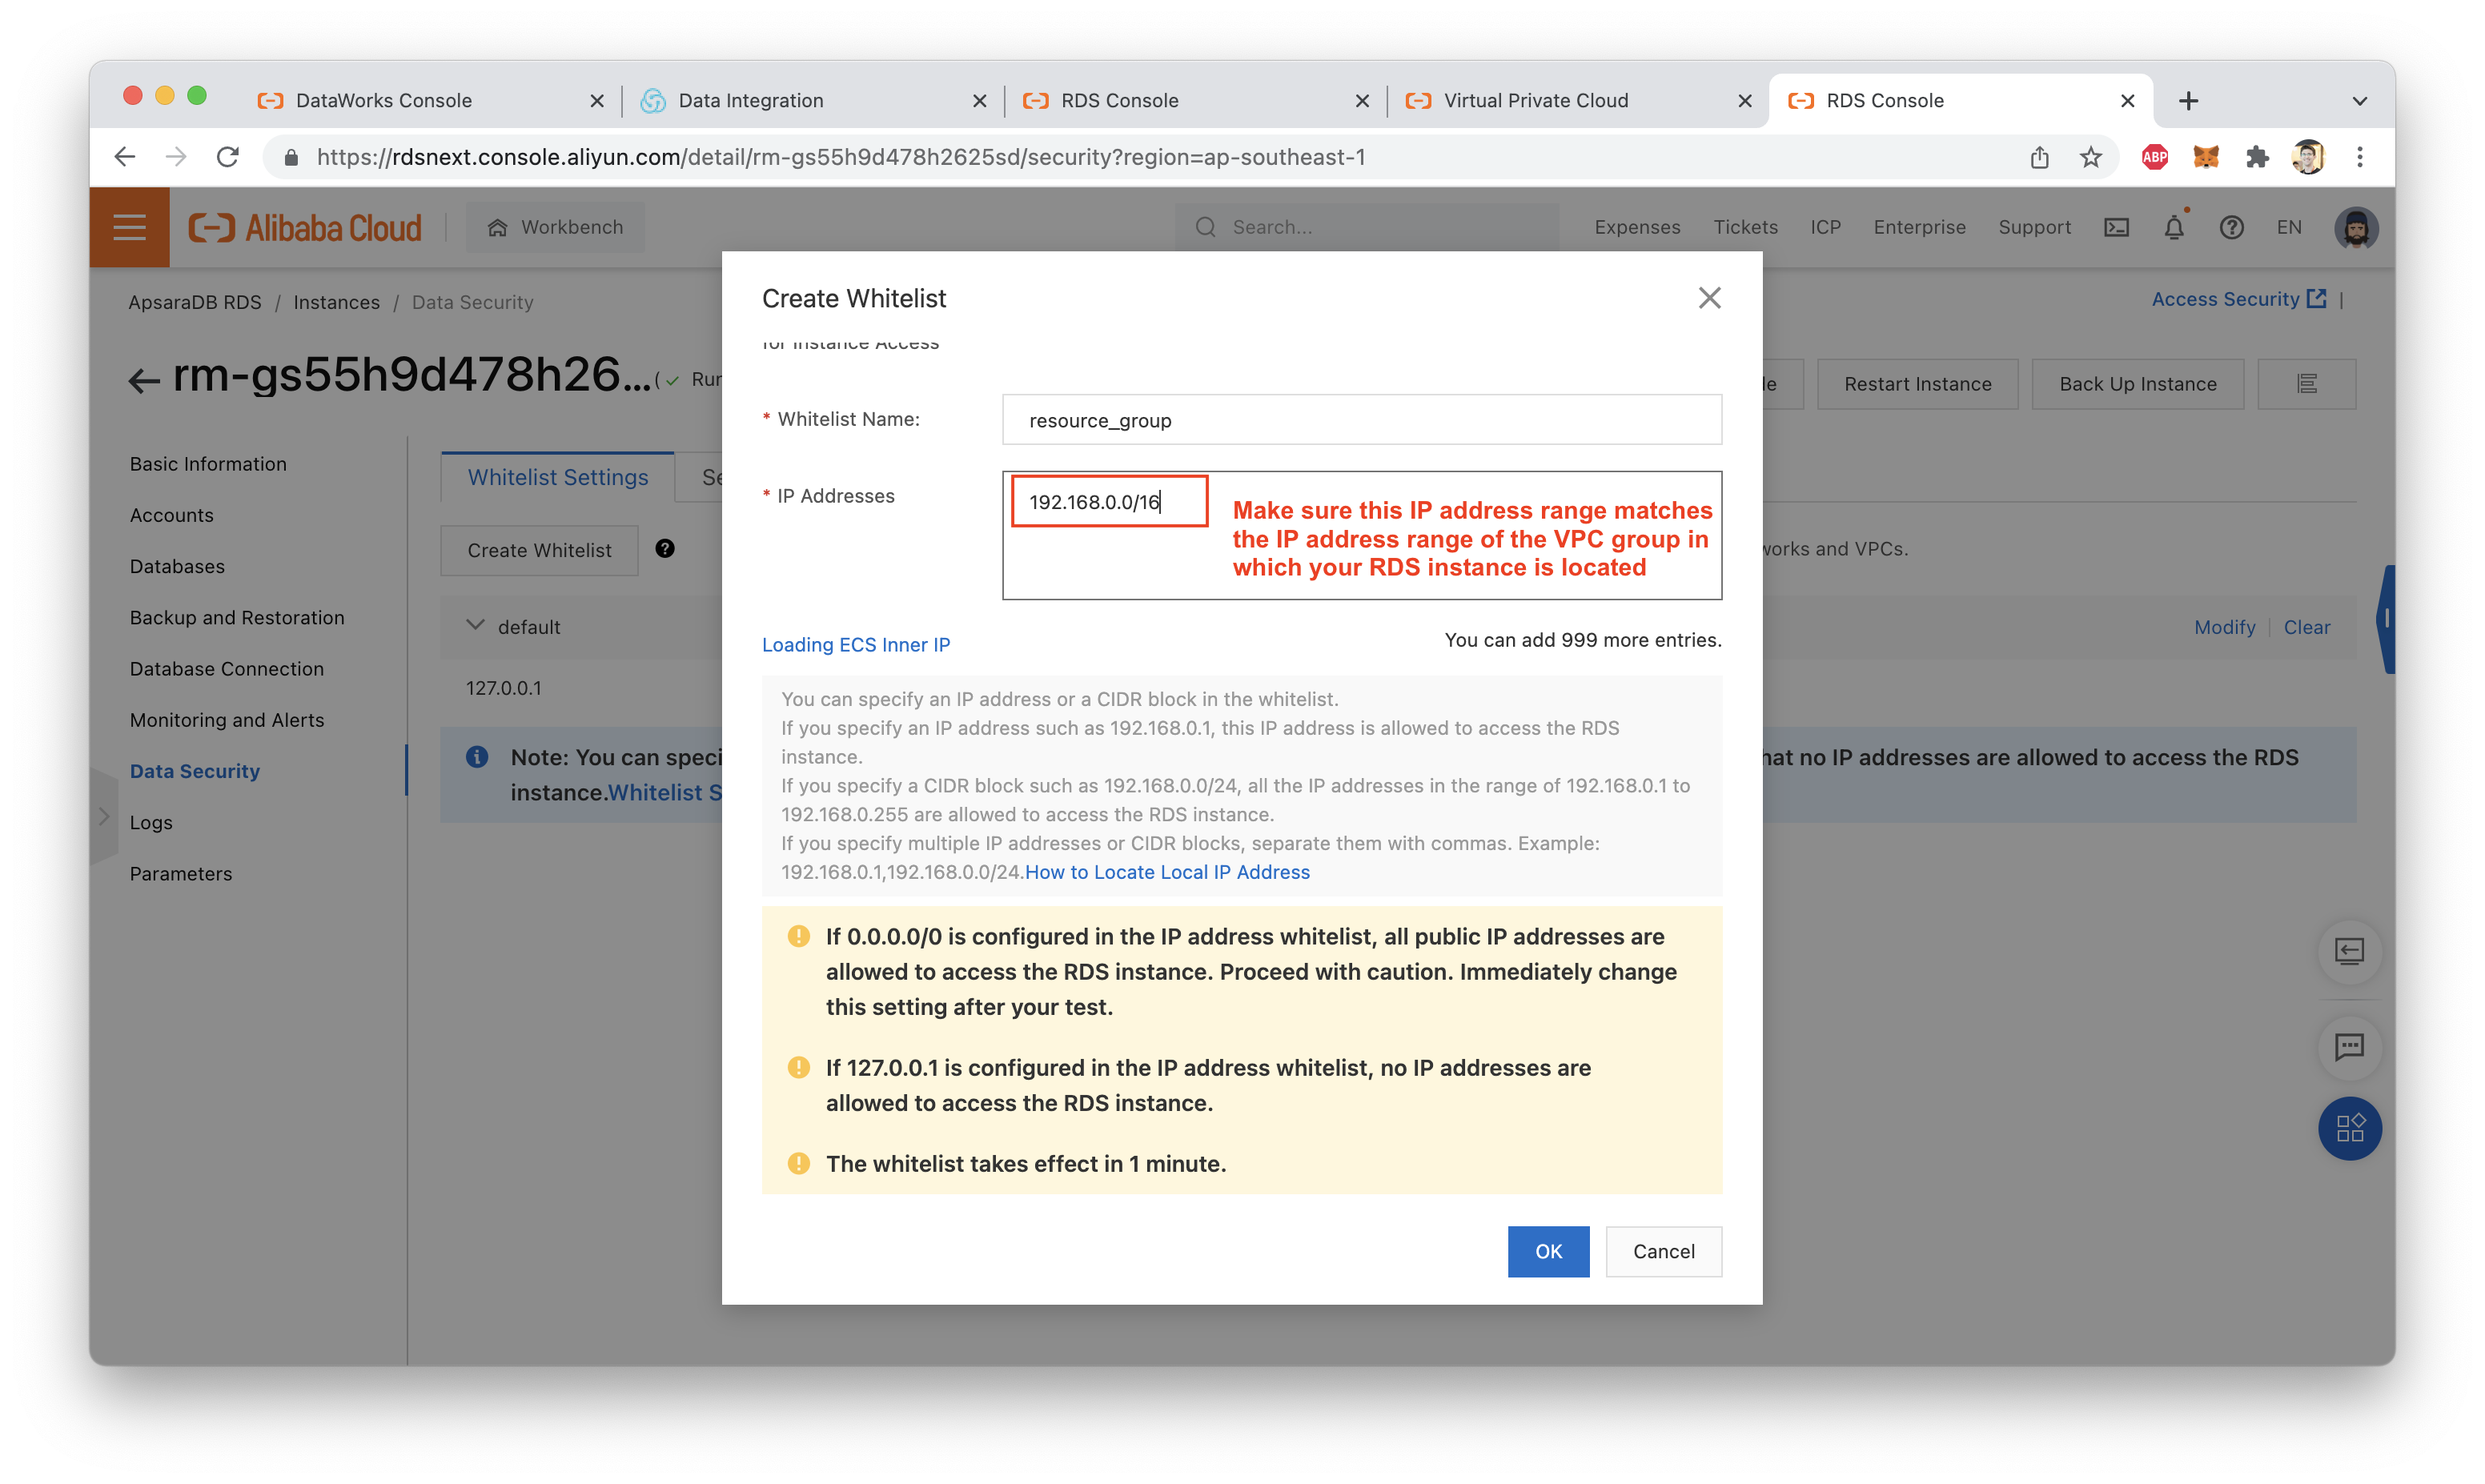
We have one more step to do before we can re-run the connectivity test. We need to make sure that the VPC's CIDR block (IP address range) has been added to the RDS database whitelist. We can do this from the RDS console:
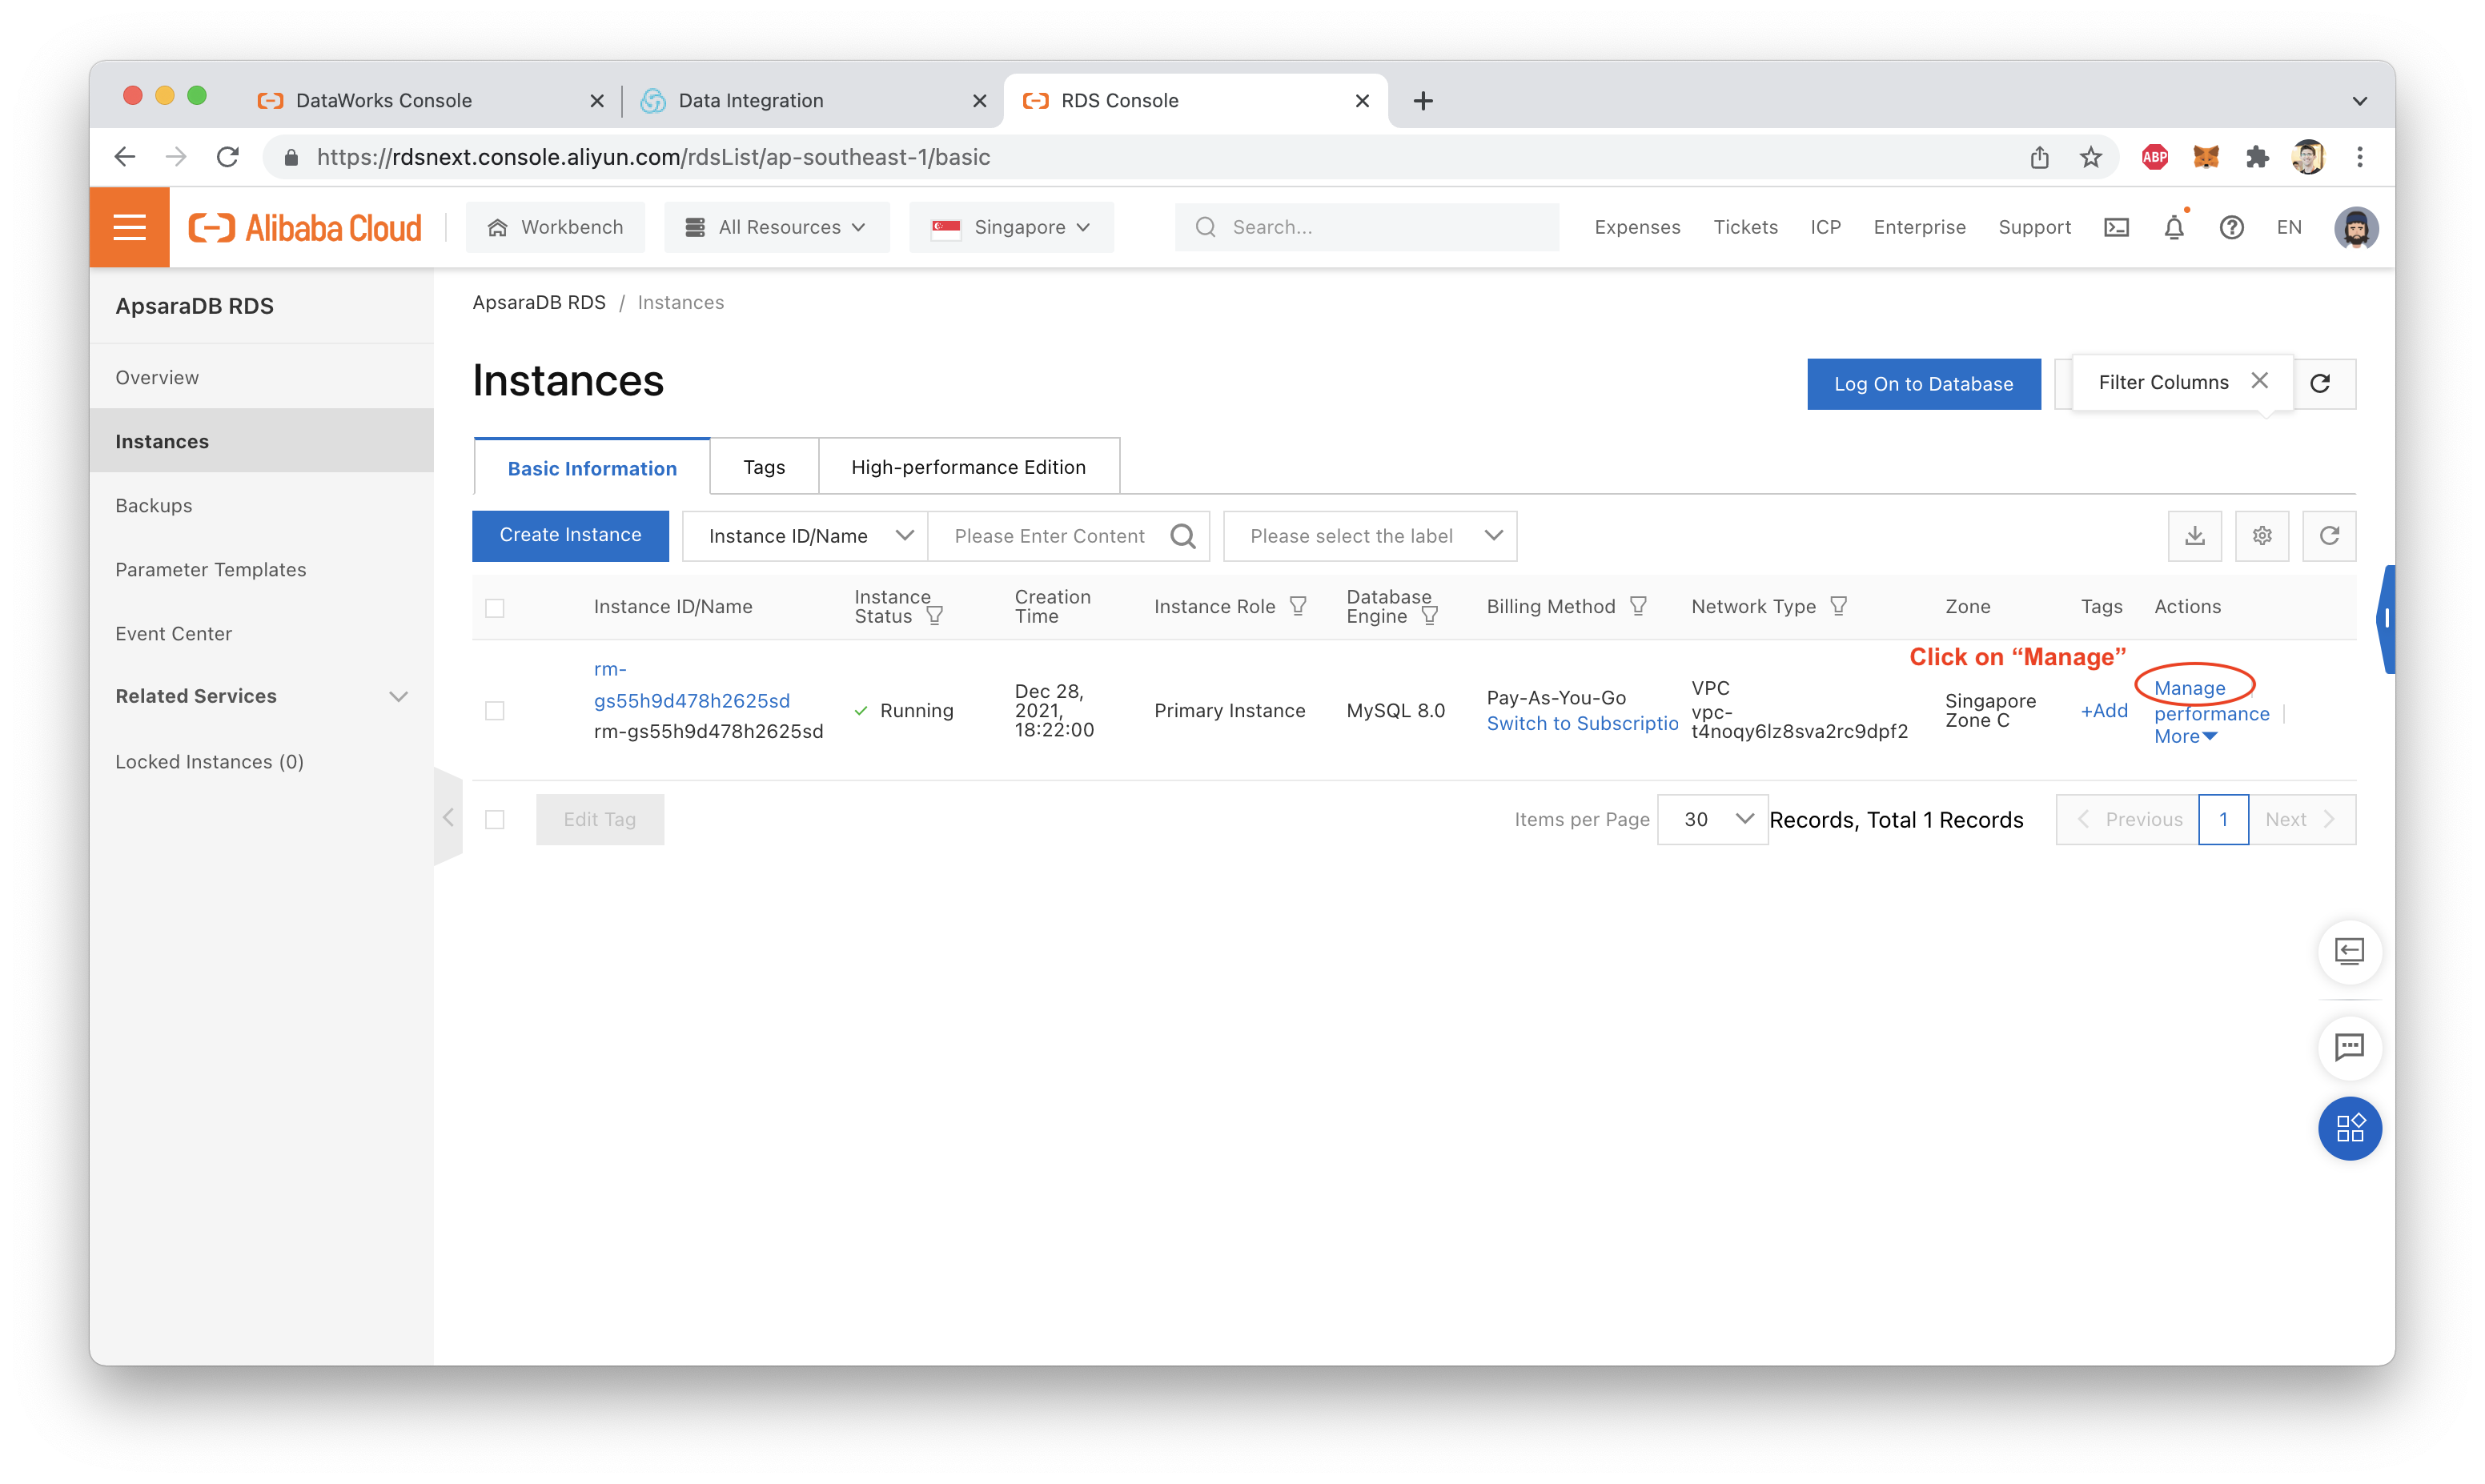
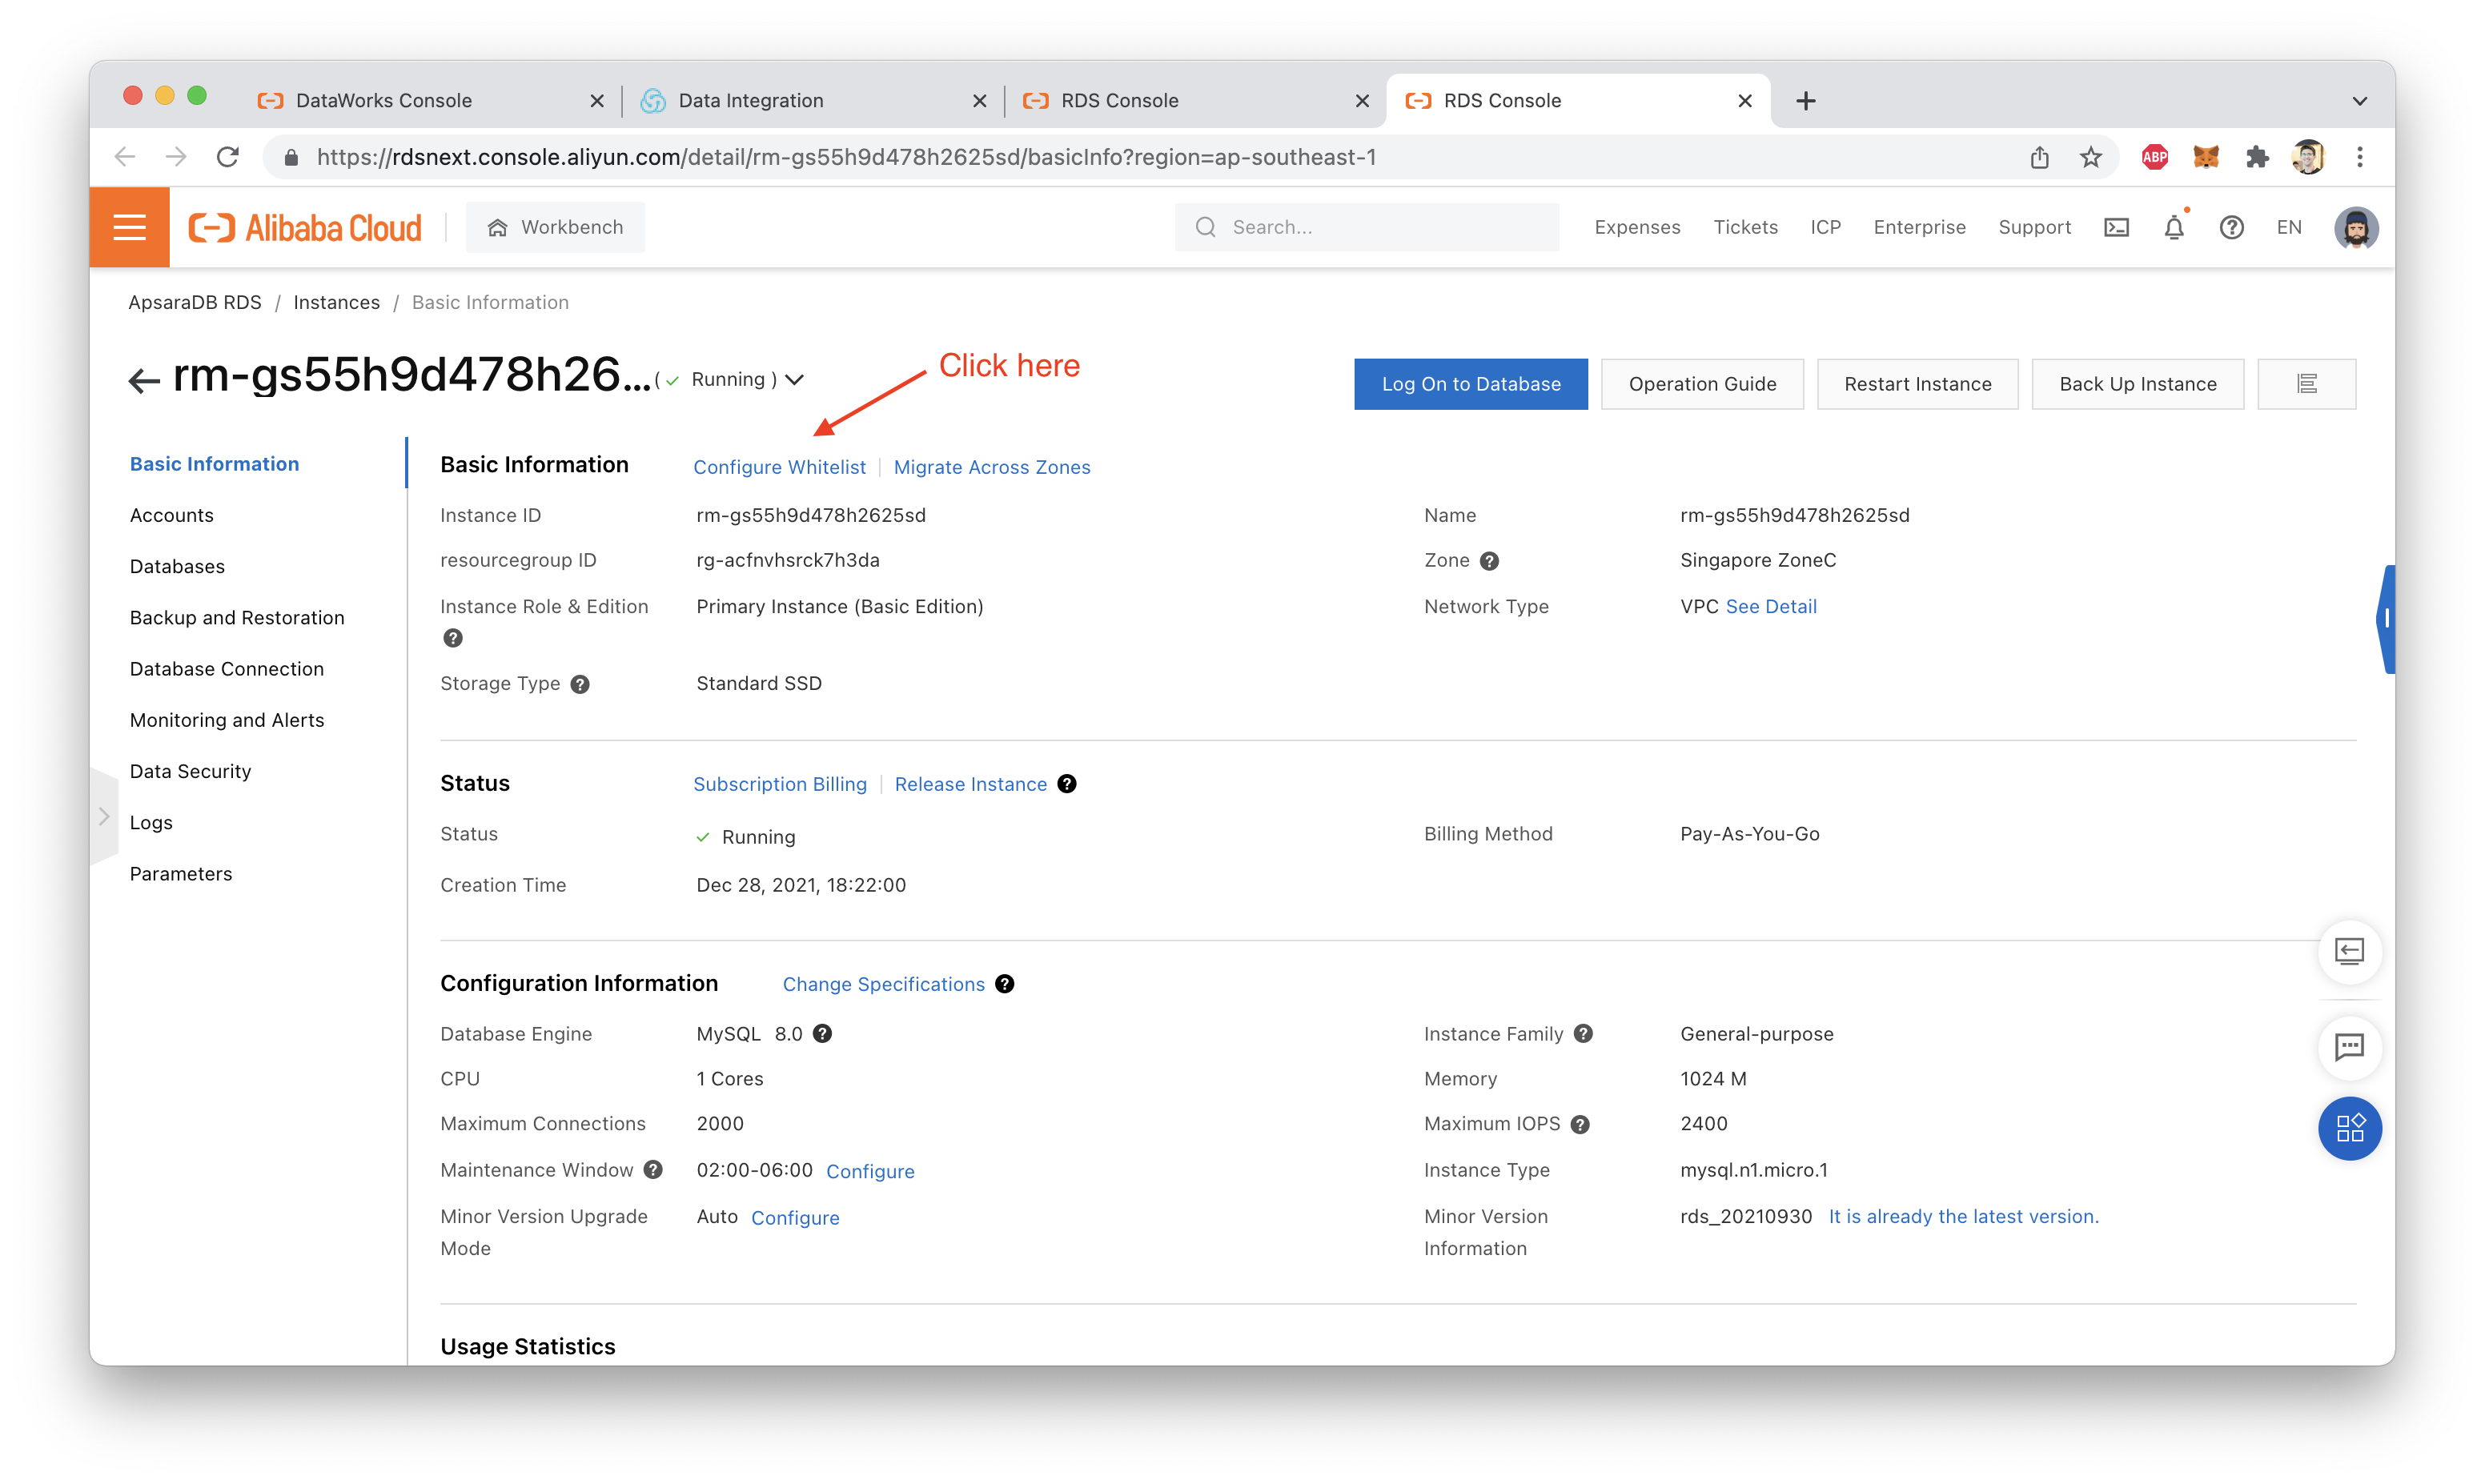
Now we can re-run the connection test. This time, it should succeed:
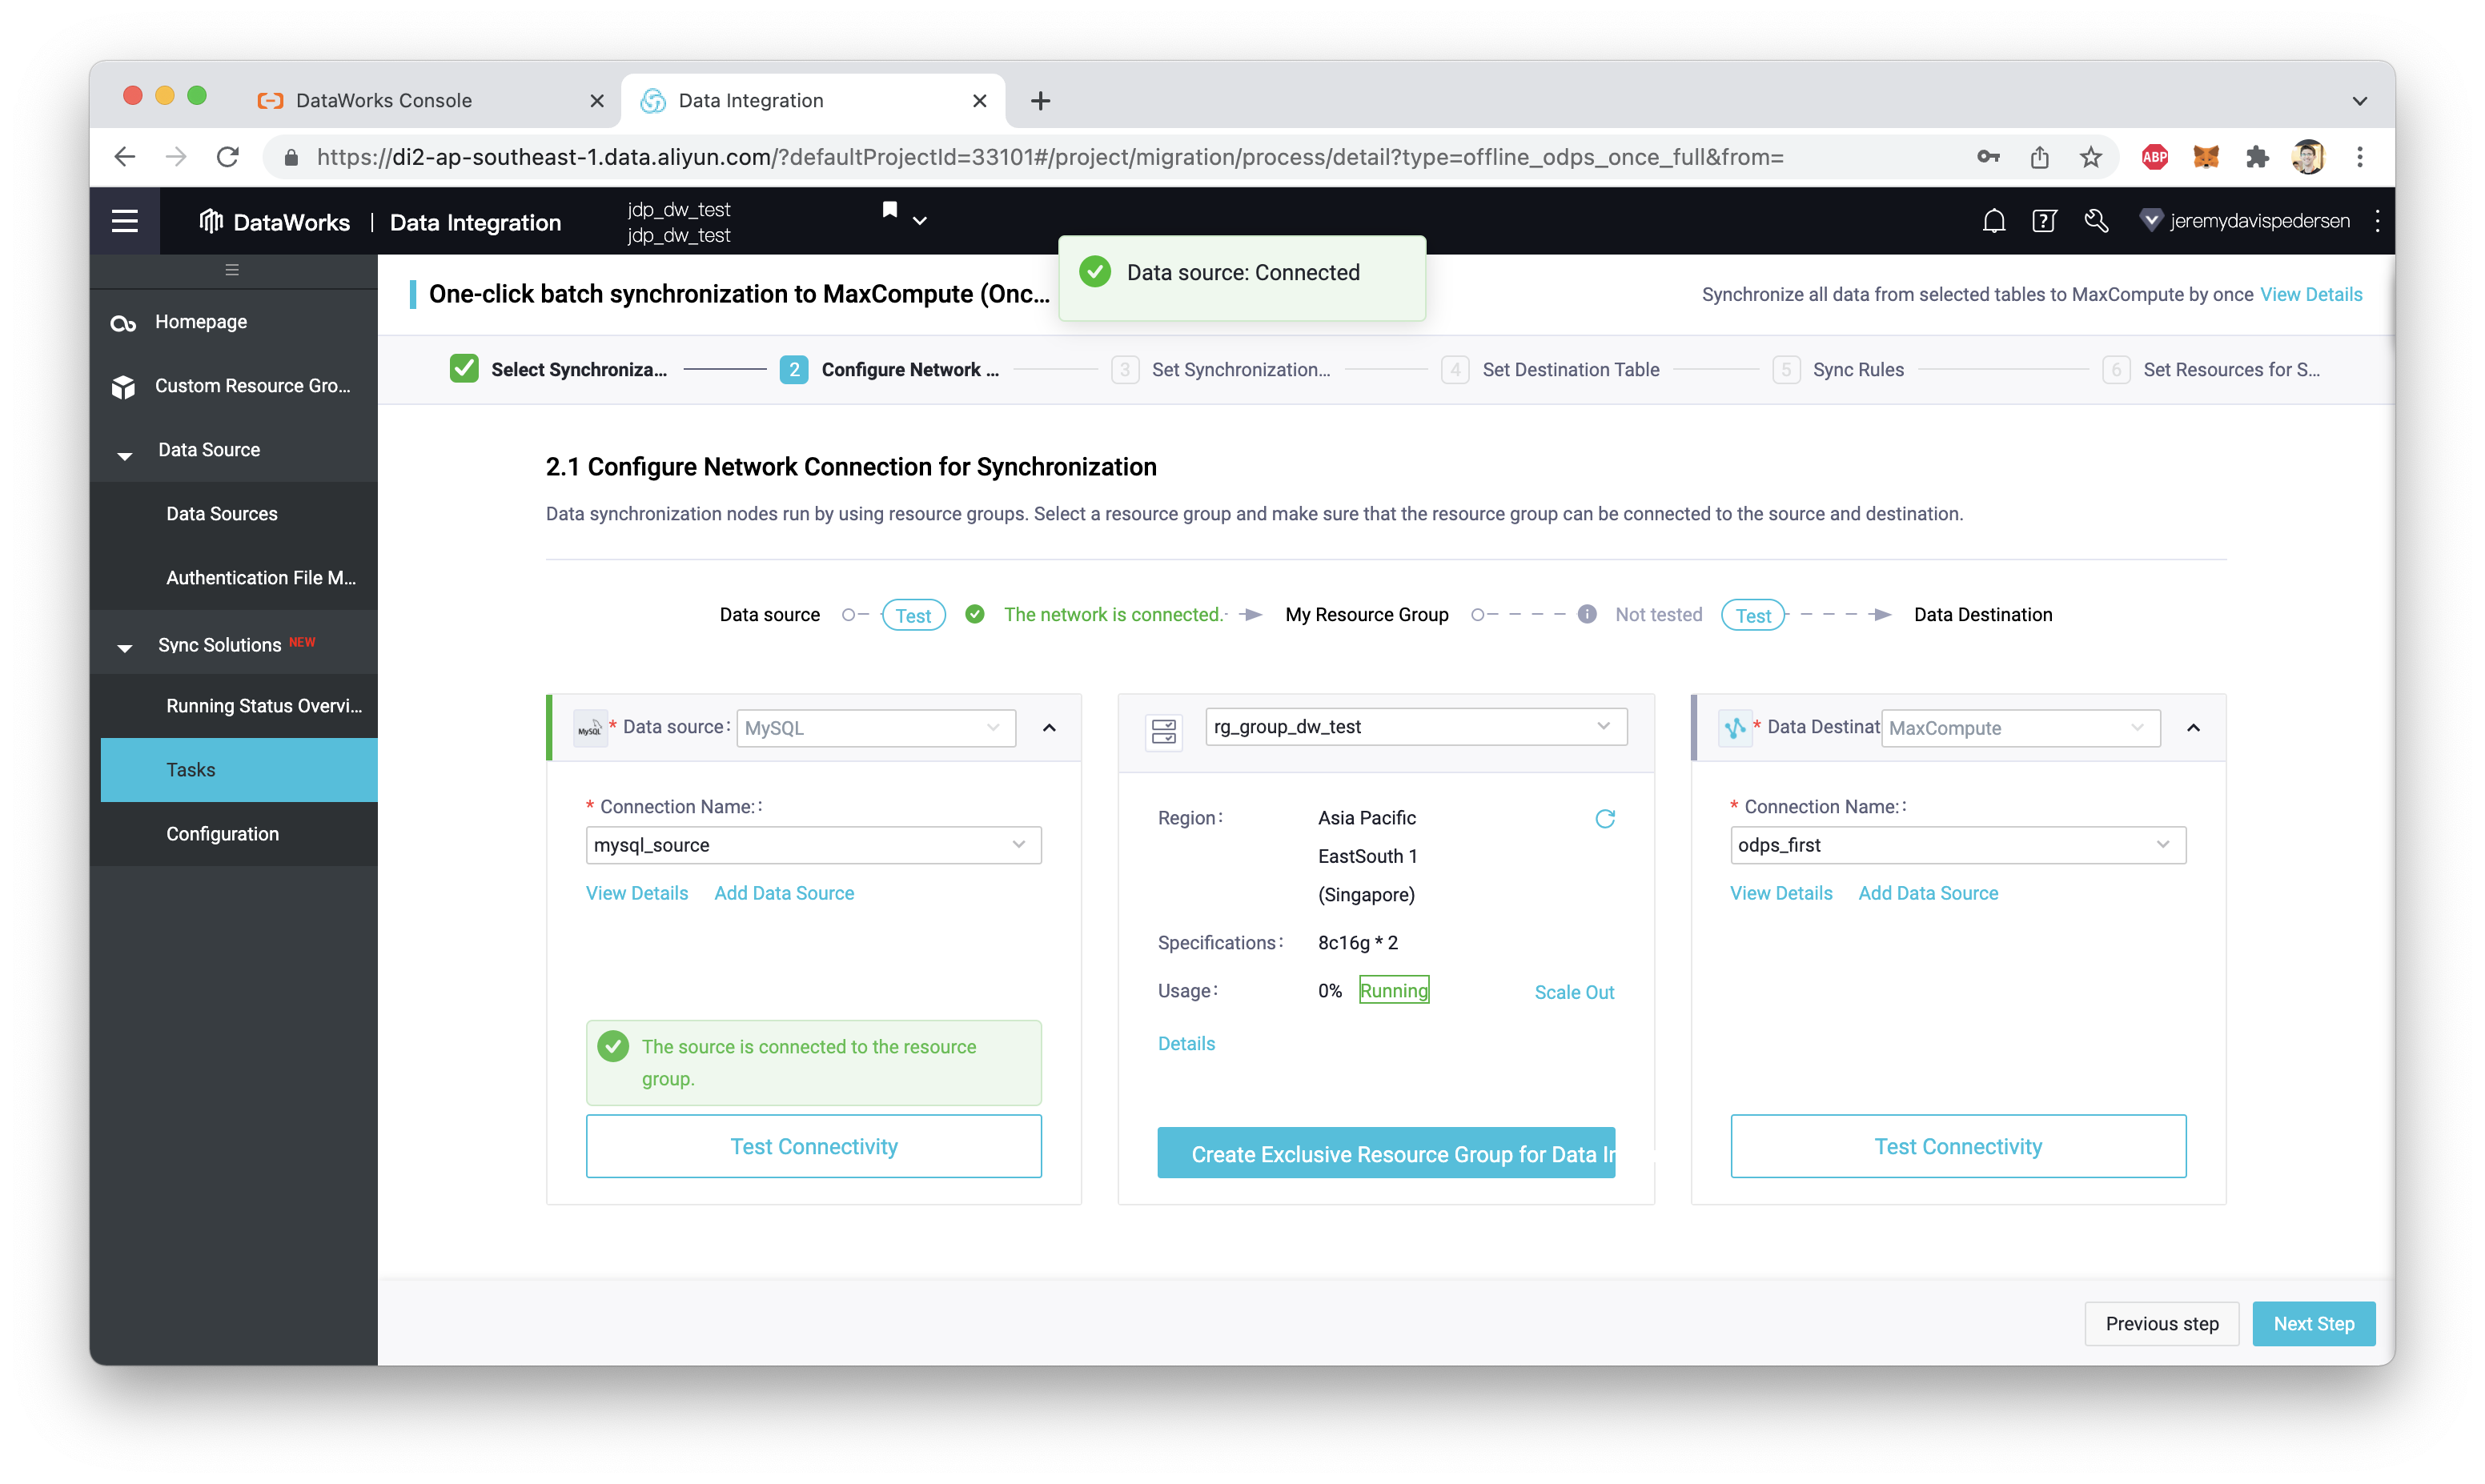
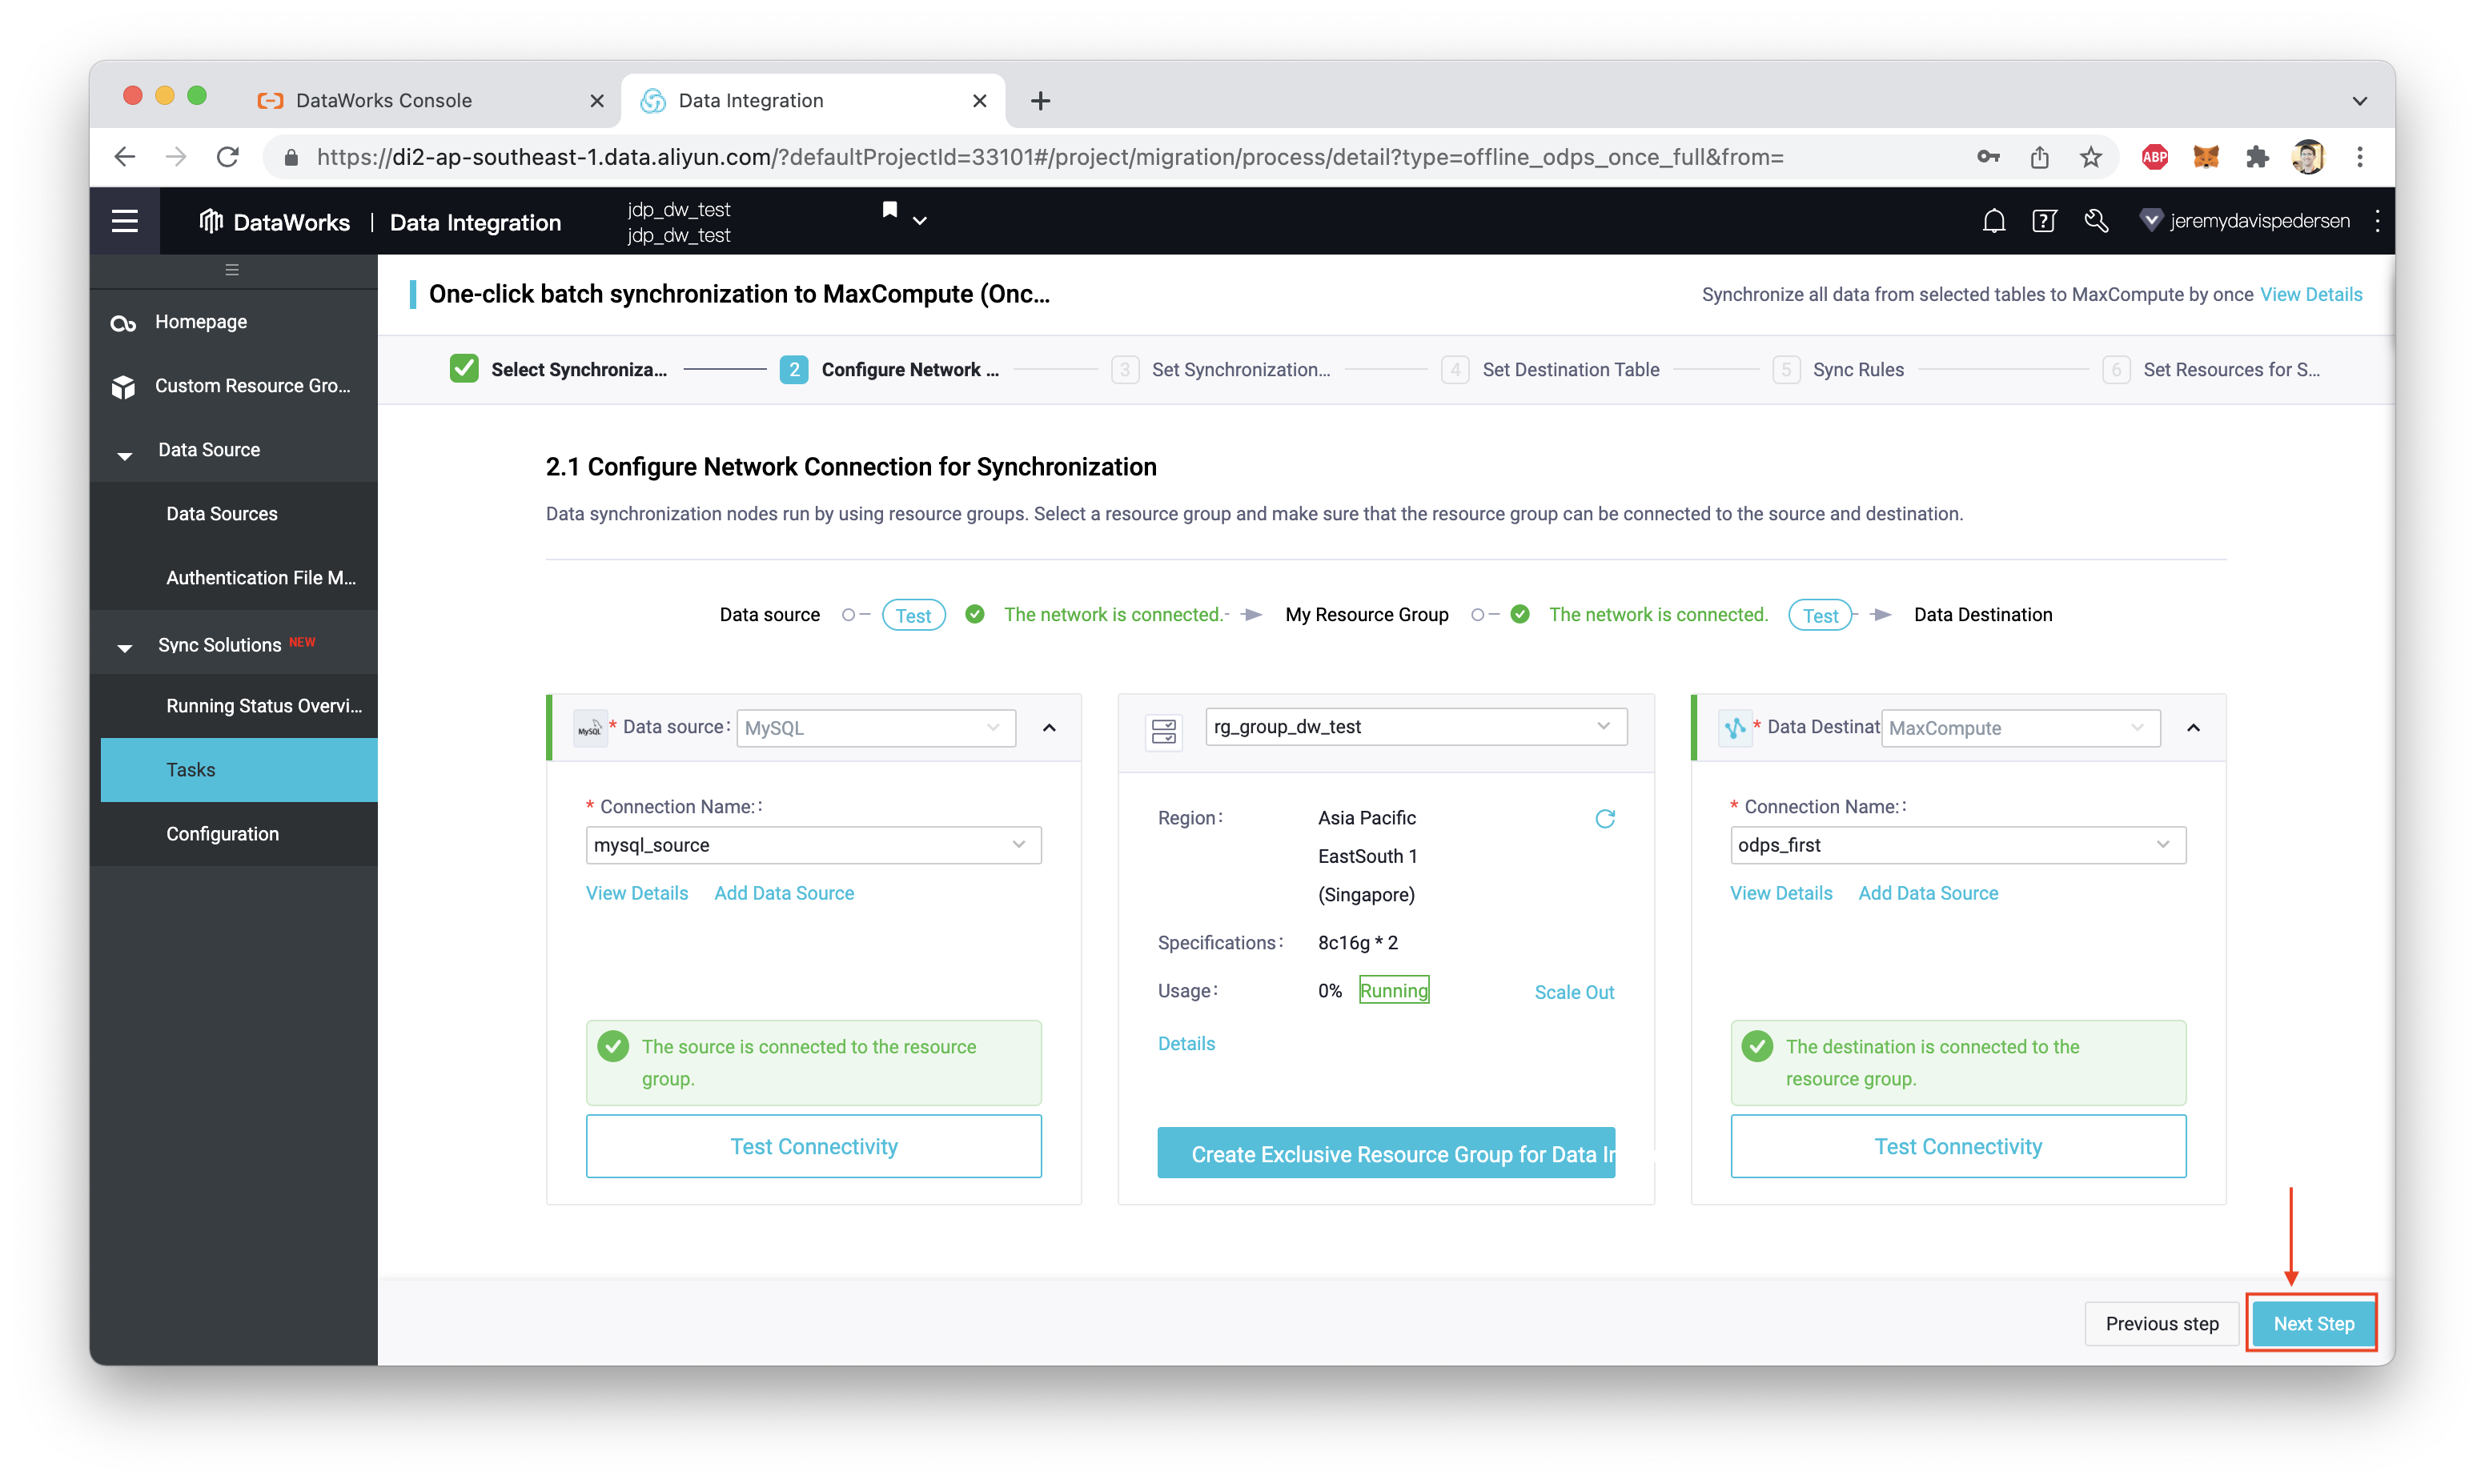
Notice that there is also a Test Connection button on the right hand side of the screen, for the connection to MaxCompute. Click "Test Connection" and wait for that test to succeed as well, then click "Next Step" as shown here:
Select the tables you want to import into MaxCompute:
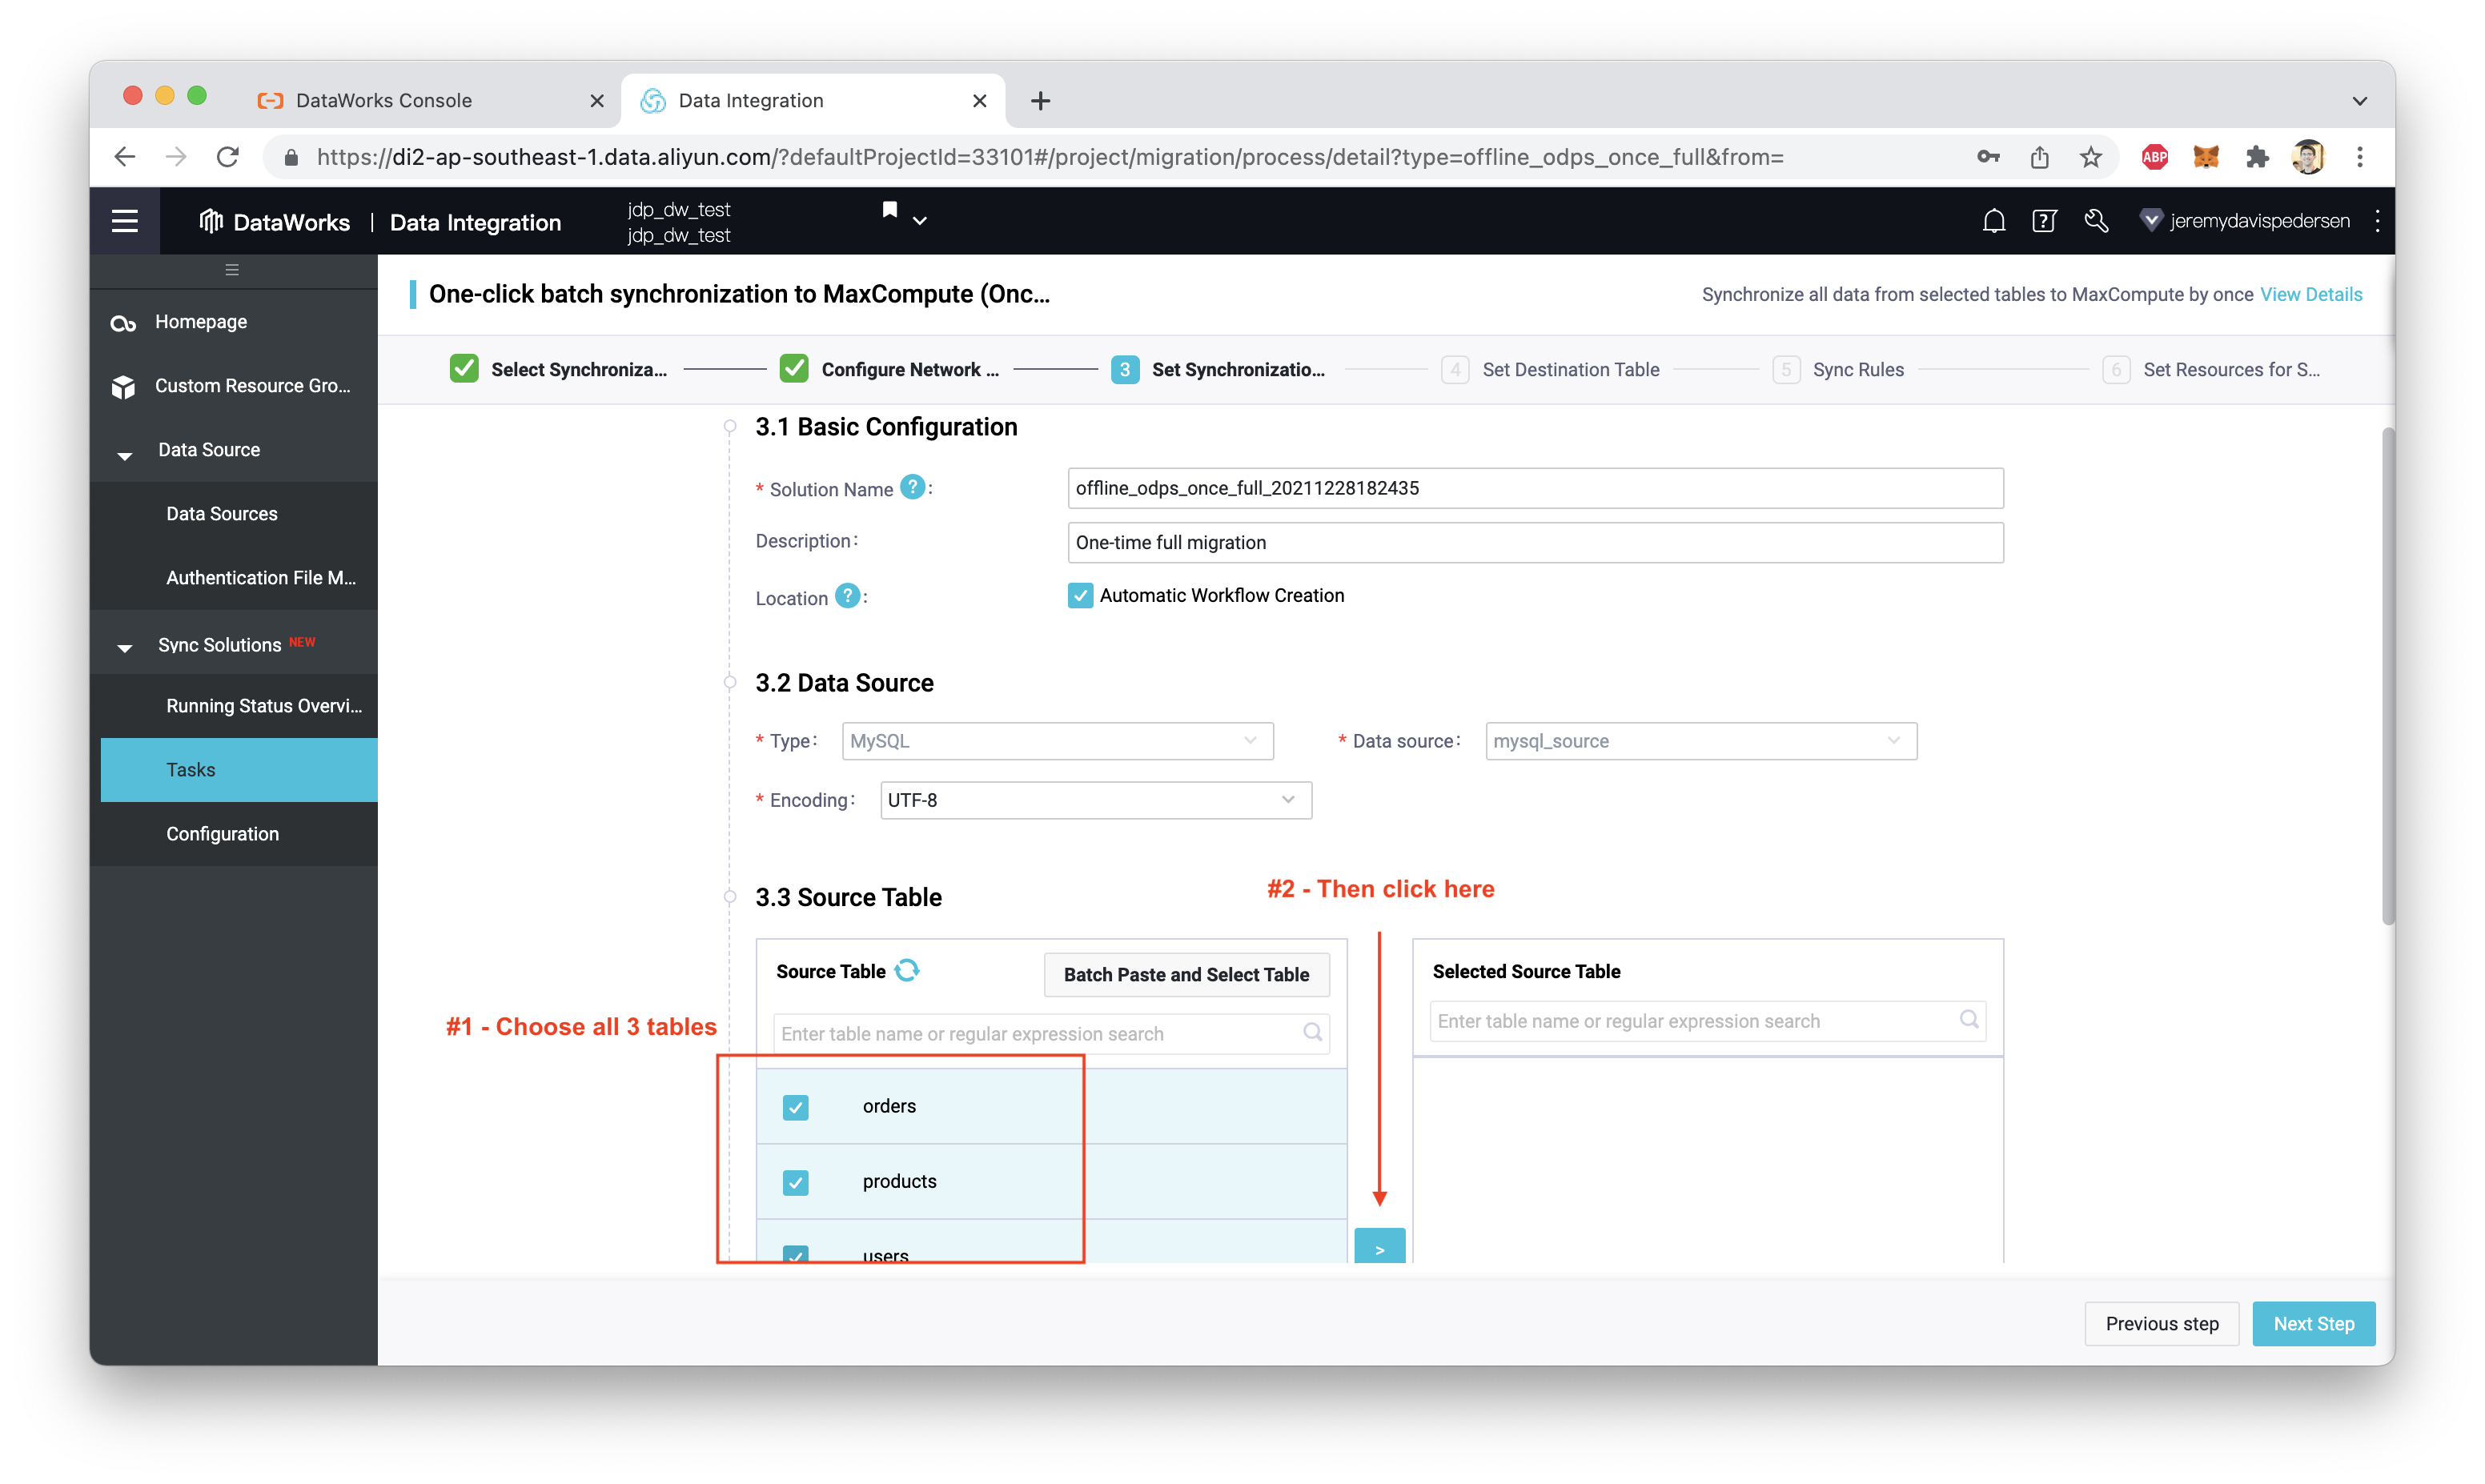
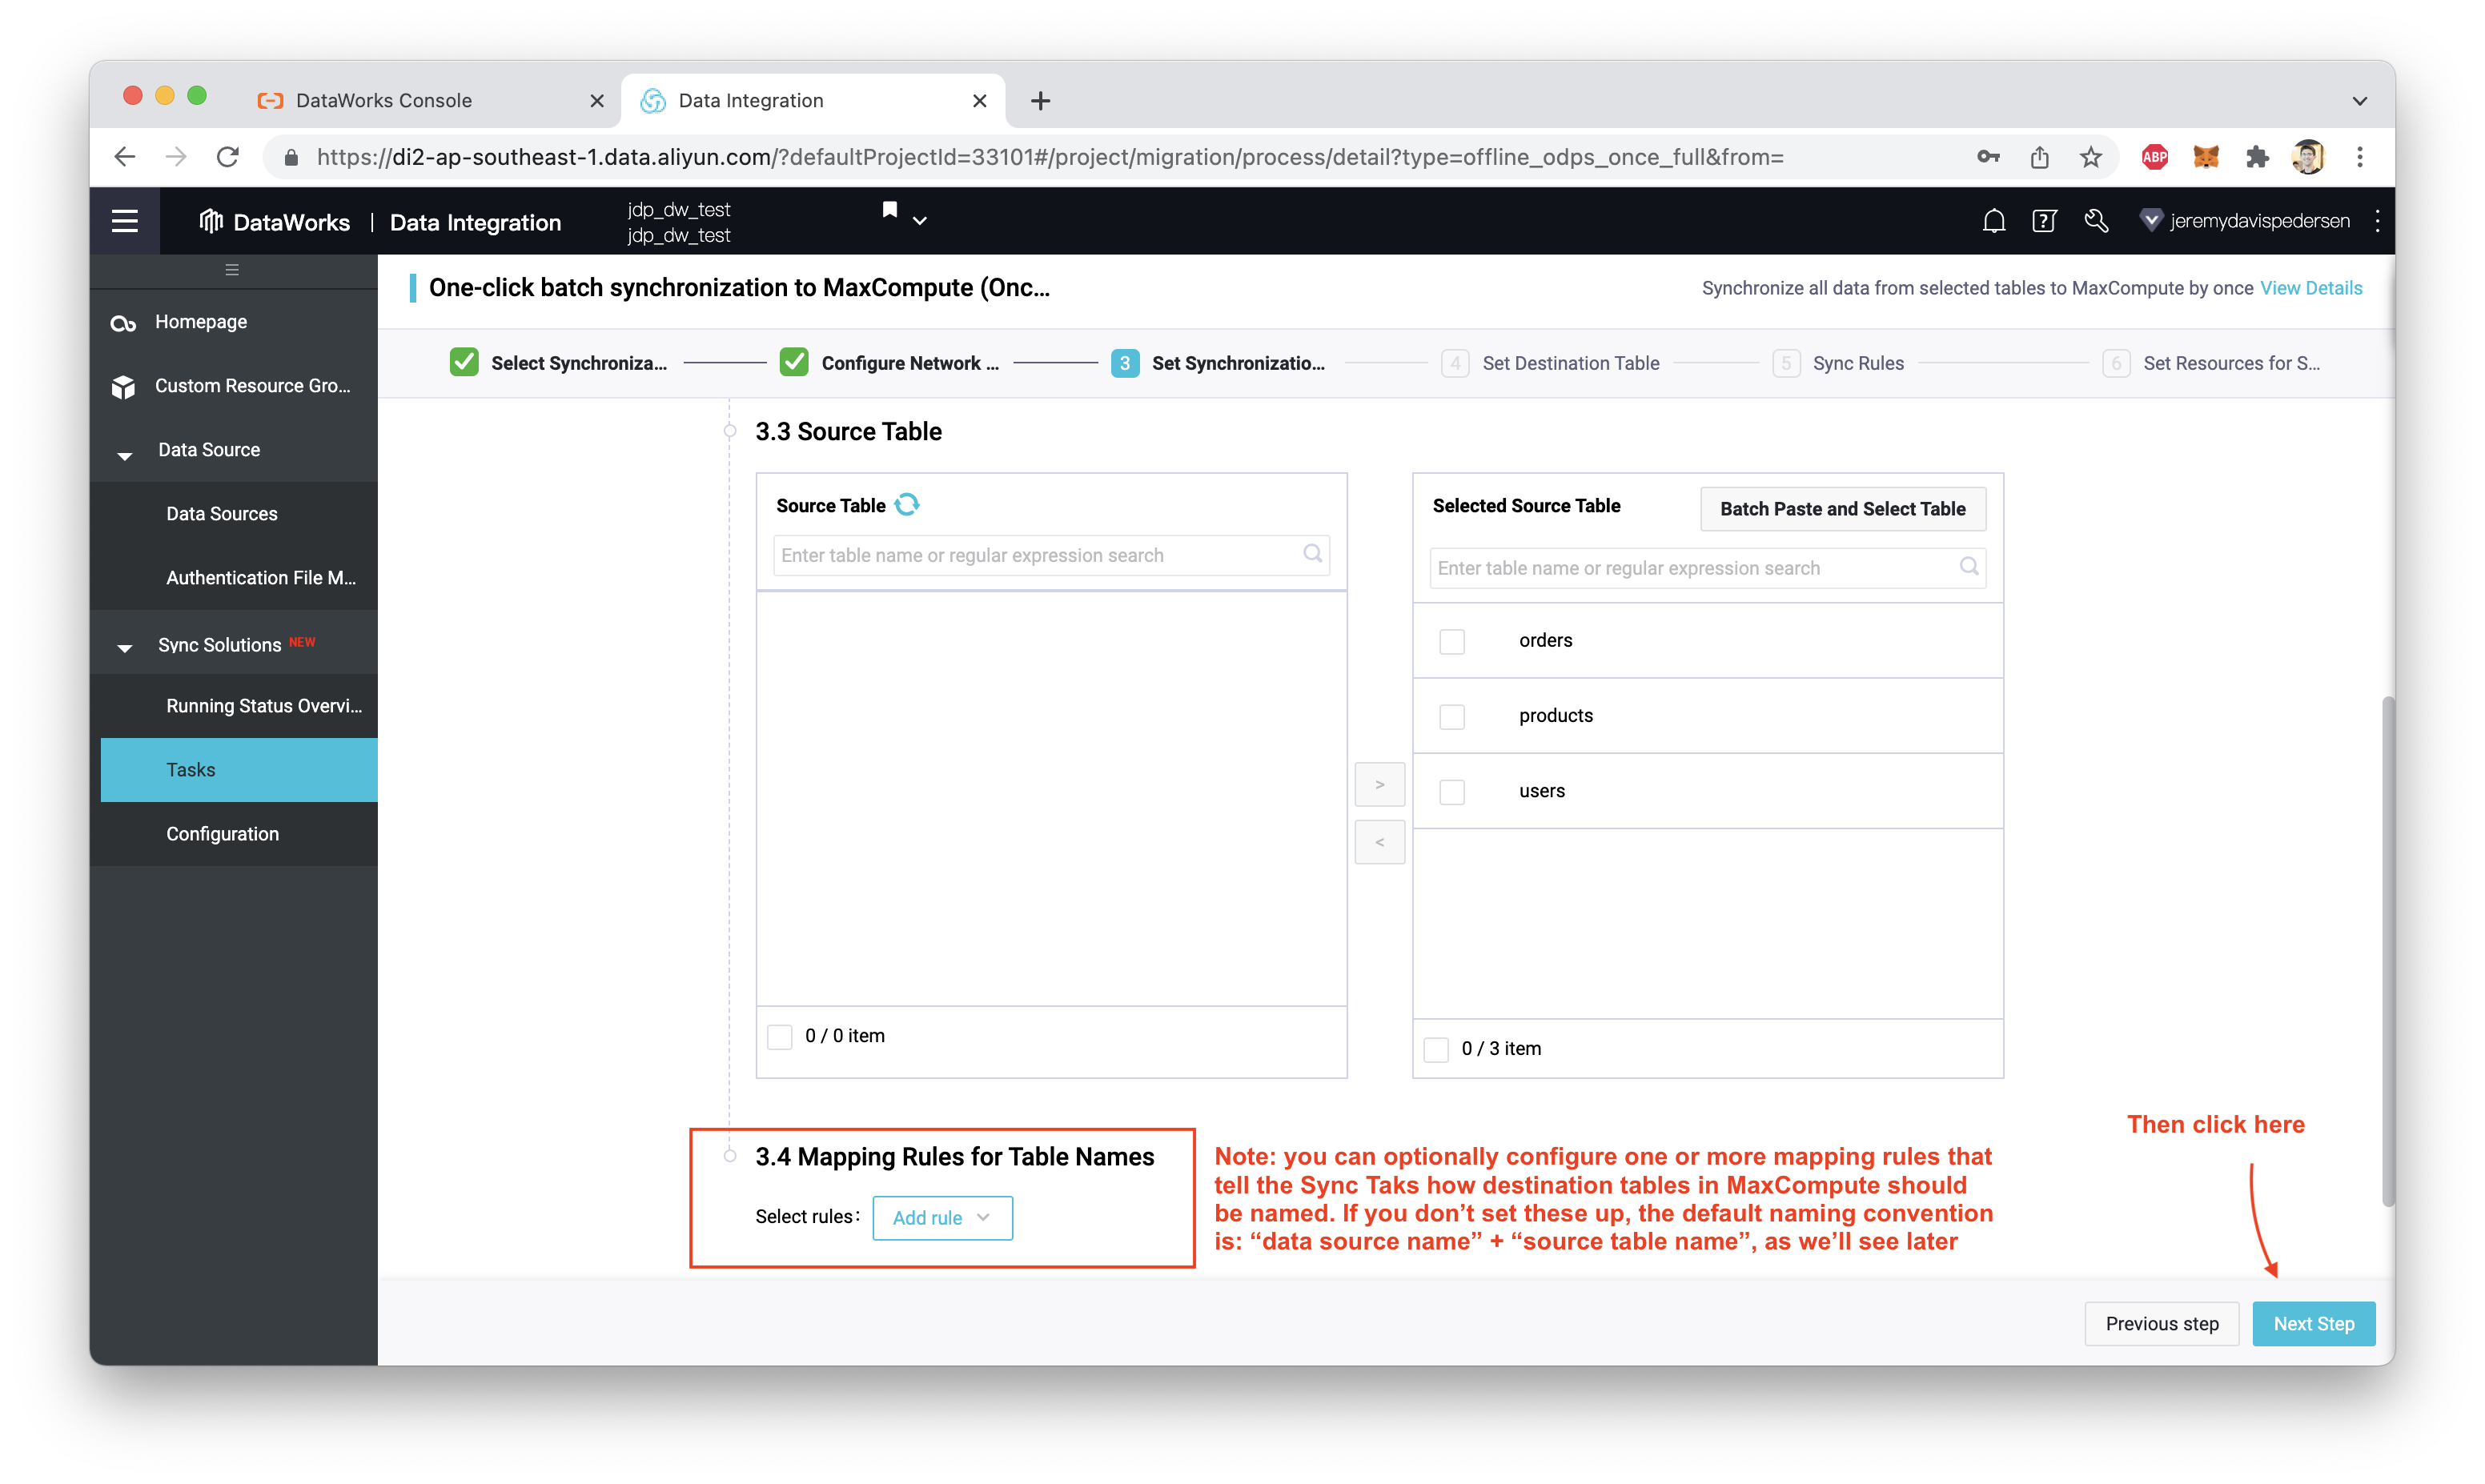
As you can see in the screenshot above, it's possible to set naming rules ("mapping rules") that determine what names our source tables will receive when they are copied into MaxCompute. For a simple import job like the one we're trying out here, you don't need to create any mapping rules.
Confirm the source and destination table mappings, then click "Next Step" again:
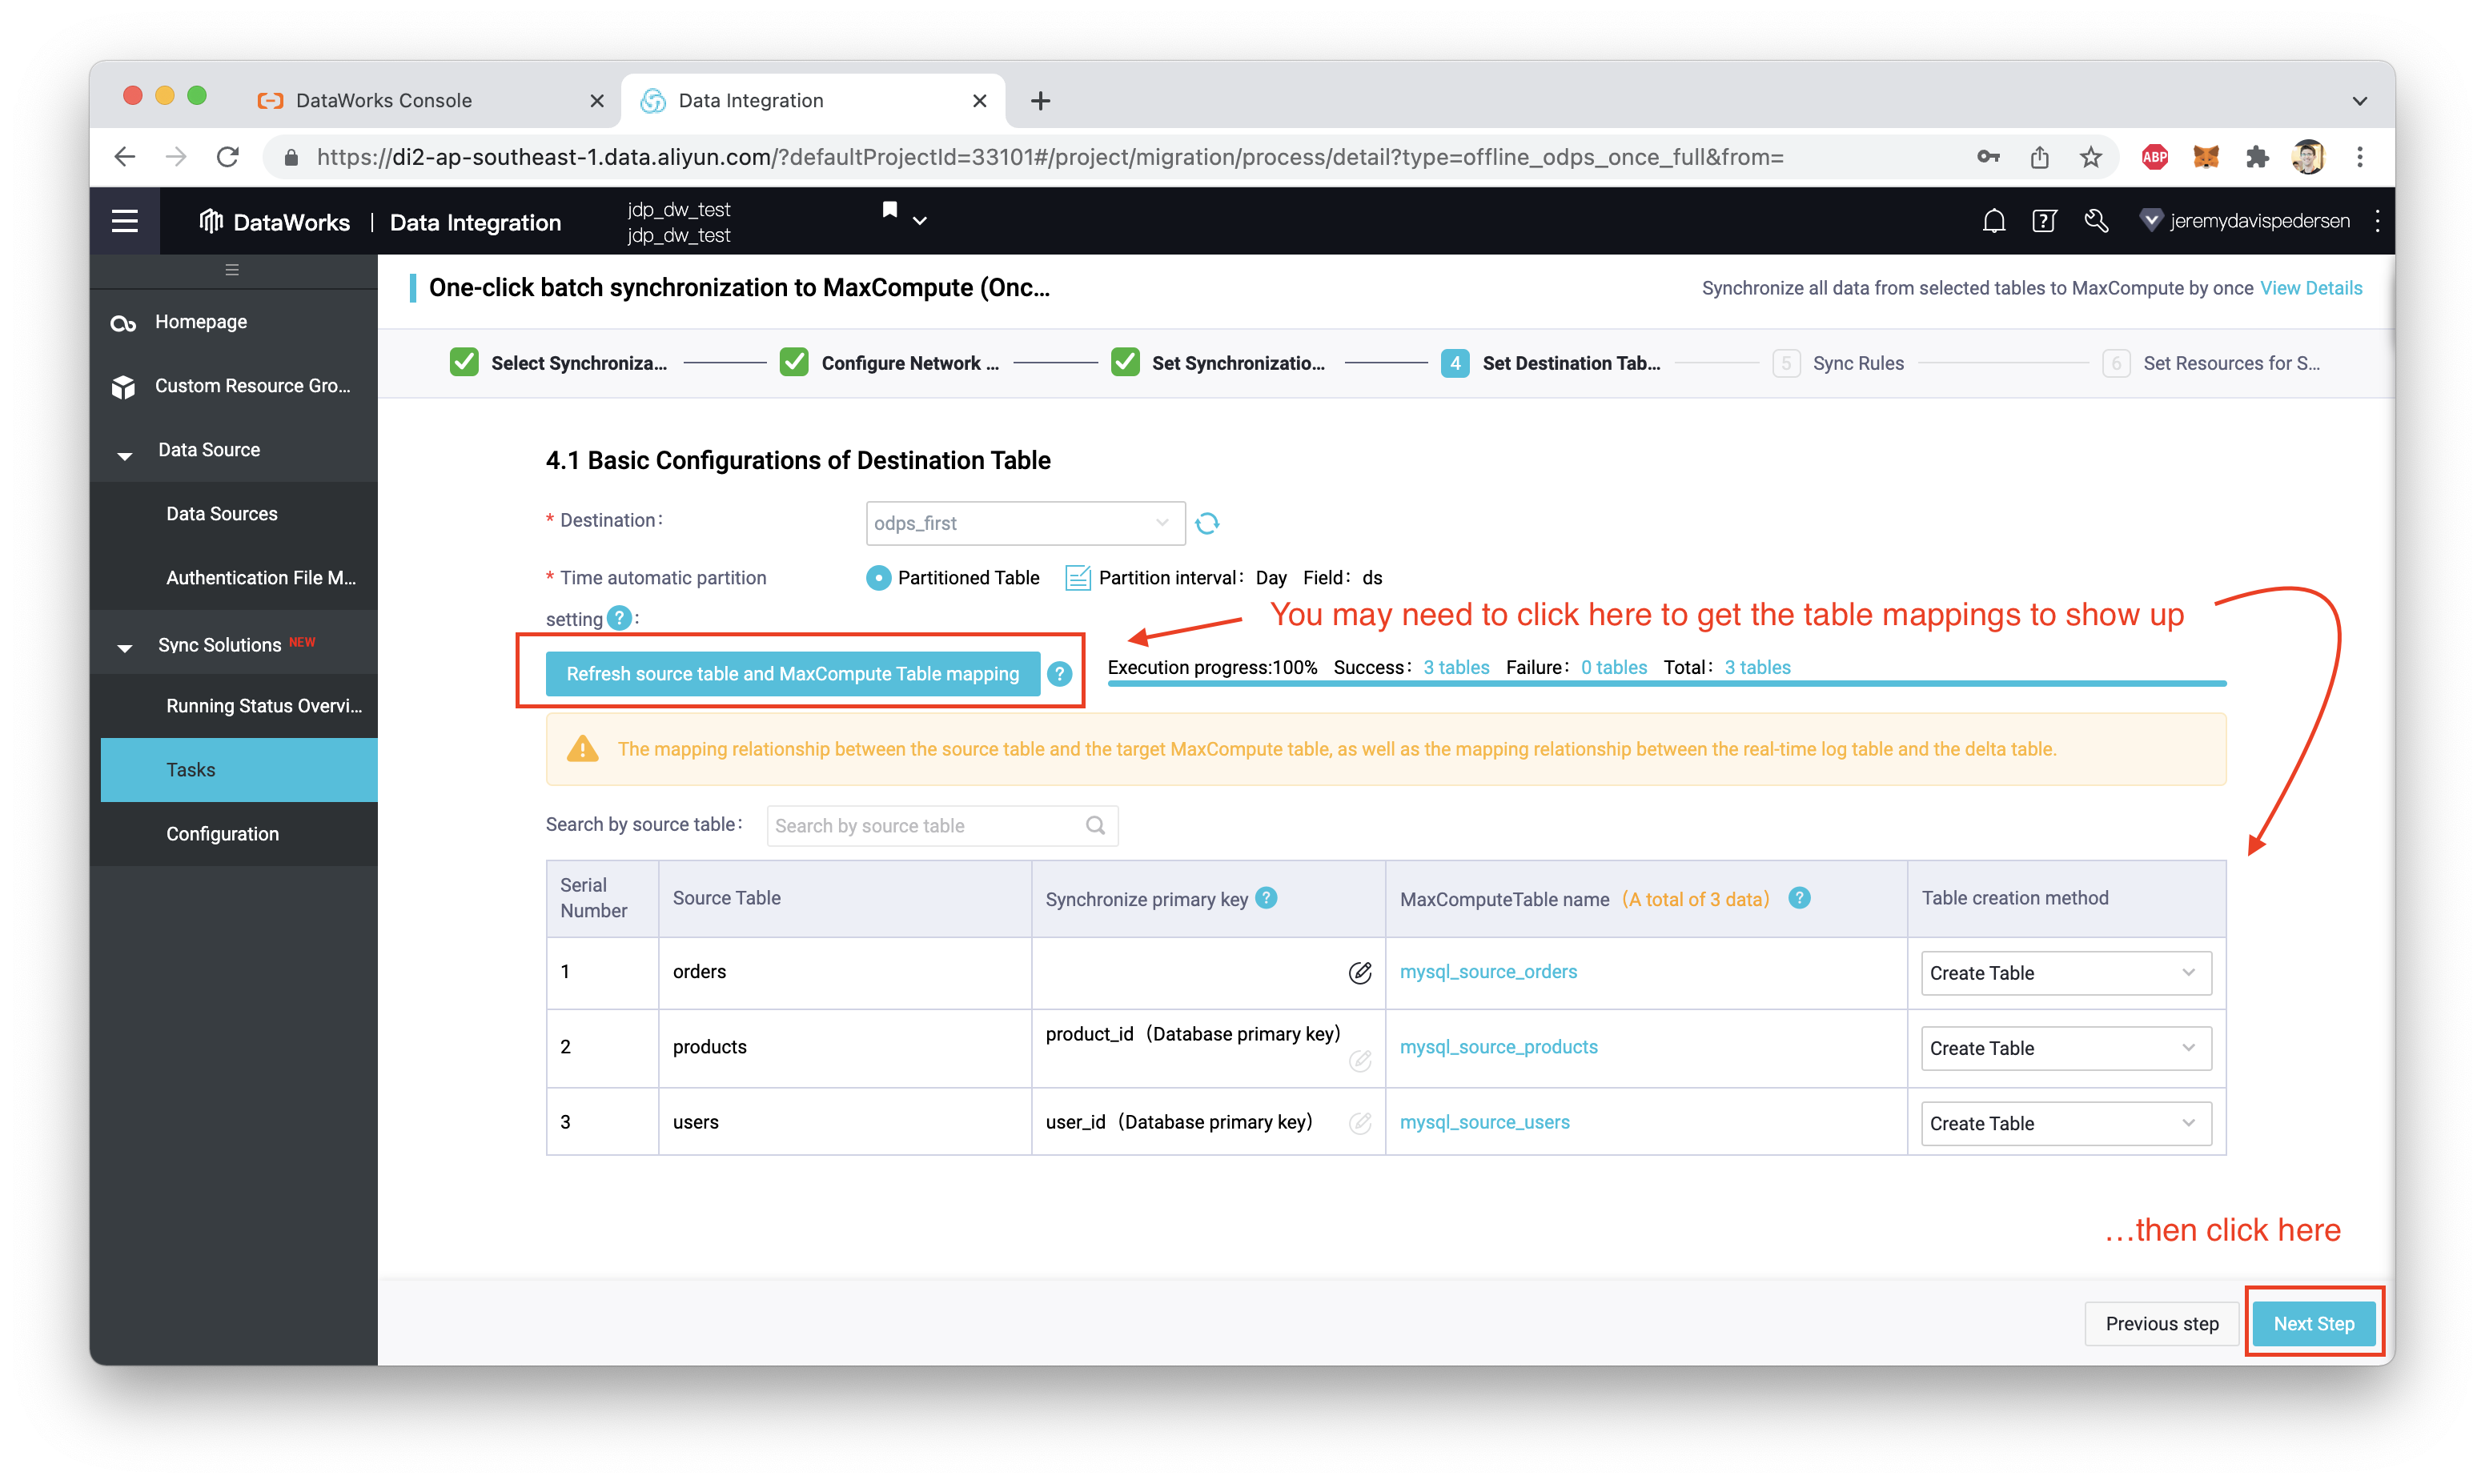
Finally, choose whether or not to clear the MaxCompute tables before starting:
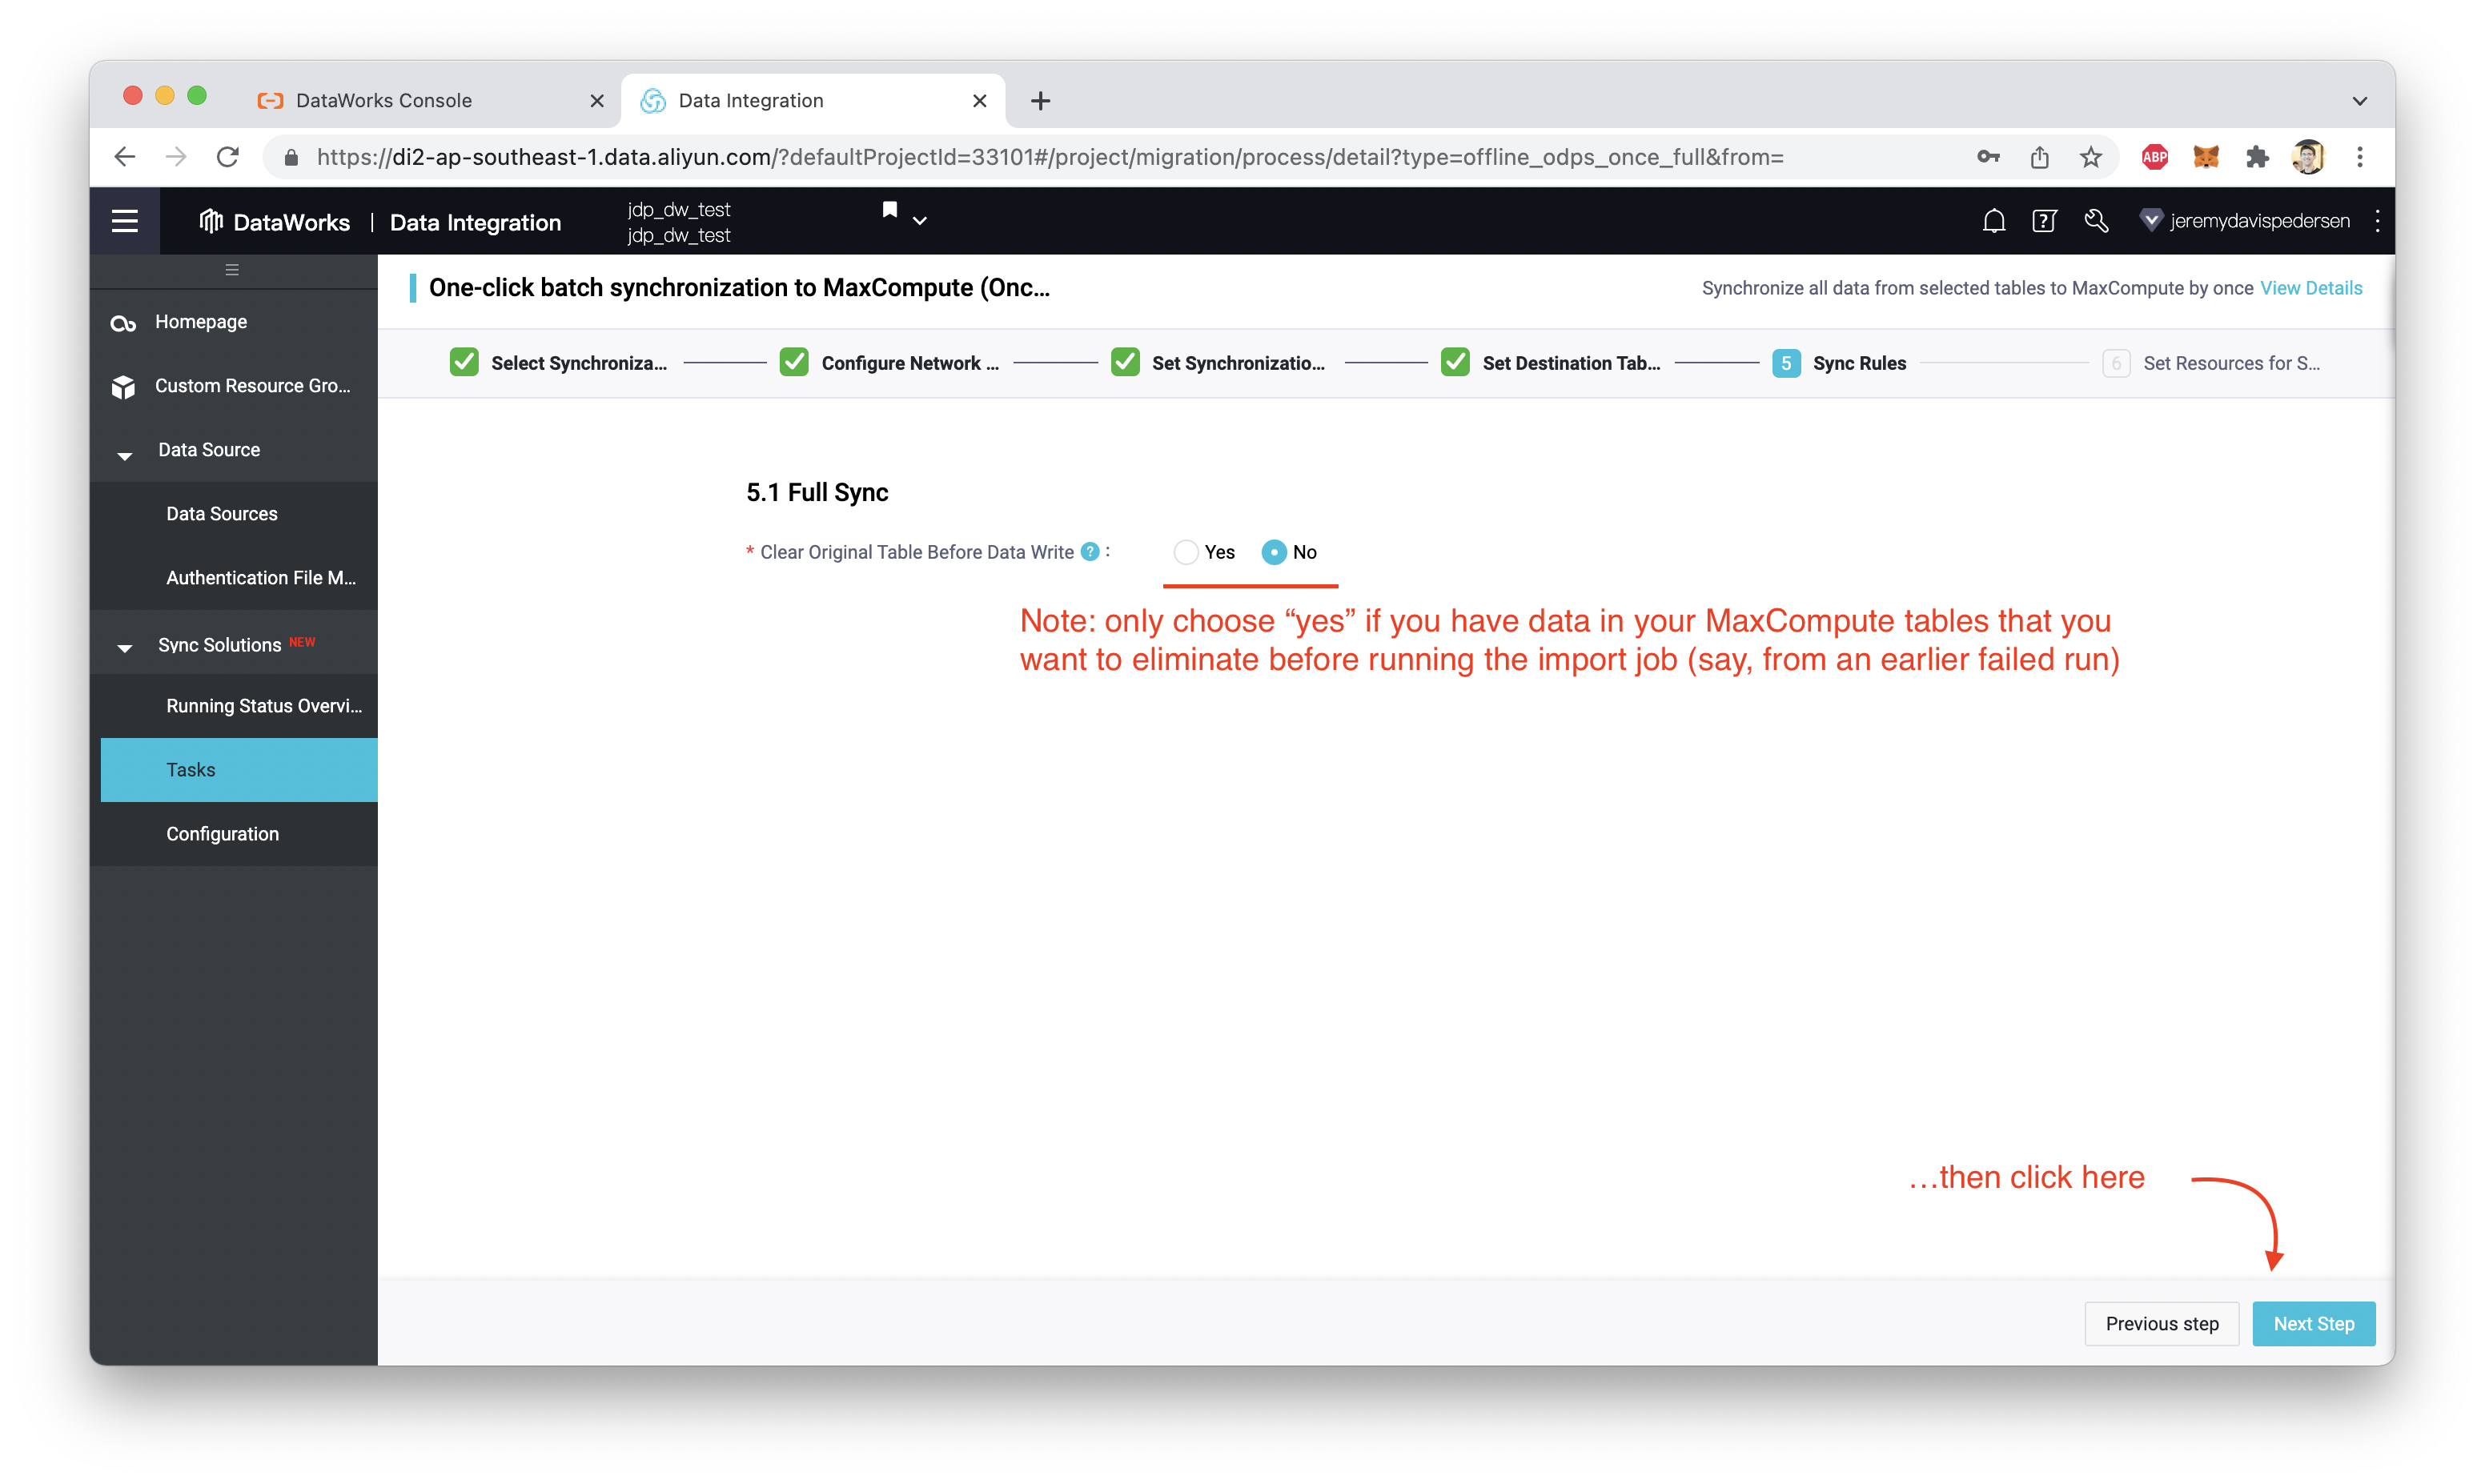
Doing this will delete any existing data from the destination tables, before the migration starts. If you are re-running a failed full migration job, it probably is a good idea to choose "Yes" here. In our case, we choose the default option, "No".
Click "Next Step". We are now prompted to configure our job's scheduling parameters. We can leave everything at defaults here:
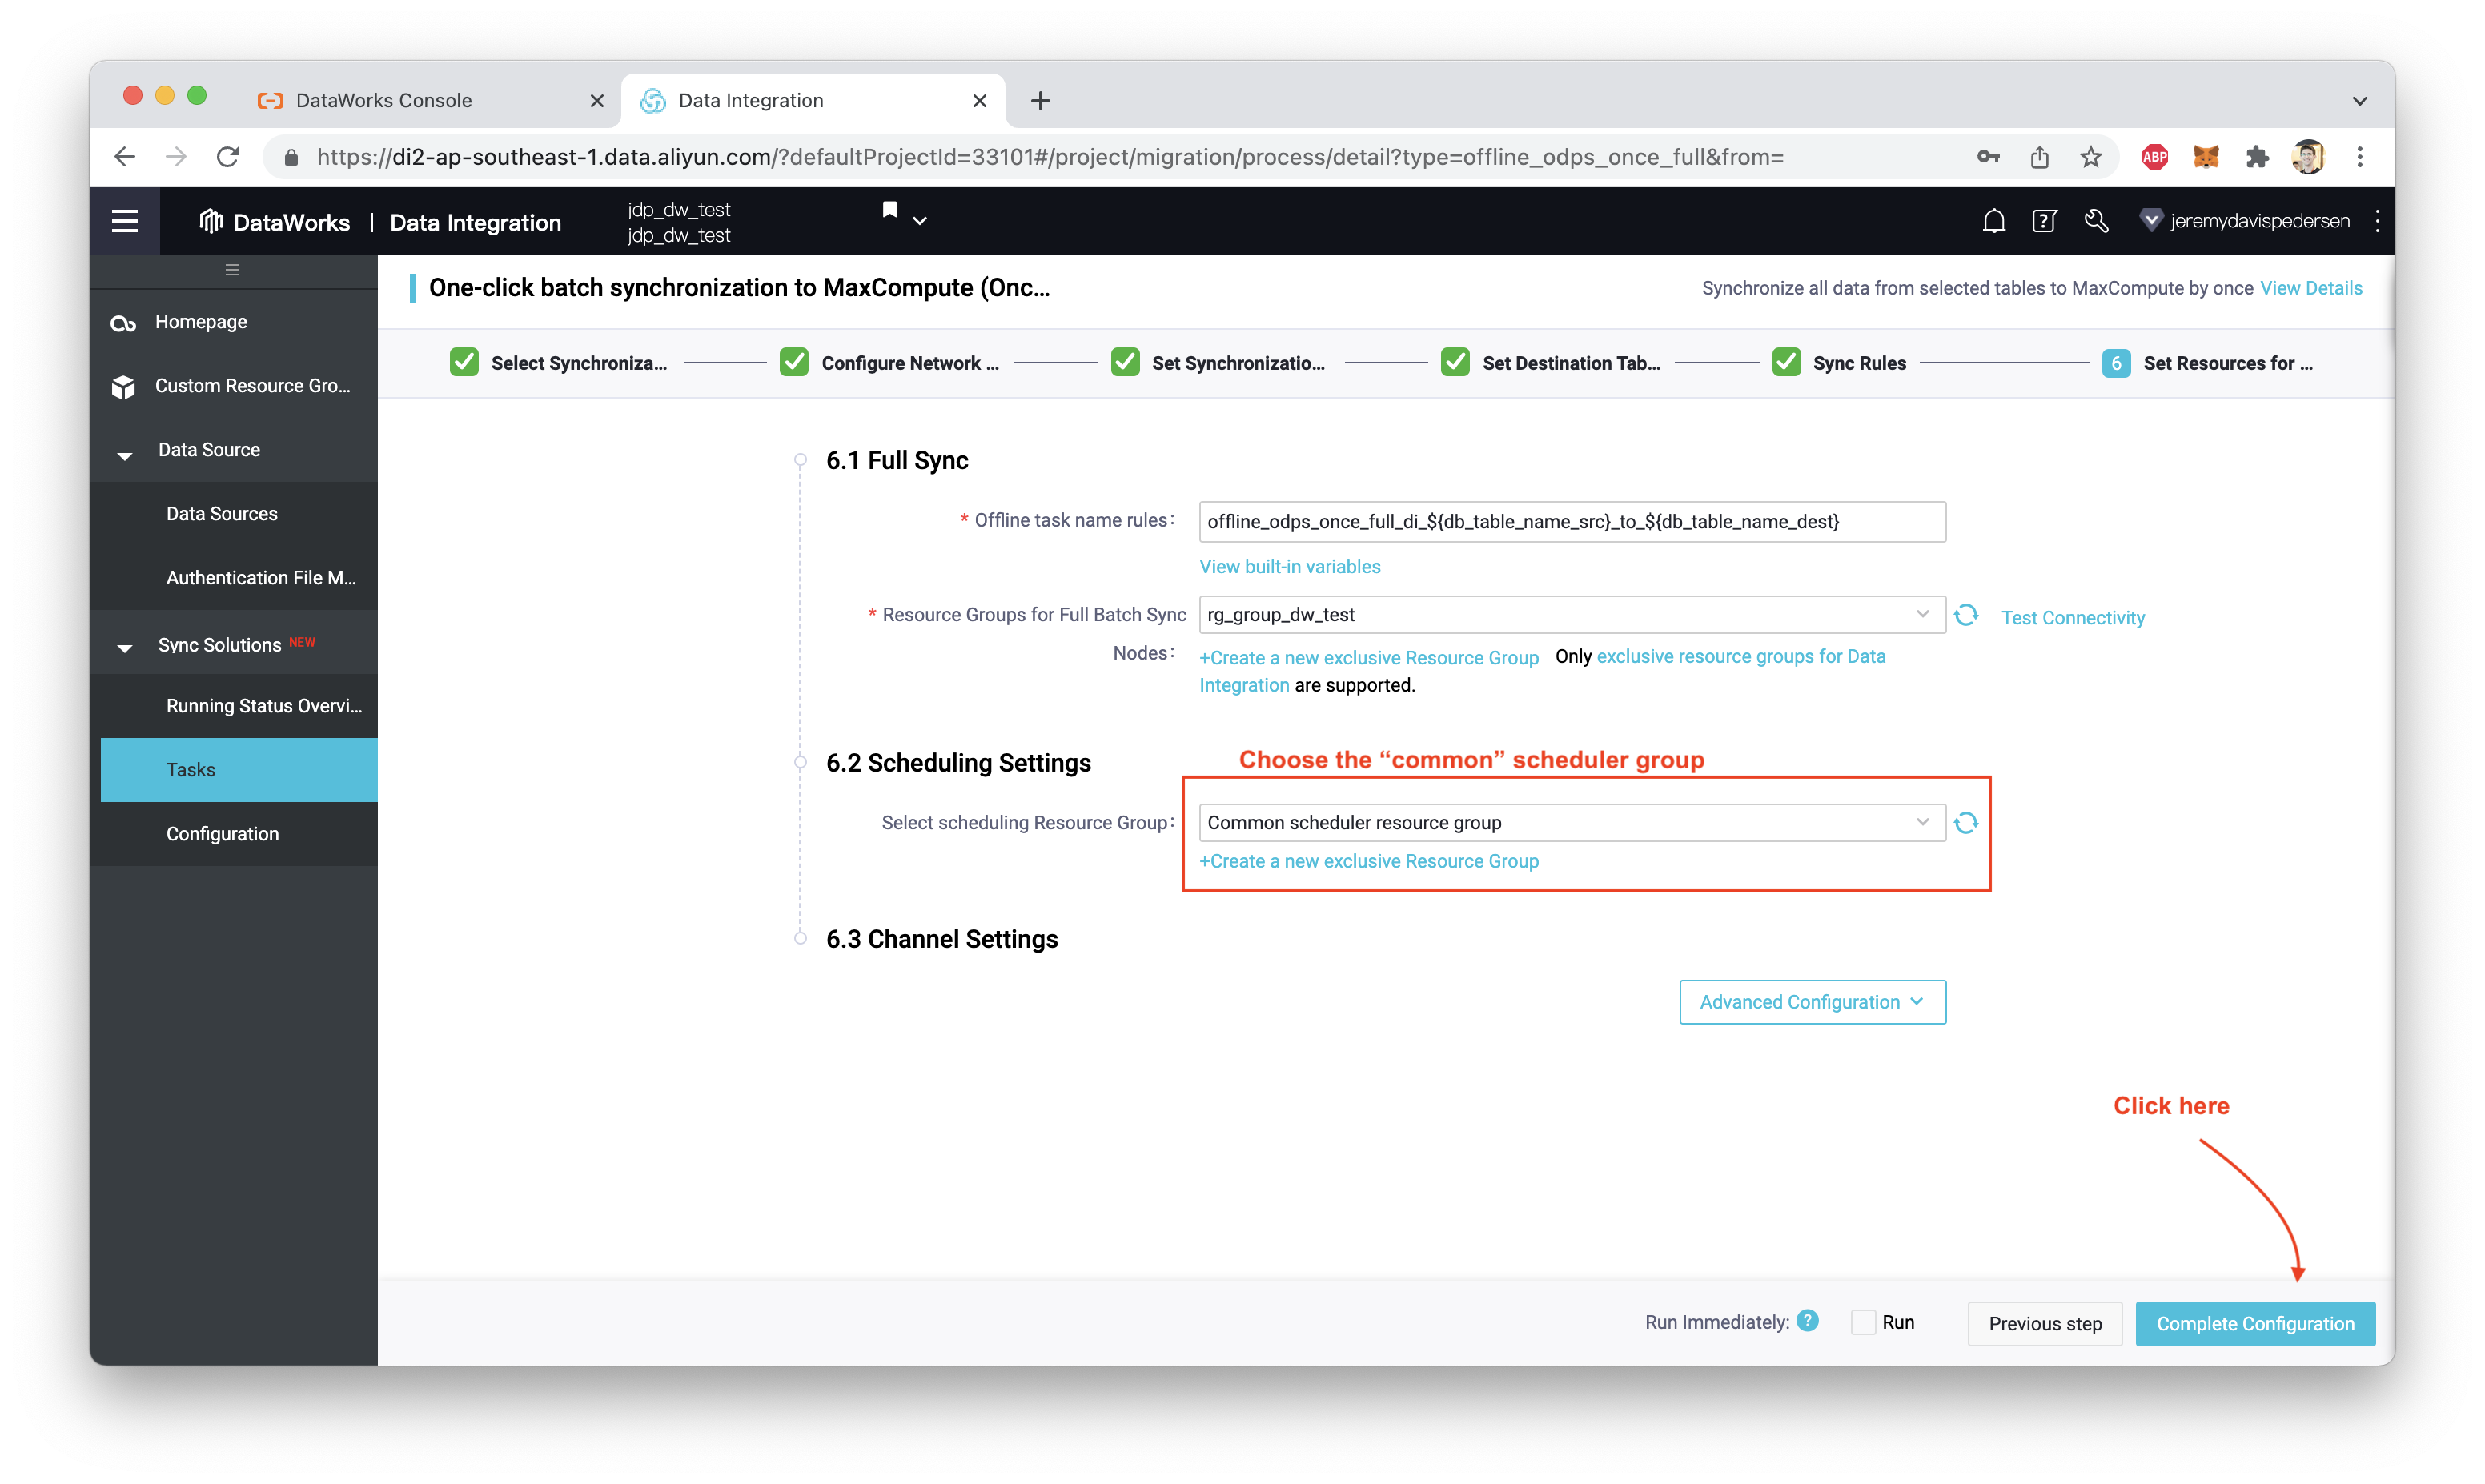
Clicking "Next Step" again takes us back to the "Tasks" page. We now click "Submit and Run", and the job starts!
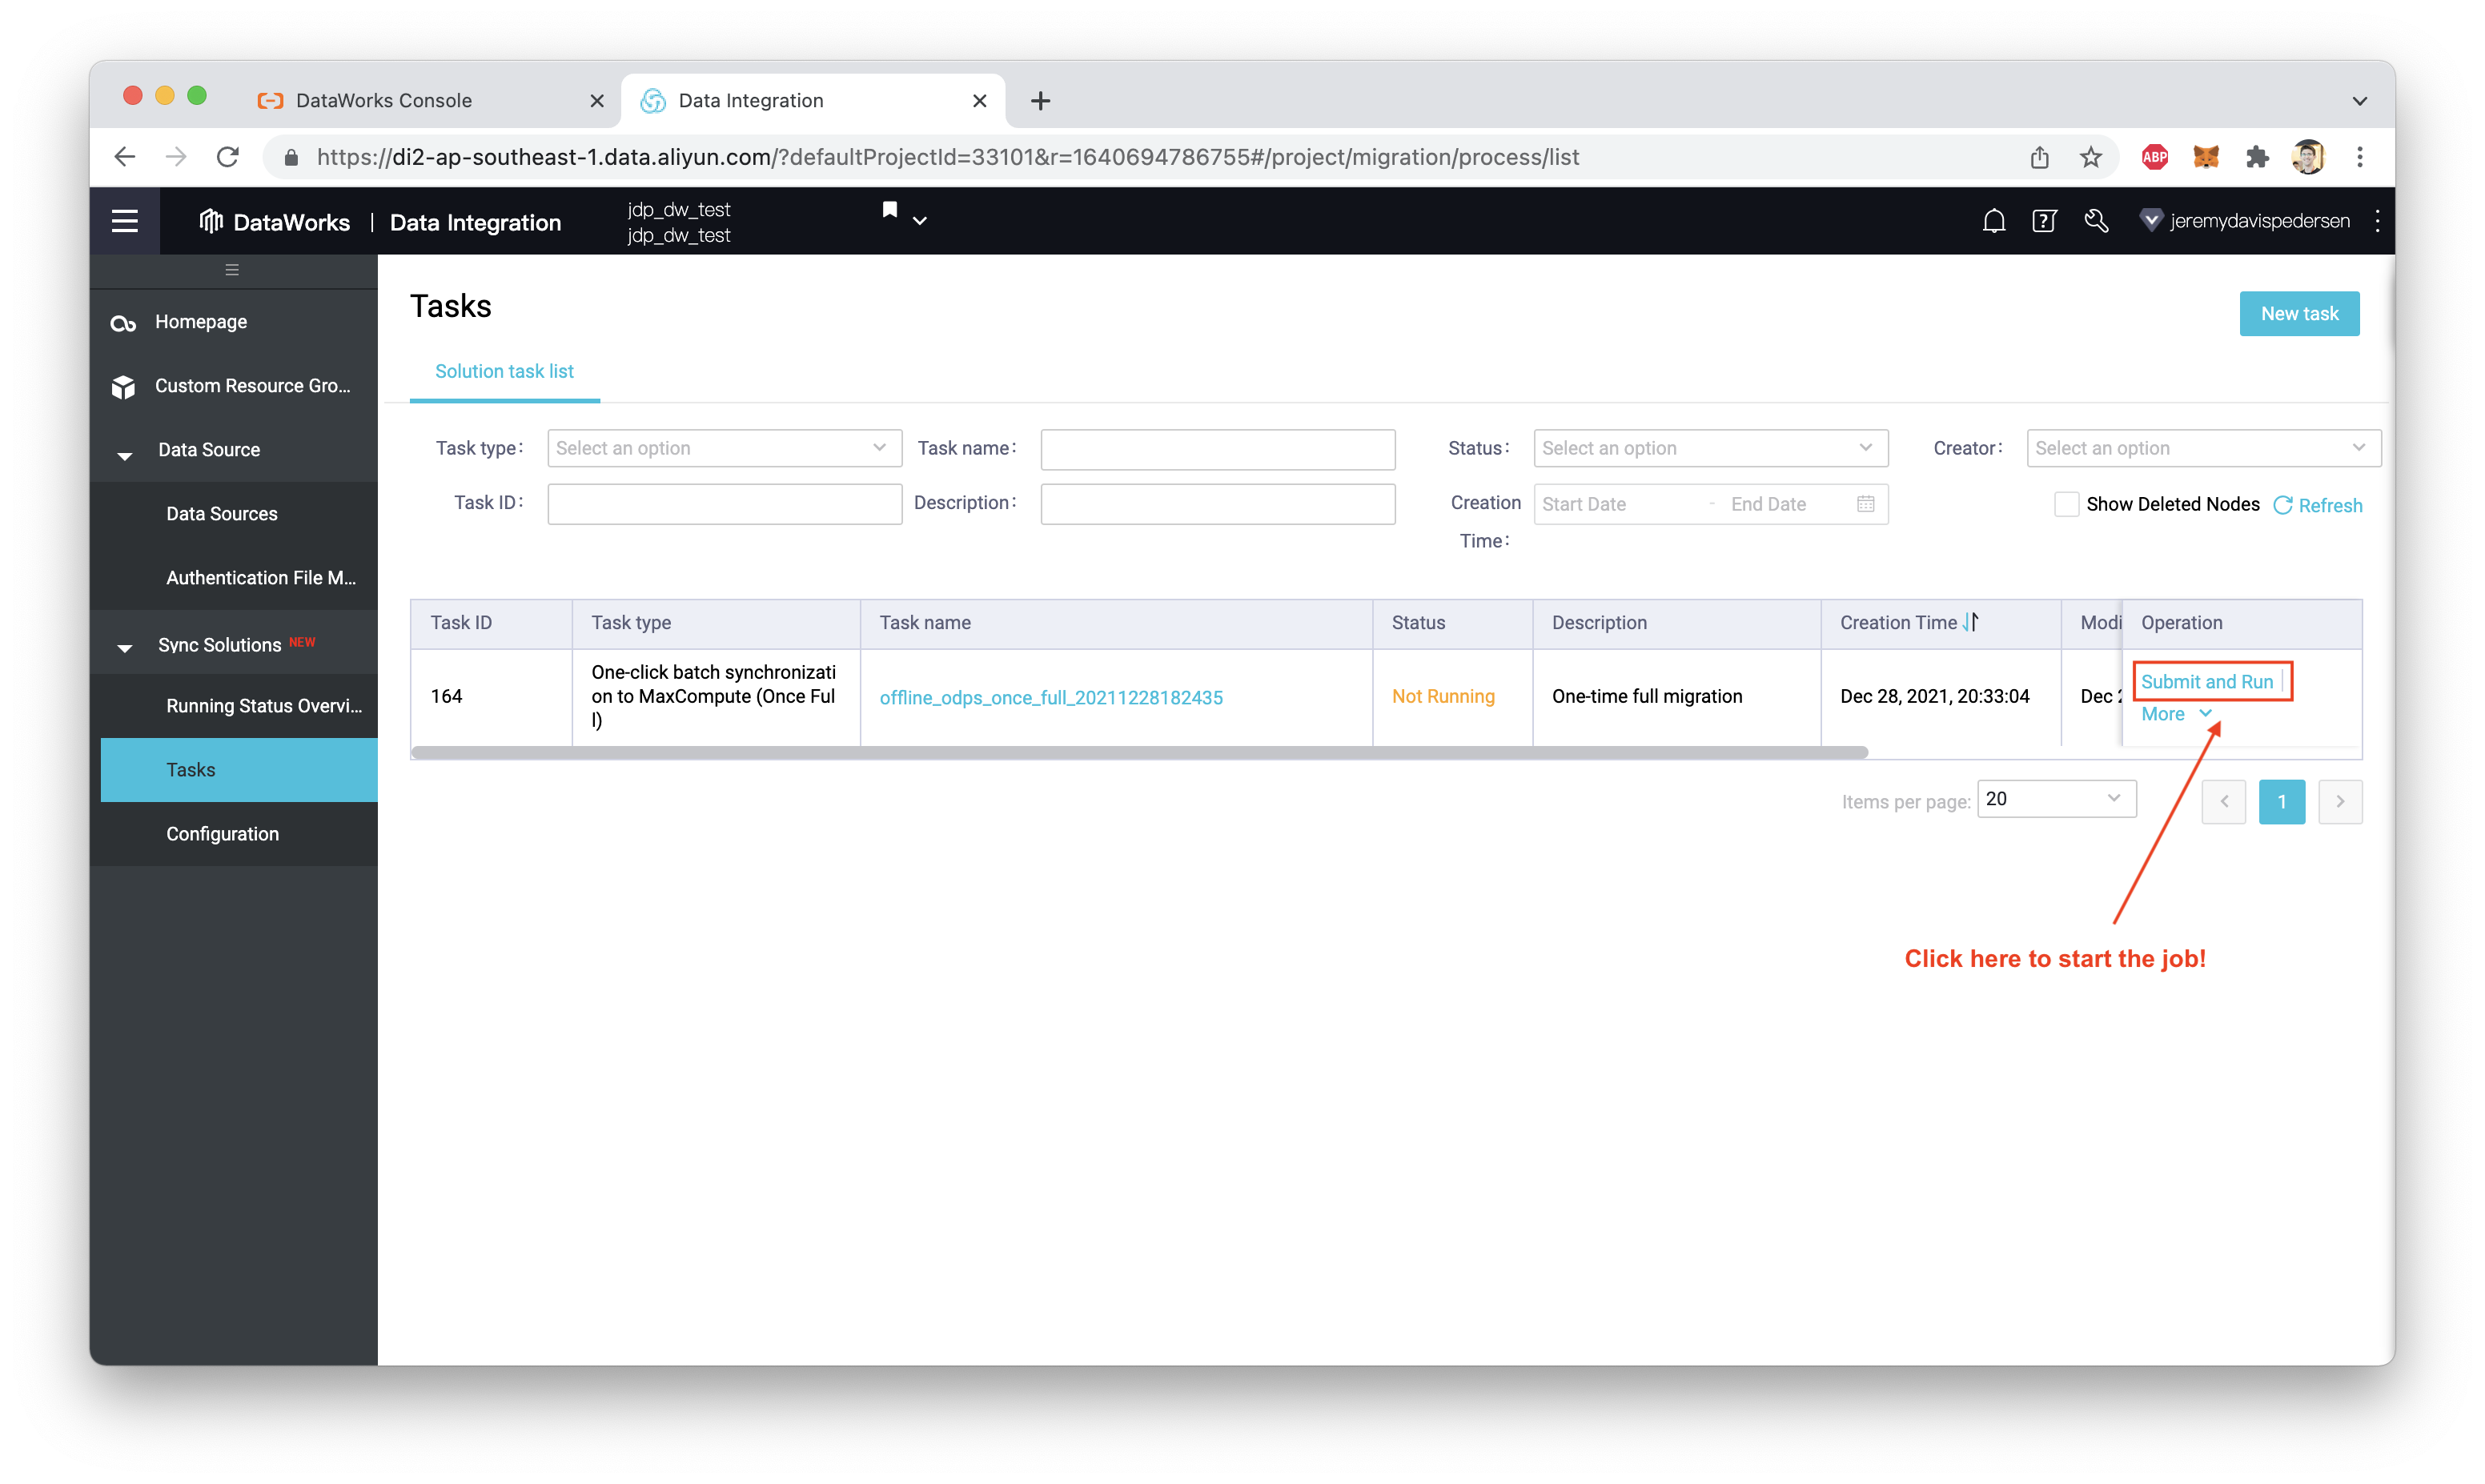
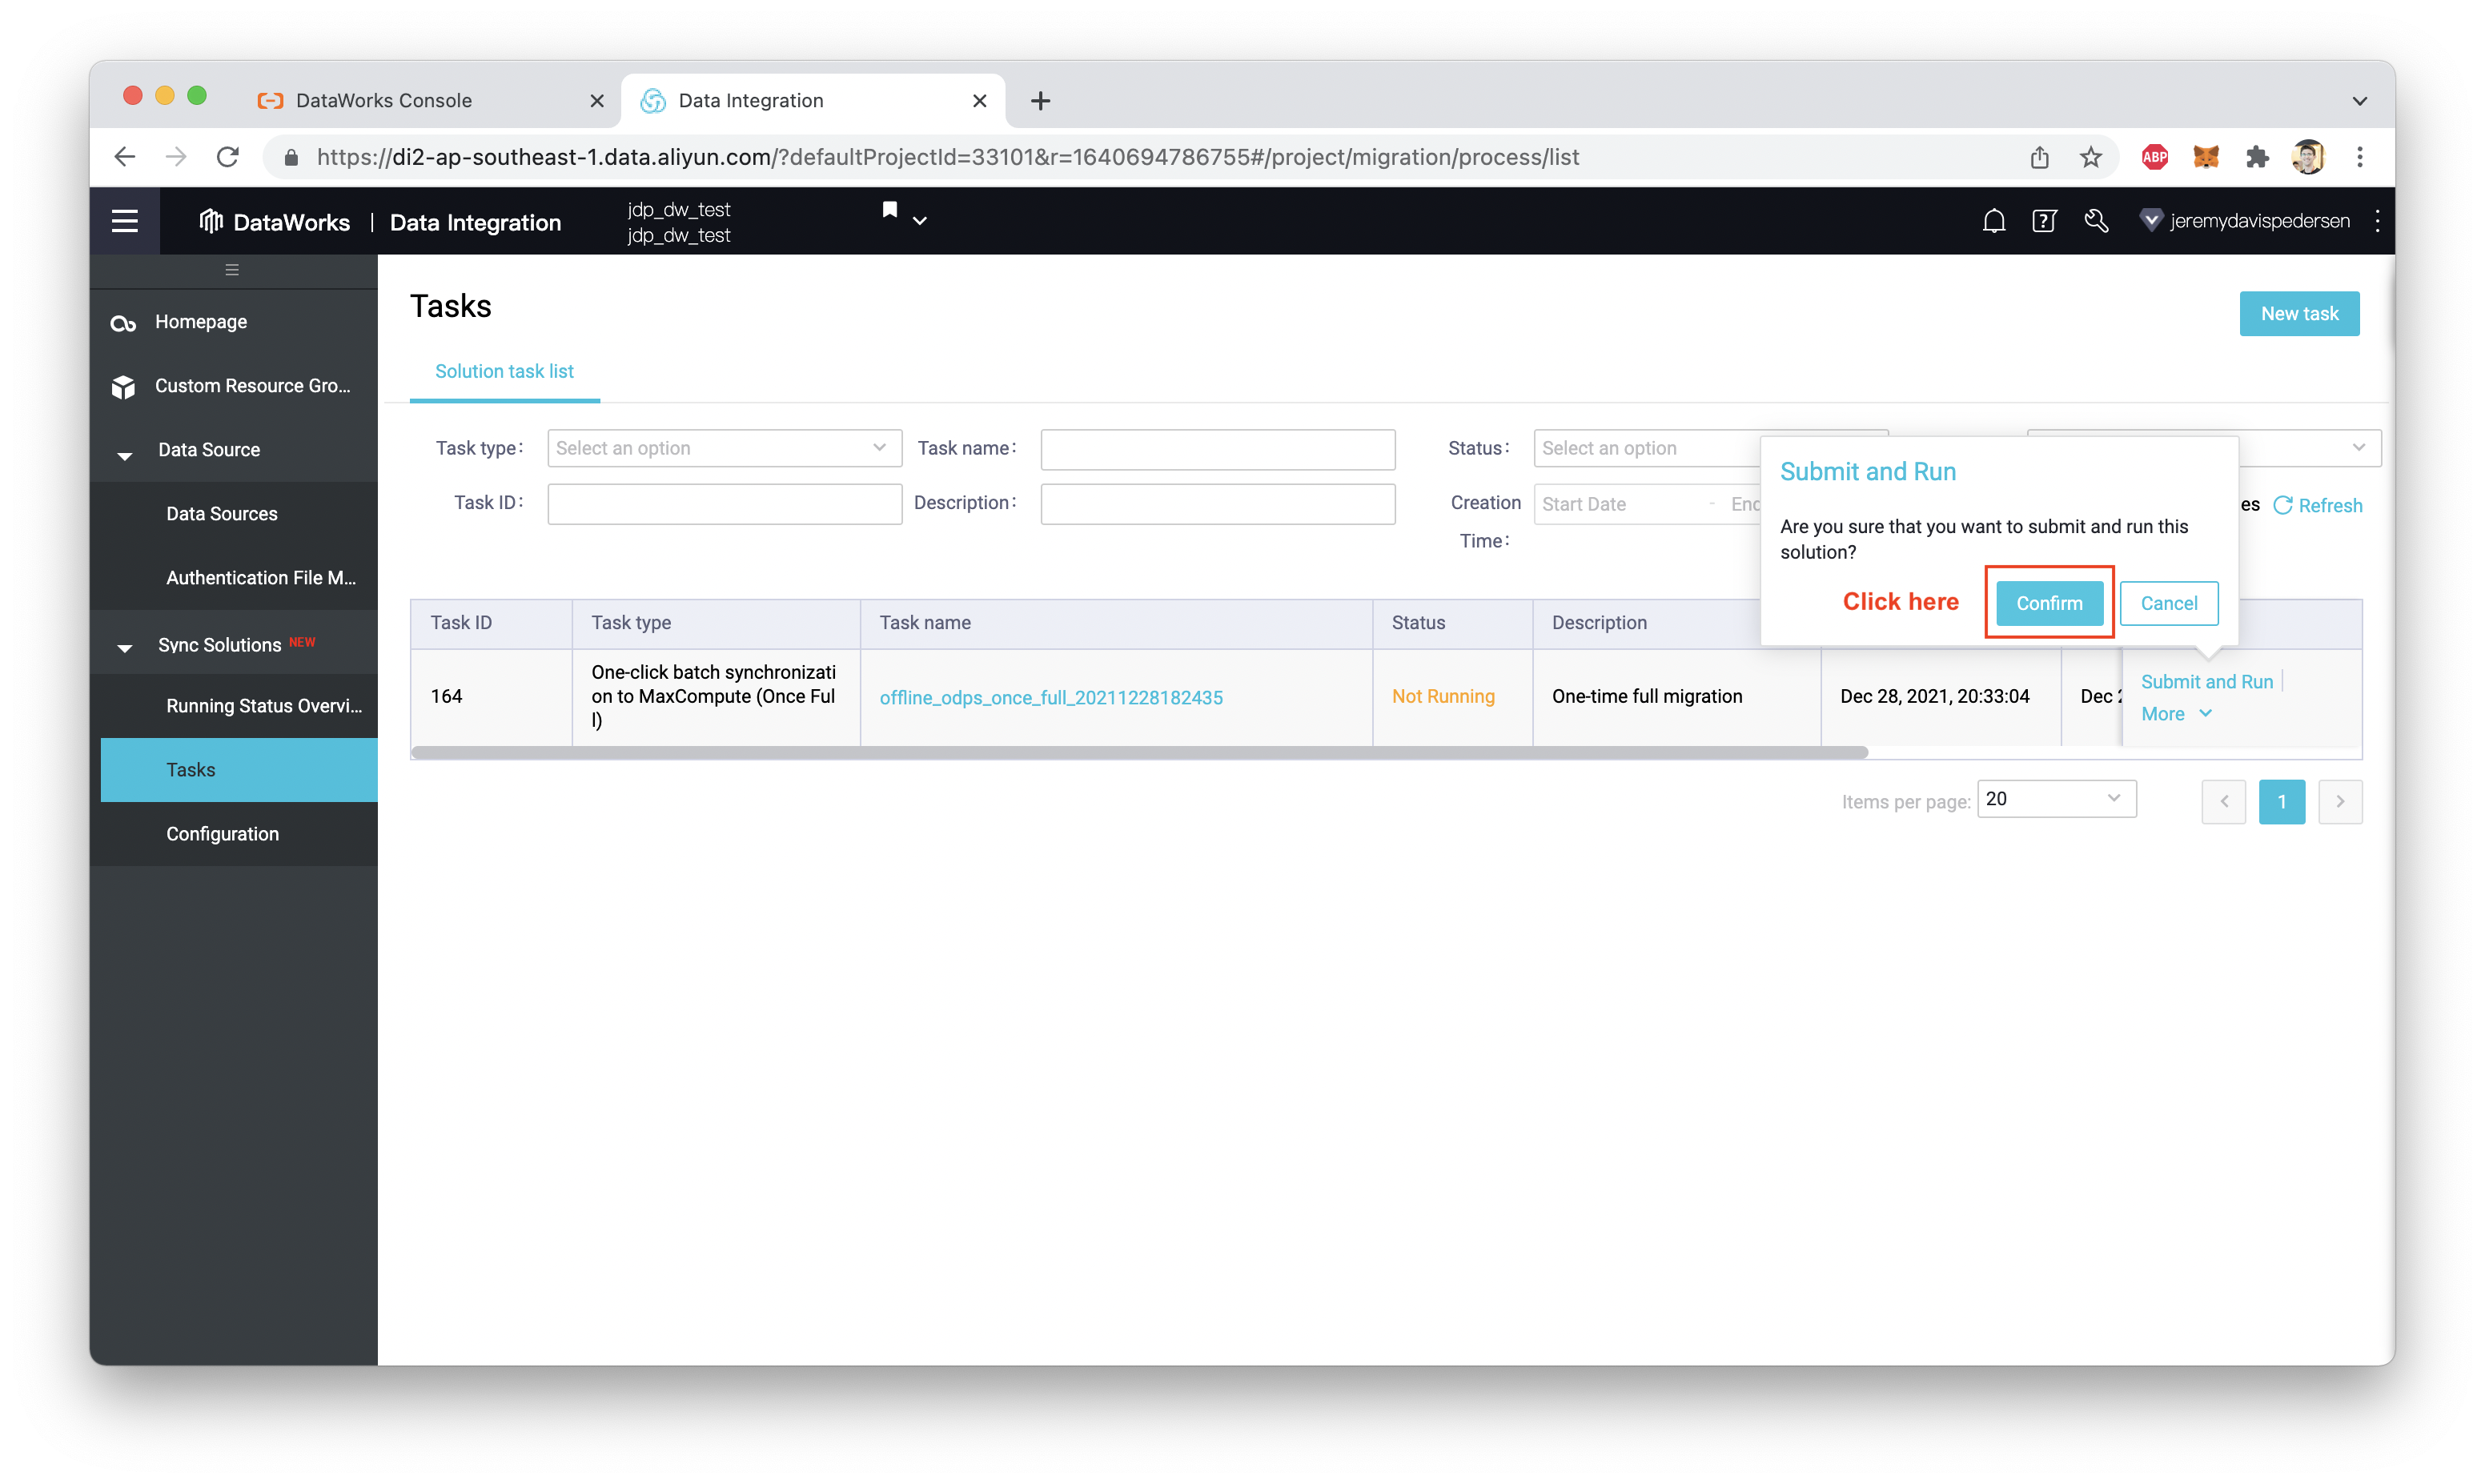
Once we confirm, the task should start executing:
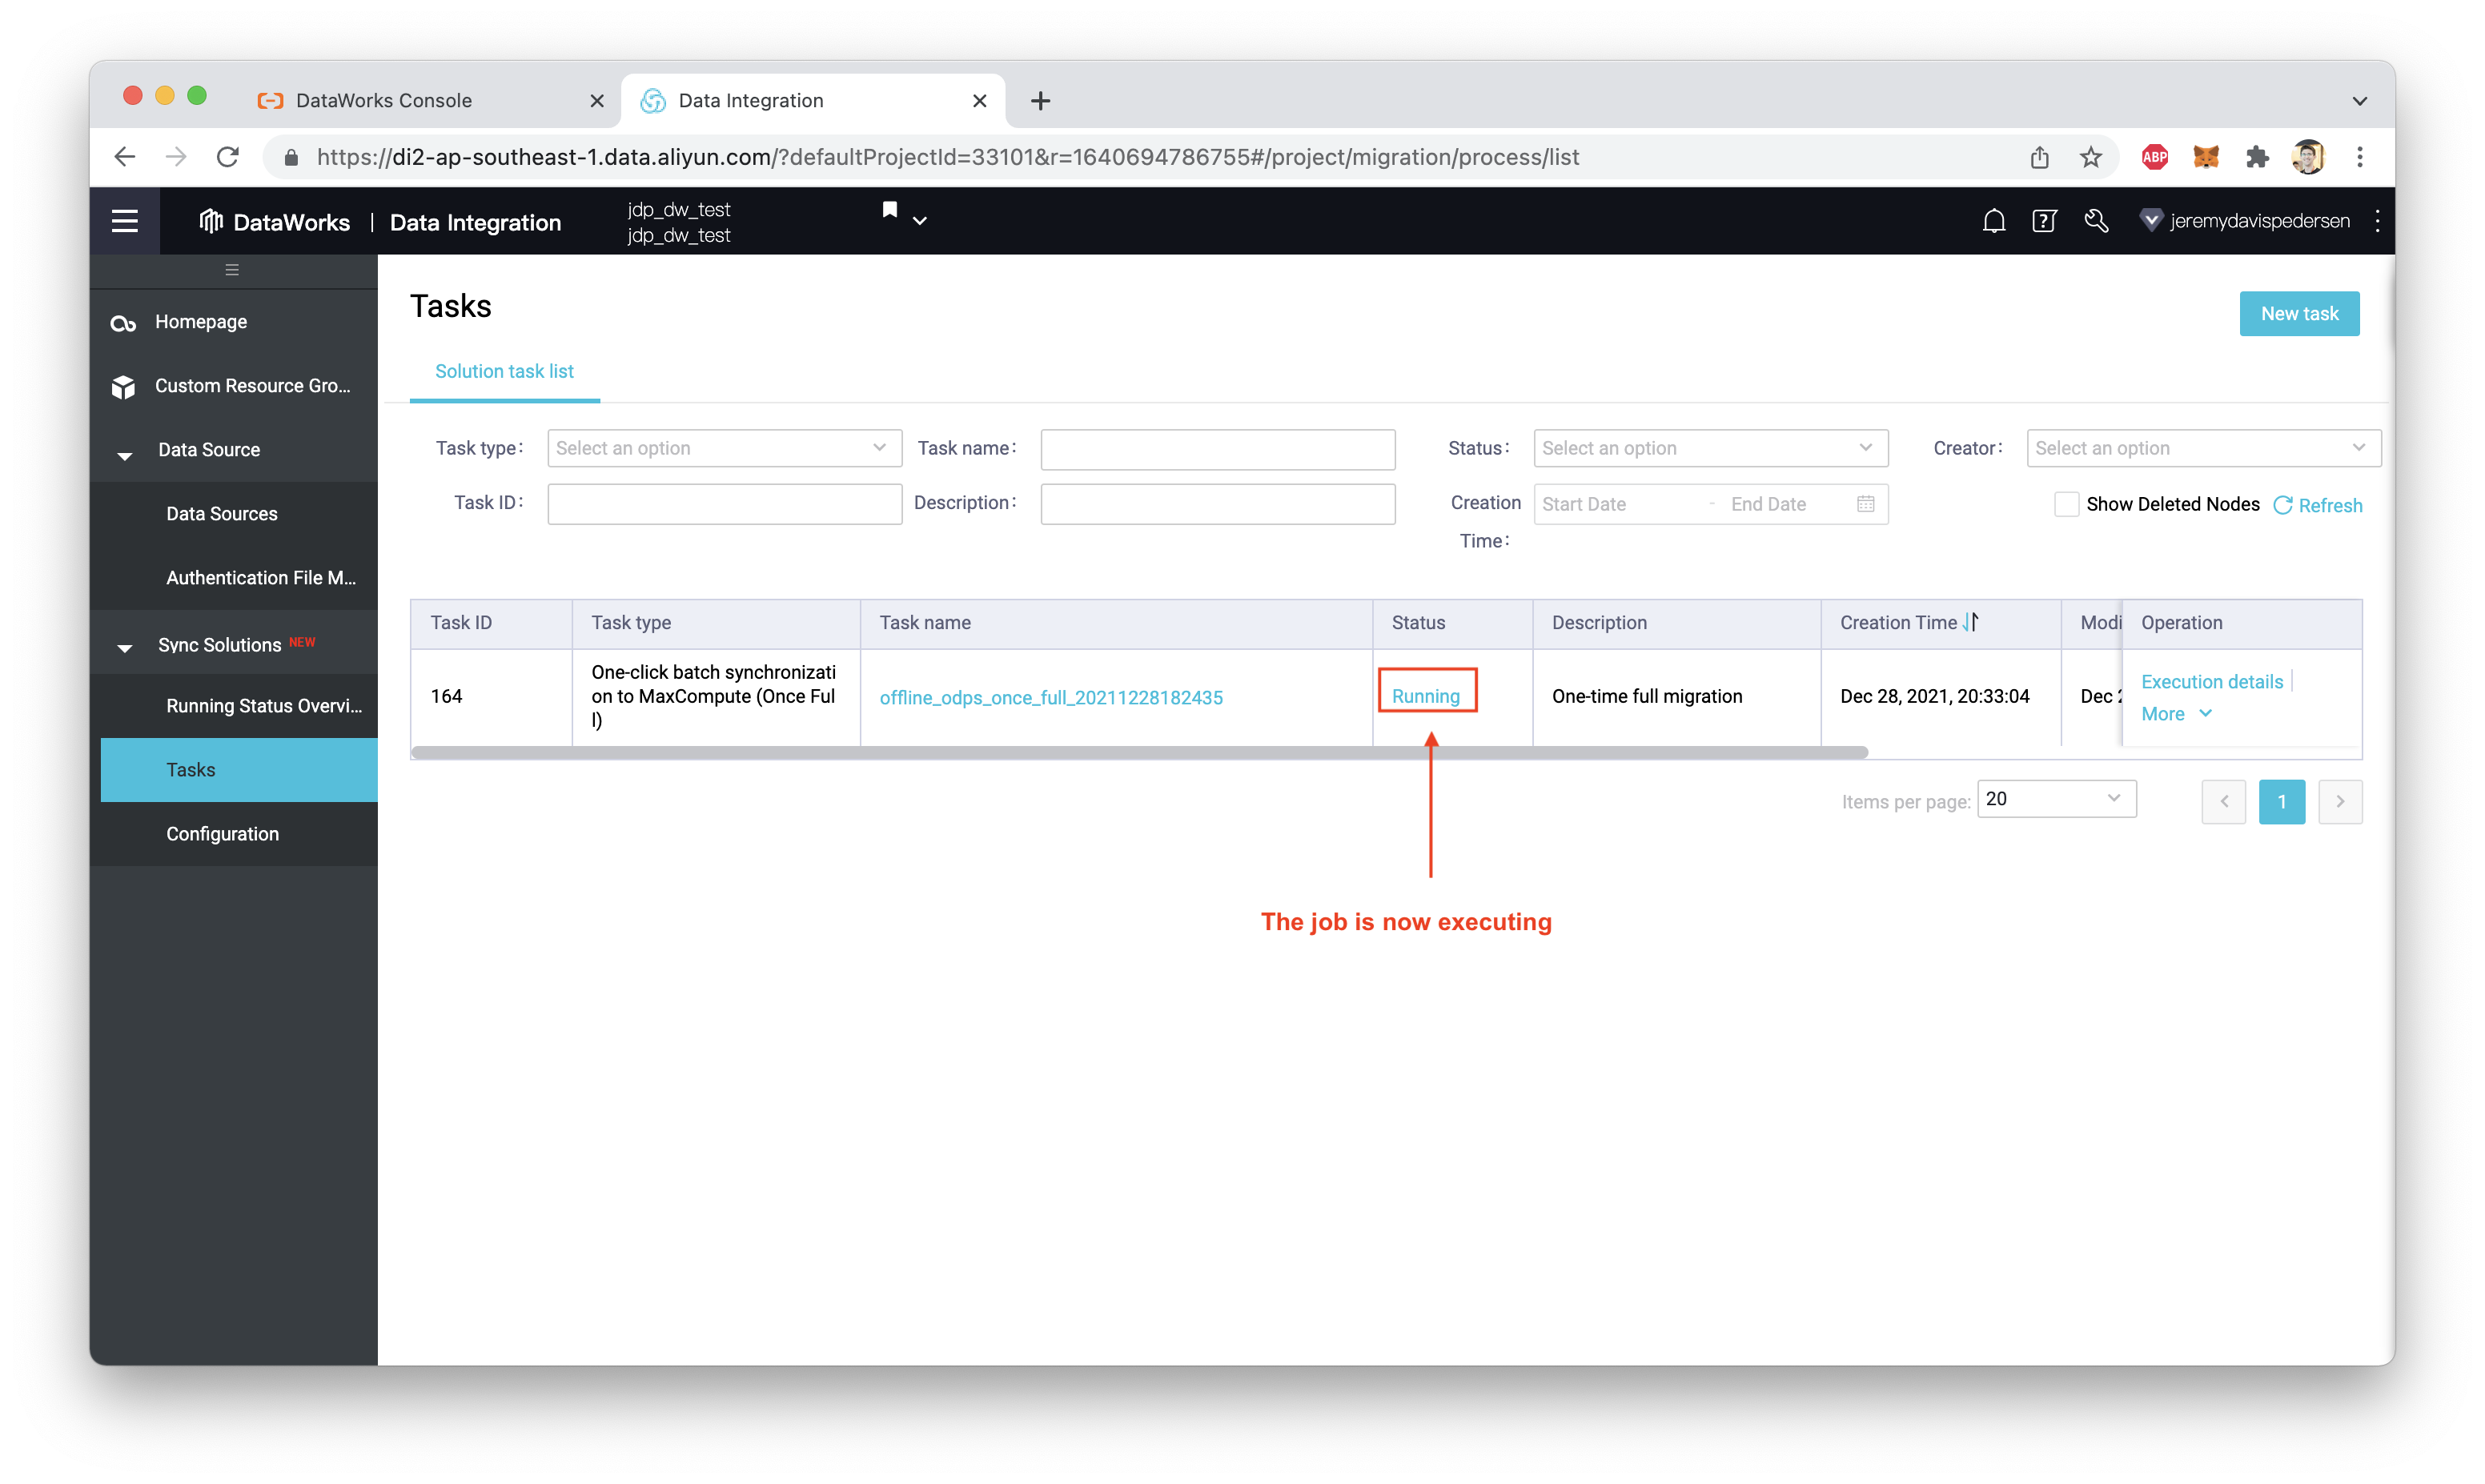
Note that the task may appear to fail. If this happens, take a look at the execution results to determine whether or not there's a real problem:
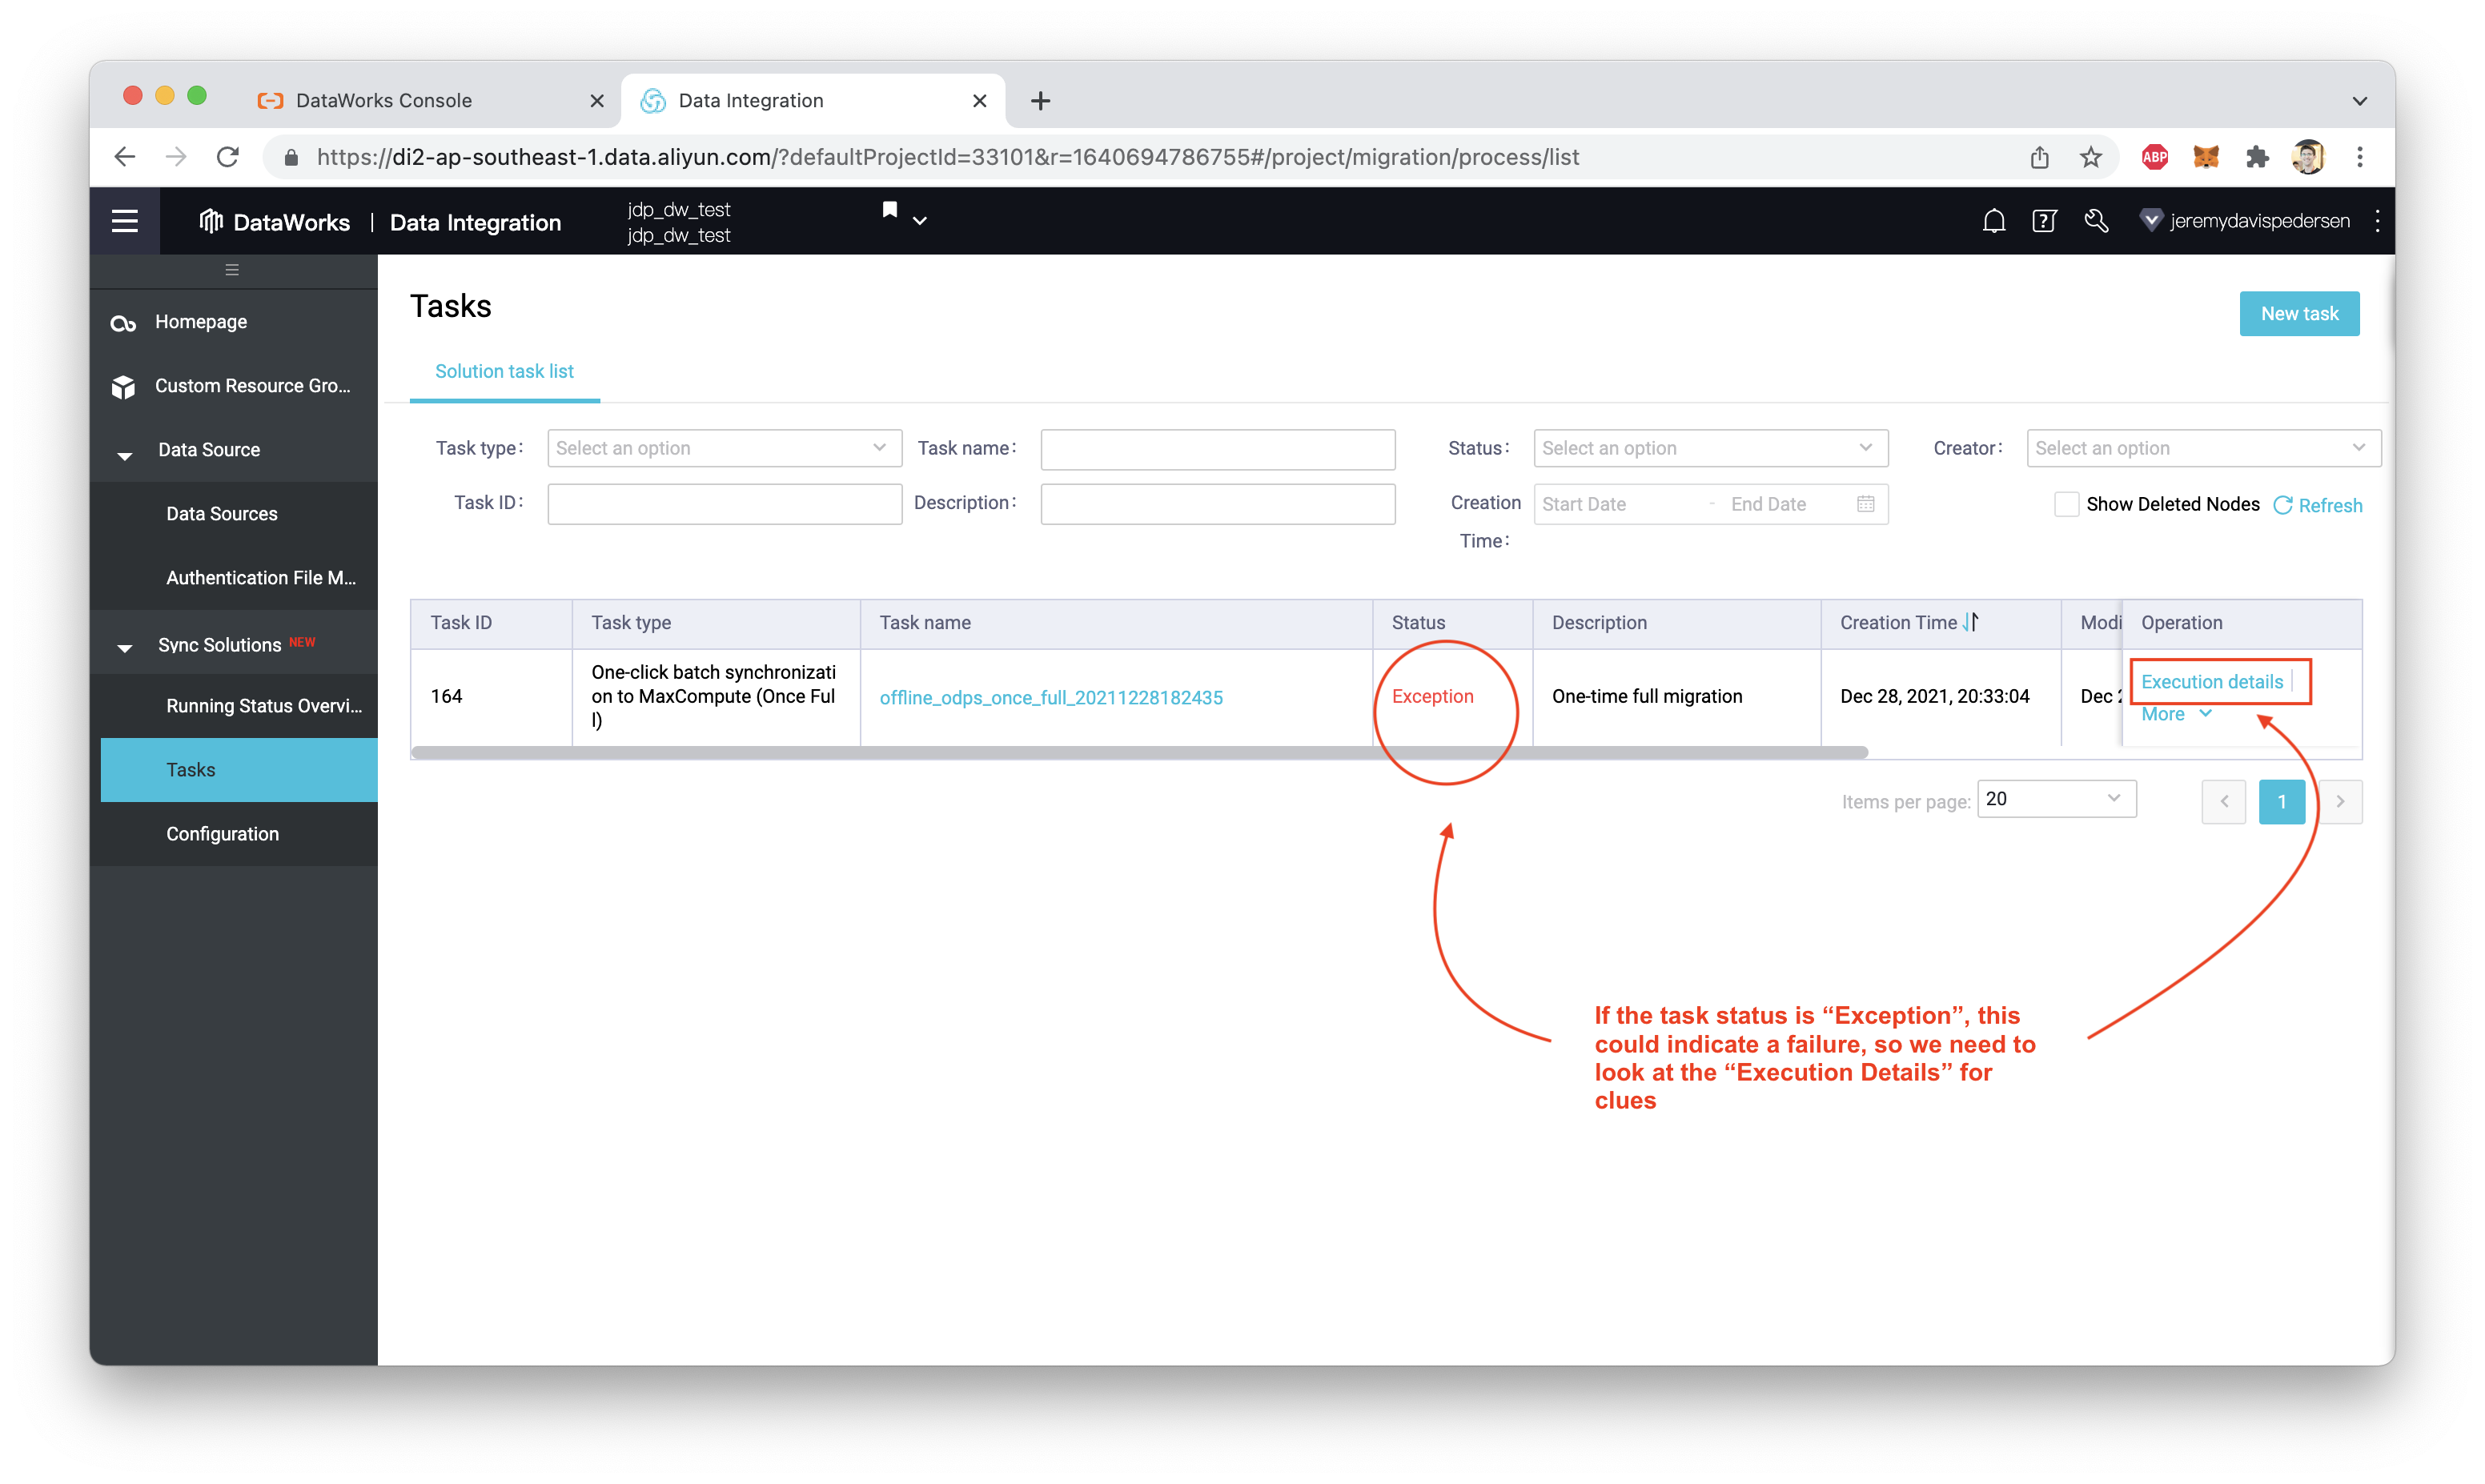
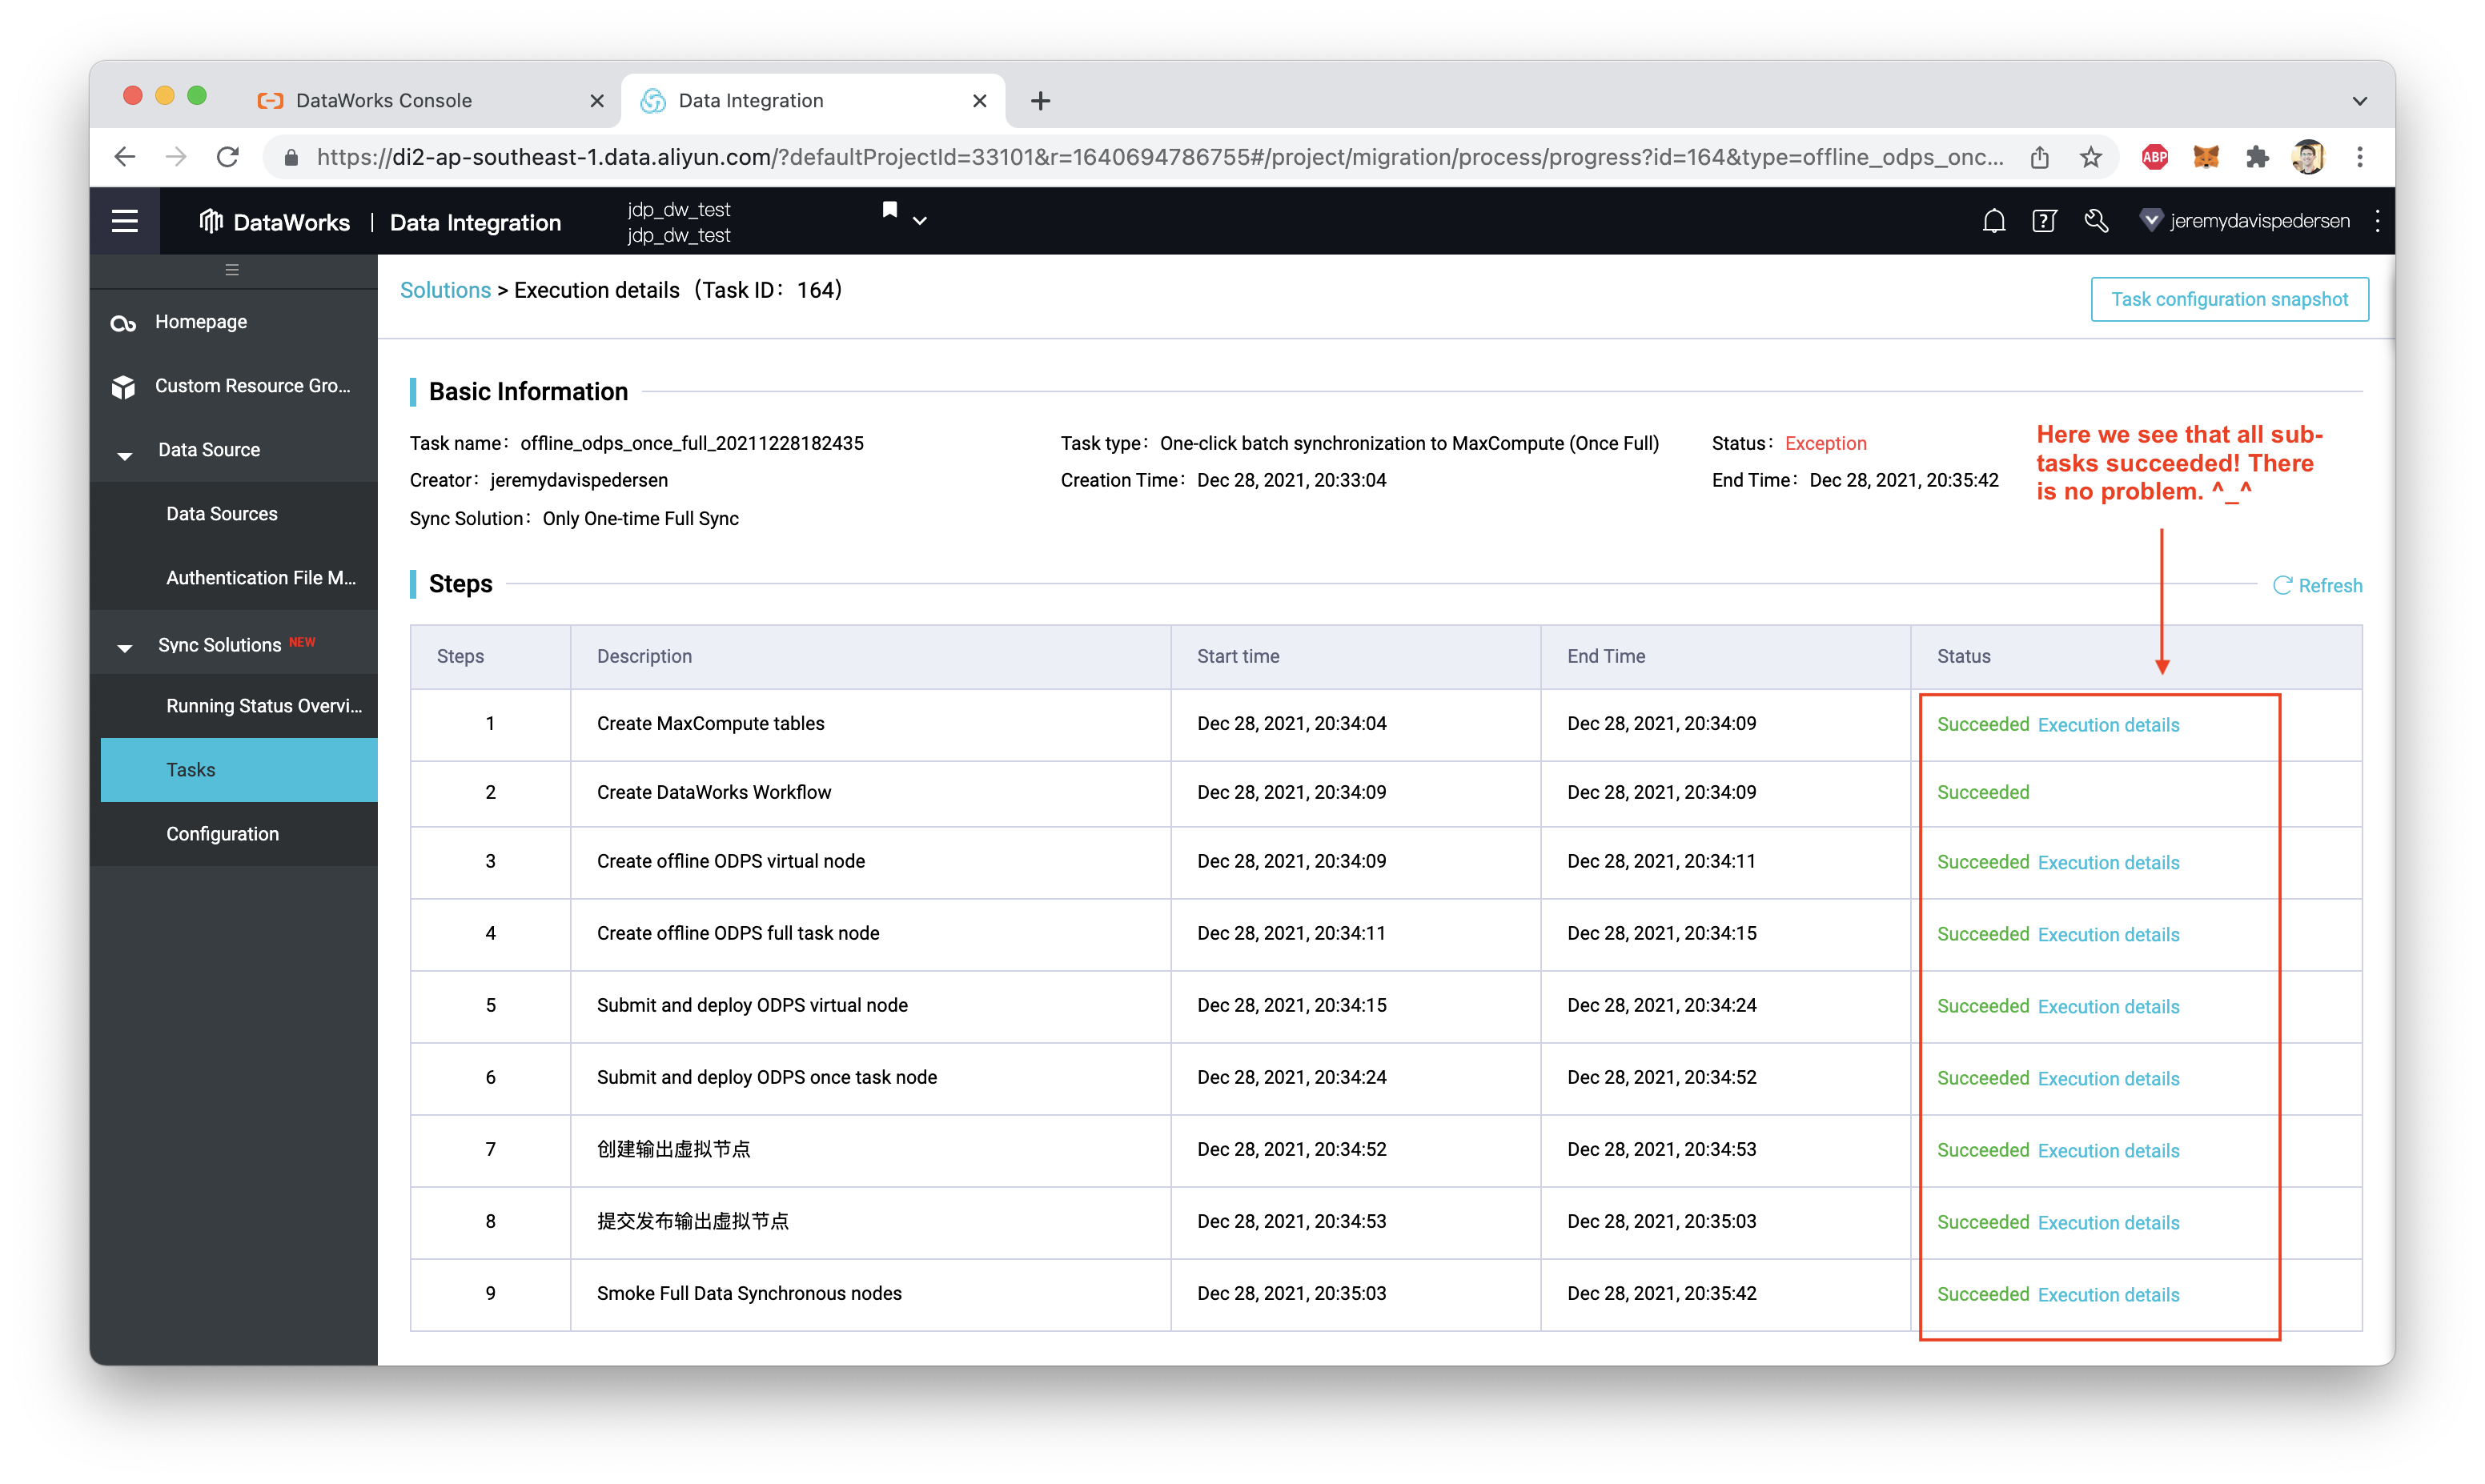
Even though the task appeared to fail, everything is actually OK.
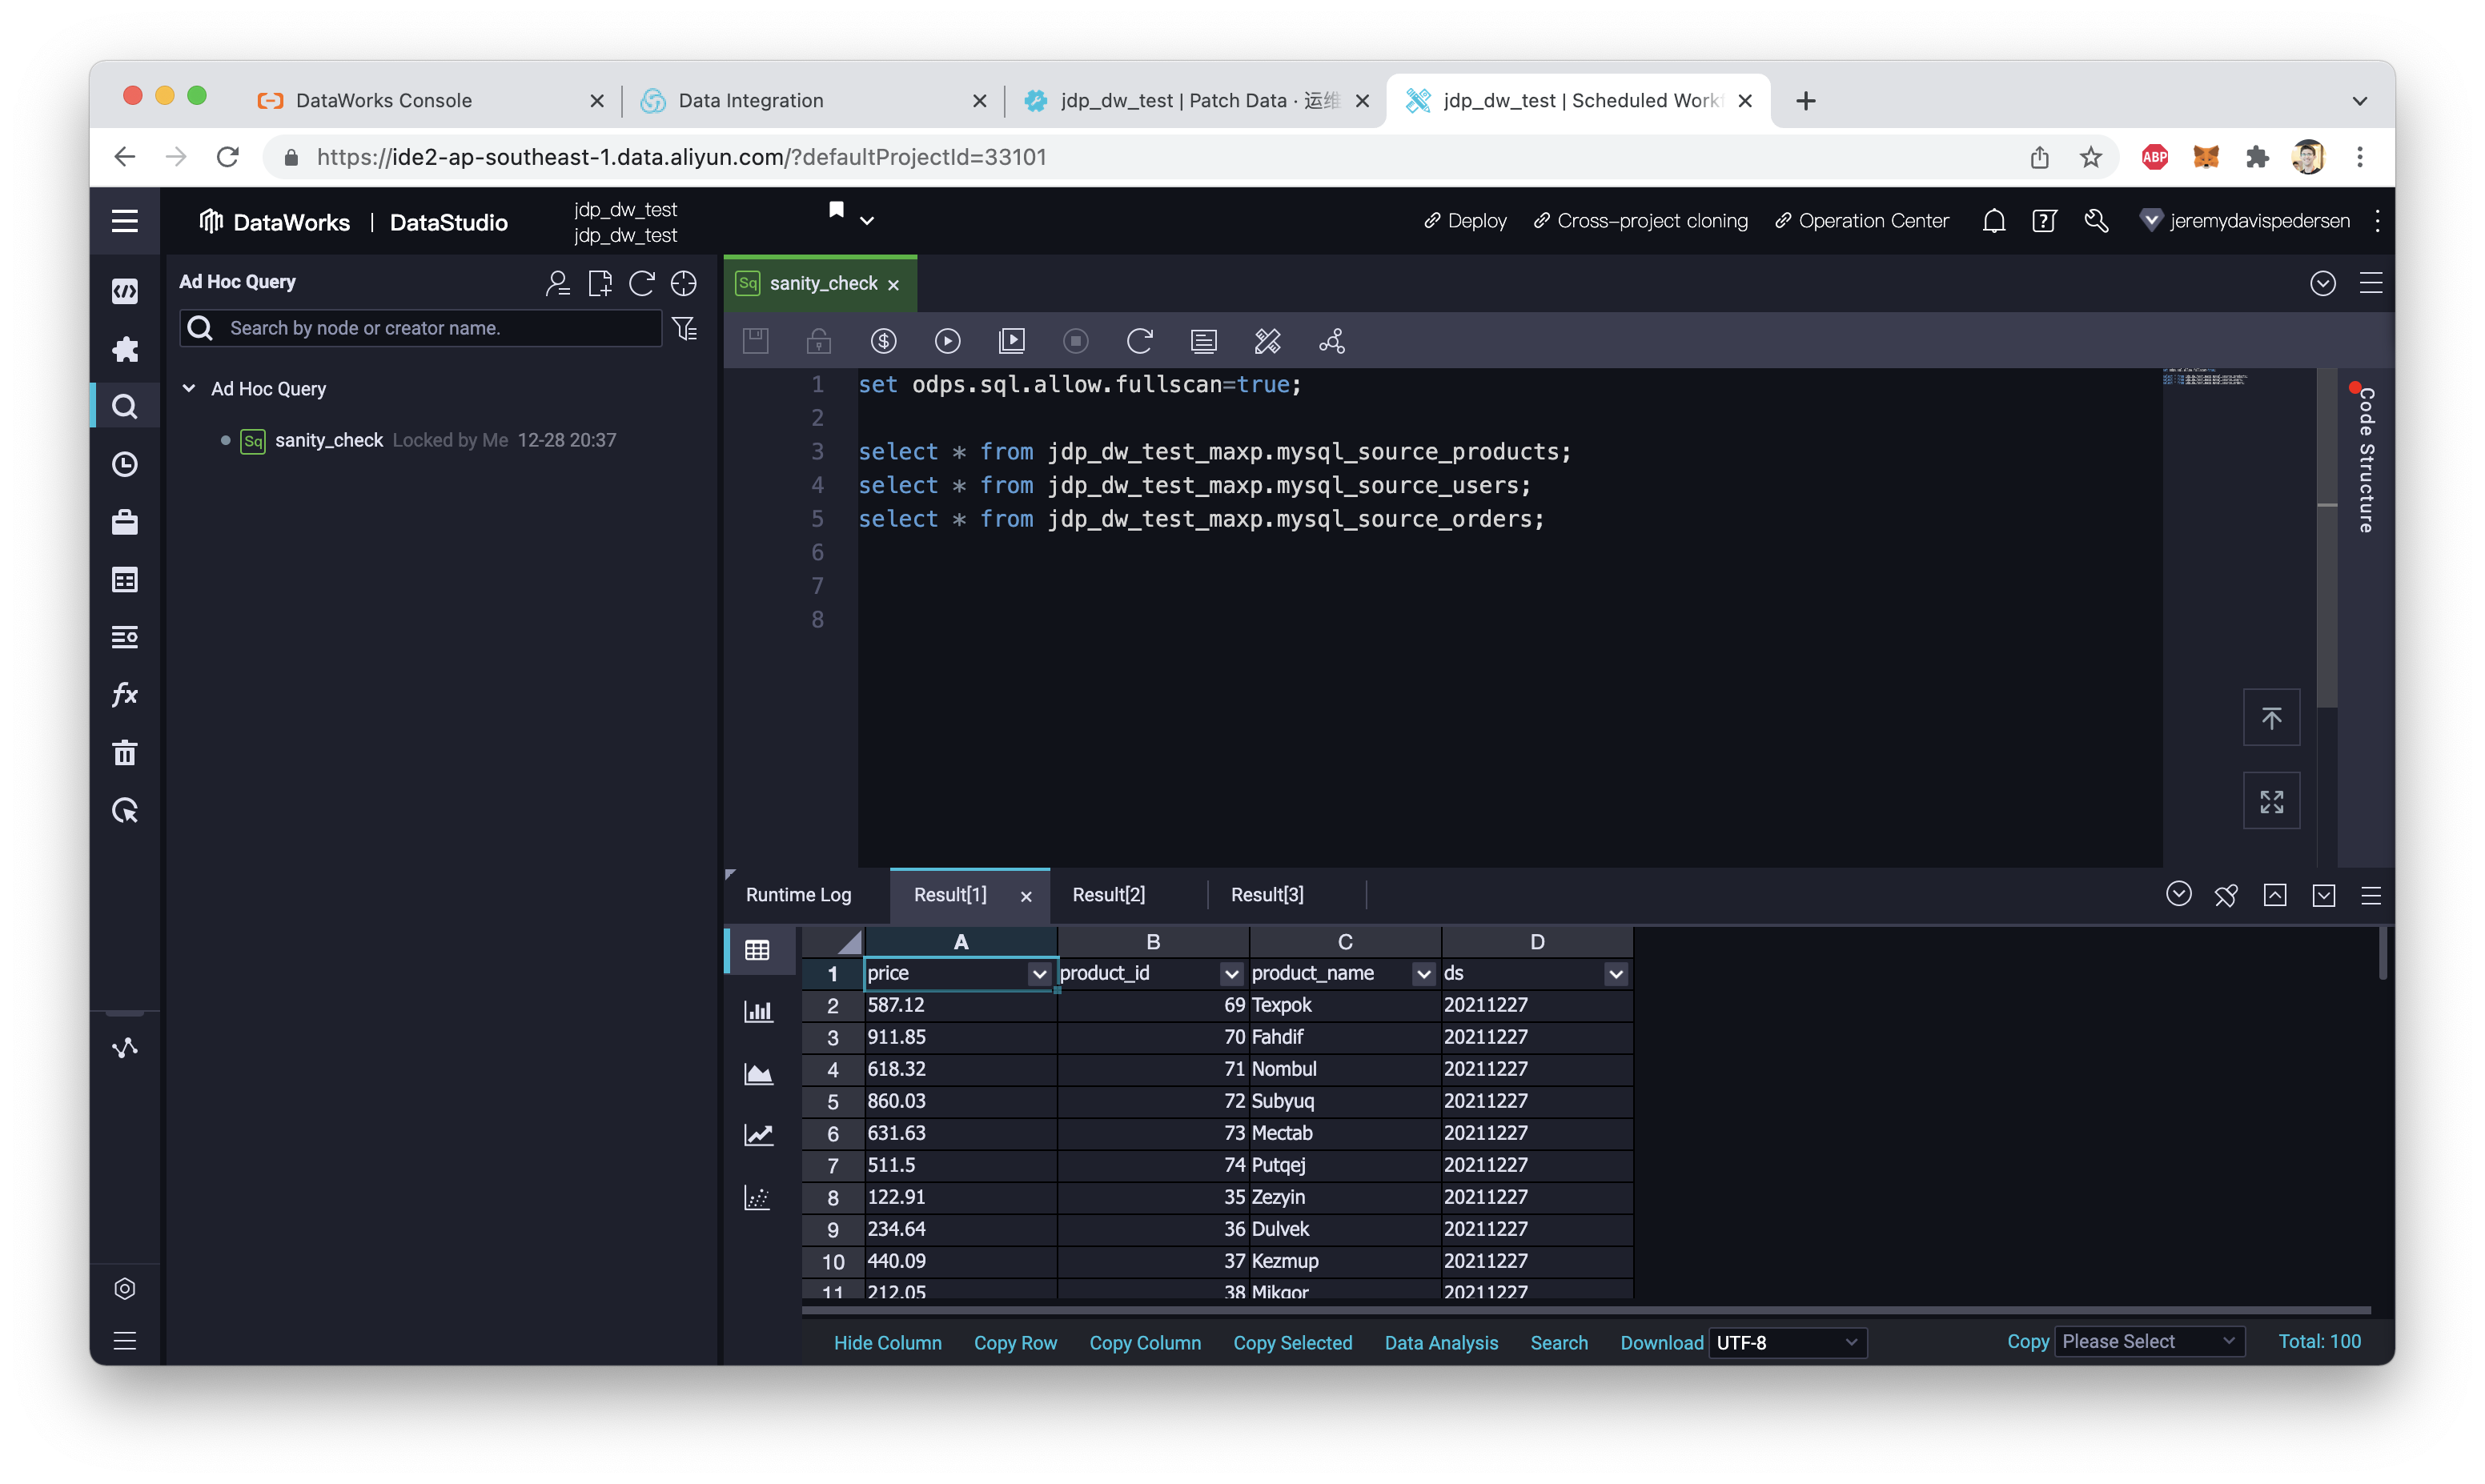
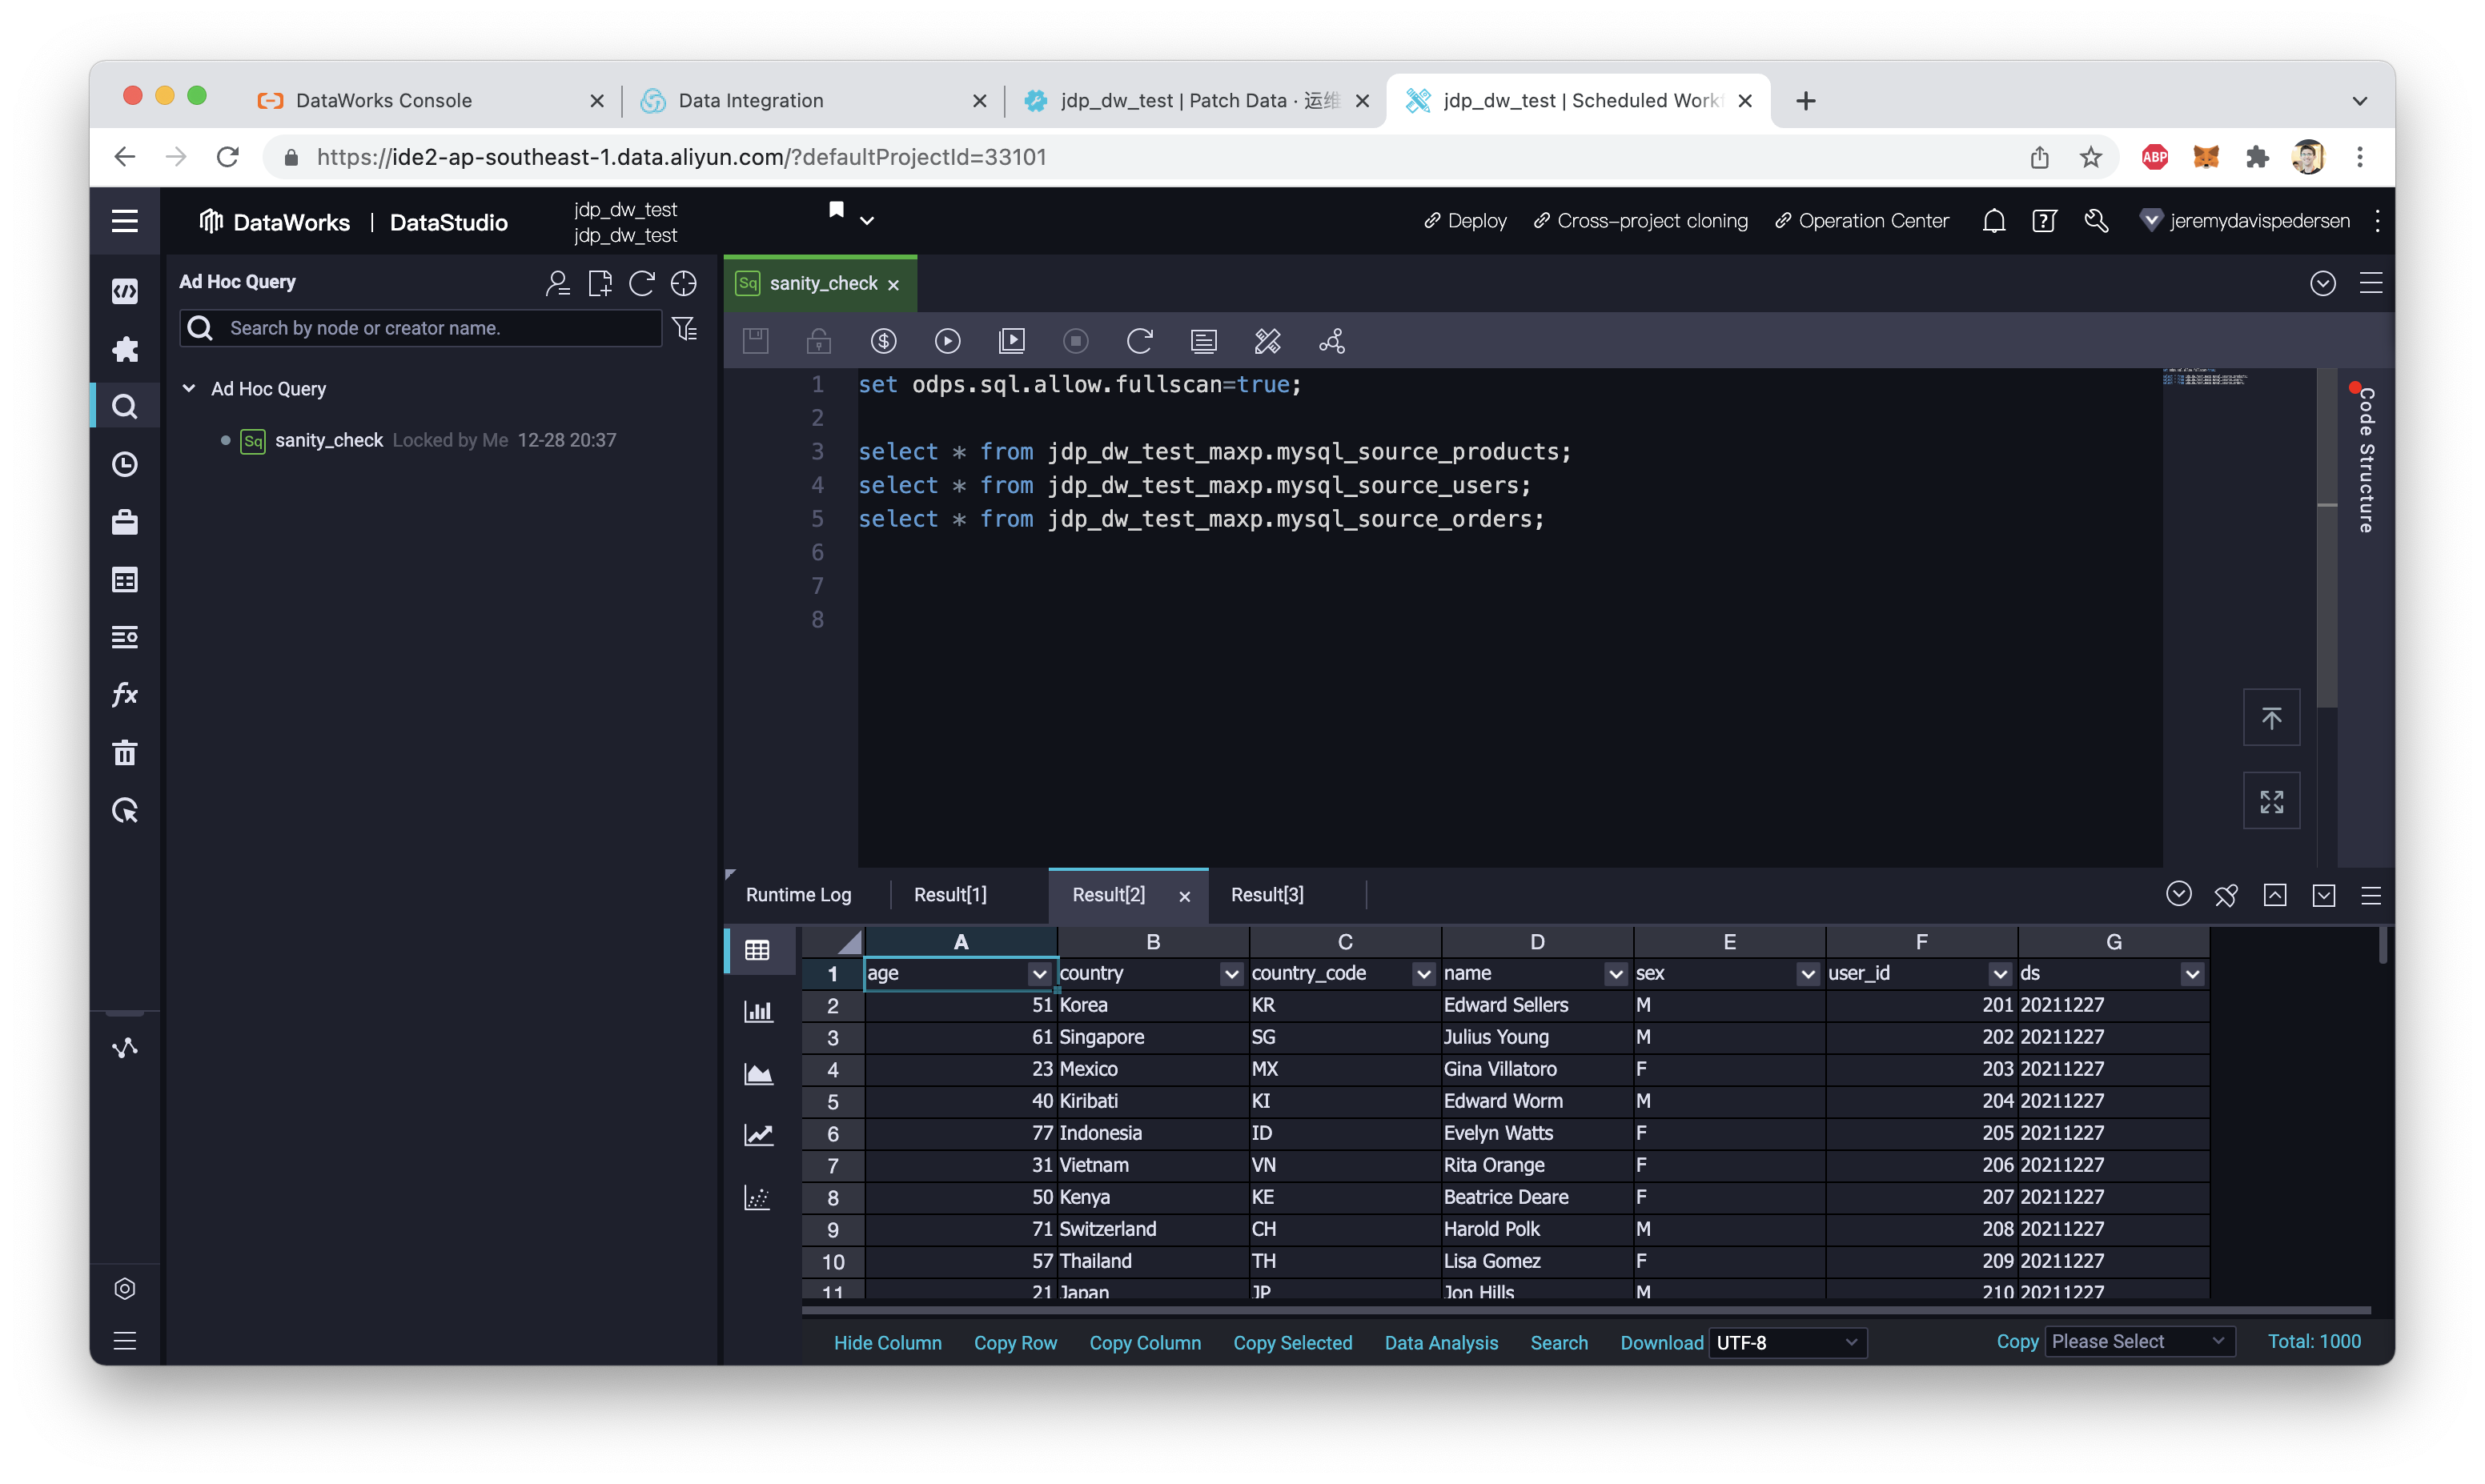
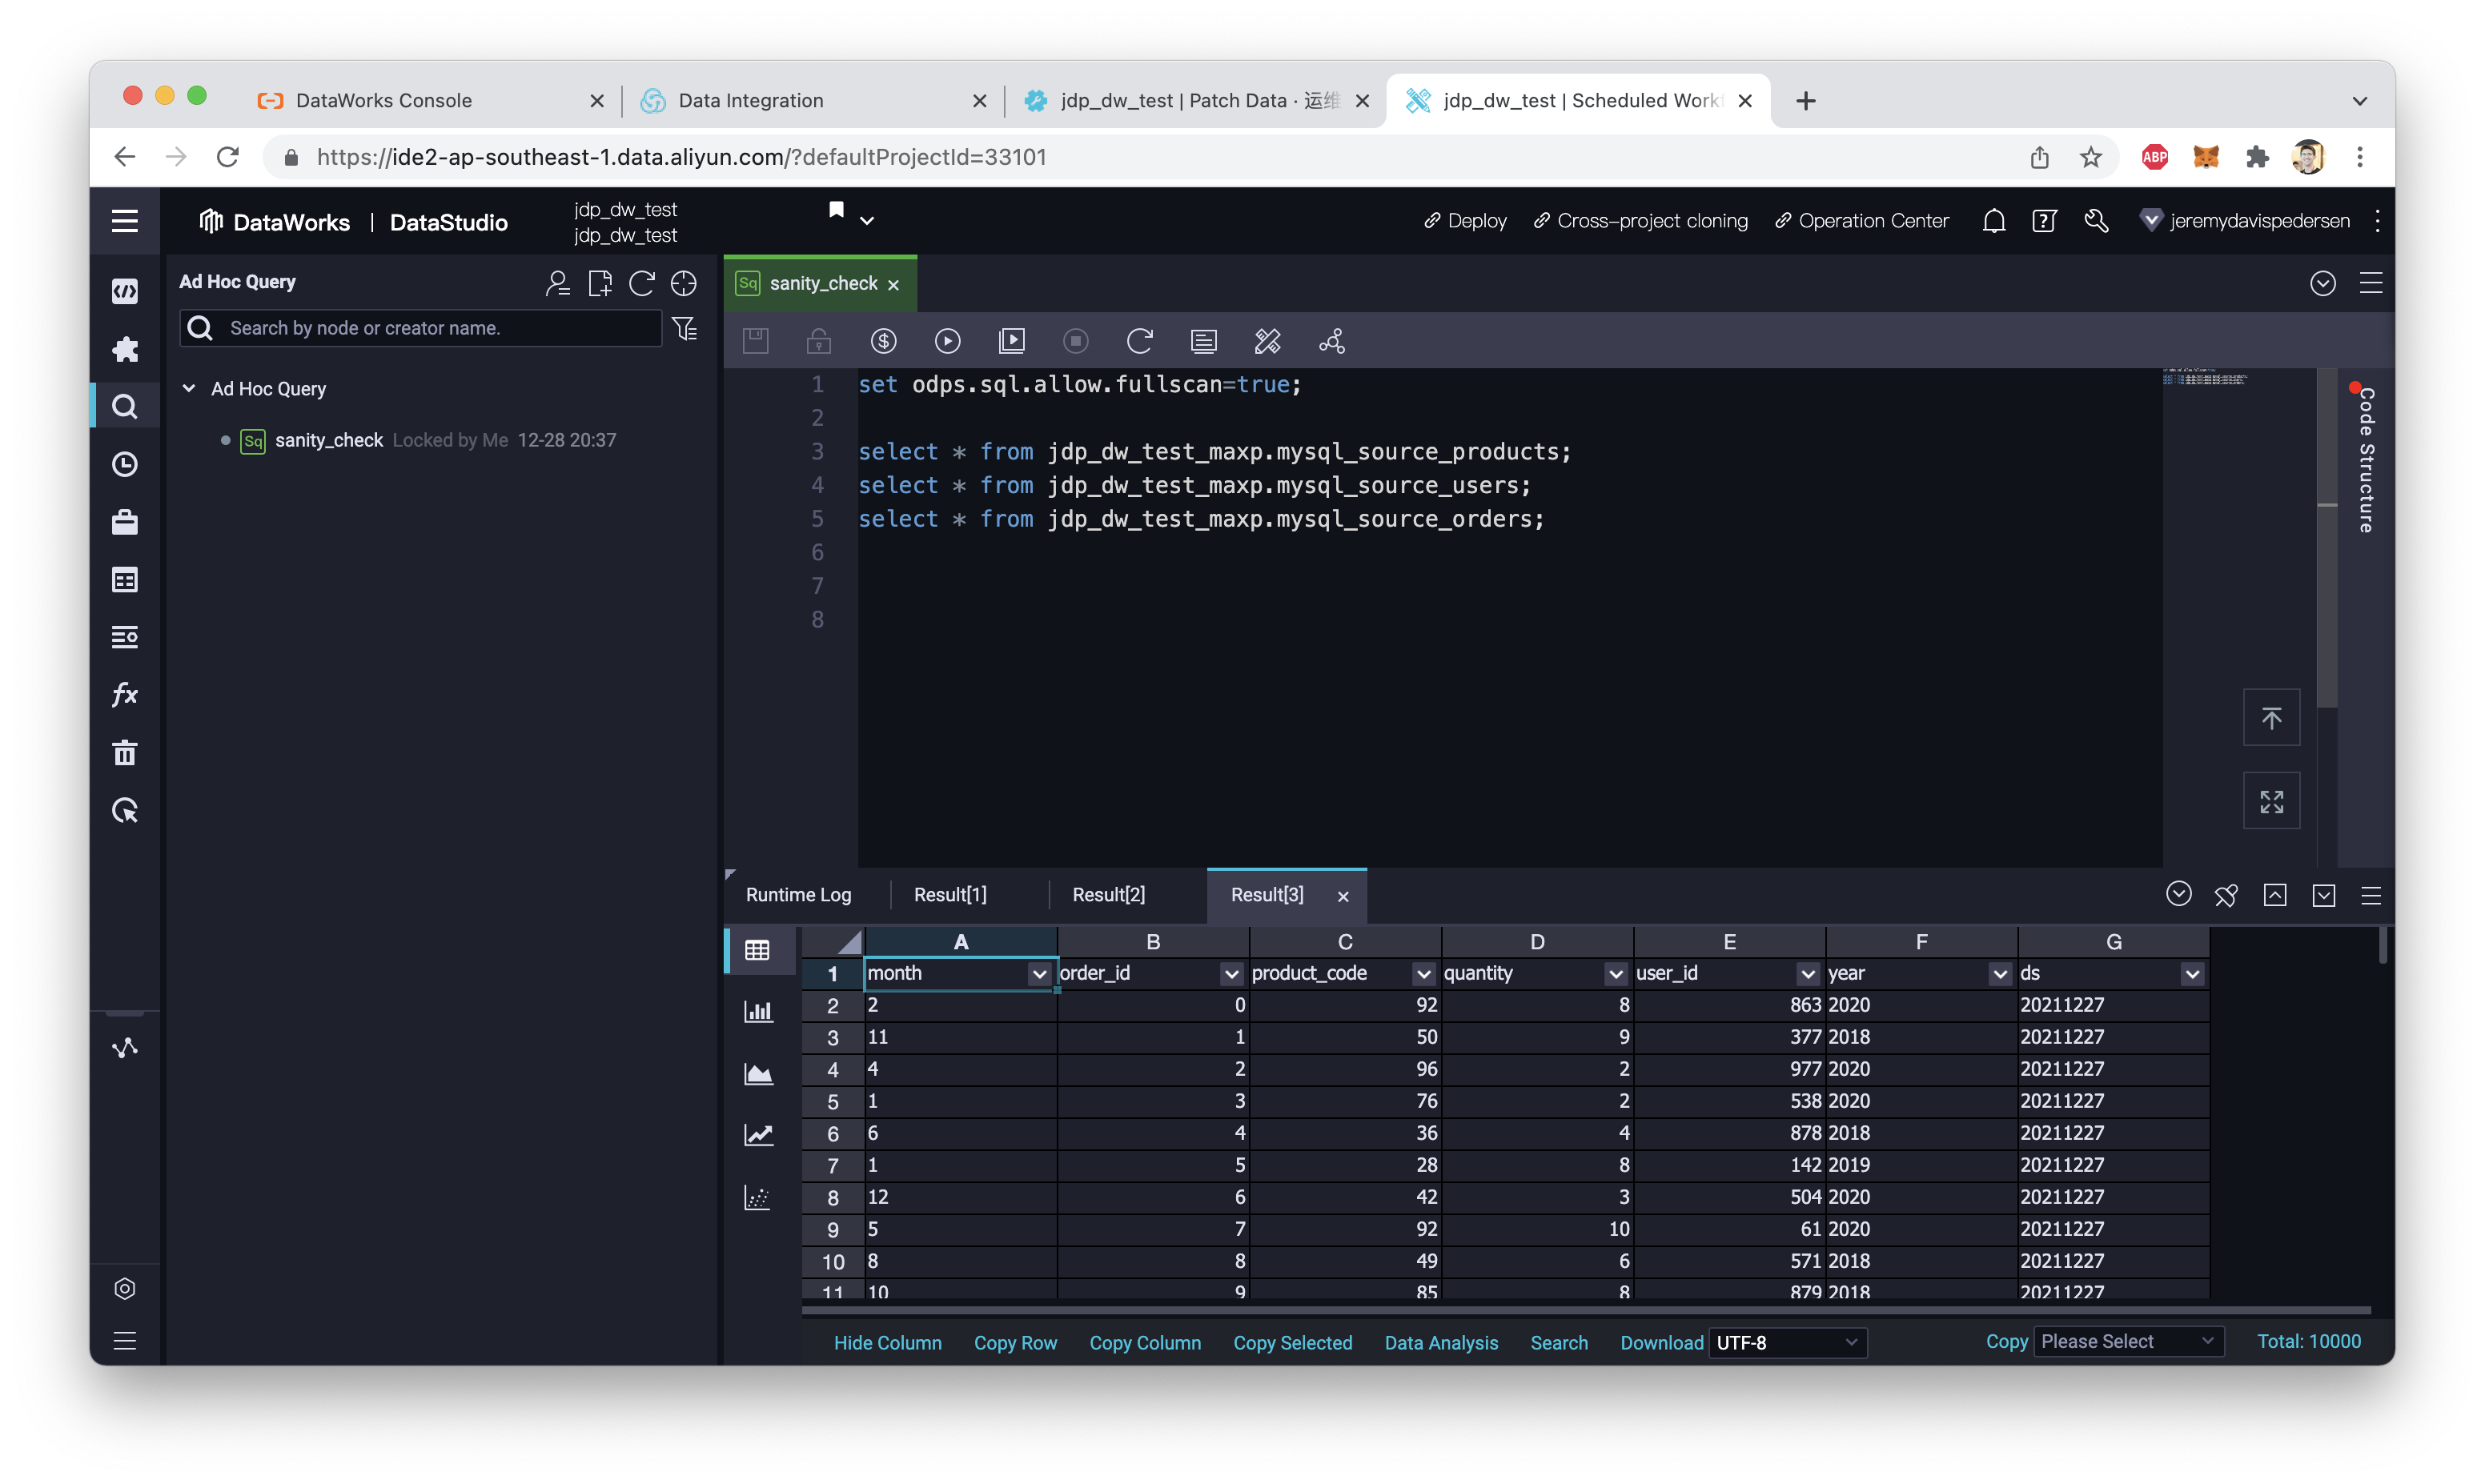
We can confirm this by running an Ad Hoc Query from DataWorks DataStudio. Note that if your DataWorks Workspace is in Standard Mode, the Data Import task will have imported the data into your production environment, meaning you'll have to include the name of your MaxCompute project in your SELECT queries, like this:
set odps.sql.allow.fullscan=true;

select * from jdp_dw_test_maxp.mysql_source_products;
select * from jdp_dw_test_maxp.mysql_source_users;
select * from jdp_dw_test_maxp.mysql_source_orders;
You'll also notice that the MaxCompute tables aren't simply named products, users, and orders. By default - if you do not set a naming convention - the Sync Task will rename the tables using the format [data_source_name]_[table_name]. In my case, I named my data source mysql_source. Using the users table as an example, the name of the corresponding table in MaxCompute is therefore mysql_source_users.
Running these queries in the "Ad Hoc Queries" pane in DataStudio should confirm that the data has been successfully imported:
That's it! You now know how to perform a full database migration from a relational database into MaxCompute! See you next week. ^_^
Great! Reach out to me at jierui.pjr@alibabacloud.com and I'll do my best to answer in a future Friday Q&A blog.
You can also follow the Alibaba Cloud Academy LinkedIn Page. We'll re-post these blogs there each Friday.
What's New On Alibaba Cloud This Week? - Friday Blog - Week 40
Realtime Synchronization From MySQL to MaxCompute with DataWorks - Friday Blog - Week 42
JDP - January 14, 2022
JDP - May 20, 2021
JDP - January 6, 2022
JDP - December 23, 2021
JDP - June 25, 2021
JDP - June 17, 2022
 Big Data Consulting for Data Technology Solution
Alibaba Cloud provides big data consulting services to help enterprises leverage advanced data technology.
Learn More MaxCompute
Conduct large-scale data warehousing with MaxCompute
Learn More Big Data Consulting Services for Retail Solution
Alibaba Cloud experts provide retailers with a lightweight and customized big data consulting service to help you assess your big data maturity and plan your big data journey.
Learn More Data Integration
Data Integration is an all-in-one data synchronization platform. The platform supports online real-time and offline data exchange between all data sources, networks, and locations.
Learn MoreMore Posts by JDP