2.1. Prepare SQL 2017 Media
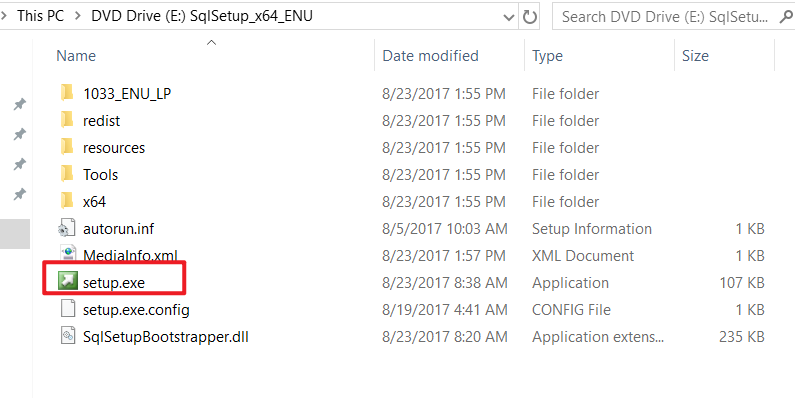
2.2. Mount the SQL image and select Setup.exe to start the installation
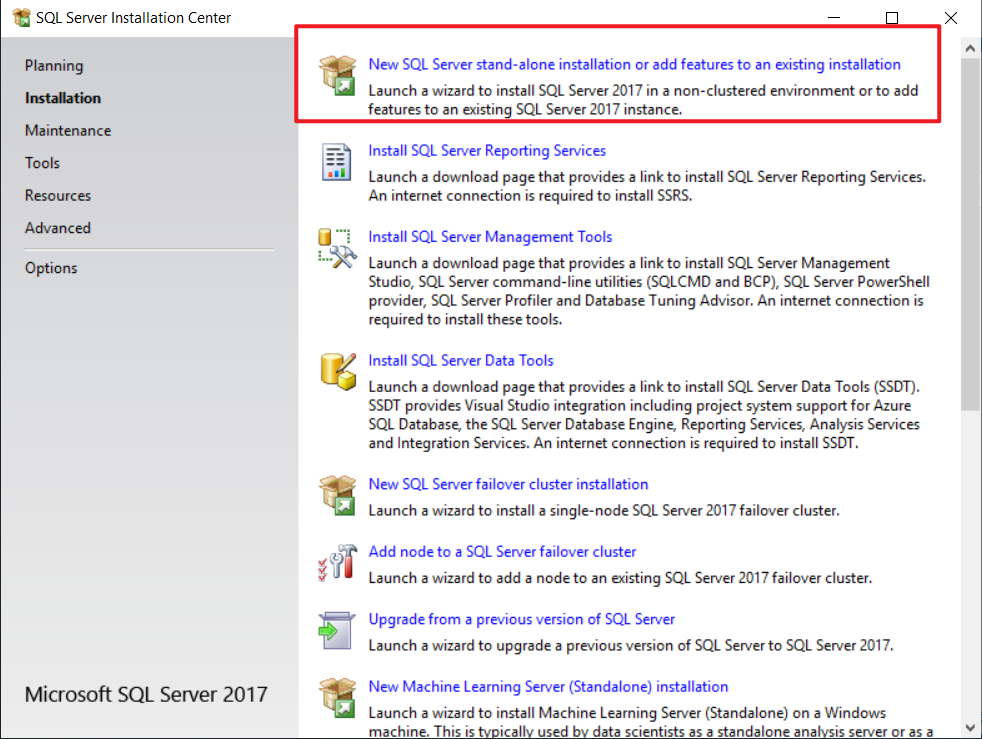
2.3. Select New SQL Server stand-alone installation, as shown below:

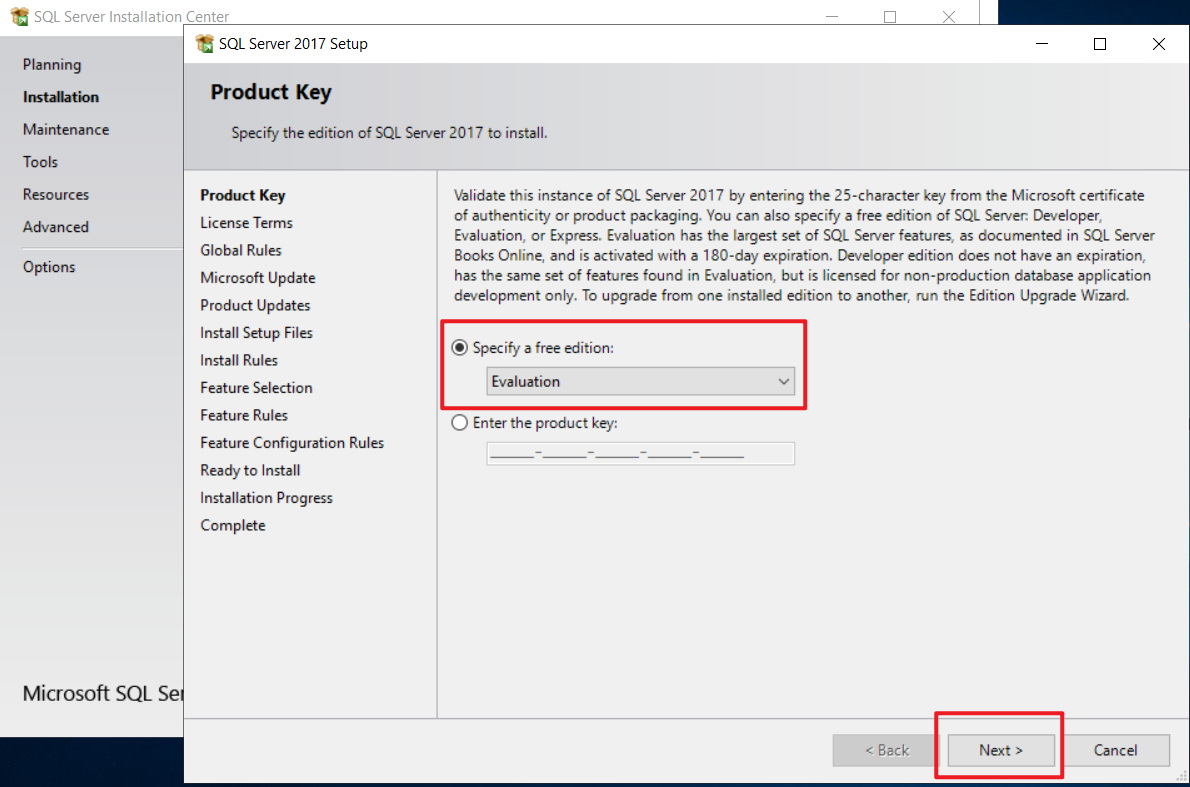
2.4. Select Evaluation for a free edition:
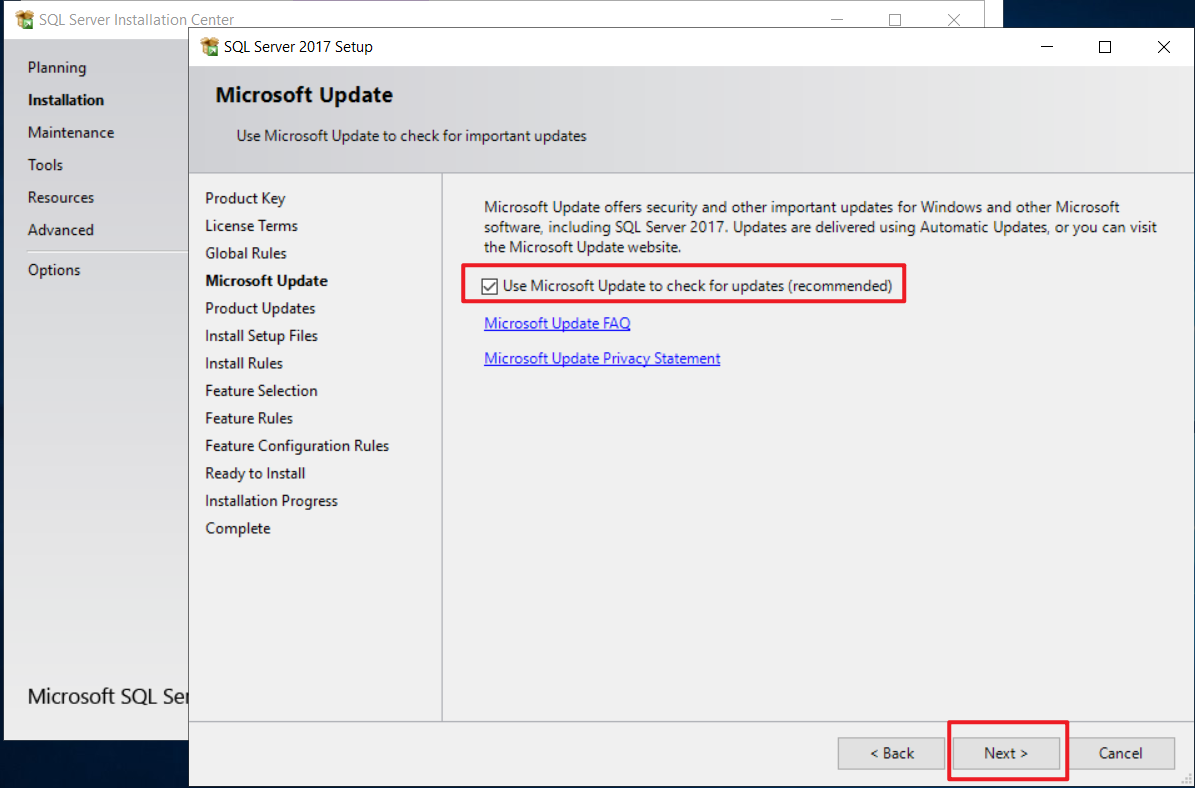
2.5 Choose the required SQL Server 2017 features on the Feature Selection screen:
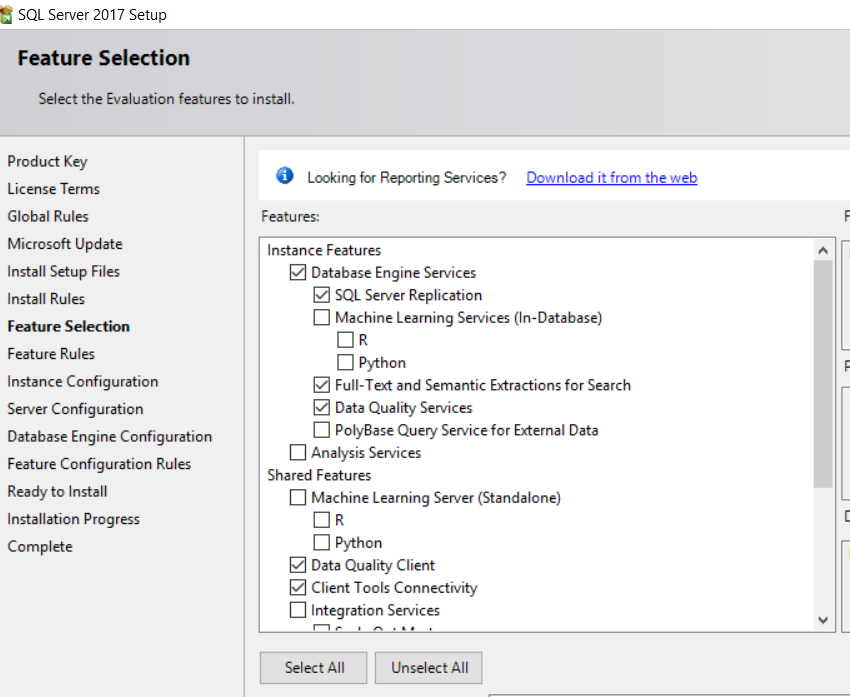
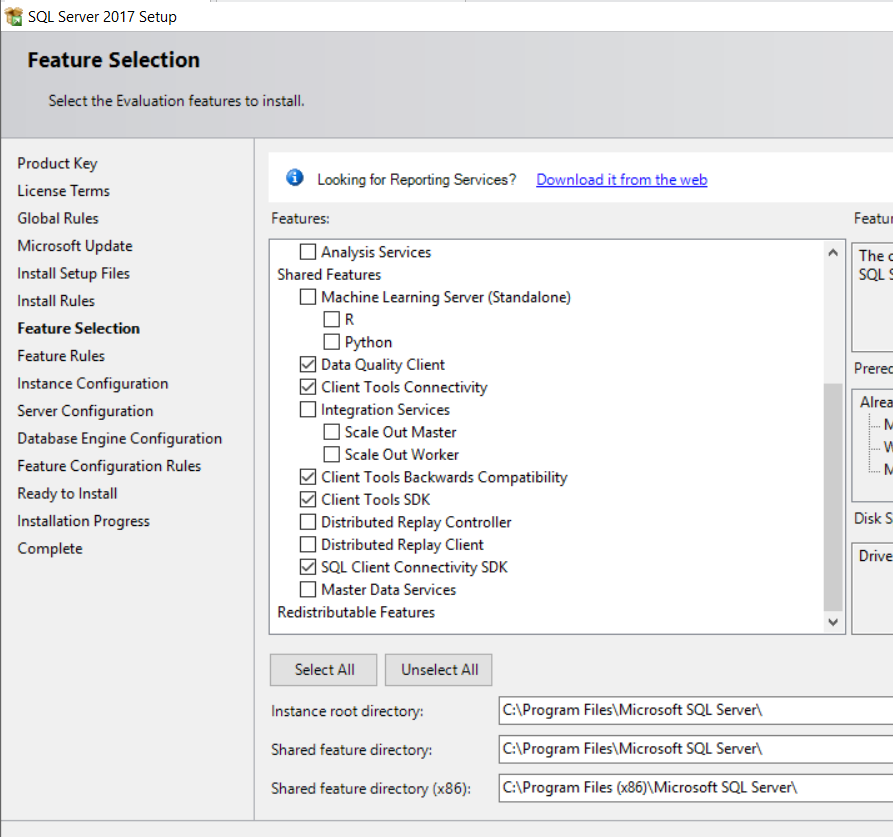
2.5. Click Next and name your instance before installation:

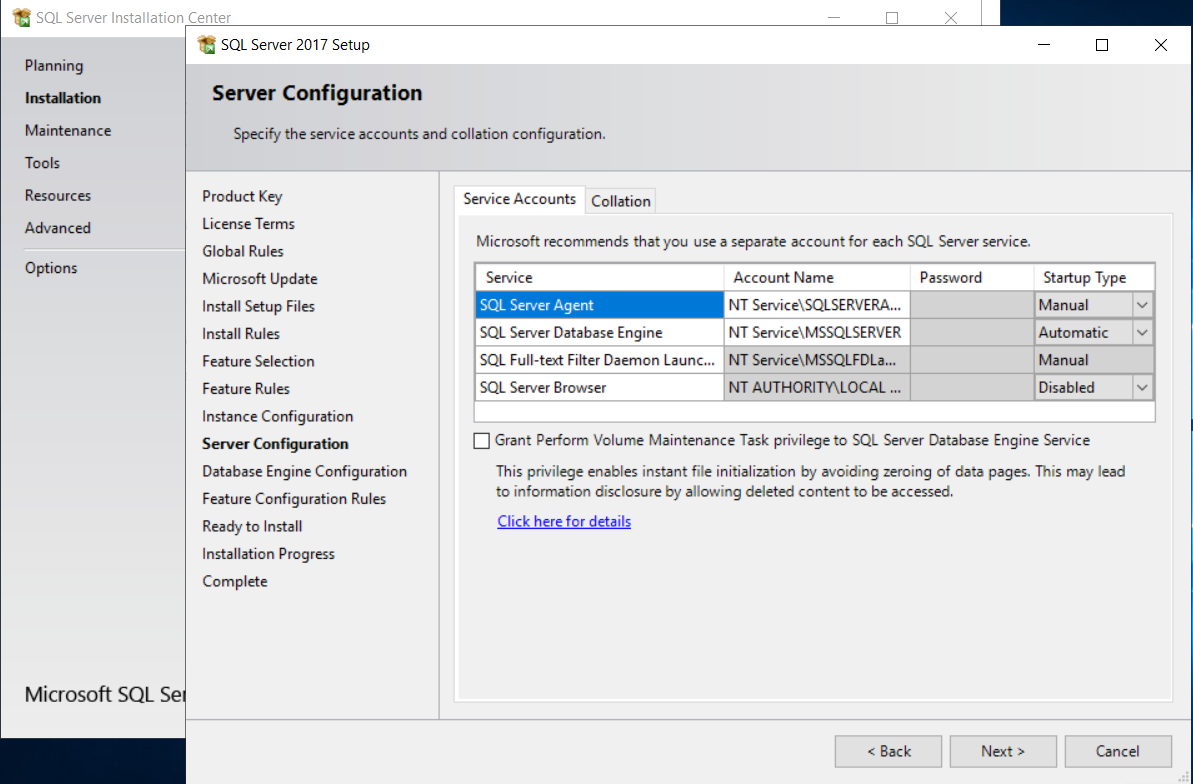
2.6. Click Next. On the Server Configuration screen, leave these settings as is:
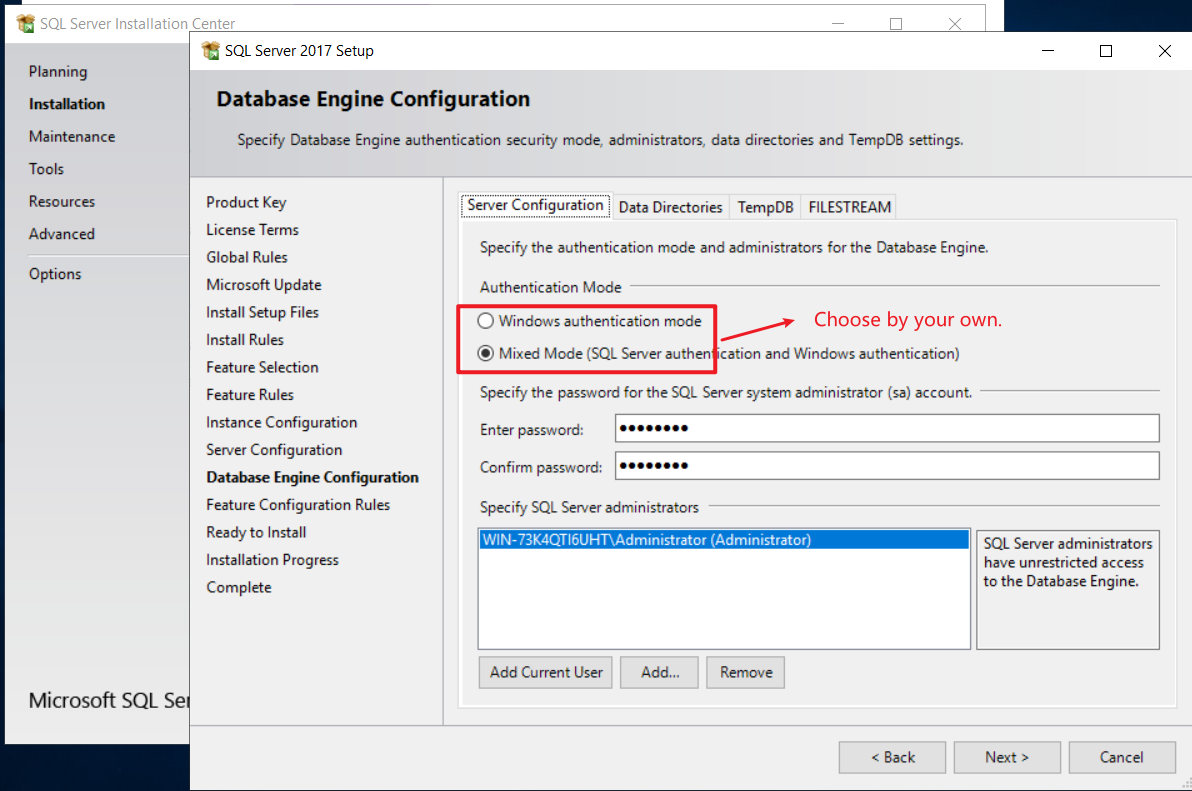
2.7. Click Next. Check Mixed Mode on Database Engine Configuration settings:
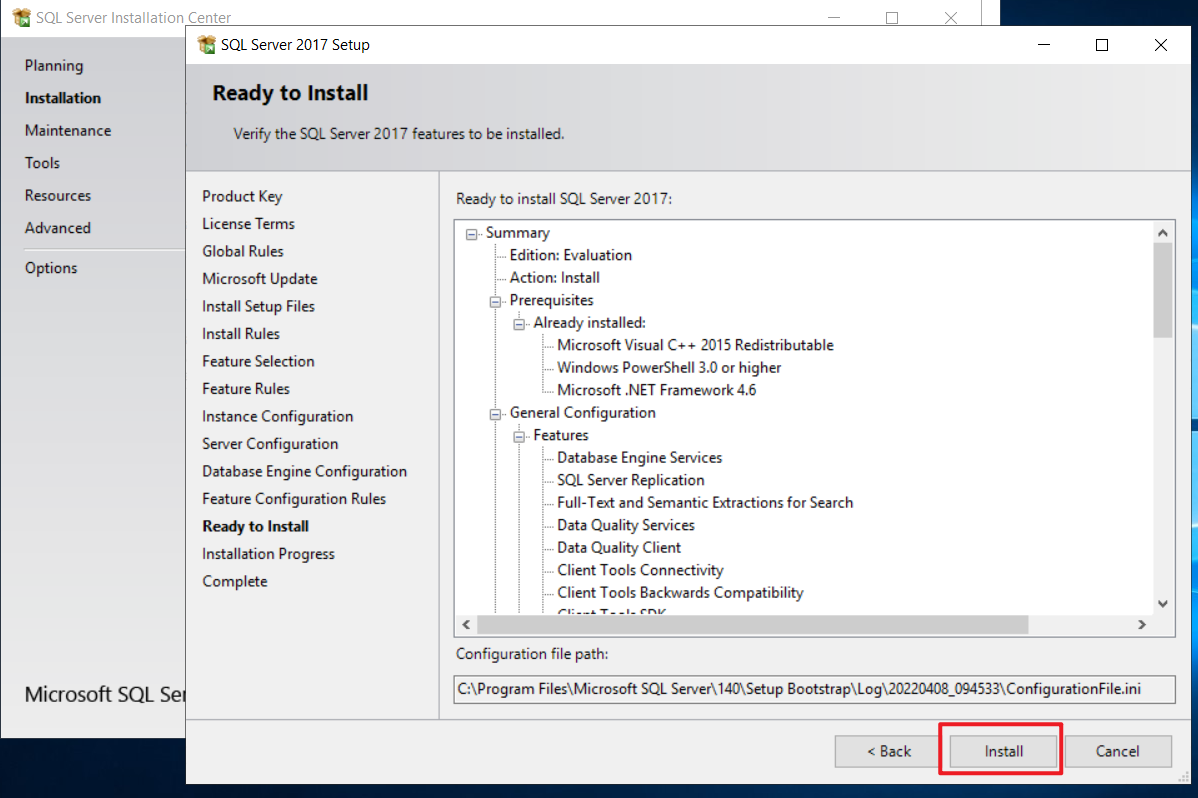
2.8. Click Next. Verify Configurations and click Install to start the Installation:
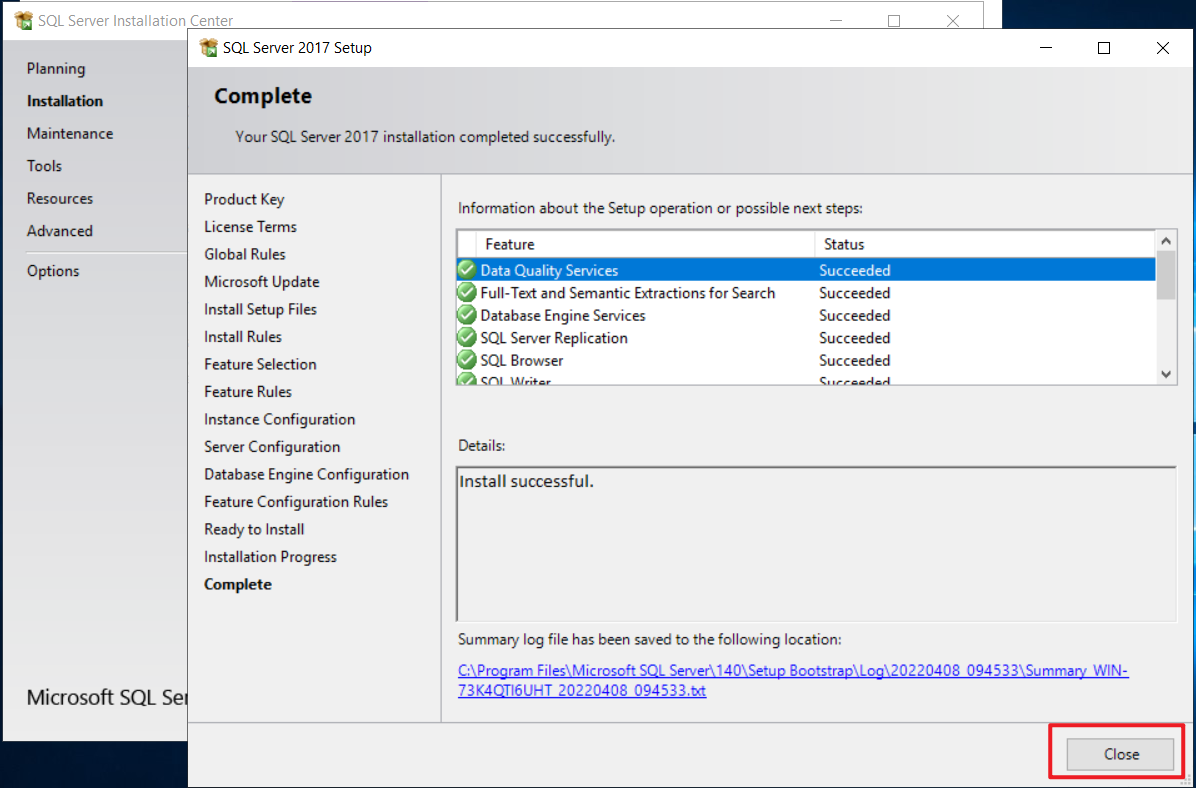
2.9. Once the installation is complete, click Close to finish:
3.1. Download SQL Server Management Studio
3.2. Double click the .exe file and click Install
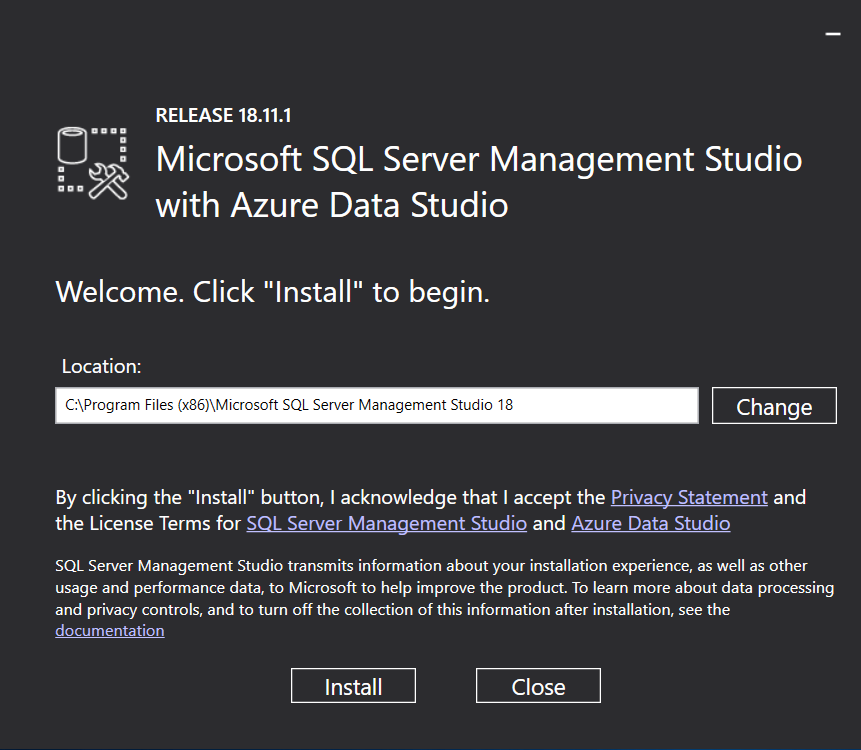
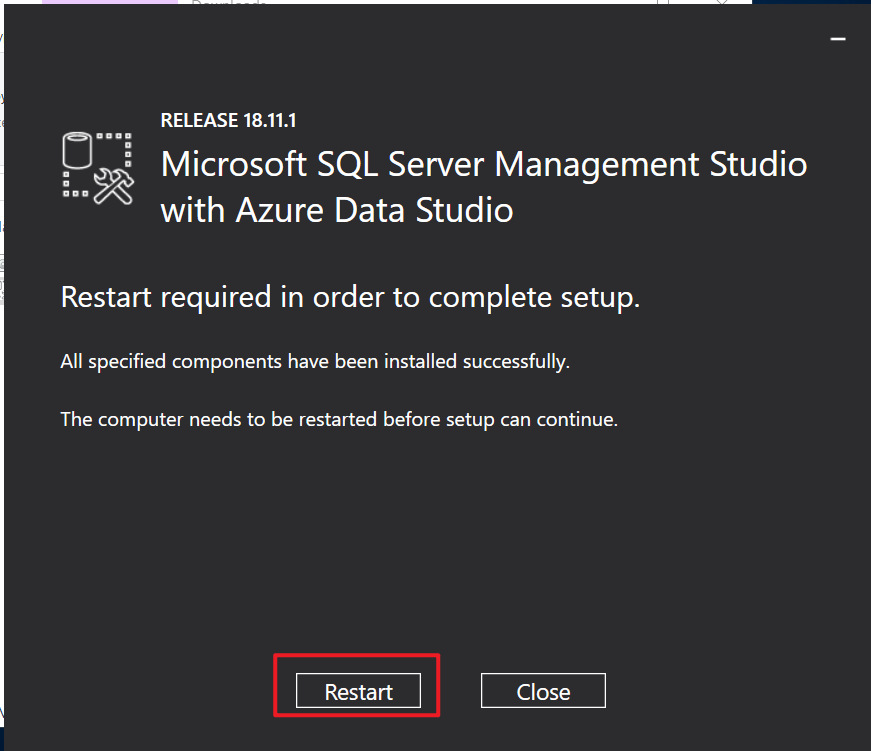
3.3. After installation, you need to reboot the Windows system:
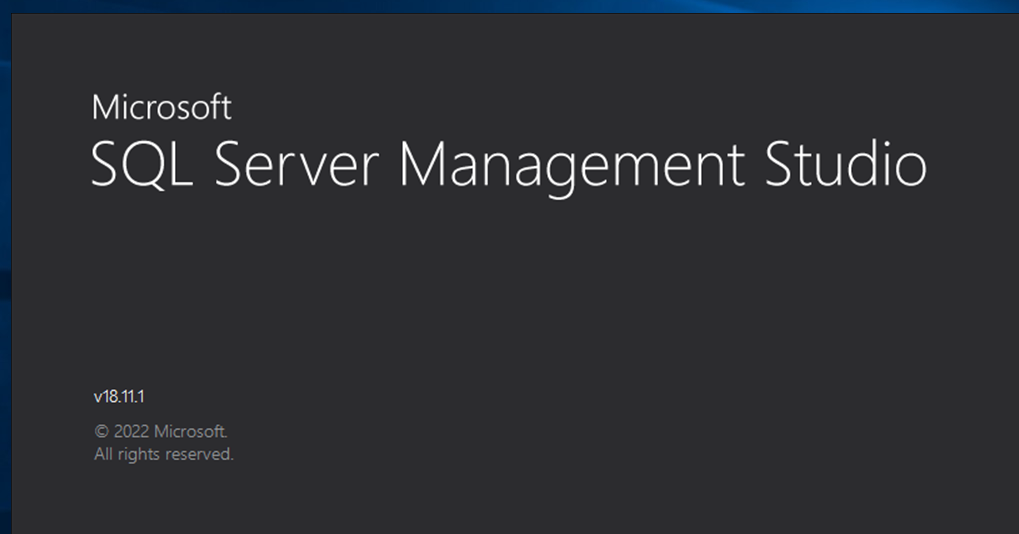
3.4. After restarting, the SQL Server Management Studio is ready to launch:
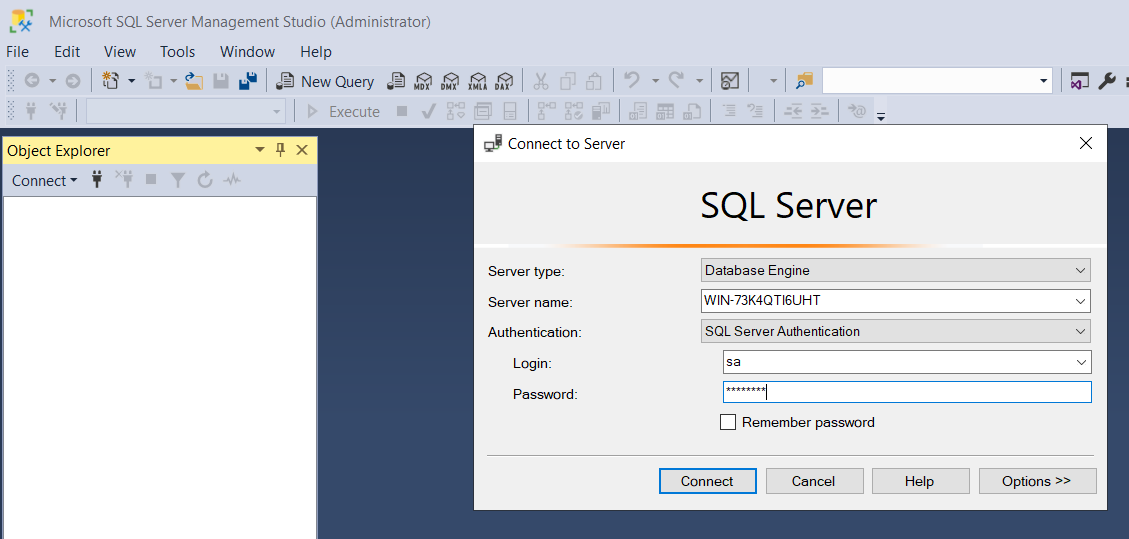
3.5. Launch SQL Server Management Studio and connect to Server window. Select the name of the server after entering the login and password. Click Connect:
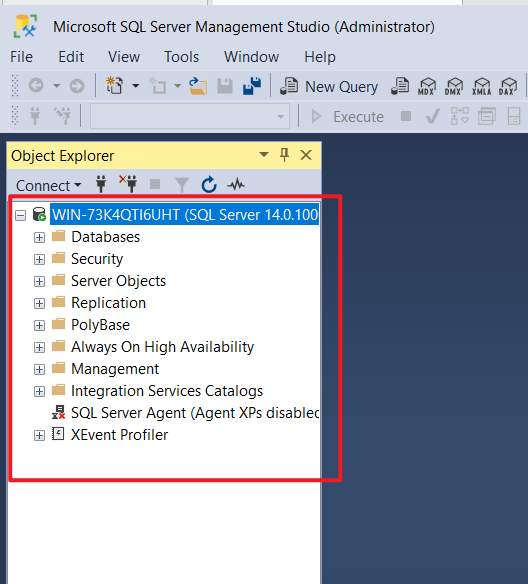
4.1. From SQL Management Studio, click Security---Logins. Follow the process below for every login. Paste the scripts to notepad and save the scripts as username.sql
4.2. SSMS → Security → Logins → User-Name → Right Click → Script Login as → Create TO → Clipboard → Save the script as username.sql
Generate SQL scripts with SSMS for databases that restrict access to the user. It can also be stored as a consolidated script in a file named database_users.sql.
4.3. Back up the Database user information stored in a system database, which is located at Databases---System Databases---msdb.
SSMS → Databases → msdb → Tasks → Back Up
4.4. Copy the backup file and scripts file made in Step 4.3 to the ECS server
4.5. Restore the login information using the SQL scripts generated in Step 4.1. Use the SSMS and execute the SQL Script file.
4.6. Restore the database user information through the backup file generated in step 4.3:
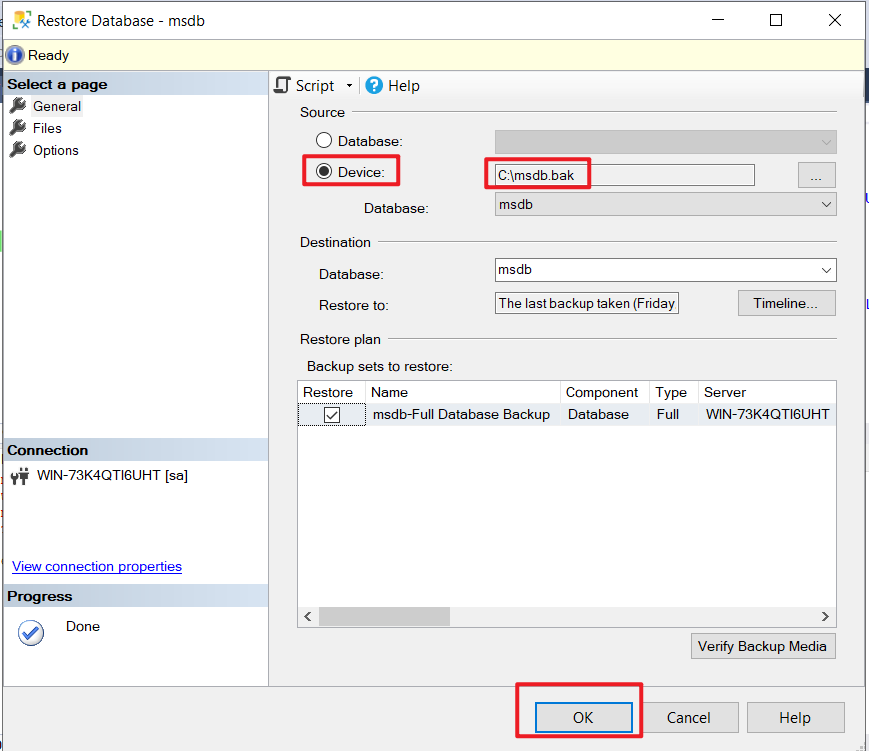
4.7. Create them one by one without any data for databases that restrict access for some specific users. Execute the script in Step 4.2.
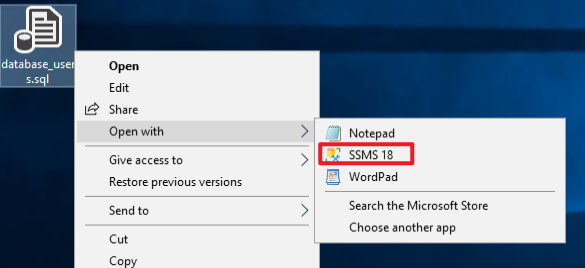
DTS supports structure migration, full data migration, and incremental data migration and uses these three migration types to smoothly migrate the self-built SQL Server database to the cloud without stopping the application.
5.1.1. Prerequisite: SQL Version 2008 and above
5.1.2. The tables to be migrated in the self-created SQL Server database must have a primary key or a unique non-empty index.
Please cycle to the following steps from 5.2 to 5.4 for each database that needs to be migrated when using incremental data migration. Everyone else can skip to 5.5.
5.2. Run the following command in the self-created SQL Server database to change the database recovery model to full mode.
use master;
GO
ALTER DATABASE <database_name> SET RECOVERY FULL WITH ROLLBACK IMMEDIATE;
GO
5.3. Run the following command to logically back up the database to be migrated. If you have already made a logical backup, you can skip this step.
BACKUP DATABASE <database_name> TO DISK='<physical_backup_path>';
GO
5.4. Run the following command to back up the database logs to be migrated:
BACKUP LOG <database_name> to DISK='<physical_backup_path>' WITH init;
GO
5.5. Create the migration task from the DTS console in Alibaba Cloud:
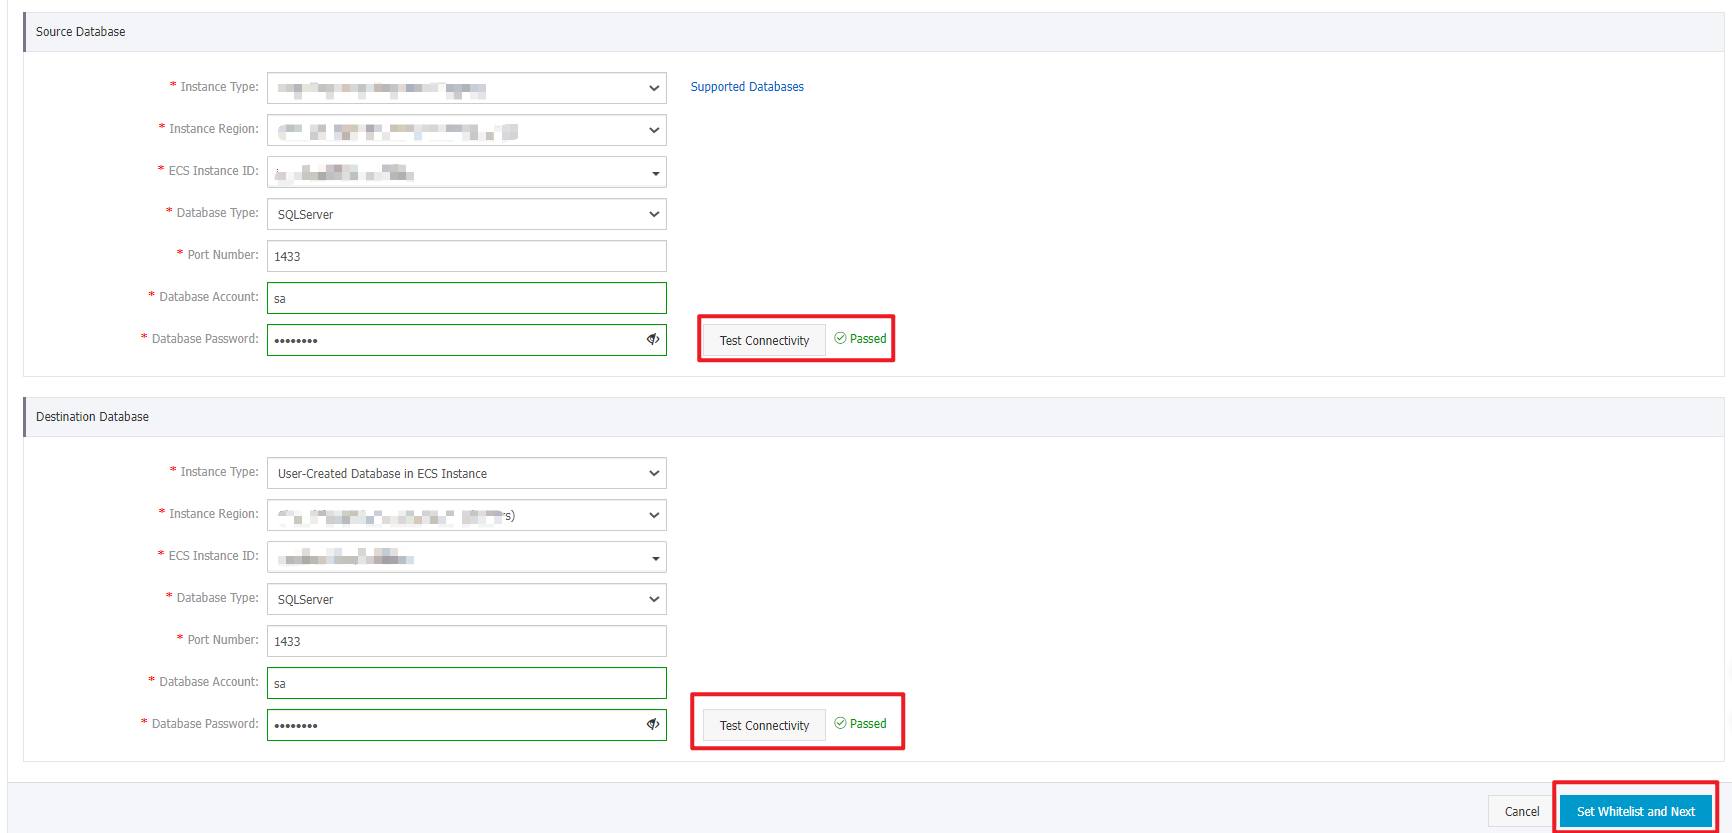
5.6. After the pre-check passes, click Next. Select link specifications and select data transfer (pay-as-you-go) terms of service on the purchase configuration confirmation page.
5.7. Click buy and start, and the migration task officially begins.
5.8. Wait until the task finishes.

20 posts | 2 followers
FollowAlibaba Clouder - July 9, 2020
Alibaba Clouder - February 26, 2019
ApsaraDB - July 23, 2025
Alibaba Clouder - August 25, 2020
ApsaraDB - July 12, 2023
ApsaraDB - October 29, 2024
20 posts | 2 followers
Follow Database Migration Solution
Migrating to fully managed cloud databases brings a host of benefits including scalability, reliability, and cost efficiency.
Learn More Oracle Database Migration Solution
Migrate your legacy Oracle databases to Alibaba Cloud to save on long-term costs and take advantage of improved scalability, reliability, robust security, high performance, and cloud-native features.
Learn More Cloud Migration Solution
Secure and easy solutions for moving you workloads to the cloud
Learn More Data Transmission Service
Supports data migration and data synchronization between data engines, such as relational database, NoSQL and OLAP
Learn MoreMore Posts by 5544031433091282