This article is from Alibaba Cloud Advent Calendar 2023, focusing on launching services with Alibaba Cloud's Kubernetes and Serverless products like SAE.
I have been actively working on solutions, development techniques, and deployments by Alibaba Cloud, continuously striving to acquire cutting-edge technology from China and around the world.
The Advent Calendar serves as a platform to share these activities with the outside world. Through the articles written by each member, our goal is to generate interest in Alibaba Cloud among as many people as possible.
This article is about launching a Stable Diffusion API environment with Function Compute.
If you want to launch a Stable Diffusion API server with an ordinary virtual server, the cost-effectiveness would be poor because you'd also be charged during your off-hours. This is why a Stable Diffusion API server was launched quickly using Function Compute.
This tutorial is intended for people who have basic knowledge about the following services:
In Function Compute, go to the Applications page to create a new project.
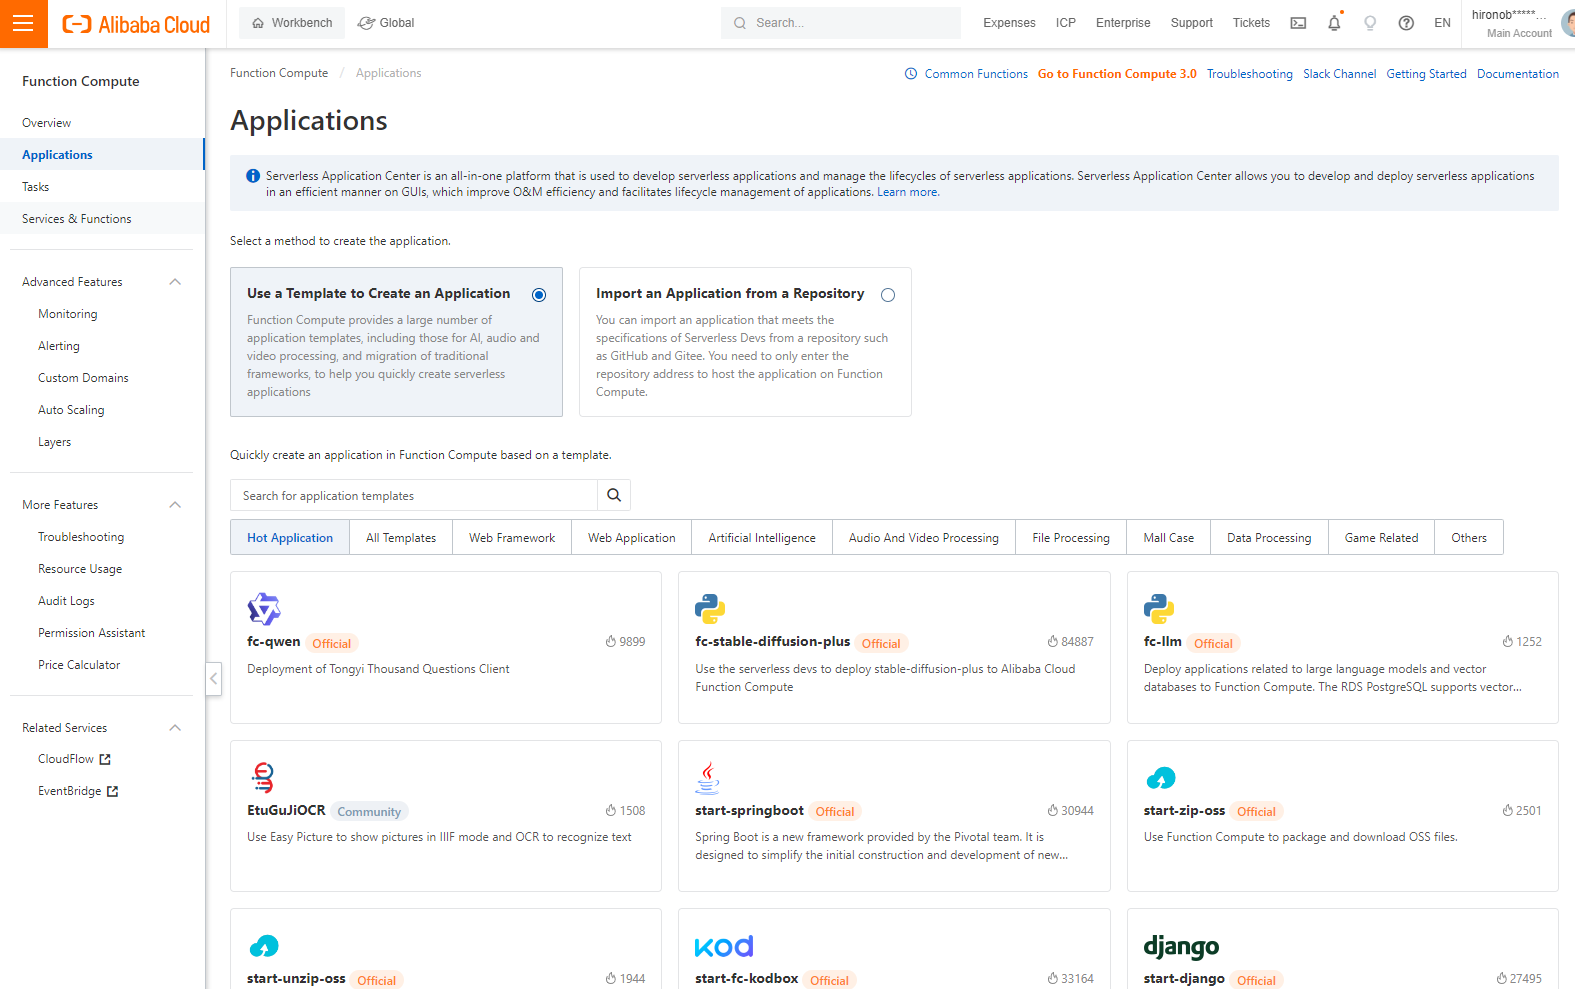
What's great about Function Compute on Alibaba Cloud is that it allows you to use templates for quick deployment. Function Compute has various templates, on which you can build and operate to meet your needs.
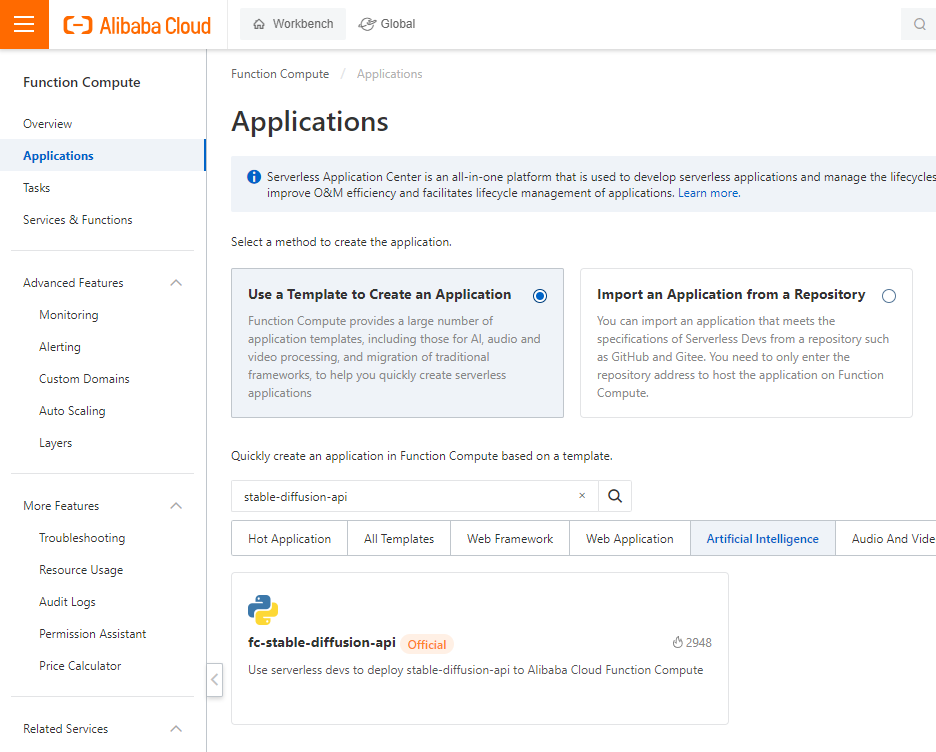
On the Applications page, enter stable-diffusion-API in the search box to search for the fc-stable-diffusion-api template.
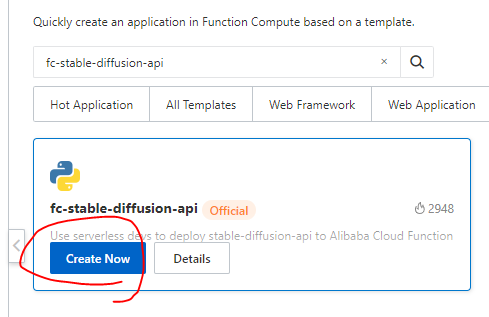
Click Create Now.
Function Compute provides two ways to deploy with a template.
For more information, please refer to Manage applications
This time, the latter is used, so select Directly Deploy for Deployment Type.
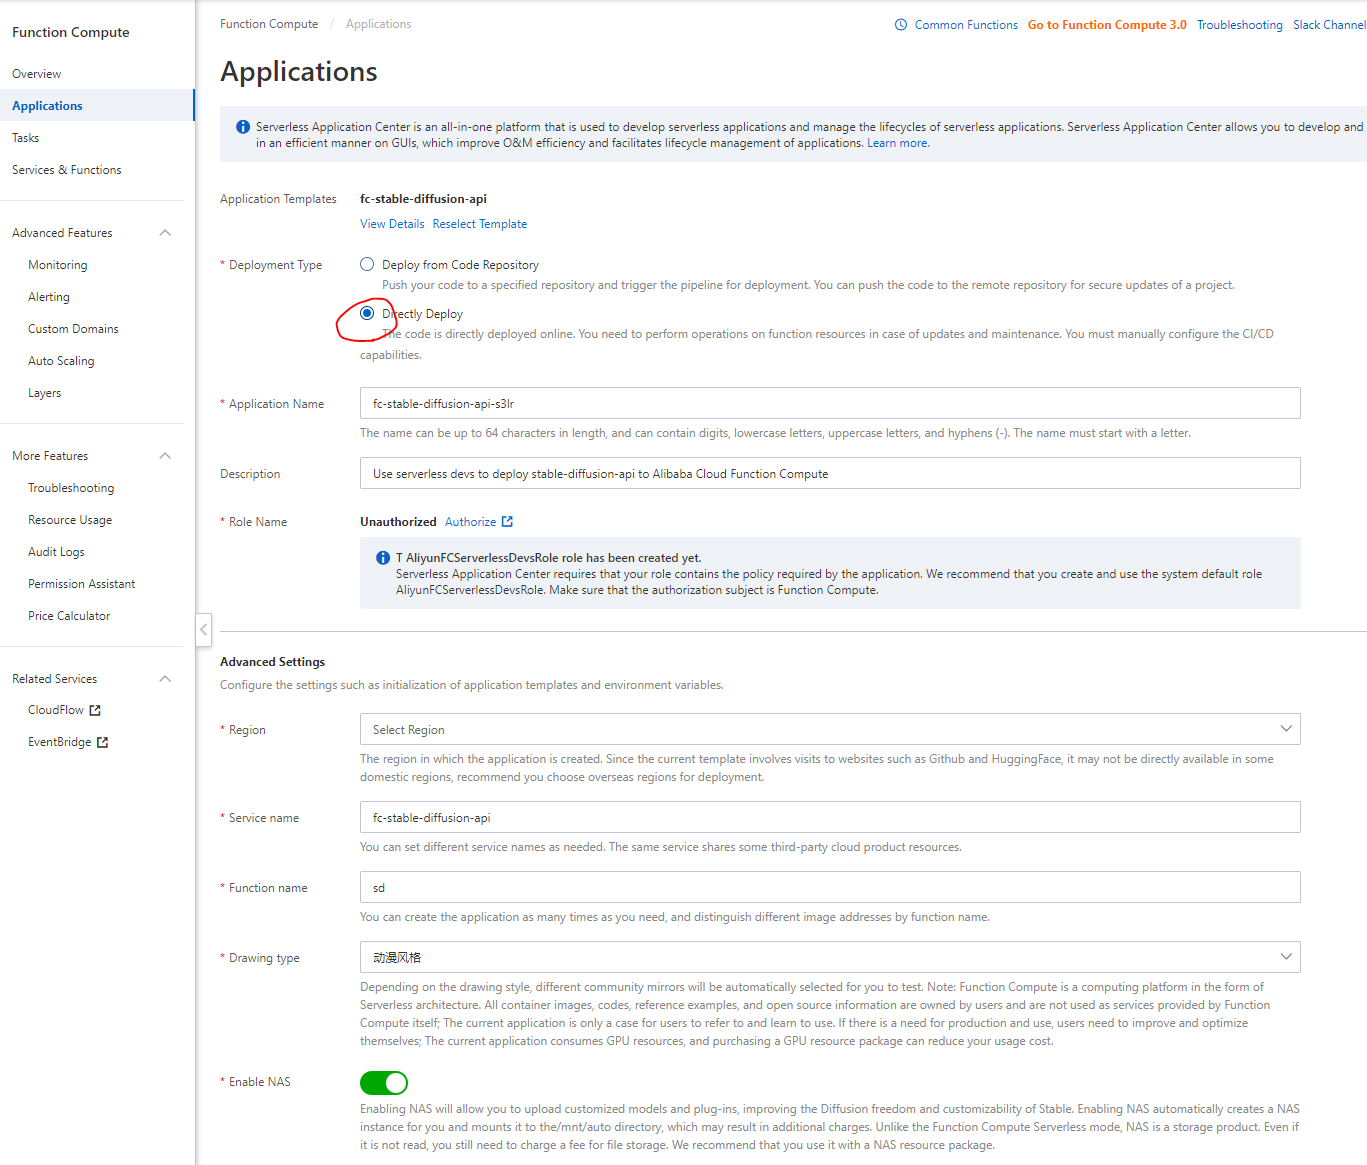
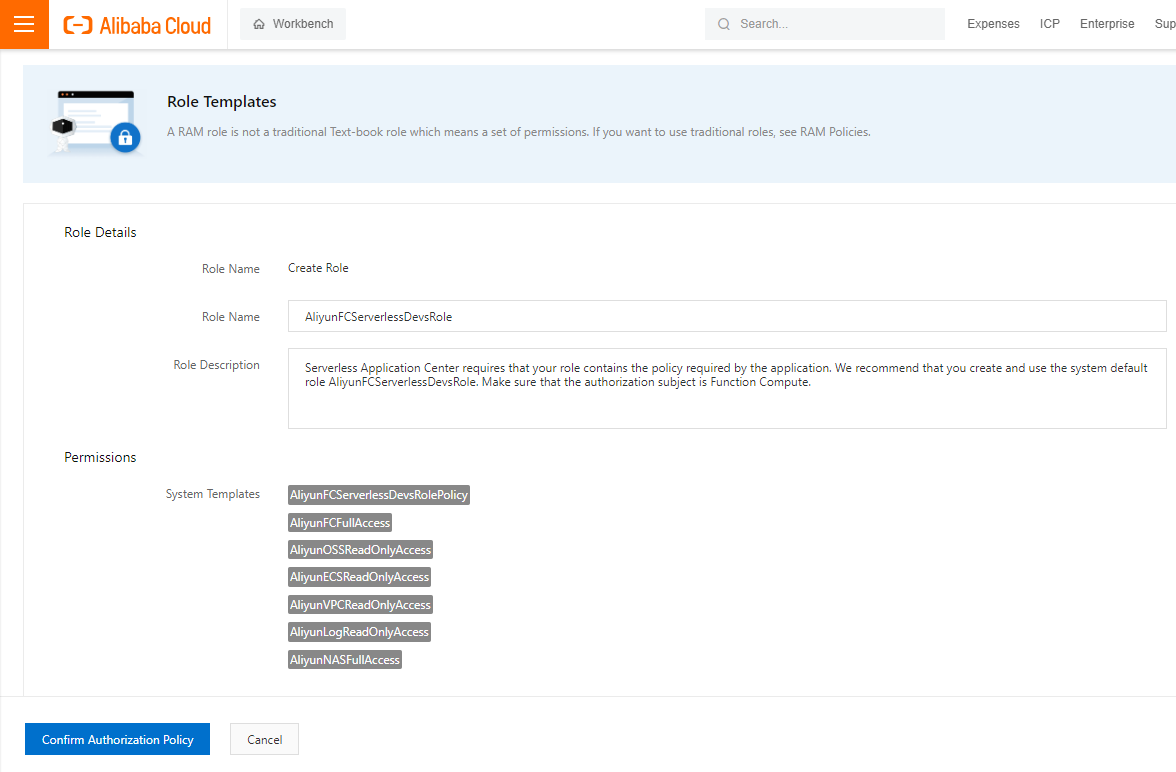
In the Role Name section, click Authorize to give a new authorization.
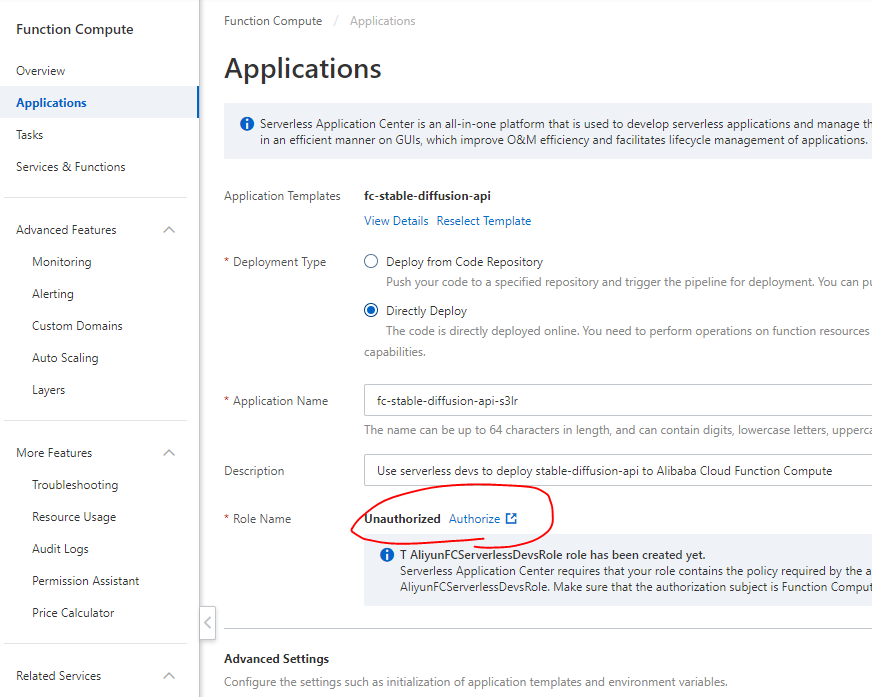
Click Confirm Authorization Policy.
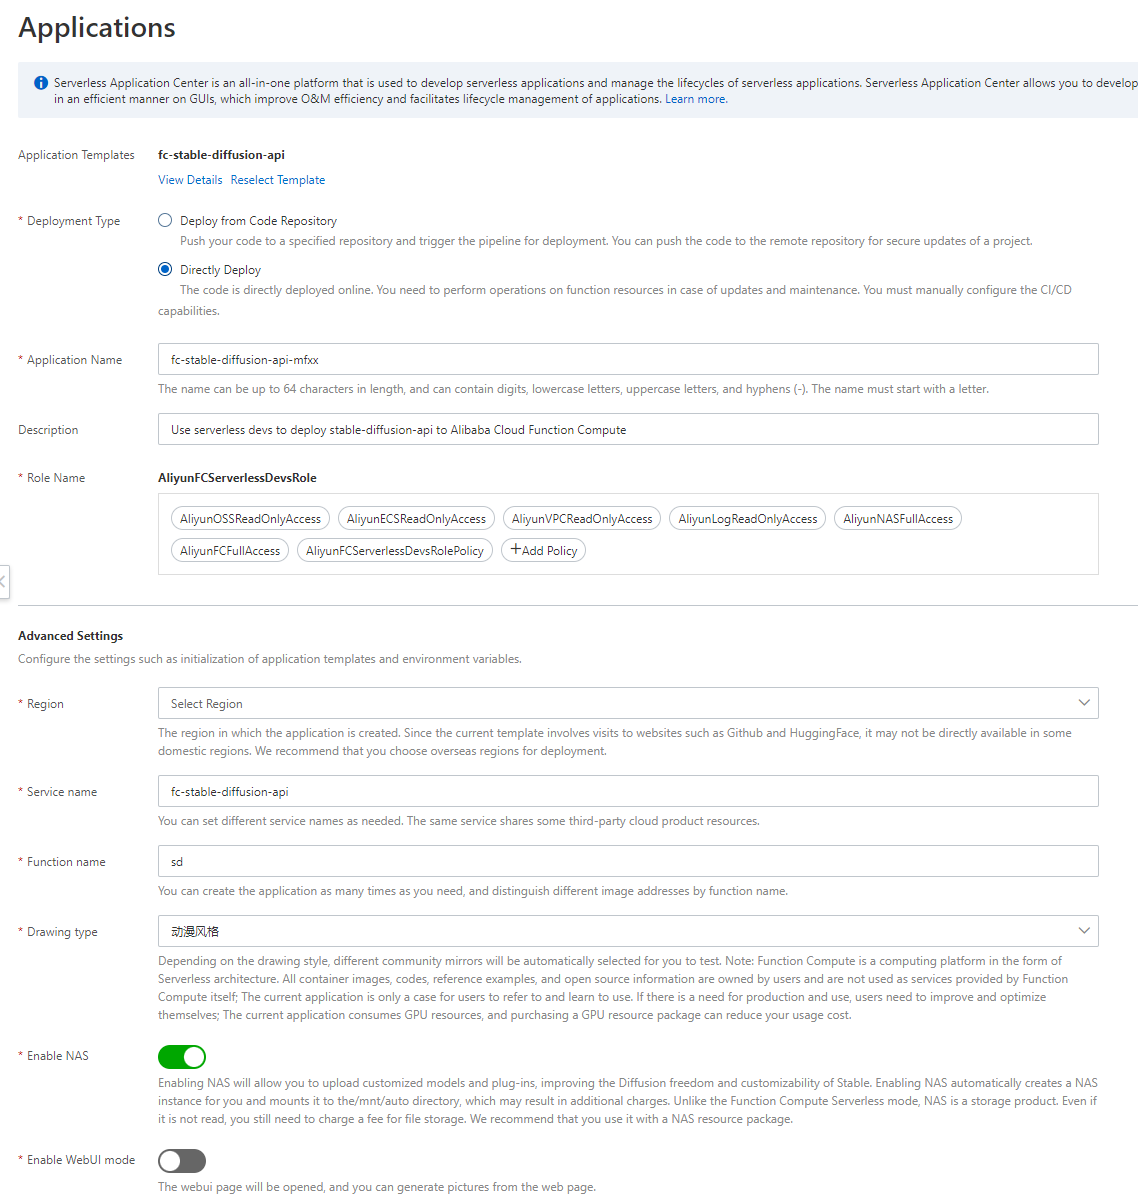
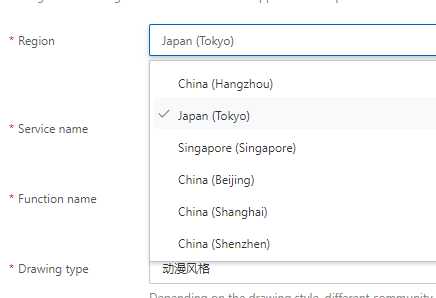
Select a region. Choose the Japan (Tokyo) region.
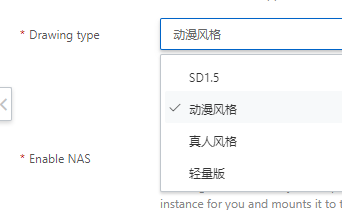
Then, specify the Drawing type parameter. This is not localized, so I was a little stuck, but, according to the Chinese-speaking colleague in my company, the following options seem to mean:
Select the Anime style (动漫风格).
Scroll down and take note of the following error message: The application you selected application requires additional permissions: AliyunFCFullAccess.
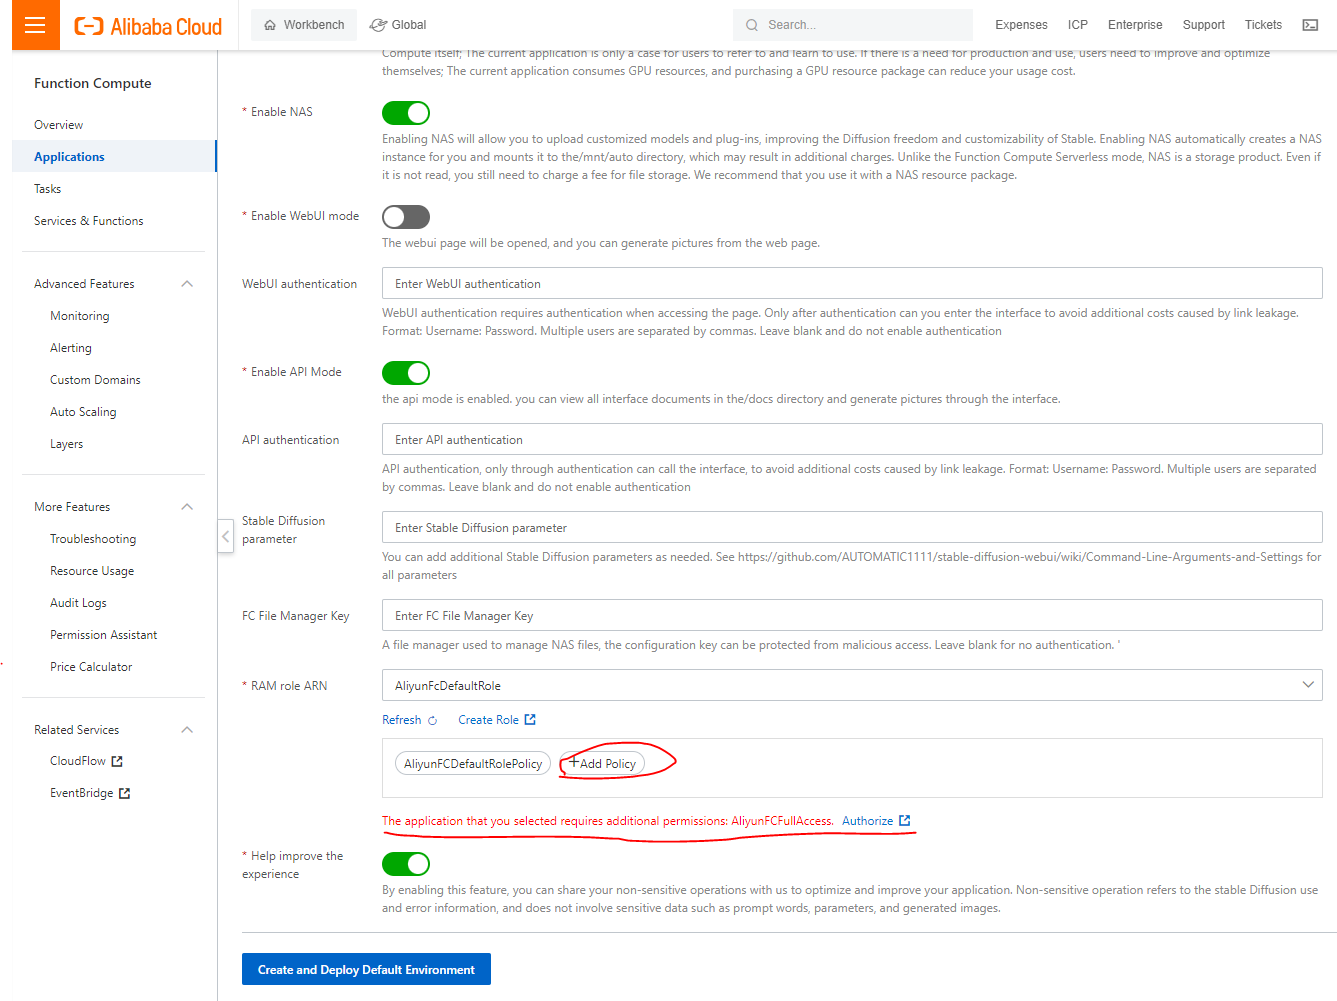
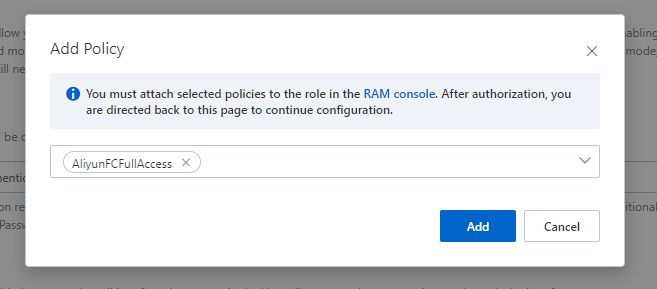
Click Add to add the AliyunFCFullAccess policy.
You will be redirected to another page for RAM role configuration, where you can click Confirm Authorization Policy.
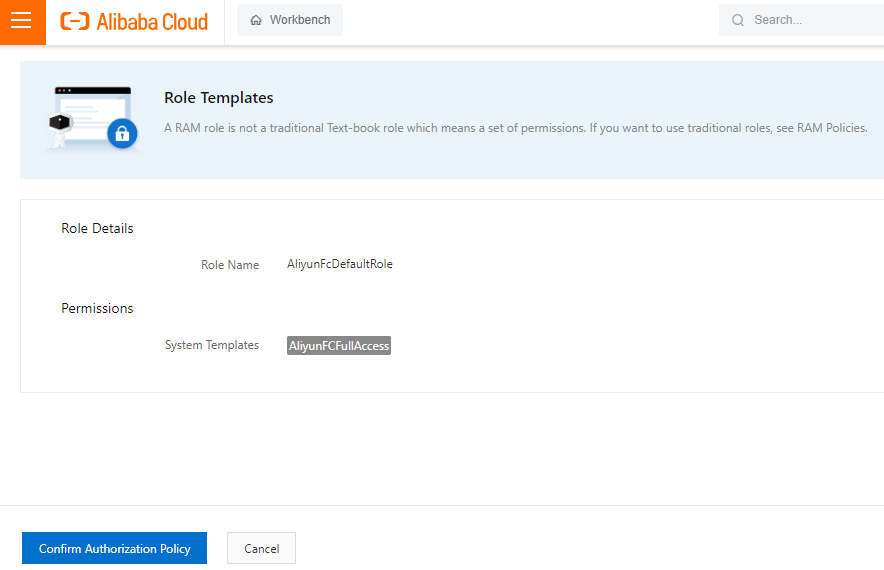
This directs you back to the Function Compute page. You can then continue with the settings.
If the settings have been successful, click Create and Deploy Default Environment.
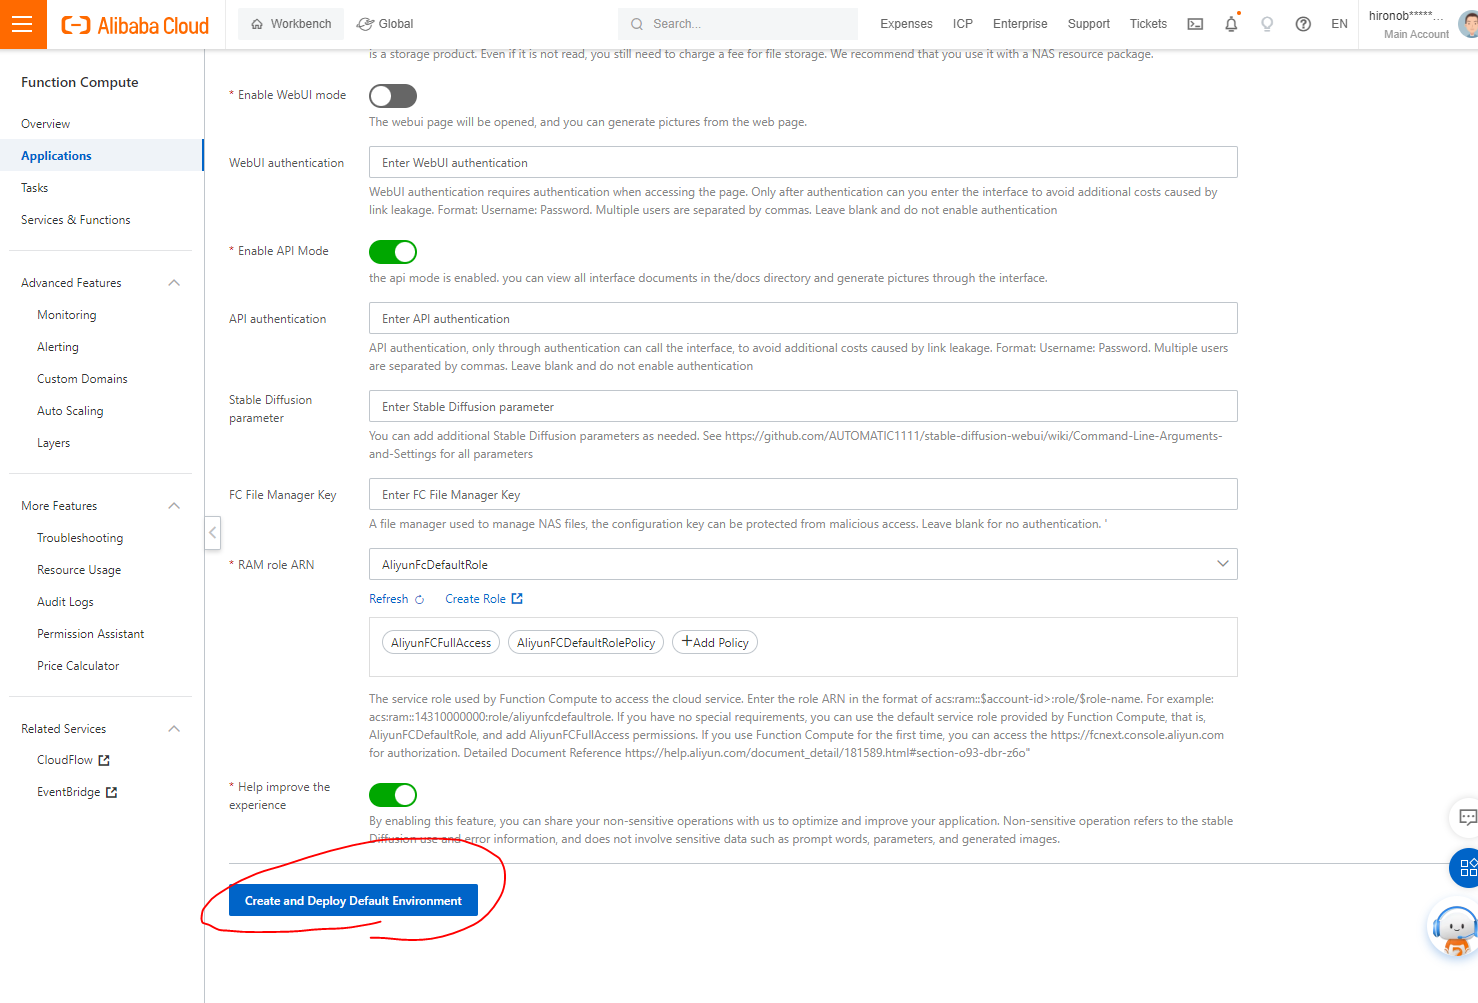
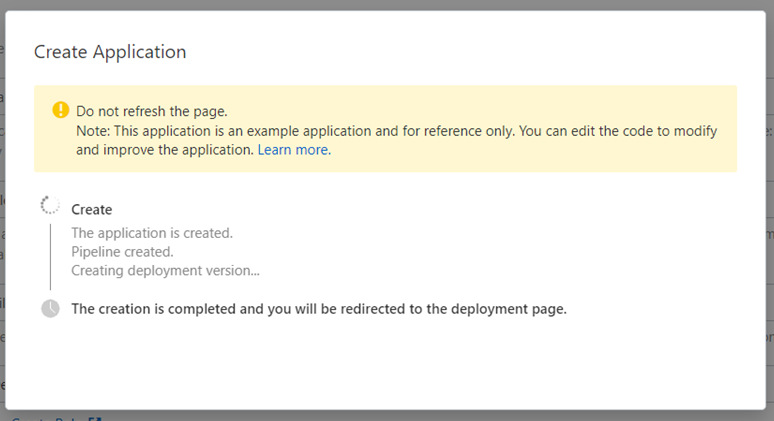
The progress status is displayed, but it ends quickly.
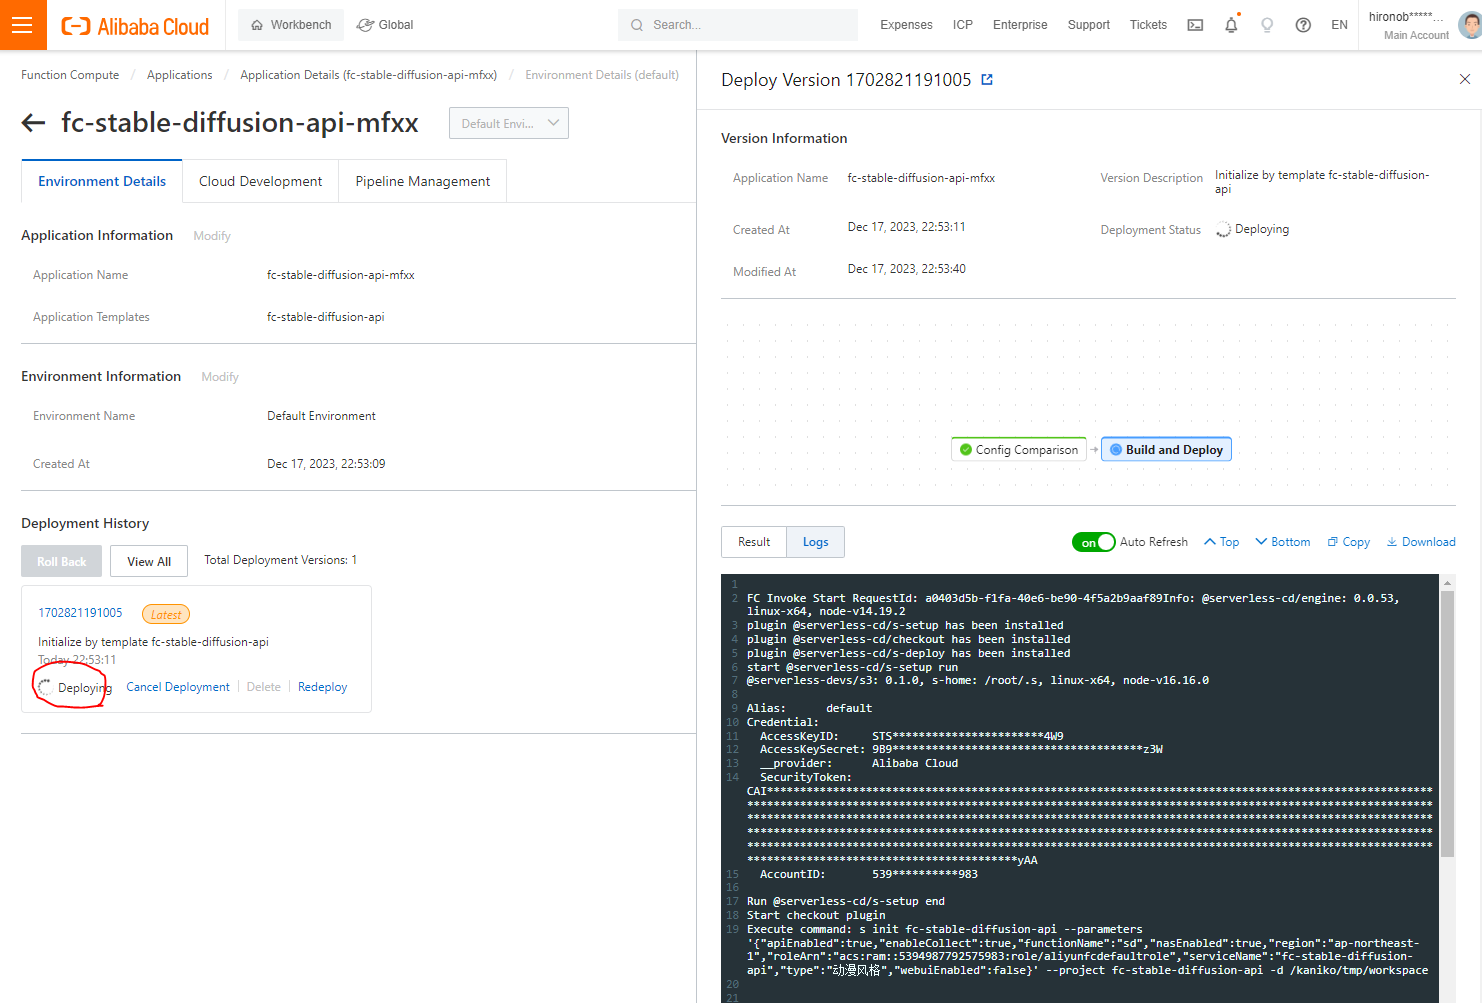
The console page will appear. It is in the Deploying status, so wait for a while.
The deployment seems to be complete.
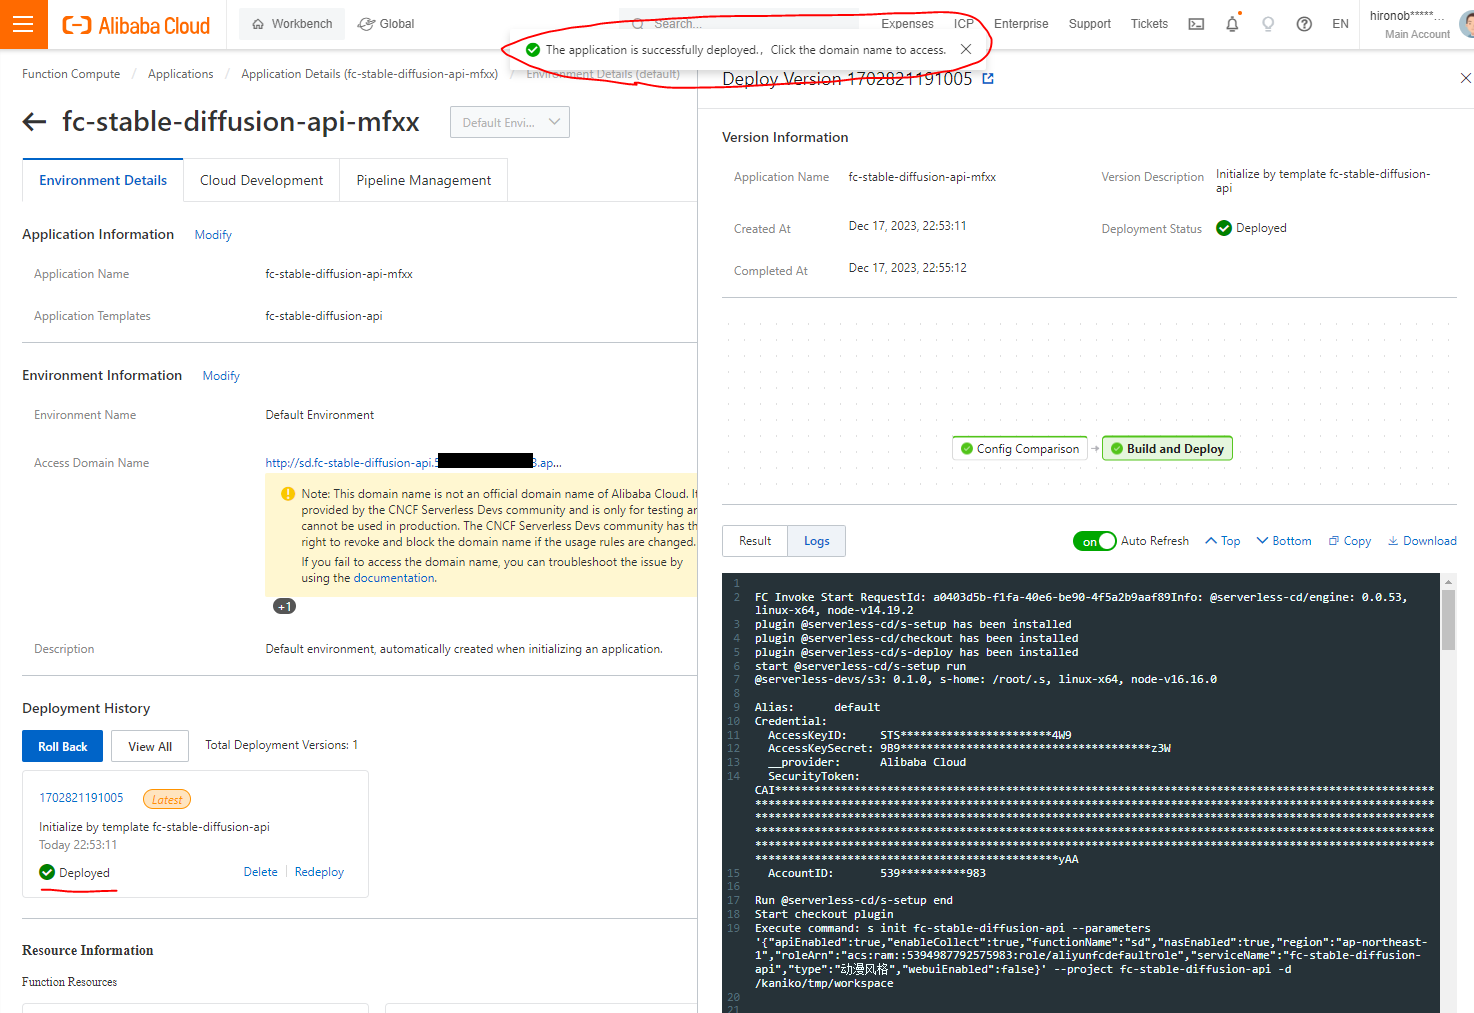
The log looks good as well.
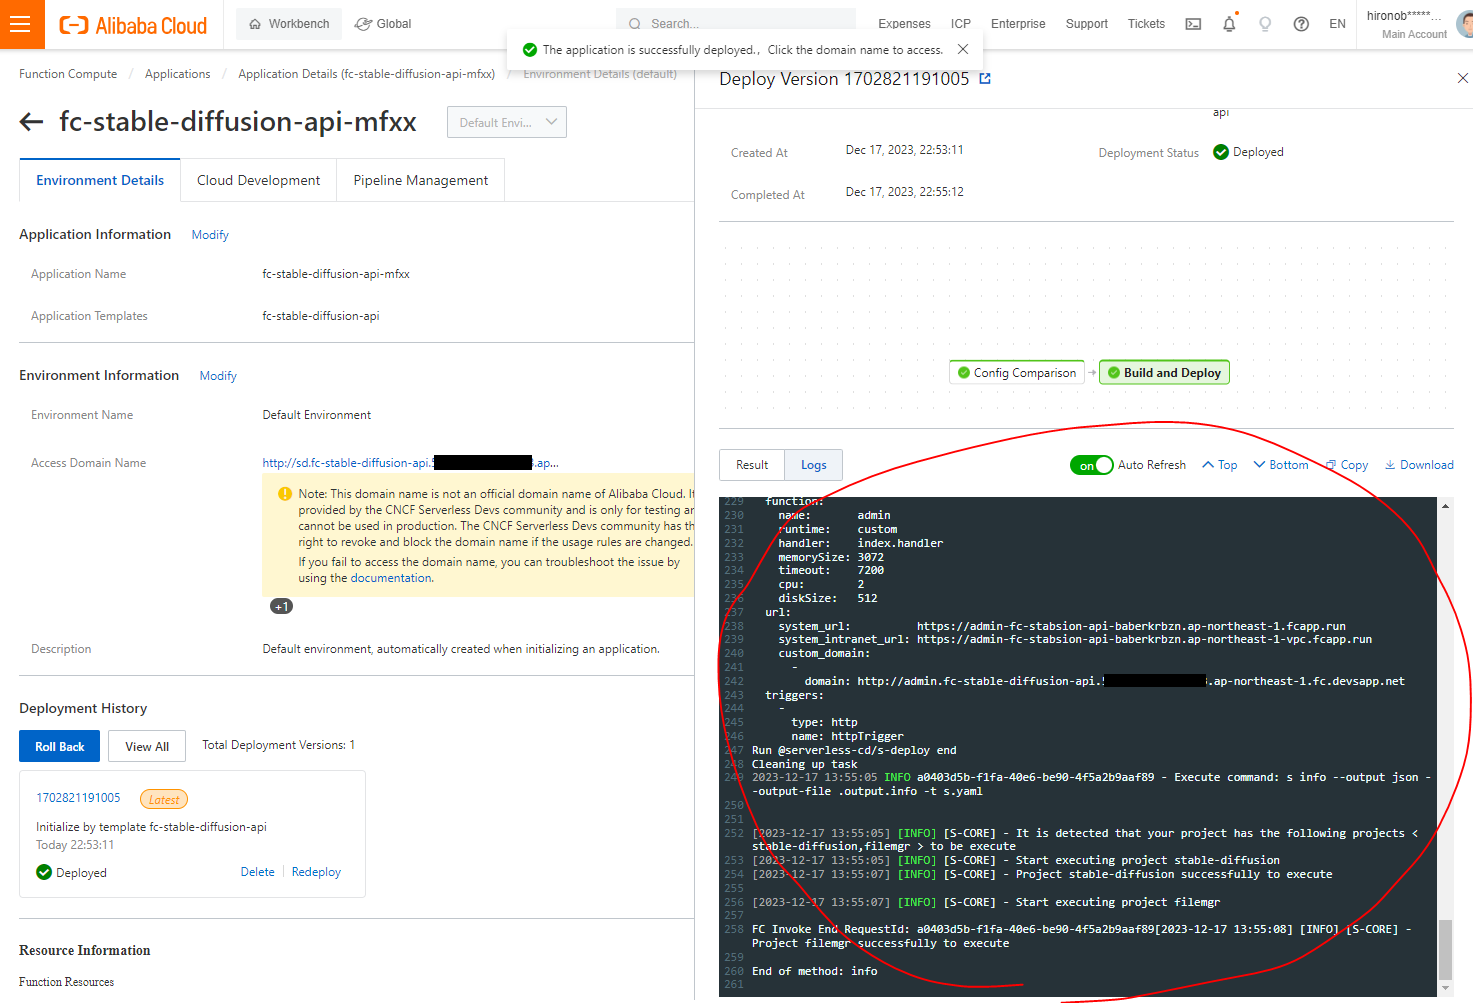
http://sd.fc-stable-diffusion-api.xxxxxxxxxx.ap-northeast-1.fc.devsapp.net/ is the URL of the API server. Try to open this in a web browser.

This seems to be a FastAPI, so append "docs" to the URL.
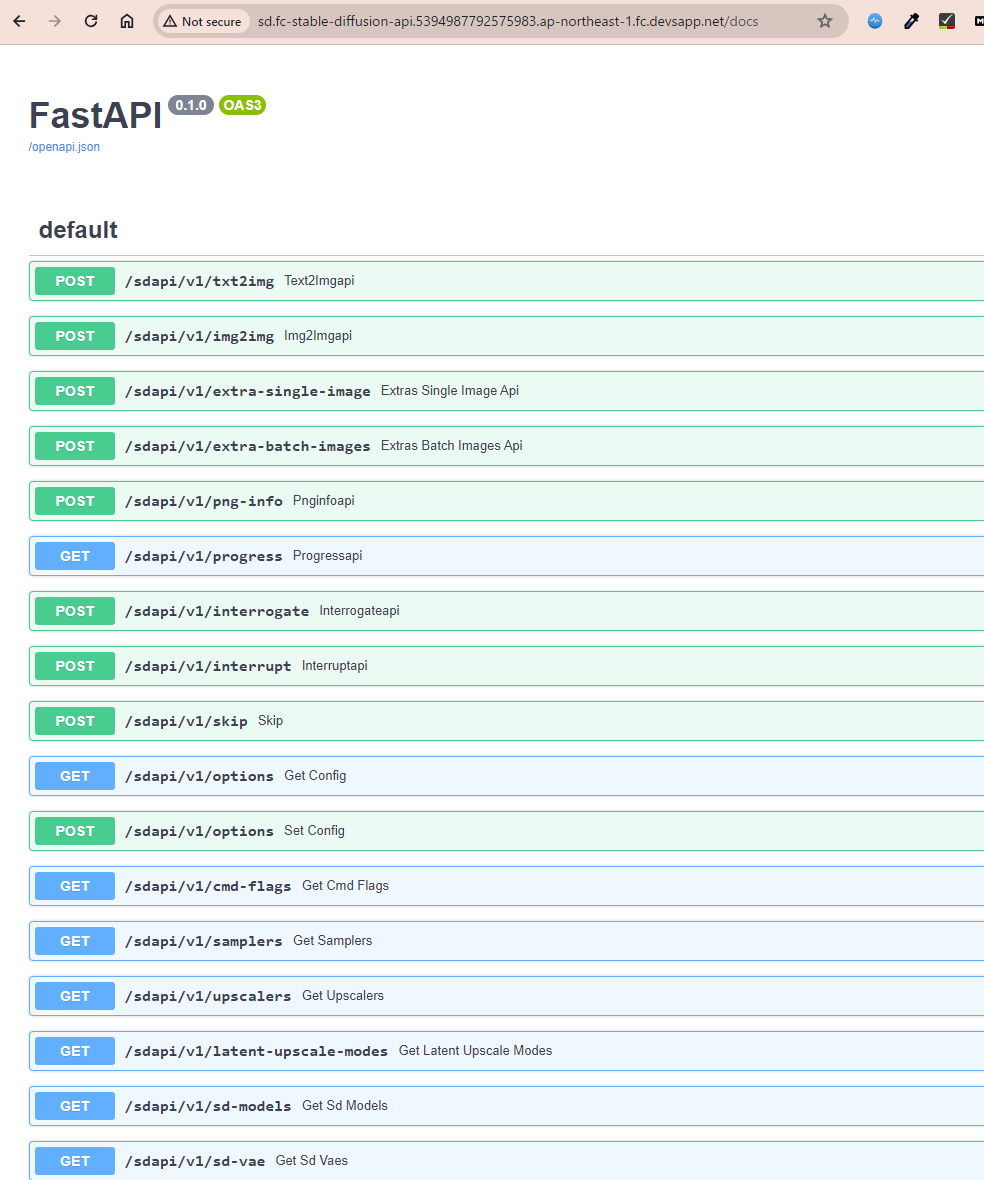
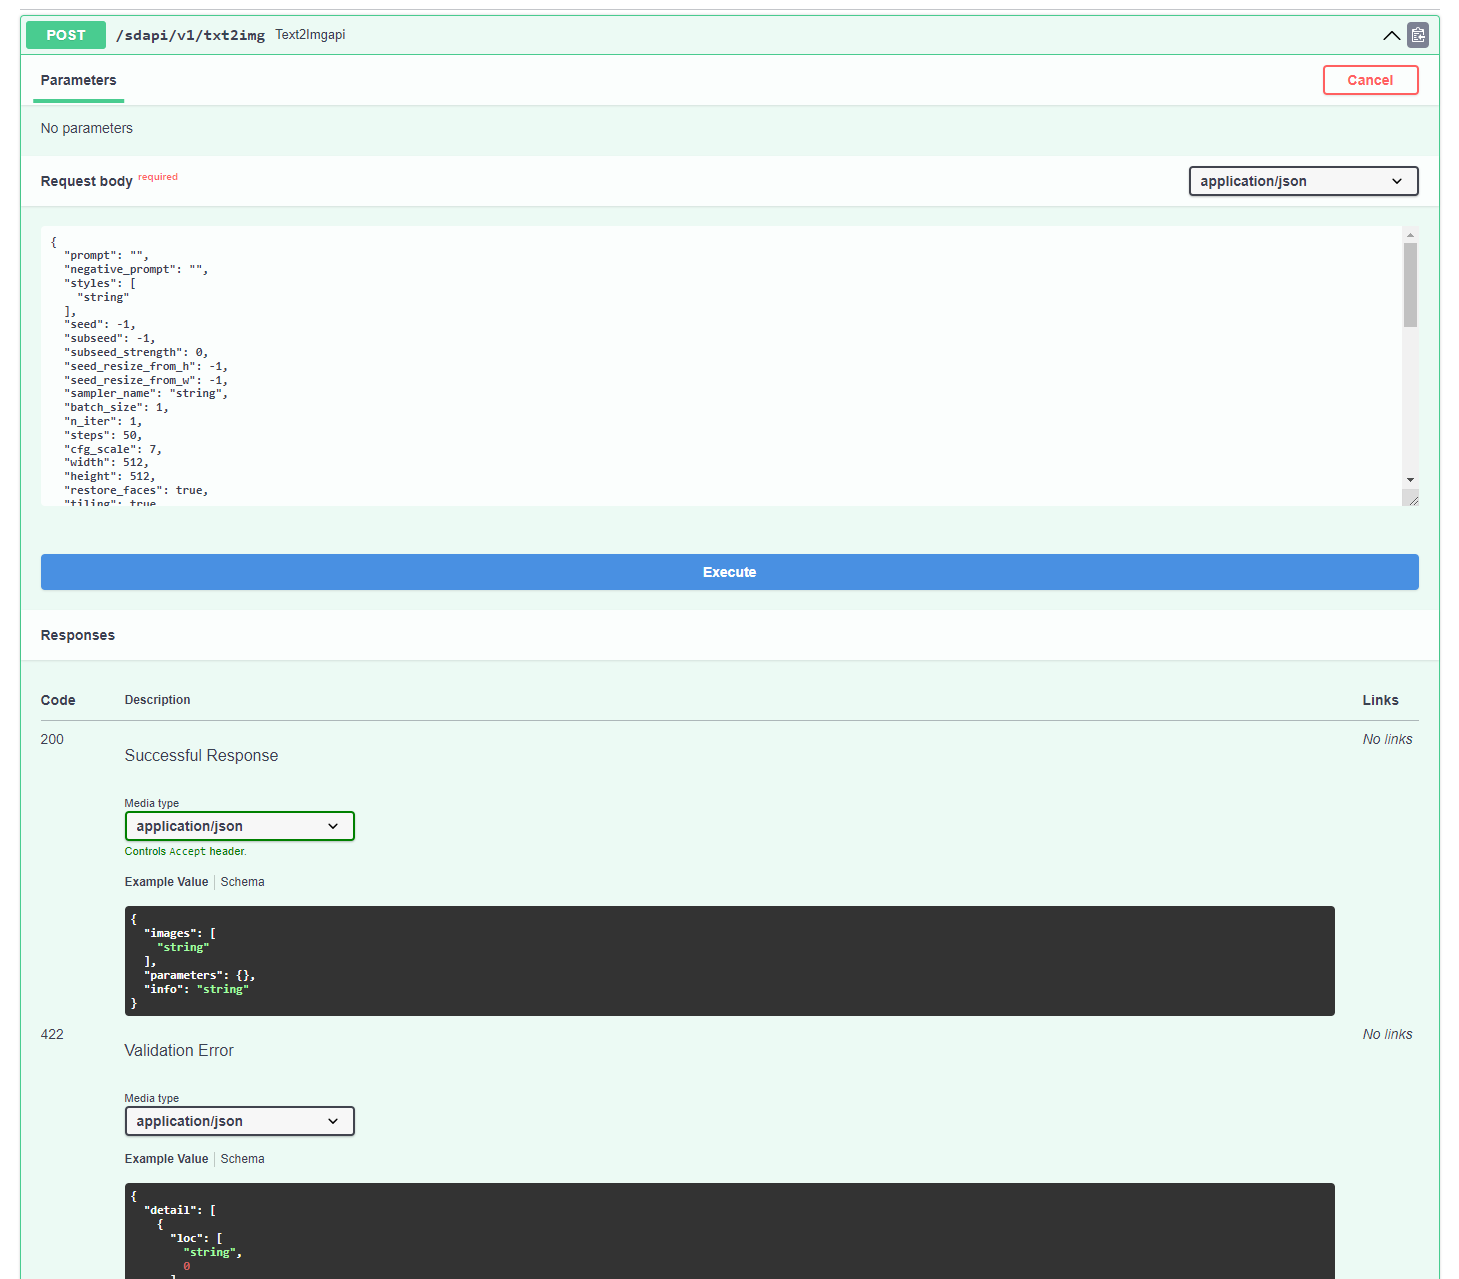
The API list is displayed. Try to write Python code while looking at this list.
For the details of the API, see the above-mentioned docs.

import json
import base64
import requests
def submit_post(url: str, data: dict):
return requests.post(url, data=json.dumps(data))
def save_encoded_image(b64_image: str, output_path: str):
with open(output_path, 'wb') as image_file:
image_file.write(base64.b64decode(b64_image))
if __name__ == '__main__':
txt2img_url = r'http://sd.fc-stable-diffusion-api.xxxxxx.cn-hangzhou.fc.devsapp.net/sdapi/v1/txt2img'
data = {'prompt': 'Flying dog and chasing cat',
'negative_prompt': '',
'sampler_index': 'DPM++ SDE',
'seed': 1234,
'steps': 20,
'width': 512,
'height': 512,
'cfg_scale': 8}
response = submit_post(txt2img_url, data)
save_image_path = r'tmp.png'
save_encoded_image(response.json()['images'][0], save_image_path)
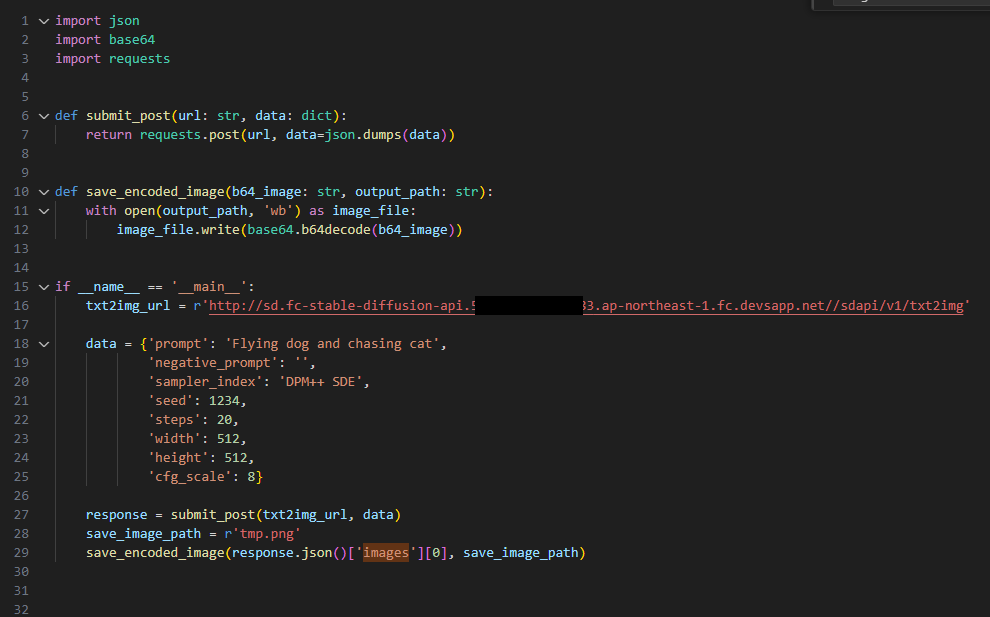
Run this code. As a result, the image is returned and displayed. However this dog is missing a leg.

This article demonstrated how to easily launch the Stable Diffusion API environment in Function Compute. With various templates available in Function Compute, it should take less than 30 minutes to set up. Anyone interested in creating a Stable Diffusion API environment may find this article helpful.
This article is translated from Qiita.
Disclaimer: The views expressed herein are for reference only and don't necessarily represent the official views of Alibaba Cloud.
Use Terraform to Quickly Deploy Magento by Alibaba Cloud ECS + RDS
Alibaba Cloud Community - April 18, 2024
Alibaba Cloud Serverless - July 27, 2023
Alibaba Cloud Serverless - July 9, 2024
Alibaba Cloud Community - July 11, 2024
Alibaba Cloud Community - May 10, 2024
Alibaba Cloud Native Community - September 19, 2023
 Managed Service for Prometheus
Multi-source metrics are aggregated to monitor the status of your business and services in real time.
Learn More Resource Management
Organize and manage your resources in a hierarchical manner by using resource directories, folders, accounts, and resource groups.
Learn More Apsara Stack
Apsara Stack is a full-stack cloud solution created by Alibaba Cloud for medium- and large-size enterprise-class customers.
Learn More Application Real-Time Monitoring Service
Build business monitoring capabilities with real time response based on frontend monitoring, application monitoring, and custom business monitoring capabilities
Learn MoreMore Posts by H Ohara