Hello, I am Edwin Ji-wan Tack from the Alibaba Cloud Service Team. In this article, I will guide you through the Intelligent Chatbot service provided by Alibaba Cloud and explain how to configure it.
The Intelligent Chatbot (Tongyi Xiaomi) provided by Alibaba Cloud is an advanced AI chatbot service. It is a solution designed to help companies deliver AI-based customer responses and support through web crawling, document learning, and more. With the Intelligent Chatbot, you can integrate AI chatbot widgets into your website or mobile site, allowing Alibaba's AI to handle various queries from users quickly and efficiently. The Intelligent Chatbot is powered by Tongyi Qwen, AI Large Language Model (LLM) service developed by Alibaba Cloud, and is currently available only by using an Alibaba Cloud account.
Service Introduction Homepage: Alibaba Cloud Intelligent Robot
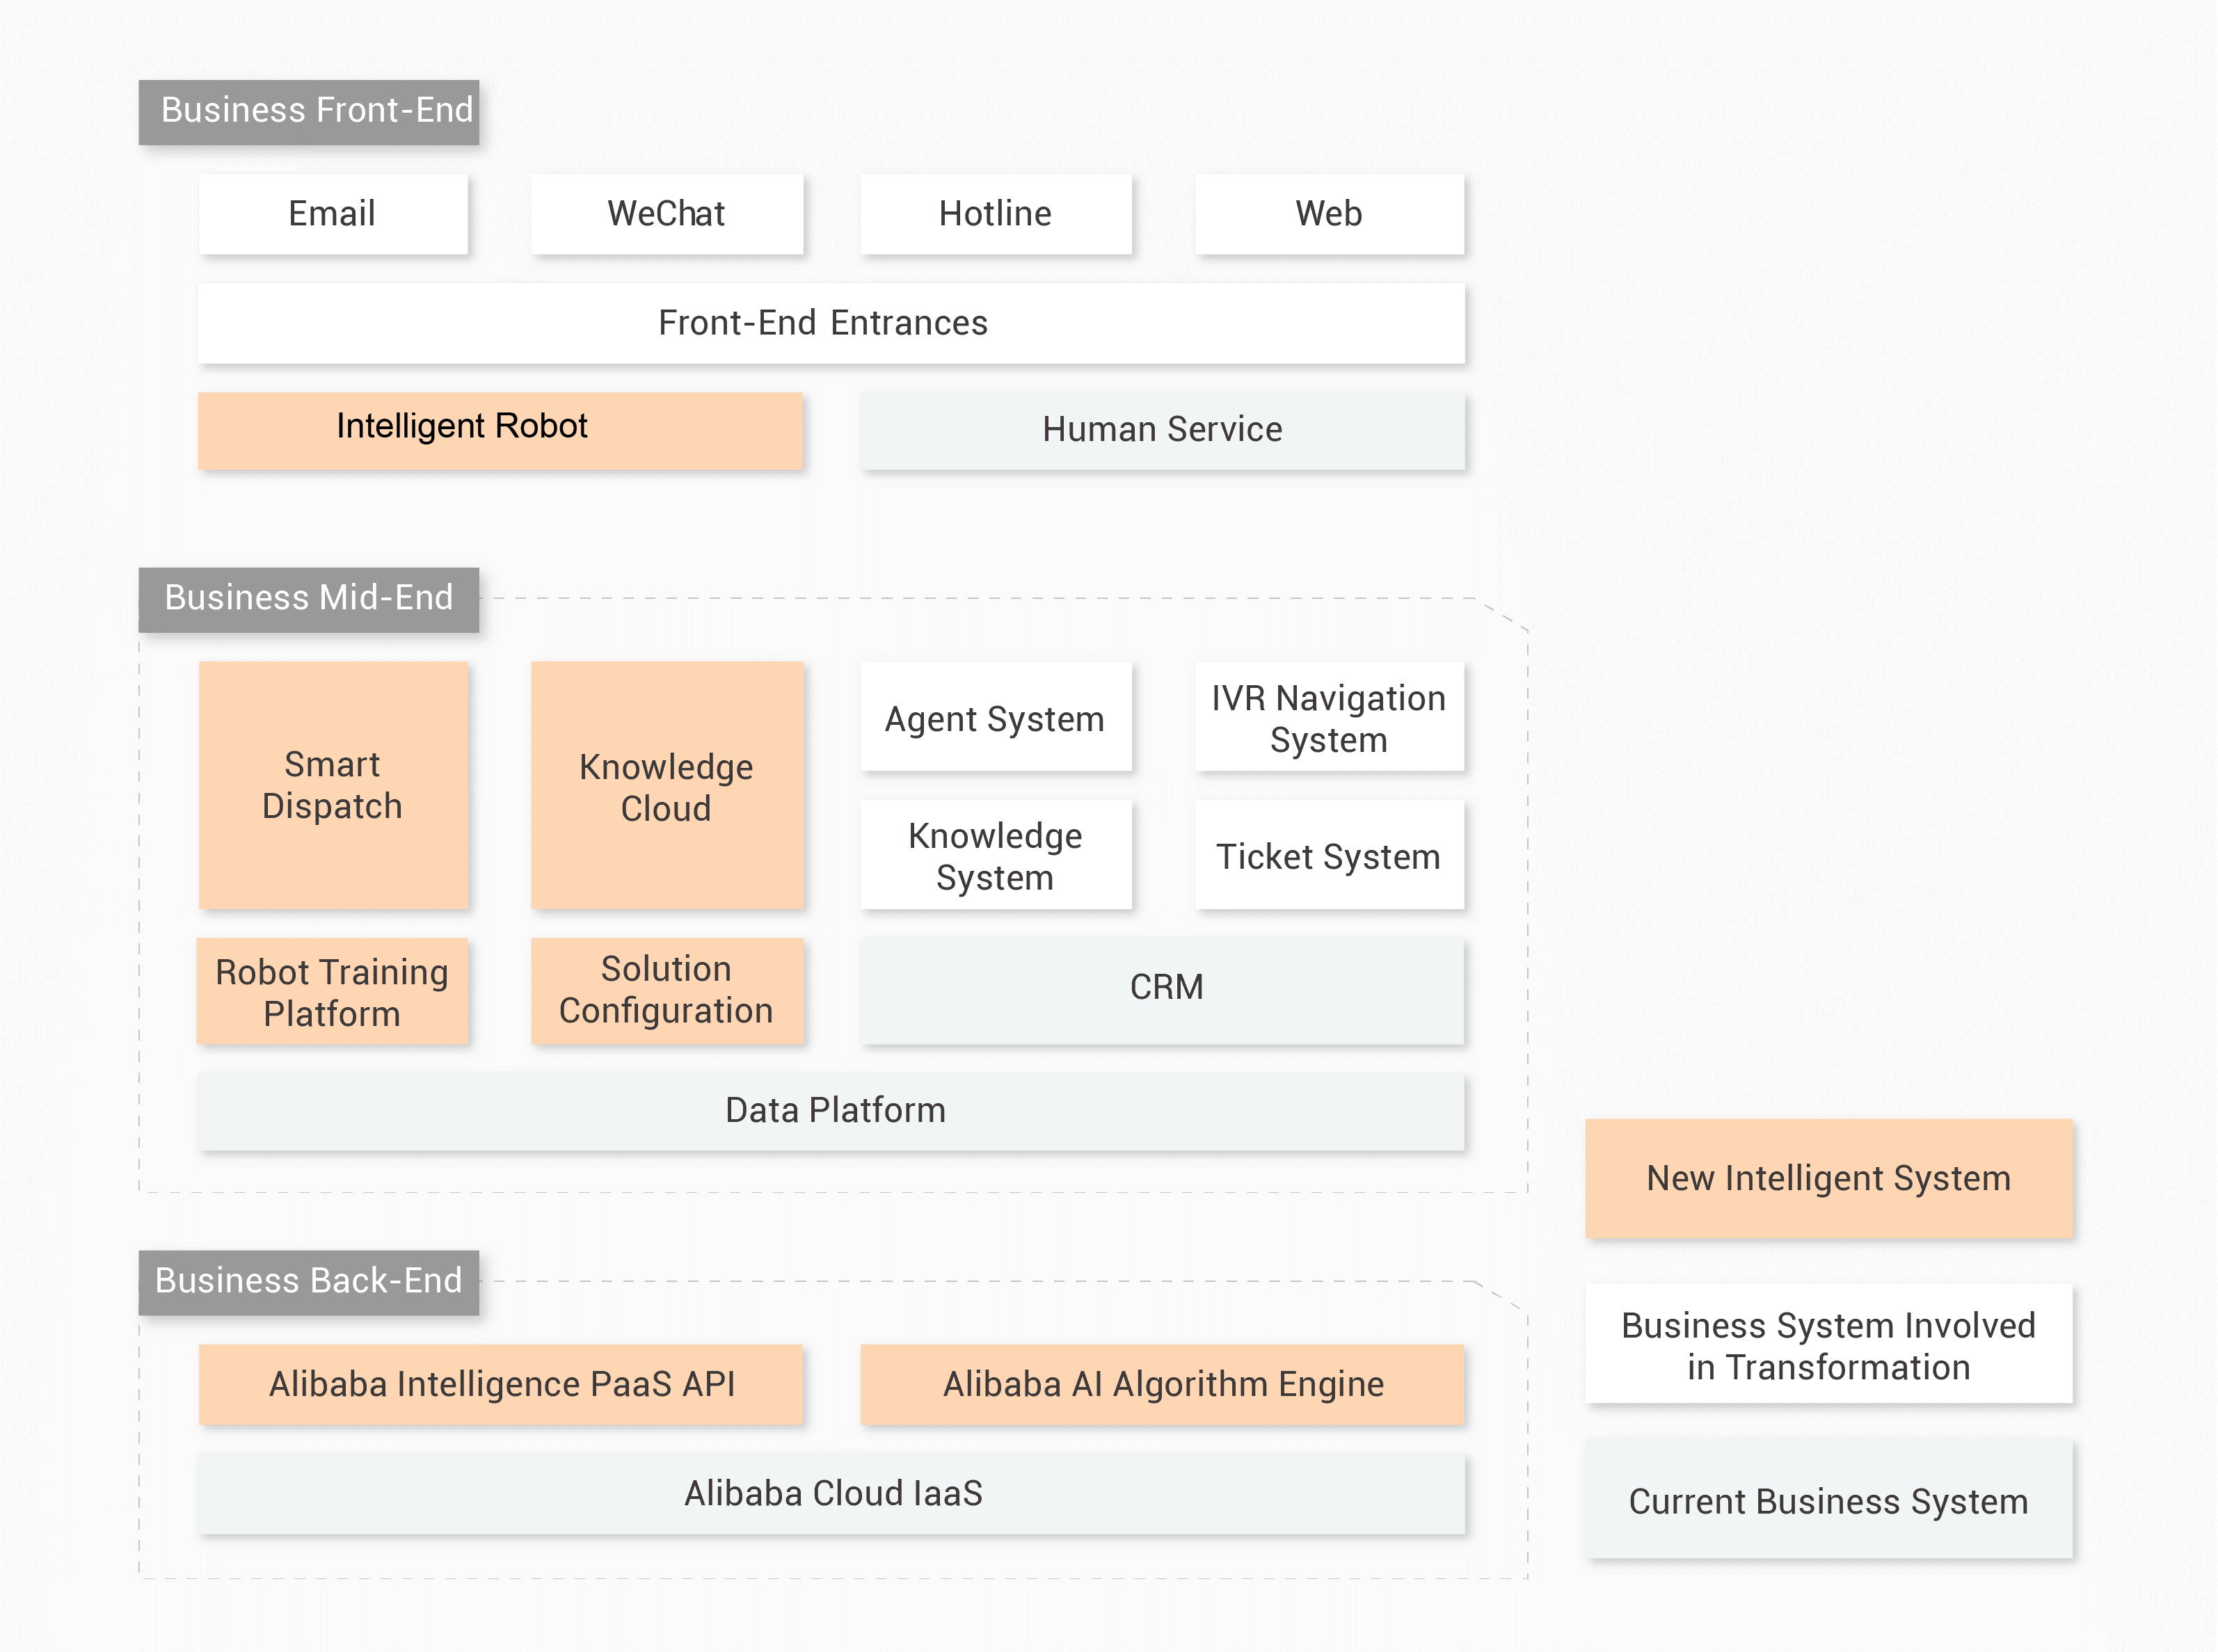
In this section, I'll introduce how to configure the Intelligent Chatbot (Tongyi Xiaomi).
You need to activate Intelligent Chatbot (Tongyi Xiaomi) to use the AICC solution.
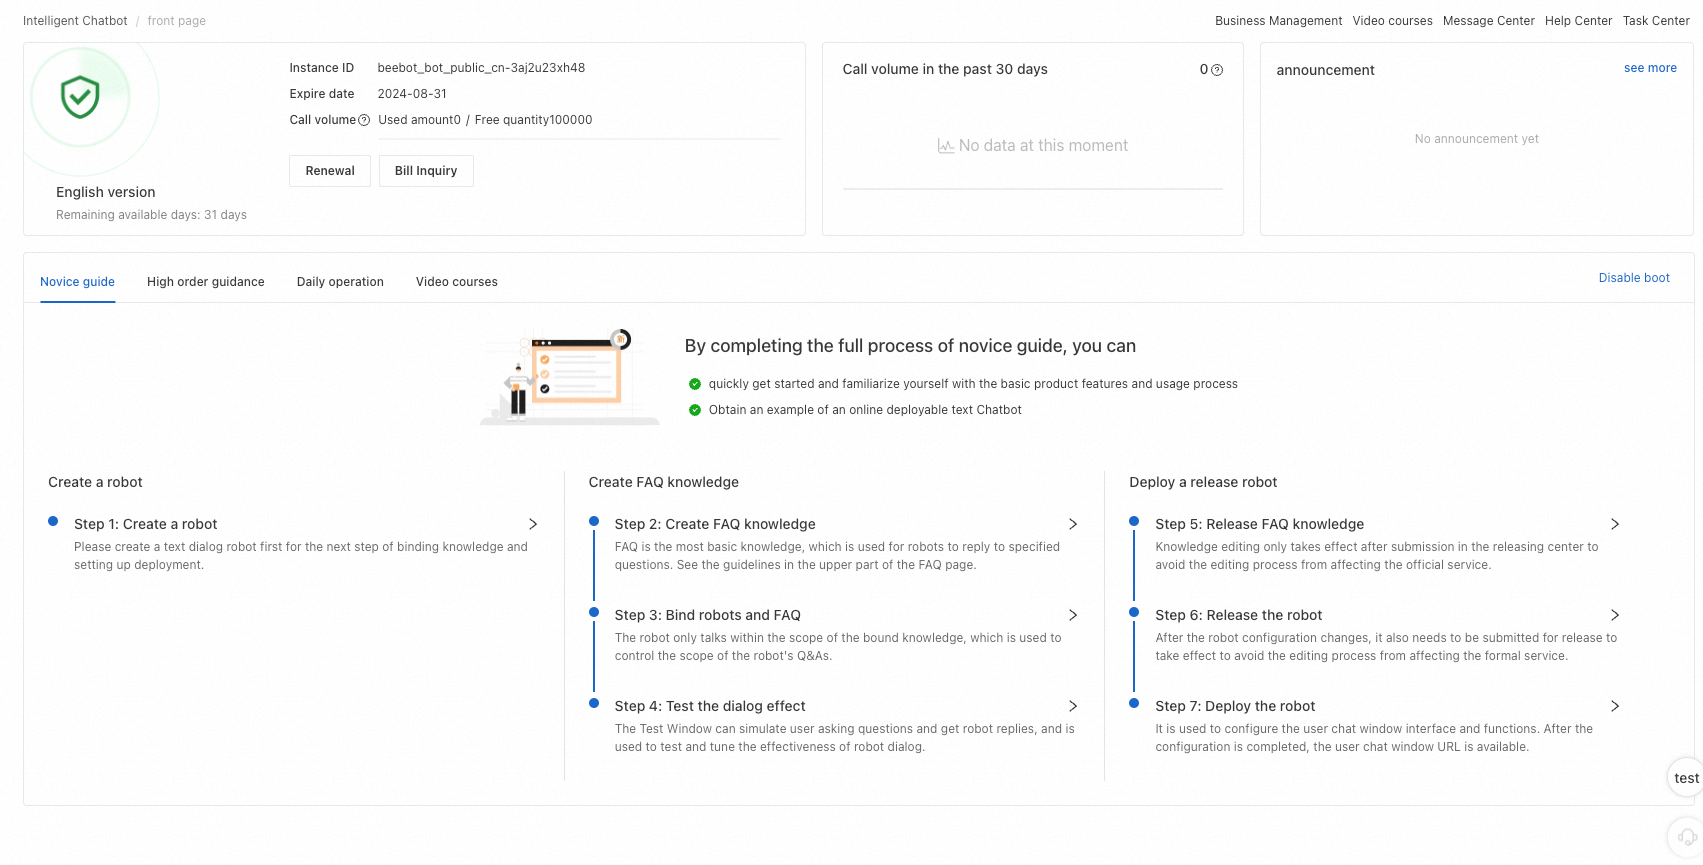
=> Chatbot configuration process
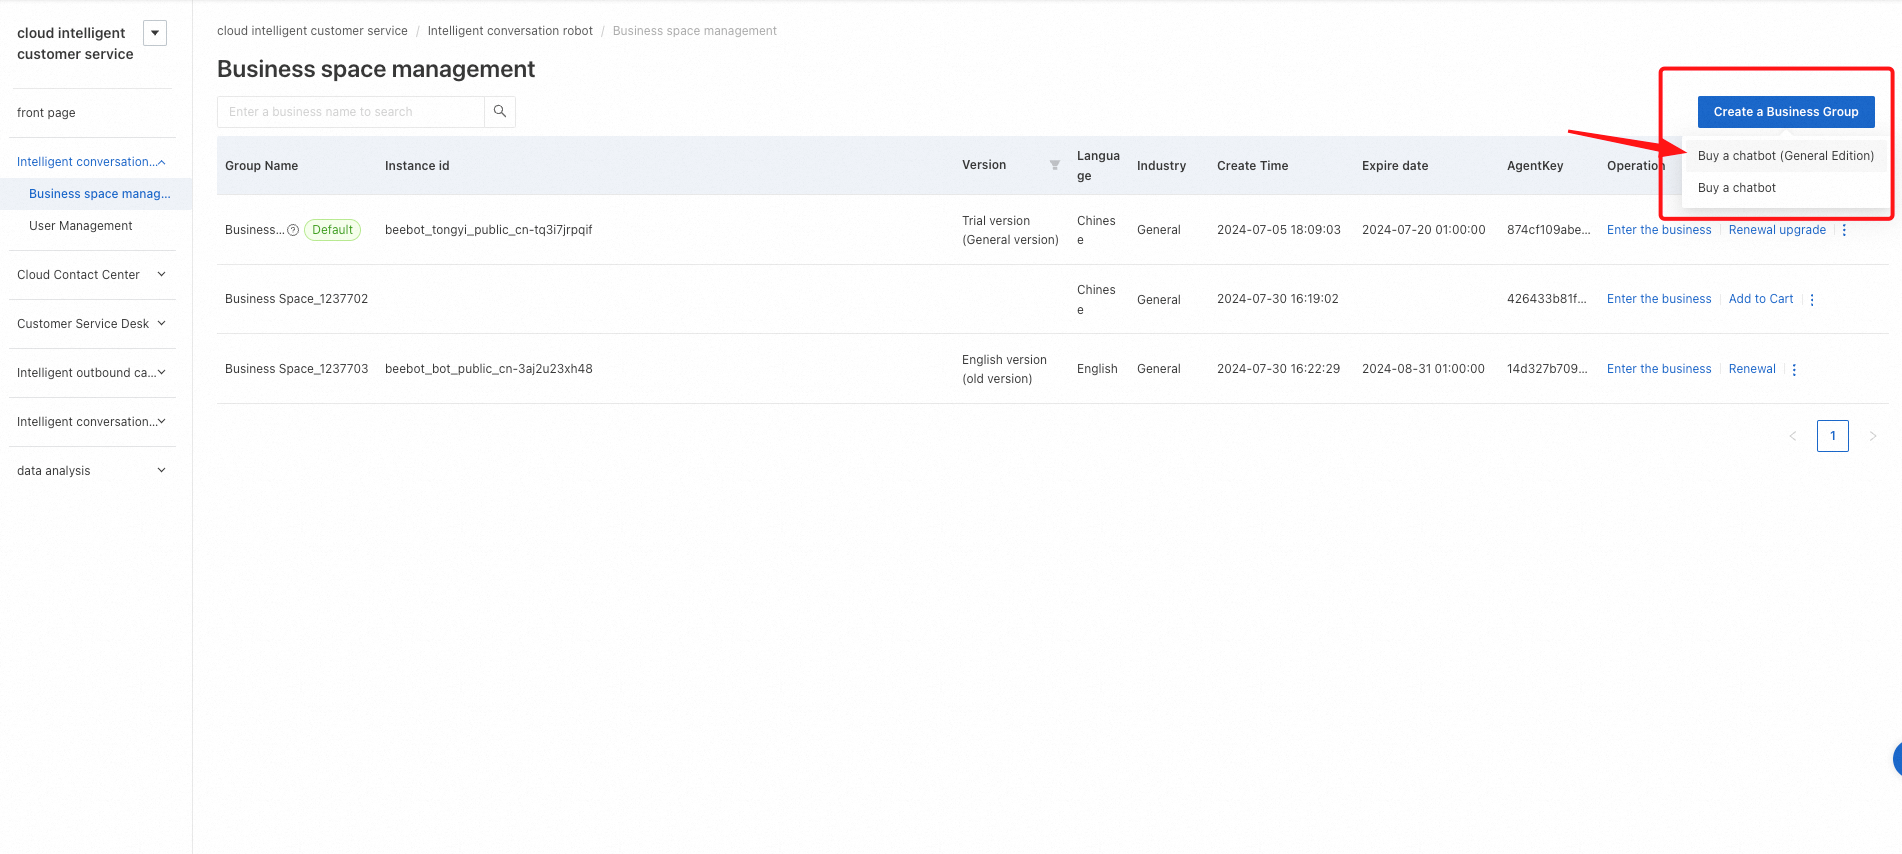
Step 1: Create a business space in the Intelligent Chatbot.
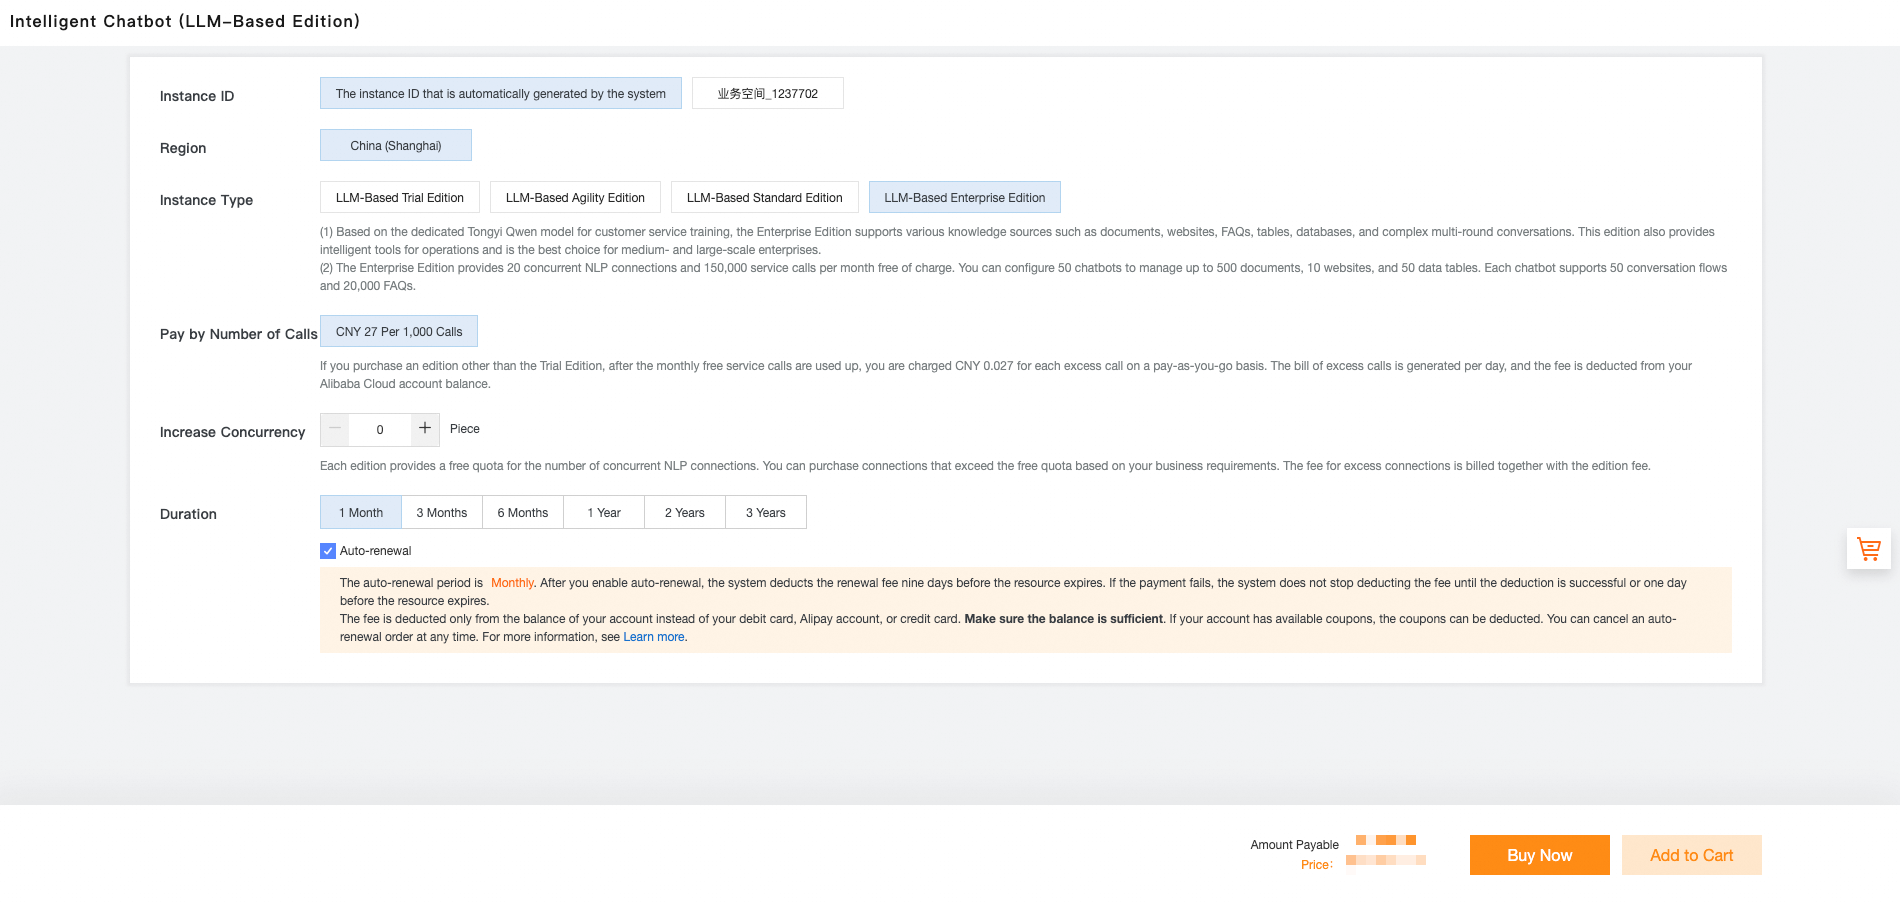
Step 2: Select LLM-Based Enterprise Edition.
The pricing follows a pay-as-you-go model based on the number of calls.
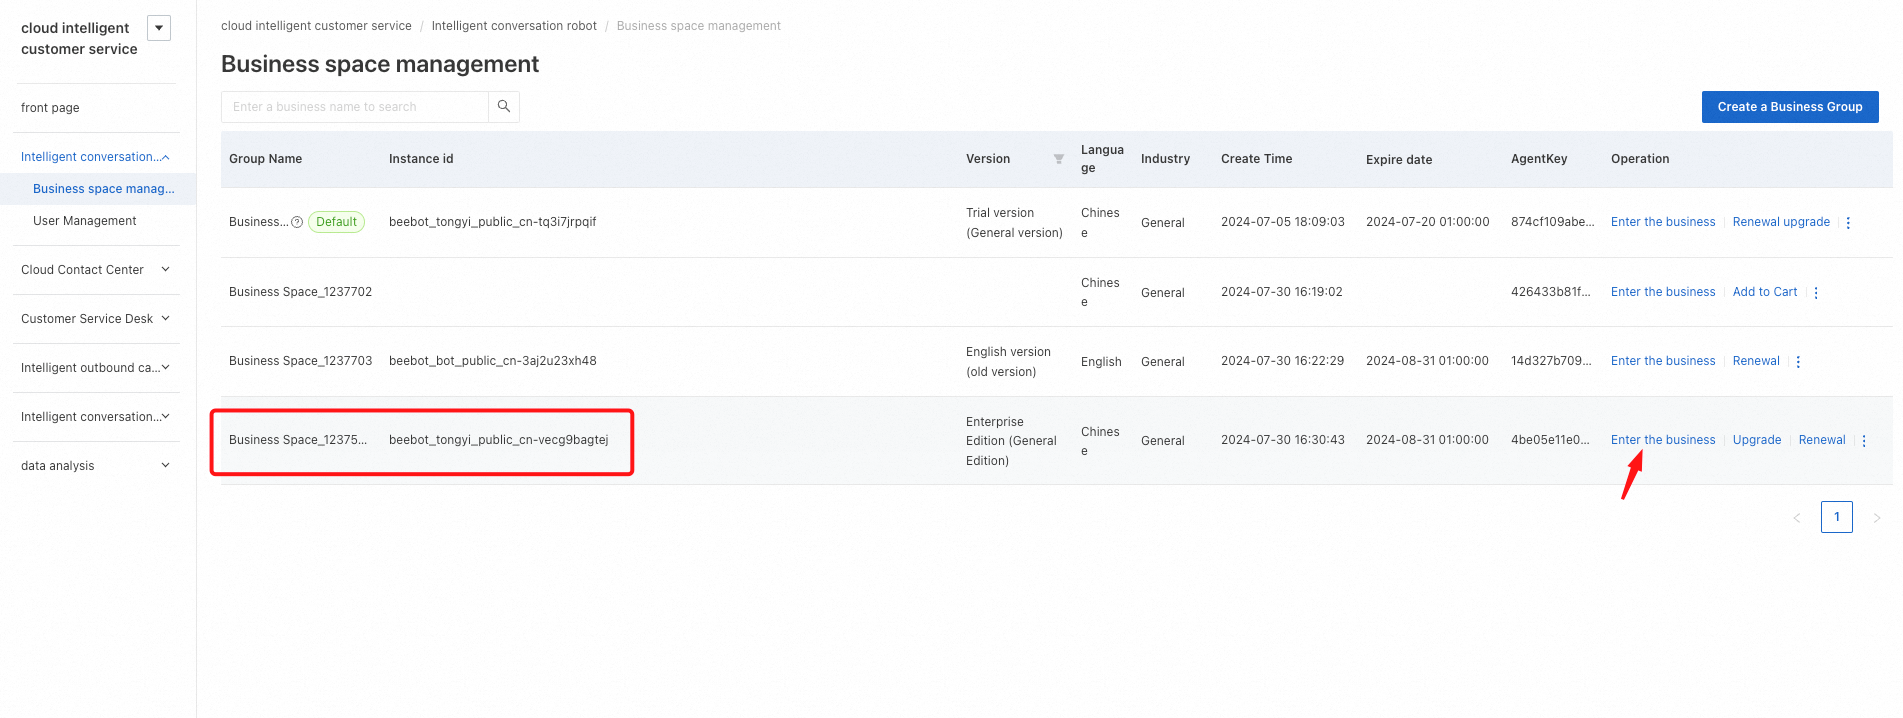
Step 3: Click "Enter the business" in the Operation column of the newly created business space.
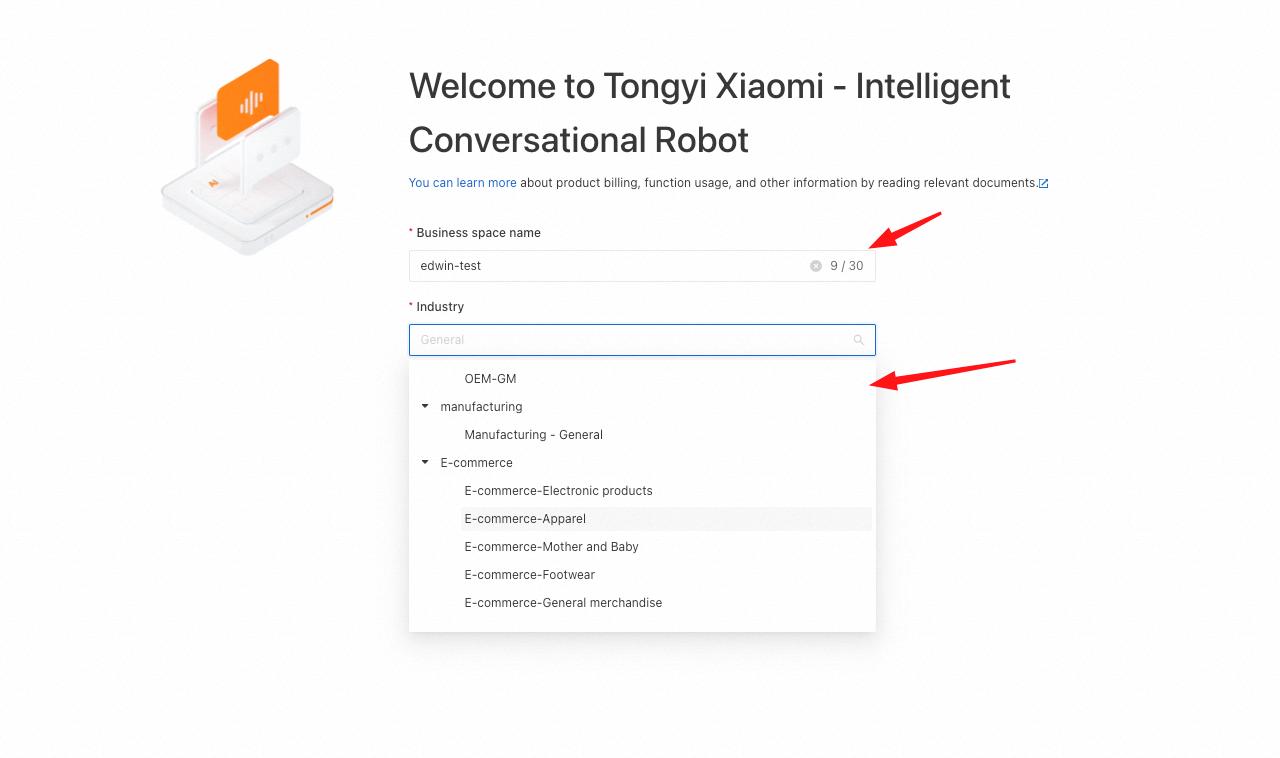
Step 4: Specify the name of the business space and select the industry category. (In this example, E-commerce Apparel is selected.)
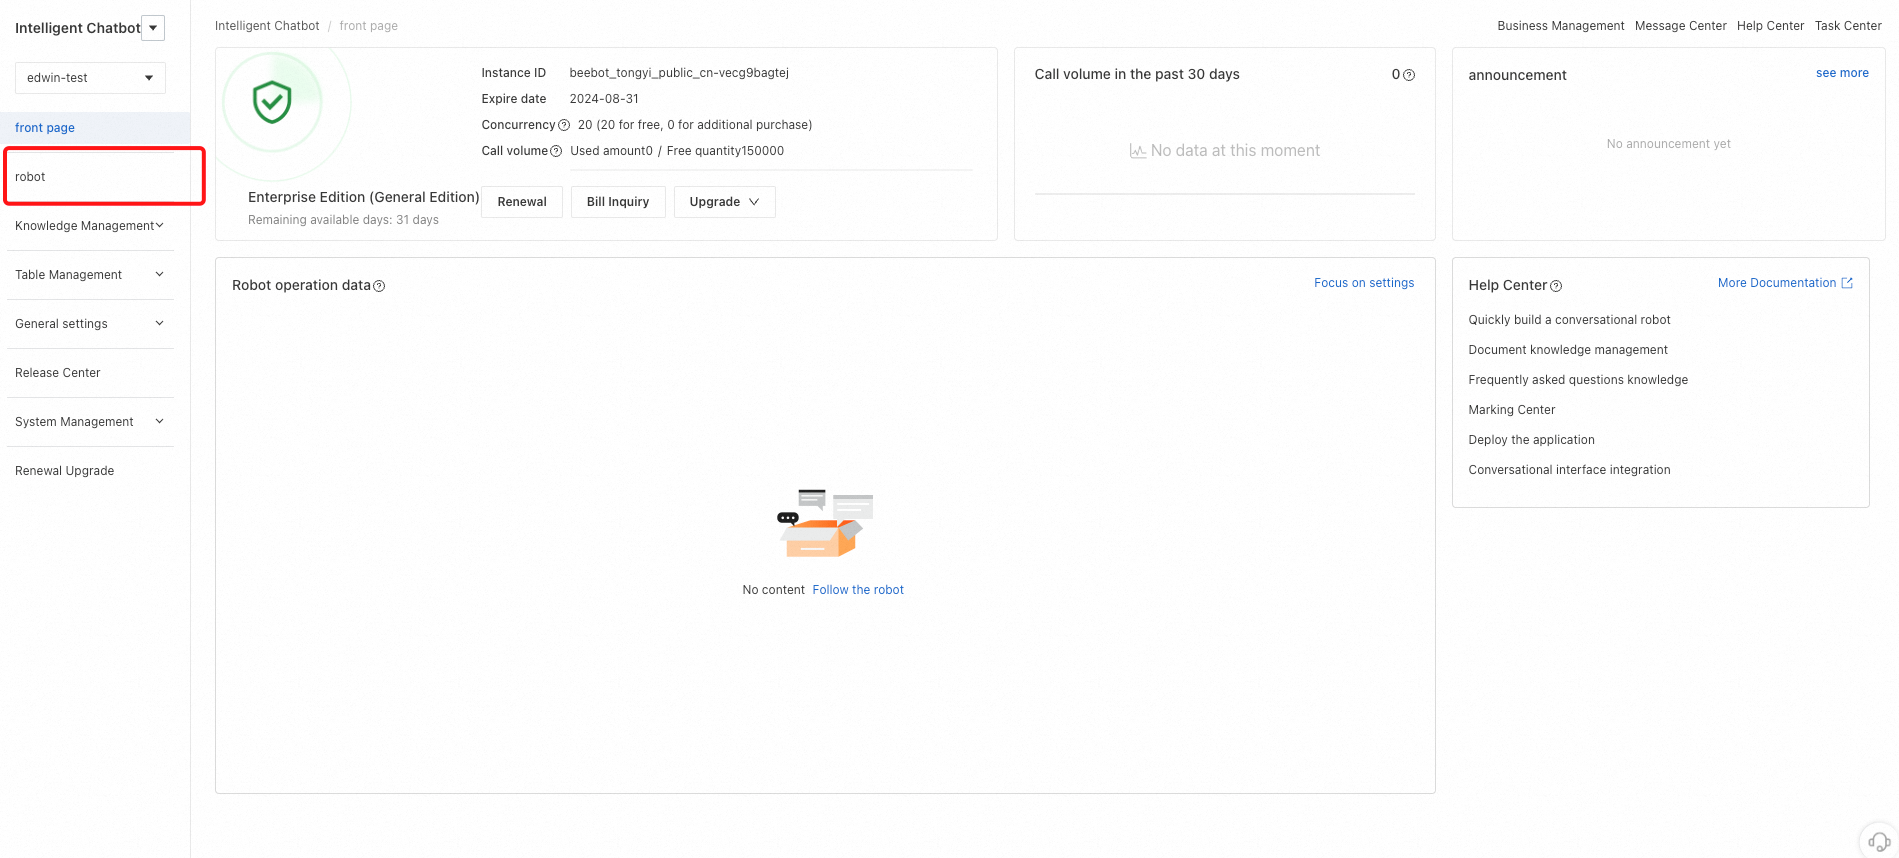
Step 5: On the homepage, click robot in the left-side navigation pane.
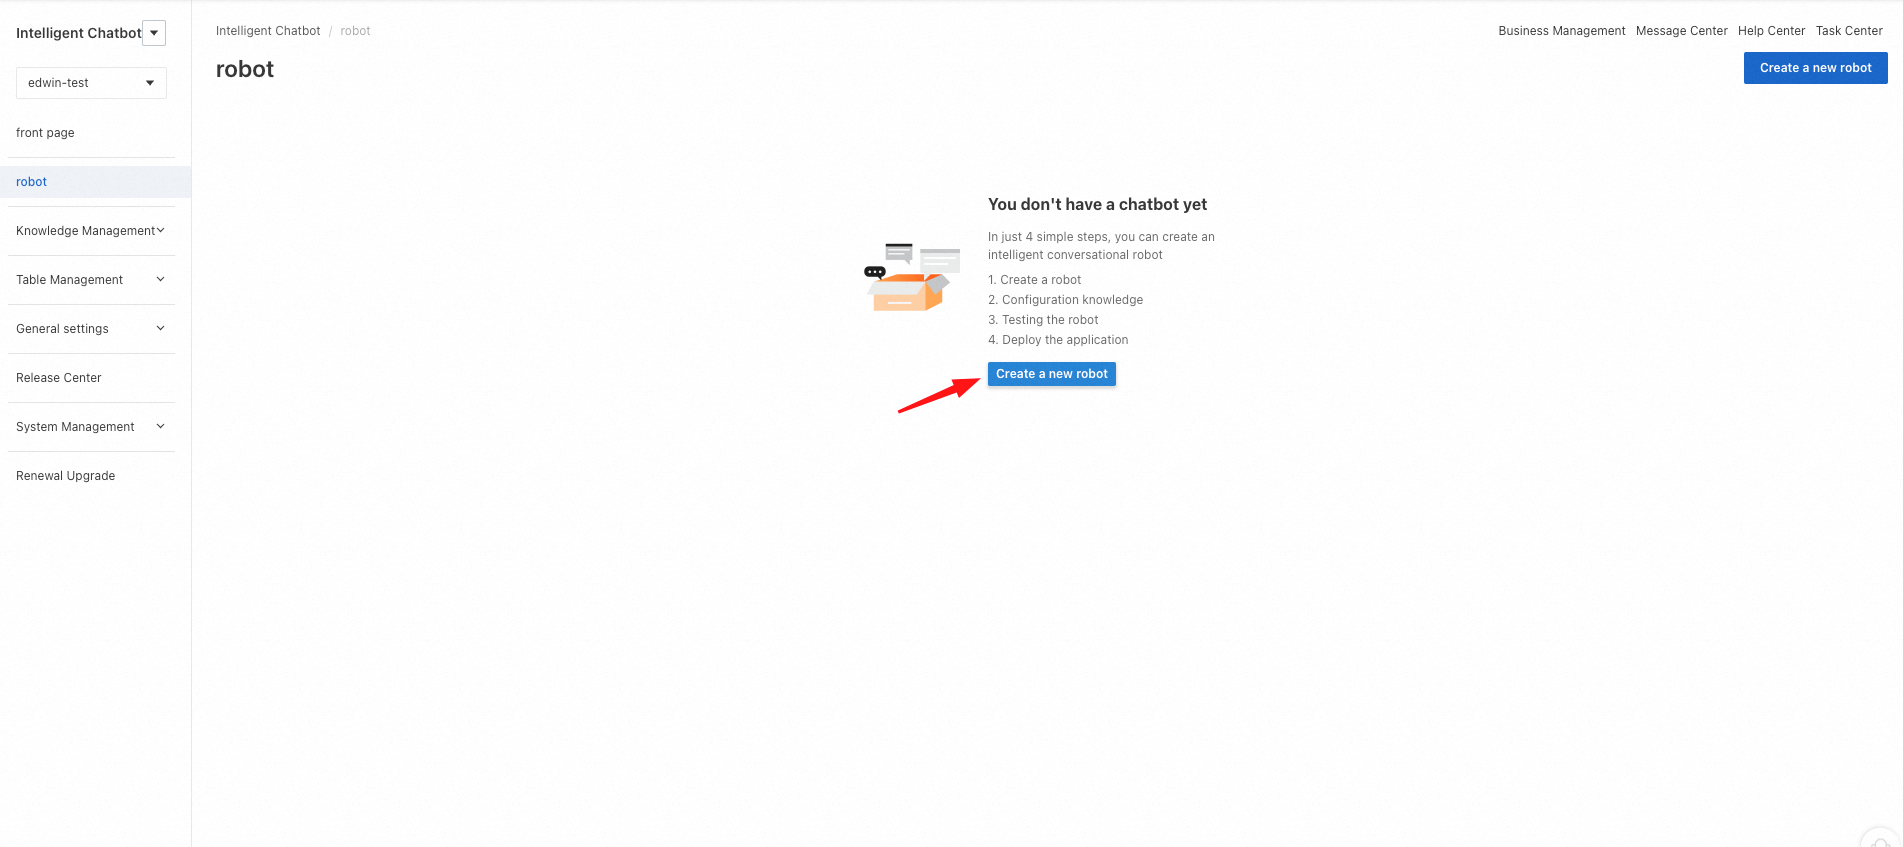
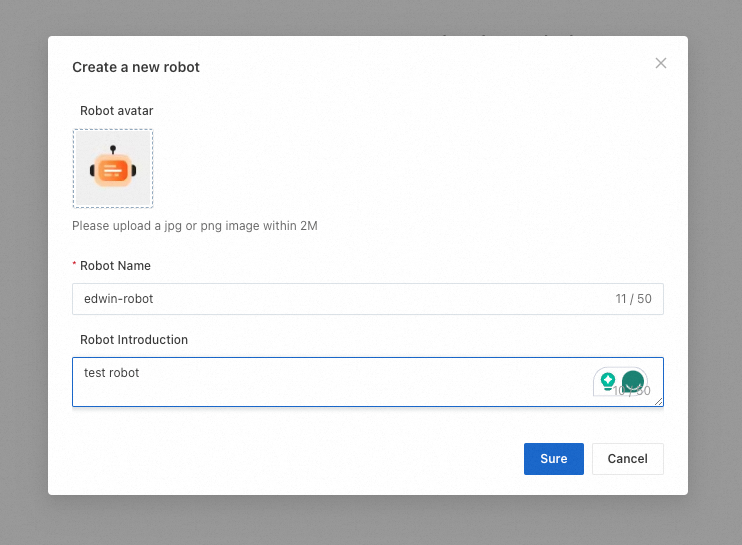
Step 6: Create a new robot. (It may take some time for the chatbot to become active after the configuration.)
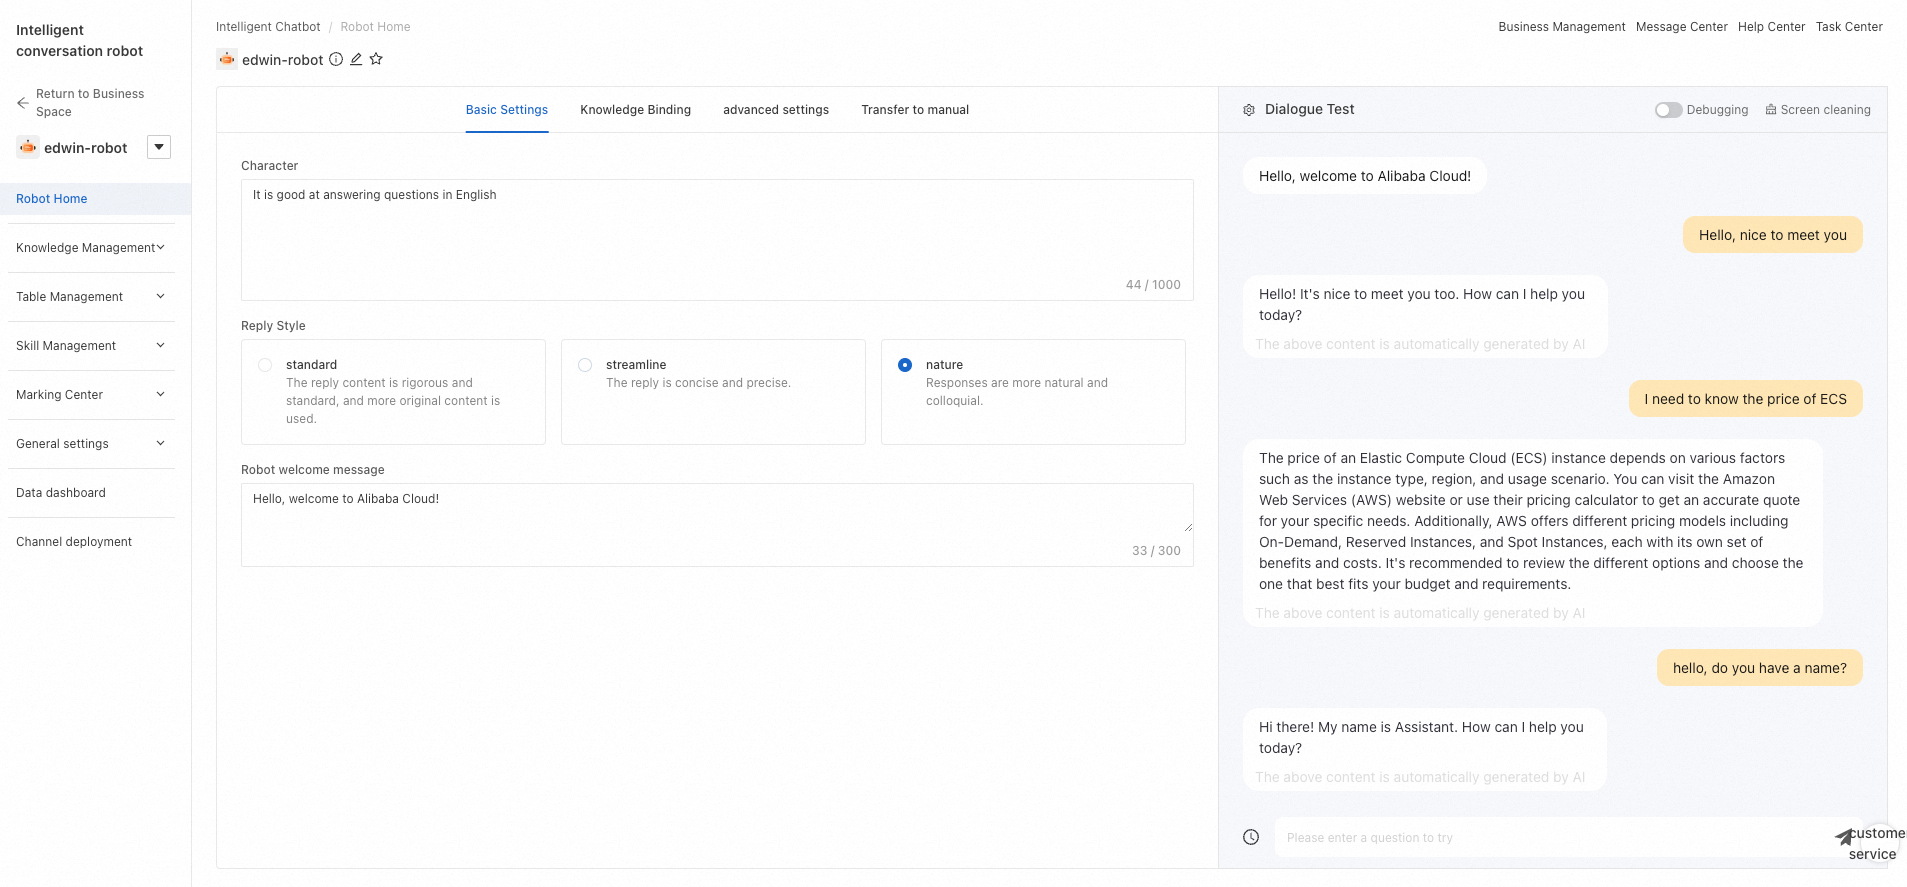
Step 7: In the created robot, select options such as documents, Q&A, greetings, and options.
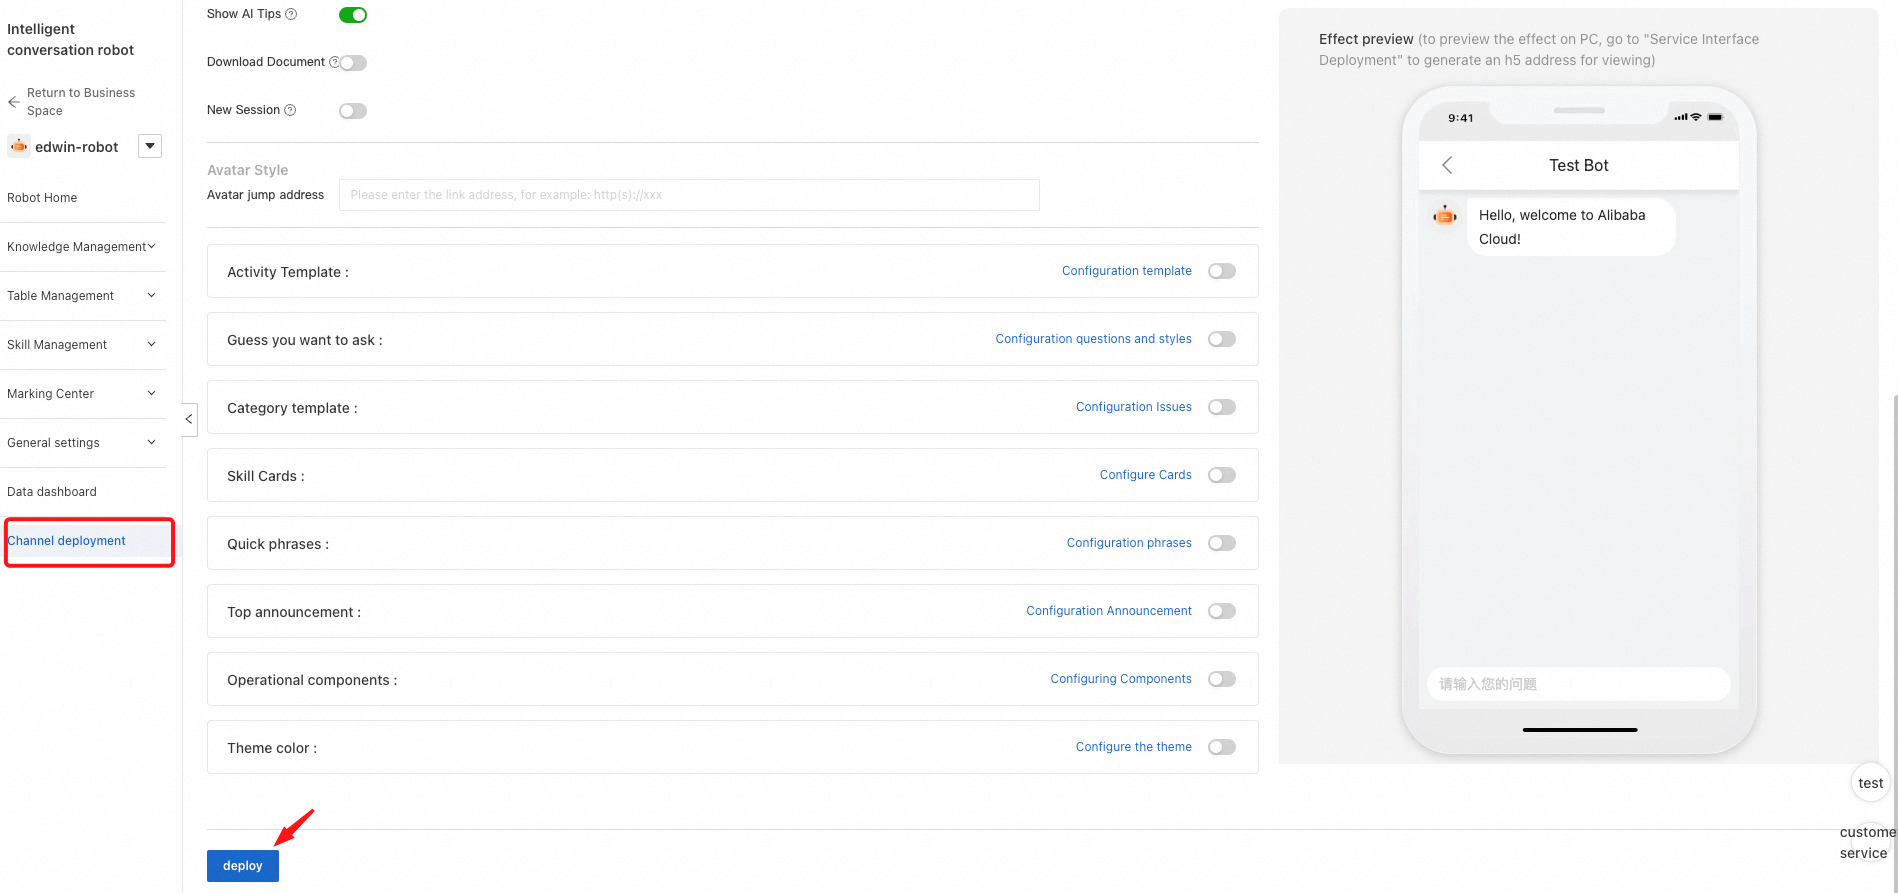
Step 8: Complete the final settings in Channel deployment and deploy the configured chatbot by clicking deploy. In this example, "the AI chatbot has been deployed" means that your settings have been applied to the AI chatbot. To use the AI chatbot on your website, additional steps are required.
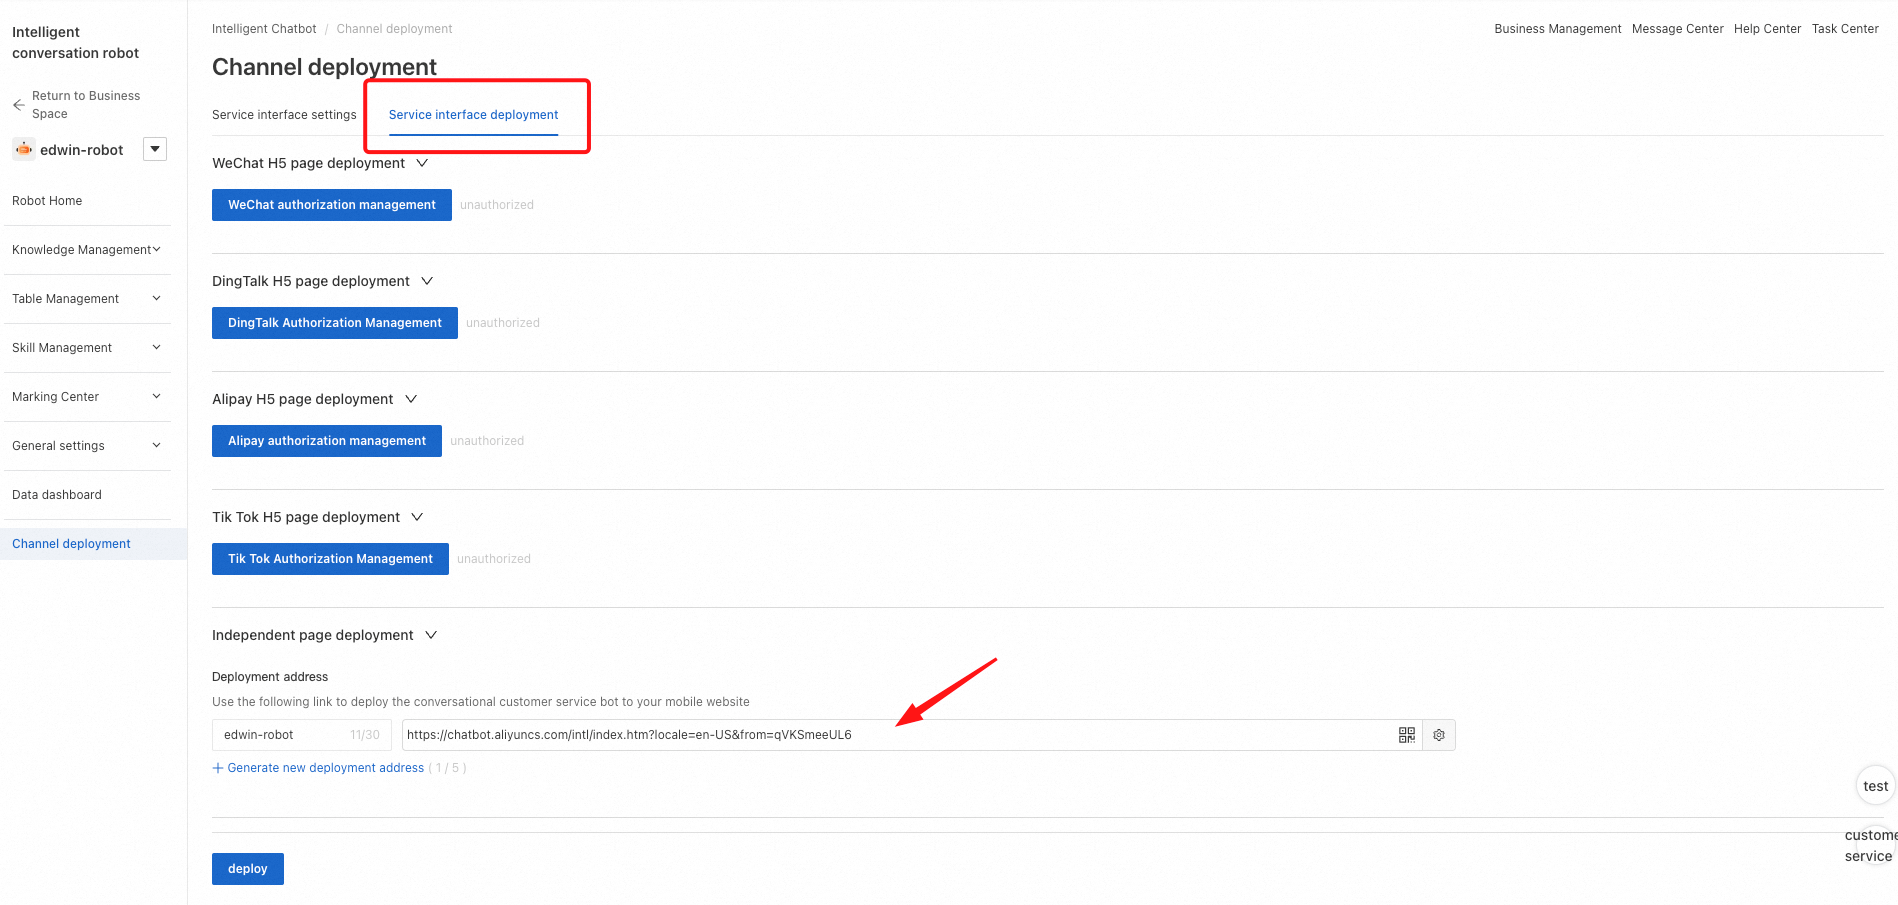
Step 9: If you want to use the chatbot URL, copy the URL indicated by the arrow.
Now, let's look at how to apply the AI chatbot to a custom webpage.
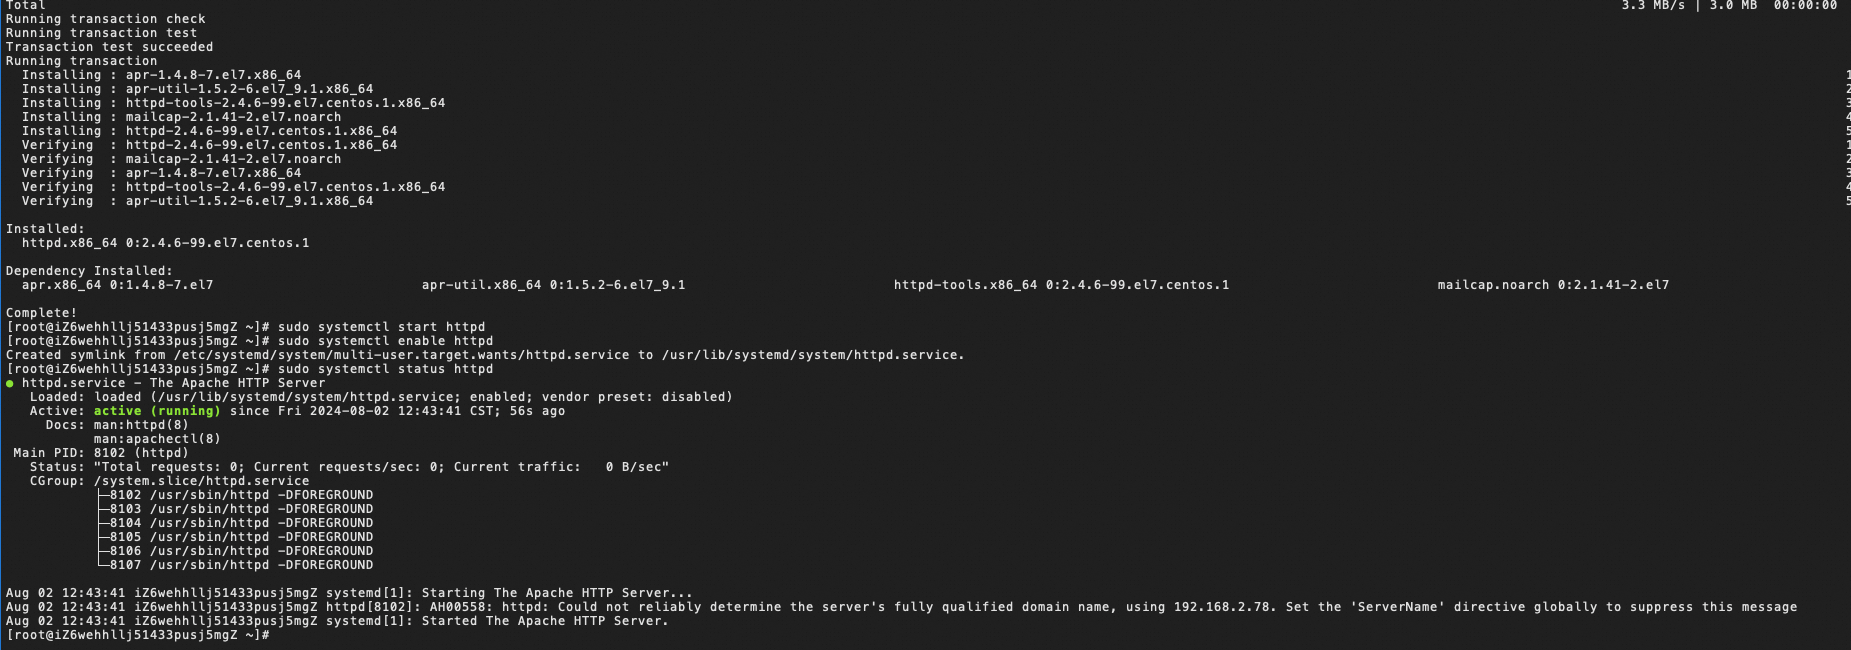
Step 1: Personal test page (for a client, go to the client's page)
● Go to 'cd /var/www/html'
● Enter the 'index.html' file by using 'sudo vi index.html' and edit the 'index.html' file
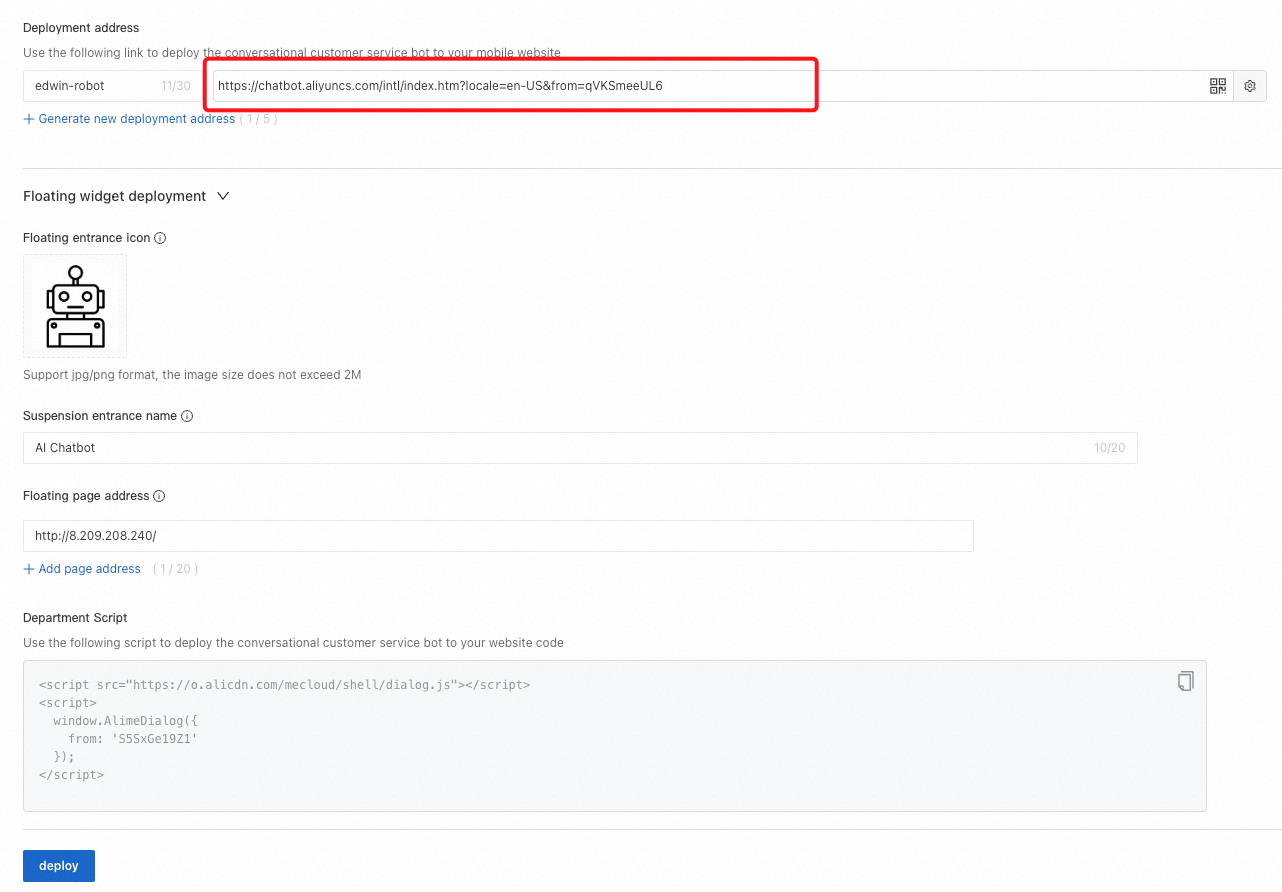
Step 2: To use the AI chatbot URL directly, copy and use the provided URL.
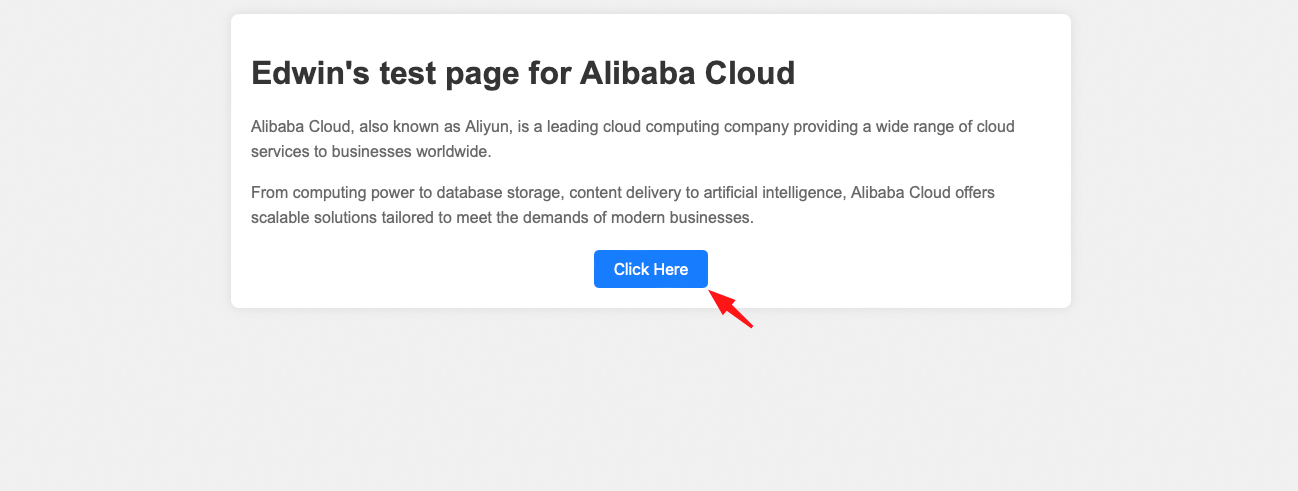
Step 3: After you click Click Here, you will be directed to the configured AI chatbot.
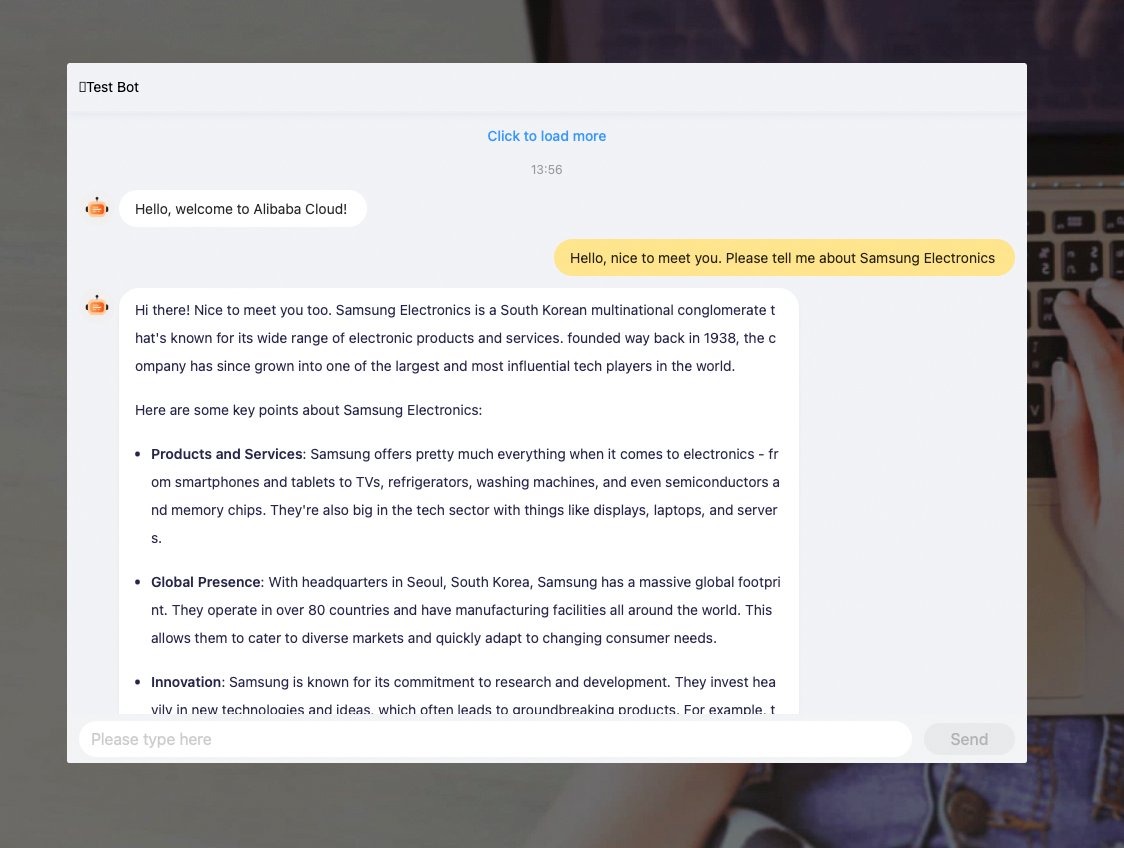
If you want to see the chatbot widget directly on your website, you need to set up the widget at the bottom.
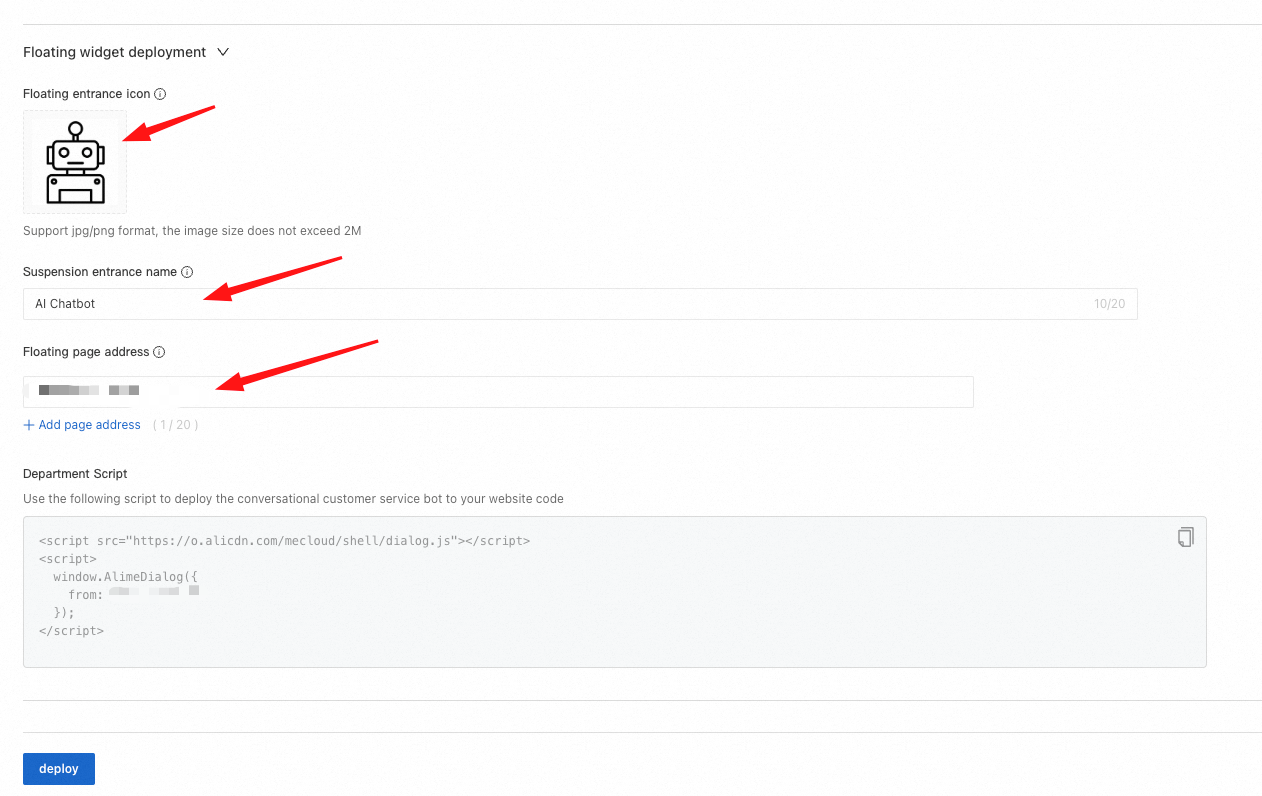
Step 1: Customize the AI chatbot widget icon and name, and enter the site address where the chatbot widget will be used.
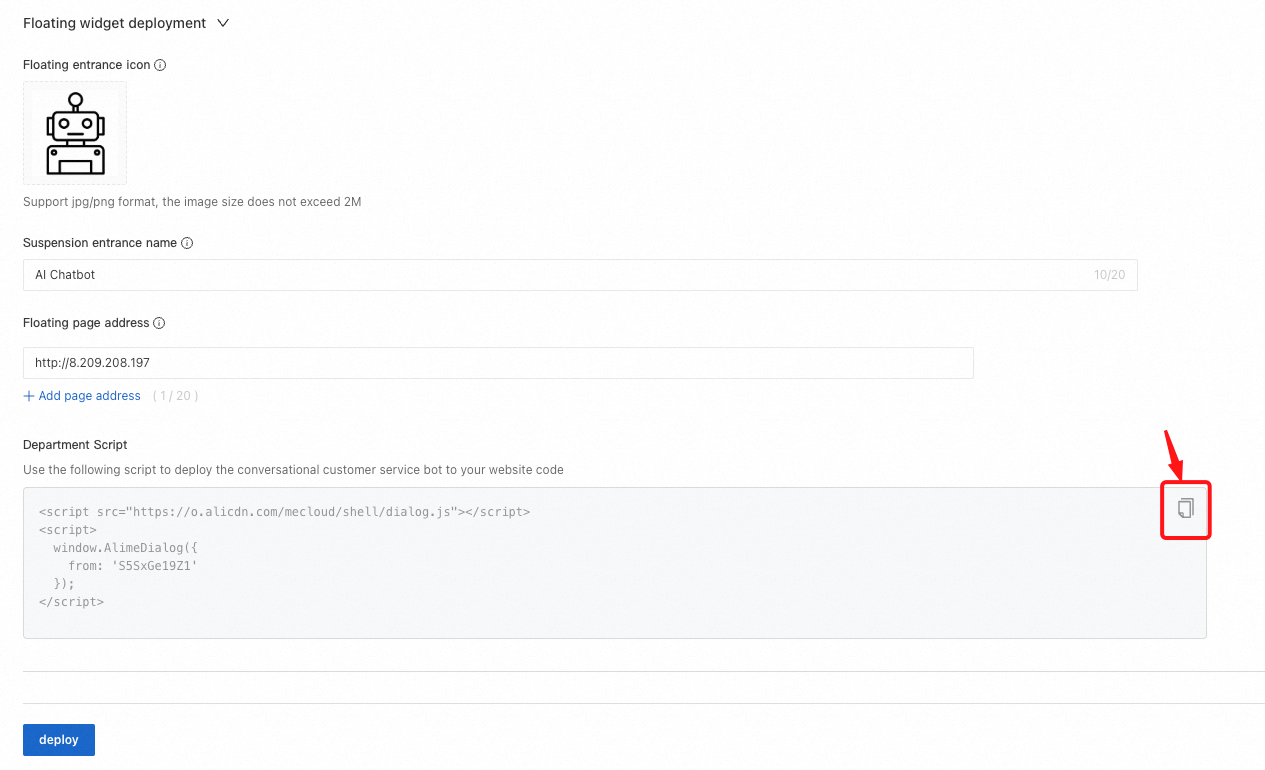
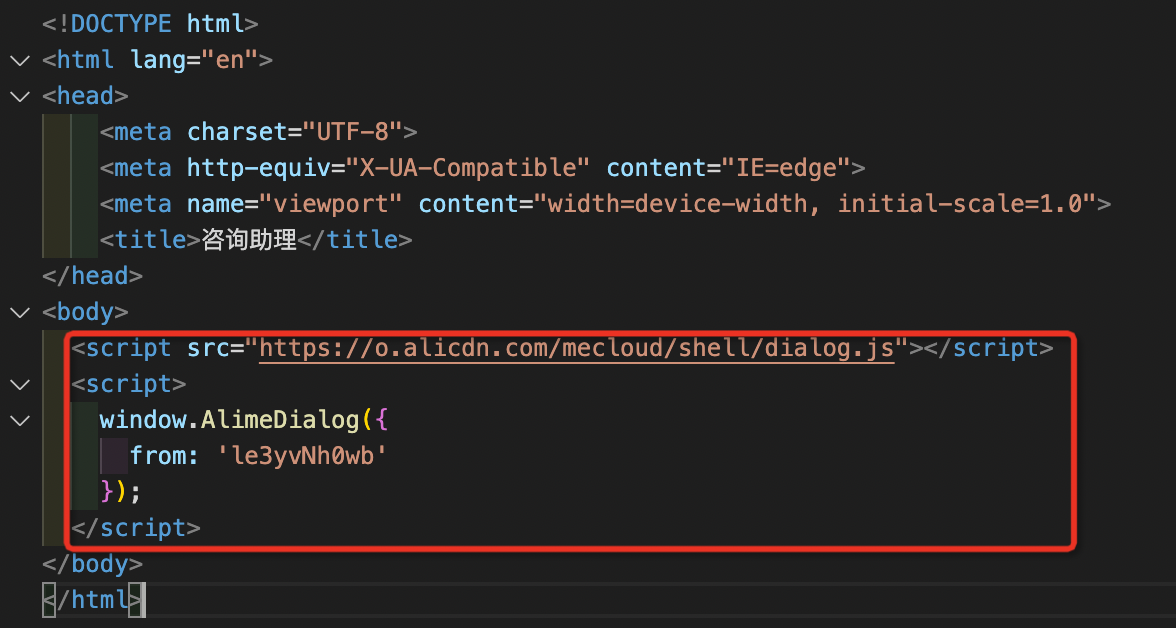
Step 2: Copy the script and paste it into the script of your website.
Step 3: You will also need to enter the token value. This example shows how to obtain it.
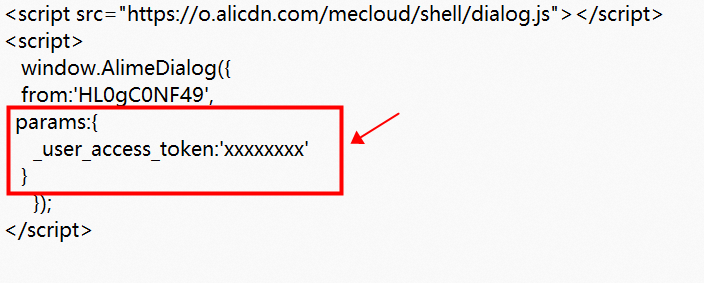
xxxxxx) Add the token value
Token creation link: Reference document link
OpenAPI link: OpenAPI token creation link
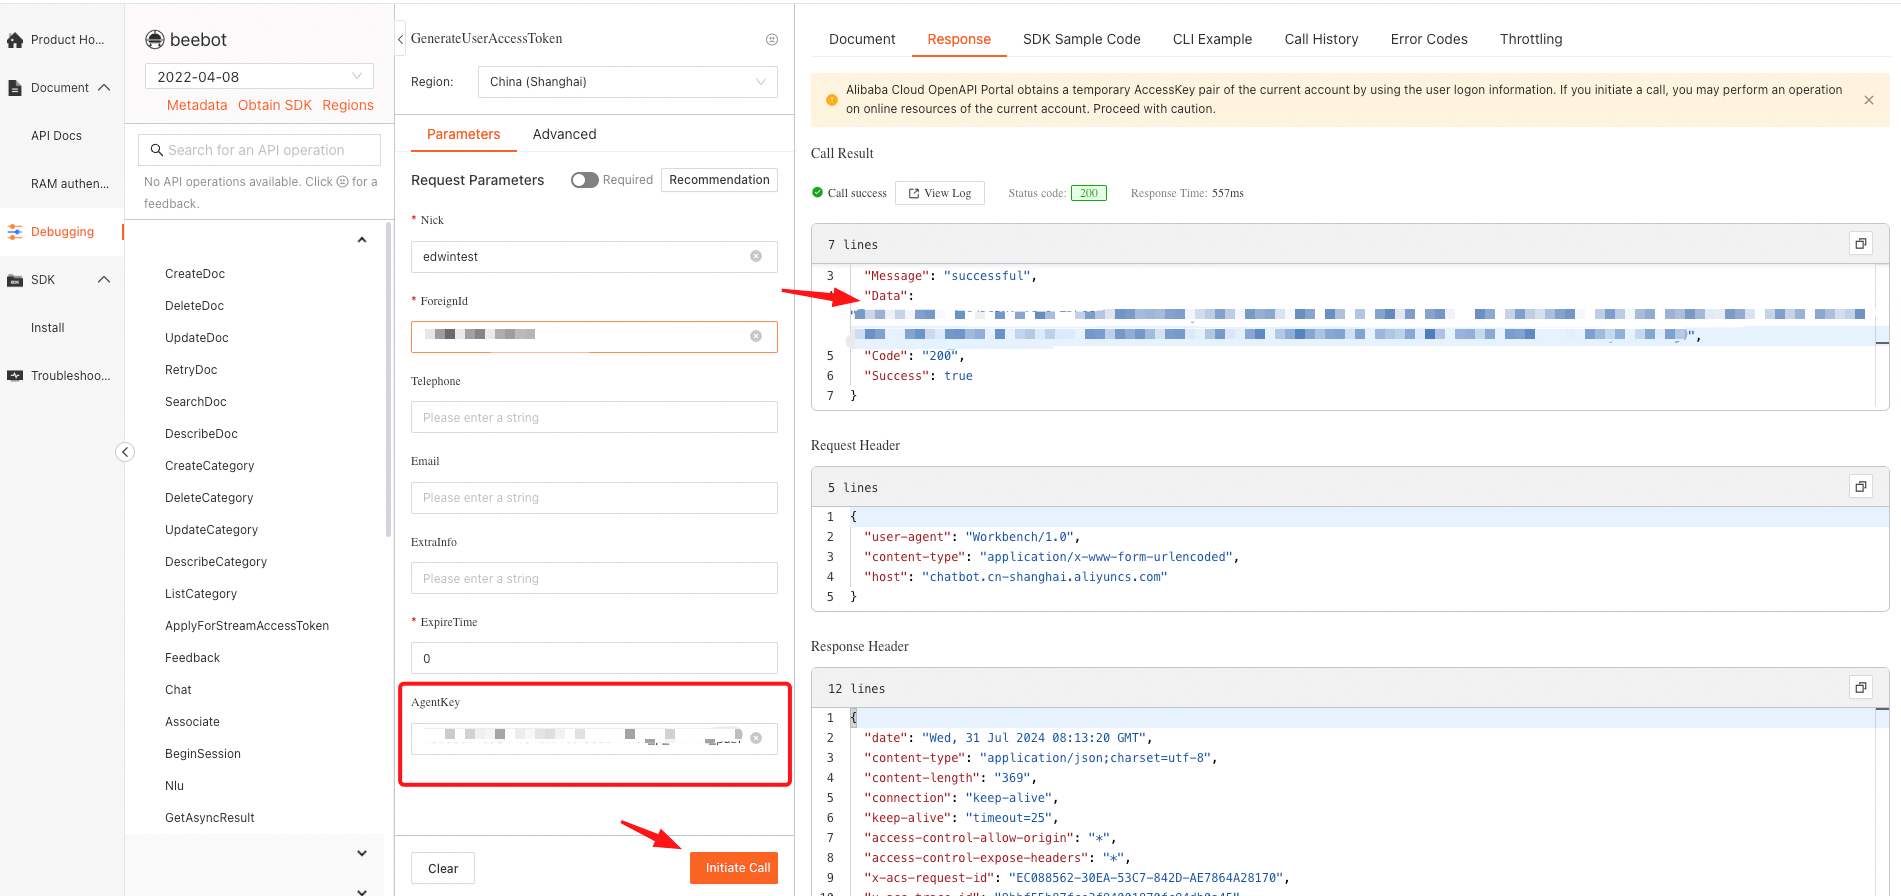
Step 1: Access OpenAPI Explorer and enter Name, Foreignid, and expire time (set to 0) in order. Enter the Agent Key. If the values are entered correctly, click Initiate Call to generate the Agent Key. If the call is successful, a ‘Success’ message will appear on the right, and you can find the Agent Key in the Data value.
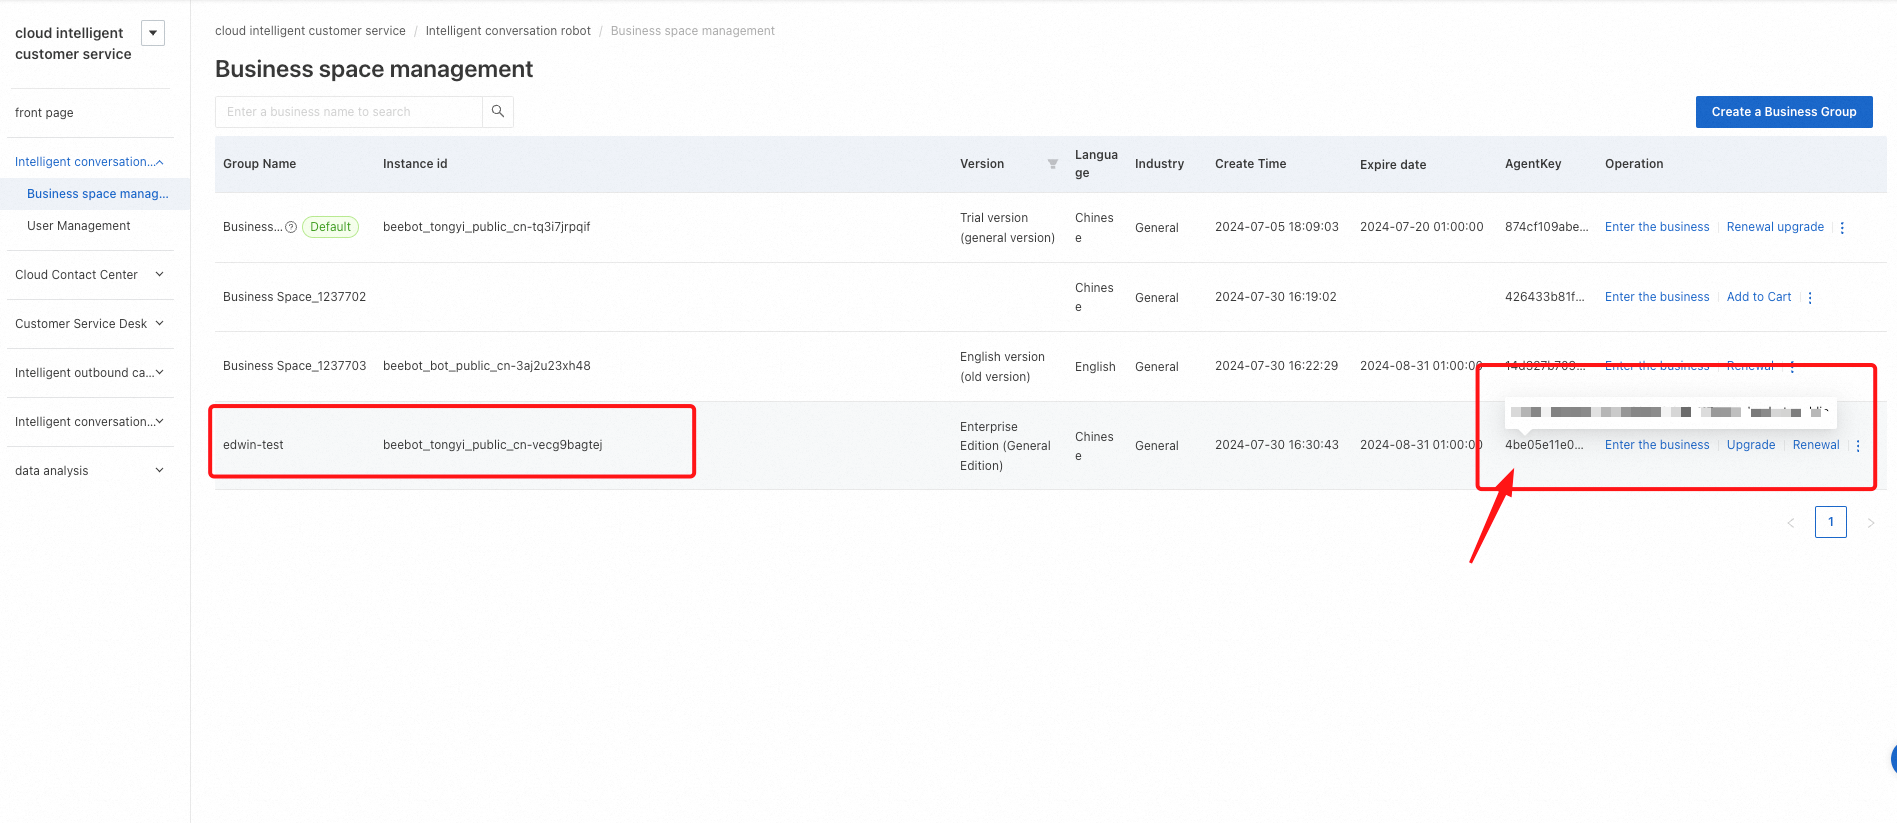
Step 2: For reference, the Agent Key can be found in the AgentKey column of the business space created during the initial setup of the AI chatbot. Hover over the Agent Key to view the entire value. Copy the Key value and paste it into the AgentKey field in OpenAPI Explorer to make the API call.

Step 3: Insert the token value into the HTML body and save it.
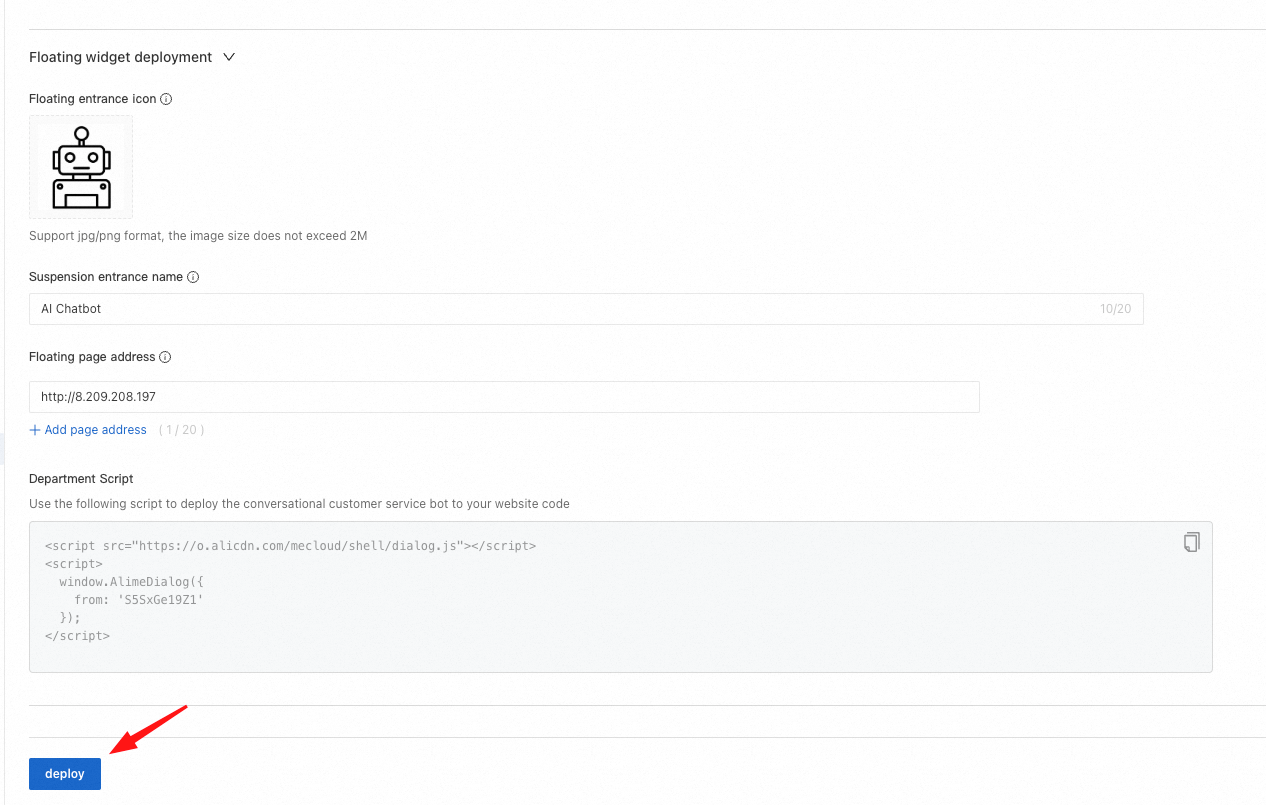
Step 4: Finally, go back to the AI Chatbot console and click deploy to apply the configured settings and deploy the chatbot. If there are new tasks done or changes made, click deploy to apply them.
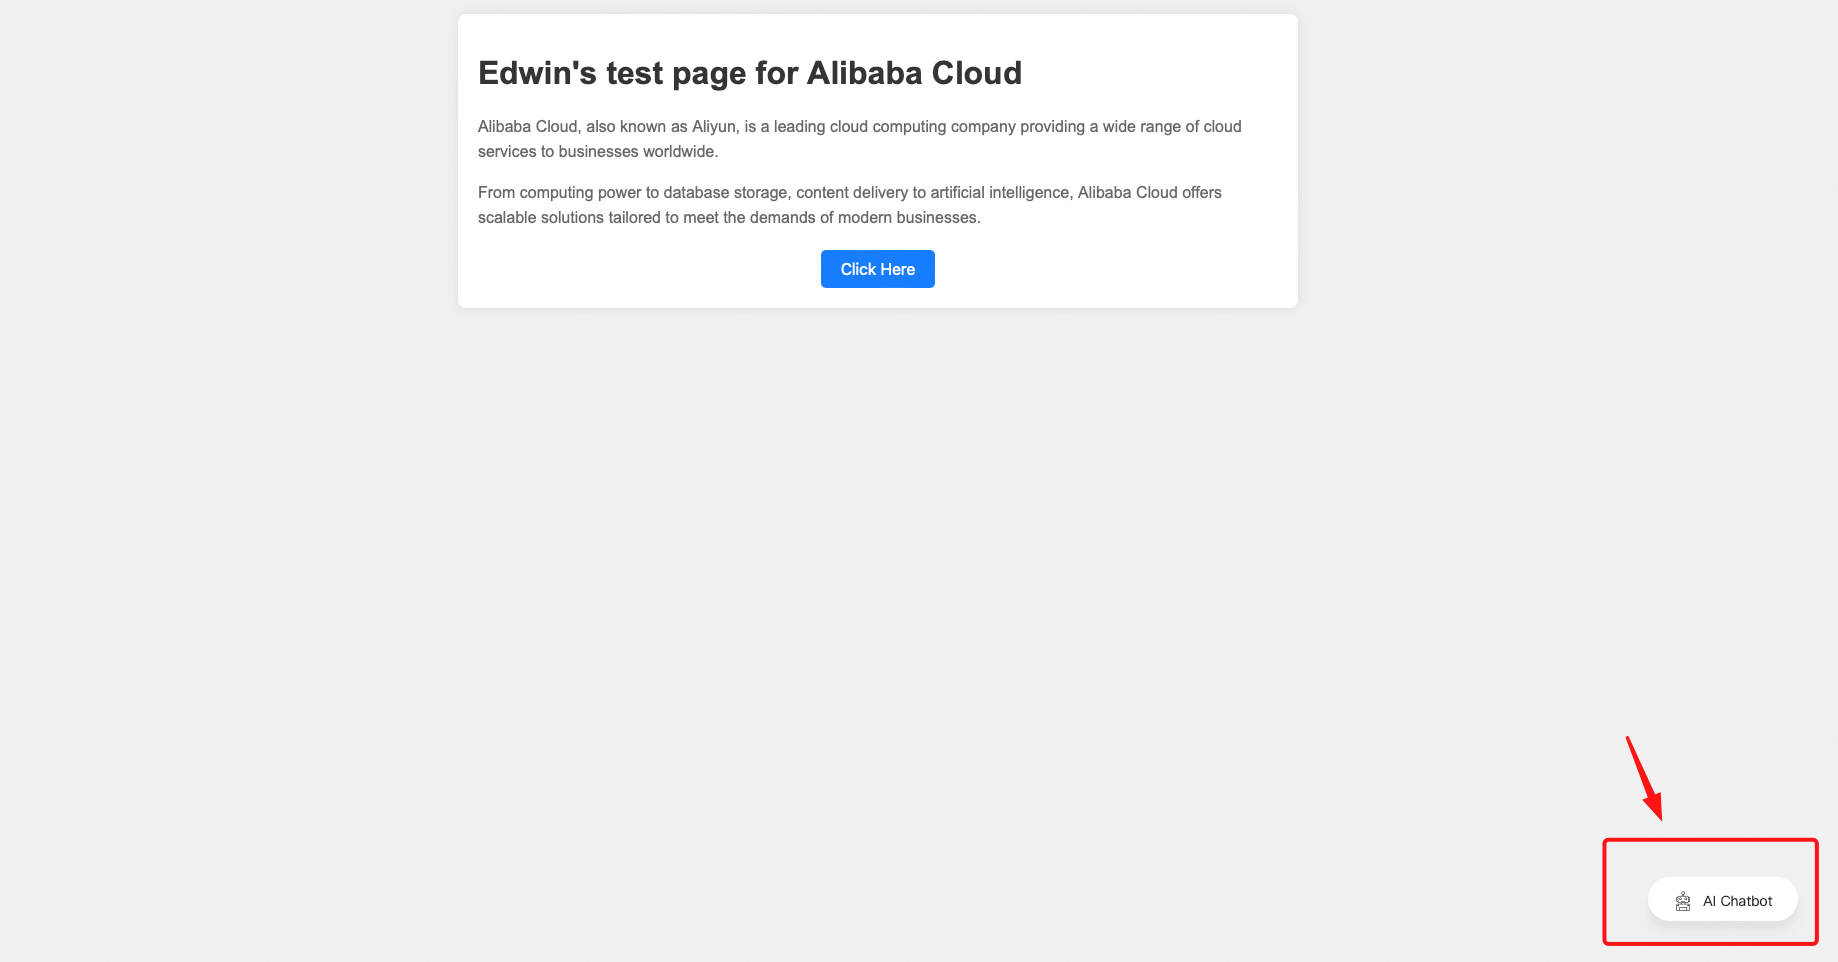
Step 5: Then, refresh the page. You can see the AI chatbot widget added to the bottom right.
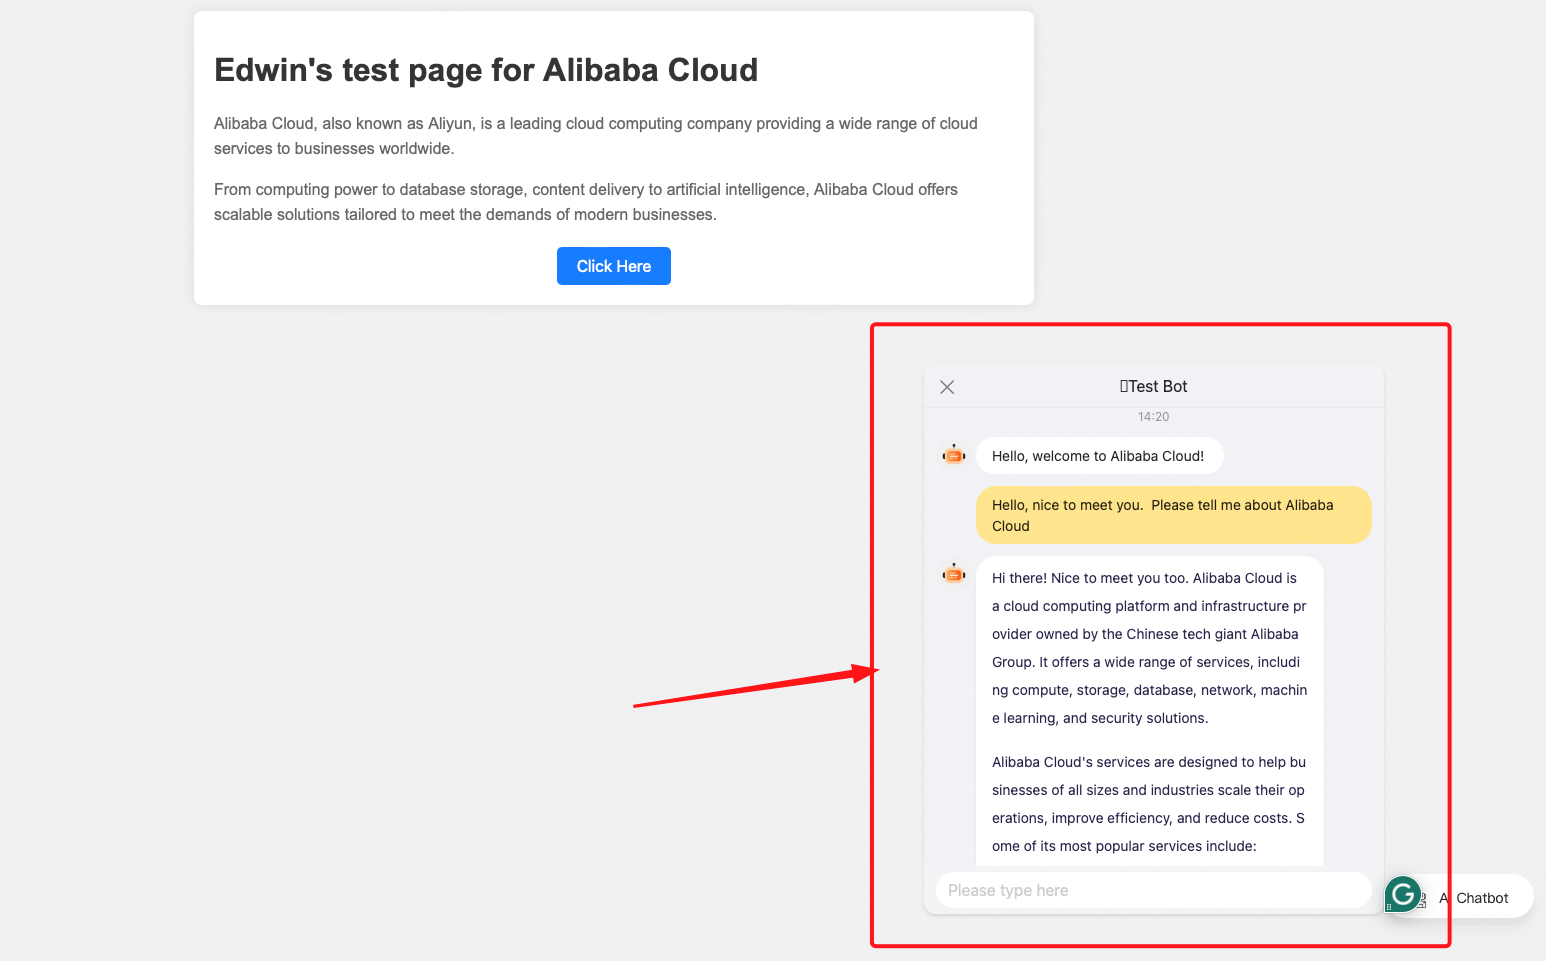
Step 6: Click on the chatbot widget to open the configured AI chatbot chatroom, where you can start asking questions.
If you want to use English, specify the locale parameter in params.
params: {
_user_access_token: 'xxxxx',
locale: 'en-US'
}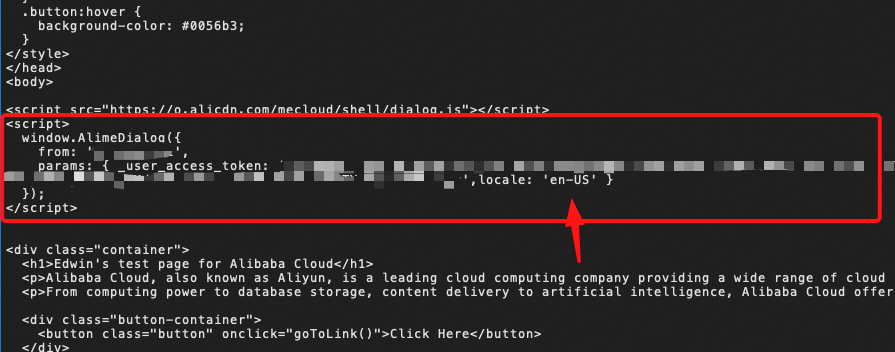
Apply the value of the locale parameter.
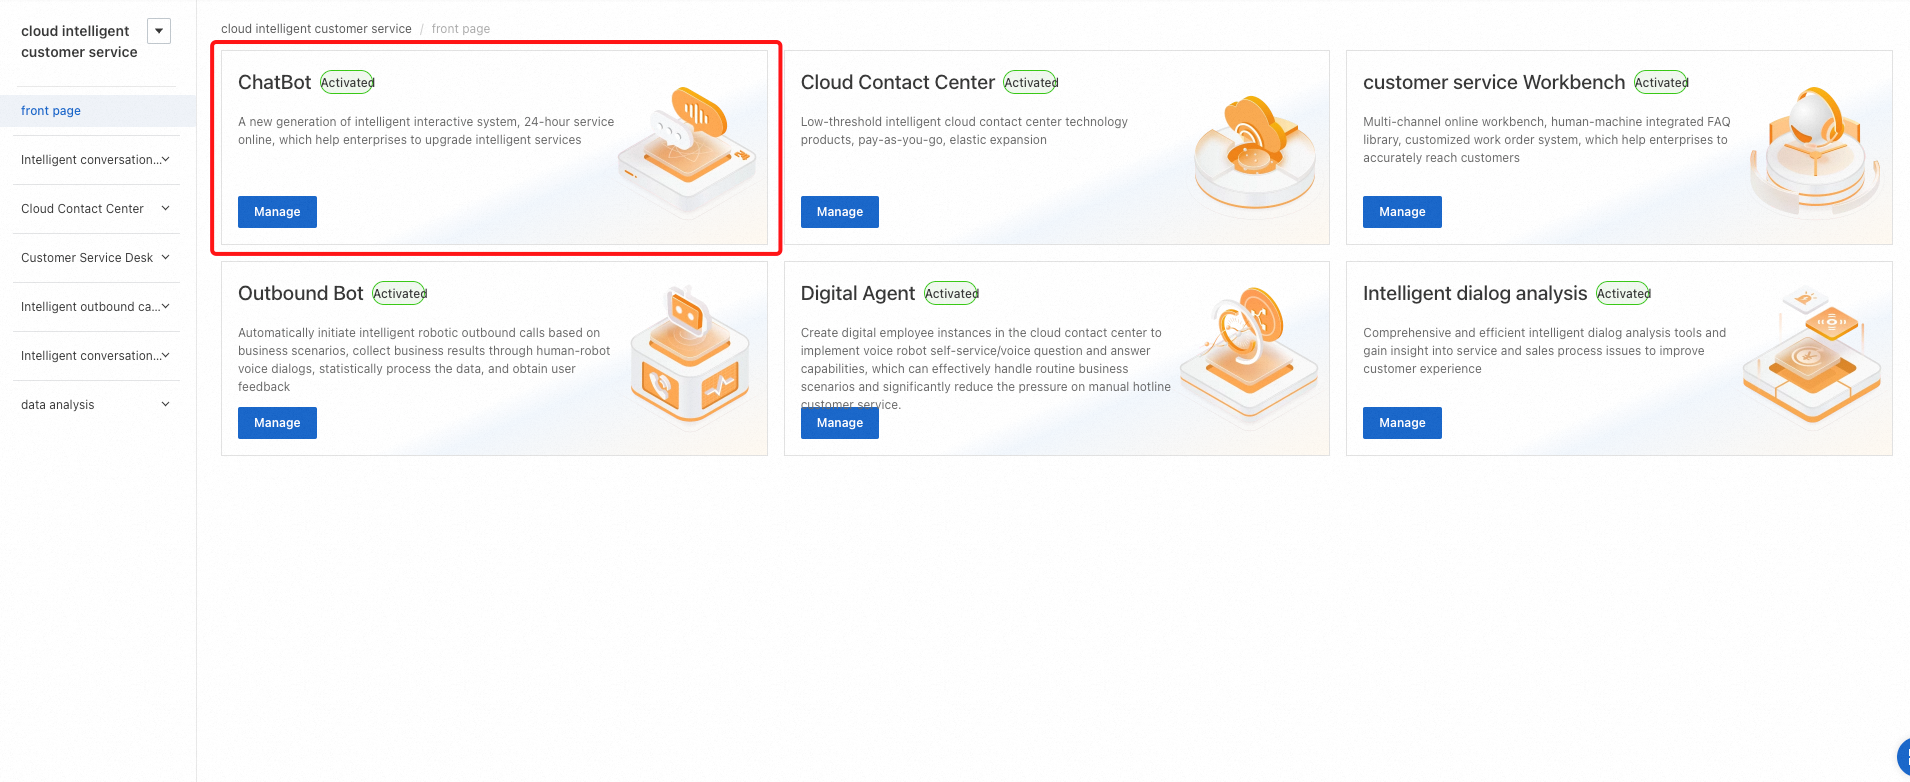
Step 1: In the Cloud Customer Center, select ChatBot to access the AI chatbot service and adjust settings.
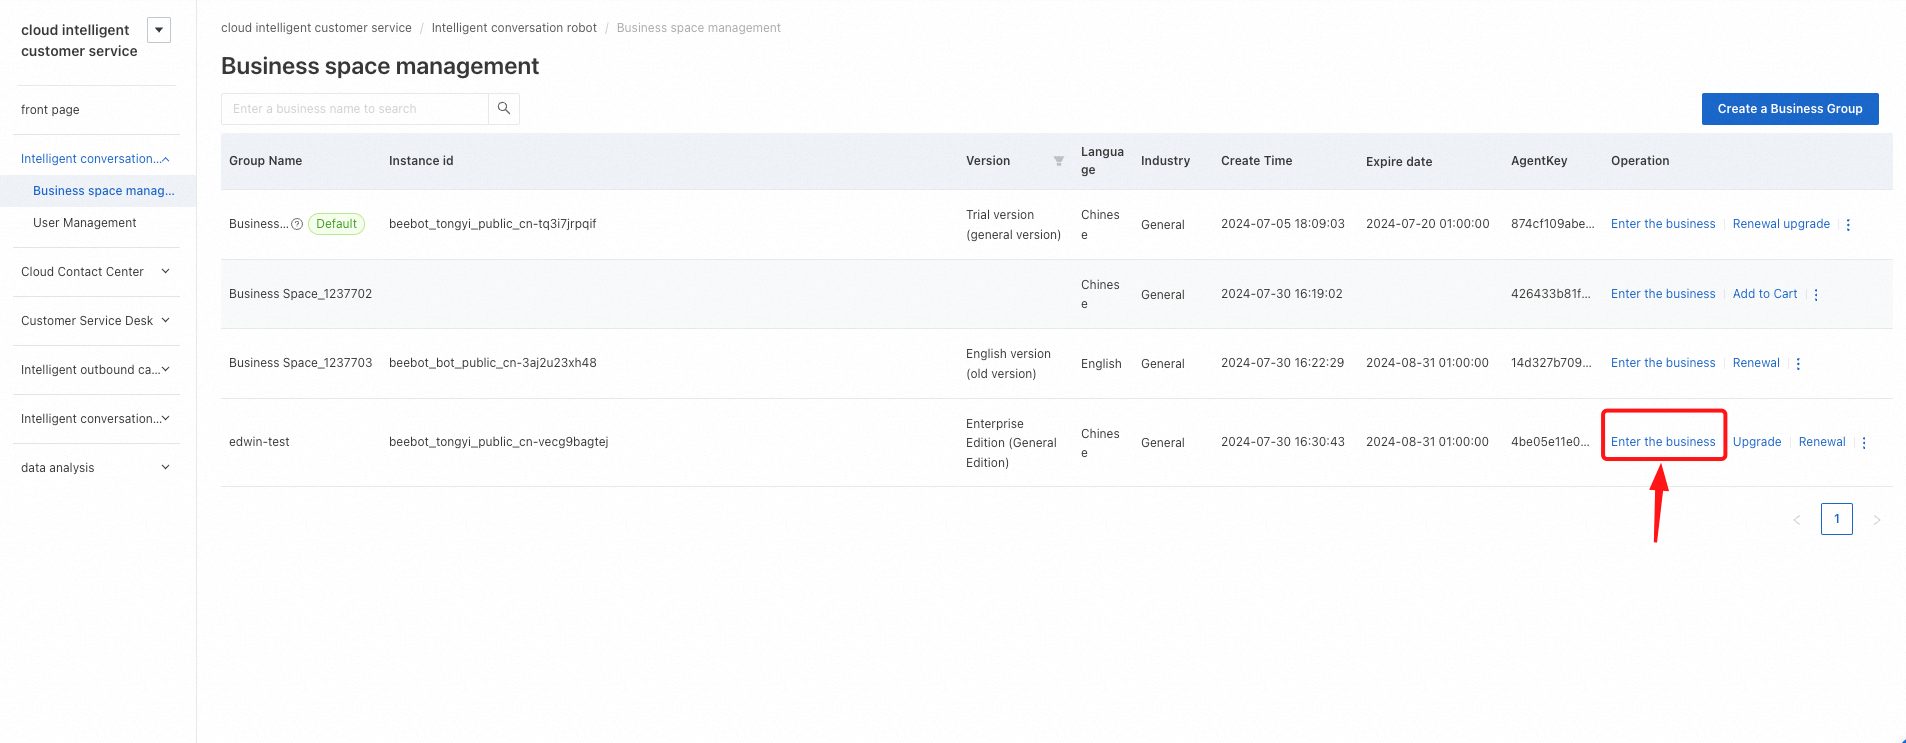
Step 2: In the Operation column of the business space that you want to use, click Enter the business to access the AI chatbot that you are using.
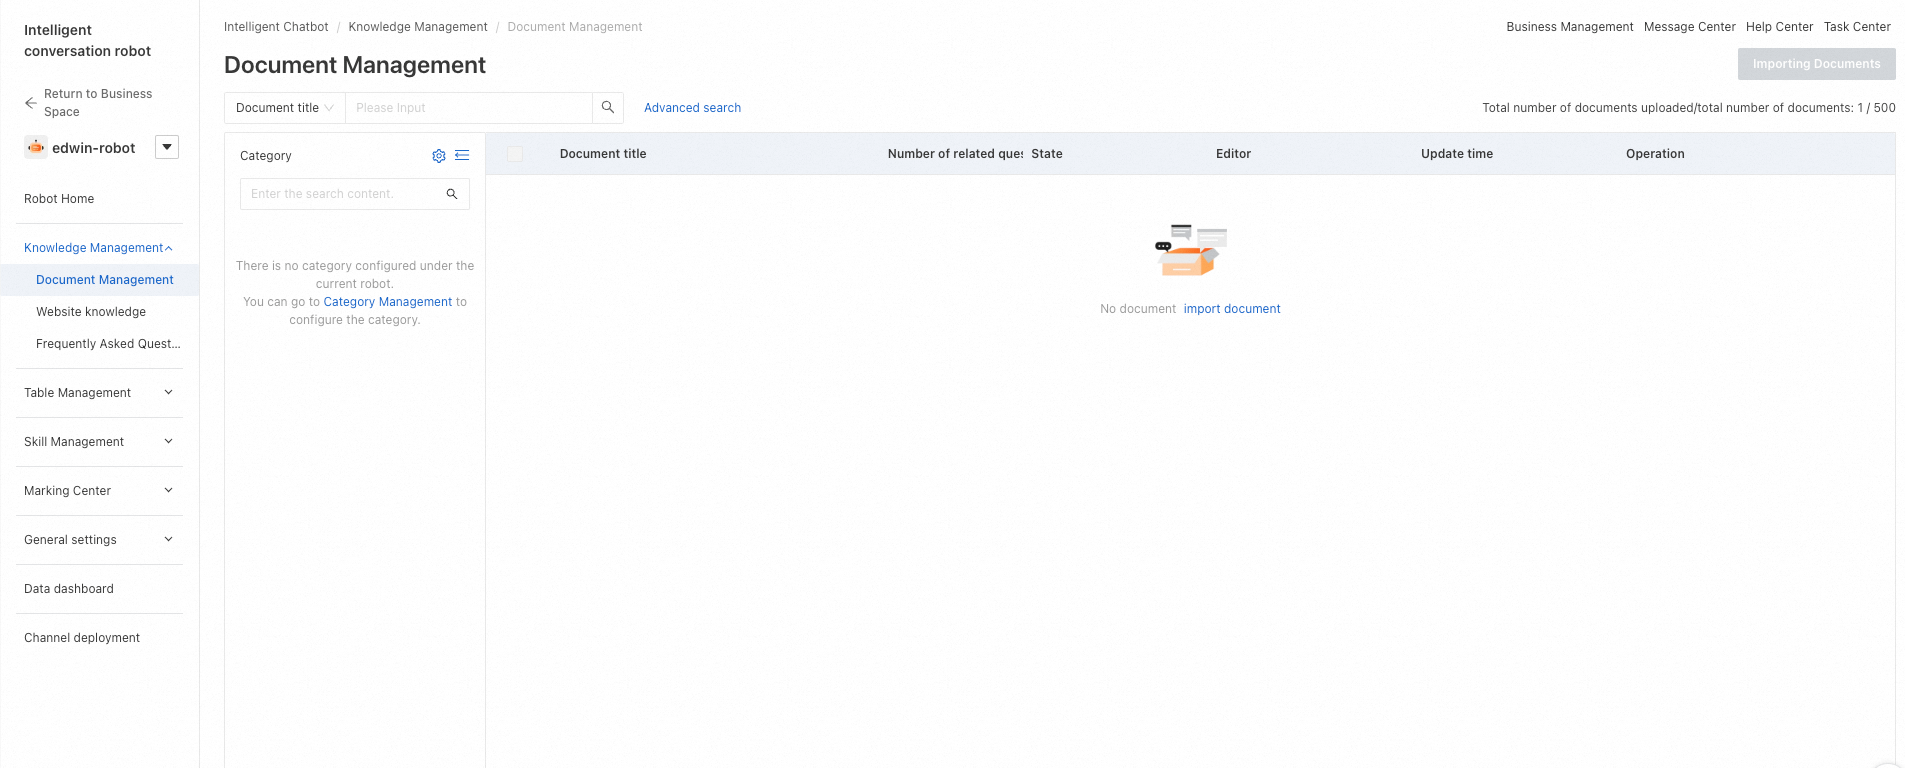
Step 3: If training is required, go to the Document Management page. Here, you can upload documents for the AI chatbot to learn from, enabling it to provide appropriate responses. The number of documents you can upload depends on the AI chatbot model that you have purchased.
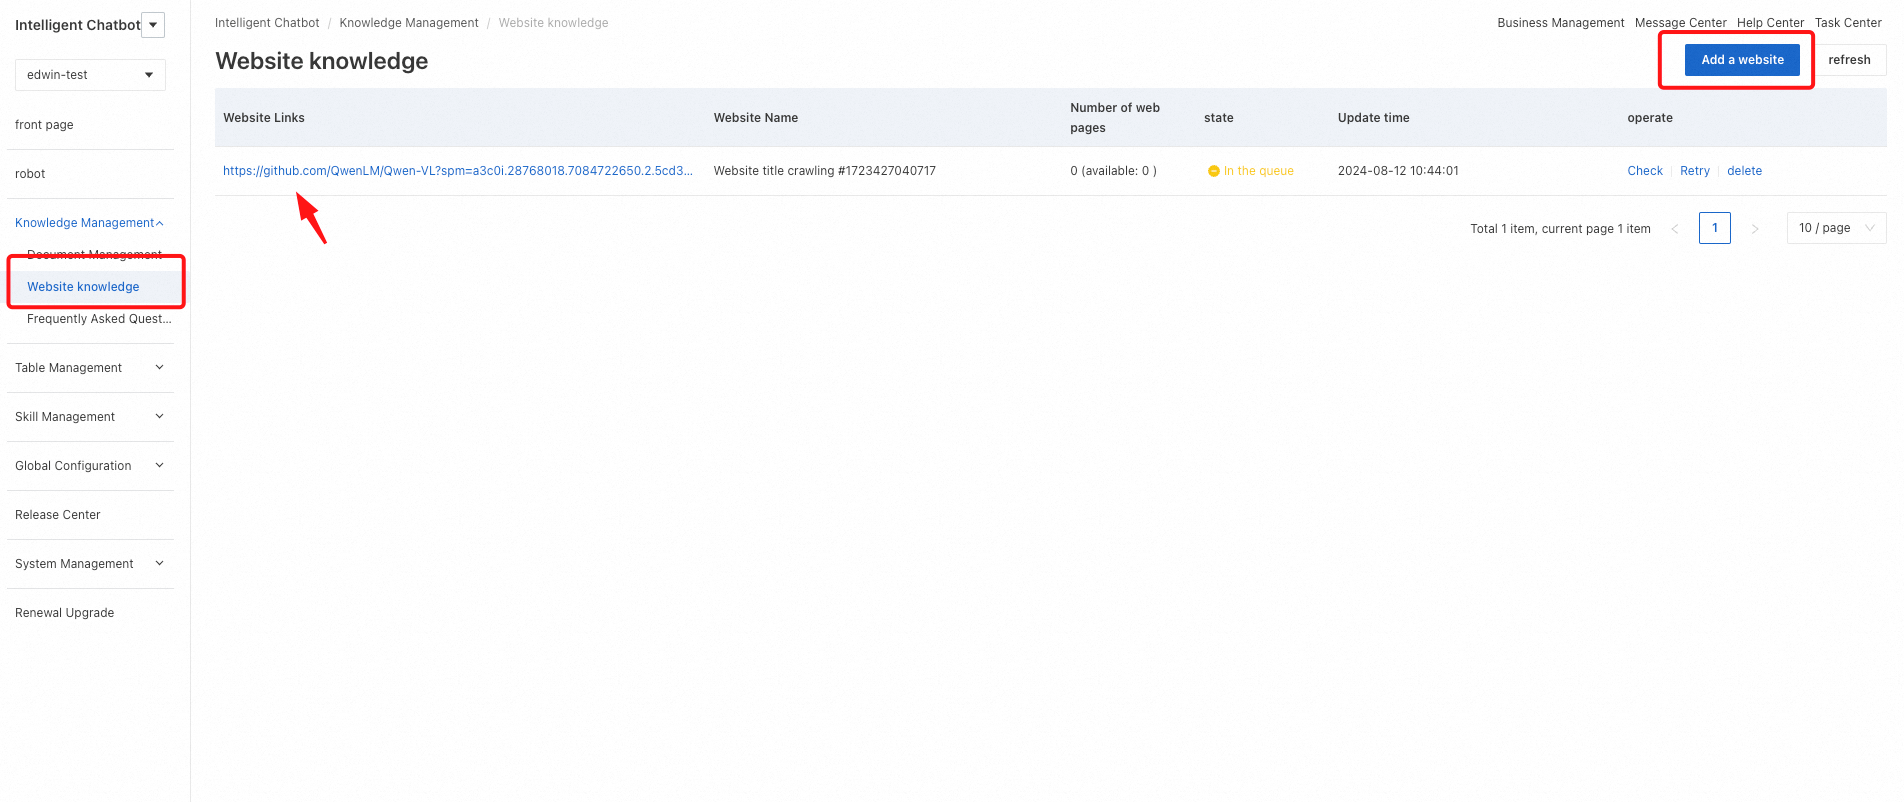
Step 4: If web crawling is required, add the URL you want to crawl on the Website knowledge page. The number of web crawling items you can apply also varies based on your chatbot model.
Don't forget to deploy the AI chatbot again after completing any changes or training.
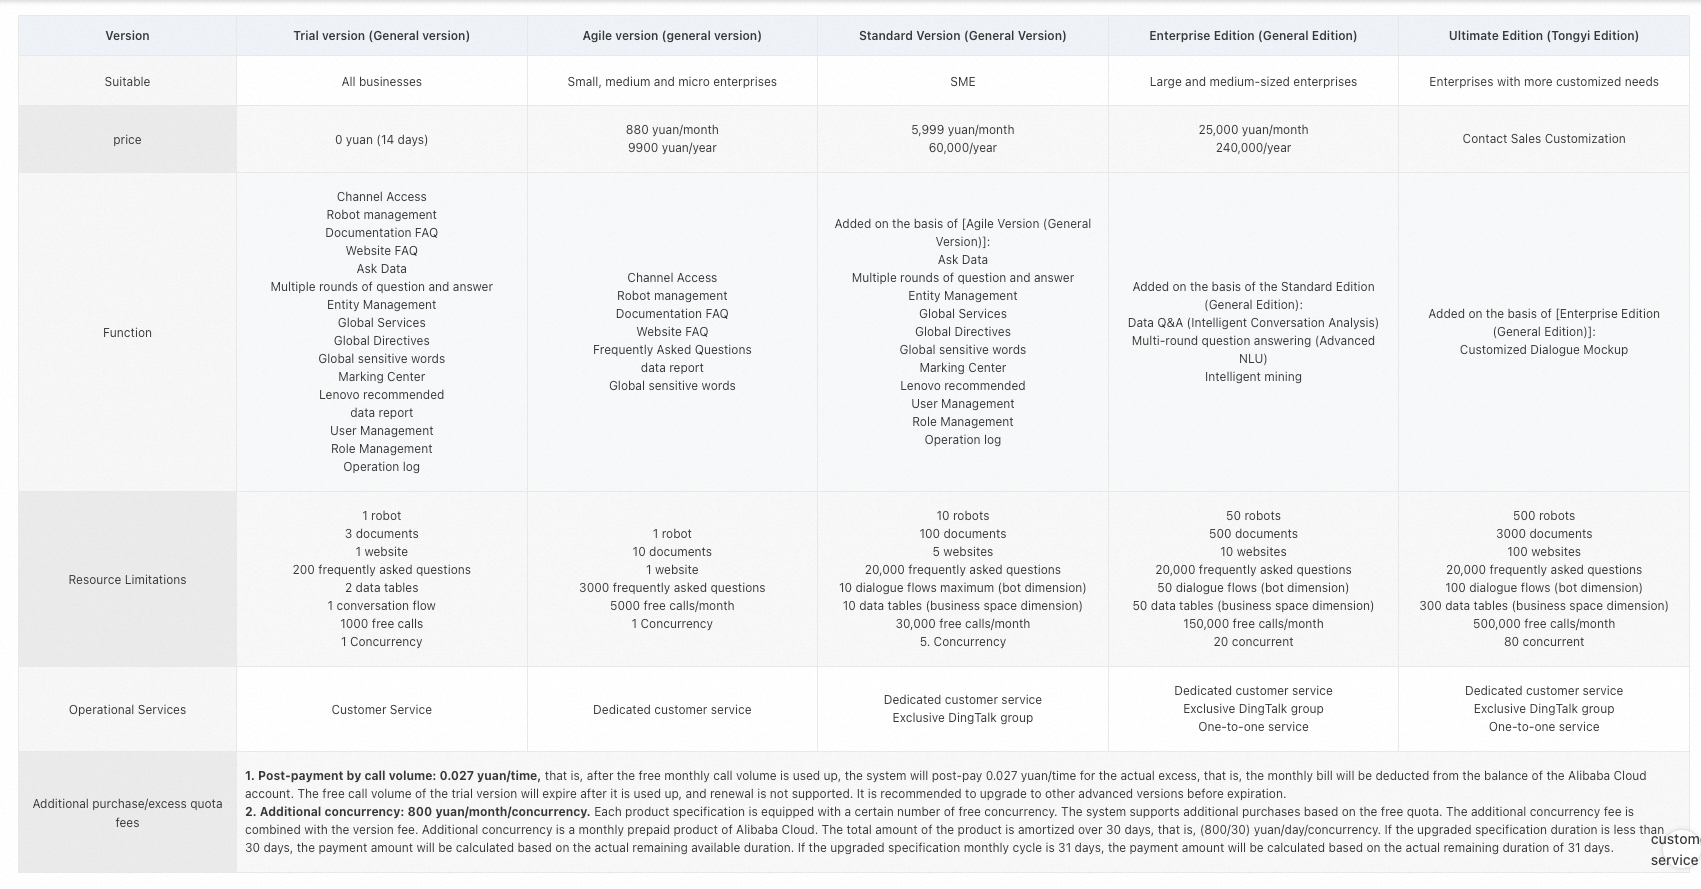
The following figure provides the chatbot usage pricing.
Billing Link: https://help.aliyun.com/zh/beebot/intelligent-dialogue-robot-tongyi-version/product-overview/product-billing
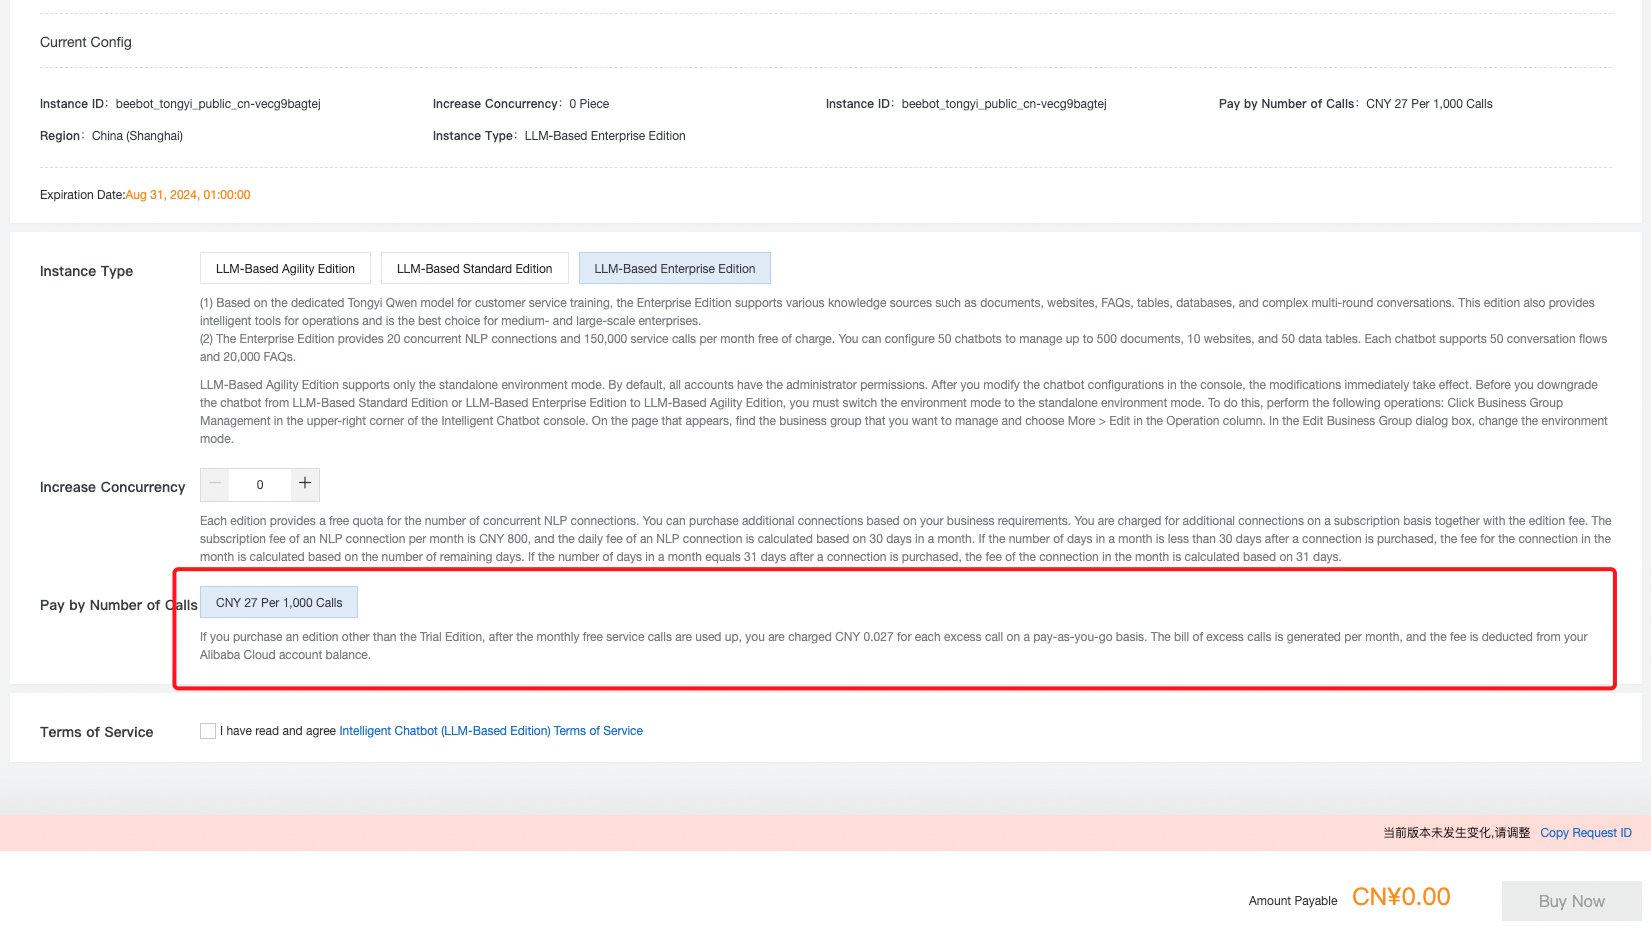
After all purchased calls have been consumed, a fee of CNY 27 per 1,000 calls will apply.
How to Customize AI Chatbot
=> Document learning, color change, and icon change.
How to Configure Chatbot Widget
=> How to apply the AI Chatbot widget to a customer's website
Get Token
=> How to generate a token
OpenAPI
=> How to extract data from OpenAPI Explorer
Thank you for reading. If you have other questions about the Intelligent Chatbot or other Alibaba Cloud services, contact us by sending emails to j.tack@alibaba-inc.com or abckr@list.alibaba-inc.com.
Thank you.
Edwin Ji-wan Tack
Technical Account Manager
Olympic Projects & Key Account Support

3 posts | 0 followers
FollowAlibaba Clouder - October 9, 2019
Alibaba Clouder - July 10, 2018
Alibaba Clouder - November 21, 2018
Clouders - January 12, 2022
Alibaba Clouder - March 11, 2021
Alex - July 9, 2020

3 posts | 0 followers
Follow Tongyi Qianwen (Qwen)
Top-performance foundation models from Alibaba Cloud
Learn More Conversational AI Service
This solution provides you with Artificial Intelligence services and allows you to build AI-powered, human-like, conversational, multilingual chatbots over omnichannel to quickly respond to your customers 24/7.
Learn More Alibaba Cloud for Generative AI
Accelerate innovation with generative AI to create new business success
Learn More AI Acceleration Solution
Accelerate AI-driven business and AI model training and inference with Alibaba Cloud GPU technology
Learn MoreMore Posts by Edwin Ji-wan Tack