By Farah Abdou
1. Install Python (version 3.7 or later) on your local machine.
2. Install the Alibaba Cloud SDK:
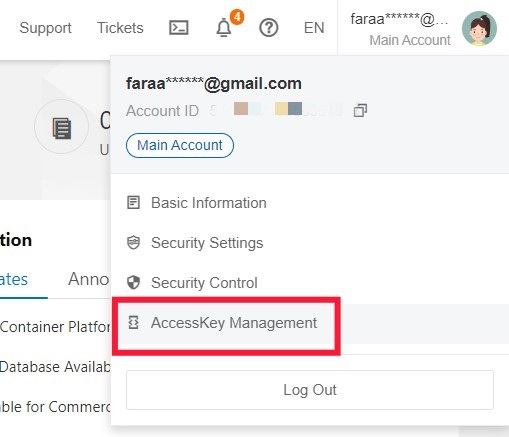
pip install aliyun-python-sdk-core3. Set up your credentials:


For this guide, we'll use TensorFlow with Keras.
1. Install TensorFlow:
pip install tensorflow2. Create a new Python file for your project, e.g., generative_model.py.
Add the following code to your Python file:
import tensorflow as tf
from tensorflow.keras.datasets import mnist

(x_train, _), (x_test, _) = mnist.load_data()
x_train = x_train.reshape(x_train.shape[0], 28, 28, 1).astype('float32')
x_test = x_test.reshape(x_test.shape[0], 28, 28, 1).astype('float32')
x_train /= 255.
x_test /= 255.We'll create a simple autoencoder as our generative model:
from tensorflow.keras.layers import Input, Conv2D, MaxPooling2D, UpSampling2D
from tensorflow.keras.models import Model

input_img = Input(shape=(28, 28, 1))
x = Conv2D(16, (3, 3), activation='relu', padding='same')(input_img)
x = MaxPooling2D((2, 2), padding='same')(x)
x = Conv2D(8, (3, 3), activation='relu', padding='same')(x)
x = MaxPooling2D((2, 2), padding='same')(x)
x = Conv2D(8, (3, 3), activation='relu', padding='same')(x)
encoded = MaxPooling2D((2, 2), padding='same')(x)

x = Conv2D(8, (3, 3), activation='relu', padding='same')(encoded)
x = UpSampling2D((2, 2))(x)
x = Conv2D(8, (3, 3), activation='relu', padding='same')(x)
x = UpSampling2D((2, 2))(x)
x = Conv2D(16, (3, 3), activation='relu')(x)
x = UpSampling2D((2, 2))(x)
decoded = Conv2D(1, (3, 3), activation='sigmoid', padding='same')(x)

autoencoder = Model(input_img, decoded)
autoencoder.compile(optimizer='adam', loss='binary_crossentropy')Before deploying, let's train the model locally:
autoencoder.fit(x_train, x_train,
                epochs=50,
                batch_size=128,
                shuffle=True,
validation_data=(x_test, x_test))Save the trained model:
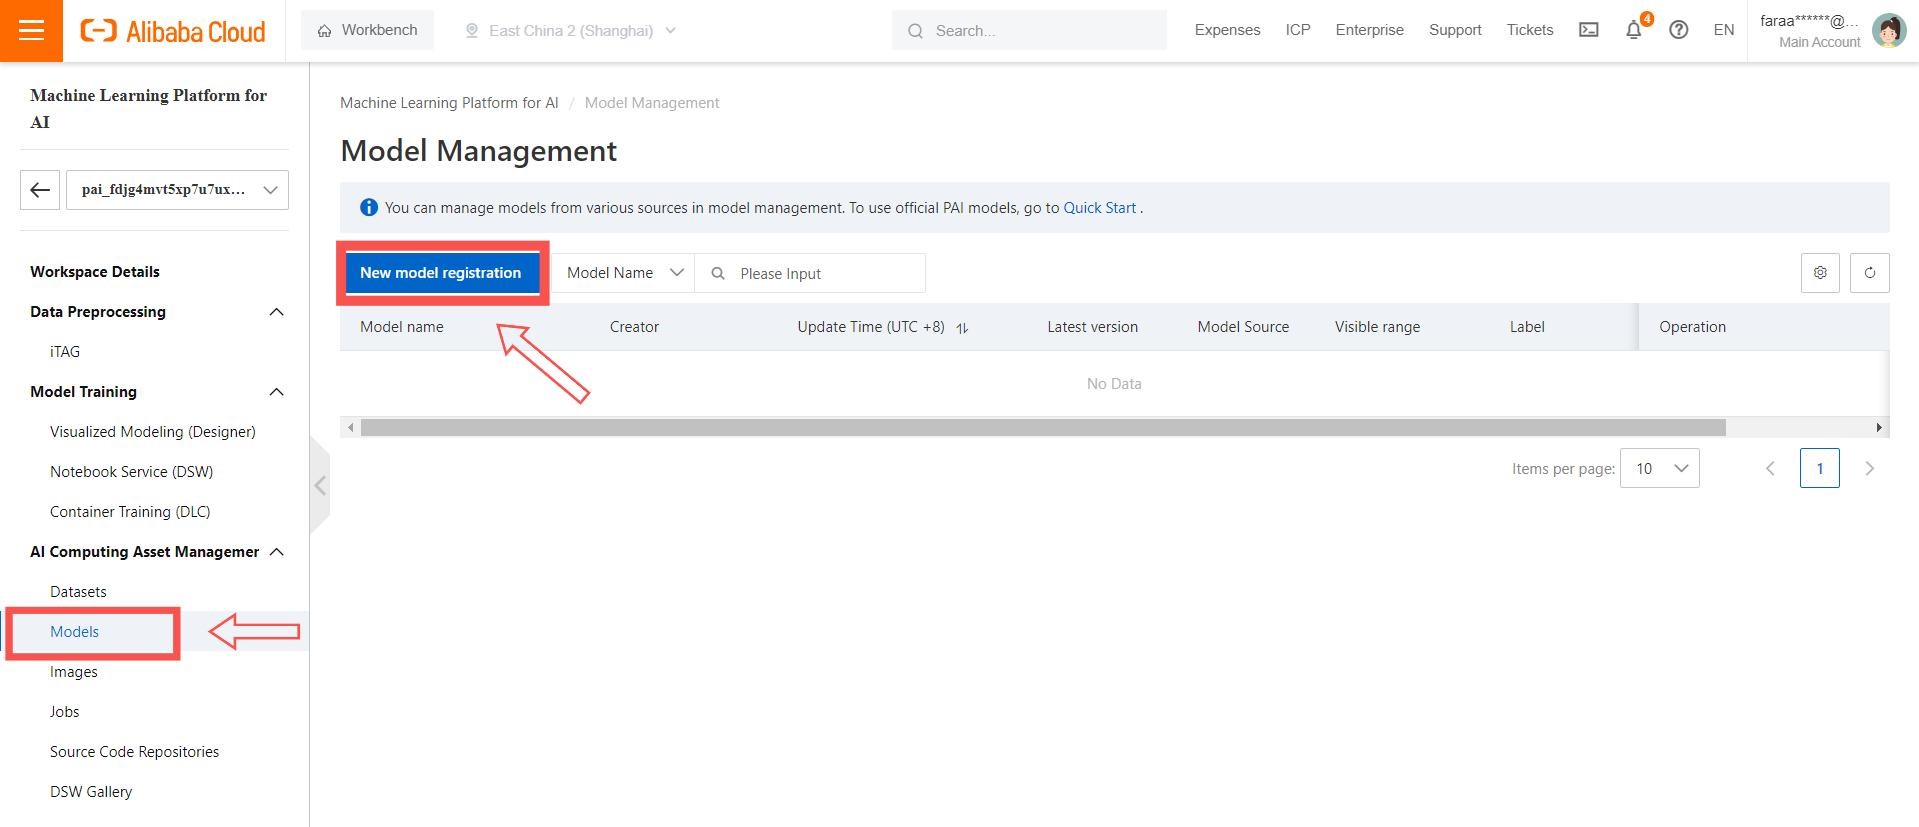
autoencoder.save('my_autoencoder.h5')1. In your project, go to Model Management and click Create Model.

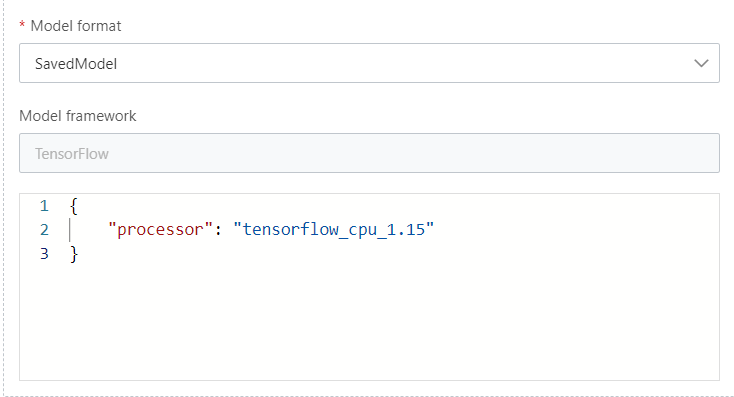
2. Choose TensorFlow as the framework.

3. Upload your my_autoencoder.h5 file.
   from aliyunsdkcore.client import AcsClient
   from aliyunsdkcore.acs_exception.exceptions import ClientException
   from aliyunsdkcore.acs_exception.exceptions import ServerException
   from aliyunsdkcore.auth.credentials import AccessKeyCredential
   from aliyunsdkcore.auth.credentials import StsTokenCredential
   from aliyunsdkcore.request import CommonRequest

   # Replace with your AccessKey ID and Secret
   credentials = AccessKeyCredential('<your-access-key-id>', '<your-access-key-secret>')
   client = AcsClient(region_id='<your-region-id>', credential=credentials)

   request = CommonRequest()
   request.set_domain('pai-eas.cn-hangzhou.aliyuncs.com')
   request.set_version('2019-09-25')
   request.set_action_name('PredictModel')
   request.add_query_param('RegionId', '<your-region-id>')
   request.add_query_param('ServiceName', '<your-service-name>')
   request.add_body_params('Body', '<your-input-data>')

   response = client.do_action_with_exception(request)
print(response)You've now created and deployed a basic generative AI model (an autoencoder) on Alibaba Cloud. This is just the beginning!
Remember to monitor your usage and costs in the Alibaba Cloud console, and don't forget to shut down resources you're not using to avoid unnecessary charges.
Disclaimer: The views expressed herein are for reference only and don't necessarily represent the official views of Alibaba Cloud.
Fine-Tune a Language Model Using Alibaba Cloud's Platform for AI (PAI)
Data Visualization & Analytics with Alibaba Cloud QuickBI: From Setup to Optimization

19 posts | 0 followers
Followferdinjoe - December 26, 2023
Farruh - July 25, 2023
Alibaba Cloud Serverless - July 9, 2024
Farruh - January 12, 2024
Amuthan Nallathambi - October 14, 2024
Rupal_Click2Cloud - August 9, 2024

19 posts | 0 followers
Follow Platform For AI
A platform that provides enterprise-level data modeling services based on machine learning algorithms to quickly meet your needs for data-driven operations.
Learn More Alibaba Cloud for Generative AI
Accelerate innovation with generative AI to create new business success
Learn More AI Acceleration Solution
Accelerate AI-driven business and AI model training and inference with Alibaba Cloud GPU technology
Learn More Conversational AI Service
This solution provides you with Artificial Intelligence services and allows you to build AI-powered, human-like, conversational, multilingual chatbots over omnichannel to quickly respond to your customers 24/7.
Learn MoreMore Posts by Farah Abdou