You can perform various operations to manage workspace members. For example, you can manage a member list, invite members, and assign roles to members. This topic describes how to manage workspace members.
Prerequisites
A workspace administrator account is created.
Invite a member
Log on to the Application Open Platform console.
In the left-side navigation pane, click Members. The Members page appears.
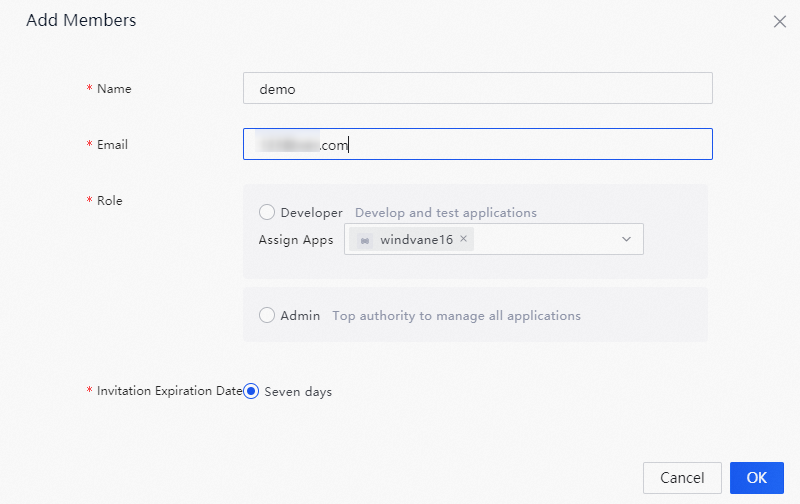
In the upper-right corner of the Members page, click Add Members. The Add Members dialog box appears.

In the Add Members dialog box, configure the parameters.

Parameter
Description
Name
The name of the member that you want to invite.
Email
The email address of the member. The email address is used to receive an invitation code. Enter a valid email address.
Role
The role to be assumed by the member in the workspace. You can also associate the member with one or more miniapps to be developed, such as a car rental miniapp.
Invitation Expiration Date
The validity period of the invitation. By default, the invitation is valid for seven days. This parameter value cannot be changed.
Click OK.
After an invitation is sent, you can view the information about the invitation on the Invitations tab.
Change a role
In the left-side navigation pane, click Members. The Members page appears.
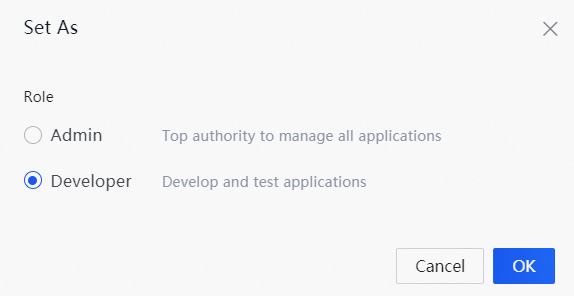
On the Members tab of the Members page, find the member whose role you want to change and click Set As in the Action column. The Set As dialog box appears.
In the Set As dialog box, change the role of the member.

Click OK.
Lock an account
In the left-side navigation pane, click Members. The Members page appears.
On the Members tab of the Members page, find the member whose account you want to lock and click Block in the Action column. In the message that appears, click OK.