LAMP is a popular environment for building web applications. LAMP is an acronym made up of the names of its four base components: Linux operating system, Apache HTTP Server, MySQL relational database management system, and PHP programming language. This topic describes how to use an application image provided by Simple Application Server to build a LAMP development environment.
Background information
Alibaba Cloud Marketplace provides abundant images, which integrate both operating systems and applications. If you select an image that contains the LAMP environment when you create a simple application server, you do not need to deploy an environment after the creation is complete. You can use one of the following methods to apply an image that contains the LAMP environment:
Select an application image that contains the LAMP environment when you create a simple application server.
Replace the operating system of an existing simple application server with an image that contains the LAMP environment.
This topic uses an application image as an example to help you quickly deploy a LAMP environment. If you need a customized deployment, we recommend that you refer to the Elastic Compute Service (ECS) document to manually deploy a LAMP environment. For more information, see Manually deploy a LAMP stack.
Step 1: Create a simple application server
You must select one of the following methods based on your business requirements.
Create a simple application server
If you do not have any existing simple application server, we recommend that you create one by using an application image that contains the LAMP environment.
Go to the Servers page in the Simple Application Server console.
In the middle of the page, click Create Server.
On the buy page of Simple Application Server, configure parameters to complete resource configuration.
For more information about how to create a simple application server, see Create a simple application server.
In the Image section, you must select the LAMP 7.4 application image on the Apps Image tab.
Replace the image of an existing simple application server
If you have an existing simple application server, we recommend that you replace the operating system of the server by using an application image that contains the LAMP environment. For more information, see Reset a simple application server.
For information about the limits on resetting a simple application server, see the Limits section in the "Reset a simple application server" topic.
Resetting the operating system of a simple application server causes disk data loss. If you have important data on your simple application server, we do not recommend that you use this method. We recommend you manually deploy a LAMP environment. For more information, see Manually deploy a LAMP stack.
Step 2: View application information
Click the card of the LAMP server.
Click the Application Details tab.
View the usernames and passwords of the software preset in the LAMP application image.
In the LAMP Information section, click Connect.
In the command line window that appears, run the following command to view application information:
sudo cat /credentials/password.txtThe application information is slightly different based on the tag of the LAMP application image. The LAMP 7.4 application image is used in this example. You can find the administrator password of the database that is preset in the image.
[admin@iZj6cfztoffl5xdjtax**** ~]$ sudo cat /credentials/password.txt
mysql administrator username:root
mysql administrator password:w1gnxHCyKKB****

---
Select and right-click the application information. Select Copy to copy the information and paste it to your on-premises computer to facilitate subsequent website deployment.
Keep the password information confidential.
(Optional) View the PHP configuration details.
If you want to use the
phpinfofunction to view the PHP configuration details or check whether the server is running as expected, perform this step.NoteBy default, LAMP images do not contain the phpinfo.php file. Before you can view the PHP configuration details, you must perform the following steps to create the phpinfo.php file and add the
phpinfofunction to the file:Run the following command to create the phpinfo.php file in the website root directory. This file is used to store the code of the
phpinfofunction.LAMP 7.4:
sudo vim /data/wwwroot/example/phpinfo.phpLAMP 6.1.0:
su root
sudo vim /home/www/htdocs/phpinfo.php
Press the I key to enter the edit mode. Add the following code to the file:
<?php
phpinfo();
?>
Press the Esc key, enter
:wq, and then press the Enter key to save and close the file.Enter
http://Public IP address of the simple application server/phpinfo.phpin the browser on your on-premises computer.If a domain name is bound to the simple application server, you can enter
Domain name/phpinfo.phpin the browser.In this example,
http://Public IP address of the simple application server/phpinfo.phpis used to view the PHP configuration details. If information similar to the following figure is displayed, the LAMP server runs as expected.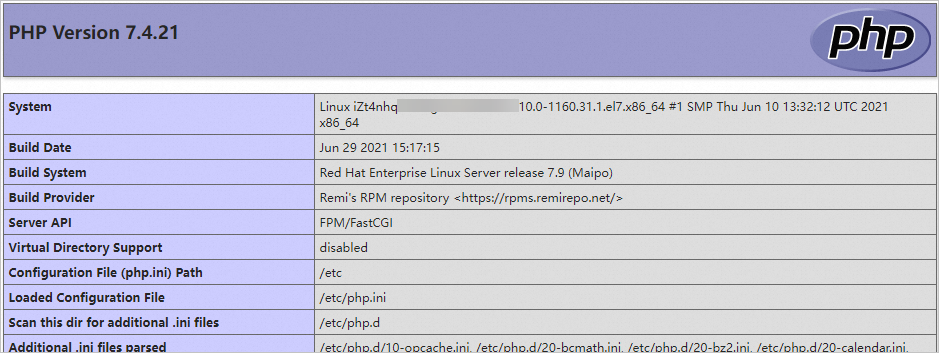
Step 3: Test access to a website
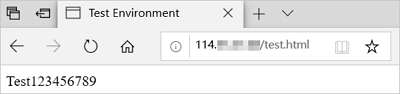
Before you perform test access to a website, you need to upload the web project file that you want to deploy to the website root directory on the LAMP server, and change the owner of the web project file. In this example, FileZilla is used to upload the test.html file that is only for test purposes to the website root directory on the LAMP 7.4 server. The file contains the following content:
<html>
<head>
<meta charset="utf-8">
<title>Test Environment</title>
</head>

<body>
Test123456789
</body>

</html>
Perform the following operations:
Upload the website code stored on your on-premises computer to the website root directory on the LAMP server.
Add a firewall rule on the LAMP server to allow traffic on port
21and ports in the range of20000 to 30000.Port
21is the default FTP port. Ports in the range of20000 to 30000may be used by FTP in passive mode on the LAMP server. For more information about how to add a firewall rule, see Manage a firewall.Use the stored FTP username and password to connect to the LAMP server. Then, use FileZilla to upload the test.html file to the /data/wwwroot/example directory of the LAMP server.
For more information, see Build an FTP server (Linux).
In the command line window of remote connection, run the following command to change the owner of the test file.
In this example, the LAMP 7.4 server is connected. The website root directory is /data/wwwroot/example. The test file is named test.html. Run the following command to change the owner of the file:
sudo chmod 777 -R /data/wwwroot/example
sudo chown -R apache:apache /data/wwwroot/example/test.html
Enter
http://Public IP address of the simple application server/test.htmlin the browser on your on-premises computer.If a domain name is bound to the server, you can enter
<Domain name>/test.htmlin the browser.A page similar to the following figure indicates that the website is accessed.