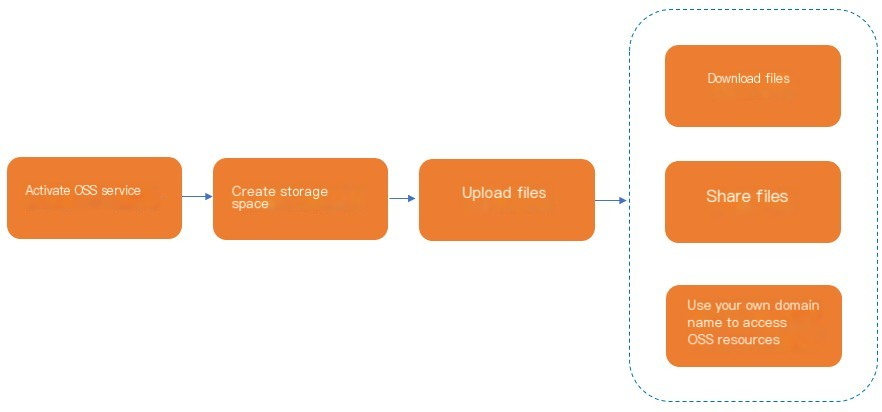
Activate OSS

Configure an OSS data source
Log on to the OpenSearch console. In the upper-left corner, select OpenSearch Retrieval Engine Edition. On the Instances page, find the instance that you want to manage and click Manage in the Actions column.
In the left-side pane, choose Configuration Center > Data Source. On the Data Source page, click Add Data Source. In the Add Data Source panel, set the Data Source Type parameter to OSS, and configure the Data Source Name, OSS Path, and Bucket parameters. Then, click Verify.
Parameters:
Data Source Name: the custom name of the OSS data source. The name must start with a letter and can contain letters, digits, and underscores (_).
OSS Path: the path that is used to access an OSS object.
Bucket: the name of the OSS bucket.
The specified OSS path must contain opensearch and cannot contain the following special characters: equal signs (=), ampersands (&), and question marks (?). Otherwise, the data cannot be read.
To create an OSS path, perform the following operations: Go to the Buckets page of the OSS console, click the name of the created OSS bucket in the bucket list, and then click Create Directory. In the Create Directory panel, configure the Directory Name parameter. In this example, /opensearch_index_data/ is created.

To obtain the name of the created OSS bucket, perform the following operations: Go to the Buckets page of the OSS console, and view the bucket name in the Bucket Name column.

Create an index table.
After the OSS data source is configured, choose Configuration Center > Index Schema in the left-side pane. On the Index Schema page, click Create Index Table.
On the configuration page, enter a custom index table name and select the OSS data source that you have configured.
In this example, the pk and embeddings fields are configured. For more information about sample data, see oss_test.txt.
CMD=add
pk=999000
embeddings=0.00.0039257140.0098142860.0039257140.00
pk=999000
embeddings=0.00.0039257140
For more information about the index schema, see the "Data files for indexing" section of this topic.
In the left-side pane, choose O&M Center > O&M Management. On the O&M Management page, click Reindexing. In the Reindexing panel, configure the parameters to trigger reindexing for the OSS data source.
After reindexing is complete, you can perform a query test.
Data files for indexing
A file serves as the data source of indexing. The file must be encoded in the UTF-8 format. This section describes the standard input format of a data file for indexing.
The following information shows the content of a complete data file named standard_sample.data:
CMD=add^_
PK=12345321^_
url=http://www.aliyun.com/index.html^_
title=Alibaba Cloud Computing Co., Ltd.^_
body=xxxxxx xxx^_
time=3123423421^_
multi_value_field=1234^]324^]342^_
bidwords=mp3^\price=35.8^Ptime=13867236221^]mp4^\price=32.8^Ptime=13867236221^_
^^
CMD=delete^_
PK=12345321^_CMD=add^_
PK=12345321^_
url=http://www.aliyun.com/index.html^_
title=Alibaba Cloud Computing Co., Ltd.^_
body=xxxxxx xxx^_
time=3123423421^_
multi_value_field=1234^]324^]342^_
bidwords=mp3^\price=35.8^Ptime=13867236221^]mp4^\price=32.8^Ptime=13867236221^_
^^
CMD=delete^_
PK=12345321^_
This data file contains the add and delete commands. Each command consists of multiple lines, and each line is a key-value pair. Commands are separated by '^^\n', key-value pairs are separated by '^_\n', and values are separated by '^]'. The following table and list describe the file delimiters and command formats.
File delimiters
C++ encoding | ASCII code in hexadecimal notation | Description | Display pattern in Emacs or Vi | Input method in Emacs | Input method in Vi |
"\x1F\n" | 1F0A | The key-value pair delimiter. | ^_ (followed by a line break) | C-q C-7 | C-v C-7 |
"\x1E\n" | 1E0A | The command delimiter. | ^^ (followed by a line break) | C-q C-6 | C-v C-6 |
"\x1D" | 1D | The multi-value delimiter. | ^] | C-q C-5 | C-v C-5 |
"\x1C" | 1C | The section weight identifier. | ^\ | C-q C-4 | C-v C-4 |
"\x1D" | 1D | The section delimiter. | ^] | C-q C-5 | C-v C-5 |
"\x03" | 03 | The field delimiter of child documents. | ^C | C-q C-c | C-v C-c |
Command formats
add
The add command is used to add data to the index schema.
The first line of the add command must be CMD=add, which is followed by the fields of the document. The order of the fields can be the same as that of the fields in the index schema. All the fields that are displayed in the add command must be specified in the index schema.
CMD=add^_
PK=12345321^_
url=http://www.aliyun.com/index.html^_
title=Alibaba Cloud Computing Co., Ltd.^_
body=xxxxxx xxx^_
time=3123423421^_
multi_value_field=1234^]324^]342^_
bidwords=mp3^\price=35.8^Ptime=13867236221^]mp4^\price=32.8^Ptime=13867236221^_
^^CMD=add^_
PK=12345321^_
url=http://www.aliyun.com/index.html^_
title=Alibaba Cloud Computing Co., Ltd.^_
body=xxxxxx xxx^_
time=3123423421^_
multi_value_field=1234^]324^]342^_
bidwords=mp3^\price=35.8^Ptime=13867236221^]mp4^\price=32.8^Ptime=13867236221^_
^^
delete
The delete command is used to remove data from the index schema.
The first line of the delete command must be CMD=delete, which is followed by the field that is defined as the primary key field in the index schema,
and the field used for hash partitioning. If the two fields are the same, you need to specify only one field.
CMD=delete^_
PK=12345321^_
^^CMD=delete^_
PK=12345321^_
^^
Delete an OSS data source
On the Data Source page, find the data source that you want to delete and click Delete in the Actions column.
Note:
After the data source is deleted, it cannot be recovered. Proceed with caution.
If an index table is created for the OSS data source that you want to delete, you must delete the index table before you delete the OSS data source.
Usage notes
You must activate OSS in the same region as the purchased OpenSearch Retrieval Engine Edition instance.
OpenSearch Retrieval Engine Edition does not support Anywhere OSS buckets.
When you configure an OSS data source, the system automatically creates a service-linked role named AliyunServiceRoleForSearchEngine. If the service-linked role already exists, the system does not create another role. OpenSearch uses this role to access your cloud resources to implement related features.