Alibaba Cloud Model Studio supports API calls to models through OpenAI-compatible interfaces and the DashScope SDK.
To call the Qwen API:
Get an API key
Set up your local development environment
Call the Qwen API
Account setup
Create an account: If you do not have an Alibaba Cloud account, create one.
If you encounter issues, see Register an Alibaba Cloud account.
Activate Model Studio: Use your Alibaba Cloud account to go to Alibaba Cloud Model Studio. Read and accept the Terms of Service to activate the service. If no Terms of Service dialog appears, the service is already activated.
Get an API key: Go to the API Key page and click Create API key. Then use the API key to call models.
Get your workspace ID: When calling models in the China (Beijing), Singapore, Japan (Tokyo), Germany (Frankfurt), or China (Hong Kong) region, you need to include the workspace ID (WorkspaceId) in the Base URL. You can find it on the Workspace Management page.
Set your API key as an environment variable
Store your API key in an environment variable to avoid hardcoding credentials and reduce security risks.
Linux
Permanent environment variable
To make the API key available in all future sessions, export it permanently.
-
Run the following command to add the environment variable to the
~/.bashrcfile:# Replace YOUR_DASHSCOPE_API_KEY with your API key. echo "export DASHSCOPE_API_KEY='YOUR_DASHSCOPE_API_KEY'" >> ~/.bashrcYou can also edit the
~/.bashrcfile manually. -
Run the following command to make the change take effect:
source ~/.bashrc -
Create a session and run the following command to check whether the environment variable takes effect:
echo $DASHSCOPE_API_KEY
Temporary environment variable
To use the API key only in the current session, export it temporarily.
-
Run the following command:
# Replace YOUR_DASHSCOPE_API_KEY with your API key. export DASHSCOPE_API_KEY="YOUR_DASHSCOPE_API_KEY" -
Run the following command to check whether the environment variable takes effect:
echo $DASHSCOPE_API_KEY
macOS
Permanent environment variable
To make the API key available in all future sessions, export it permanently.
-
Run the following command to check the default Shell type.
echo $SHELL -
Perform the following operation based on your Shell type.
Zsh
-
Run the following command to add the environment variable to the
~/.zshrcfile.# Replace YOUR_DASHSCOPE_API_KEY with your API key. echo "export DASHSCOPE_API_KEY='YOUR_DASHSCOPE_API_KEY'" >> ~/.zshrcYou can also edit the
~/.zshrcfile manually. -
Run the following command to make the change take effect:
source ~/.zshrc -
Create a session and run the following command to check whether the environment variable takes effect:
echo $DASHSCOPE_API_KEY
Bash
-
Run the following command to add the environment variable to the
~/.bash_profilefile.# Replace YOUR_DASHSCOPE_API_KEY with your API key. echo "export DASHSCOPE_API_KEY='YOUR_DASHSCOPE_API_KEY'" >> ~/.bash_profileYou can also edit the
~/.bash_profilefile manually. -
Run the following command to make the change take effect:
source ~/.bash_profile -
Create a session and run the following command to check whether the environment variable takes effect:
echo $DASHSCOPE_API_KEY
-
Temporary environment variable
To use the API key only in the current session, export it temporarily.
The following commands work only for Zsh and Bash.
-
Run the following command:
# Replace YOUR_DASHSCOPE_API_KEY with your API key. export DASHSCOPE_API_KEY="YOUR_DASHSCOPE_API_KEY" -
Run the following command to check whether the environment variable takes effect:
echo $DASHSCOPE_API_KEY
Windows
In Windows, you can export environment variables using System Properties, Command Line, or PowerShell.
System Properties
-
The environment variable configured in this way is permanently effective.
-
Modifying system environment variable requires administrative permissions.
-
After configuring the environment variable, it will not affect already-running programs. Restart IDEs and command windows, or open a new command line, to load the new variable.
-
Press
Win+Qon your desktop. Enter "Edit the system environment variables" in the search box, and click to open the System Properties window. -
In the System Properties window, click Environment Variables. In the System Variables section, click New, enter
DASHSCOPE_API_KEYas the variable name, andyour actual API Keyas the variable value.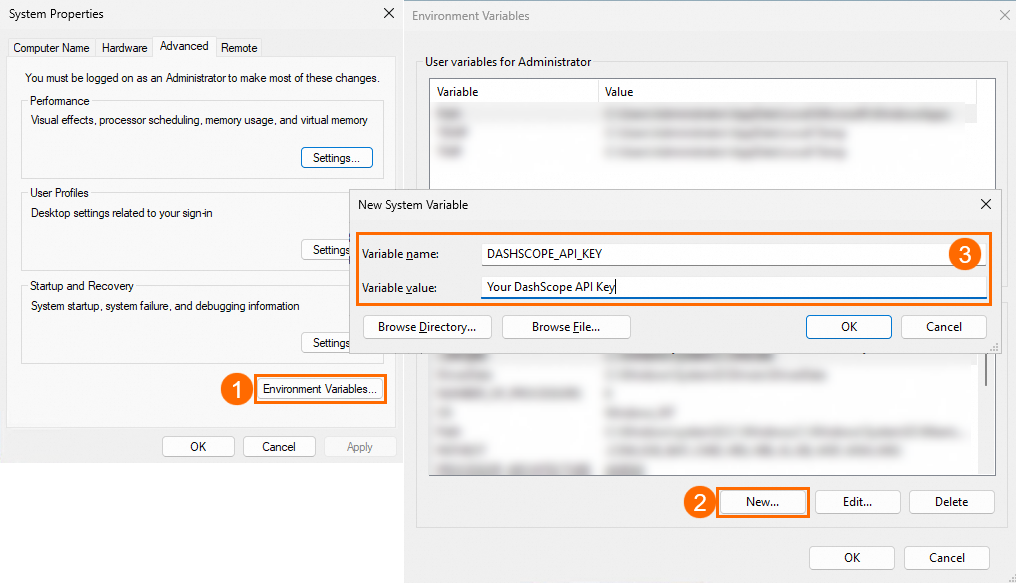
-
Click OK on all three dialog boxes.
-
Open CMD or Windows PowerShell and run the following command to check whether the environment variable takes effect.
-
CMD:
echo %DASHSCOPE_API_KEY%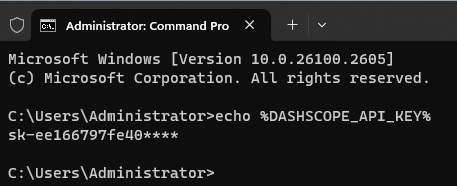
-
Windows PowerShell:
echo $env:DASHSCOPE_API_KEY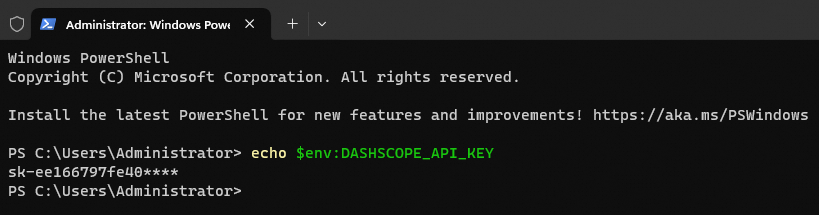
-
CMD
Permanent environment variable
To make the API key available in all future sessions, export it permanently.
-
Run the following command:
# Replace YOUR_DASHSCOPE_API_KEY with your API key. setx DASHSCOPE_API_KEY "YOUR_DASHSCOPE_API_KEY" -
Create a new session.
-
Run the following command to check whether the environment variable takes effect:
echo %DASHSCOPE_API_KEY%
Temporary environment variable
To use the API key only in the current session, export it temporarily.
-
Run the following command:
# Replace YOUR_DASHSCOPE_API_KEY with your API key. set DASHSCOPE_API_KEY="YOUR_DASHSCOPE_API_KEY" -
Run the following command in the current session to check whether the environment variable takes effect:
echo %DASHSCOPE_API_KEY%
PowerShell
Permanent environment variable
To make the API key available in all future sessions, export it permanently.
-
Run the following command:
# Replace YOUR_DASHSCOPE_API_KEY with your API key. [Environment]::SetEnvironmentVariable("DASHSCOPE_API_KEY", "YOUR_DASHSCOPE_API_KEY", [EnvironmentVariableTarget]::User) -
Create a session.
-
Run the following command to check whether the environment variable takes effect:
echo $env:DASHSCOPE_API_KEY
Temporary environment variable
To use the API key only in the current session, export it temporarily.
-
Run the following command:
# Replace YOUR_DASHSCOPE_API_KEY with your API key. $env:DASHSCOPE_API_KEY = "YOUR_DASHSCOPE_API_KEY" -
Run the following command in the current session to check whether the environment variable takes effect:
echo $env:DASHSCOPE_API_KEY
Choose a development language
Select a language or tool to call model APIs.
Python
Step 1: Set up Python
Check your Python version
Run this command to check whether Python and pip are installed:
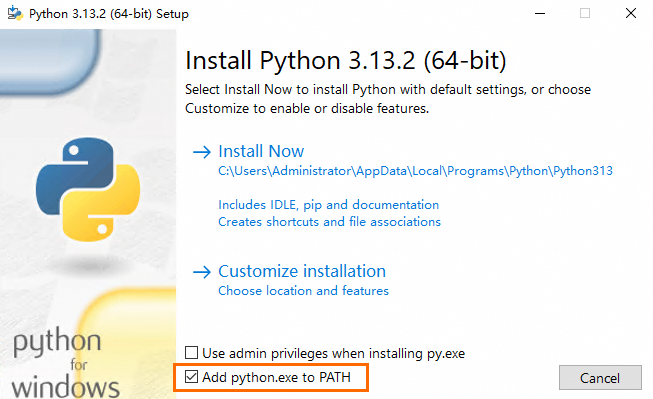
Python 3.8 or later is required. For installation instructions, see Install Python.
python -V
pip --version
For example, on Windows Command Prompt:

FAQ
Q: The commands python -V and pip --version return errors:
'python' is not recognized as an internal or external command, operable program or batch file.'pip' is not recognized as an internal or external command, operable program or batch file.-bash: python: command not found-bash: pip: command not found
Try these solutions:
Windows
Confirm that you installed Python by following Install Python, and added python.exe to the PATH environment variable.
If Python and PATH are correctly configured but the error persists, close your current terminal and open a new one.
Linux and macOS
Confirm that you installed Python by following Install Python.
If Python is installed but the error persists, run
which python pipto check whetherpythonandpipexist in your system.If this result appears, close the current terminal window, open a new terminal window, and try again.
/usr/bin/python
/usr/bin/pip
If this result is returned, run the
which python3 pip3query again./usr/bin/which: no python in (/root/.local/bin:/root/bin:/usr/local/sbin:/usr/local/bin:/usr/sbin:/usr/bin) /usr/bin/which: no pip in (/root/.local/bin:/root/bin:/usr/local/sbin:/usr/local/bin:/usr/sbin:/usr/bin)If the returned result is shown, use
python3 -Vandpip3 --versionto check the version./usr/bin/python3 /usr/bin/pip3
Set up a virtual environment (optional)
Install the OpenAI Python SDK or DashScope Python SDK
You can call models on Model Studio using the OpenAI Python SDK or the DashScope Python SDK.
Install the OpenAI Python SDK
Install or upgrade the OpenAI Python SDK:
# If this fails, replace pip with pip3
pip install -U openai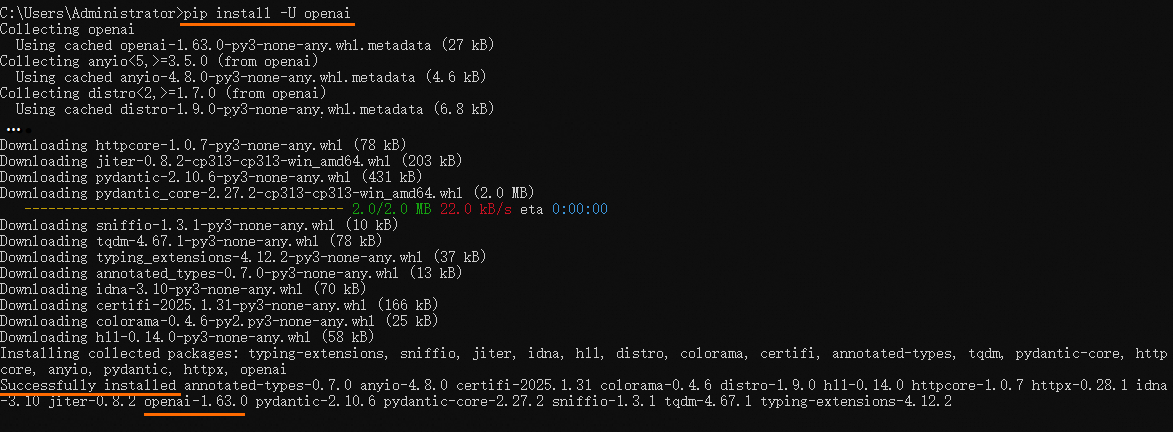
Look for Successfully installed ... openai-x.x.x to confirm installation.
Install the DashScope Python SDK
Install or upgrade the DashScope Python SDK:
# If this fails, replace pip with pip3
pip install -U dashscope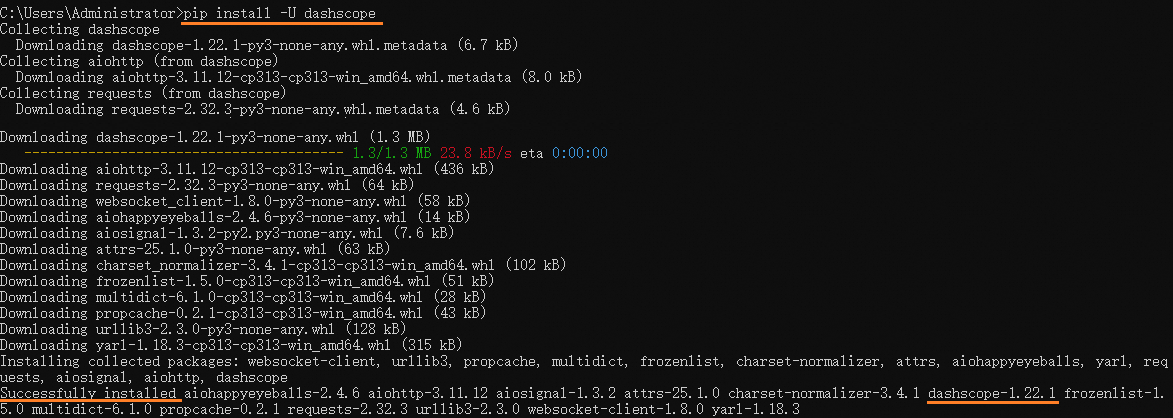
Look for Successfully installed ... dashscope-x.x.x to confirm installation.
Step 2: Call the API
OpenAI Python SDK
With Python and the OpenAI Python SDK installed, send your first API request.
Create a file named
hello_qwen.py.Copy this code into
hello_qwen.pyand save it.import os from openai import OpenAI try: client = OpenAI( # If the environment variable is not configured, replace with: api_key="sk-xxx" api_key=os.getenv("DASHSCOPE_API_KEY"), # The following URL is for the Singapore region. When calling, replace {WorkspaceId} with your actual workspace ID. URLs vary by region. base_url="https://{WorkspaceId}.ap-southeast-1.maas.aliyuncs.com/compatible-mode/v1", ) completion = client.chat.completions.create( model="qwen-plus", messages=[ {'role': 'system', 'content': 'You are a helpful assistant.'}, {'role': 'user', 'content': 'Who are you?'} ] ) print(completion.choices[0].message.content) except Exception as e: print(f"Error message: {e}") print("See: https://www.alibabacloud.com/help/model-studio/developer-reference/error-code")Run
python hello_qwen.pyorpython3 hello_qwen.pyfrom the command line.If you see
No such file or directory, specify the full path to the file.The output is:
I am a large-scale language model developed by Alibaba Cloud. My name is Qwen.
DashScope Python SDK
With Python and the DashScope Python SDK installed, send your first API request.
Create a file named
hello_qwen.py.Copy this code into
hello_qwen.pyand save it.import os from dashscope import Generation import dashscope # The following URL is for the Singapore region. When calling, replace {WorkspaceId} with your actual workspace ID. URLs vary by region. dashscope.base_http_api_url = 'https://{WorkspaceId}.ap-southeast-1.maas.aliyuncs.com/api/v1' messages = [ {'role': 'system', 'content': 'You are a helpful assistant.'}, {'role': 'user', 'content': 'Who are you?'} ] response = Generation.call( # Singapore, US (Virginia), and China (Beijing) API keys are not interchangeable. Get your API key: https://www.alibabacloud.com/help/model-studio/get-api-key # If the environment variable is not configured, replace with: api_key = "sk-xxx" api_key=os.getenv("DASHSCOPE_API_KEY"), model="qwen-plus", messages=messages, result_format="message" ) if response.status_code == 200: print(response.output.choices[0].message.content) else: print(f"HTTP status code: {response.status_code}") print(f"Error code: {response.code}") print(f"Error message: {response.message}") print("See: https://www.alibabacloud.com/help/model-studio/developer-reference/error-code")Run
python hello_qwen.pyorpython3 hello_qwen.pyfrom the command line.NoteThe command in this example must be executed from the directory containing the Python file. To run it from elsewhere, specify the full path.
The output is:
I am a large-scale language model from Alibaba Cloud. My name is Qwen.
Node.js
Step 1: Set up your Node.js environment
Check your Node.js installation
Check whether Node.js and npm are installed:
node -v
npm -v
For example, on Windows Command Prompt:
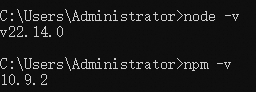
This prints your current Node.js version. If Node.js is not installed, download it from the Node.js official website.
Install the model calling SDK
Run this command in your terminal:
npm install --save openai
# Or
yarn add openaiIf installation fails, configure a registry mirror:
npm config set registry https://registry.npmmirror.com/After configuring the mirror, rerun the SDK installation command.
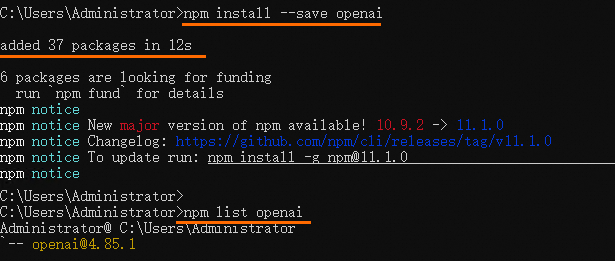
Look for added xx package in xxs to confirm installation. Check version: npm list openai.
Step 2: Call the model API
Create a file named
hello_qwen.mjs.Copy this code into the file.
import OpenAI from "openai";

try {
    const openai = new OpenAI(
        {
            // If the environment variable is not configured, replace with: apiKey: "sk-xxx"
            apiKey: process.env.DASHSCOPE_API_KEY,
            // The following URL is for the Singapore region. When calling, replace {WorkspaceId} with your actual workspace ID. URLs vary by region.
            baseURL: "https://{WorkspaceId}.ap-southeast-1.maas.aliyuncs.com/compatible-mode/v1"
        }
    );
    const completion = await openai.chat.completions.create({
        model: "qwen-plus",
        messages: [
            { role: "system", content: "You are a helpful assistant." },
            { role: "user", content: "Who are you?" }
        ],
    });
    console.log(completion.choices[0].message.content);
} catch (error) {
    console.log(`Error message: ${error}`);
    console.log("See: https://www.alibabacloud.com/help/model-studio/developer-reference/error-code");
}
Run this command to send an API request.
node hello_qwen.mjsNoteRun this command from the directory containing
hello_qwen.mjs. To run it from any location, specify the full path to the file.Ensure the SDK is installed in the same directory as
hello_qwen.mjs. If they are in different directories, you will seeCannot find package 'openai' imported from xxx.
After successful execution, the output is:
I am a language model from Alibaba Cloud. My name is Qwen.
Java
Step 1: Set up your Java environment
Check your Java version
Run this command in your terminal:
java -version
# (Optional) If you use Maven to manage and build Java projects, ensure Maven is installed
mvn --version
For example, on Windows Command Prompt:
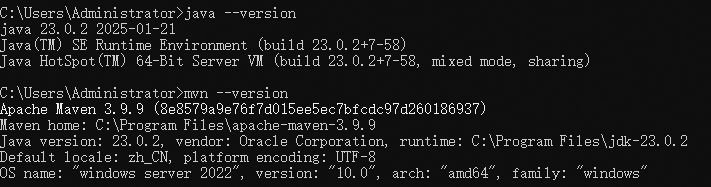
Java 8 or later is required for the DashScope Java SDK. For example, openjdk version "16.0.1" 2021-04-20 means Java 16. If Java is not installed or the version is below Java 8, download and install it from Java downloads.
Install the model calling SDK
Install the DashScope Java SDK. For the latest version, see DashScope Java SDK. Add this dependency, replacing the-latest-version with the latest version number.
XML
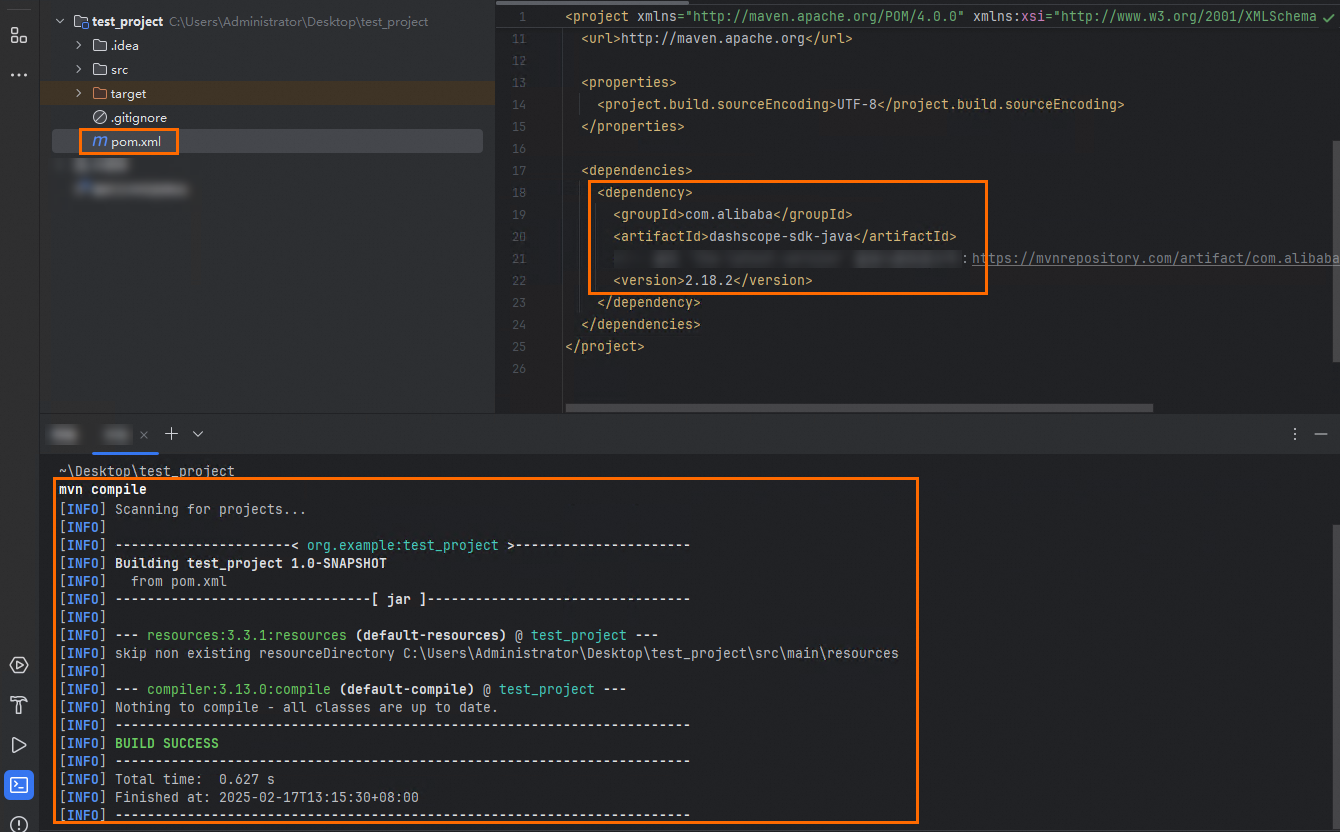
Open your Maven project's
pom.xmlfile.Add this dependency to the
<dependencies>tag:<dependency> <groupId>com.alibaba</groupId> <artifactId>dashscope-sdk-java</artifactId> <!-- Replace 'the-latest-version' with the latest version number: https://mvnrepository.com/artifact/com.alibaba/dashscope-sdk-java --> <version>the-latest-version</version> </dependency>Save the
pom.xmlfile.Run a Maven command such as
mvn compileormvn clean installto update dependencies. Maven will automatically download and add the DashScope Java SDK to your project.
For example, in IntelliJ IDEA on Windows:
Gradle
Open your Gradle project's
build.gradlefile.Add this dependency to the
dependenciesblock:dependencies { // Replace 'the-latest-version' with the latest version number: https://mvnrepository.com/artifact/com.alibaba/dashscope-sdk-java implementation group: 'com.alibaba', name: 'dashscope-sdk-java', version: 'the-latest-version' }Save the
build.gradlefile.In your terminal, navigate to your project root directory and run this Gradle command to update dependencies. It will automatically download and add the DashScope Java SDK to your project.
./gradlew build --refresh-dependencies
For example, in IntelliJ IDEA on Windows:

Step 2: Call the API
Run this code to call the model API.
import java.util.Arrays;
import java.lang.System;
import com.alibaba.dashscope.aigc.generation.Generation;
import com.alibaba.dashscope.aigc.generation.GenerationParam;
import com.alibaba.dashscope.aigc.generation.GenerationResult;
import com.alibaba.dashscope.common.Message;
import com.alibaba.dashscope.common.Role;
import com.alibaba.dashscope.exception.ApiException;
import com.alibaba.dashscope.exception.InputRequiredException;
import com.alibaba.dashscope.exception.NoApiKeyException;
import com.alibaba.dashscope.protocol.Protocol;
public class Main {
    public static GenerationResult callWithMessage() throws ApiException, NoApiKeyException, InputRequiredException {
        // The following URL is for the Singapore region. When calling, replace {WorkspaceId} with your actual workspace ID. URLs vary by region.
        Generation gen = new Generation(Protocol.HTTP.getValue(), "https://{WorkspaceId}.ap-southeast-1.maas.aliyuncs.com/api/v1");
        Message systemMsg = Message.builder()
                .role(Role.SYSTEM.getValue())
                .content("You are a helpful assistant.")
                .build();
        Message userMsg = Message.builder()
                .role(Role.USER.getValue())
                .content("Who are you?")
                .build();
        GenerationParam param = GenerationParam.builder()
                // Singapore, US (Virginia), and China (Beijing) API keys are not interchangeable. Get your API key: https://www.alibabacloud.com/help/model-studio/get-api-key
                // If the environment variable is not configured, replace with: .apiKey("sk-xxx")
                .apiKey(System.getenv("DASHSCOPE_API_KEY"))
                // Model list: https://www.alibabacloud.com/help/model-studio/getting-started/models
                .model("qwen-plus")
                .messages(Arrays.asList(systemMsg, userMsg))
                .resultFormat(GenerationParam.ResultFormat.MESSAGE)
                .build();
        return gen.call(param);
    }
    public static void main(String[] args) {
        try {
            GenerationResult result = callWithMessage();
            System.out.println(result.getOutput().getChoices().get(0).getMessage().getContent());
        } catch (ApiException | NoApiKeyException | InputRequiredException e) {
            System.err.println("Error message: "+e.getMessage());
            System.out.println("See: https://www.alibabacloud.com/help/model-studio/developer-reference/error-code");
        }
        System.exit(0);
    }
}
The output is:
I am a large-scale language model developed by Alibaba Cloud. My name is Qwen.curl
Call models on Model Studio using OpenAI-compatible or DashScope HTTP endpoints. For supported models, see Model list.
If DASHSCOPE_API_KEY is not set, replace -H "Authorization: Bearer $DASHSCOPE_API_KEY" with -H "Authorization: Bearer sk-xxx".
OpenAI-compatible HTTP
The URL in this example uses the Singapore region, replace {WorkspaceId} with your actual workspace ID. URLs vary by region. If you use the China (Beijing) region, replace the URL with https://{WorkspaceId}.cn-beijing.maas.aliyuncs.com/compatible-mode/v1/chat/completions.
Send the API request:
After sending the API request, you receive this response:
{
    "choices": [
        {
            "message": {
                "role": "assistant",
                "content": "I am a large-scale language model from Alibaba Cloud. My name is Qwen."
            },
            "finish_reason": "stop",
            "index": 0,
            "logprobs": null
        }
    ],
    "object": "chat.completion",
    "usage": {
        "prompt_tokens": 22,
        "completion_tokens": 16,
        "total_tokens": 38
    },
    "created": 1728353155,
    "system_fingerprint": null,
    "model": "qwen-plus",
    "id": "chatcmpl-39799876-eda8-9527-9e14-2214d641cf9a"
}
DashScope HTTP
The URL in this example uses the Singapore region, replace {WorkspaceId} with your actual workspace ID. URLs vary by region.
If you use the US (Virginia) region, replace the URL with
https://dashscope-us.aliyuncs.com/api/v1/services/aigc/text-generation/generation.If you use the China (Beijing) region, replace the URL with
https://{WorkspaceId}.cn-beijing.maas.aliyuncs.com/api/v1/services/aigc/text-generation/generation. Replace {WorkspaceId} with your workspace ID.
Send the API request:
After sending the API request, you receive this response:
{
    "output": {
        "choices": [
            {
                "finish_reason": "stop",
                "message": {
                    "role": "assistant",
                    "content": "I am a large-scale language model from Alibaba Cloud. My name is Qwen."
                }
            }
        ]
    },
    "usage": {
        "total_tokens": 38,
        "output_tokens": 16,
        "input_tokens": 22
    },
    "request_id": "87f776d7-3c82-9d39-b238-d1ad38c9b6a9"
}
Other languages
Call the model API
package main

import (
	"bytes"
	"encoding/json"
	"fmt"
	"io"
	"log"
	"net/http"
	"os"
)

type Message struct {
	Role    string `json:"role"`
	Content string `json:"content"`
}
type RequestBody struct {
	Model    string    `json:"model"`
	Messages []Message `json:"messages"`
}

func main() {
	// Create an HTTP client
	client := &http.Client{}
	// Build the request body
	requestBody := RequestBody{
		// Model list: https://www.alibabacloud.com/help/model-studio/getting-started/models
		Model: "qwen-plus",
		Messages: []Message{
			{
				Role:    "system",
				Content: "You are a helpful assistant.",
			},
			{
				Role:    "user",
				Content: "Who are you?",
			},
		},
	}
	jsonData, err := json.Marshal(requestBody)
	if err != nil {
		log.Fatal(err)
	}
	// The following URL is for the Singapore region. When calling, replace {WorkspaceId} with your actual workspace ID. URLs vary by region.
	req, err := http.NewRequest("POST", "https://{WorkspaceId}.ap-southeast-1.maas.aliyuncs.com/compatible-mode/v1/chat/completions", bytes.NewBuffer(jsonData))
	if err != nil {
		log.Fatal(err)
	}
	// Set request headers
	// Singapore, US (Virginia), and China (Beijing) API keys are not interchangeable. Get your API key: https://www.alibabacloud.com/help/model-studio/get-api-key
	// If the environment variable is not configured, replace with: apiKey := "sk-xxx"
	apiKey := os.Getenv("DASHSCOPE_API_KEY")
	req.Header.Set("Authorization", "Bearer "+apiKey)
	req.Header.Set("Content-Type", "application/json")
	// Send the request
	resp, err := client.Do(req)
	if err != nil {
		log.Fatal(err)
	}
	defer resp.Body.Close()
	// Read the response body
	bodyText, err := io.ReadAll(resp.Body)
	if err != nil {
		log.Fatal(err)
	}
	// Print the response
	fmt.Printf("%s\n", bodyText)
}
<?php
// The following URL is for the Singapore region. When calling, replace {WorkspaceId} with your actual workspace ID. URLs vary by region.
$url = 'https://{WorkspaceId}.ap-southeast-1.maas.aliyuncs.com/compatible-mode/v1/chat/completions';
// Singapore, US (Virginia), and China (Beijing) API keys are not interchangeable. Get your API key: https://www.alibabacloud.com/help/model-studio/get-api-key
// If the environment variable is not configured, replace with: $apiKey = "sk-xxx"
$apiKey = getenv('DASHSCOPE_API_KEY');
// Set request headers
$headers = [
    'Authorization: Bearer '.$apiKey,
    'Content-Type: application/json'
];
// Set request body
$data = [
    "model" => "qwen-plus",
    "messages" => [
        [
            "role" => "system",
            "content" => "You are a helpful assistant."
        ],
        [
            "role" => "user",
            "content" => "Who are you?"
        ]
    ]
];
// Initialize a cURL session
$ch = curl_init();
// Set cURL options
curl_setopt($ch, CURLOPT_URL, $url);
curl_setopt($ch, CURLOPT_POST, true);
curl_setopt($ch, CURLOPT_POSTFIELDS, json_encode($data));
curl_setopt($ch, CURLOPT_RETURNTRANSFER, true);
curl_setopt($ch, CURLOPT_HTTPHEADER, $headers);
// Execute the cURL session
$response = curl_exec($ch);
// Check for errors
if (curl_errno($ch)) {
    echo 'Curl error: ' . curl_error($ch);
}
// Close the cURL resource
curl_close($ch);
// Output the response
echo $response;
?>using System.Net.Http.Headers;
using System.Text;
class Program
{
private static readonly HttpClient httpClient = new HttpClient();
static async Task Main(string[] args)
{
// Singapore, US (Virginia), and China (Beijing) API keys are not interchangeable. Get your API key: https://www.alibabacloud.com/help/model-studio/get-api-key
// If the environment variable is not configured, replace with: string? apiKey = "sk-xxx"
string? apiKey = Environment.GetEnvironmentVariable("DASHSCOPE_API_KEY");
if (string.IsNullOrEmpty(apiKey))
{
Console.WriteLine("API Key not set. Make sure the 'DASHSCOPE_API_KEY' environment variable is set.");
return;
}
// The following URL is for the Singapore region. When calling, replace {WorkspaceId} with your actual workspace ID. URLs vary by region.
string url = "https://{WorkspaceId}.ap-southeast-1.maas.aliyuncs.com/compatible-mode/v1/chat/completions";
// Model list: https://www.alibabacloud.com/help/model-studio/getting-started/models
string jsonContent = @"{
""model"": ""qwen-plus"",
""messages"": [
{
""role"": ""system"",
""content"": ""You are a helpful assistant.""
},
{
""role"": ""user"",
""content"": ""Who are you?""
}
]
}";
// Send the request and get the response
string result = await SendPostRequestAsync(url, jsonContent, apiKey);
// Output the result
Console.WriteLine(result);
}
private static async Task<string> SendPostRequestAsync(string url, string jsonContent, string apiKey)
{
using (var content = new StringContent(jsonContent, Encoding.UTF8, "application/json"))
{
// Set request headers
httpClient.DefaultRequestHeaders.Authorization = new AuthenticationHeaderValue("Bearer", apiKey);
httpClient.DefaultRequestHeaders.Accept.Add(new MediaTypeWithQualityHeaderValue("application/json"));
// Send the request and get the response
HttpResponseMessage response = await httpClient.PostAsync(url, content);
// Handle the response
if (response.IsSuccessStatusCode)
{
return await response.Content.ReadAsStringAsync();
}
else
{
return $"Request failed: {response.StatusCode}";
}
}
}
}API reference
For the input and output parameters, see Qwen API reference.
For other models, see Model list.
FAQ
How do I fix the Model.AccessDenied error after calling the model API?
A: This error occurs because you are using an API key from a sub-workspace. A sub-workspace cannot access applications or models in the default workspace. To use a sub-workspace API key, the root account administrator must grant model authorization for the corresponding sub-workspace (for example, this topic uses the Qwen-Plus model). For detailed steps, see Configure model calling permissions.
Next steps
Explore more models | The example code uses |
Learn advanced features | The example code covers basic Q&A only. To learn more about the Qwen API, such as streaming output, structured output, and function calling, see the Text generation model overview. |
Try models in the browser | If you want to interact with models through a dialog box, like on Qwen Chat, go to the Playground . |