After ApsaraMQ for RocketMQ is integrated with Function Compute as an event source by using EventBridge, you can use ApsaraMQ for RocketMQ triggers to trigger the execution of the associated functions to perform custom operations on messages that are published to ApsaraMQ for RocketMQ. This topic describes how to create an ApsaraMQ for RocketMQ trigger, configure the input parameters of the associated function, write function code, and test the function in the Function Compute console.
Overview
After you submit a request to create a trigger in the Function Compute console, Function Compute automatically creates event streams in EventBridge based on the configurations of the trigger. For more information, see Overview.
After the trigger is created, you can view the information about the trigger in the Function Compute console. You can also view the information about the created resources in the EventBridge console. When a message is enqueued in the source ApsaraMQ for RocketMQ instance, the associated function in Function Compute is triggered. During function executions, message events are pushed to the function for processing separately or in batches based on your batch configurations. ApsaraMQ for RocketMQ triggers are suitable for scenarios in which end-to-end streaming data is processed.
Usage notes
The ApsaraMQ for RocketMQ instance that is used as the trigger source must reside in the same region as the Function Compute function.
If the number of created event streams exceeds the upper limit, you can no longer create ApsaraMQ for RocketMQ triggers.
For information about the limits on resources related to triggers in one region for each Alibaba Cloud account, see Limits.
Before you start
EventBridge
Function Compute
ApsaraMQ for RocketMQ
Step 1: Create a trigger
After you create an ApsaraMQ for RocketMQ instance, log on to the Function Compute console, go to the function details page, click the Configurations tab, and then click Create Trigger in the Triggers page. After the trigger is created, click OK. The following figure shows the details.
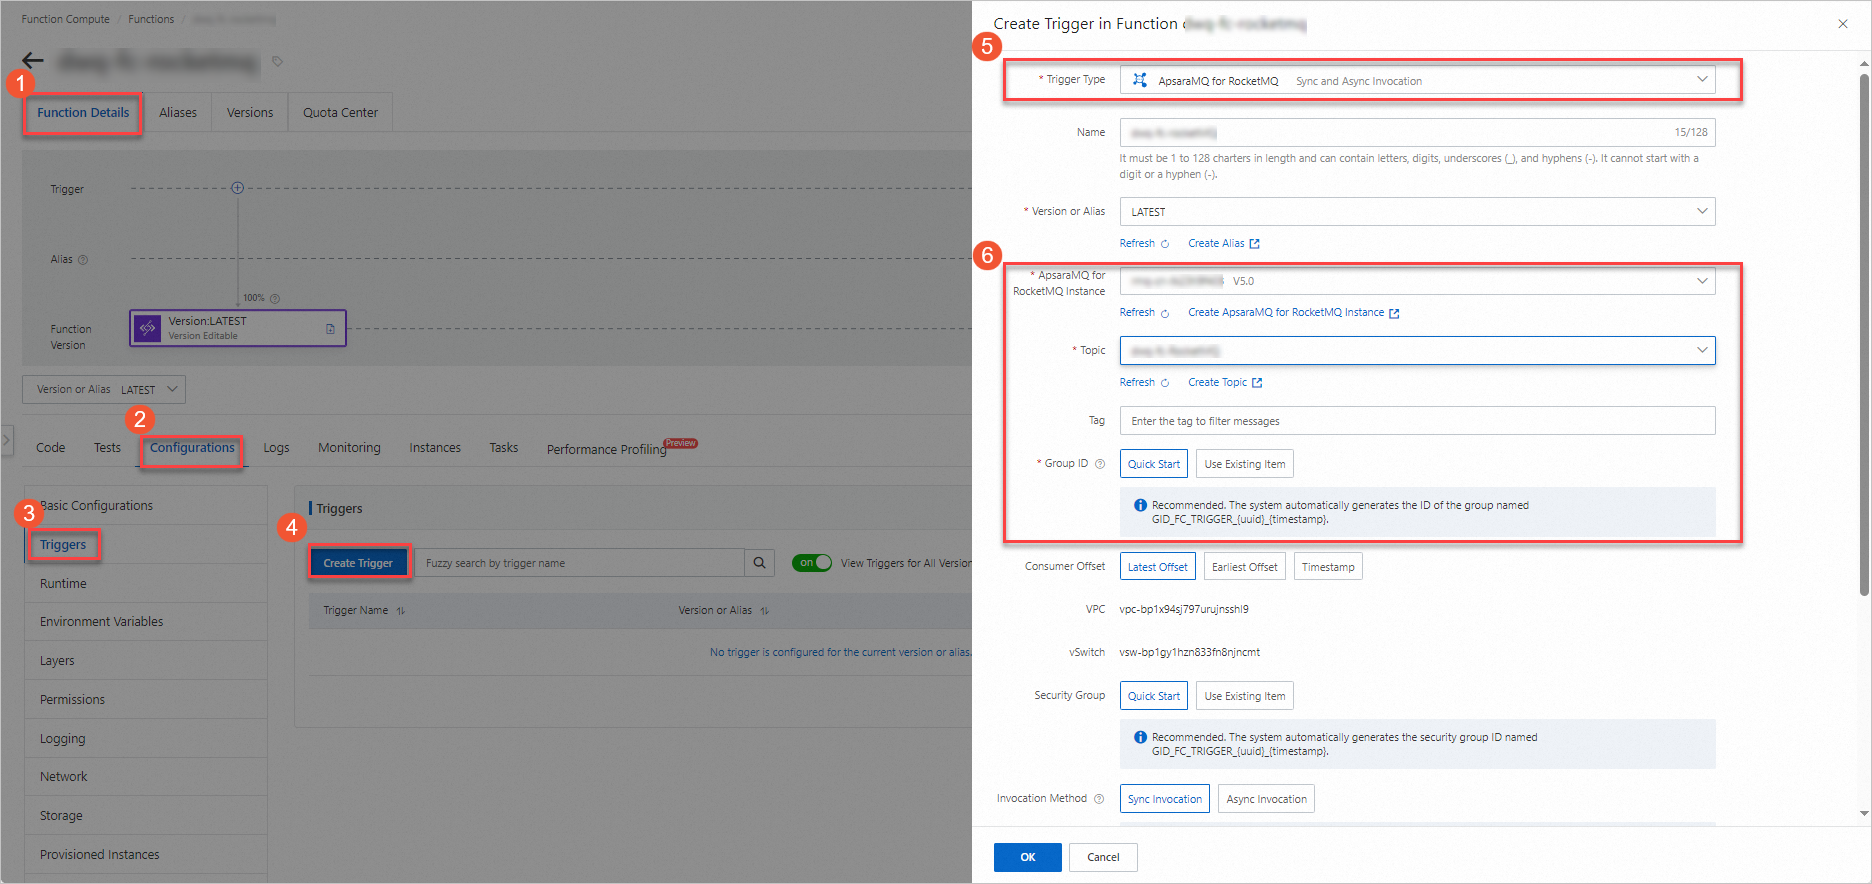
The following table describes the parameters.
Parameter | Description | Example |
Consumer Offset | Specify the offset from which ApsaraMQ for RocketMQ starts to pull messages from EventBridge. Valid values:
| Latest Offset |
Invocation Method | Specify a function invocation method. Set the parameter to one of following values based on your business requirements:
| Sync Invocation |
For information about advanced configurations such as push settings, retry policies, and dead-letter queues, see Advanced features of triggers.
Step 2: (Optional) Configure input parameters
ApsaraMQ for RocketMQ passes an event source to a function in the form of event as input parameters. You can use code to parse and process event. You can manually pass event to the function to simulate a trigger event to test whether the function code is correct.
On the Code tab of the function details page, click the
 icon next Test Function and select Configure Test Parameters from the drop-down list.
 In the Configure Test Parameters panel, click the Create New Test Event or Modify Existing Test Event tab, enter the event name and event content, and then click OK.
Sample code of
event:[ { "id":"94ebc15f-f0db-4bbe-acce-56fb72fb****", "source":"RocketMQ-Function-rocketmq-trigger", "specversion":"1.0", "type":"mq:Topic:SendMessage", "datacontenttype":"application/json; charset=utf-8", "subject":"acs:mq:cn-hangzhou:164901546557****:MQ_INST_164901546557****_BXhFHryi%TopicName", "time":"2021-04-08T06:01:20.766Z", "aliyunaccountid":"164901546557****", "aliyunpublishtime":"2021-10-15T02:05:16.791Z", "aliyunoriginalaccountid":"164901546557****", "aliyuneventbusname":"RocketMQ-Function-rocketmq-trigger", "aliyunregionid":"cn-chengdu", "aliyunpublishaddr":"42.120.XX.XX", "data":{ "topic":"TopicName", "systemProperties":{ "MIN_OFFSET":"0", "TRACE_ON":"true", "MAX_OFFSET":"8", "MSG_REGION":"cn-hangzhou", "KEYS":"systemProperties.KEYS", "CONSUME_START_TIME":1628577790396, "TAGS":"systemProperties.TAGS", "INSTANCE_ID":"MQ_INST_164901546557****_BXhFHryi" }, "userProperties":{ }, "body":"TEST" } }, { "id":"94ebc15f-f0db-4bbe-acce-56fb72fb****", "source":"RocketMQ-Function-rocketmq-trigger", "specversion":"1.0", "type":"mq:Topic:SendMessage", "datacontenttype":"application/json; charset=utf-8", "subject":"acs:mq:cn-hangzhou:164901546557****:MQ_INST_164901546557****_BXhFHryi%TopicName", "time":"2021-04-08T06:01:20.766Z", "aliyunaccountid":"164901546557****", "aliyunpublishtime":"2021-10-15T02:05:16.791Z", "aliyunoriginalaccountid":"164901546557****", "aliyuneventbusname":"RocketMQ-Function-rocketmq-trigger", "aliyunregionid":"cn-chengdu", "aliyunpublishaddr":"42.120.XX.XX", "data":{ "topic":"TopicName", "systemProperties":{ "MIN_OFFSET":"0", "TRACE_ON":"true", "MAX_OFFSET":"8", "MSG_REGION":"cn-hangzhou", "KEYS":"systemProperties.KEYS", "CONSUME_START_TIME":1628577790396, "TAGS":"systemProperties.TAGS", "INSTANCE_ID":"MQ_INST_164901546557****_BXhFHryi" }, "userProperties":{ }, "body":"TEST" } } ]The following table describes the parameters contained in data. For information about parameters that are defined in the CloudEvents specification, see Overview.
Parameter
Type
Example
Description
topic
String
TopicName
The topic name.
systemProperties
Map
The system properties.
MIN_OFFSET
Int
0
The earliest offset.
TRACE_ON
Boolean
true
Indicates whether a message trace exists. Valid values:
true
false
MAX_OFFSET
Int
8
The latest offset.
MSG_REGION
String
cn-hangzhou
The region from which the message is sent.
KEYS
String
systemProperties.KEYS
The keys that are used to filter the message.
CONSUME_START_TIME
Long
1628577790396
The start time of message consumption. Unit: milliseconds.
UNIQ_KEY
String
AC14C305069E1B28CDFA3181CDA2****
The unique key of the message.
TAGS
String
systemProperties.TAGS
The tags that are used to filter the message.
INSTANCE_ID
String
MQ_INST_123456789098****_BXhFHryi
The ID of the ApsaraMQ for RocketMQ instance.
userProperties
Map
None
The user properties.
body
String
TEST
The message body.
Step 3: Write function code and test the function
After the trigger is created, you can write function code and test the function to verify whether the code is correct. When events that are generated by ApsaraMQ for RocketMQ are delivered to Function Compute by using EventBridge, the trigger automatically triggers the function.
On the Code tab of the function details page, write code in the code editor and click Deploy Code.
The following sample code provides an example of function code in Node.js:
'use strict';
/*
To enable the initializer feature
please implement the initializer function as below:
exports.initializer = (context, callback) => {
  console.log('initializing');
  callback(null, '');
};
*/
exports.handler = (event, context, callback) => {
  console.log("event: %s", event);
  // Parse the event parameters and process the event.
  callback(null, 'return result');
}
Test the function.
Method 1: If you configure
eventto simulate an event source, click Test Function.Method 2: Log on to the ApsaraMQ for RocketMQ console, select the topic that you created, and then click Send Message. The following figure shows an example.

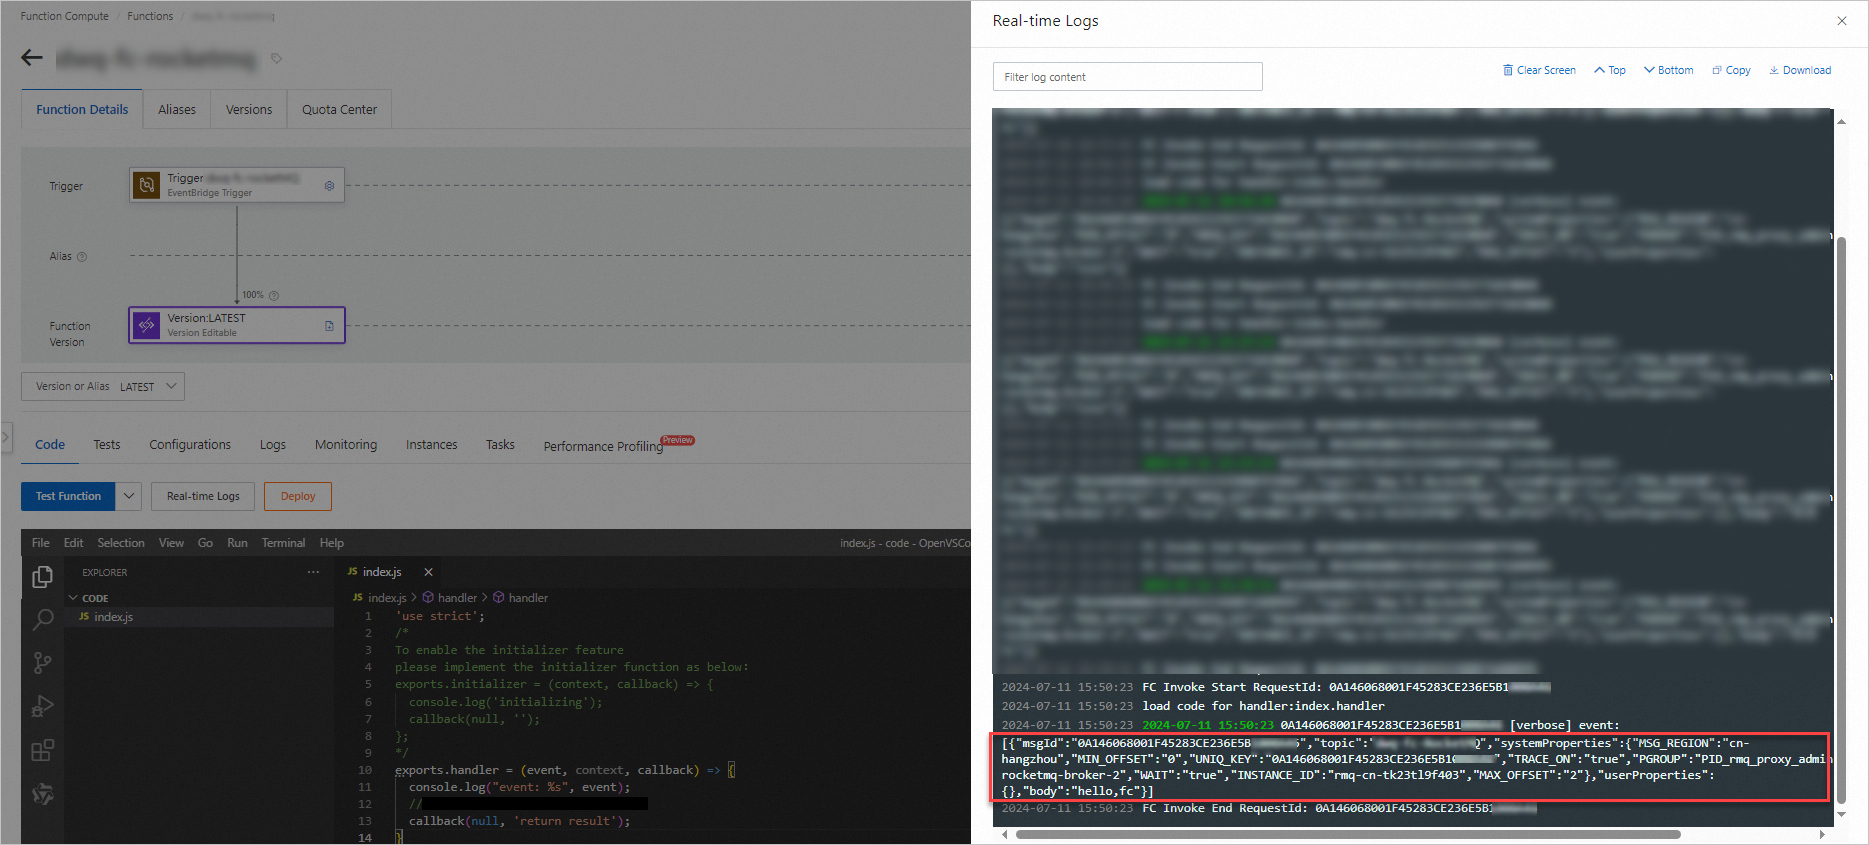
After the execution is complete, view the result in Real-time Logs.
Additional information
To modify or delete an existing trigger, see Manage triggers.