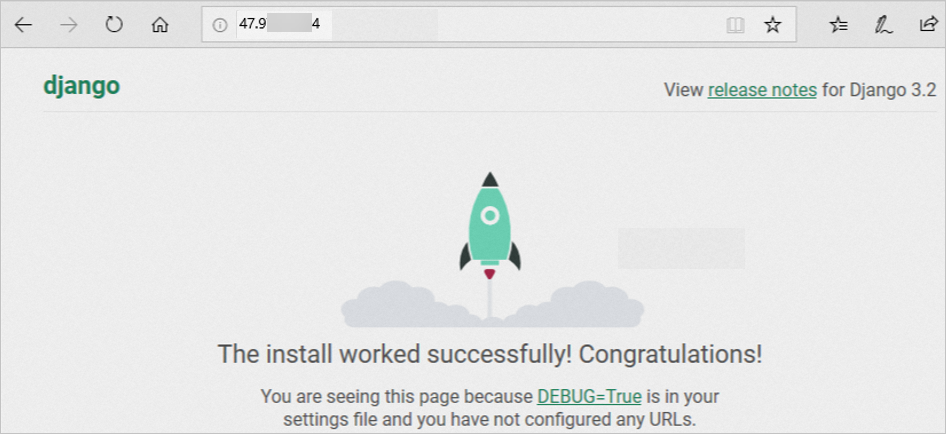
Django is an open-source Python-based web framework that is used to build web projects. This topic describes how to use NGINX and uWSGI to deploy a Django project on a Linux Elastic Compute Service (ECS) instance.
Prerequisites
ECS instances that meet the following requirements are created:
The instances are associated with auto-assigned public IP addresses or elastic IP addresses (EIPs). For information about how to associate an EIP with an instance, see Associate or disassociate an EIP.
The instances run Alibaba Cloud Linux 3.2104, Alibaba Cloud Linux 2.1903, CentOS 7, Ubuntu 22.04, Ubuntu 20.04, or Ubuntu 18.04.
ImportantIn this topic, an instance that runs Alibaba Cloud Linux 3.2104 and an instance that runs Ubuntu 20.04 64-bit are used. Operations may vary if your instances run other operating system versions.
Operations may also vary based on your software or program versions.
Inbound rules are added to the security groups of the instances to open the following ports: 22, 80, 8001, and 8002. For more information, see Add security group rules.
Step 1: Install Python or check the Python version
Connect to a Linux instance.
For more information, see Connect to a Linux instance by using a password or key.
Run the following commands based on the operating system of the instance to view the installation information about Python.
In this example, Python 3 has been installed on the instance. If Python 3 is not installed on your instance, install Python 3.
Alibaba Cloud Linux 3.2104/Alibaba Cloud Linux 2.1903/CentOS 7.x
which python3
ll /usr/bin/python*
A command output similar to the following one is returned:
[ecs-user@iZbp17st8t8txp6po87**** ~]$ which python3
/usr/bin/python3
[ecs-user@iZbp17st8t8txp6po87**** ~]$ ll /usr/bin/python*
lrwxrwxrwx 1 root root 7 Feb 8 10:30 /usr/bin/python -> python2
lrwxrwxrwx 1 root root 9 Feb 8 10:30 /usr/bin/python2 -> python2.7
-rwxr-xr-x 1 root root 7144 Jun 28 2022 /usr/bin/python2.7
lrwxrwxrwx 1 root root 9 Feb 8 10:25 /usr/bin/python3 -> python3.6
-rwxr-xr-x 2 root root 11328 Nov 17 2020 /usr/bin/python3.6
lrwxrwxrwx 1 root root 17 Feb 8 10:25 /usr/bin/python3.6-config -> python3.6m-config
-rwxr-xr-x 2 root root 11328 Nov 17 2020 /usr/bin/python3.6m
-rwxr-xr-x 1 root root 173 Nov 17 2020 /usr/bin/python3.6m-config
-rwxr-xr-x 1 root root 3403 Nov 17 2020 /usr/bin/python3.6m-x86_64-config
lrwxrwxrwx 1 root root 16 Feb 8 10:25 /usr/bin/python3-config -> python3.6-config
Ubuntu 20.04
which python3
ll /usr/bin/python*
A command output similar to the following one is returned:
ecs-user@iZjyfbxivbj****:~$ which python3
/usr/bin/python3
ecs-user@iZjyfbxivbj****:~$ ll /usr/bin/python*
-rwxr-xr-x 1 root root 3662032 Jul 1 2022 /usr/bin/python2.7*
lrwxrwxrwx 1 root root 9 Feb 8 14:05 /usr/bin/python3 -> python3.8*
-rwxr-xr-x 1 root root 5494584 Nov 14 20:59 /usr/bin/python3.8*
lrwxrwxrwx 1 root root 33 Nov 14 20:59 /usr/bin/python3.8-config -> x86_64-linux-gnu-python3.8-config*
lrwxrwxrwx 1 root root 16 Mar 13 2020 /usr/bin/python3-config -> python3.8-config*
Step 2: Deploy an NGINX environment
Run one or more of the following commands based on the operating system of the instance to install NGINX.
Alibaba Cloud Linux 3.2104/Alibaba Cloud Linux 2.1903/CentOS 7.x
sudo yum -y install nginxUbuntu 22.04/Ubuntu 20.04/Ubuntu 18.04
sudo apt update
sudo apt -y install nginx
Run the following commands to start the NGINX service and check the status of the service:
sudo systemctl start nginx
systemctl status nginx
If the NGINX service starts as expected,
Active: active (running)is displayed in the command output.
Step 3: Deploy and test a uWSGI environment
Run the following command to install uWSGI:
sudo pip3 install uwsgiThe following command output indicates that uWSGI is installed:
WARNING: Running pip install with root privileges is generally not a good idea. Try `pip3 install --user` instead.
Collecting uwsgi
 Downloading http://mirrors.cloud.aliyuncs.com/pypi/packages/b3/8e/b4fb9f793745afd6afcc0d2443d5626132e5d3540de98f28a8b8f5c753f9/uwsgi-2.0.21.tar.gz (808kB)
 100% |████████████████████████████████| 808kB 72.9MB/s
Installing collected packages: uwsgi
 Running setup.py install for uwsgi ... done
Successfully installed uwsgi-2.0.22
If an error message appears during the installation process as shown in the following figure, run the following command to re-install uWSGI:
Alibaba Cloud Linux 3.2104/Alibaba Cloud Linux 2.1903/CentOS 7.x
sudo yum -y install python3-devel.x86_64Ubuntu 22.04/Ubuntu 20.04
sudo apt -y install python3-devel.x86_64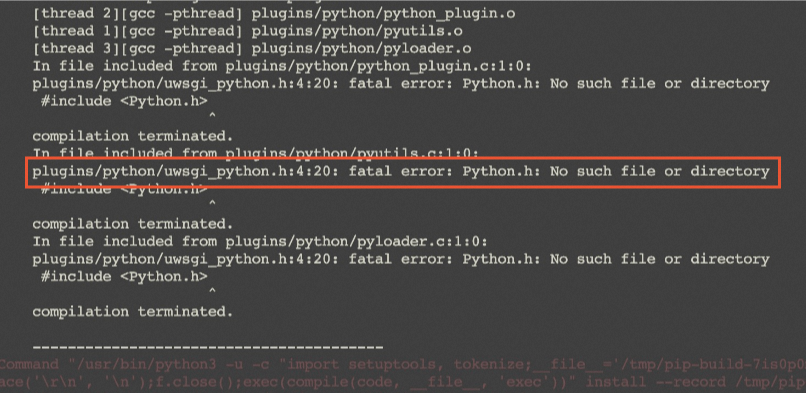
Run the following command to create a test directory.
In this example, the
/home/myblogdirectory is created. You can specify a directory based on your business requirements.sudo mkdir /home/myblogRun the following commands to create and open the test program file
test.py:cd /home/myblog sudo vim test.pyPress the
Ikey to enter Insert mode, and then copy the following content to the file:def application(env,start_response): start_response('200 ok',[('Content-Type','text/html')]) return [b"Hello World"]Press the
Esckey, enter:wq, and then press the Enter key to save and close the file.Run one of the following commands based on the operating system of the instance to check whether test.py can run and be accessed.
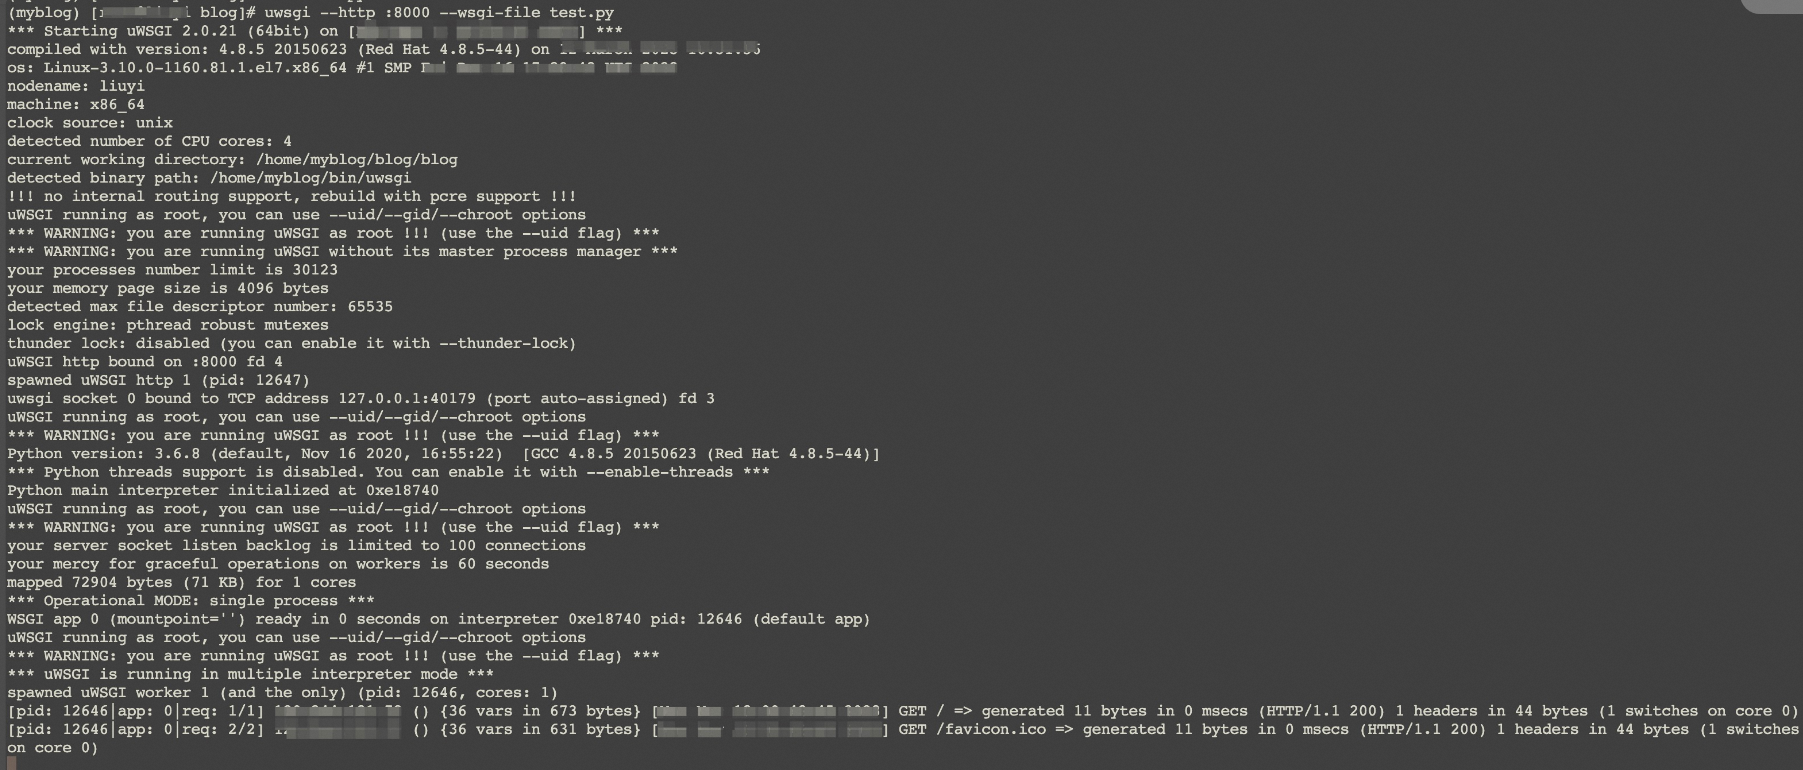
Alibaba Cloud Linux 3.2104/Alibaba Cloud Linux 2.1903/CentOS 7.x
sudo /usr/local/bin/uwsgi --http :8001 --wsgi-file test.pyA command output similar to the following one is returned.
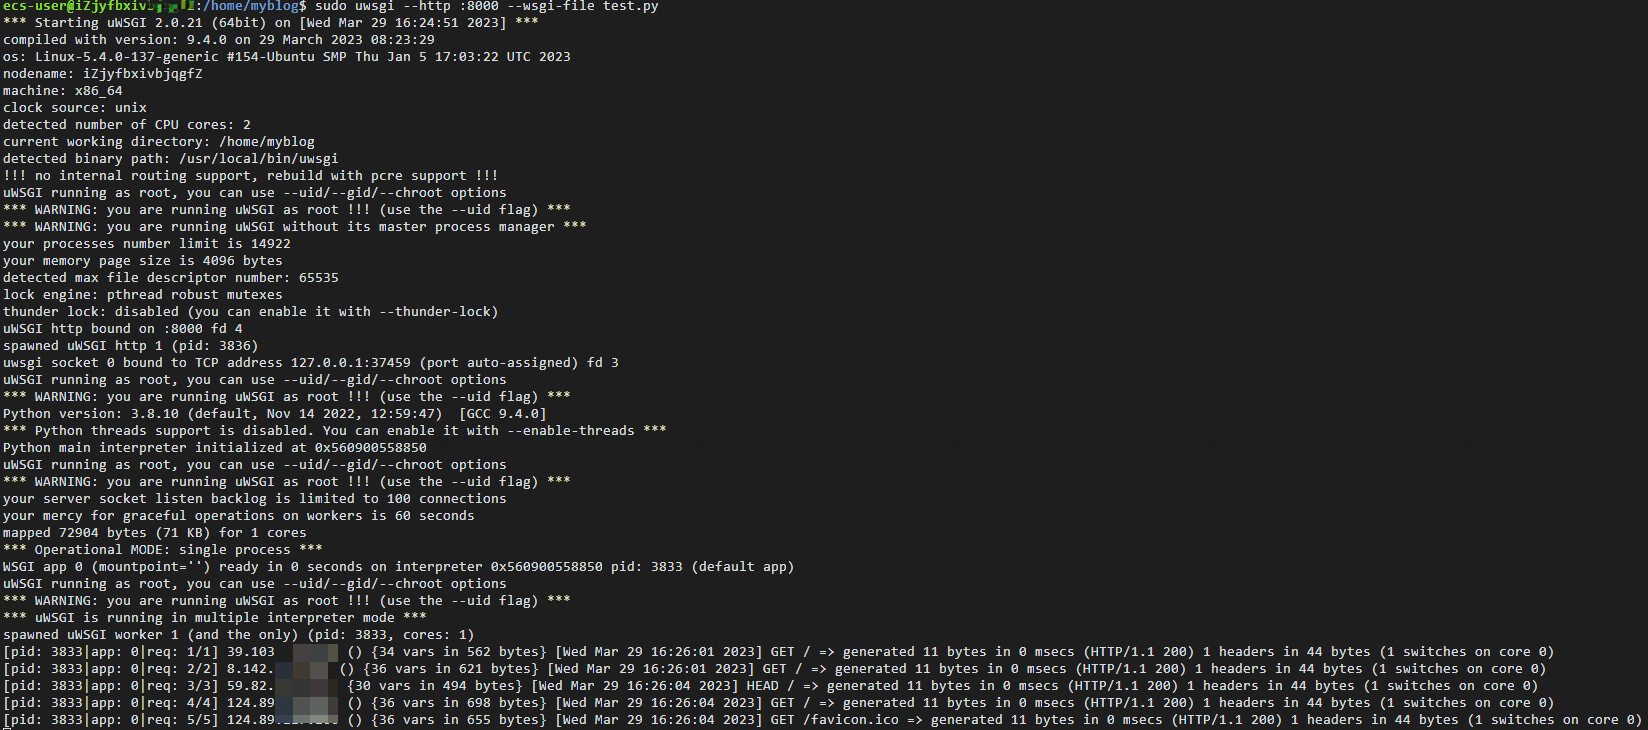
Ubuntu 22.04/Ubuntu 20.04
sudo uwsgi --http :8001 --wsgi-file test.pyA command output similar to the following one is returned.
In the address bar of a browser on your computer, enter
http://<Public IP address of the instance>:8001to access the test program file.The page shown in the following figure indicates that the uWSGI environment is deployed.

Step 4: Deploy and test a Django environment
Run the following command to install Django:
sudo pip3 install Django
Run one of the following commands based on the operating system of the instance to create a project.
In this example, the
uwsgi_projectproject is created. You can specify a project name based on your business requirements.Alibaba Cloud Linux 3.2104/Alibaba Cloud Linux 2.1903/CentOS 7.x
sudo /usr/local/bin/django-admin.py startproject uwsgi_projectUbuntu 22.04/Ubuntu 20.04
sudo /usr/local/bin/django-admin startproject uwsgi_projectRun the following command to open the
settings.pyfile:sudo vim /home/myblog/uwsgi_project/uwsgi_project/settings.pyPress the
Ikey to enter Insert mode and changeALLOWED_HOSTS = [ ]toALLOWED_HOSTS = ["*"]. Press theEsckey, enter:wq, and then press the Enter key to save and close the file.Note["*"] indicates that access from all IP addresses is allowed. If the ALLOWED_HOSTS parameter is not set to ["*"], access is denied. Configure the ALLOWED_HOSTS parameter based on your business requirements.
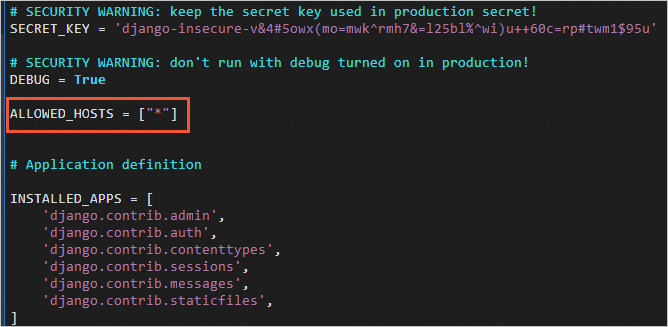
Run the following commands to start Django:
cd /home/myblog/uwsgi_project
sudo python3 manage.py runserver 0.0.0.0:8002
An error message similar to the following one may be returned:
django.core.exceptions.ImproperlyConfigured: SQLite 3.9.0 or later is required (found 3.7.17).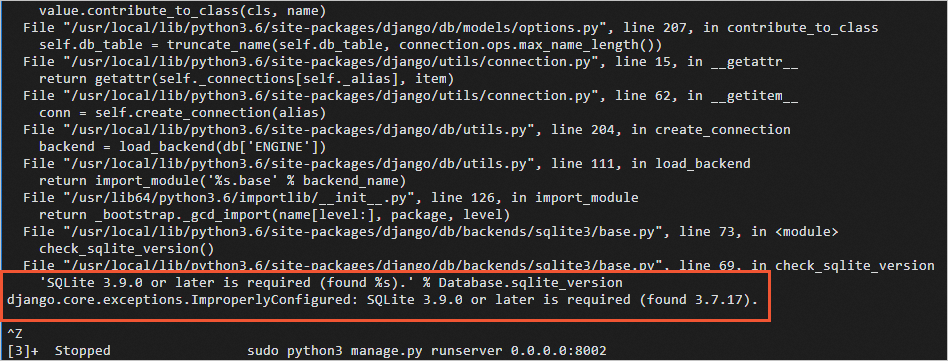
If an error message similar to the preceding one is returned, comment out
DATABASESin thesettings.pyfile and restart Django. For information about how to modify thesettings.pyfile, see Edit the settings.py file.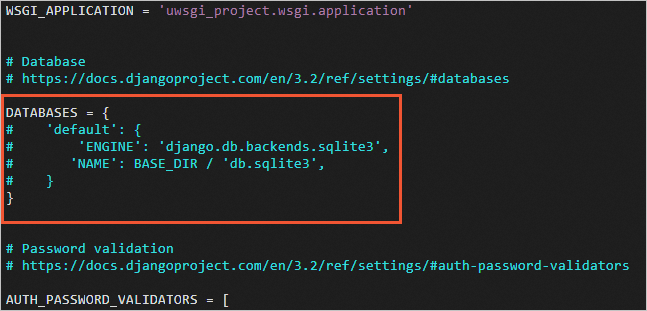
In the address bar of a browser on your computer, enter
http://<Public IP address of the instance>:8002to access the Django page.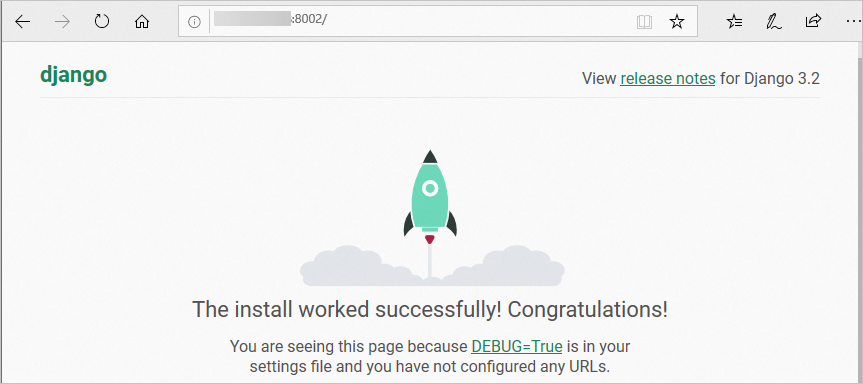
Step 5: Configure NGINX, uWSGI, and Django
Run one of the following commands based on the operating system of the instance to open the NGINX configuration file.
Alibaba Cloud Linux 3.2104/Alibaba Cloud Linux 2.1903/CentOS 7.x
sudo vim /etc/nginx/nginx.confUbuntu 22.04/Ubuntu 20.04
sudo vim /etc/nginx/sites-enabled/defaultPress the
Ikey to enter Insert mode. Add or modify the following parameters in theserversection. Press theEsckey, enter:wq, and then press the Enter key to save and close the file.upstream django { server 127.0.0.1:8001; #Use the port that you configured in the uWSGI configuration file. } server { listen 80; #Configure the NGINX port. server_name test; charset utf-8; location /static { autoindex on; alias /home/myblog/uwsgi_project/static; #Specify your actual directory. } location / { uwsgi_pass 127.0.0.1:8001; include uwsgi_params; #Specify your actual directory. include /etc/nginx/uwsgi_params; #Specify your actual directory. uwsgi_param UWSGI_SCRIPT iCourse.wsgi; #Specify your actual directory. uwsgi_param UWSGI_CHDIR /iCourse; #Specify your actual directory. index index.html index.htm; client_max_body_size 35m; index index.html index.htm; } }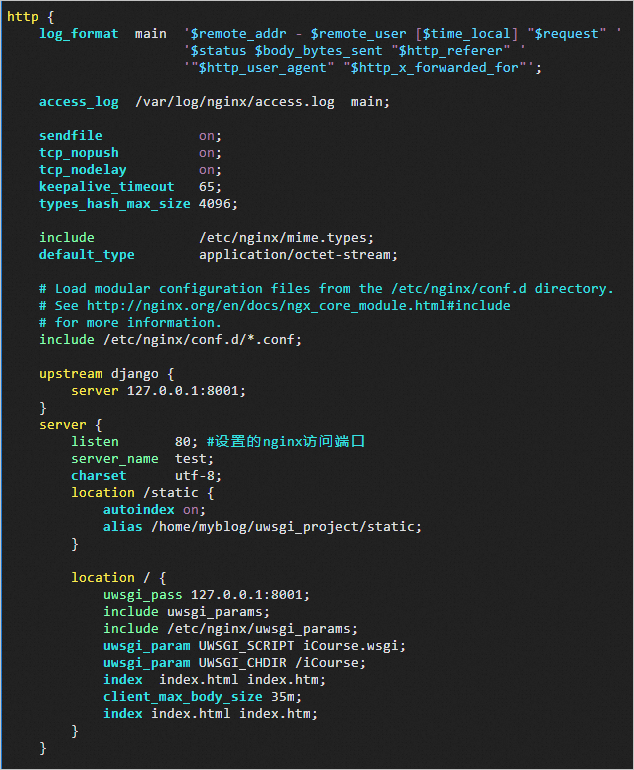
Run the following command to create the uWSGI configuration file
uwsgi_config.ini:sudo vim uwsgi_config.iniPress the
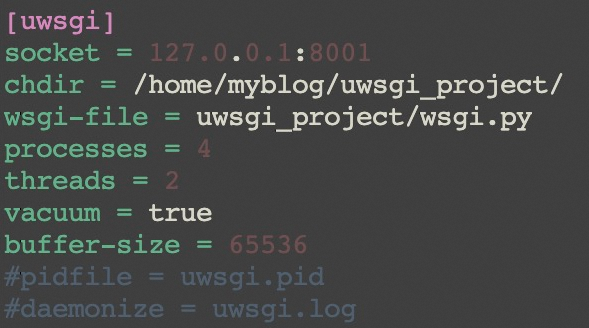
Ikey to enter Insert mode and add the following parameters to the file. Press theEsckey, enter:wq, and then press the Enter key to save and close the file.[uwsgi] socket = 127.0.0.1:8001 chdir = /home/myblog/uwsgi_project/ wsgi-file = uwsgi_project/wsgi.py processes = 4 threads = 2 vacuum = true buffer-size = 65536Parameter description:
socket: Use the uwsgi_pass port that you configured in the NGINX configuration file. In this example, port 8001 is used.
chdir: Specify a project directory. In this example,
/home/myblog/uwsgi_projectis used as the project directory.wsgi-file: Specify a
.wsgifile for Django. Configure the parameter based on the project.processes: Specify the maximum number of worker processes.
threads: Specify the number of threads that start after each worker process starts.
vacuum: Clear the environment when you exit.
buffer-size: Specify the size of the buffer that is used to parse uWSGI packets. In this example, the size of the buffer is set to 64k. Default value: 4k.
Configure other parameters based on your project.
Restart services.
Run the following command to restart the NGINX service:
sudo systemctl restart nginxRun the following commands to restart the uWSGI service.
Run the following commands to stop the uWSGI service that is running:
ps aux |grep uwsgi
sudo kill -9 13187 #Specify the process ID (PID) that you obtained in the previous step. In this example, the PID is 13187.
Run one of the following commands based on the operating system of the instance to start the uWSGI service.
Alibaba Cloud Linux 3.2104/Alibaba Cloud Linux 2.1903/CentOS 7.x
uwsgi --ini uwsgi_config.ini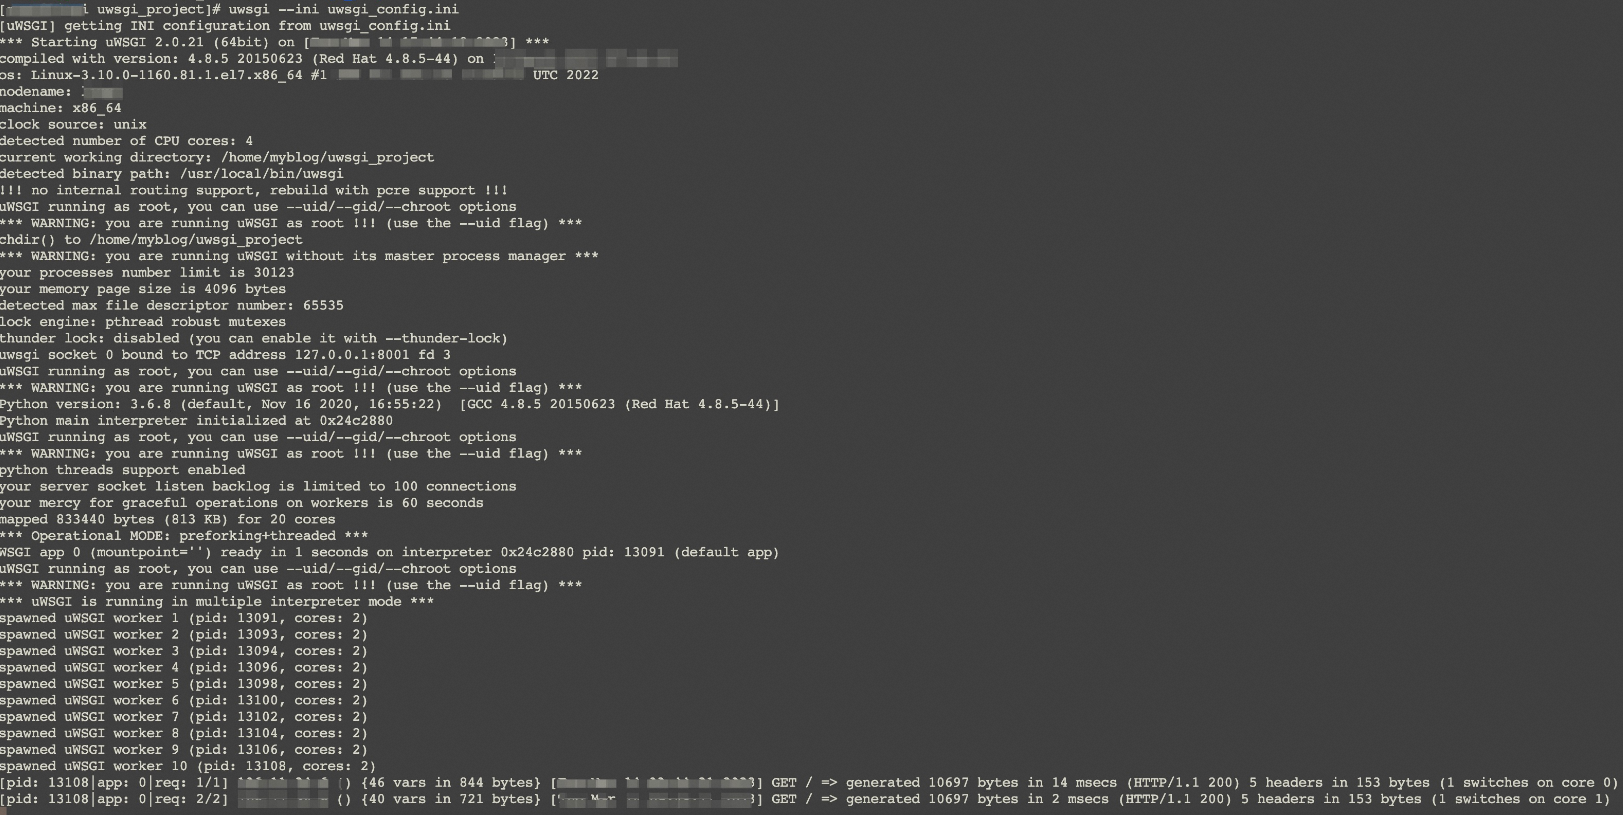
Ubuntu 22.04/Ubuntu 20.04
sudo uwsgi --ini uwsgi_config.ini
In the address bar of a browser on your computer, enter
http://<Public IP address of the instance>to access the Django page.