vsftpd (Very Secure FTP Daemon) is a widely used, open source FTP server software. It is known for its high performance, security, and stability. vsftpd supports various FTP-related protocols, such as FTP, SFTP over SSH, and FTP with Secure Sockets Layer (SSL)/Transport Layer Security (TLS) encryption. This topic describes how to install and configure vsftpd on an Elastic Compute Service (ECS) instance that runs Linux.
Quick deployment
Click Run now to go to Terraform Explorer. In Terraform Explorer, you can view and run Terraform code to automatically build an FTP site on an ECS instance.
Prerequisites
Create a basic ECS instance that meets the following requirements. If you have not created an instance, see Create an instance using the wizard.
Operating system: Alibaba Cloud Linux 3 or 2, CentOS 7.x 64-bit, Ubuntu, or Debian.
IP address: The instance has a static public IP address or is associated with an Elastic IP Address (EIP). For more information, see Elastic IP Address.
Introduction to VSFTP
vsftpd (Very Secure FTP Daemon) is an open source FTP server software designed for UNIX and Linux systems. Its main features include the following:
High security: vsftpd undergoes strict security audits and uses multiple security mechanisms to effectively prevent common attacks and vulnerabilities.
Superior performance: It provides high-performance file transfers and supports many concurrent user connections.
Simple configuration: It offers flexible and easy-to-understand configuration options to suit various user needs.
IPv6 support: It provides robust support for the next-generation network protocol.
Build the VSFTP service
Alibaba Cloud Linux 3 and 2/CentOS 7.x
Step 1: Install vsftpd
Run the following commands to update system components and install the
vsftpdservice.sudo yum update -y sudo yum install vsftpd -yRun the following commands to start the FTP service and enable it to start automatically upon system startup.
sudo systemctl start vsftpd
sudo systemctl enable vsftpd
Run the following command to check whether the service is started.
netstat -antup | grep ftpIf the output is similar to the following, the FTP service has started successfully.

At this point, vsftpd has enabled anonymous user mode by default. You can log on to the FTP server without a username and password. Users who log on this way do not have permission to modify or upload files.
Step 2: Configure vsftpd
Run the following commands to create a dedicated user for the FTP service and set a password. This topic uses
ftpuseras an example.sudo useradd -d /data/ftp -s /sbin/nologin ftpuser # Specify the home directory and disable shell access sudo passwd ftpuserRun the following commands to create a folder for the FTP service and configure directory permissions.
sudo mkdir -p /data/ftp      # Create a custom storage directory
sudo chown ftpuser:ftpuser /data/ftp
sudo chmod 750 /data/ftp    # Permissions must be 755 or 750
Edit the
vsftpdconfiguration file.NoteAn FTP server can connect to a client and transfer data in active or passive mode. Because of firewall settings on most client machines and the inability to obtain a real IP address, we recommend that you use passive mode to build the FTP service. The following modifications are for setting up passive mode.
Run the following command to back up the
vsftpdconfiguration file.sudo cp /etc/vsftpd/vsftpd.conf /etc/vsftpd/vsftpd.conf.bakRun the following command to modify the configuration file.
sudo vim /etc/vsftpd/vsftpd.confModify the basic security configuration for the FTP service.
listen=YES                   # Enable IPv4 listener
anonymous_enable=NO          # Disable anonymous access
local_enable=YES             # Enable local user logon
write_enable=YES             # Allow file uploads
chroot_local_user=YES        # Lock users to their home directory
allow_writeable_chroot=YES   # Resolve chroot write errors
Add the passive mode configuration to the end of the configuration file.
pasv_enable=YES              # Enable passive mode
pasv_min_port=40000          # Lower limit of the passive port range
pasv_max_port=40100          # Upper limit of the passive port range
pasv_address=public_ip_address      # Must be set to the server's public IP address
Run the following command to restart the
vsftpdservice.sudo systemctl restart vsftpd
Step 3: Set security group rules
After you build the FTP service, add inbound rules to the security group of the Linux instance based on the FTP mode you are using. For more information, see Add a security group rule.
Most client machines are in a local area network (LAN), and their IP addresses are translated. If you use FTP active mode, make sure that the client machines obtain their real IP addresses. Otherwise, the clients may fail to log on to the FTP server. Correct configuration helps prevent connection issues and improves the stability and availability of the FTP service.
Active mode: Allow traffic on port 21.
Passive mode: Allow traffic on port 21 and all ports between pasv_min_port and pasv_max_port that are specified in the /etc/vsftpd/vsftpd.conf file. In this topic, ports 40000 to 40100 are allowed. For information about why a port range is required for FTP passive mode and configuration recommendations, see Recommendations for FTP passive mode port configuration.
Step 4: Verify the FTP service
You can use an FTP client, a browser, or a file explorer to verify the FTP service. This topic uses the client's file explorer as an example.
Test the local connection.
Run the following command to test the connection from the local machine.
ftp ftpuser@localhostA
Login successfulmessage in the console indicates a successful connection.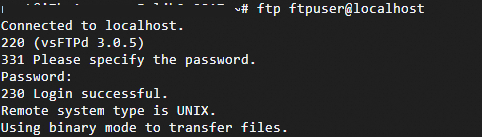
Test the client connection.
On the client computer, open the file explorer and access the following address, as shown in the figure.
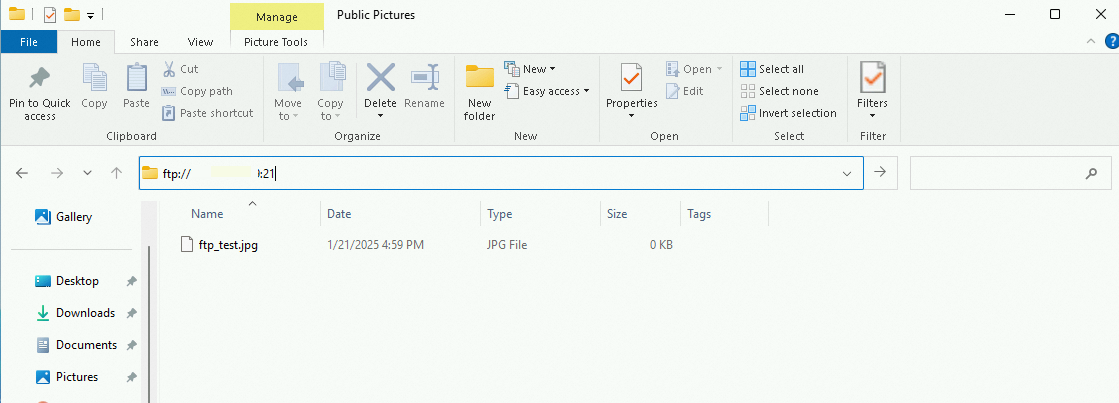
In the logon dialog box that appears, enter the FTP username and password. After you log on, you can upload and download files.
Ubuntu and Debian
Step 1: Install VSFTP
Run the following commands to update system components and install the
vsftpdservice.sudo apt update && sudo apt upgrade -y sudo apt install vsftpd -yRun the following command to start the
vsftpdservice and enable it to start automatically upon system startup.sudo systemctl start vsftpd sudo systemctl enable vsftpd
Step 2: Configure VSFTP
Run the following commands to create a dedicated FTP user.
sudo useradd -m -s /bin/bash ftpuser  # Create a user and automatically generate a home directory
sudo passwd ftpuser  # Set the user password (a strong password is recommended)
Run the following commands to create a file storage directory and configure permissions.
sudo mkdir /home/ftpuser/ftp-files
sudo chown ftpuser:ftpuser /home/ftpuser/ftp-files
sudo chmod 755 /home/ftpuser/ftp-files
Run the following command to back up the original configuration file.
sudo cp /etc/vsftpd.conf /etc/vsftpd.conf.bakRun the following command to edit the configuration file.
sudo nano /etc/vsftpd.confModify the following configuration settings:
# Basic configuration
listen=YES
anonymous_enable=NO          # Disable anonymous access
local_enable=YES             # Allow local user logon
write_enable=YES             # Enable write permissions
chroot_local_user=YES        # Lock users in their home directory
Add the following configuration to the end of the file:
allow_writeable_chroot=YES   # Allow writing to the chroot directory
local_root=/home/ftpuser/ftp-files  # Specify the root directory for the FTP user

# Passive mode configuration (to resolve external network connection issues)
pasv_enable=YES
pasv_address=xx.xx.xx.xx  # Replace with your public IP address
pasv_min_port=40000
pasv_max_port=40100
Run the following command to restart the FTP service.
sudo systemctl restart vsftpdAfter FTP is installed, a user named ftp is created by default with no password. Run the following command to change the password for the ftp user.
sudo passwd ftpSet a strong password and skip all other prompts.
Add the user to the list of allowed FTP users.
echo "ftp" | sudo tee -a /etc/vsftpd.userlistCreate an FTP file directory and grant permissions to the user.
Create an FTP folder.
sudo mkdir /home/ftpSet the folder ownership.
In this example, read, write, and full control permissions are granted to the folder. You can modify the permissions as needed.
sudo chmod 777 /home/ftp
Step 3: Set security group rules
After you build the FTP service, add inbound rules to the security group of the Linux instance based on the FTP mode you are using. For more information, see Add a security group rule.
Most client machines are in a local area network (LAN), and their IP addresses are translated. If you use FTP active mode, make sure that the client machines obtain their real IP addresses. Otherwise, the clients may fail to log on to the FTP server. Correct configuration helps prevent connection issues and improves the stability and availability of the FTP service.
Active mode: Allow traffic on port 21.
Passive mode: Allow traffic on port 21 and all ports between pasv_min_port and pasv_max_port that are specified in the /etc/vsftpd/vsftpd.conf file. For information about why a port range is required for FTP passive mode and configuration recommendations, see Build an FTP site on a Windows instance.
Step 4: Verify the FTP service
You can use an FTP client, a browser, or a file explorer to verify the FTP service. This topic uses the client's file explorer as an example.
Test the local connection.
Run the following command to test the connection from the local machine.
ftp ftpuser@localhostA
Login successfulmessage in the console indicates a successful connection.Test the client connection.
On the client computer, open the file explorer and access the following address, as shown in the figure.
In the logon dialog box that appears, enter the FTP username and password. After you log on, you can upload and download files.
Common errors
Phenomenon | Solution |
Timeout after | Check the public IP address association and the firewall rules on both the client and server. |
| Change the directory permissions to 755. |
Only empty directories are listed | Check the |
| Run |
Passive mode connection timeout | Check the firewall rules and the pasv_address setting. |
Cannot upload files | Verify that the directory permissions are 755 or 750. |
Appendix
vsftpd configuration file and parameters
The following section describes the files in the /etc/vsftpd directory:
/etc/vsftpd/vsftpd.confis the core vsftpd configuration file./etc/vsftpd/ftpusersis a blacklist file. Users listed in this file cannot access the FTP server./etc/vsftpd/user_listis a whitelist file. Users listed in this file can access the FTP server.
The following tables describe the parameters in the vsftpd.conf configuration file:
The following table describes the parameters for logon control.
Parameter
Description
anonymous_enable=YES
Accepts anonymous users.
no_anon_password=YES
Anonymous users can log on without a password.
anon_root=(none)
Home directory for anonymous users.
local_enable=YES
Accepts local users.
local_root=(none)
Home directory for local users.
The following table describes the parameters for user permission control.
Parameter
Description
write_enable=YES
Allows file uploads (global setting).
local_umask=022
Permissions for files uploaded by local users.
file_open_mode=0666
Permissions for uploaded files. This setting works with local_umask.
anon_upload_enable=NO
Anonymous users can upload files.
anon_mkdir_write_enable=NO
Anonymous users can create directories.
anon_other_write_enable=NO
anonymous user: Edit, Delete
chown_username=lightwiter
Username for anonymous file uploads