This topic describes the cause and solution for external network access failures on a Windows instance caused by an excessive number of TCP connections in the TIME_WAIT state.
Problem description
You may be able to ping an external network address from your Windows instance but cannot access external networks with a web browser. Symptoms can also include slow loading times for external websites or application network errors. Running the netstat -an |find "TIME_WAIT" /c command in the Command Prompt on the Windows instance reveals many TCP connections in the TIME_WAIT state. For example:
Cause
In Windows operating systems since Windows Server 2008, the default number of dynamic ports is 16,384, ranging from 49152 to 65535. The TCP Time Wait Delay defaults to four minutes. If a system handles a high volume of connections, these connections remain in the TIME_WAIT state for an extended period after closing. This consumes many ports and can lead to port exhaustion, which prevents new connections from being established.
Solution
The following steps use Windows Server 2012 R2 as an example. The steps may vary depending on your instance's operating system.
Connect to the Windows instance using Virtual Network Computing (VNC).
For more information, see Connect to an instance using VNC.
Open the Command Prompt.
Click the
 icon in the lower-left corner of the desktop, and then click the
  icon.
icon. In the search box, enter
cmd.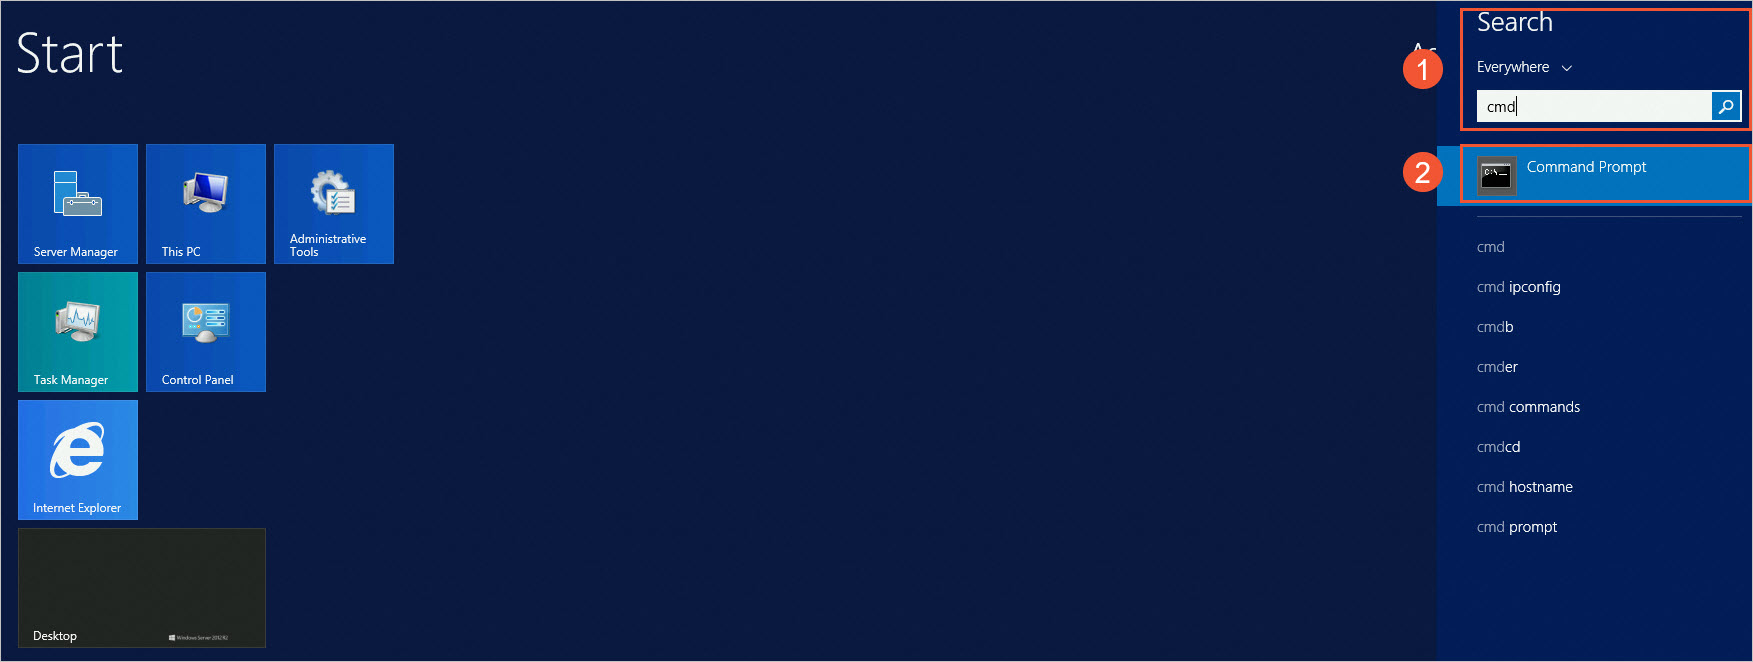
Click Command Prompt.
Open the Command Prompt window.

Run the following command to view the current dynamic ports configuration:
netsh int ipv4 show dynamicport tcpThe output is similar to the following, which indicates that the number of dynamic ports is 16,384 (from 49,152 to 65,535).

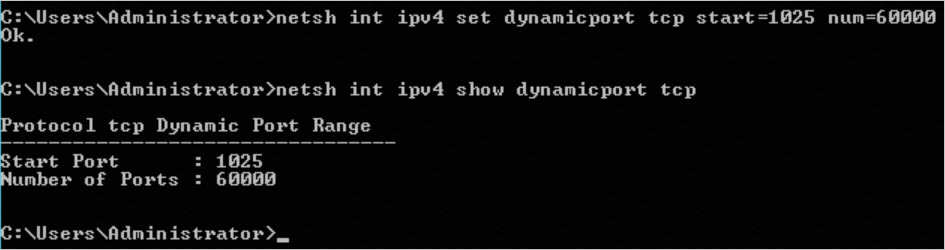
Run the following command to increase the number of dynamic ports:
netsh int ipv4 set dynamicport tcp start=1025 num=60000NoteThe
startandnumparameters specify the starting port and the total number of ports, respectively. You can adjust these values based on your requirements.The output is similar to the following, which indicates that the number of dynamic ports is increased to 60,000 (from 1,025 to 61,024).
Try to access the external network or connect to your application again.
If the access is successful, the issue is resolved.
If the access fails, continue to the next step to reduce the Time Wait delay by modifying the registry.
If increasing the dynamic port count does not resolve the issue, reduce the Time Wait delay by modifying the registry. The minimum supported value is 30 seconds. To do this, follow these steps.
ImportantModifying the registry incorrectly can cause serious system problems or data loss. Before proceeding, create snapshots for the system and data disks. For the changes to take effect, you must restart the Windows instance after the modification.
To create a snapshot, see Create a snapshot for a disk.
To restart the Windows instance, see Restart instances.
Open Registry Editor.
Click the
icon in the lower-left corner of the desktop, and then click the icon. In the search box, enter
regedit.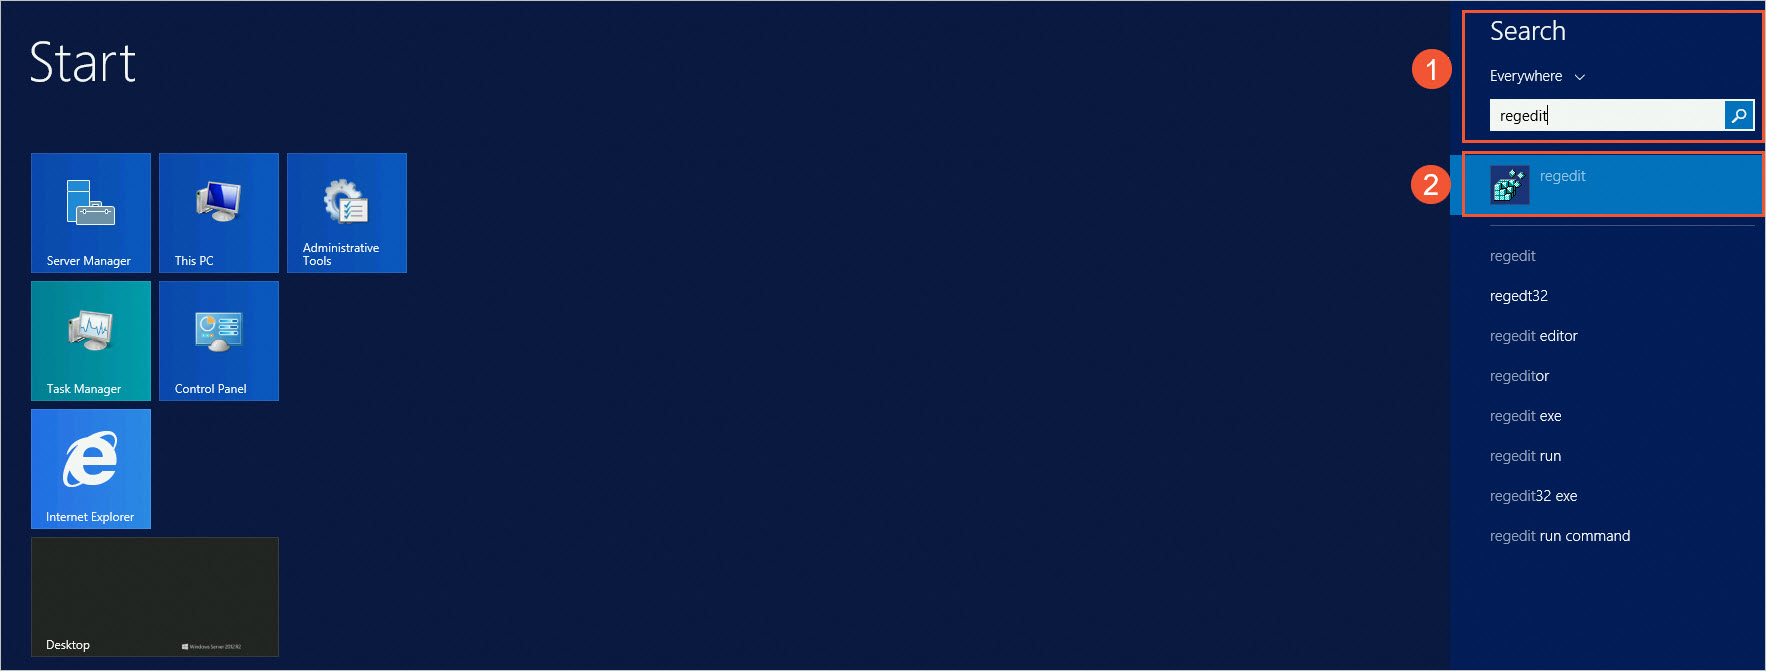
Click regedit.
The Registry Editor window opens.
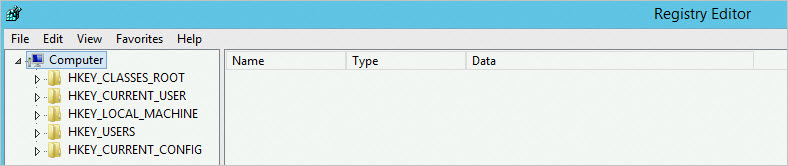
In Registry Editor, navigate to the
HKEY_LOCAL_MACHINE\SYSTEM\CurrentControlSet\Services\Tcpip\Parameterskey. Set the value of theTcpTimedWaitDelayentry to a decimal value of30.If the
TcpTimedWaitDelayentry does not exist, create it. The following steps show how to create the entry if it is missing:Under the
HKEY_LOCAL_MACHINE\SYSTEM\CurrentControlSet\Services\Tcpip\Parameterskey, right-click an empty area in the right pane, and then select New > DWORD (32-bit) Value.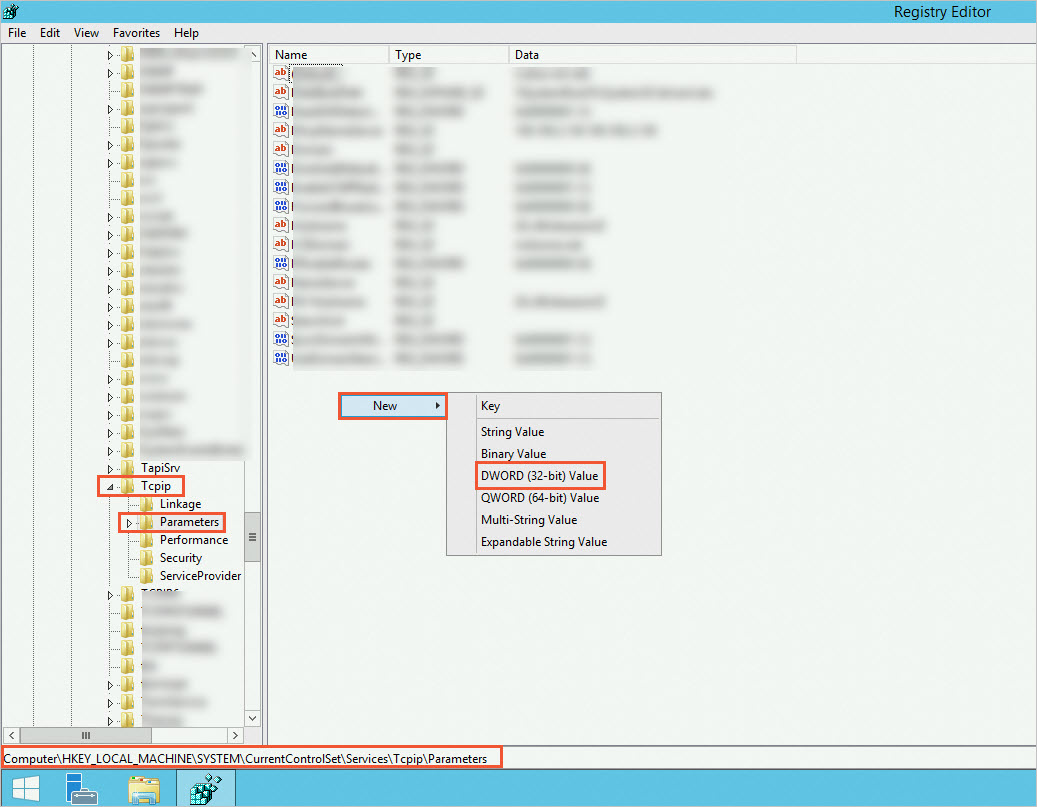
Enter
TcpTimedWaitDelayas the name and pressEnter.Right-click the new
TcpTimedWaitDelayentry and select Modify.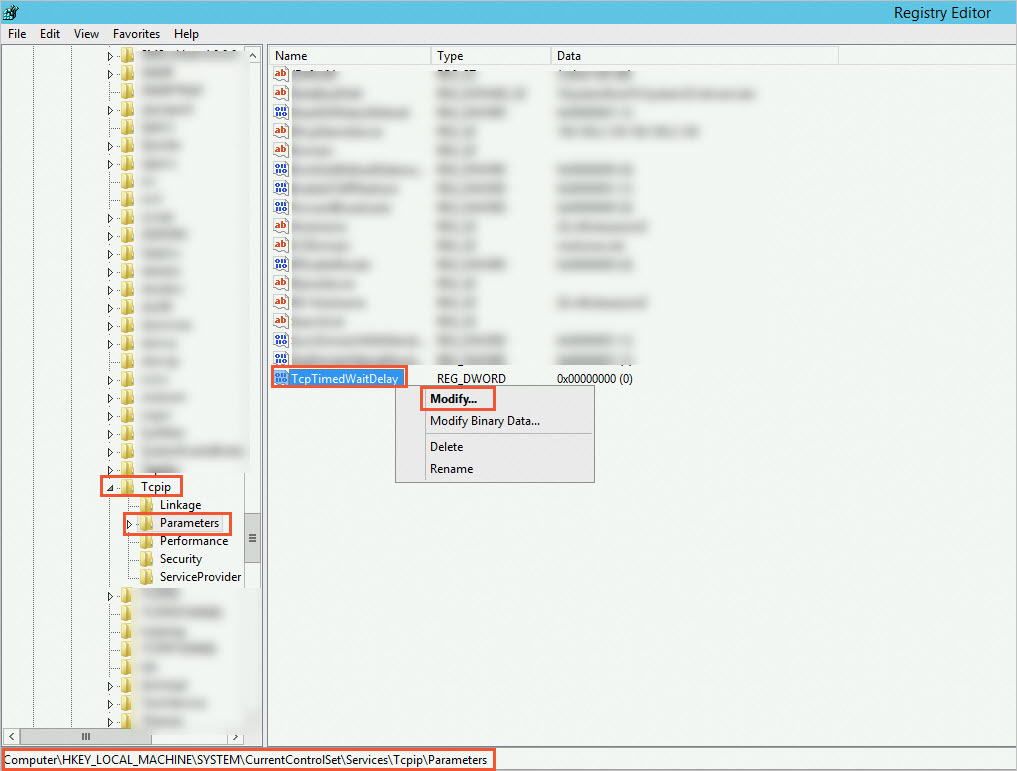
In the dialog box that opens, select Decimal and set Value data to
30.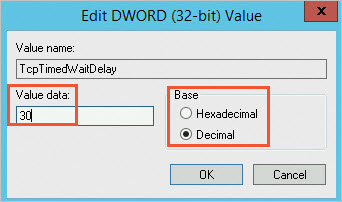
Click OK.