This topic describes how to add a built-in authoritative acceleration zone and how to add a built-in authoritative regular zone.
Add a built-in authoritative acceleration zone
To add a built-in authoritative acceleration zone, perform the following steps:
Log on to the Alibaba Cloud DNS console.
In the left-side navigation pane, click Private DNS (PrivateZone). In the upper-right corner, click Configuration Mode. Then, click the Built-in Authoritative Module tab. On this tab, click the User Defined Zones tab.
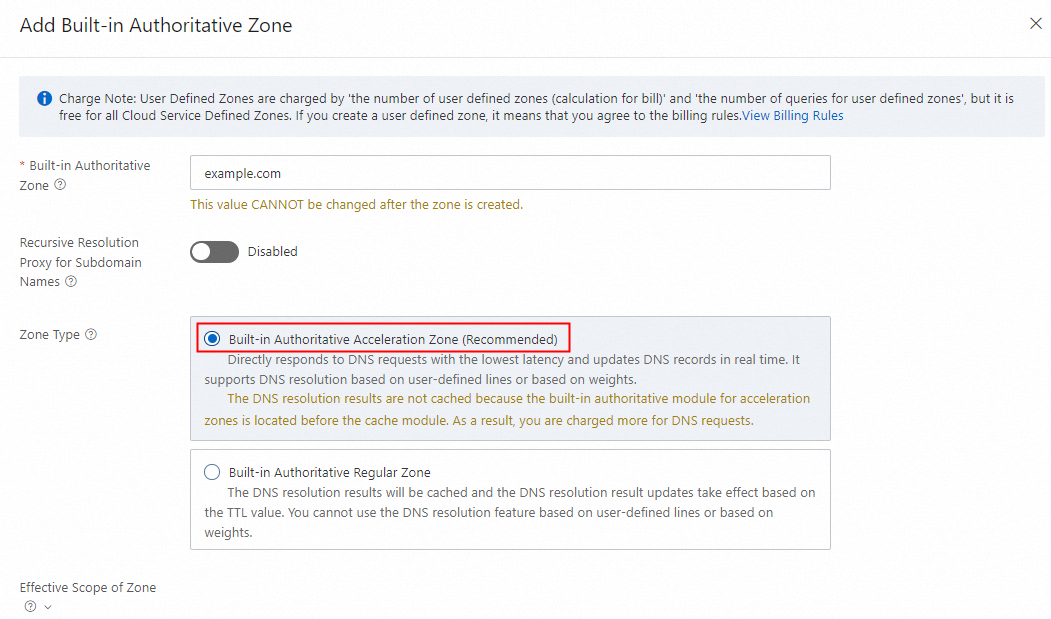
On the User Defined Zones tab, click Add New Zone. In the Add Built-in Authoritative Zone panel, enter a built-in authoritative zone name, set Zone Type to Built-in Authoritative Acceleration Zone (Recommended), and then click OK.

Add a built-in authoritative regular zone
To add a built-in authoritative regular zone, perform the following steps:
Log on to the Alibaba Cloud DNS console.
In the left-side navigation pane, click Private DNS (PrivateZone). In the upper-right corner, click Configuration Mode. Then, click the Built-in Authoritative Module tab. On this tab, click the User Defined Zones tab.
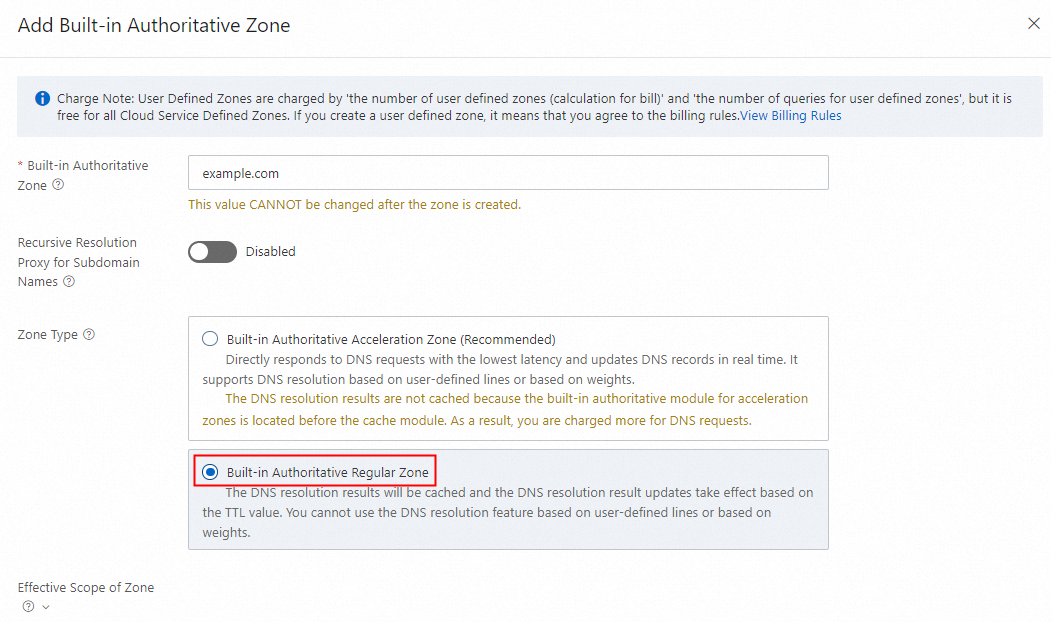
On the User Defined Zones tab, click Add New Zone. In the Add Built-in Authoritative Zone panel, enter a built-in authoritative zone name, set Zone Type to Built-in Authoritative Regular Zone, and then click OK.
 Important
We recommend that you set the Effective Scope of Zone parameter after all the DNS record configurations are complete. If you set the Effective Scope of Zone parameter when you create a zone, DNS resolution within the effective scope of the zone fails during the period after the zone is created and before DNS records are added. This situation does not happen if you enabled the Recursive Resolution Proxy for Subdomain Names feature.