By Sajid Qureshi, Alibaba Cloud Community Blog author.
Pritunl is an open source VPN server software and management panel built on the OpenVPN protocol. The Pritunl server itself organizes delivery of configurations by email and you can use it with an intuitive web interface. You can easily integrate and configure Pritunl with other services using the REST API and two-step authentication is also available using Google Authenticator.
Note: In some countries it may be illegal to use a VPN. Please consult the law in your country before proceeding.
In this guide, we'll show you how to set up a Pritunl VPN server on an Alibaba Cloud Elastic Compute Service (ECS) instance with Ubuntu.
We recommend you to upgrade all the available packages and repository before installing any new packages. Execute the following command and it will do the job for you.
sudo apt-get update && sudo apt-get upgradeOnce the system is updated, you can proceed further to install and configure the Pritnul. Before installing Pritnul package on your server you will need to add the MongoDB apt repository. In order to do so, execute the following command using a nano text editor.
sudo nano /etc/apt/sources.list.d/mongodb-org-3.0.listAdd the following line in the file, and then save and exit from the editor.
deb http://repo.mongodb.org/apt/ubuntu trusty/mongodb-org/3.0 multiverseNext, you will need to open the pritnul source file using the following command.
sudo nano /etc/apt/sources.list.d/pritunl.listAdd the following line into the file, and then save and exit.
deb http://repo.pritunl.com/stable/apt trusty mainNow all the apt repository added successfully. Next, you will need to add the public keys for the repositories to validate against. Execute the following commands and they'll do the job for you.
apt-key adv --keyserver hkp://keyserver.ubuntu.com --recv 7F0CEB10apt-key adv --keyserver hkp://keyserver.ubuntu.com --recv CF8E292AIf in case you have a firewall running on your server then you will need to modify the firewall rules to access it through a web browser. So, modify the firewall rules using the following commands.
sudo iptables -A INPUT -p udp -m udp --sport 443 --dport 1025:65355 -j ACCEPTsudo iptables -A INPUT -p tcp -m tcp --sport 443 --dport 1025:65355 -j ACCEPTsudo iptables -A INPUT -p `your protocol` -m `your protocol` --sport `your port` --dport 1025:65355 -j ACCEPTNext, update the package cache using the following command.
sudo apt-get updateAll the dependencies required installed now and we are ready to install Pritnul package. You can install the Pritnul and mongodb packages on your server using the following command.
sudo apt-get install pritunl mongodb-orgNext, you will need to start the Pritnul services using the following command.
sudo service pritunl startYou have successfully installed Pritnul on your server, now you will have to configure it from the web for the usage. Open up your favorite web browser and visit http://YourServerIP:443/ Please replace YourServerIP with your actual server IP address.
You'll be asked to accept a self-signed certificate, it is completely safe to accept this because it is generated by Pritnul itself.
Once you do that, you'll see a pritnul web page like this:

It will automatically populate the MongoDB URI so, just click on Save button and proceed further.
On the next interface, you'll have to log in to proceed further. Enter the default credentials pritnul for both username and password.
On the next interface, you'll see an initial setup web page like this:
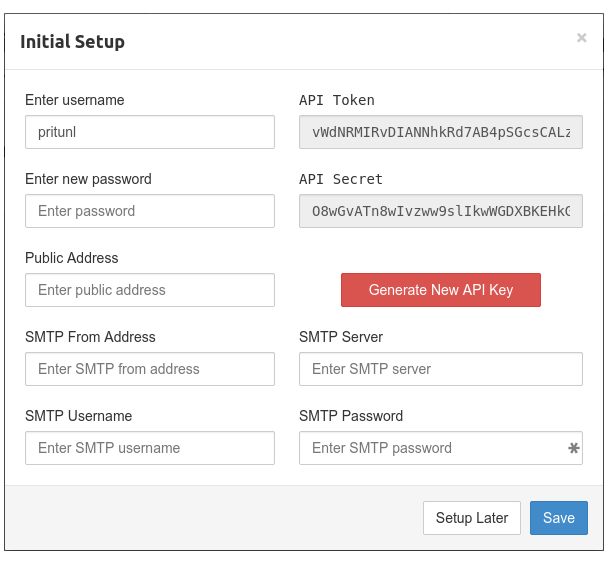
Change your default login password and if in case you have purchased Pritnul license then fill out SMTP fields as well otherwise ignore it and click on Save button.
Pritnul is installed and configured on your server now you'll need to connect it to the server. Before connecting to the server you must create an organization and a user.
So, go to the Users tab and then click on the Add Organization button. You'll be asked to enter the name of the organization and then click on Add button and proceed further.
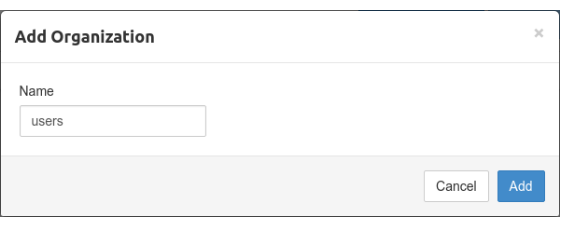
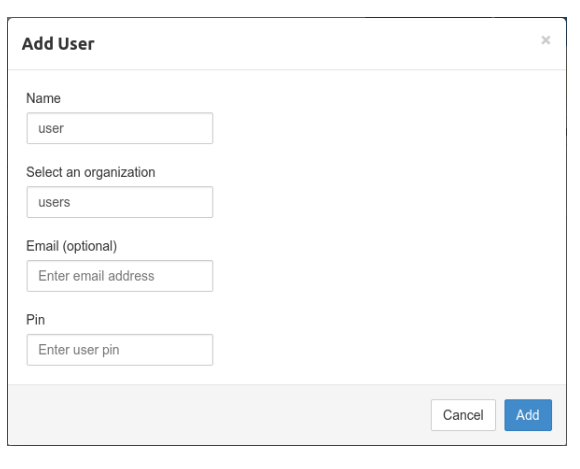
Next, click on Add User and add a user to this newly created organization. Enter the user details and then click on Add button.
Now go to the Server tab and click on Add a server then you'll be asked your server details.
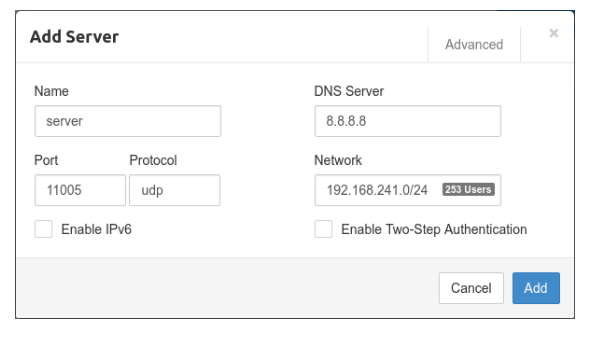
Simply, enter a name for your server and enter the protocol and port to match the firewall exceptions added earlier. Now click on Add button to proceed further.
On the next interface, you will be asked to attach an organization. Enter the required values and click on Attach button to finish this setup.
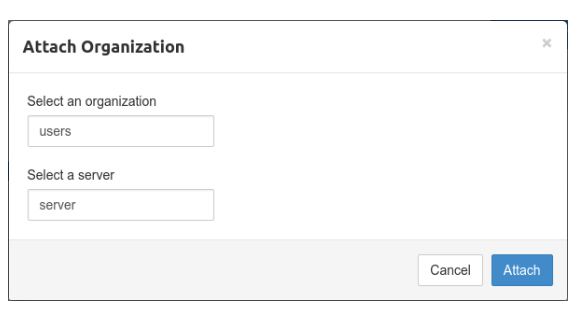
Finally, click Start Server to start the VPN server. Now you can connect to the server using any OpenVPN compatible software.
After the server has been created the user profile can be downloaded on the Users page by clicking the download button or profile links button on the right side of a user. The profile can then be imported into the Pritunl client or any other OpenVPN client.
Profile links allow downloading user profiles in different formats using temporary links. The uri link can be used to import the profile directly from the Pritunl client.
In this guide, you have learned to install and configure Pritnul on your Ubuntu server. You also learned to create your own VPN server using pritnul. You can now easily deploy a VPN server and use it for various applications. We hope now you have enough knowledge to work with Pritnul.

2,593 posts | 792 followers
FollowAlibaba Clouder - August 19, 2020
Alibaba Cloud Indonesia - August 22, 2022
Alibaba Clouder - February 25, 2019
Alibaba Clouder - July 6, 2021
Alibaba Cloud Indonesia - August 22, 2022
Dikky Ryan Pratama - May 17, 2023
Thank you so much for author's sharing. I understood there are always updates by time chaning. As updates of Author's, following links helped me to success at the time I am writing. I hope these would help others as well. I found my verson of Ubuntu Focal at: https://docs.pritunl.com/docs/repoerror installing mongodb in ubuntu 20.04 at: https://askubuntu.com/questions/1412944/error-installing-mongodb-in-ubuntu-20-04 Also please don't forget add Security Group Rule on Instance to allow 443 for pritunl setup page, 10318 for VPN Server.

2,593 posts | 792 followers
Follow OSS(Object Storage Service)
An encrypted and secure cloud storage service which stores, processes and accesses massive amounts of data from anywhere in the world
Learn More ECS(Elastic Compute Service)
Elastic and secure virtual cloud servers to cater all your cloud hosting needs.
Learn MoreLearn More
More Posts by Alibaba Clouder
5618190583687041 May 27, 2020 at 1:50 pm
Really bad guide - 'sudo apt-get upgrade' on a virtual machine is a perfect way to screw it up, install instructions are slightly different for various versions of Ubuntu (cat /etc/debian_version), better refer to https://github.com/pritunl/pritunl