By Sajid Qureshi, Alibaba Cloud Tech Share Author. Tech Share is Alibaba Cloud's incentive program to encourage the sharing of technical knowledge and best practices within the cloud community.
BookStack is a free and open source tool which helps you to create documentation for your project. It is a simple and self-hosted platform for organizing and storing information. It is written in the PHP programming language and uses the Laravel web framework. BookStack introduces an interesting approach to storage; your data is stored in a similar manner to Books, which are at the highest level, followed by Chapters, and then Pages. That's the organizational structure, though Chapters are completely optional. Some of the features of BookStack are listed below:
In this article, we will be installing BookStack Documentation Wiki on an Alibaba Cloud Elastic Compute Service (ECS) with CentOS 7.
In this whole article, we are installing BookStack as a root user. You can also switch to root user using sudo -i command. It is recommended to install any package on a freshly updated server, so first, update all the available packages.yum -y update
Next, you'll need to add the EPEL repository to the system and you can do so using the following command.yum -y install epel-release
Nginx is a web server which is required to install BookStack, so first, you'll have to install nginx on your CentOS 7 system.yum -y install nginx
Once the installation is complete, start the nginx services and enable it to launch at boot time. Run the following command to do so.systemctl start nginx.service && systemctl enable nginx.service
If in case you are using firewall services, then you'll have to modify firewall rules to install BookStack, run following command to make changes.firewall-cmd --add-service=http --permanent firewall-cmd --reload
Now nginx web server is installed on your system. Next, you'll have to install PHP and PHP-FPM with some required extensions to install BookStack.
Add new 'webtatic' repository to the CentOS 7 system using rpm command below.rpm -Uvh https://mirror.webtatic.com/yum/el7/webtatic-release.rpm
Now install PHP and PHP-FPM with all the required extensions. Run following command to do so.yum -y install php70w-fpm php70w-mcrypt php70w-curl php70w-cli php70w-mysql php70w-gd php70w-xsl php70w-json php70w-intl php70w-pear php70w-devel php70w-common php70w-mbstring php70w-tidy php70w-zip php70w-soap curl
Once, the PHP and PHP-FPM are installed on the server. Next, we need to edit the 'php.ini' configuration file.
(Here we are using nano text editor to edit the configuration file. You can also install it using yum -y install nano command.)
nano /etc/php.ini
Find the 'cgi.fix_pathinfo=1' line in the file and uncomment this line, then change the value to 0 like below.cgi.fix_pathinfo=0
Save the file and exit from the text editor.
Now edit the pool configuration file using any text editor.nano /etc/php-fpm.d/www.conf
Change the value of the user and group to 'nginx' like shown below.user = nginx group = nginx
Next, on the 'listen' line, change the value in the sock file as below.listen = /var/run/php-fpm/php-fpm.sock
Next, find these below given lines in the file. Now uncomment lines and change the value as shown.
listen.owner = nginx
 listen.group = nginx
 listen.mode = 0660
Finally, uncomment the environmental attributes of file for PHP-FPM.
env[HOSTNAME] = $HOSTNAME
 env[PATH] = /usr/local/bin:/usr/bin:/bin
 env[TMP] = /tmp
 env[TMPDIR] = /tmp
 env[TEMP] = /tmp
Save the file and exit from the text editor.
The configuration of PHP is completed now, finally, start PHP-FPM service and enable it to launch at boot time using the following command.systemctl start php-fpm && systemctl enable php-fpm
We will need to install MariaDB for database purposes for BookStack. Run this command to install MariaDB.yum -y install mariadb-server
Now you'll have to start the MariaDB service and enable it to start at the boot time, to do so please run following command.systemctl start mariadb.service && systemctl enable mariadb.service
You can check the status of MariaDB using this below-given command and you should see the following output.systemctl status mariadb.service
[root@Sajid ~]# systemctl status mariadb.service
● mariadb.service - MariaDB database server
   Loaded: loaded (/usr/lib/systemd/system/mariadb.service; enabled; vendor preset: disabled)
   Active: active (running) since Fri 2018-07-20 06:24:13 UTC; 1min 45s ago
 Main PID: 23790 (mysqld_safe)
   CGroup: /system.slice/mariadb.service
           ├─23790 /bin/sh /usr/bin/mysqld_safe --basedir=/usr
           └─23952 /usr/libexec/mysqld --basedir=/usr --datadir=/var/lib/mysql --plugin-dir=/usr/lib64/mysql/plugin --log-error=/var/log/ma...

Jul 20 06:24:11 ip-172-31-21-196.us-west-2.compute.internal mariadb-prepare-db-dir[23712]: MySQL manual for more instructions.
Jul 20 06:24:11 ip-172-31-21-196.us-west-2.compute.internal mariadb-prepare-db-dir[23712]: Please report any problems at http://mariadb....ira
Jul 20 06:24:11 ip-172-31-21-196.us-west-2.compute.internal mariadb-prepare-db-dir[23712]: The latest information about MariaDB is avail...g/.
Jul 20 06:24:11 ip-172-31-21-196.us-west-2.compute.internal mariadb-prepare-db-dir[23712]: You can find additional information about the...at:
Jul 20 06:24:11 ip-172-31-21-196.us-west-2.compute.internal mariadb-prepare-db-dir[23712]: http://dev.mysql.com
Jul 20 06:24:11 ip-172-31-21-196.us-west-2.compute.internal mariadb-prepare-db-dir[23712]: Consider joining MariaDB's strong and vibrant...ty:
Jul 20 06:24:11 ip-172-31-21-196.us-west-2.compute.internal mariadb-prepare-db-dir[23712]: https://mariadb.org/get-involved/
Jul 20 06:24:11 ip-172-31-21-196.us-west-2.compute.internal mysqld_safe[23790]: 180720 06:24:11 mysqld_safe Logging to '/var/log/mariad...og'.
Jul 20 06:24:11 ip-172-31-21-196.us-west-2.compute.internal mysqld_safe[23790]: 180720 06:24:11 mysqld_safe Starting mysqld daemon with...ysql
Jul 20 06:24:13 ip-172-31-21-196.us-west-2.compute.internal systemd[1]: Started MariaDB database server.
Hint: Some lines were ellipsized, use -l to show in full.
We recommend you make sure that this installation is secure and to do so run following command.mysql_secure_installation
You'll be asked to provide a root password so enter an appropriate password and answer yes to all questions by pressing Y.
Set root password? [Y/n] Y
 Remove anonymous users? [Y/n] Y
 Disallow root login remotely? [Y/n] Y
 Remove test database and access to it? [Y/n] Y
 Reload privilege tables now? [Y/n] Y
Now you'll have to create a database for BookStack so please follow the instructions.mysql -u root -p
You'll be asked to enter the password so simply enter a password and now execute the following queries to create a new database.
CREATE DATABASE bookstack_data;
The above query will create a database named bookstack_data. For the database, you can use any name you prefer in the place of bookstack_data. Make sure that you use semicolon at the end of each query as a query always ends with a semicolon. Once the database is created you can create a new user and grant the required permissions to the user for the database.
CREATE USER 'bookstack_user'@'localhost' IDENTIFIED BY 'StrongPassword';
The above query will create a user with username bookstack_user. You can use any preferred username instead of bookstack_user. Replace StrongPassword with a strong password.
Now provide the appropriate privileges to your database user over the database you have created. Run the following query to do so.GRANT ALL PRIVILEGES ON bookstack_data.* TO 'bookstack_user'@'localhost';
Now run the following query to immediately apply the changes on the database privileges.FLUSH PRIVILEGES;
Now you can exit from MariaDB prompt using the following command.exit
The composer is a dependency for PHP and you'll have to install it first before installing BookStack. Simply run below command and it will do the job for you.curl -sS https://getcomposer.org/installer | php
mv composer.phar /usr/bin/composer
All the dependencies are installed now and we are ready to install BookStack from git.
(If in case you don't have git already installed on your server then you can install it using yum -y install git.)
Next, you'll need to create a new directory to download git source code for BookStack. Run the following command and it will do the job for you.mkdir -p /var/www
Now go to that directory and clone the latest version of BookStack from git using these commands.cd /var/www
git clone https://github.com/BookStackApp/BookStack.git --branch release --single-branch
Execute the following commands to install PHP dependencies using composer as shown.cd BookStack/ composer install
You should see the following output on your terminal.
Generating optimized autoload files
> Illuminate\Foundation\ComposerScripts::postAutoloadDump
> @php artisan package:discover
Discovered Package: barryvdh/laravel-debugbar
Discovered Package: barryvdh/laravel-dompdf
Discovered Package: barryvdh/laravel-ide-helper
Discovered Package: barryvdh/laravel-snappy
Discovered Package: fideloper/proxy
Discovered Package: intervention/image
Discovered Package: laravel/socialite
Discovered Package: socialiteproviders/manager
Package manifest generated successfully.
> php artisan cache:clear
Cache cleared successfully.
> php artisan view:clear
Compiled views cleared!
Make sure that you don't find any error in the result.
Next, you'll need to copy the environment configuration file and edit the configuration using any text editor. Simply execute these below-given commands and they'll do the job for you.cp .env.example .env nano .env
Find the database details line in the file and then change the value of database details according to your BookStack database like below.
# Database details
 DB_HOST=localhost
 DB_DATABASE=bookstack_data
 DB_USERNAME=bookstack_user
 DB_PASSWORD=Strong Password
Save the file and exit from the text editor.
Next, change the ownership rules for BookStack to the web server user to access BookStack, to do so run following command.chown -R nginx:nginx /var/www/BookStack
You'll need to generate and update a unique app key in environment configuration and you can do so using the following command.php artisan key:generate
Next, generate database tables and other settings to finish this installation using the following command.php artisan migrate
You'll be asked to confirm these changes, simply type yes and proceed further. You should see Migration table created successfully as the final result.
Finally, you'll need to create a virtual host to access BookStack application through web interface. Before creating virtual host first, edit the '/etc/nginx/nginx.conf' file to make virtual host configuration as default configuration. nano /etc/nginx/nginx.conf
Next, please remove 'default_server' from line 40 and 41 of the file as shown.
  server {
        listen       80;
        listen       [::]:80;
        server_name  _;
        root         /usr/share/nginx/html;

        # Load configuration files for the default server block.
        include /etc/nginx/default.d/*.conf;
Save the file and exit from text editor.
Create a virtual host and to do so execute following commands.cd /etc/nginx nano conf.d/bookstack.conf
Add following content to the file and then save and exit from the text editor.
server {
   listen 80 default_server;
   server_name _ ;
   root /var/www/BookStack/public;


   access_log  /var/log/nginx/bookstack_access.log;
   error_log  /var/log/nginx/bookstack_error.log;

   client_max_body_size 1G;
   fastcgi_buffers 64 4K;

   index  index.php;

   location / {
     try_files $uri $uri/ /index.php?$query_string;
   }

   location ~ ^/(?:\.htaccess|data|config|db_structure\.xml|README) {
     deny all;
   }

   location ~ \.php(?:$|/) {
     fastcgi_split_path_info ^(.+\.php)(/.+)$;
     include fastcgi_params;
     fastcgi_param SCRIPT_FILENAME $document_root$fastcgi_script_name;
     fastcgi_param PATH_INFO $fastcgi_path_info;
     fastcgi_pass unix:/var/run/php-fpm/php-fpm.sock;
   }

   location ~* \.(?:jpg|jpeg|gif|bmp|ico|png|css|js|swf)$ {
     expires 30d;
     access_log off;
   }
 }
Finally, restart the Nginx web server to apply all the changes that we just configured here.systemctl restart nginx
BookStack is now installed on your CentOS 7 server completely. Open up your favorite web browser and visit the http://YourServerIP/ or http://YourServerDoaminName/ for your BookStack.
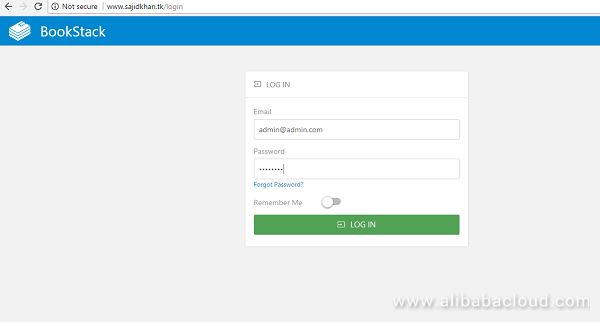
Replace YourIPDomain with your actual Domain Name or IP Address. You'll see a login web page for BookStack like below.

Provide the default username and password to login to BookStack dashboard. Use admin@admin.com as username and password as password, and then click on the Login button.
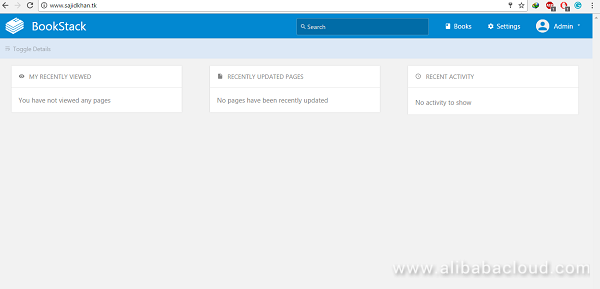
You'll see BookStack dashboard like below, from where you can manage your all applications for BookStack.

In this article, you've learned how to install BookStack Documentation Wiki on your CentOS 7 server. you also learned to configure Nginx web server and BookStack. We hope now you have enough knowledge to work with BookStack.

5 posts | 0 followers
FollowAlibaba Clouder - May 15, 2019
Alibaba Clouder - May 15, 2019
Alibaba Clouder - May 14, 2019
Alibaba Clouder - April 1, 2019
Hiteshjethva - January 8, 2020
Alibaba Clouder - April 12, 2019

5 posts | 0 followers
Follow Web App Service
Web App Service allows you to deploy, scale, adjust, and monitor applications in an easy, efficient, secure, and flexible manner.
Learn More Web Hosting Solution
Explore Web Hosting solutions that can power your personal website or empower your online business.
Learn More Web Hosting
Explore how our Web Hosting solutions help small and medium sized companies power their websites and online businesses.
Learn More EMAS Superapp
Build superapps and corresponding ecosystems on a full-stack platform
Learn More