Live shopping gives sellers the ability to showcase their products, and customers the ability to get instant feedback, answers, and of course buy products in real-time.
As an example, QVC, a home shopping channel, has made a great influence on the introduction of live shopping into our lives. QVC made a huge splash since it successfully combined socializing, entertainment and shopping. QVC customers enjoyed the shopping process and interacting with their favorite host.
When you think about it, live stream shopping is in a way bringing the age-old practice of home shopping into modern times. The concept remains the same, it's just the channel that's different.
Live streaming viewers can learn more about the product by leaving comments, asking questions to the publisher, just like on Instagram, Facebook or YouTube live videos. The live shopping experience is just like our social media usage. The viewers can even share their experiences with other viewers. Sellers can guide viewers in their purchasing decisions by projecting reviews and recommendations on the screen.
Instead of simply “liking” a product promoted by your favorite influencers, you can talk to them about the product and buy it directly.
It has become quite popular again, especially in Asia. Chinese consumers and sellers are way ahead of the trend already. In fact, the live commerce market in the country accounts for more than 10% of the entire e-commerce market.
Other parts of the world have also started to take an interest in live commerce. seeing successful startups, especially in America and Europe.
The number of live shopping initiatives will increase and it will become a very large domain. There are great opportunities for entrepreneurs.
The rate of adoption to live shopping is going to increase in 2022. Of the brands surveyed in the Forrester research, 49% of brands plan to increase their investment in social commerce in 2022, with 81% planning to either increase or maintain investment in live shopping to drive sales.
The biggest benefit of live commerce is that it gives the audience a unique shopping and entertainment experience and it increases the engagement rate regardless of location. If it was a good live stream, the image of the brand will remain in the minds of the audience, even if they do not buy it at that time.
When viewers see other people buying products in livestream, they are more likely to buy too. It is a kind of social proof. It can also create the fear of missing out (FOMO) on viewers.
The reasons for the return of the viewers who asked what they were curious about during the broadcast and received sufficient answers will also decrease. According to Coresight data, live shoppers are 40% less likely to return an item than other online shoppers.
With live events, you can show the underperforming products directly to the audience, and even make them more attractive. If you are in the clothing industry, you can use it as a fashion show for sale.
The most important requirement for building a live shopping platform is a media server. To choose the right vendor, you should know what features you need. Let's look at them.
Real-time latency: For high engagement, you need to provide ultra-low latency. Otherwise, in the delayed streams, viewers cannot receive timely answers to their questions, interaction decreases, a real-like shopping experience, and effective communication cannot be established.
Scalability: Your platform can be used for many small live shopping streams or rather large ones. You need a scalable media server to handle your streams and viewers.
Adaptive bitrate: It provides the best video quality and viewer experience possible regardless of connection, device, or software. It is a technique for dynamically adjusting the compression level and video quality of a stream to match bandwidth availability.
SDKs: We now spend most of our time online on mobile. It makes a big difference if the media server you choose has SDK support.
It should also support the following:
One-to-many live video shopping means streaming to multiple viewers at once. This type of event typically showcases products and features a host, guest appearances, and special promotions.
One-to-one live video shopping means having a one on one session with a single customer. This type of live video shopping is best suited to customers making larger purchases that require professional expertise and insight.
Embedding allows you to host your stream on your website.
Ant Media Server can help you with all these needs. It powers live shopping platforms with 0.5-second latency, adaptive streaming, high scalability, and hence high engagement. In addition, with its adaptive bitrate feature, it sends the highest quality possible stream to the viewers according to their connection quality. Thus, it offers uninterrupted streaming while shopping without buffering. Thanks to its high scalability, it can scale seamlessly to thousands or even millions of viewers.
Here is the system outline
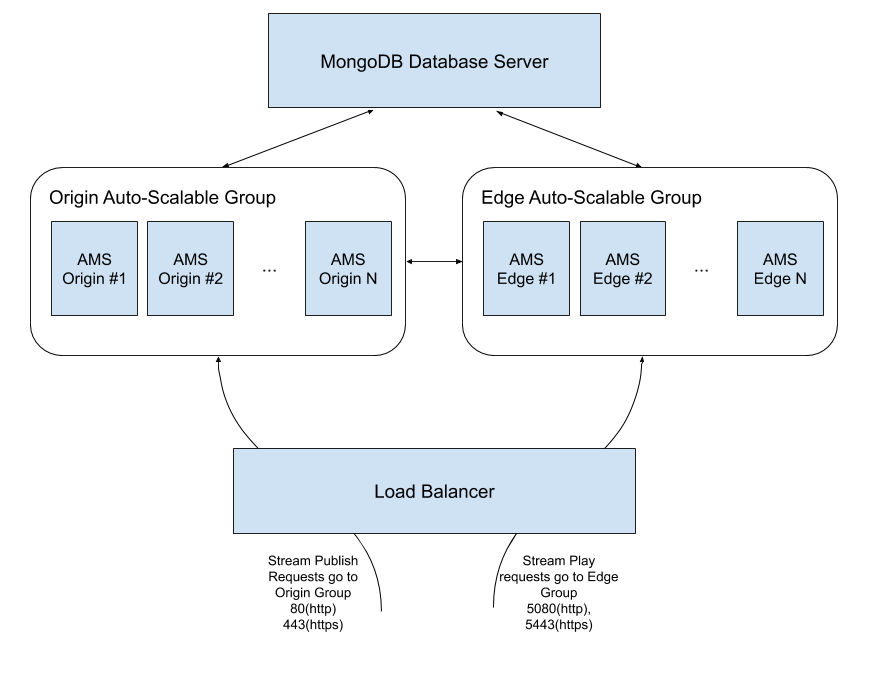
Let's start with brief definitions
Then continue with installing MongoDB Server
The procedure below shows how to start an instance in Alibaba Cloud Elastic Compute Service as well. In other words, if you have no experience with Alibaba Cloud, you can install MongoDB Server as follows. If you know how to start an instance in Alibaba Cloud, just skip to Install MongoDB to Your Instance.
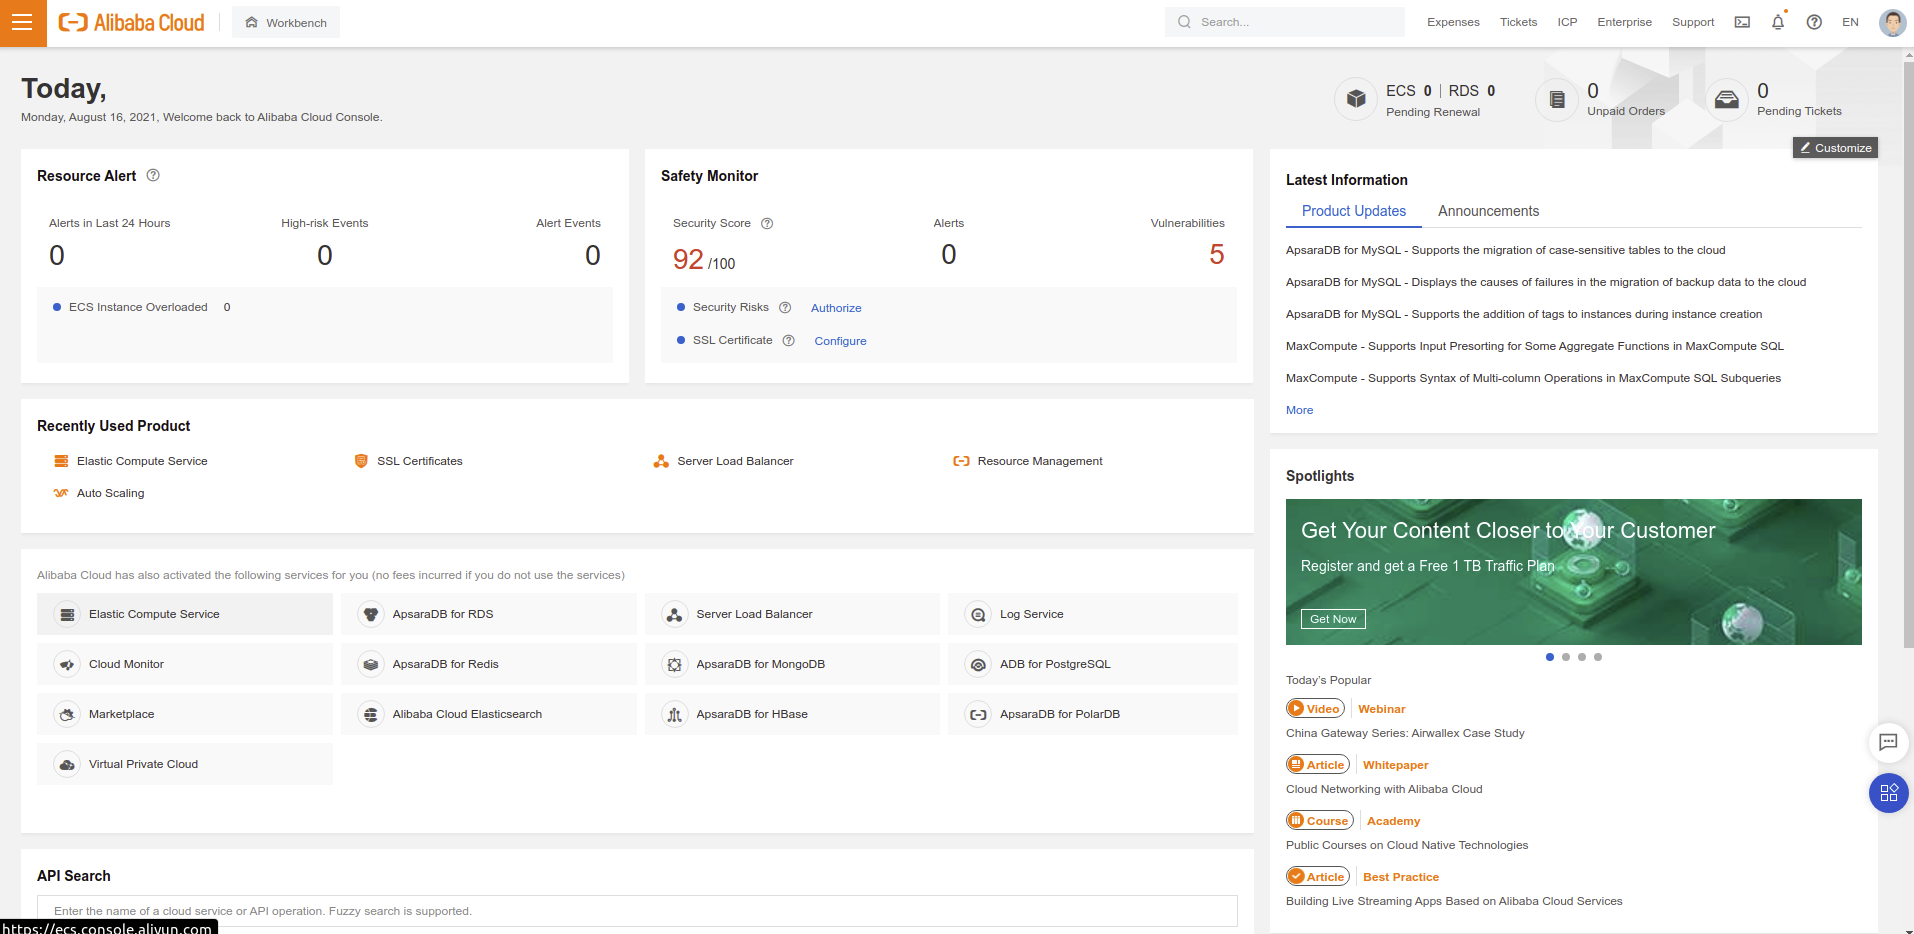
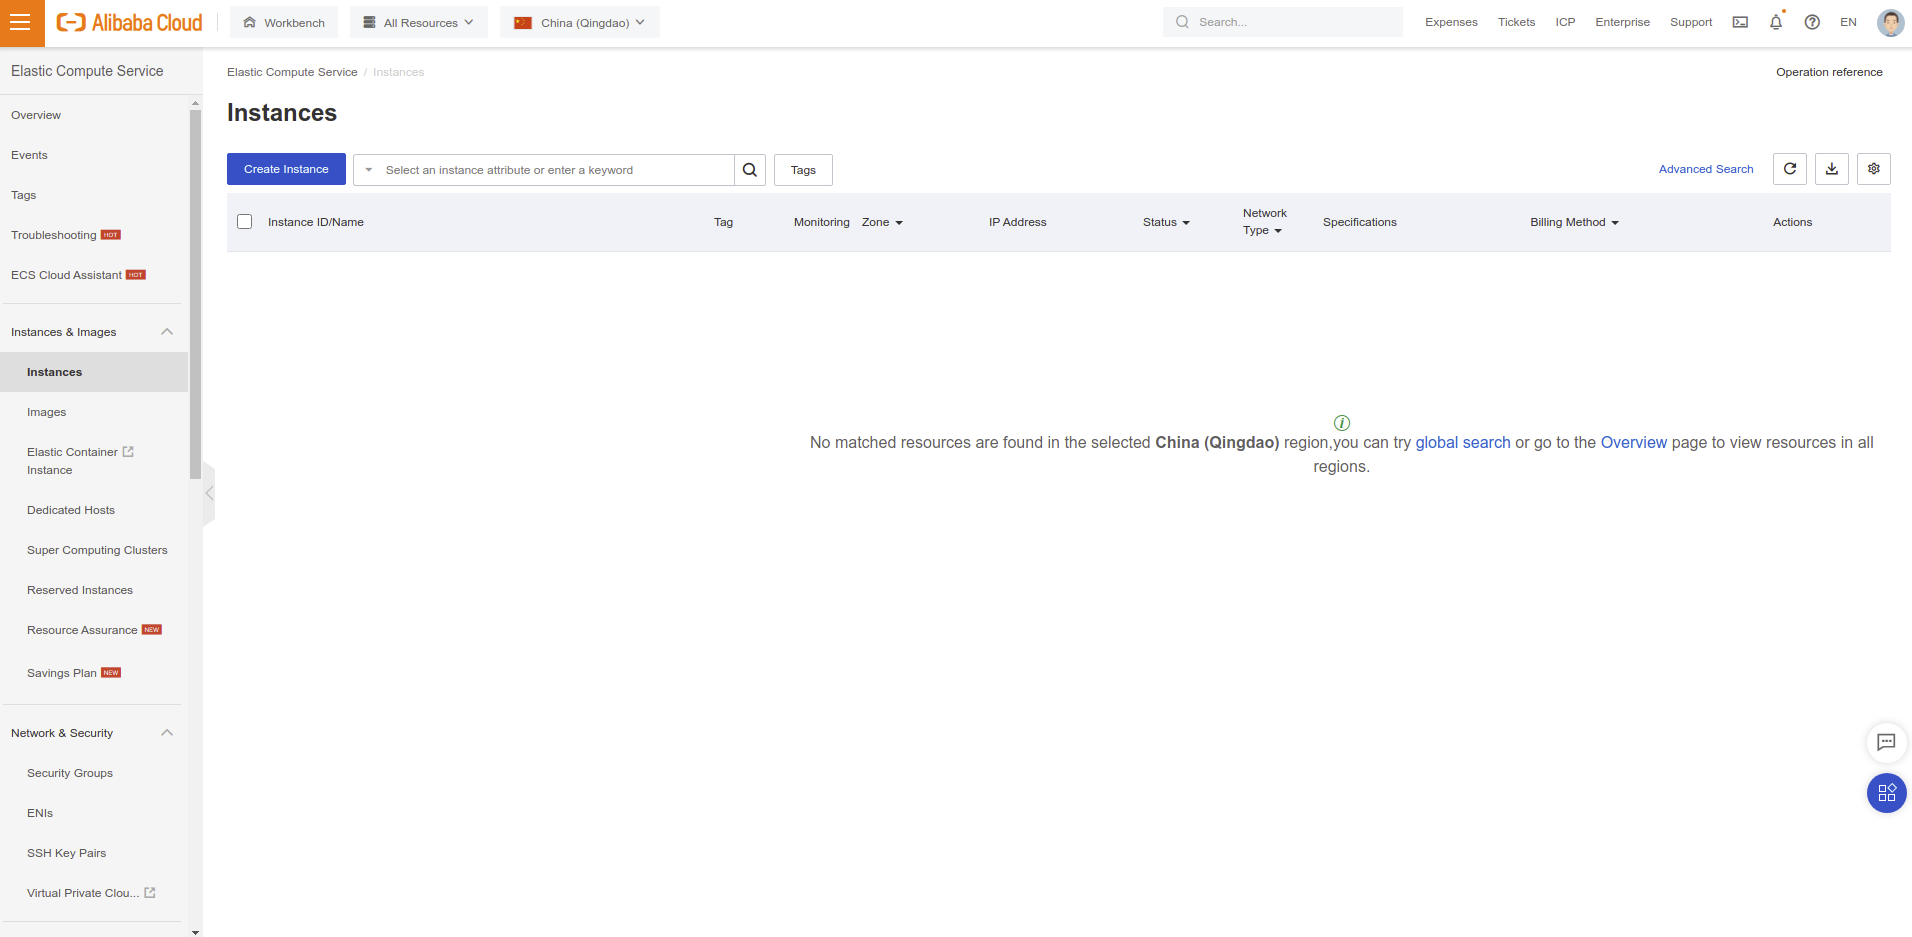
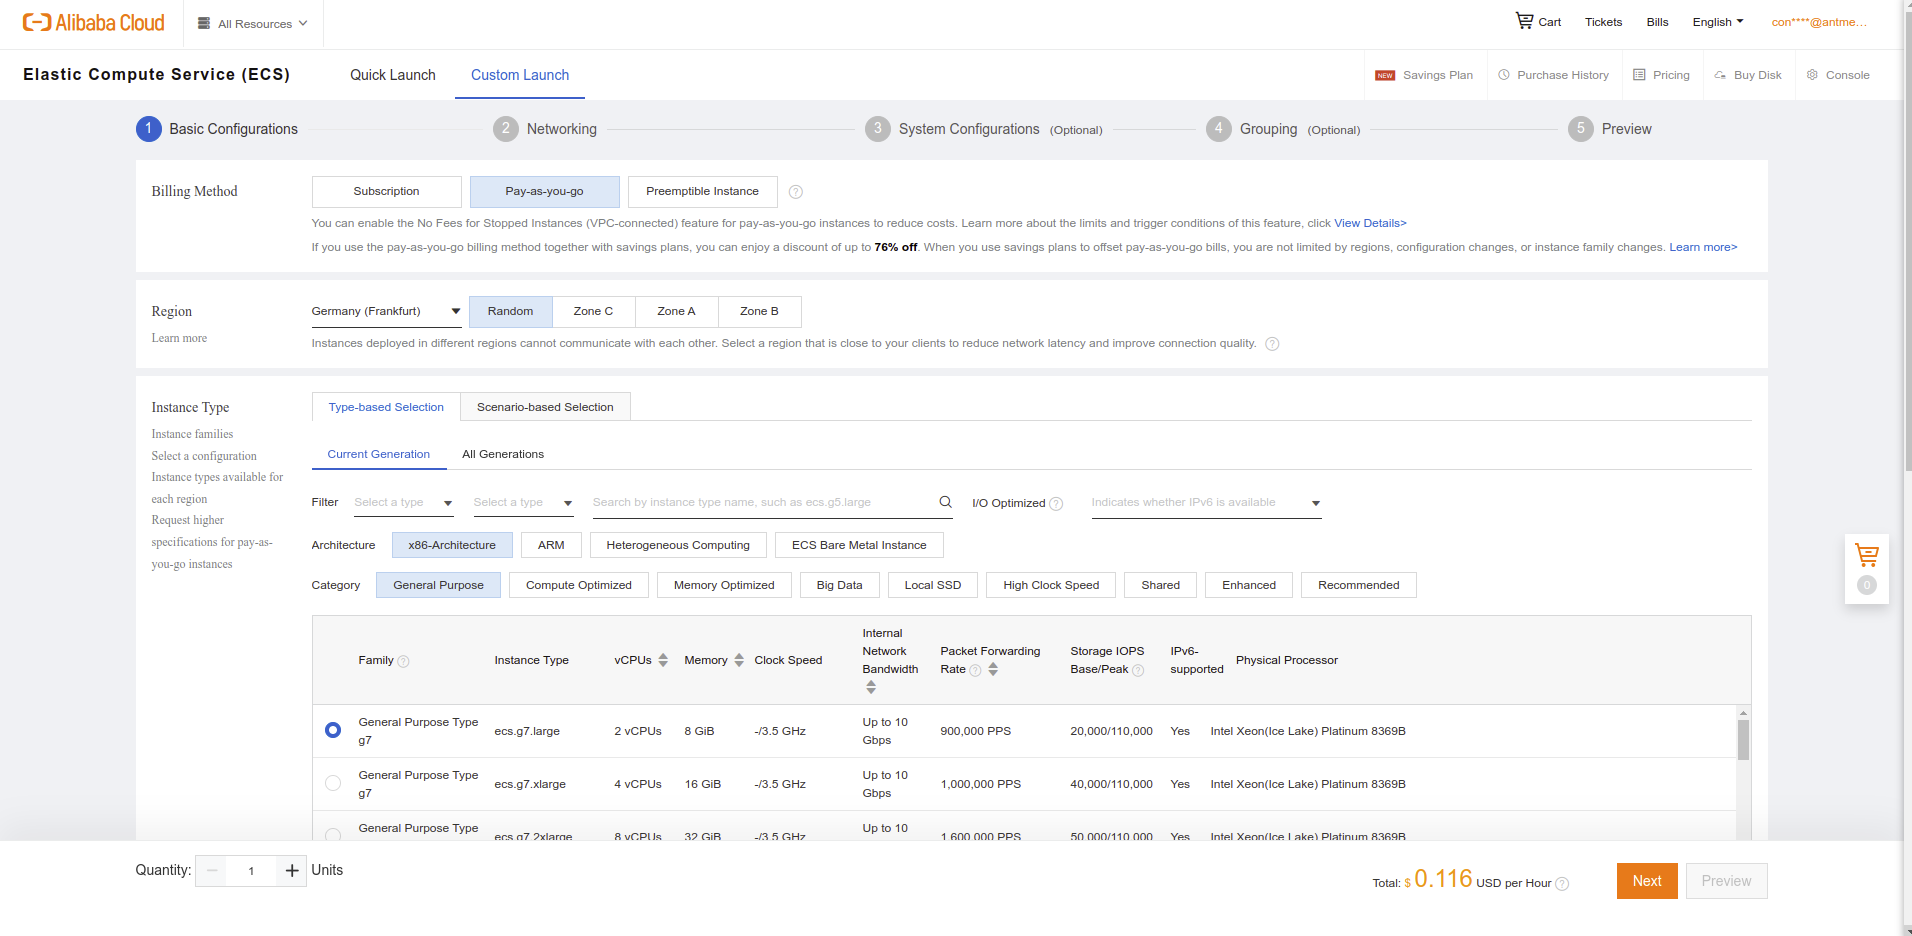
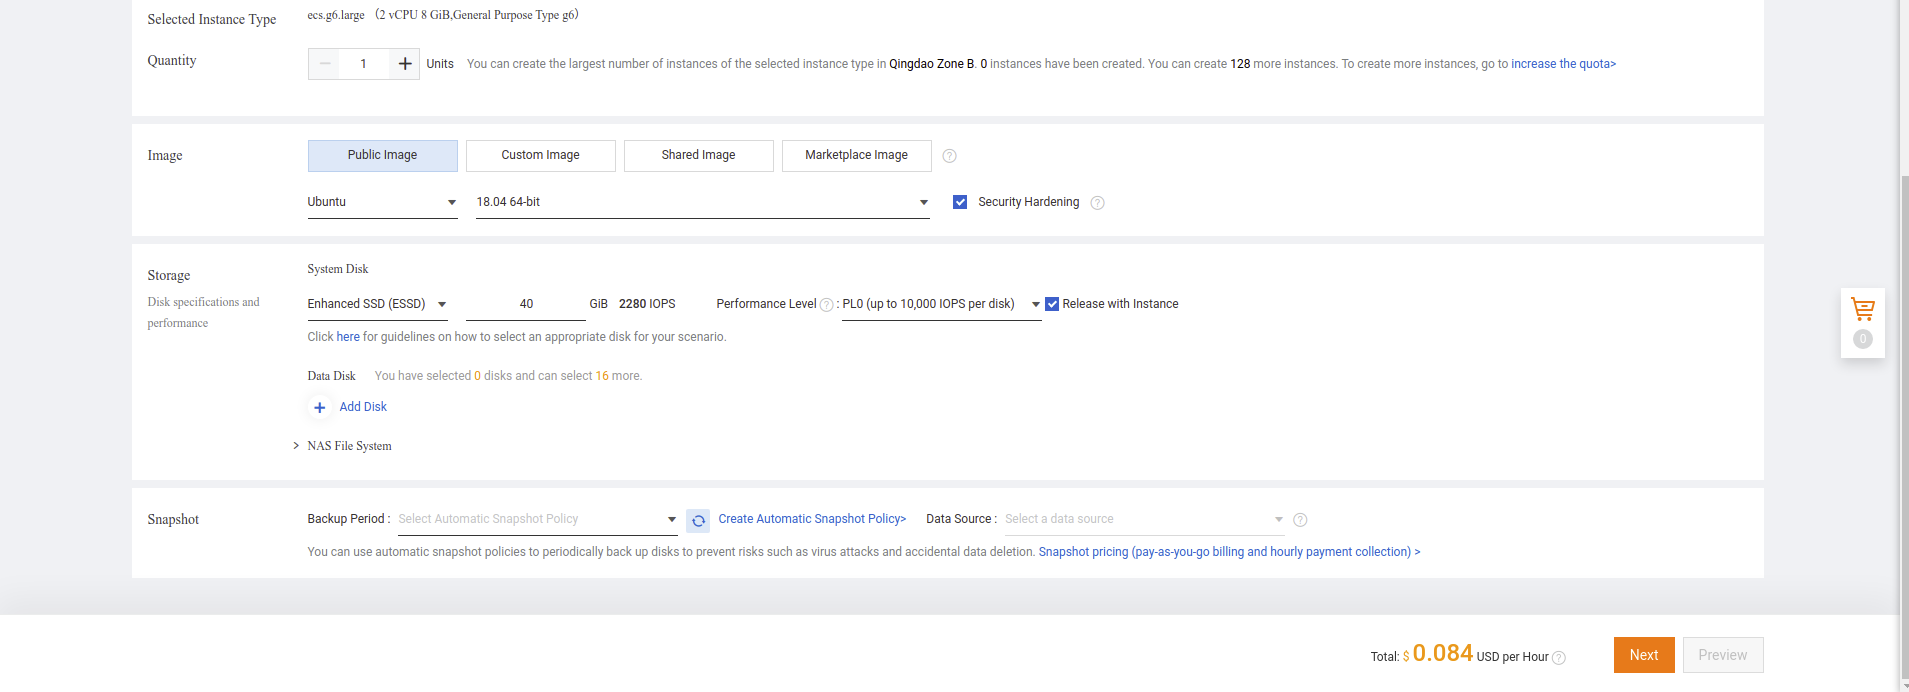
Choose Instance Type like General Purpose Type g7 series.
Search for Ubuntu and Select Ubuntu 18.04 and Click Next button
VPC and security group
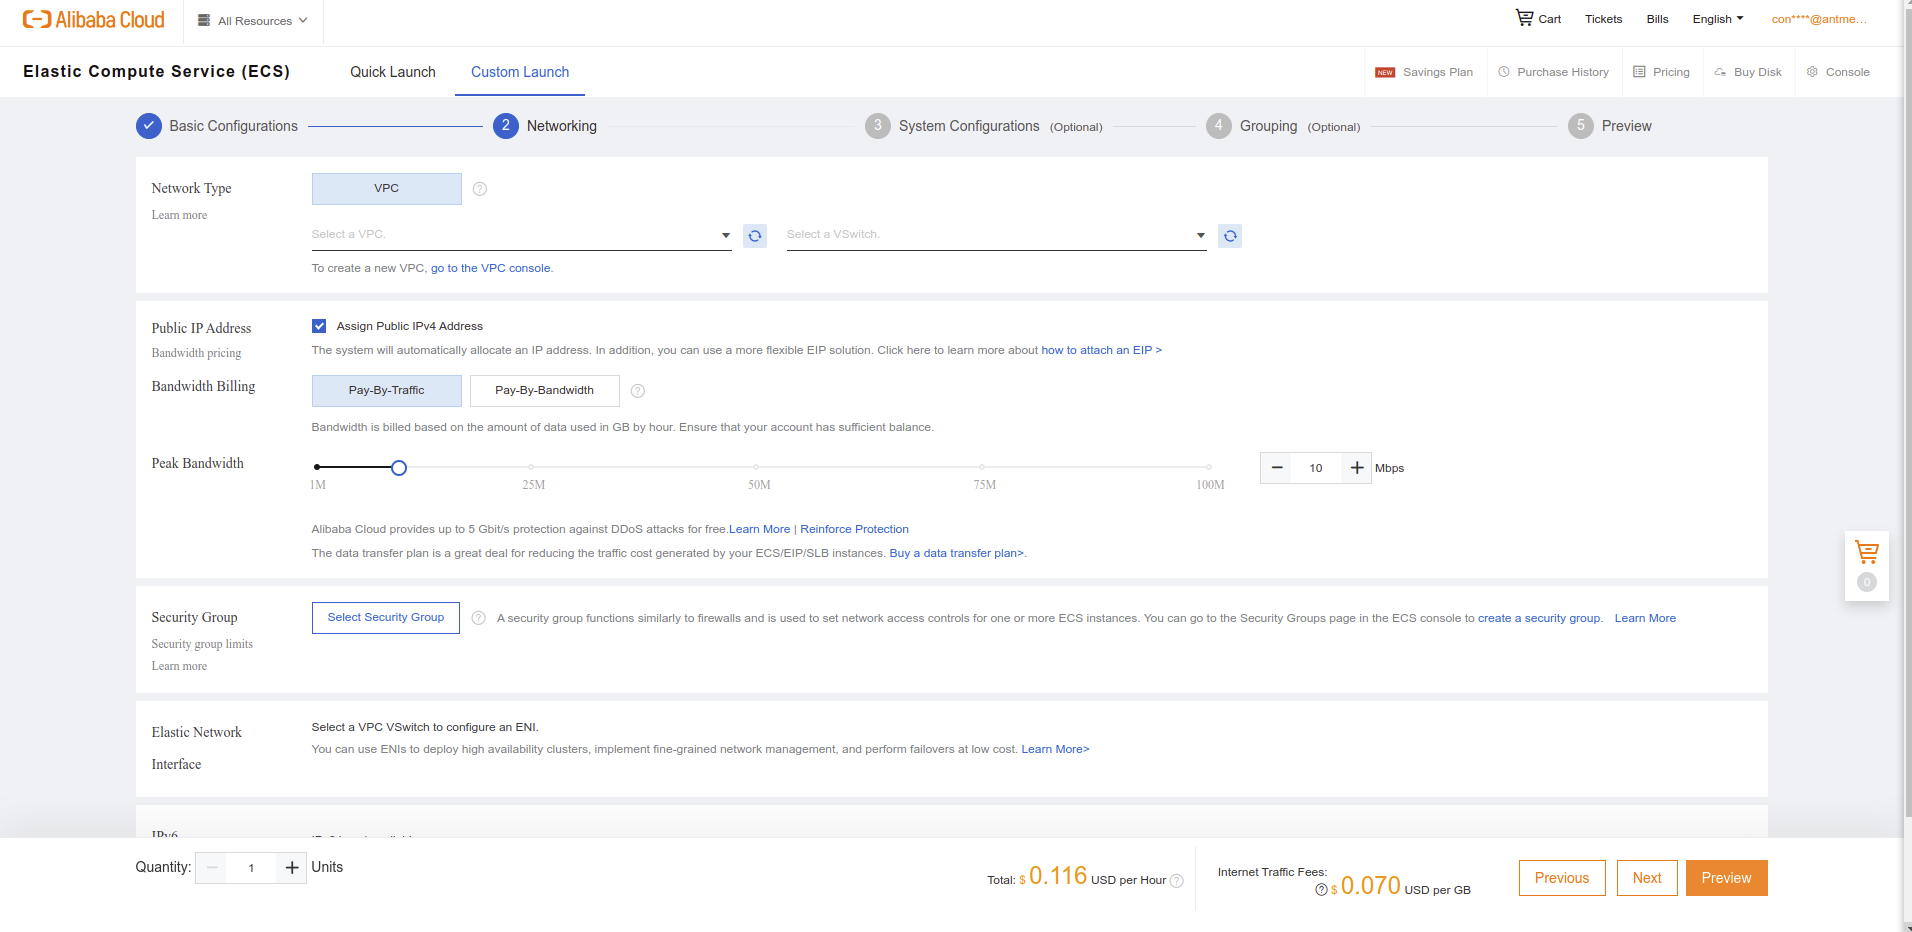
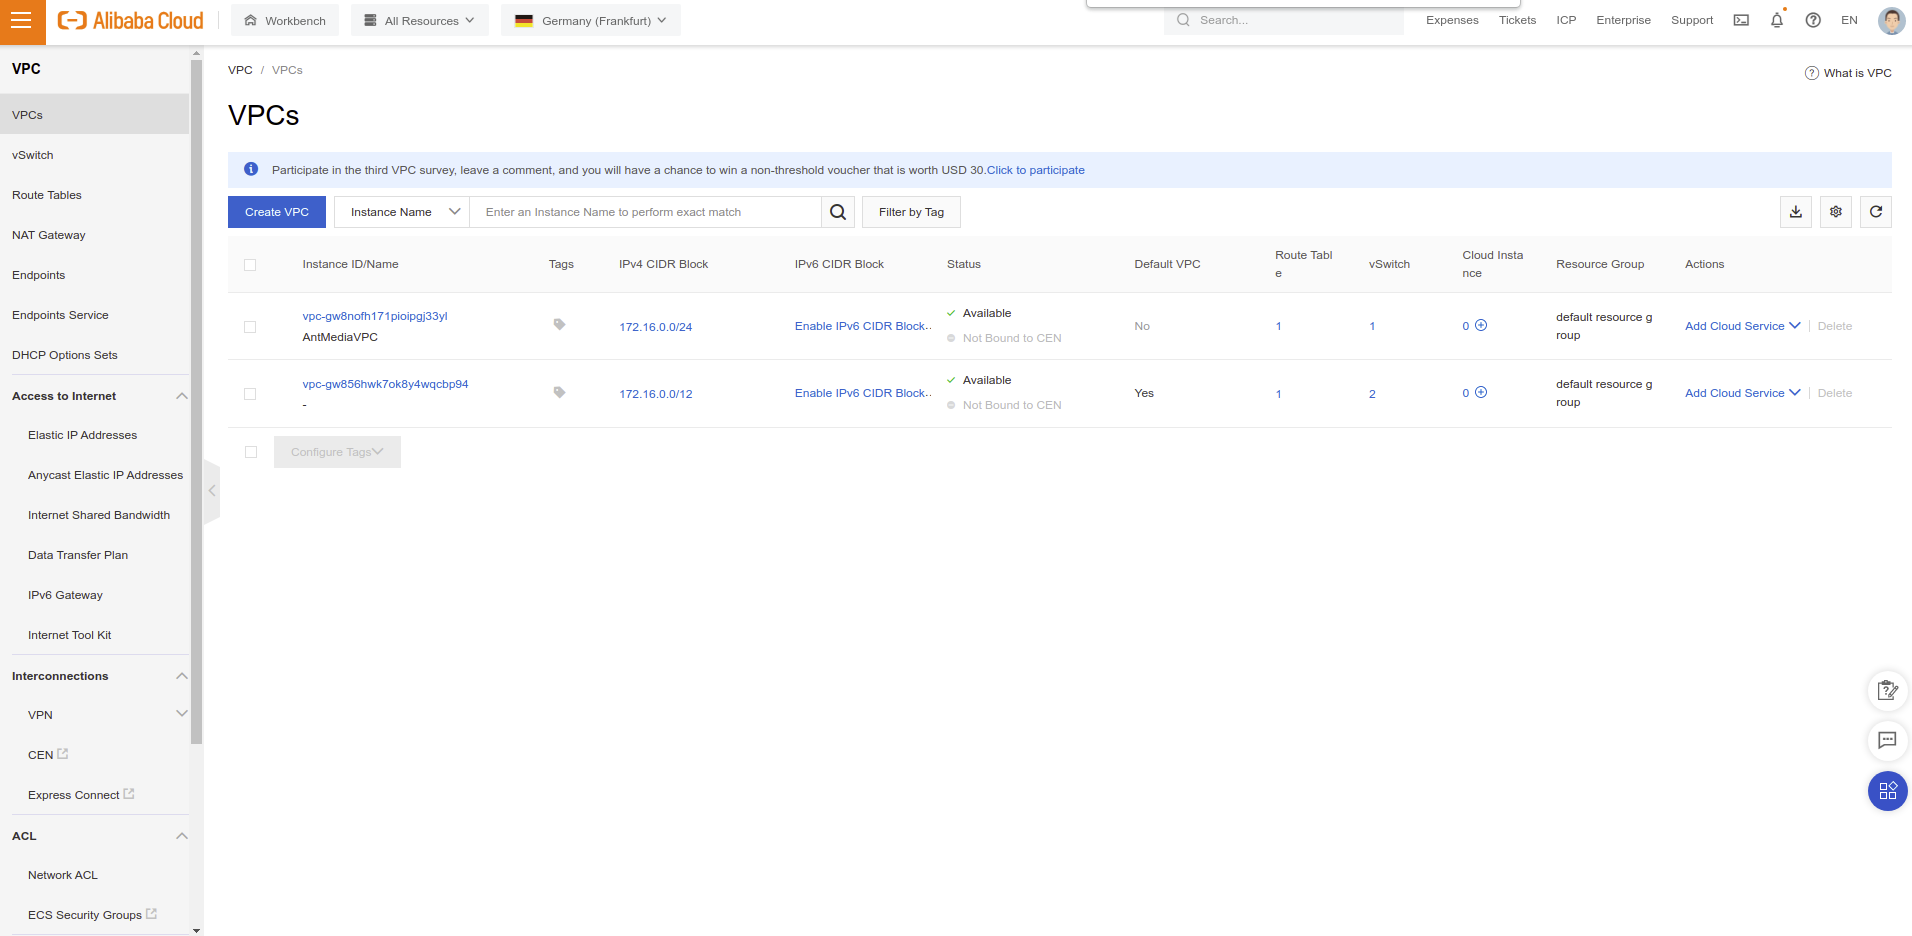
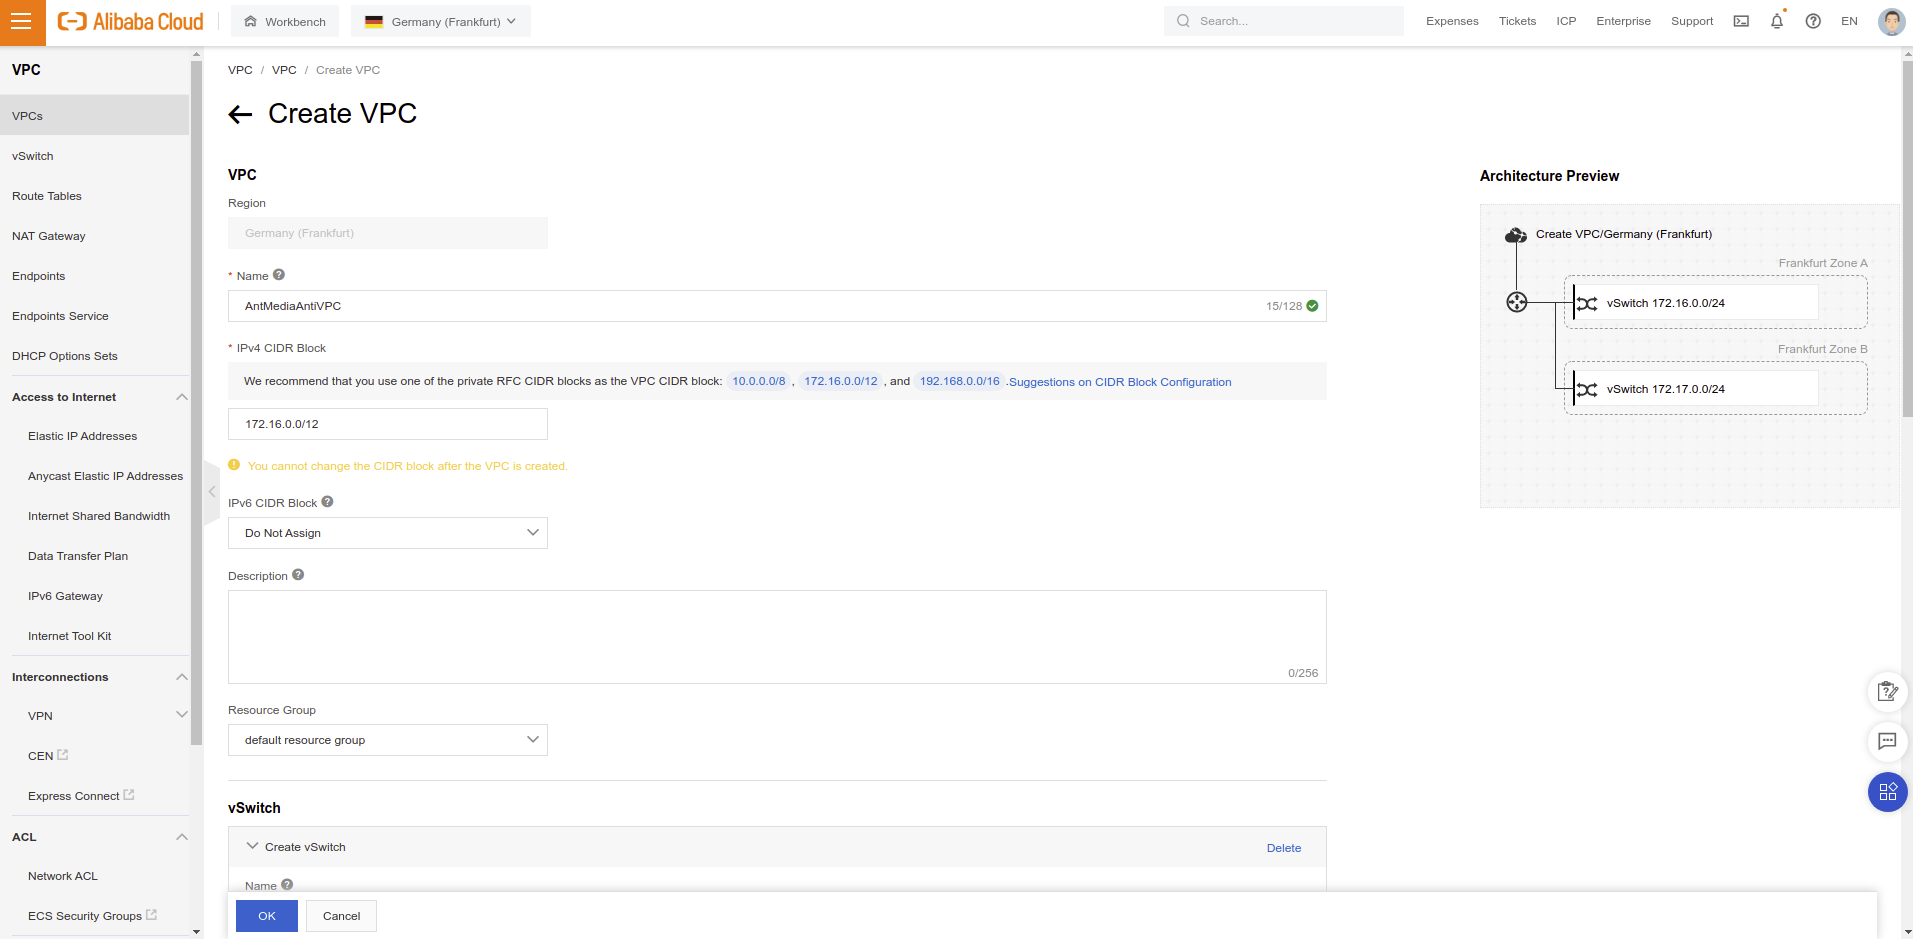
You need to have VPC and security groups for creating MongoDB instance. If you already have VPC and Security Group options, you can skip Create VPC and Create Security Group parts.
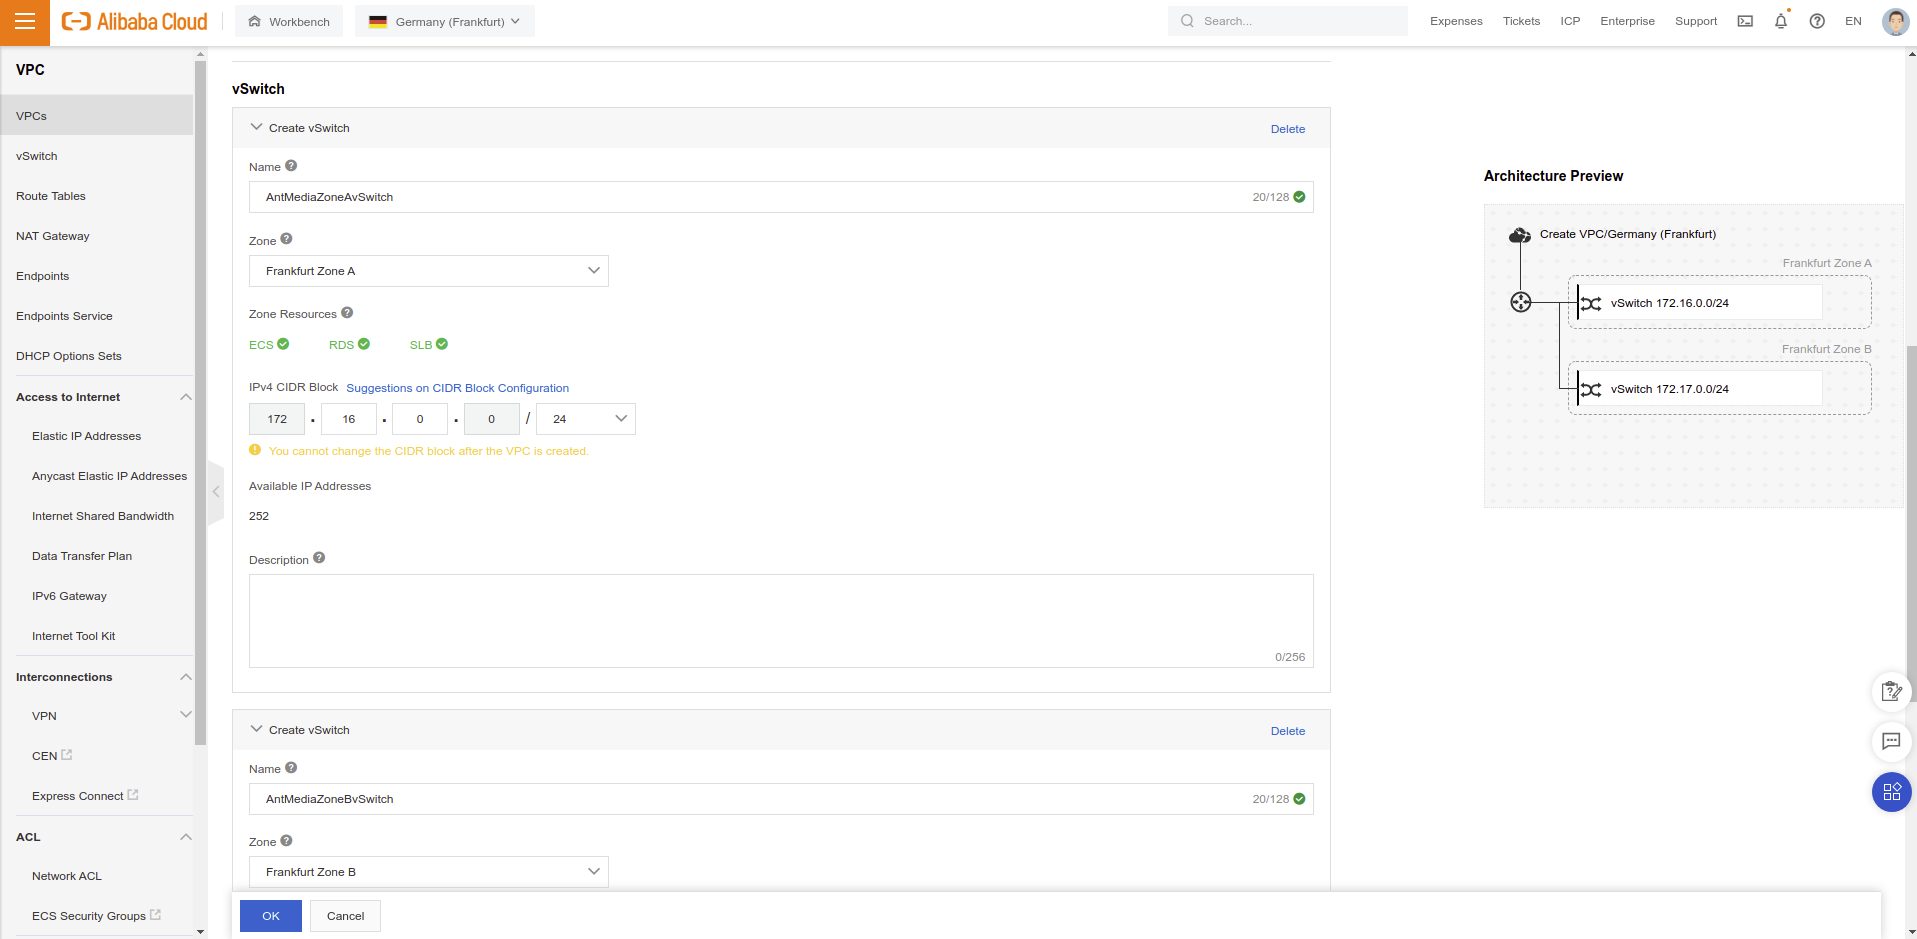
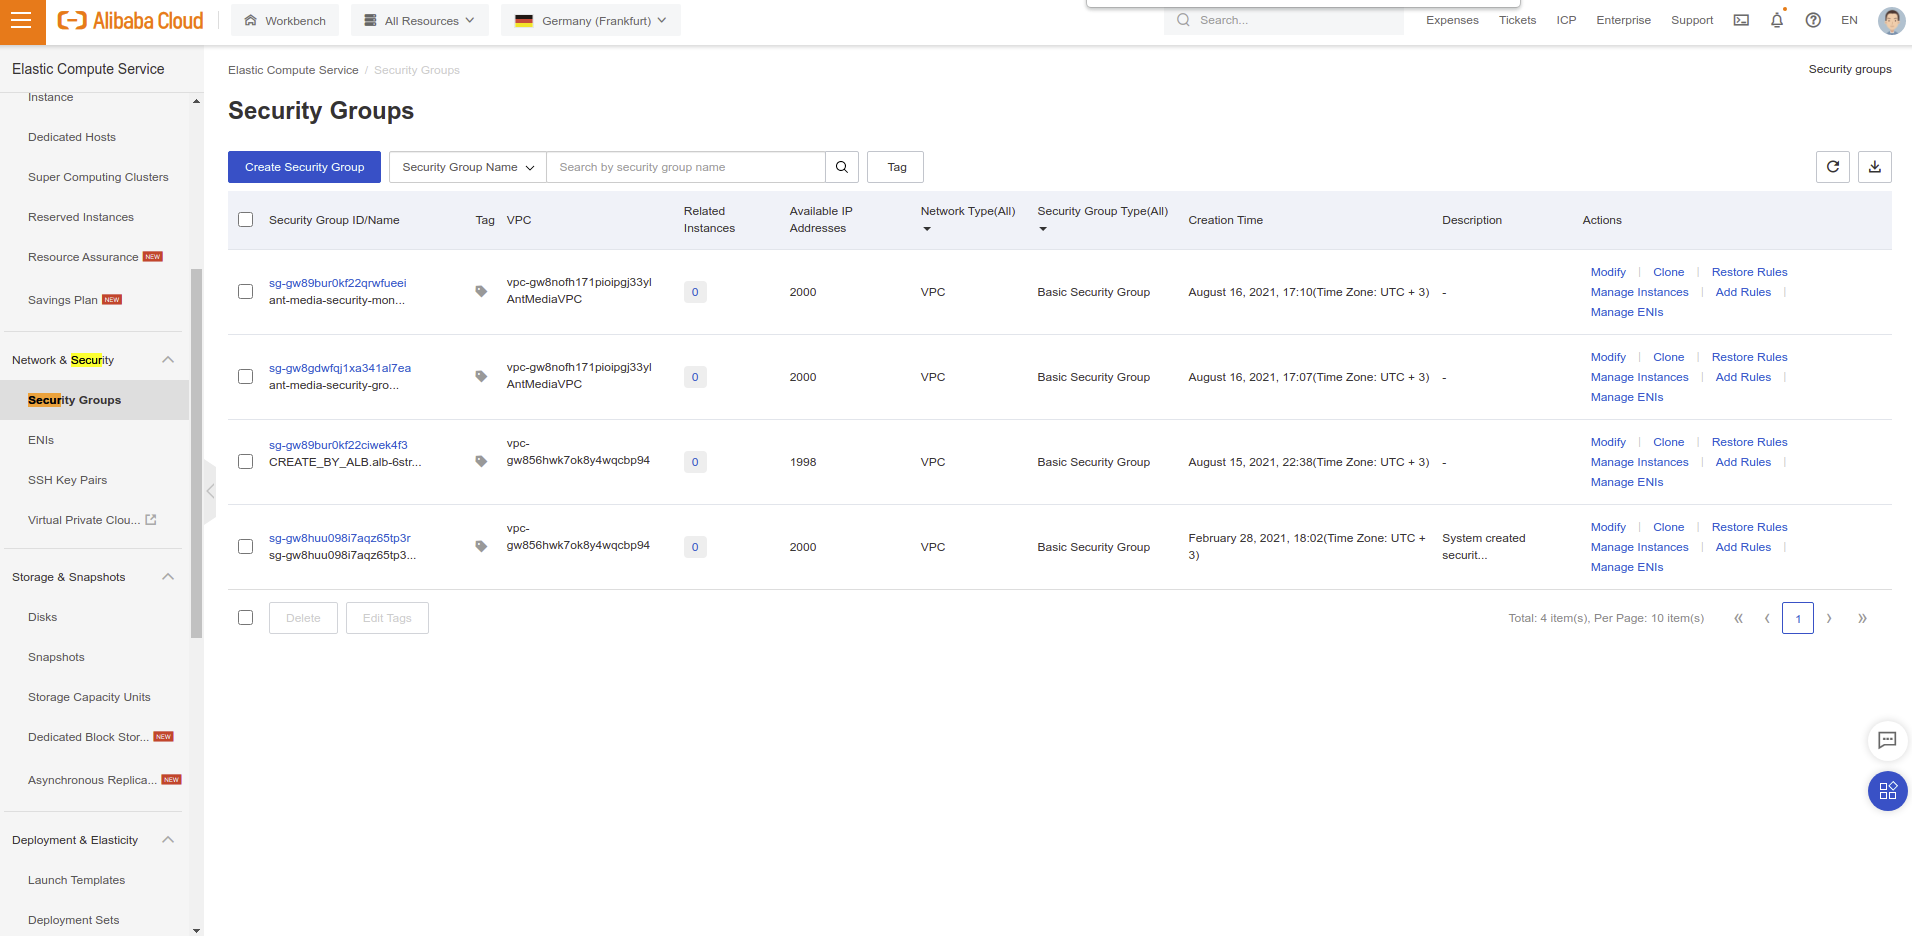
22 and 27017 TCP ports as follows in the image.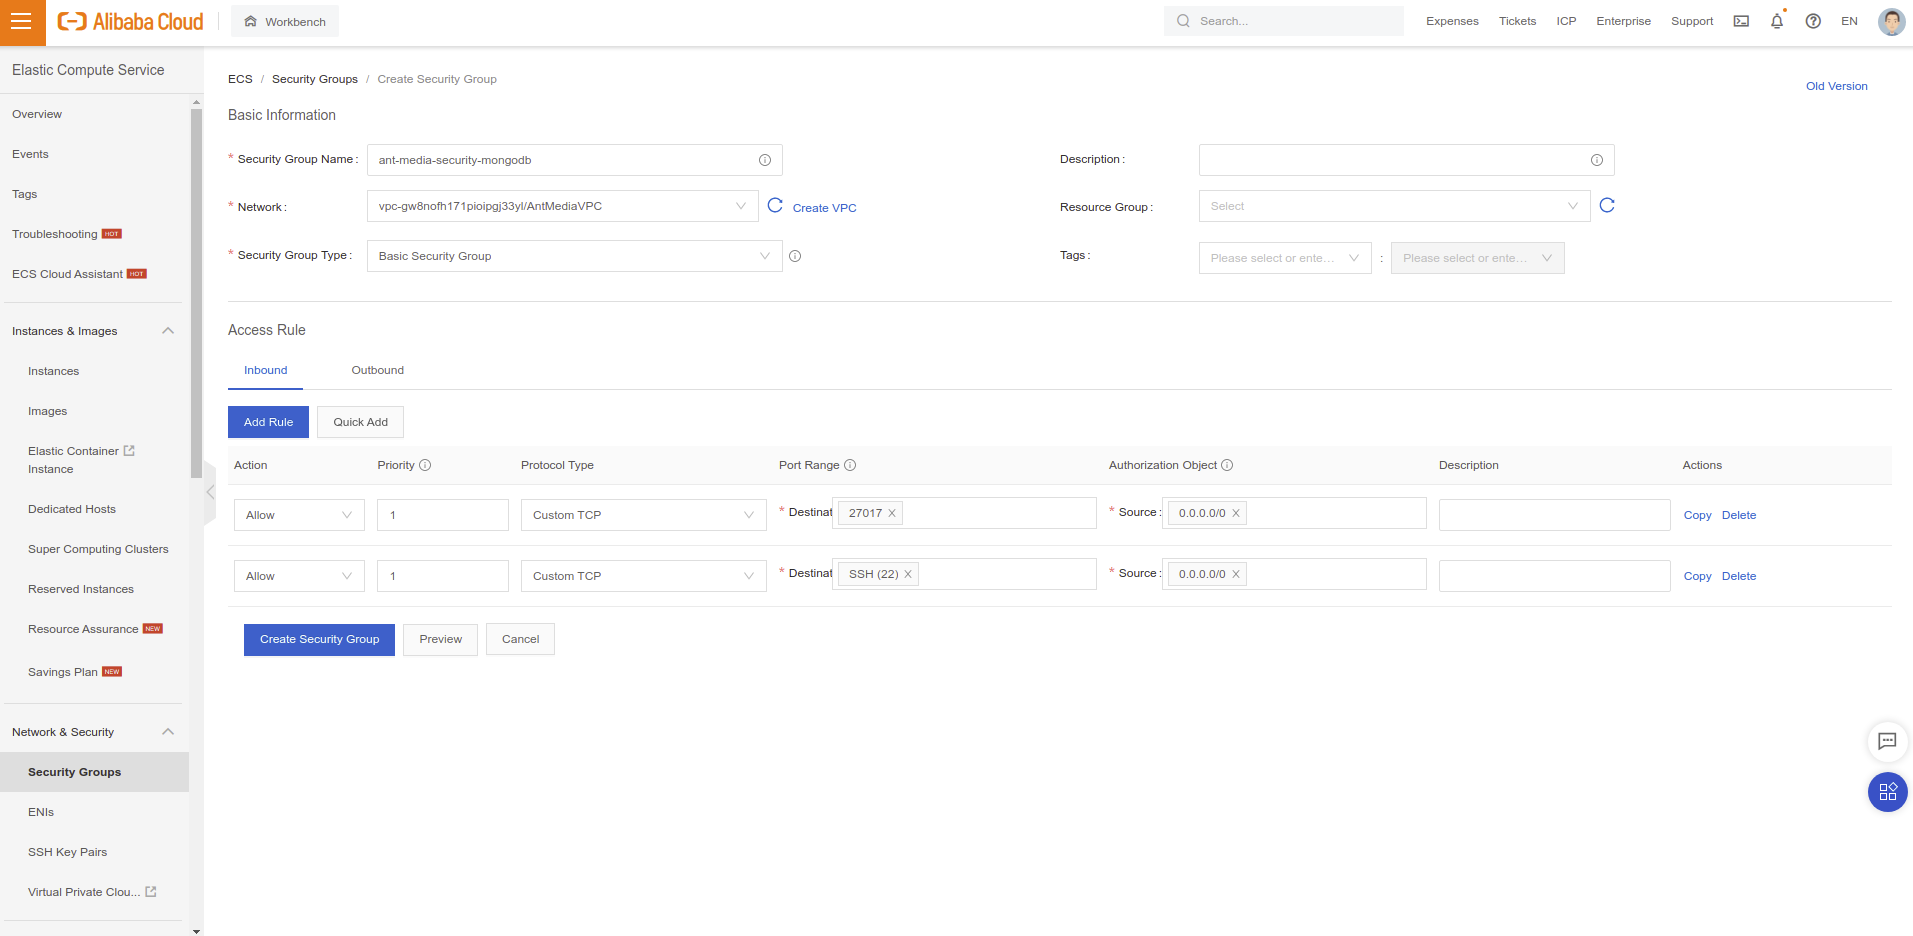
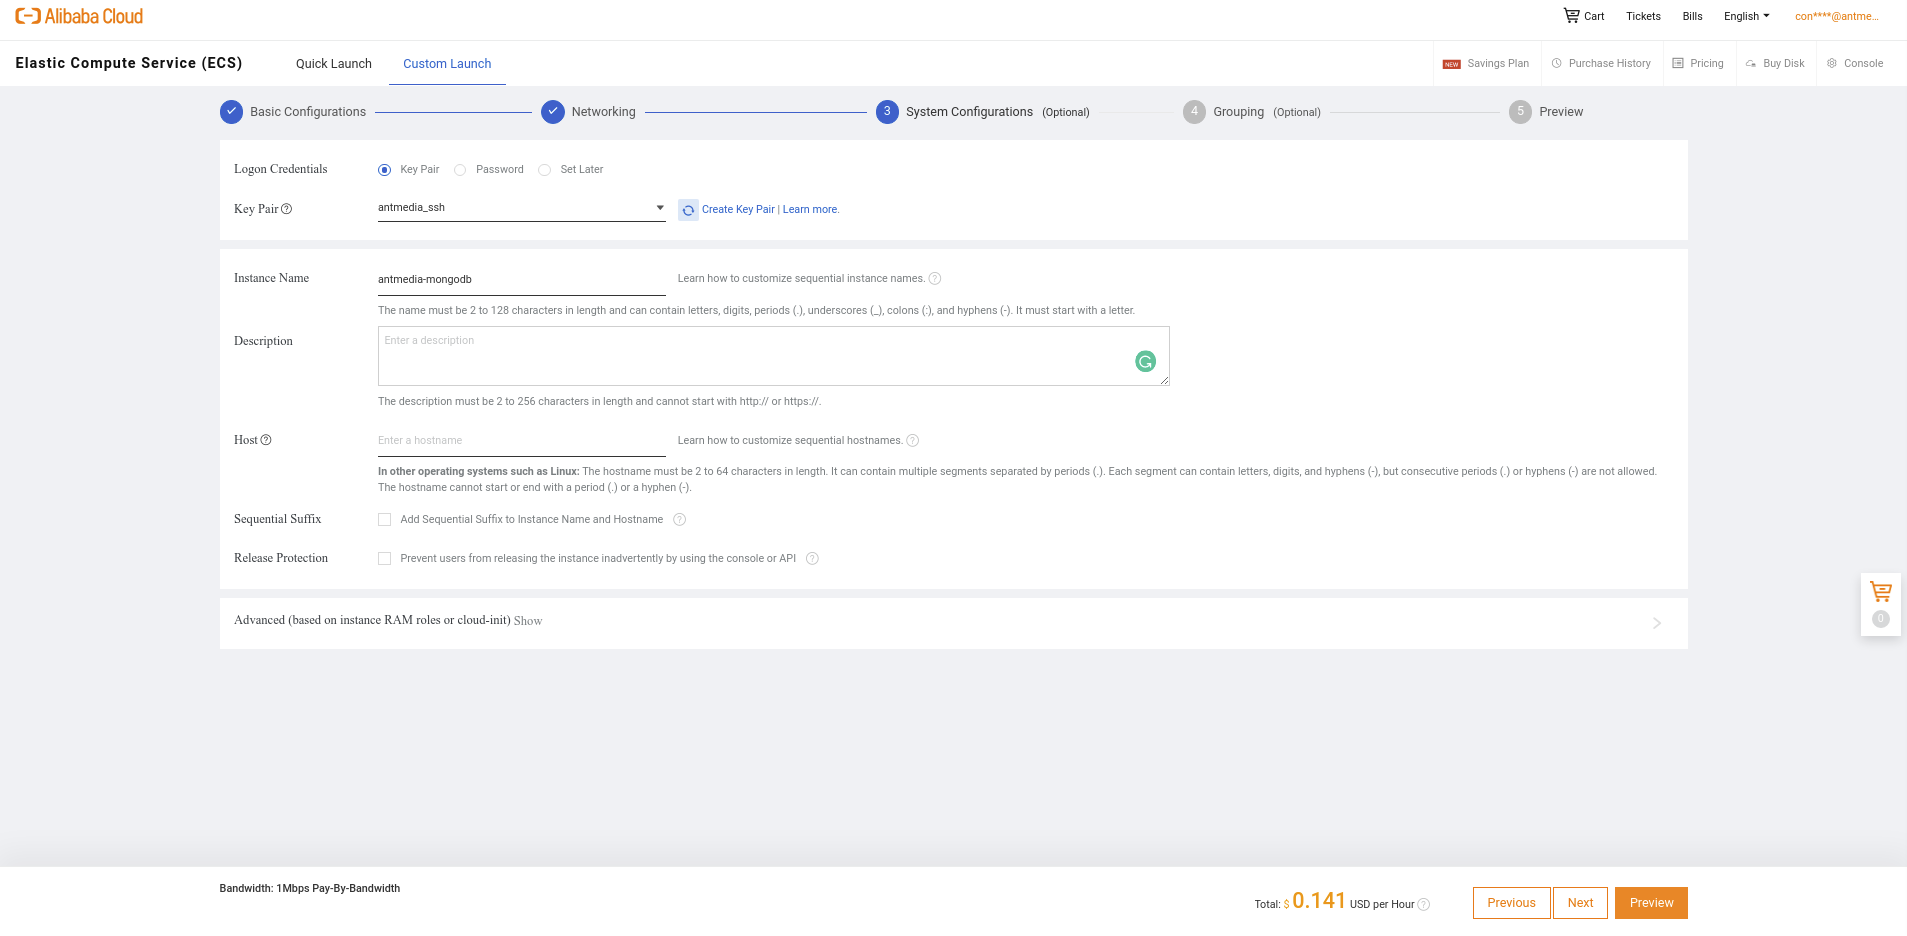
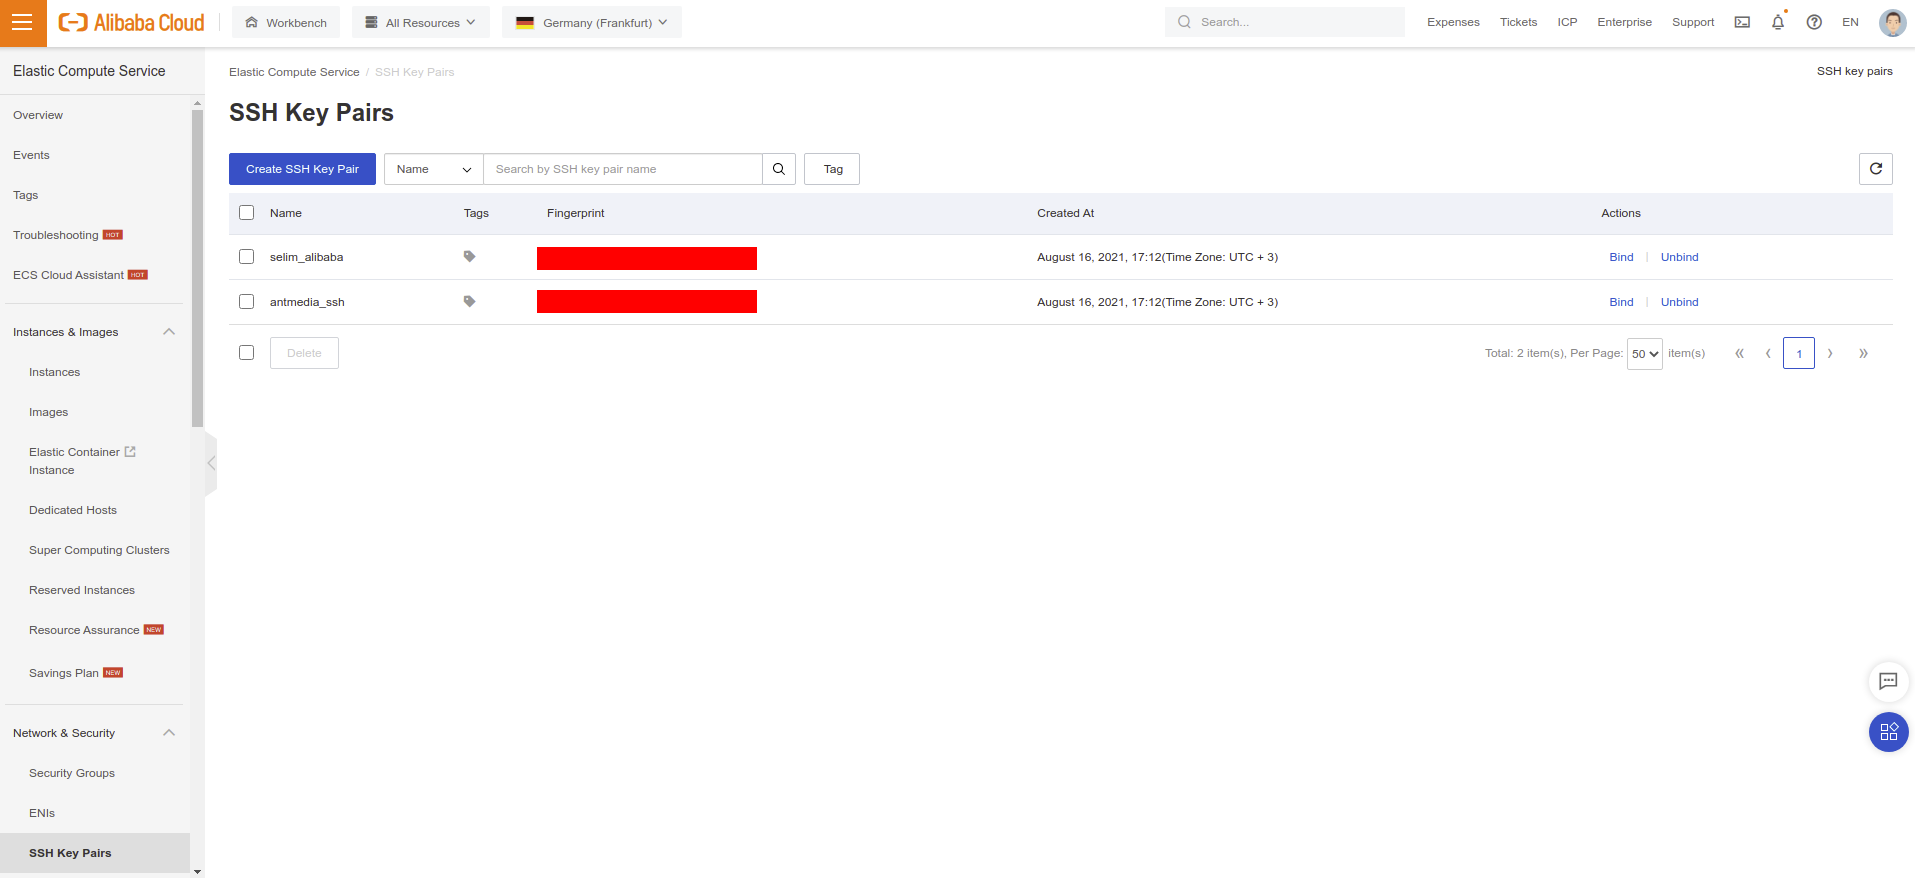
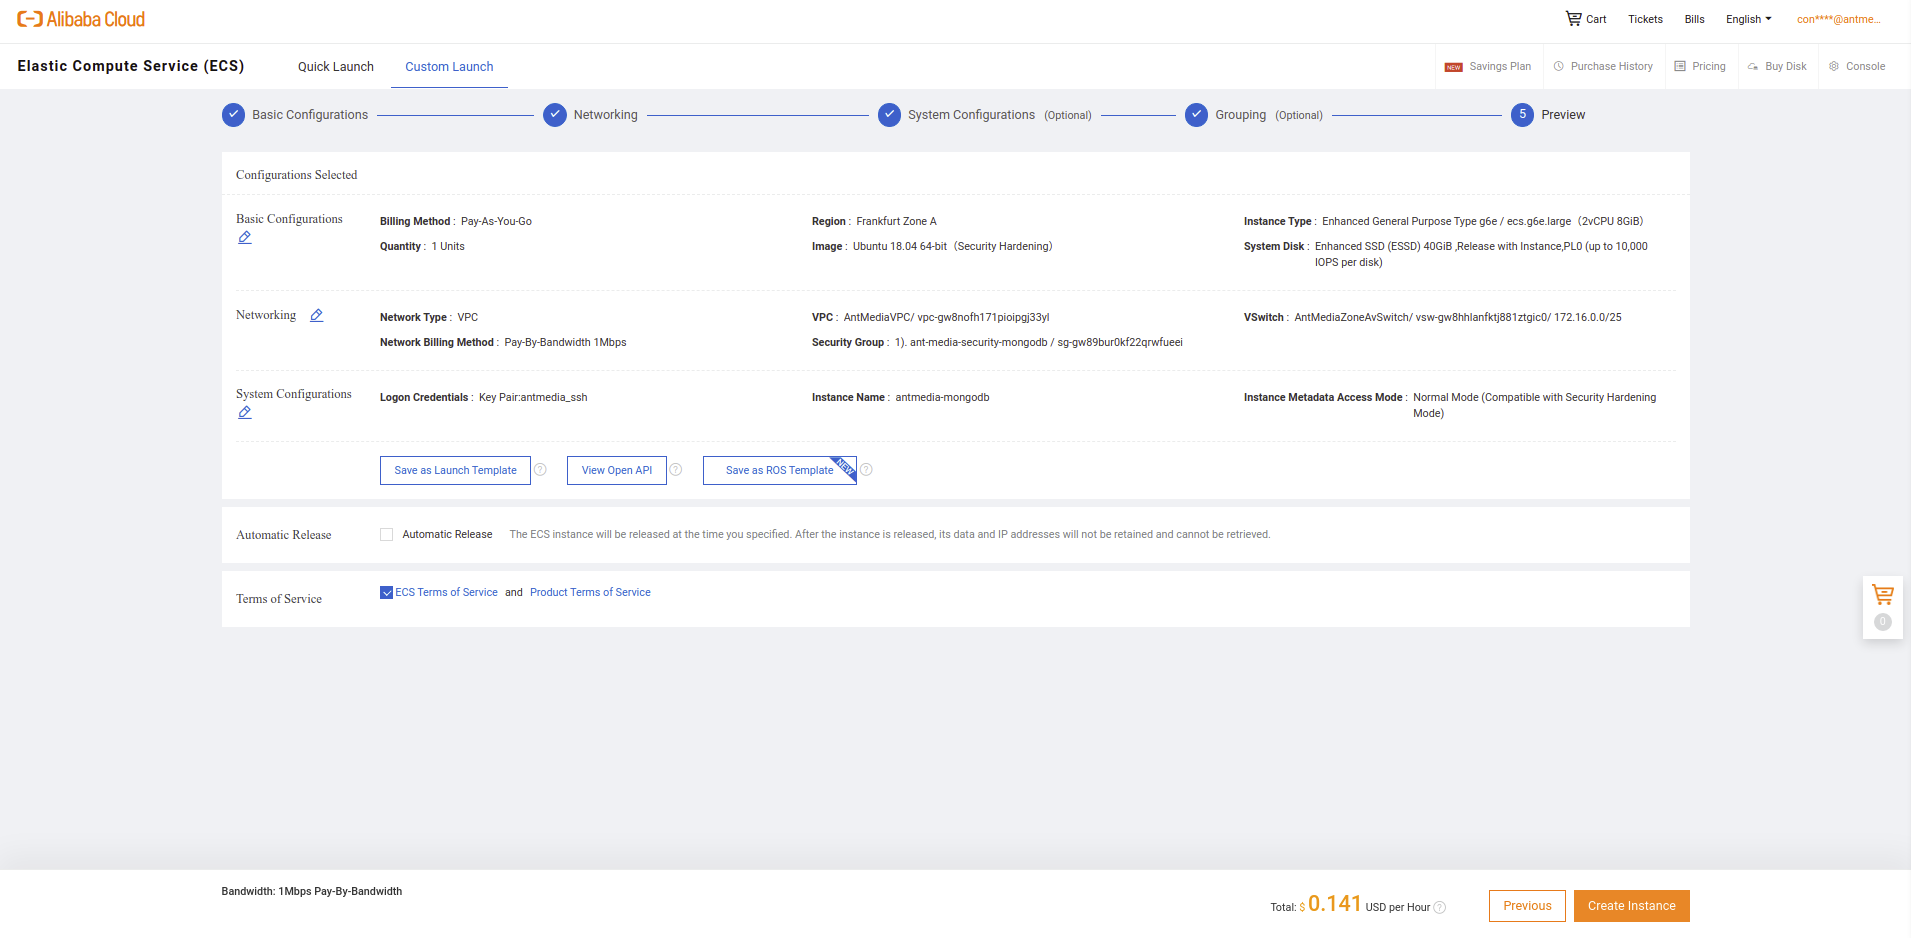
{YOUR_KEY_FILE} and {INSTANCE_PUBLIC_IP} with your own credentials.ssh -i {YOUR_KEY_FILE} root@{INSTANCE_PUBLIC_IP}wget -qO - https://www.mongodb.org/static/pgp/server-4.2.asc | sudo apt-key add -
echo "deb [ arch=amd64 ] https://repo.mongodb.org/apt/ubuntu `lsb_release -cs`/mongodb-org/4.2 multiverse" | sudo tee /etc/apt/sources.list.d/mongodb-org-4.2.list
sudo apt-get update
sudo apt-get install -y mongodb-org/etc/mongod.conf file with an editor like nano and change bind_ip value to 0.0.0.0 to let MongoDB accept connections in all interfaces and save it.sudo nano /etc/mongod.conf
Press Ctrl + X to save the file.
Restart mongod and enable service.
sudo systemctl restart mongod
sudo systemctl enable mongod.service
Now, MongoDB installation is complete. Just save your MongoDB instance's local address somewhere. We will use it in later.
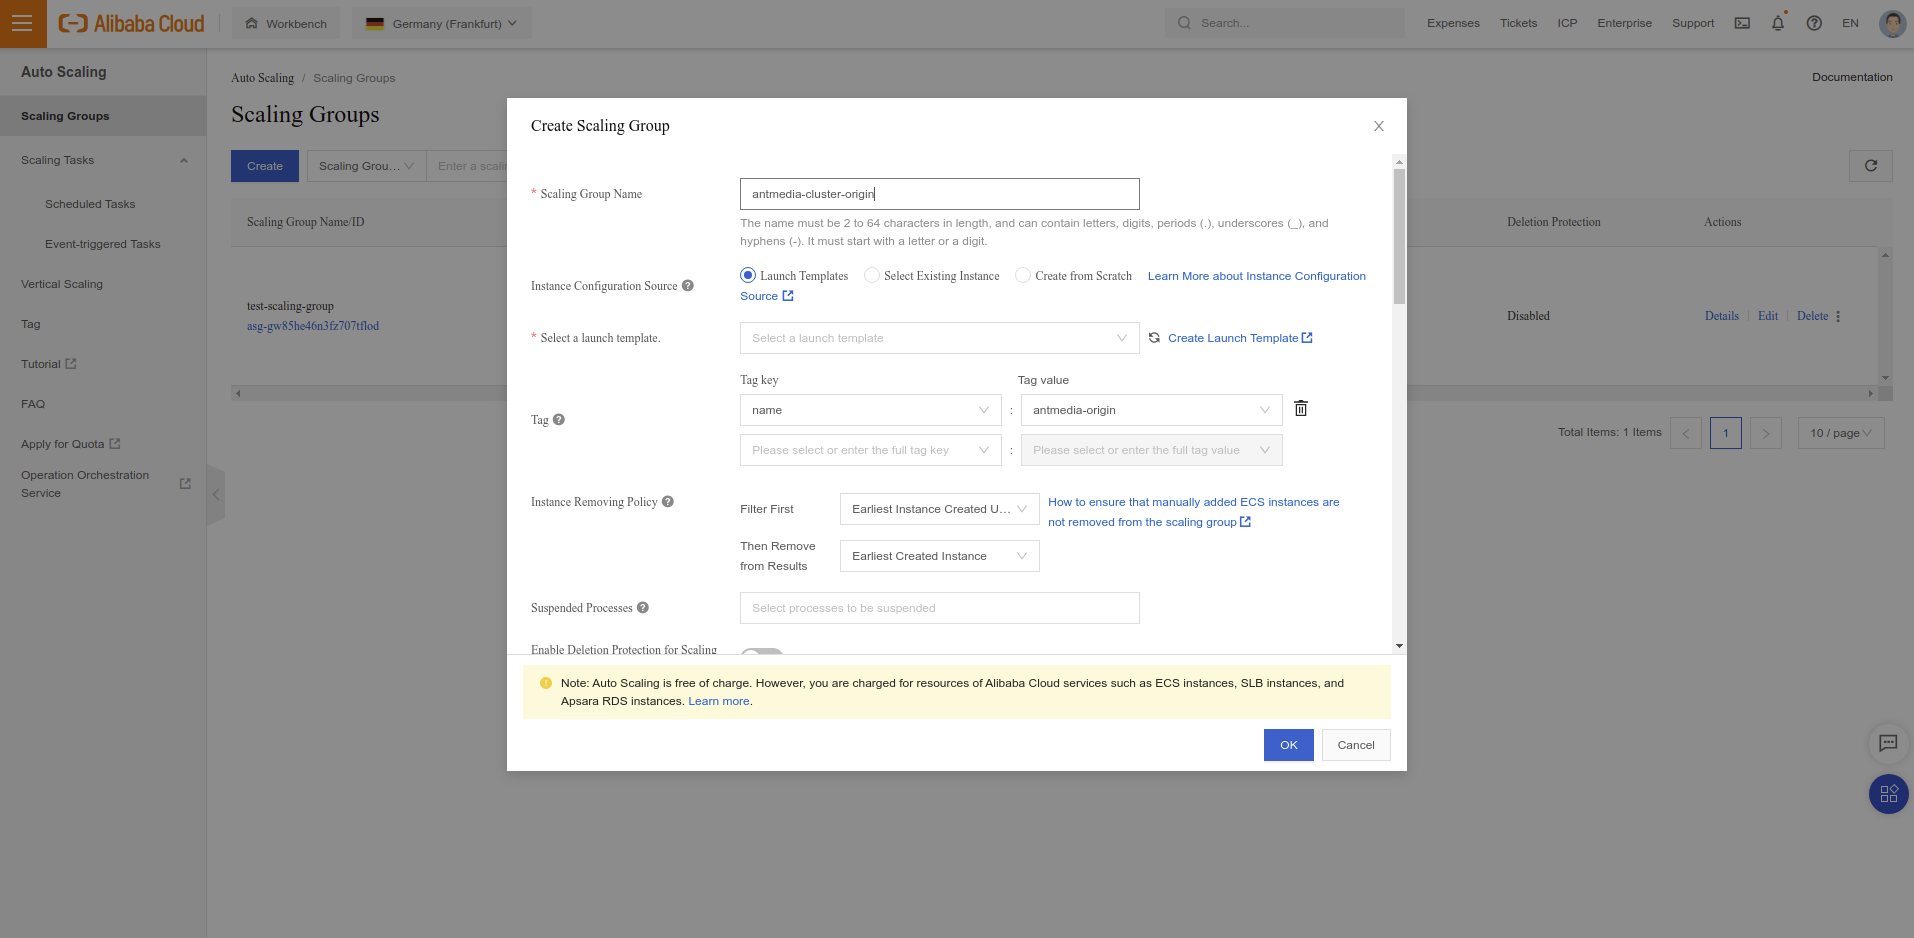
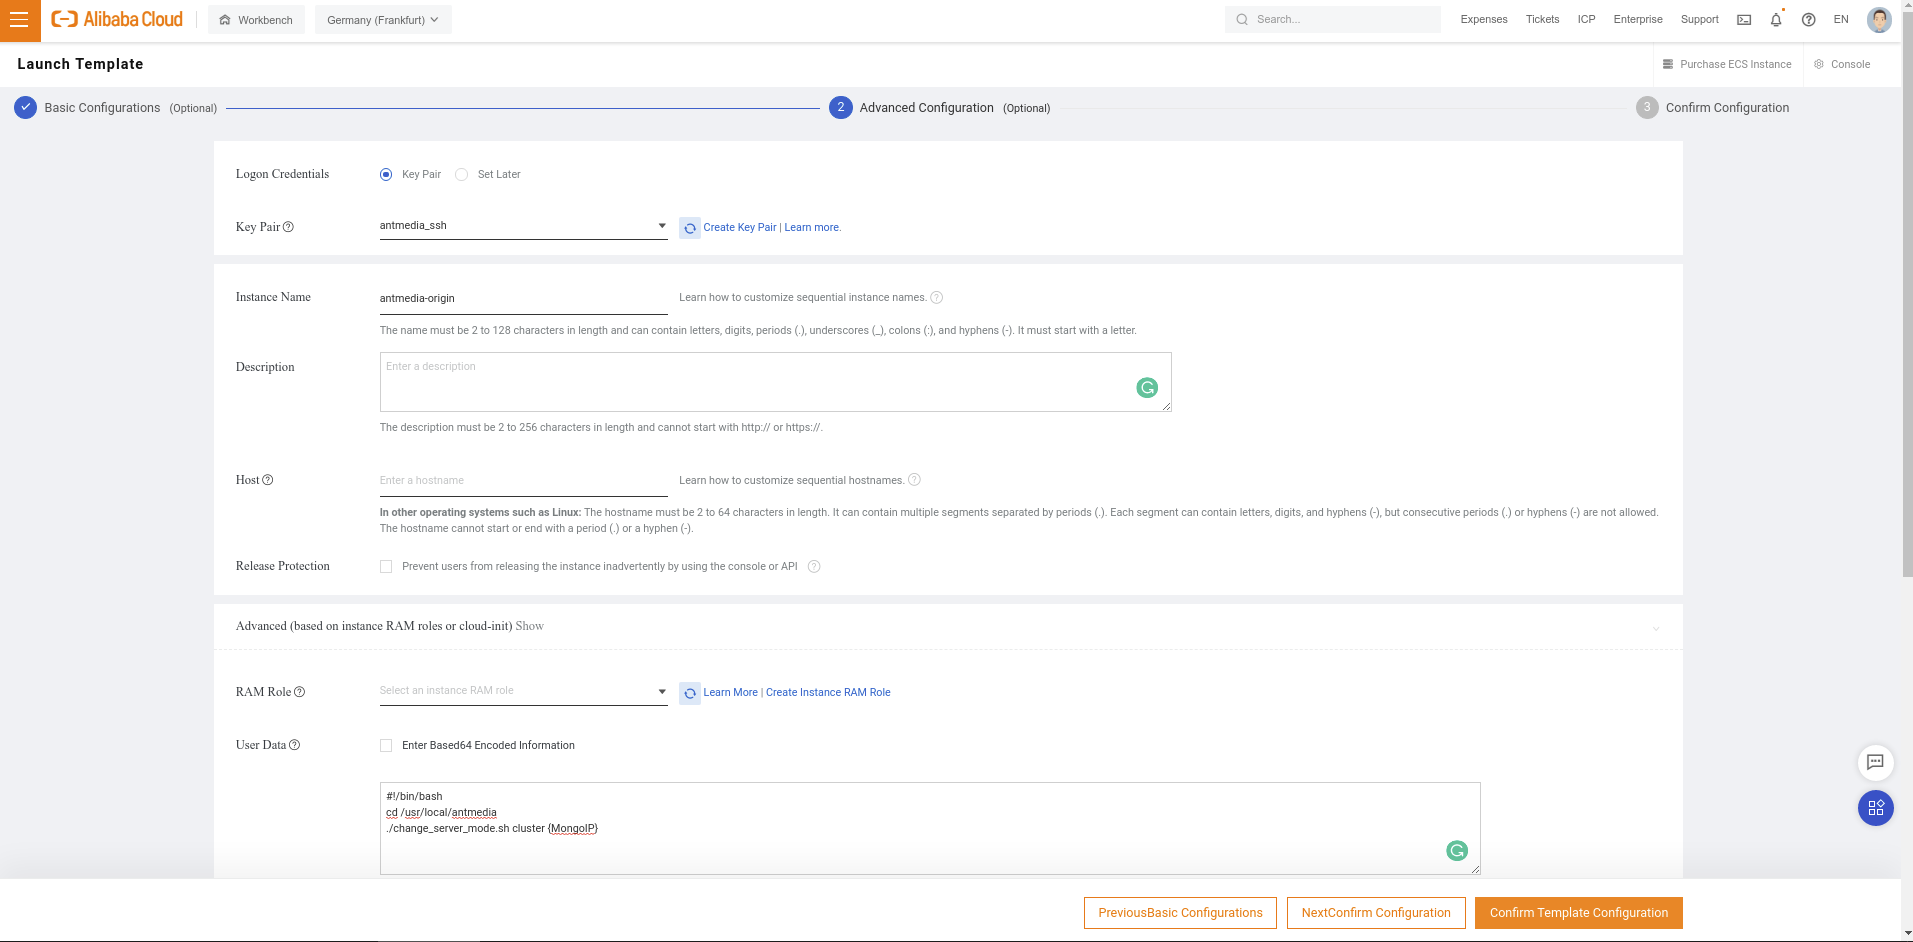
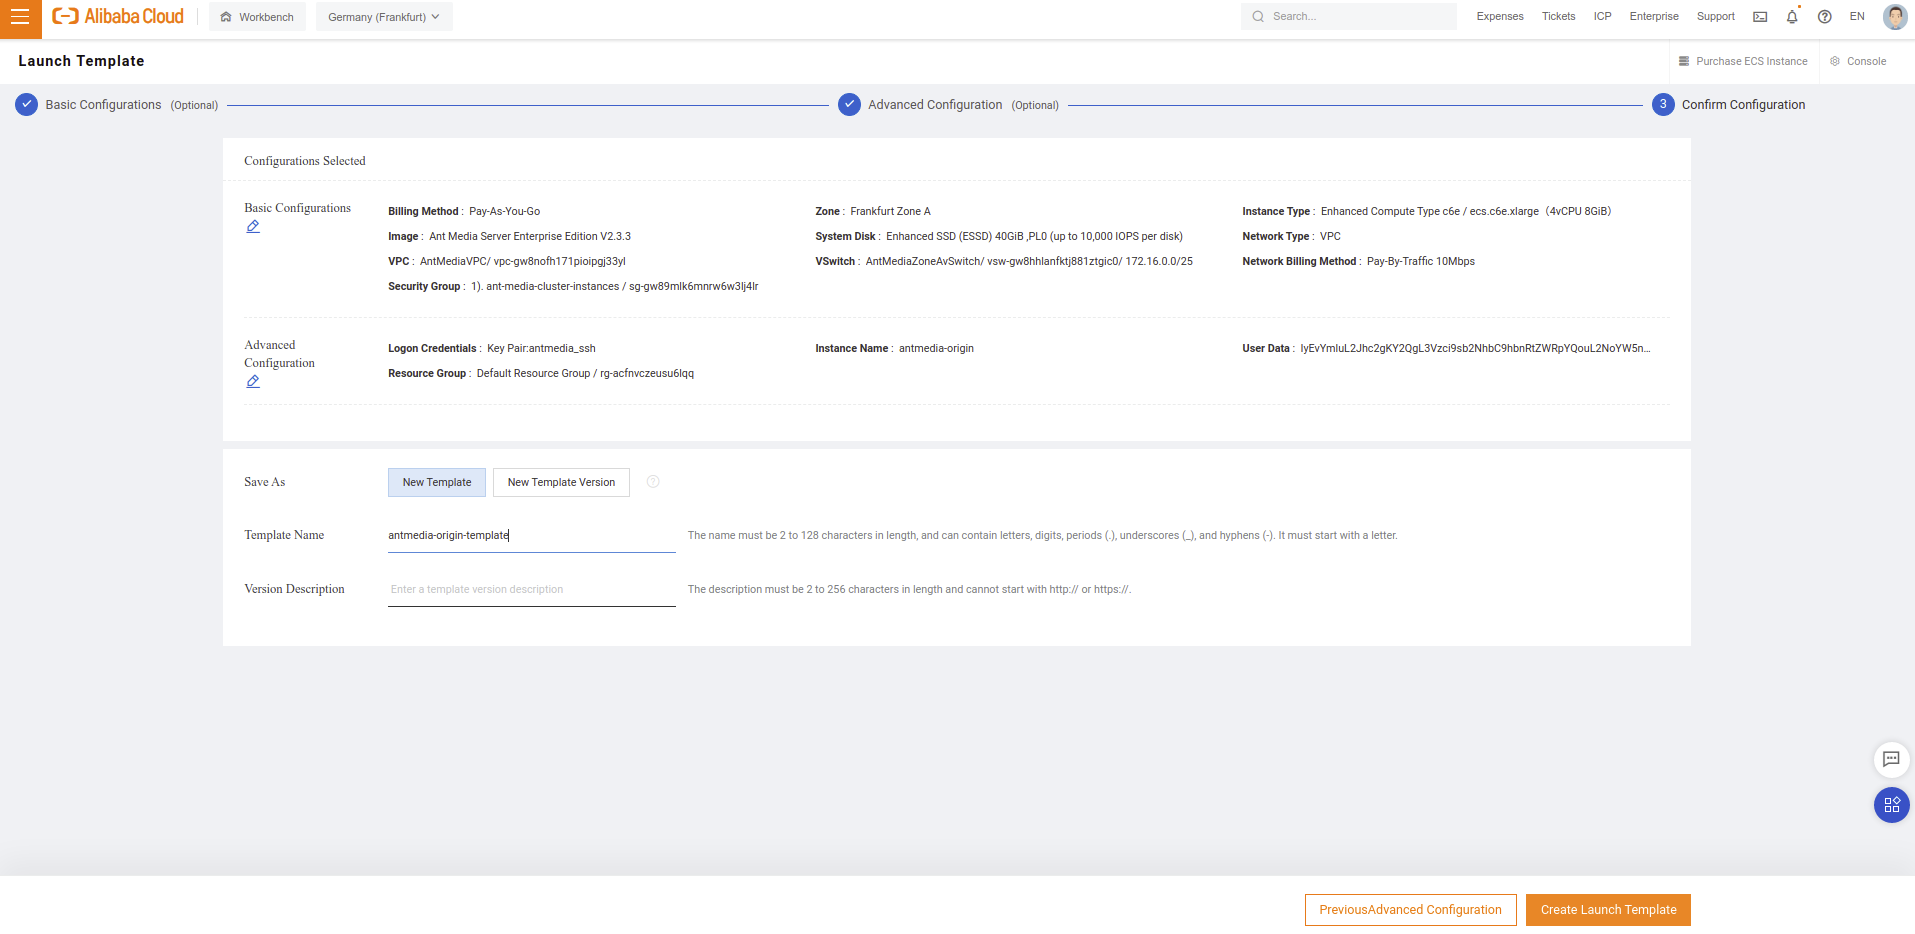
You need to have a Launch template for creating Instances. If you already have the Launch template, you can skip Create a Launch Template parts.
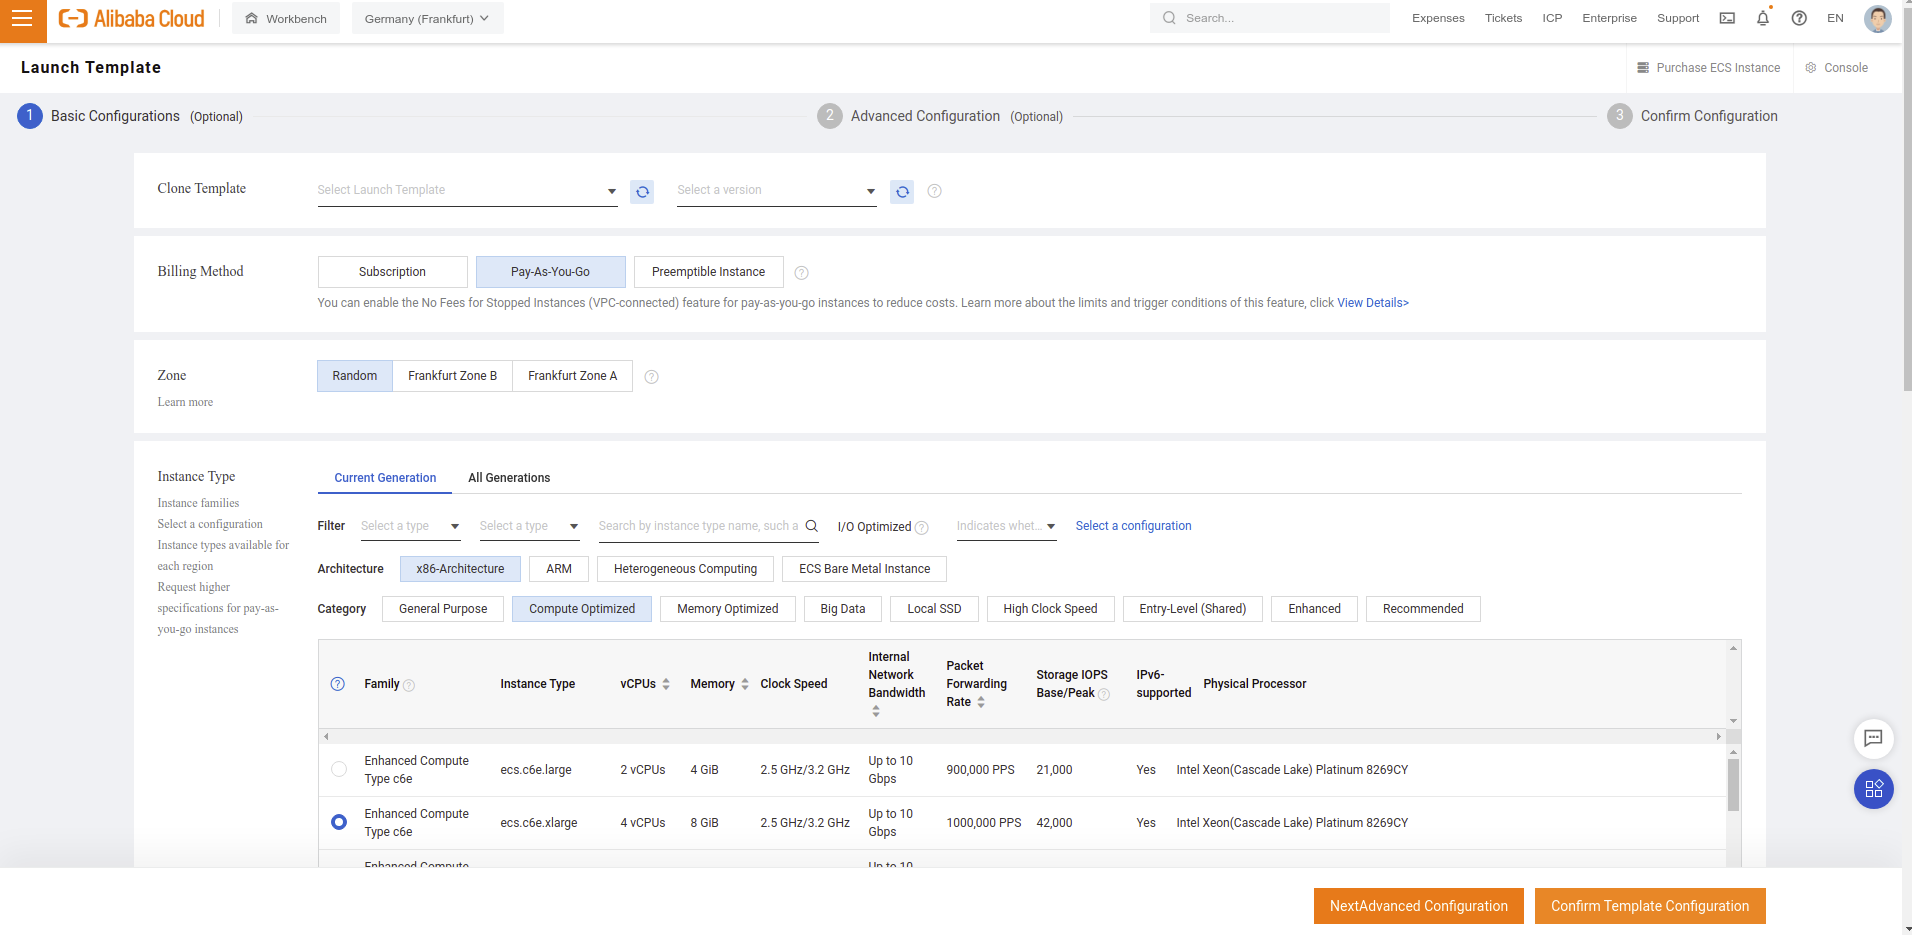
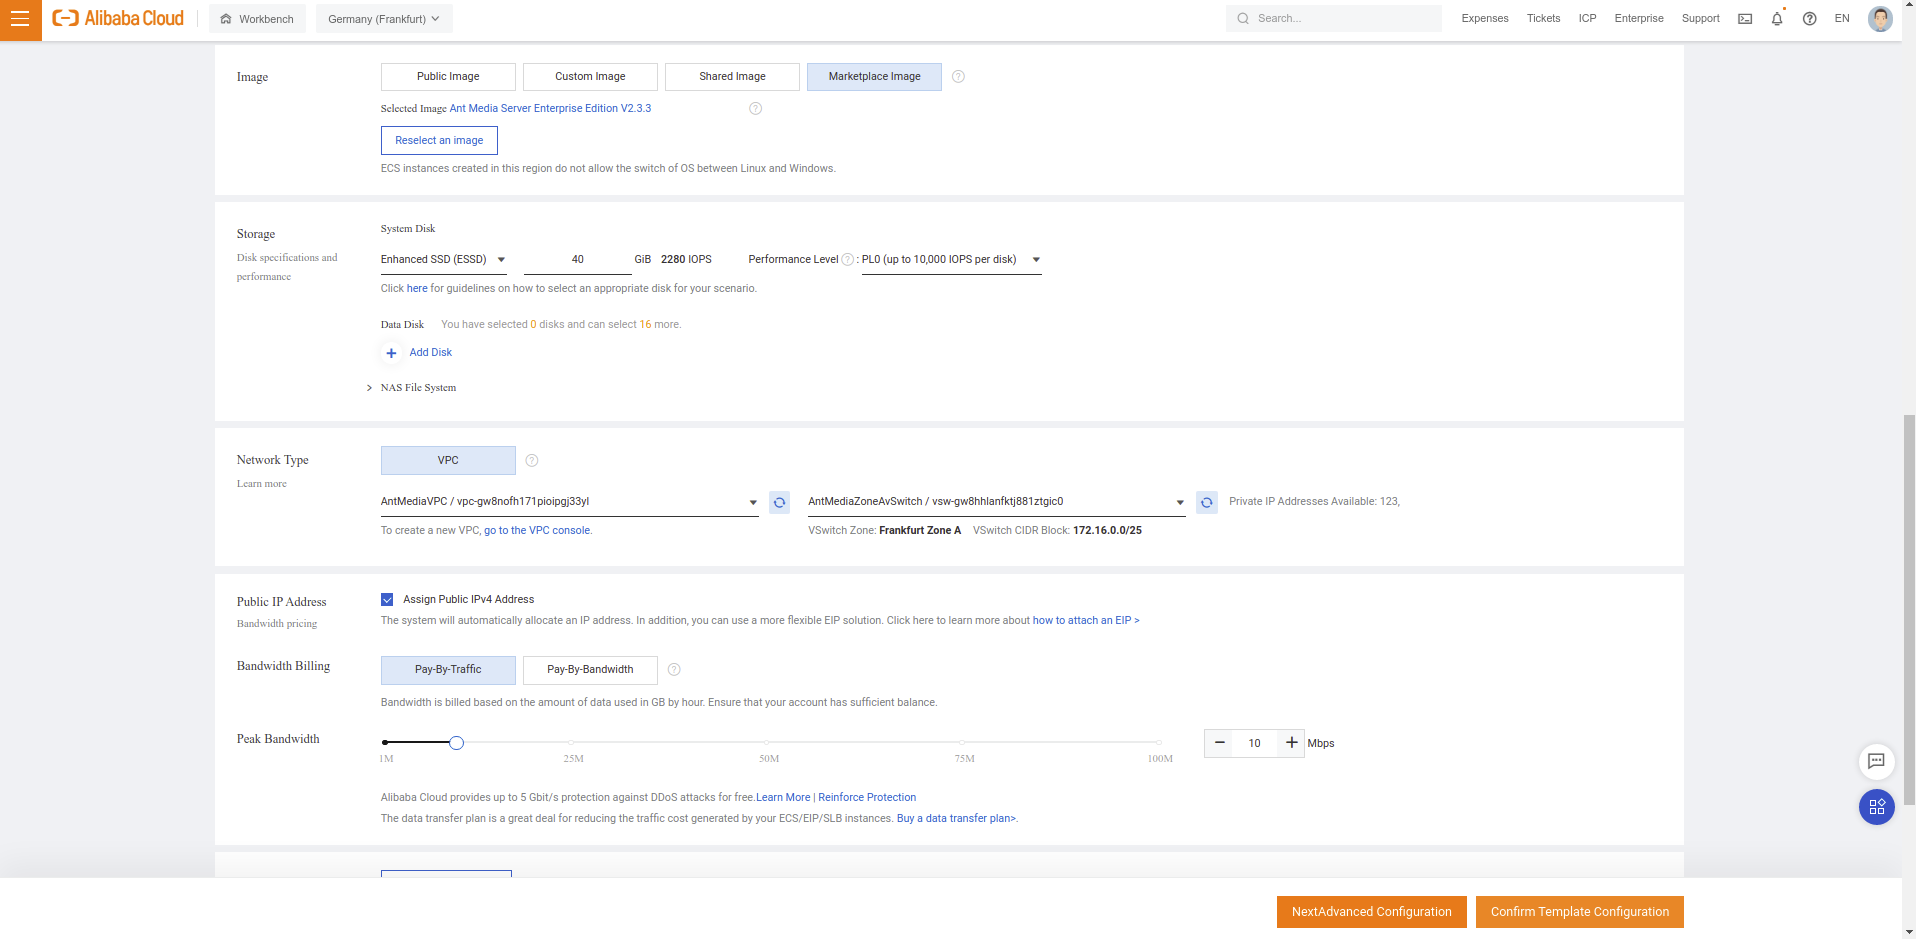
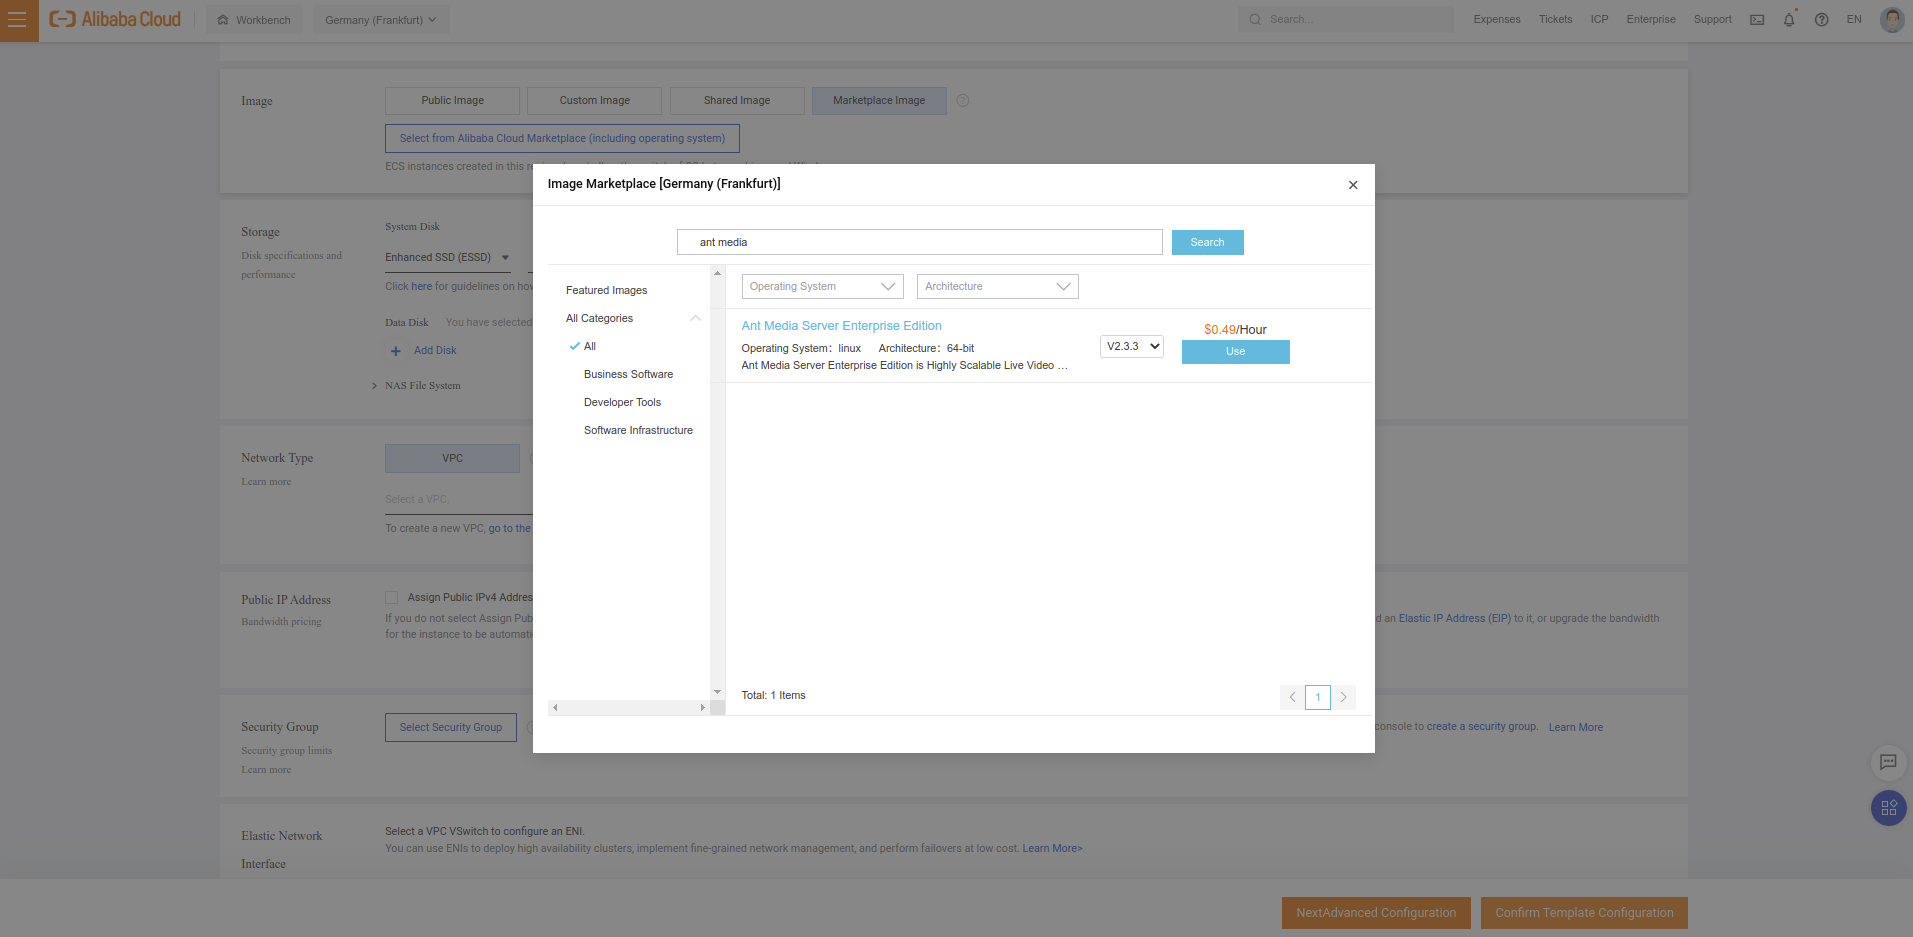
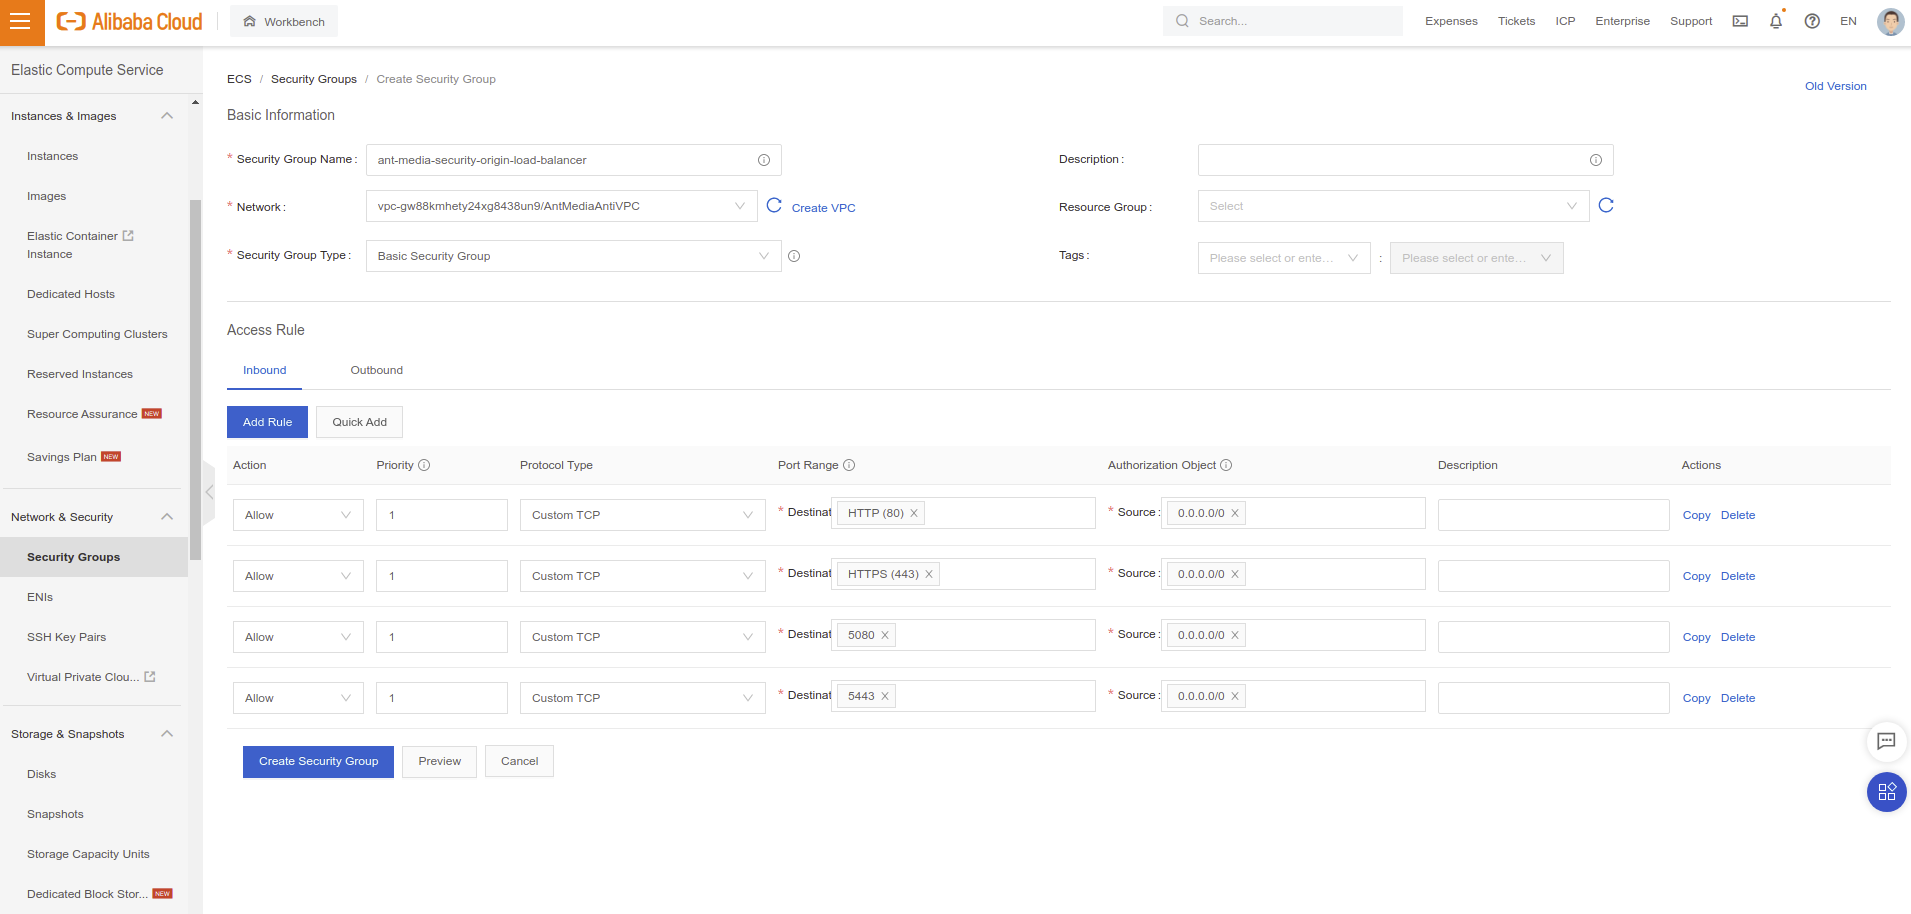
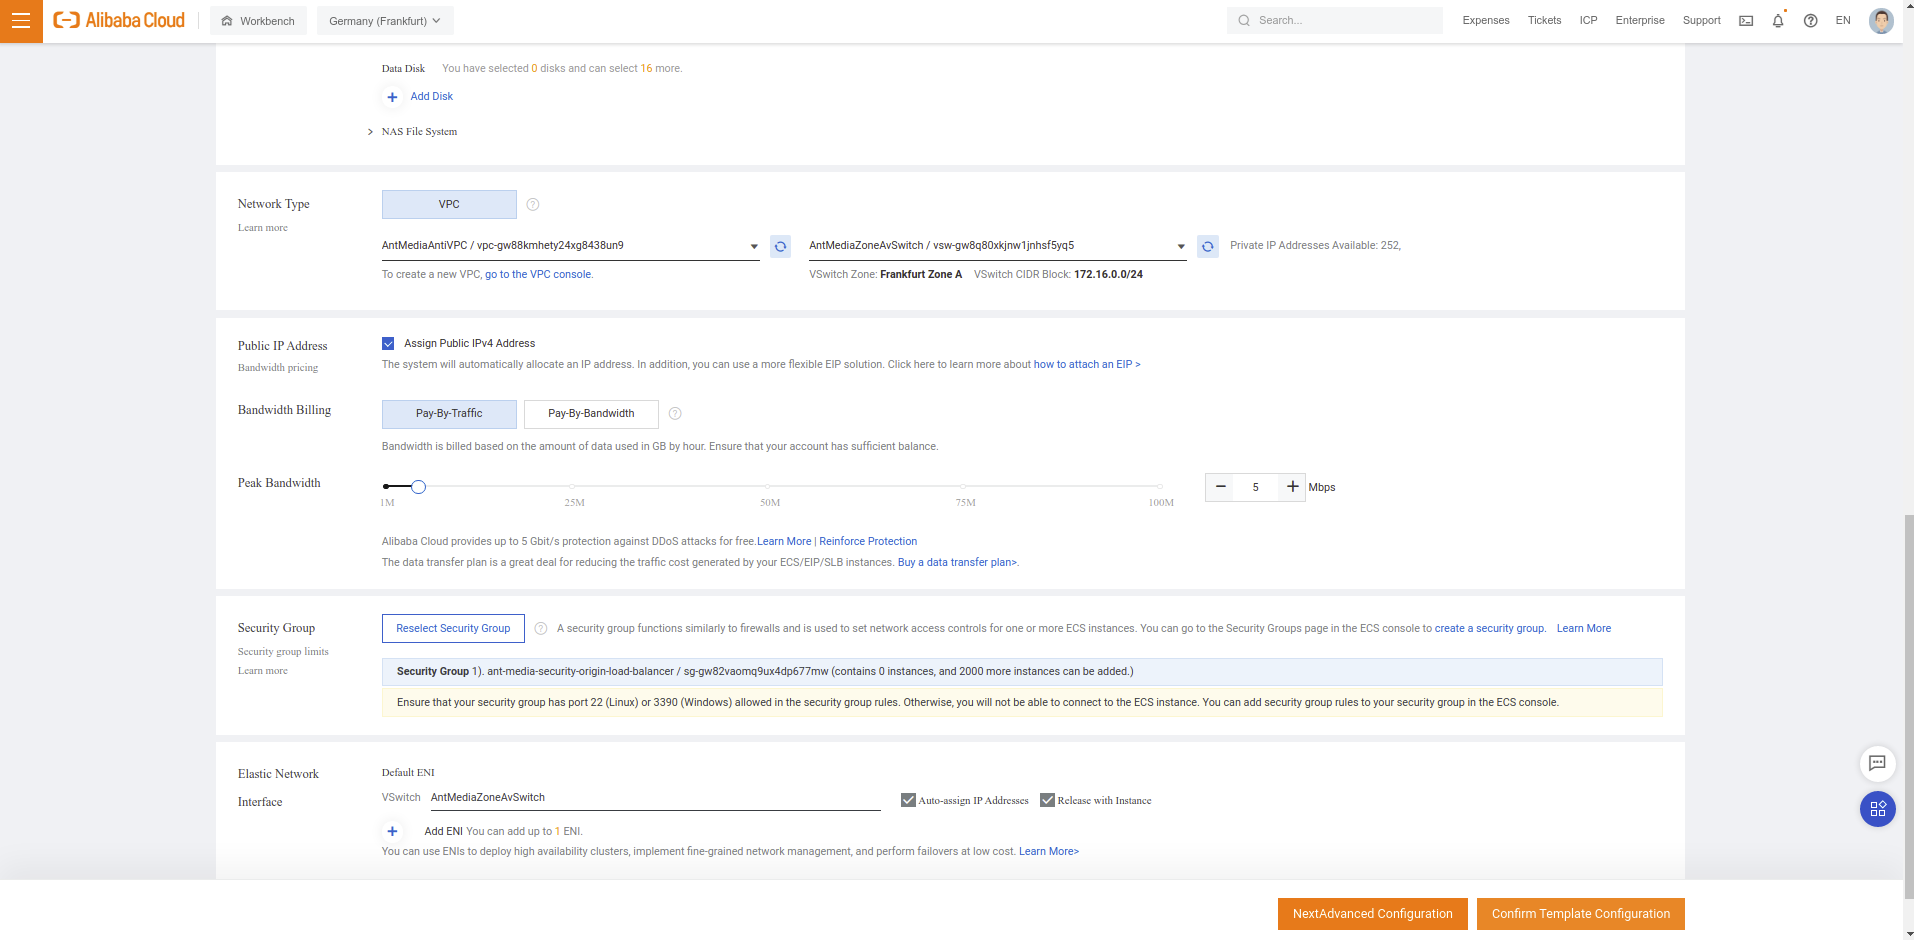
#!/bin/bash
cd /usr/local/antmedia
./change_server_mode.sh cluster {MongoIP}
After that Click Confirm Complete Configuration
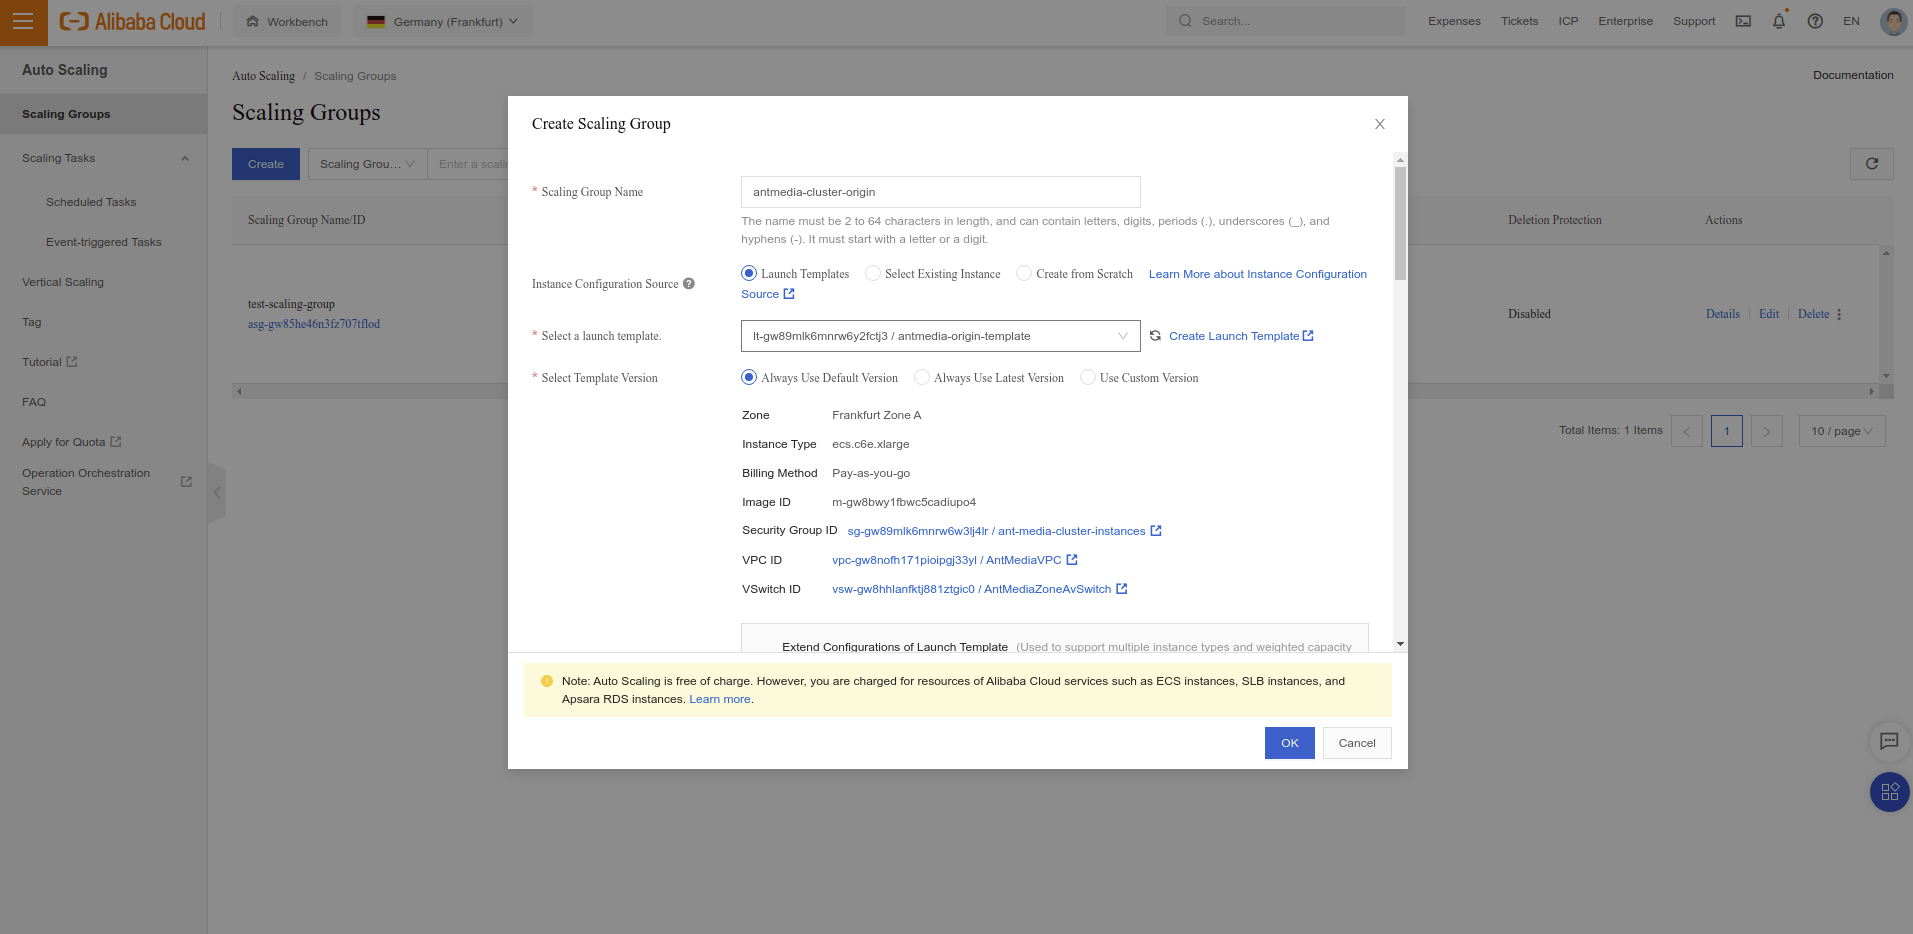
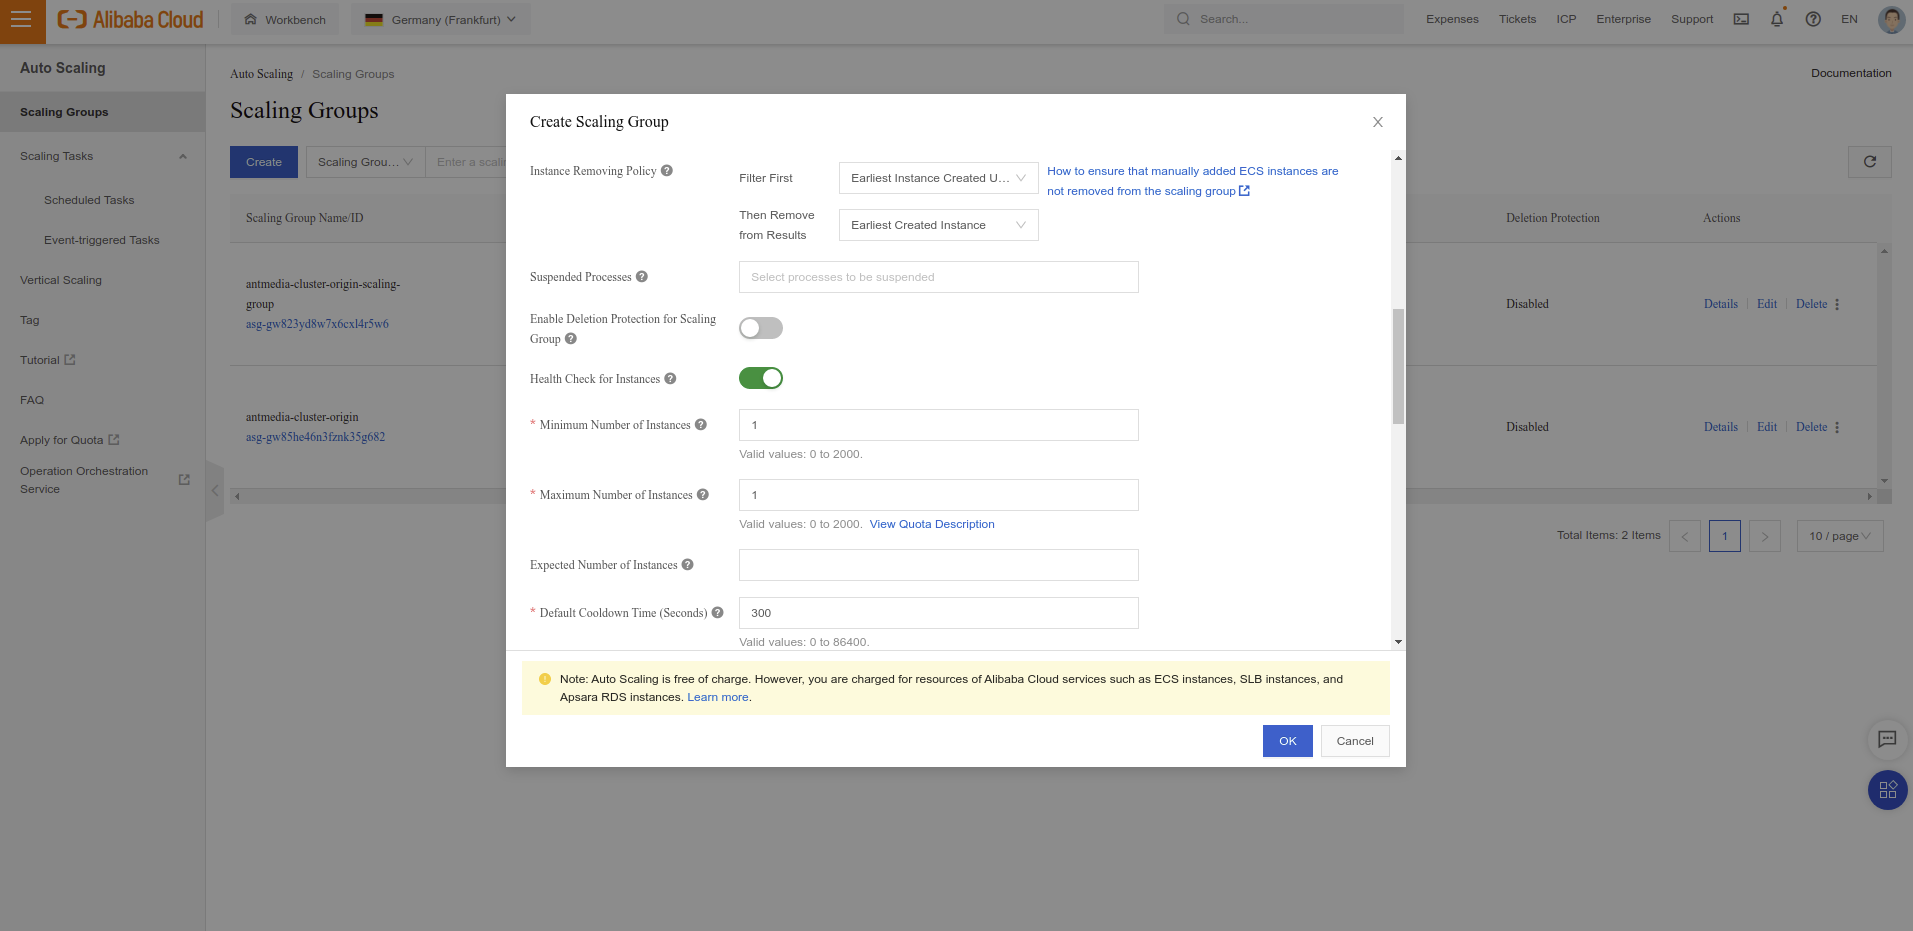
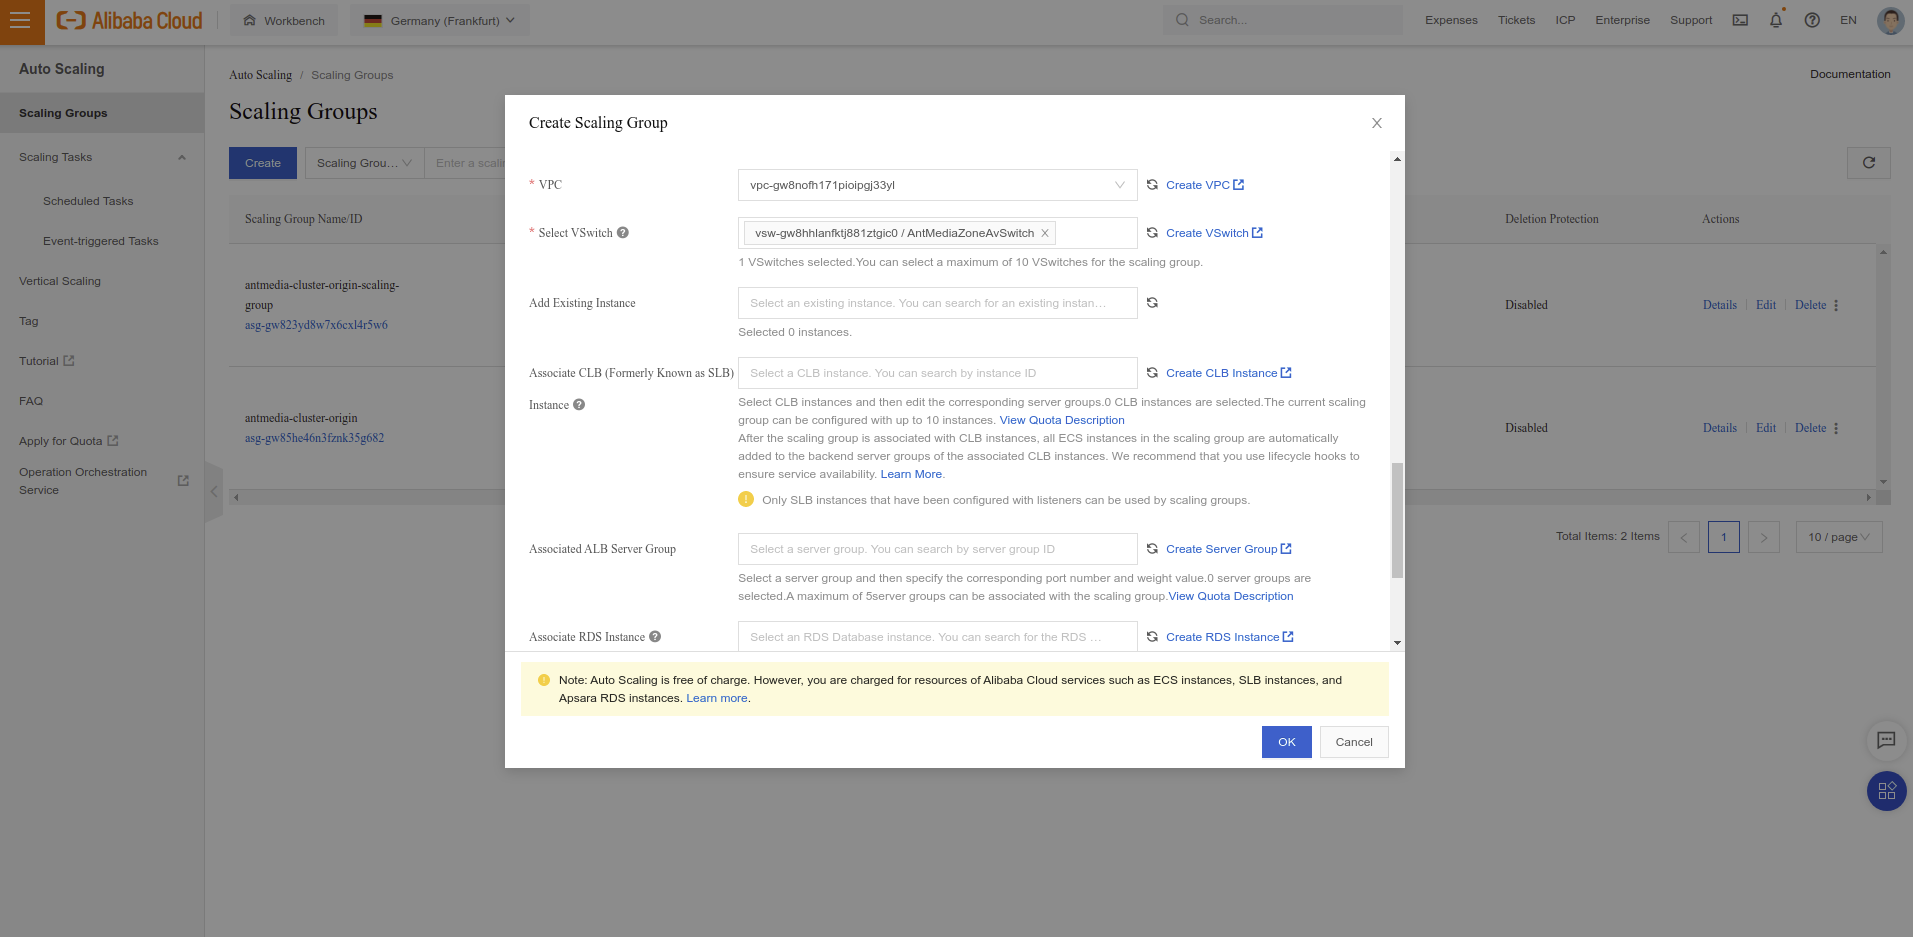
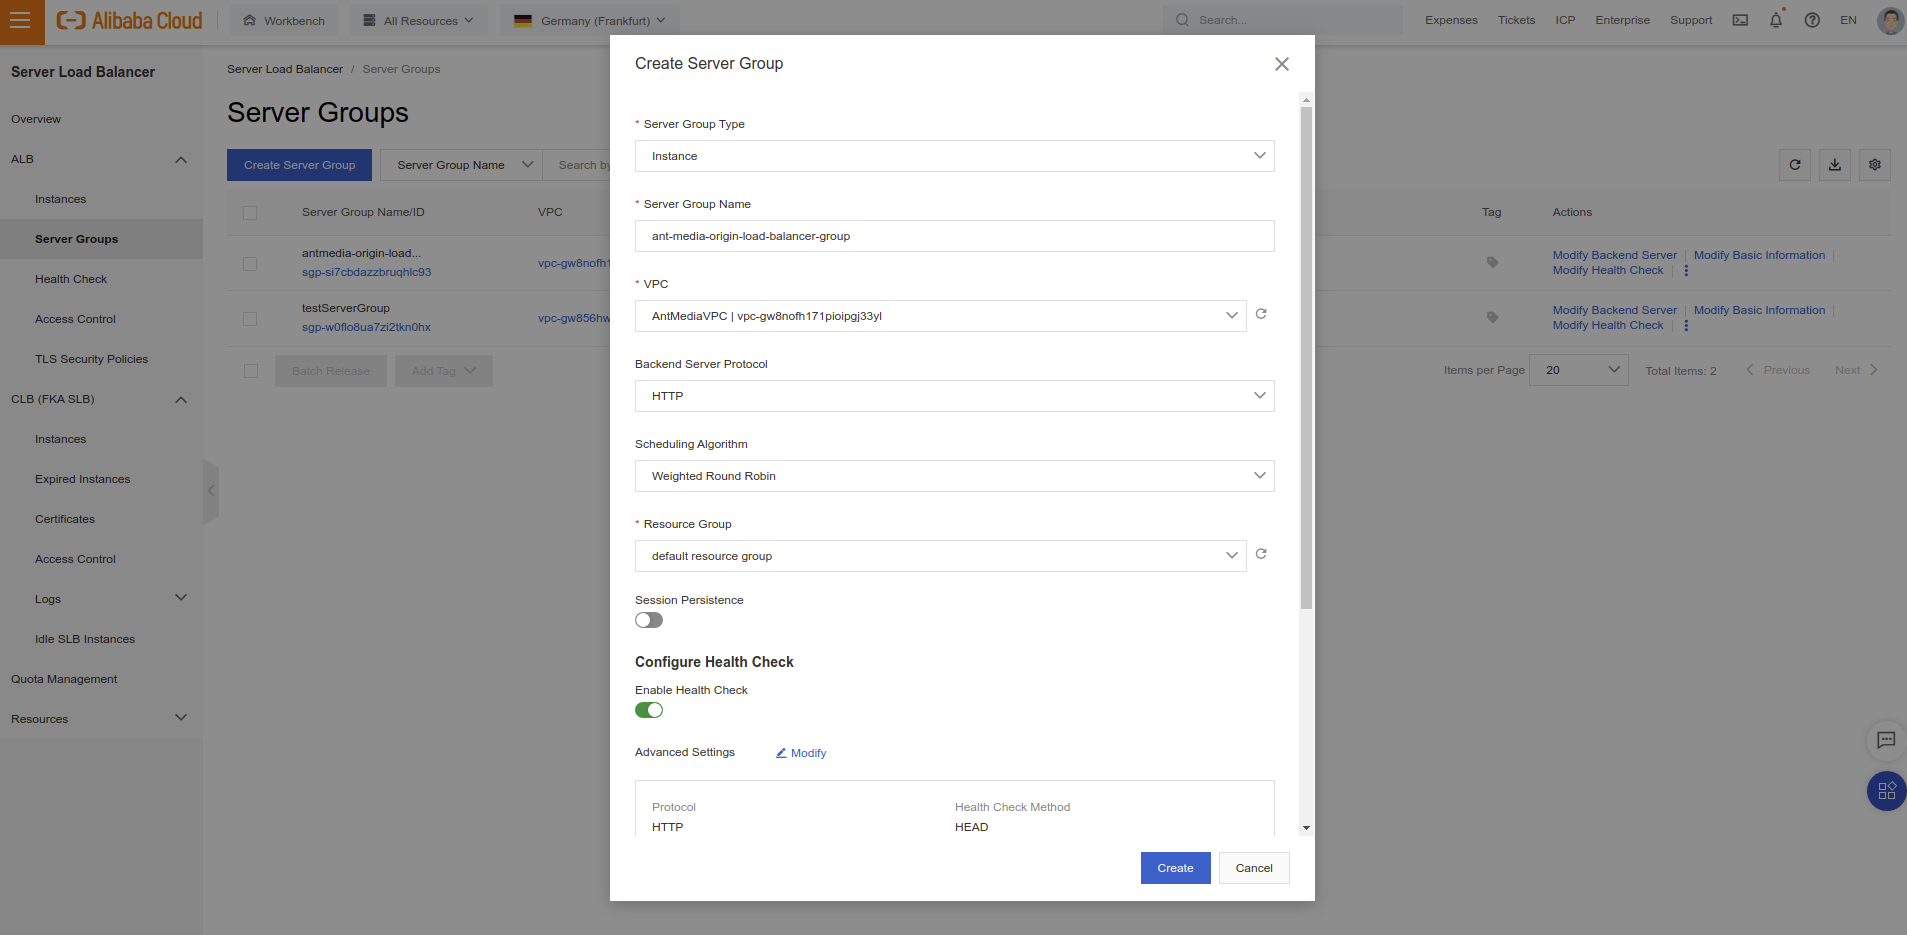
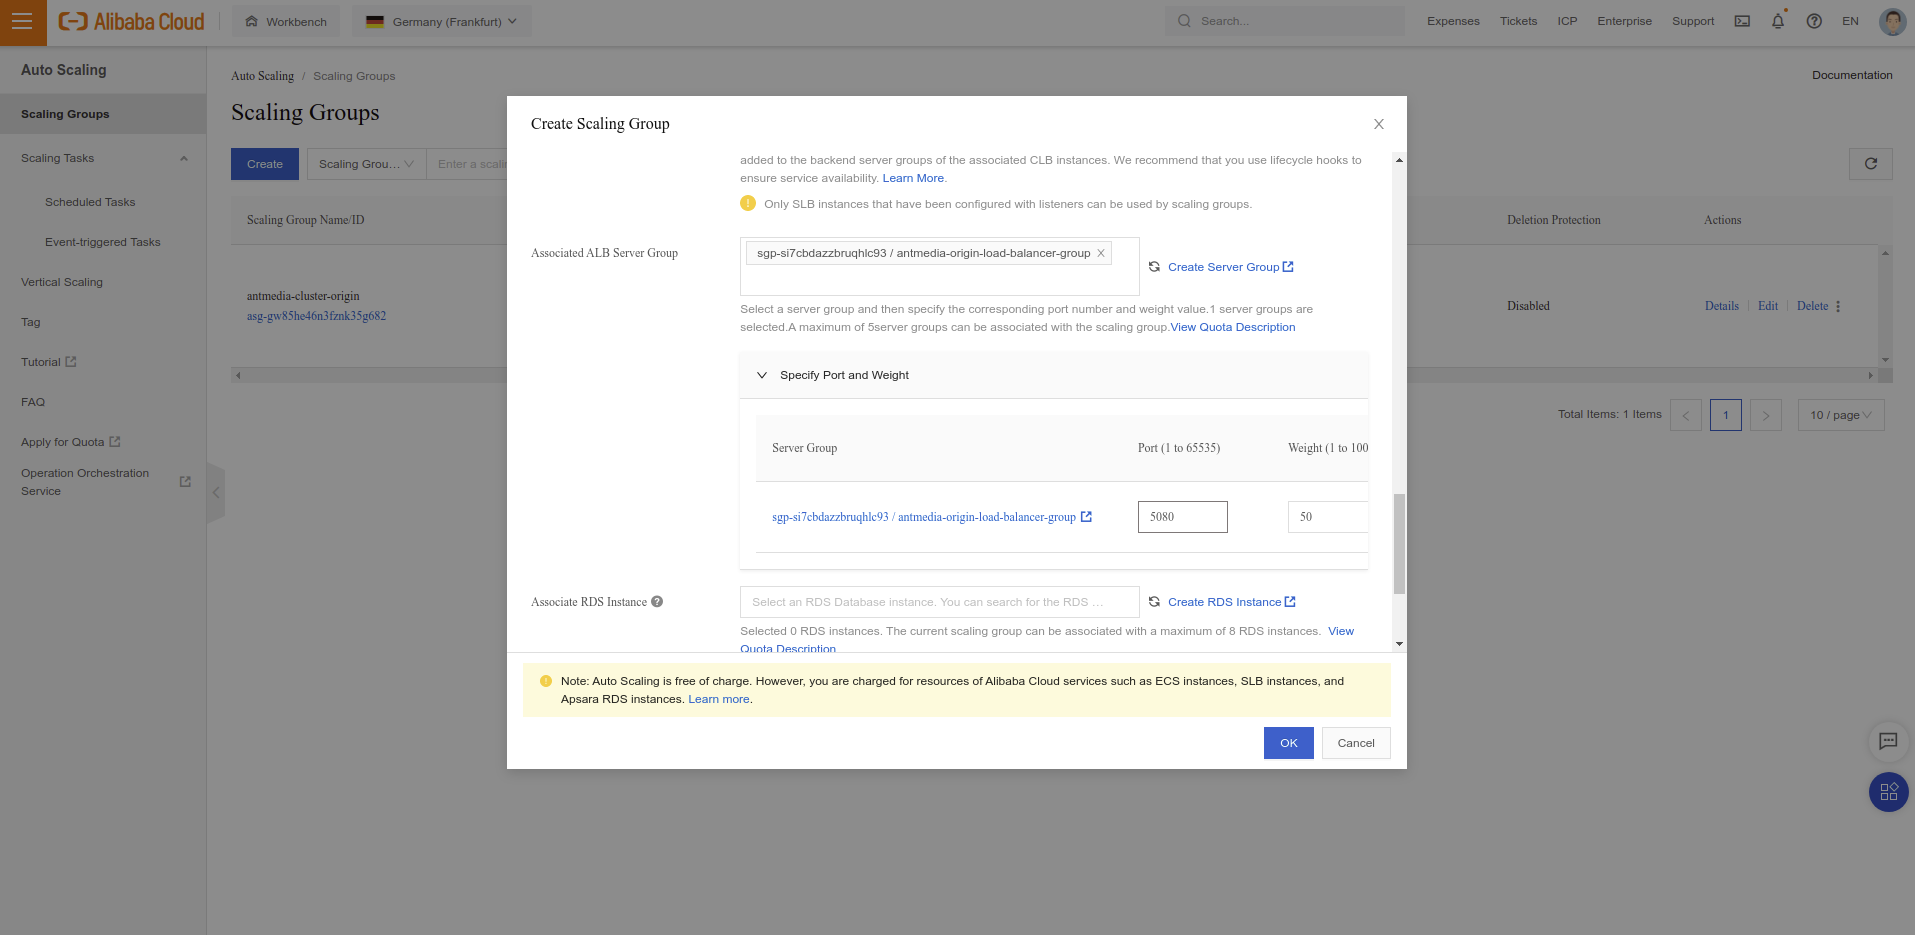
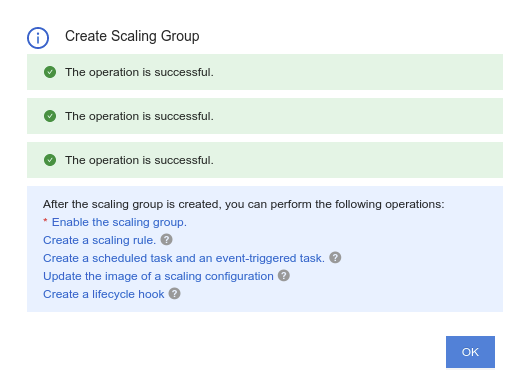
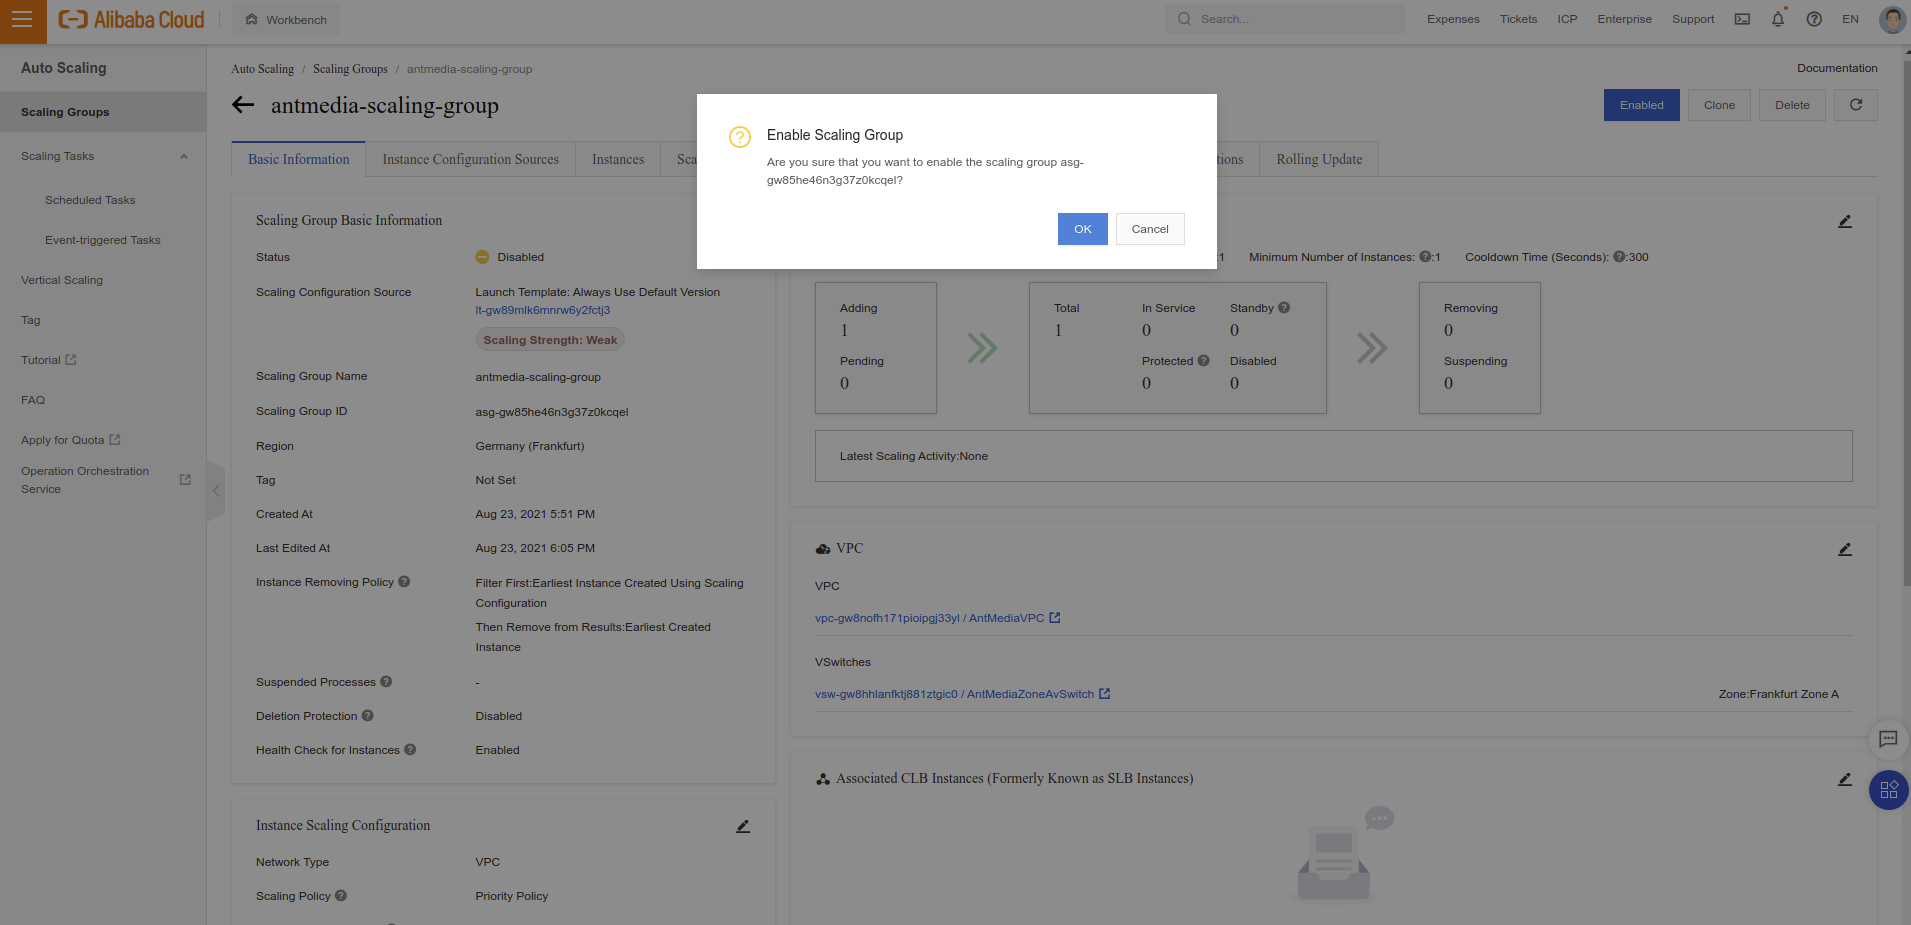
Installing scalable edge group is almost same as scalable origin group. Please go to Step 2: Install Scalable Origin Group and do the same things one more time. Just don't forget to change some namings (for instance give group name as Edge Group) and configure scaling policy and instance type according to your needs. If you have any question or problem with this, please let us know through contact@antmedia.io
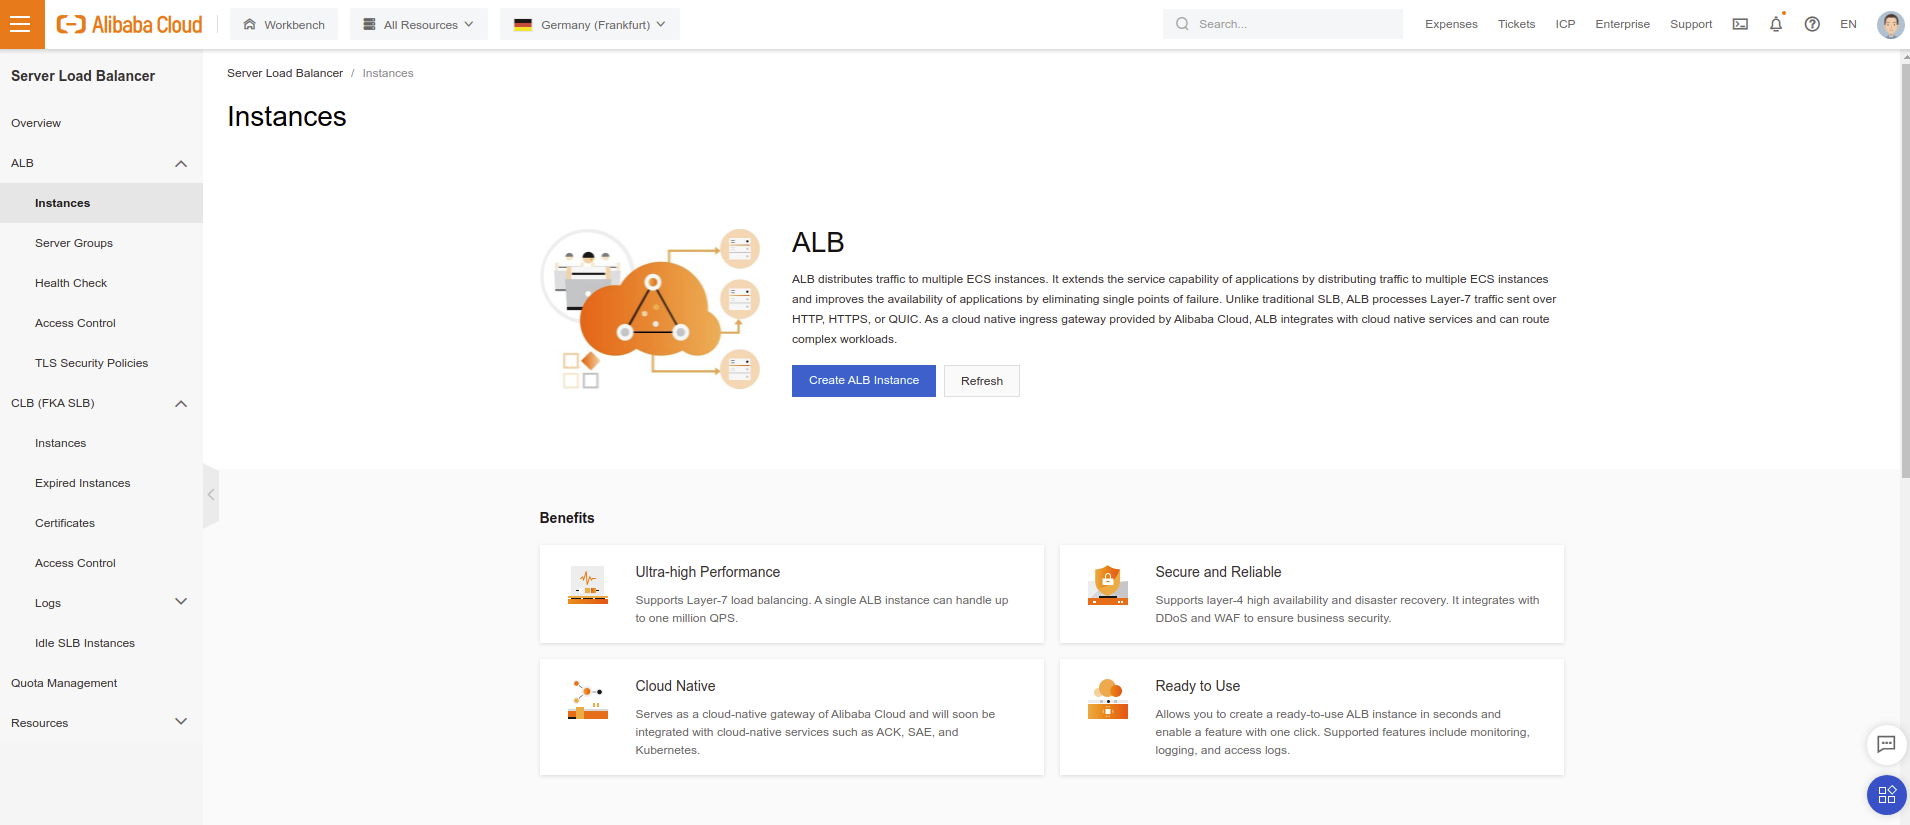
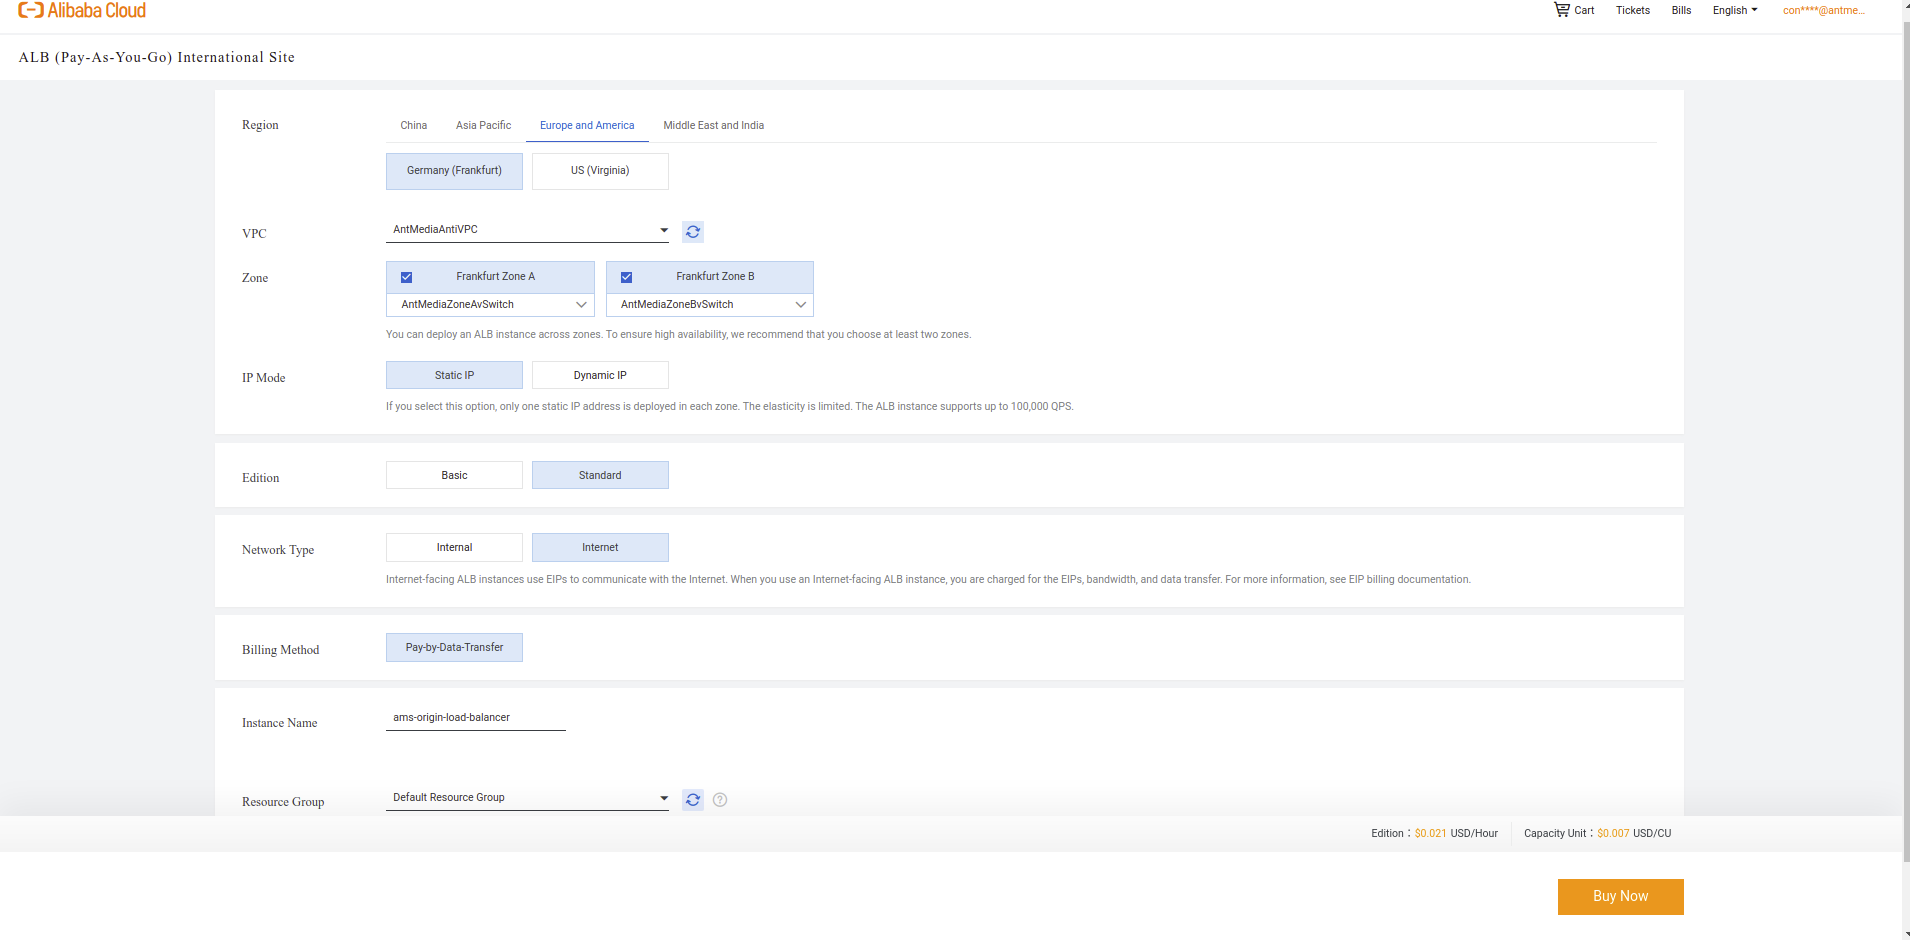
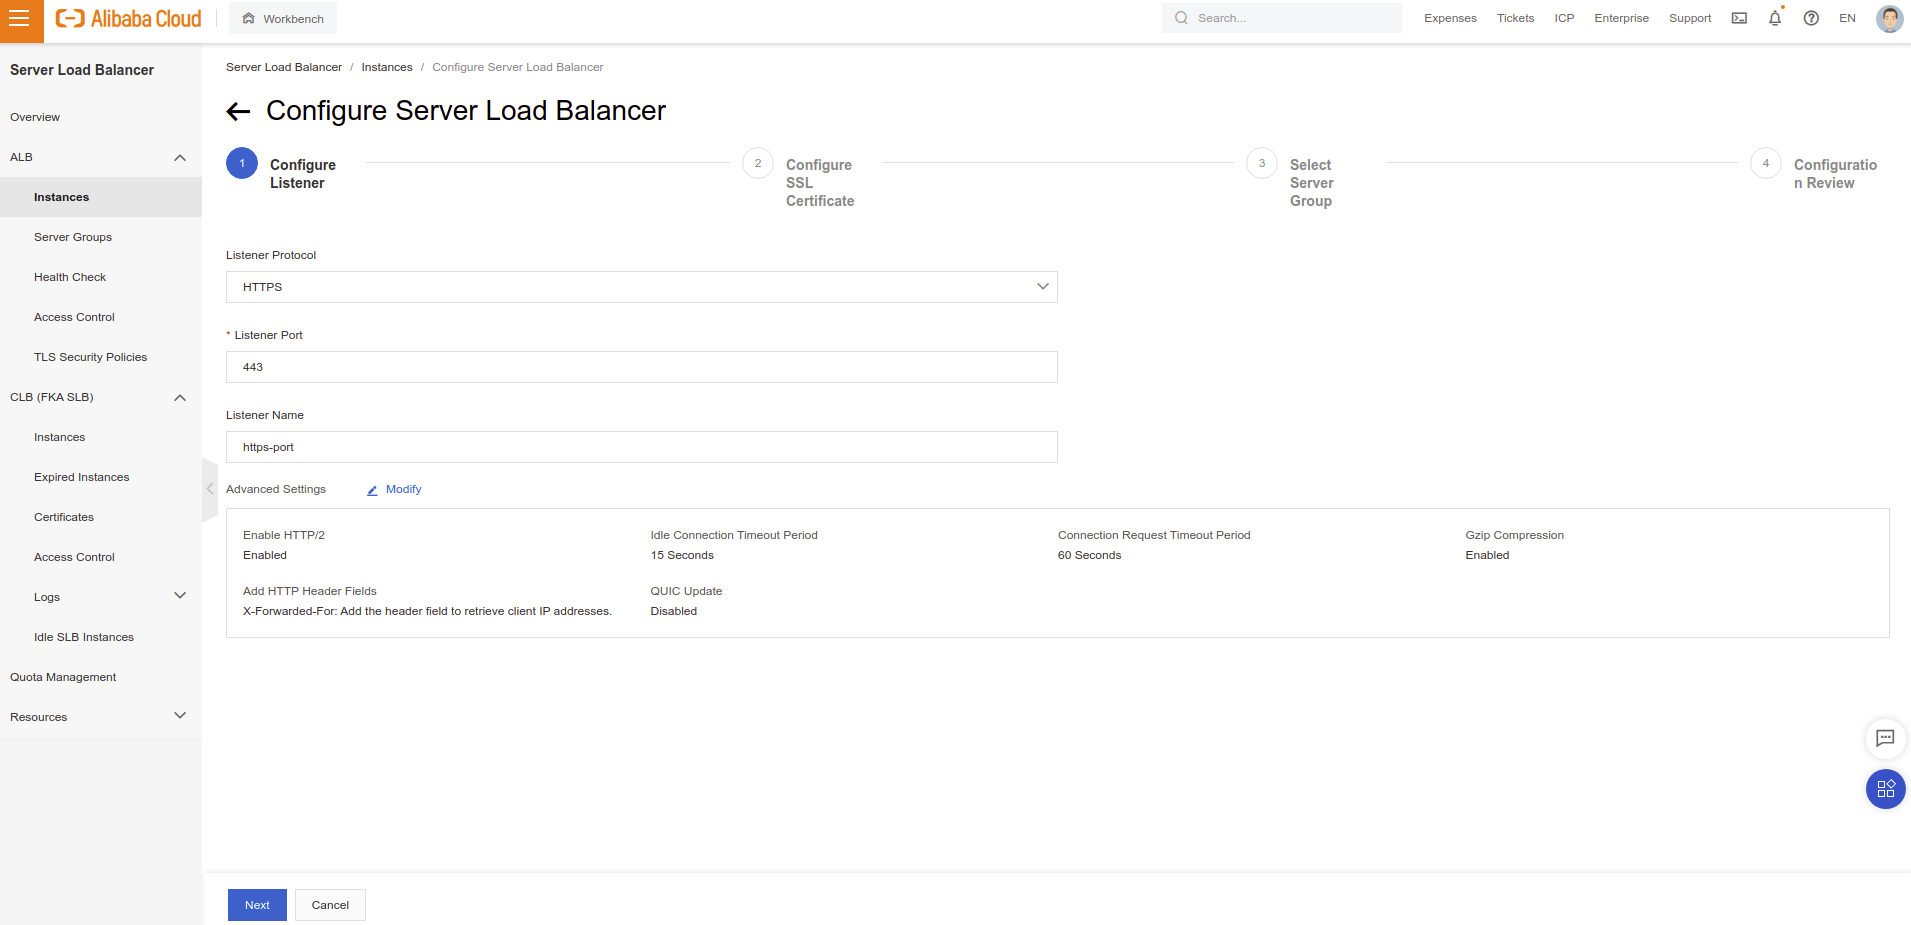
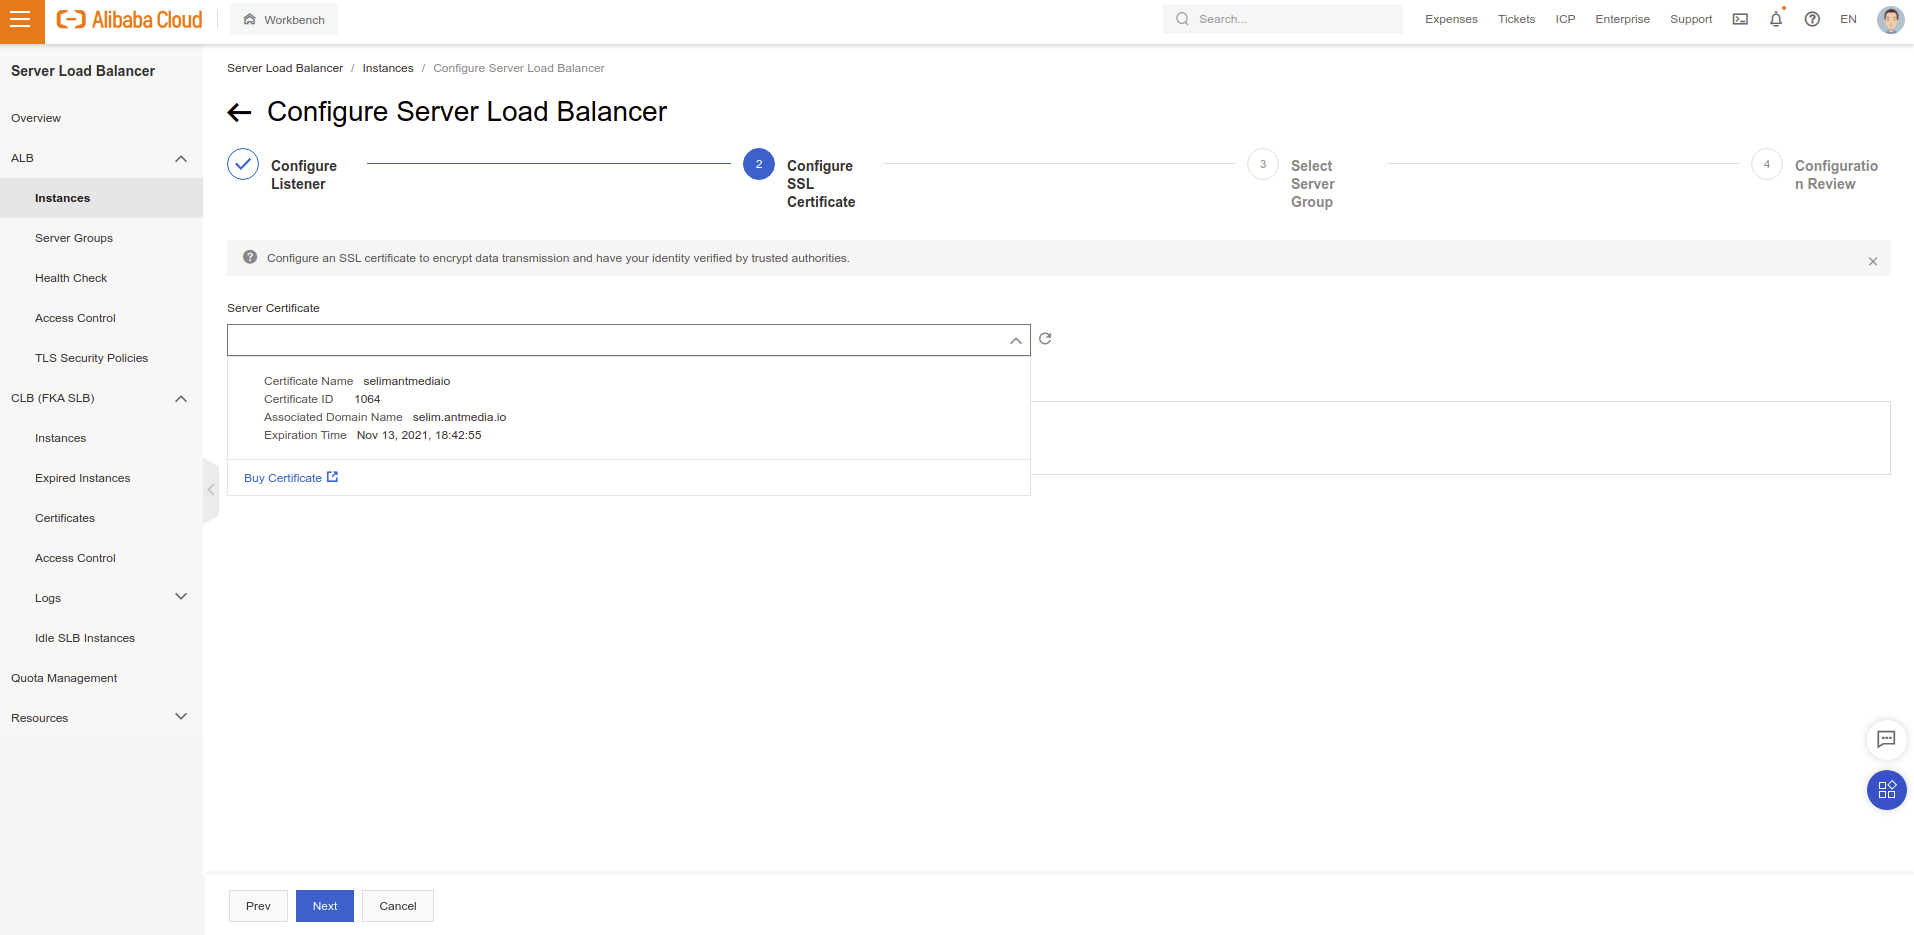
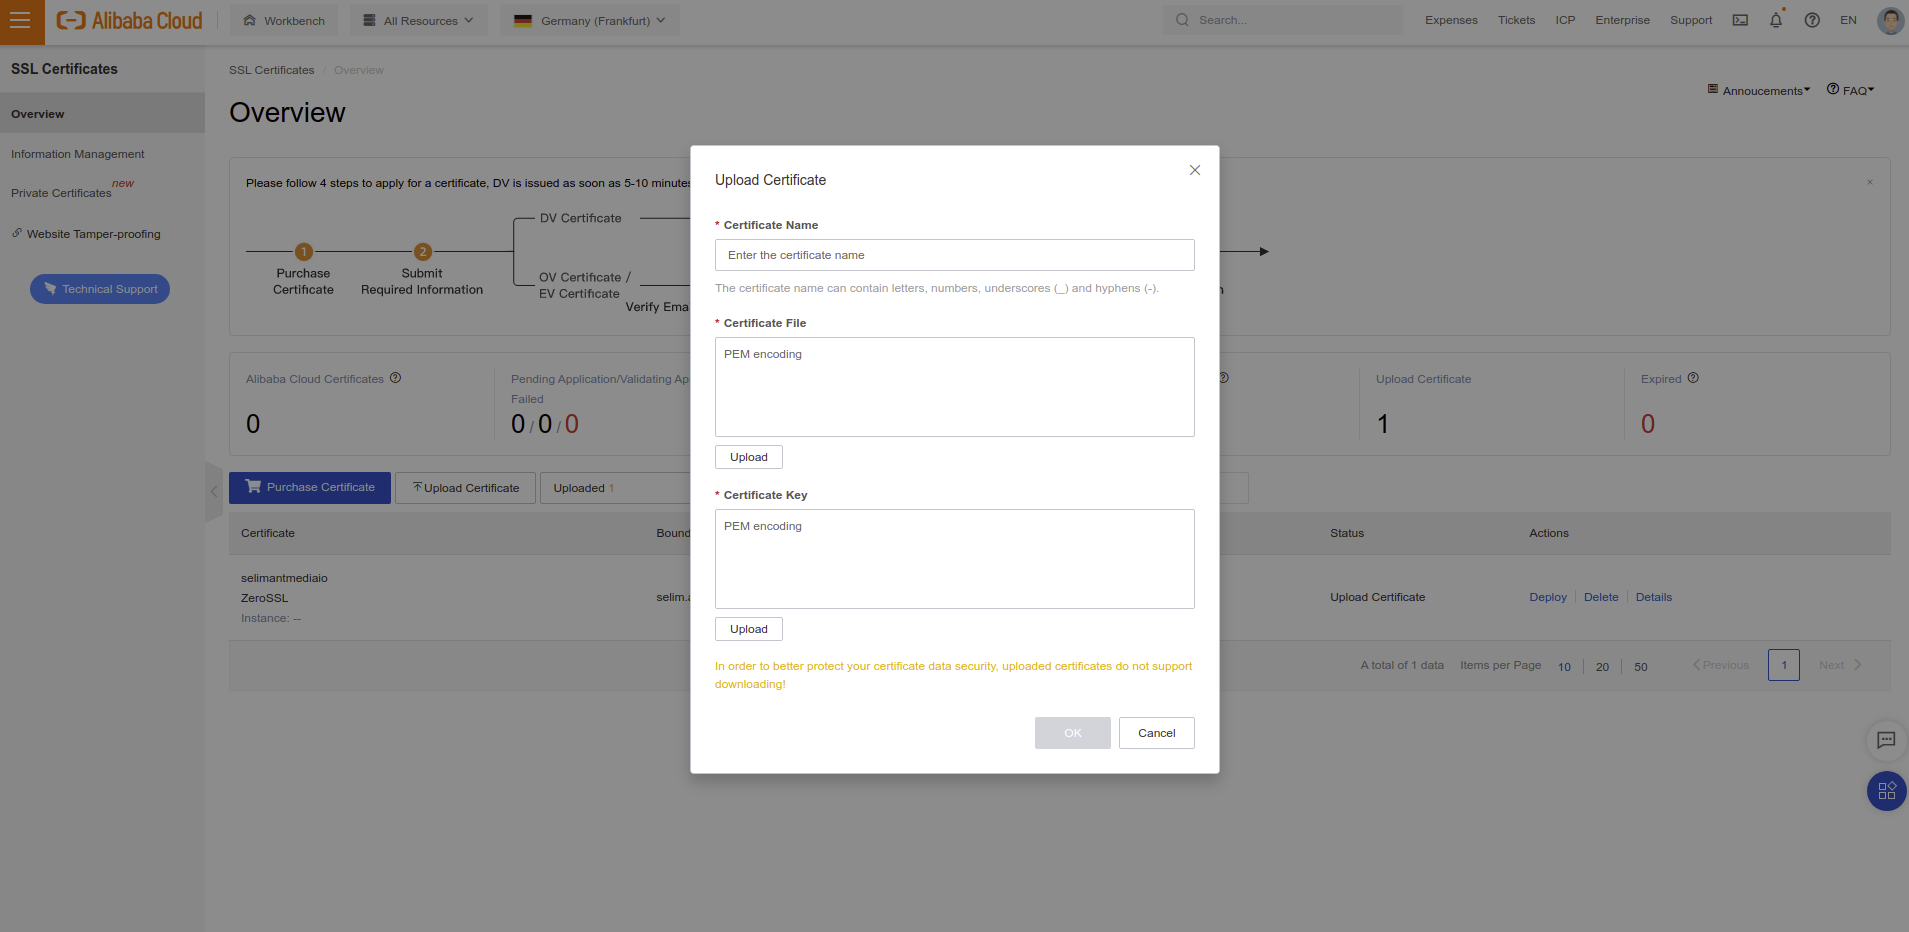
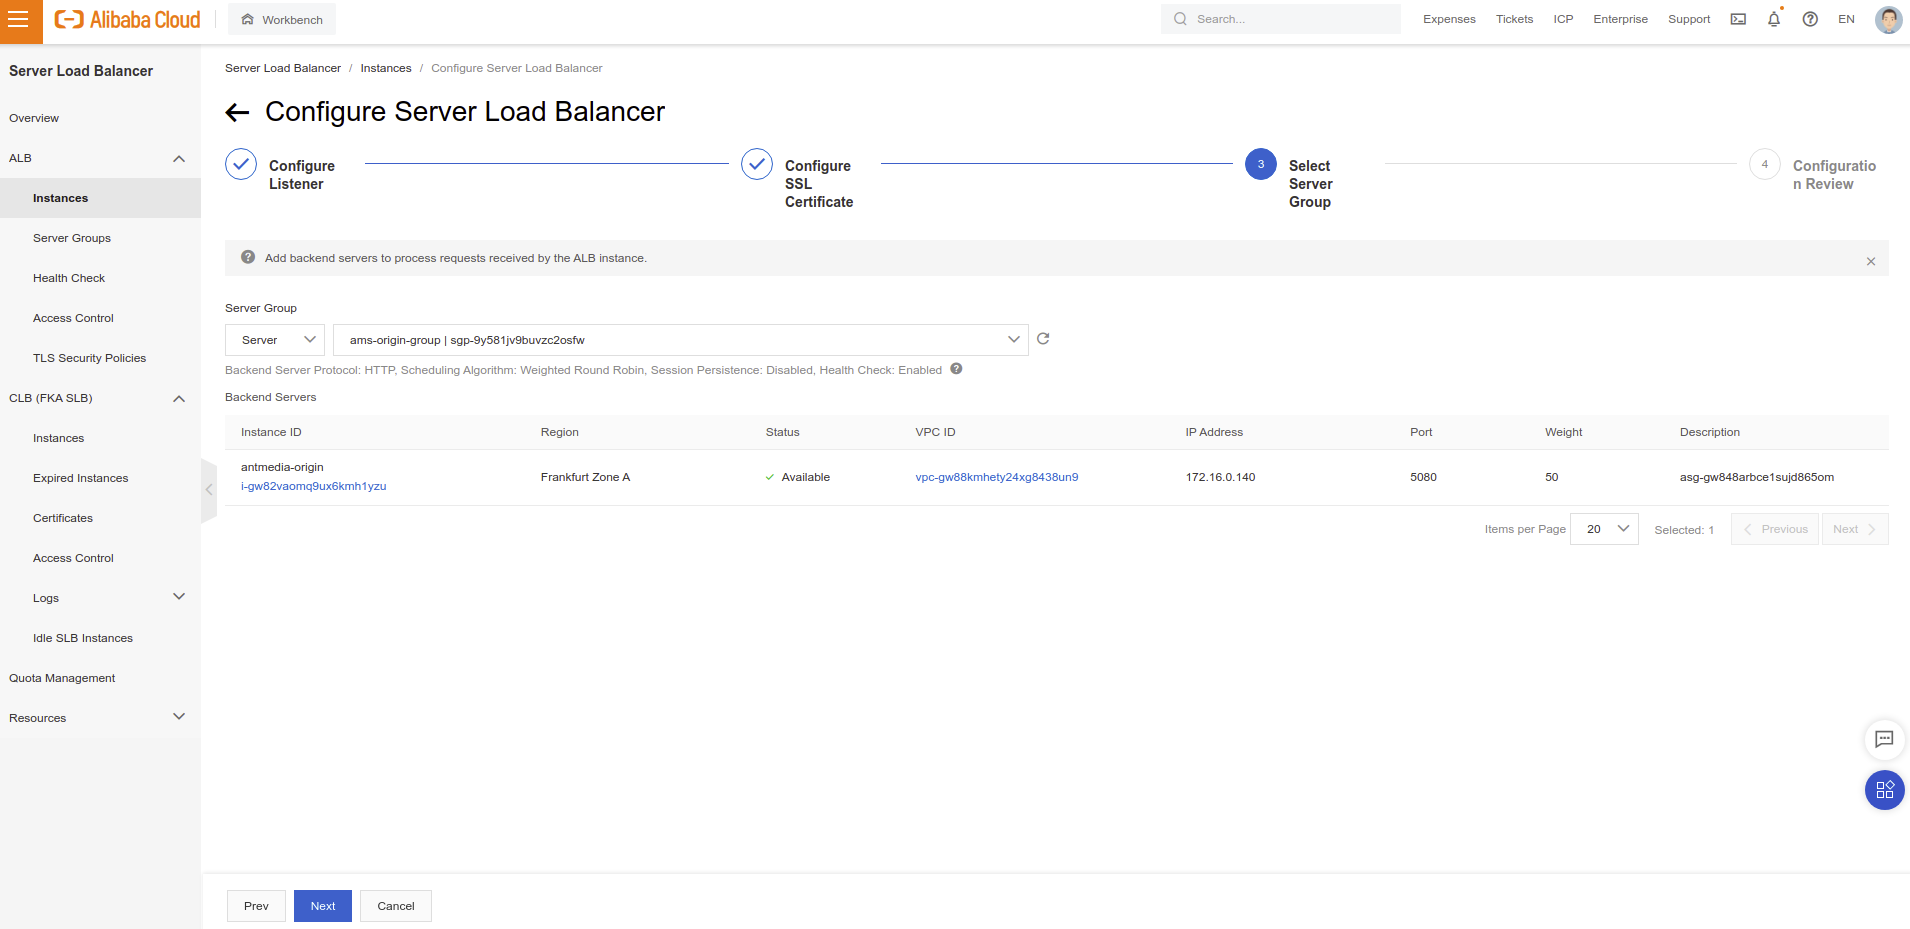
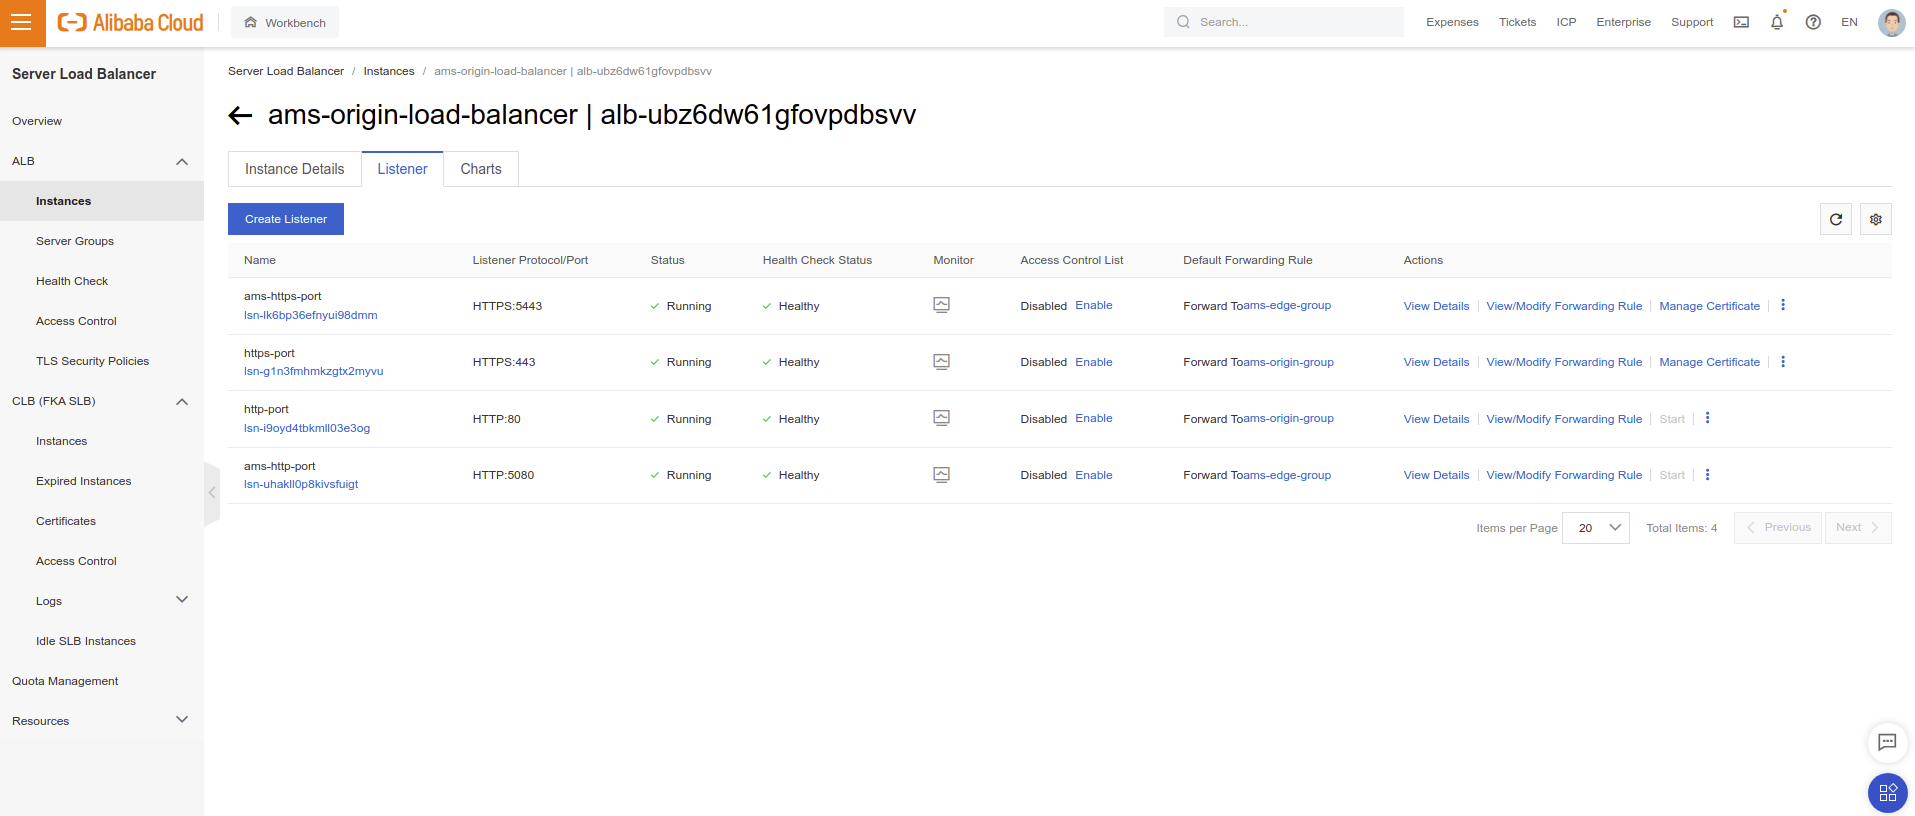
- Right now Everything is ok. Now let's give a brief information about the difference between publish and play. In our load balancer configuration, we forward HTTP (80) and HTTPS (443) to Origin Group and we forward HTTP (5080) and HTTPS (5443) to Edge Group. It means that we should connect 80 or 443 ports to publish and connect 5080 or 5443 to play streams. Otherwise, play requests goes to origin group and publish request goes to edge group and it's likely create some performance issues according to your configurations.
You can login to web panel via the https://your-domain-name/. After these steps, you just need to add your domain address CNAME to your Load Balancer URL. You just need to register a first user!
https://your-domain-name/WebRTCAppEE/ and click “Start Publishing” button. The default stream id is “stream1”https://your-domain-name:5443/WebRTCAppEE/ and click “Start Playing” button. The default stream will be playedAs the installation is a bit long, If you're stuck in somewhere, please reach out to us to make the installation together.

1,320 posts | 464 followers
FollowAlibaba Cloud Community - August 5, 2022
Marketplace - April 13, 2021
Alibaba Clouder - November 11, 2019
Alibaba Clouder - November 25, 2020
Alibaba Cloud Community - January 13, 2026
Alibaba Clouder - March 26, 2020

1,320 posts | 464 followers
Follow Media Solution
An array of powerful multimedia services providing massive cloud storage and efficient content delivery for a smooth and rich user experience.
Learn More Broadcast Live Solution
This solution provides tools and best practices to ensure a live stream is ingested, processed and distributed to a global audience.
Learn More Real-Time Streaming
Provides low latency and high concurrency, helping improve the user experience for your live-streaming
Learn More Real-Time Livestreaming Solutions
Stream sports and events on the Internet smoothly to worldwide audiences concurrently
Learn MoreMore Posts by Alibaba Cloud Community