By: Jeremy Pedersen
Welcome back for the 15th installment in our weekly blog series! In this week's post, we take a look at how you can send CloudMonitor alarms to Slack. Specifically, we consider how this can be done for two types of CloudMonitor Alarms: Event-based and Metric-based Alarms.
Alibaba Cloud's CloudMonitor is a tool for monitoring your Cloud Resources: everything from ECS instances, load balancers, disks, databases, and more can be monitored with CloudMonitor.
Further, CloudMonitor allows you to set up rules that will send you a notification (called an Alert or Alarm) when a certain event takes place. The two most common types of CloudMonitor Alarms are Event-based and Metric-based:
In the case of Event-based Alarms, CloudMonitor supports a variety of different notificaiton methods. CloudMonitor can send messages via DingTalk or Email, MNS message queue, Function Compute trigger, Log Service, or URL callback.
This makes it easy to send Event-based alarms to Slack: we can simply have CloudMnoitor trigger Function Compute, then have a function process the CloudMonitor alarm content and send it on to Slack.
Unfortunately, Metric-based Alarms like those provided by CloudMonitor's ECS Host Monitoring service don't support Function Compute directly. Metric-based Alarms support DingTalk, Email, Log Service, Auto Scaling, and URL callbacks as methods for sending alerts. This means we can't trigger Function Compute directly, so instead we use the URL callback support to trigger an HTTP-type Function Compute function.
Why not just use Slack's built-in Incoming Webhooks feature? If you've been reading carefully, you'll notice that both types of CloudMonitor alarms support a URL callback function. Why not use this to link directly to Slack? Unfortunately, this will not work, because Slack webhooks only support HTTPS, while CloudMonitor only supports HTTP .
Luckily, Function Compute itself can run virtually anything code we want, so we can use it as the glue between CloudMonitor and Slack. We will create a Python3 Function Compute function that includes the requests library, which we can use to make a GET or POST request (with HTTPS support) to Slack.
In today's tutorial, we'll set up Function Compute functions for both Event-based and Metric-based alarms. We'll set up two separate FC functions to help us do this:
If you're following along with today's blog, I assume you are already a Slack user.
If you don't already have an account, you will first need to create one, then sign in.
If you're never used Slack before, the first thing you will need to do is create a workspace. The workspace is going to serve as the "container" for your "channels", which are essentially group chats.
Each workspace has one or more administrators who can create, archive, and delete channels, as well as manage users.
In my case, I've already created a workspace for my fake company, Acme Spring Co.:
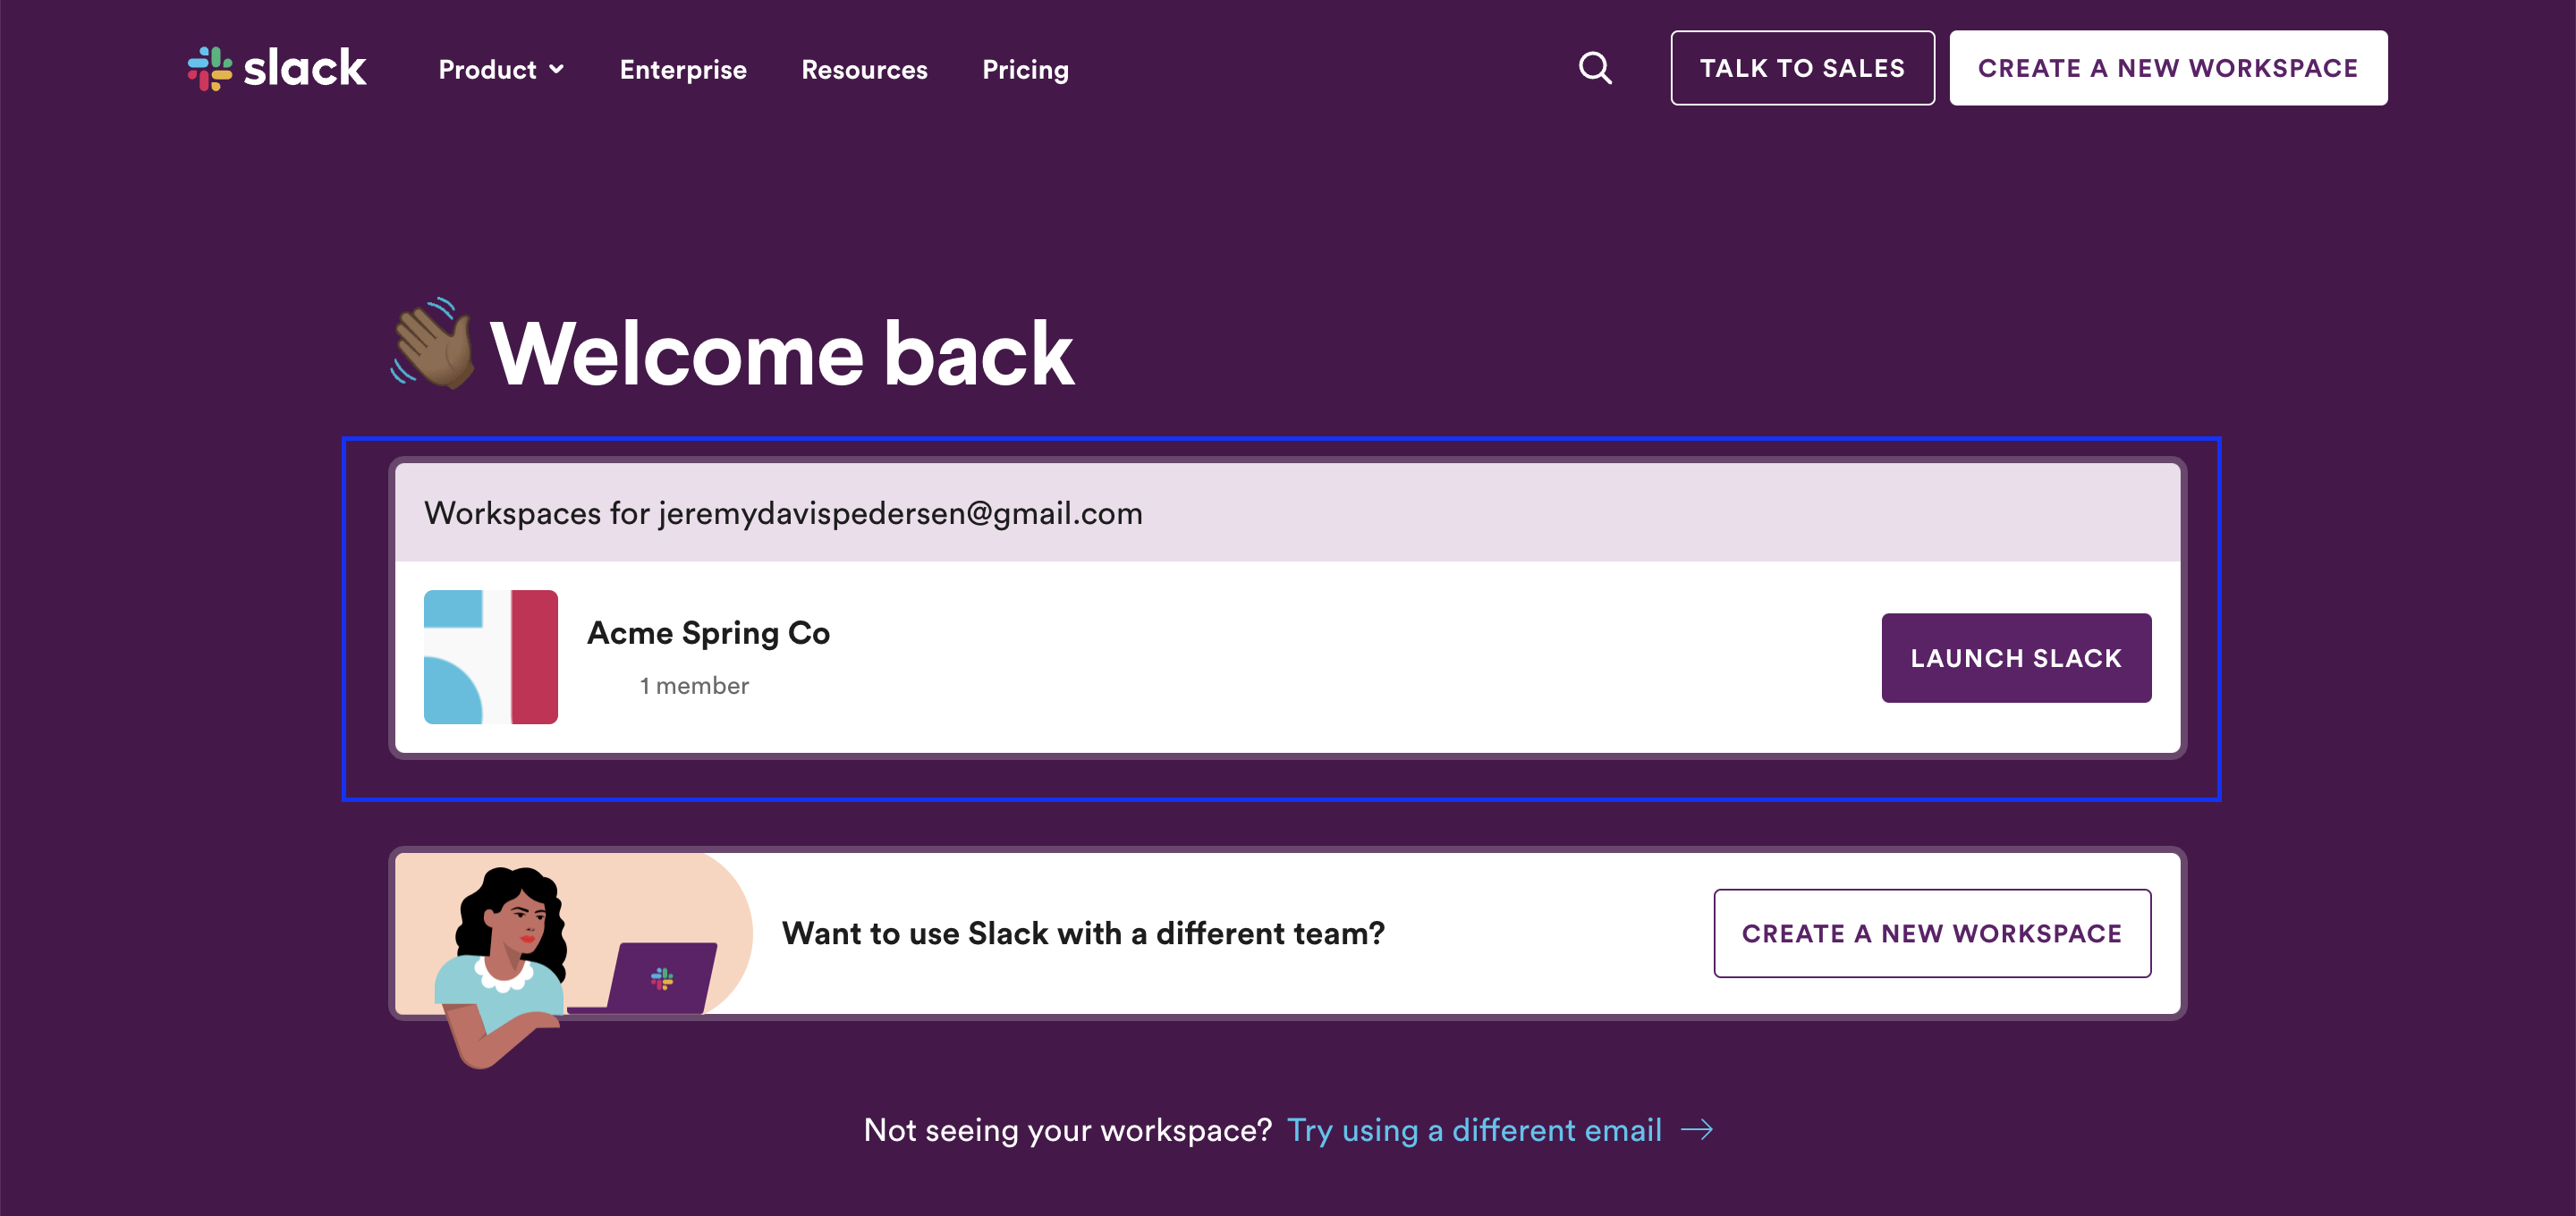
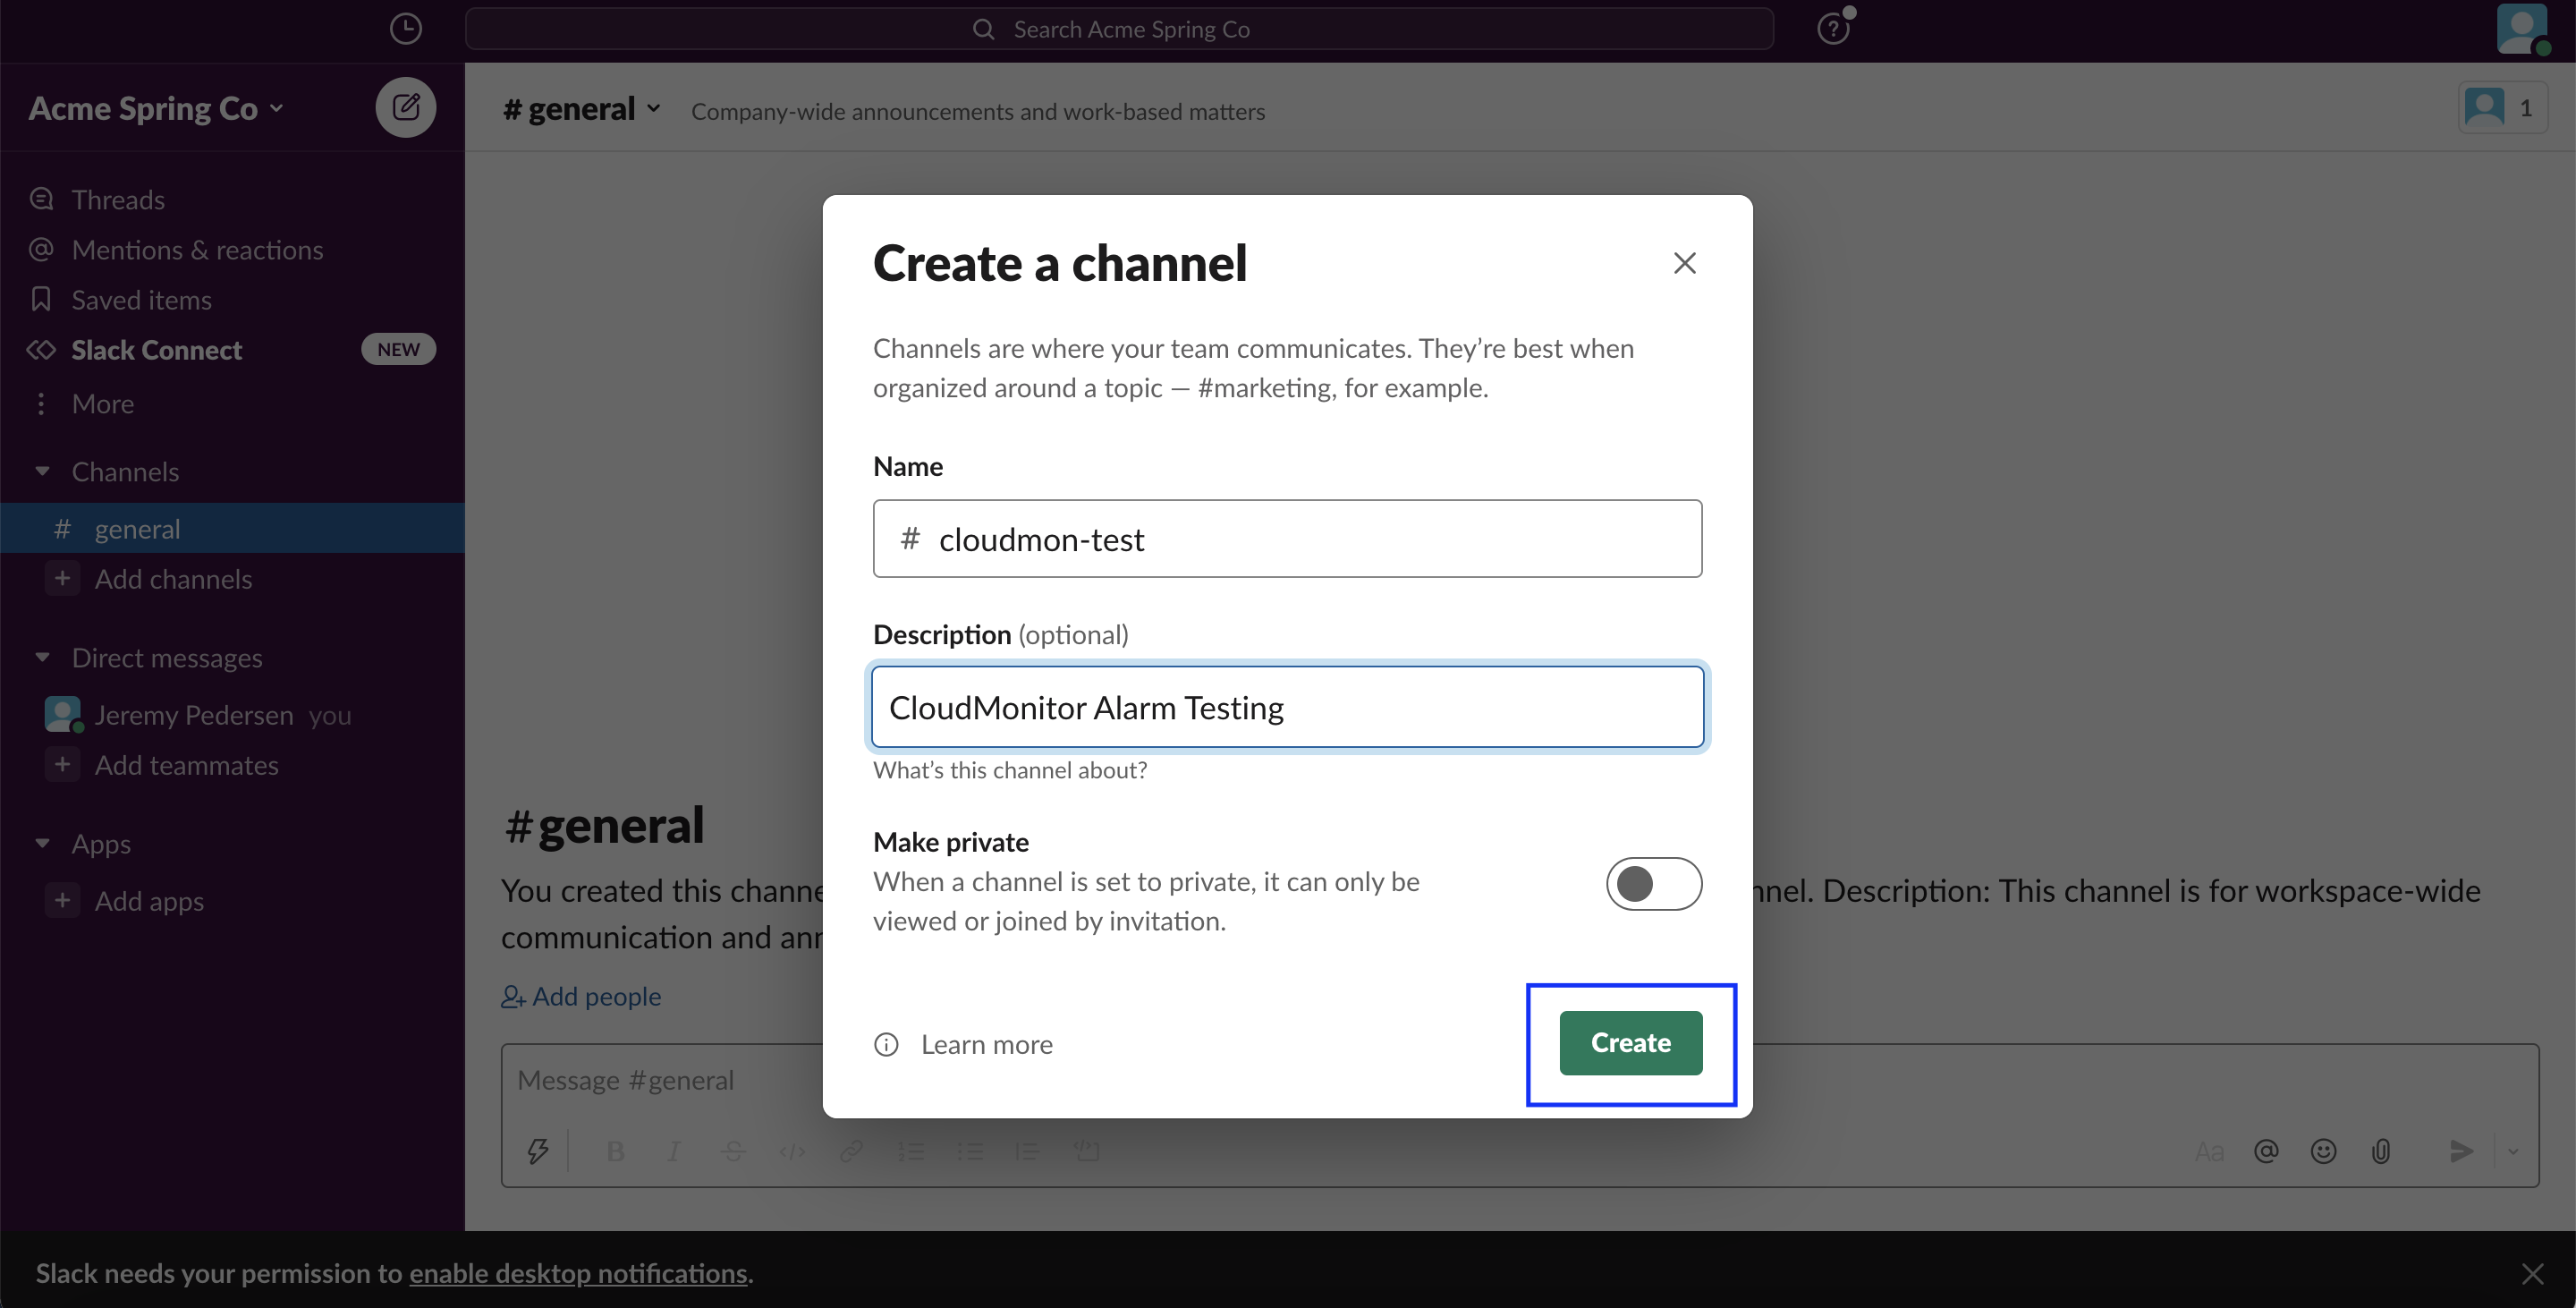
Every workspace has a default channel called #general, but we don't want to fill that up with lots of test messages, so let's start by creating a new channel where we can test out our CloudMonitor alarm integration.
If (like me) you don't have the Slack desktop app installed, you'll see a page like this one when you open up your workspace:
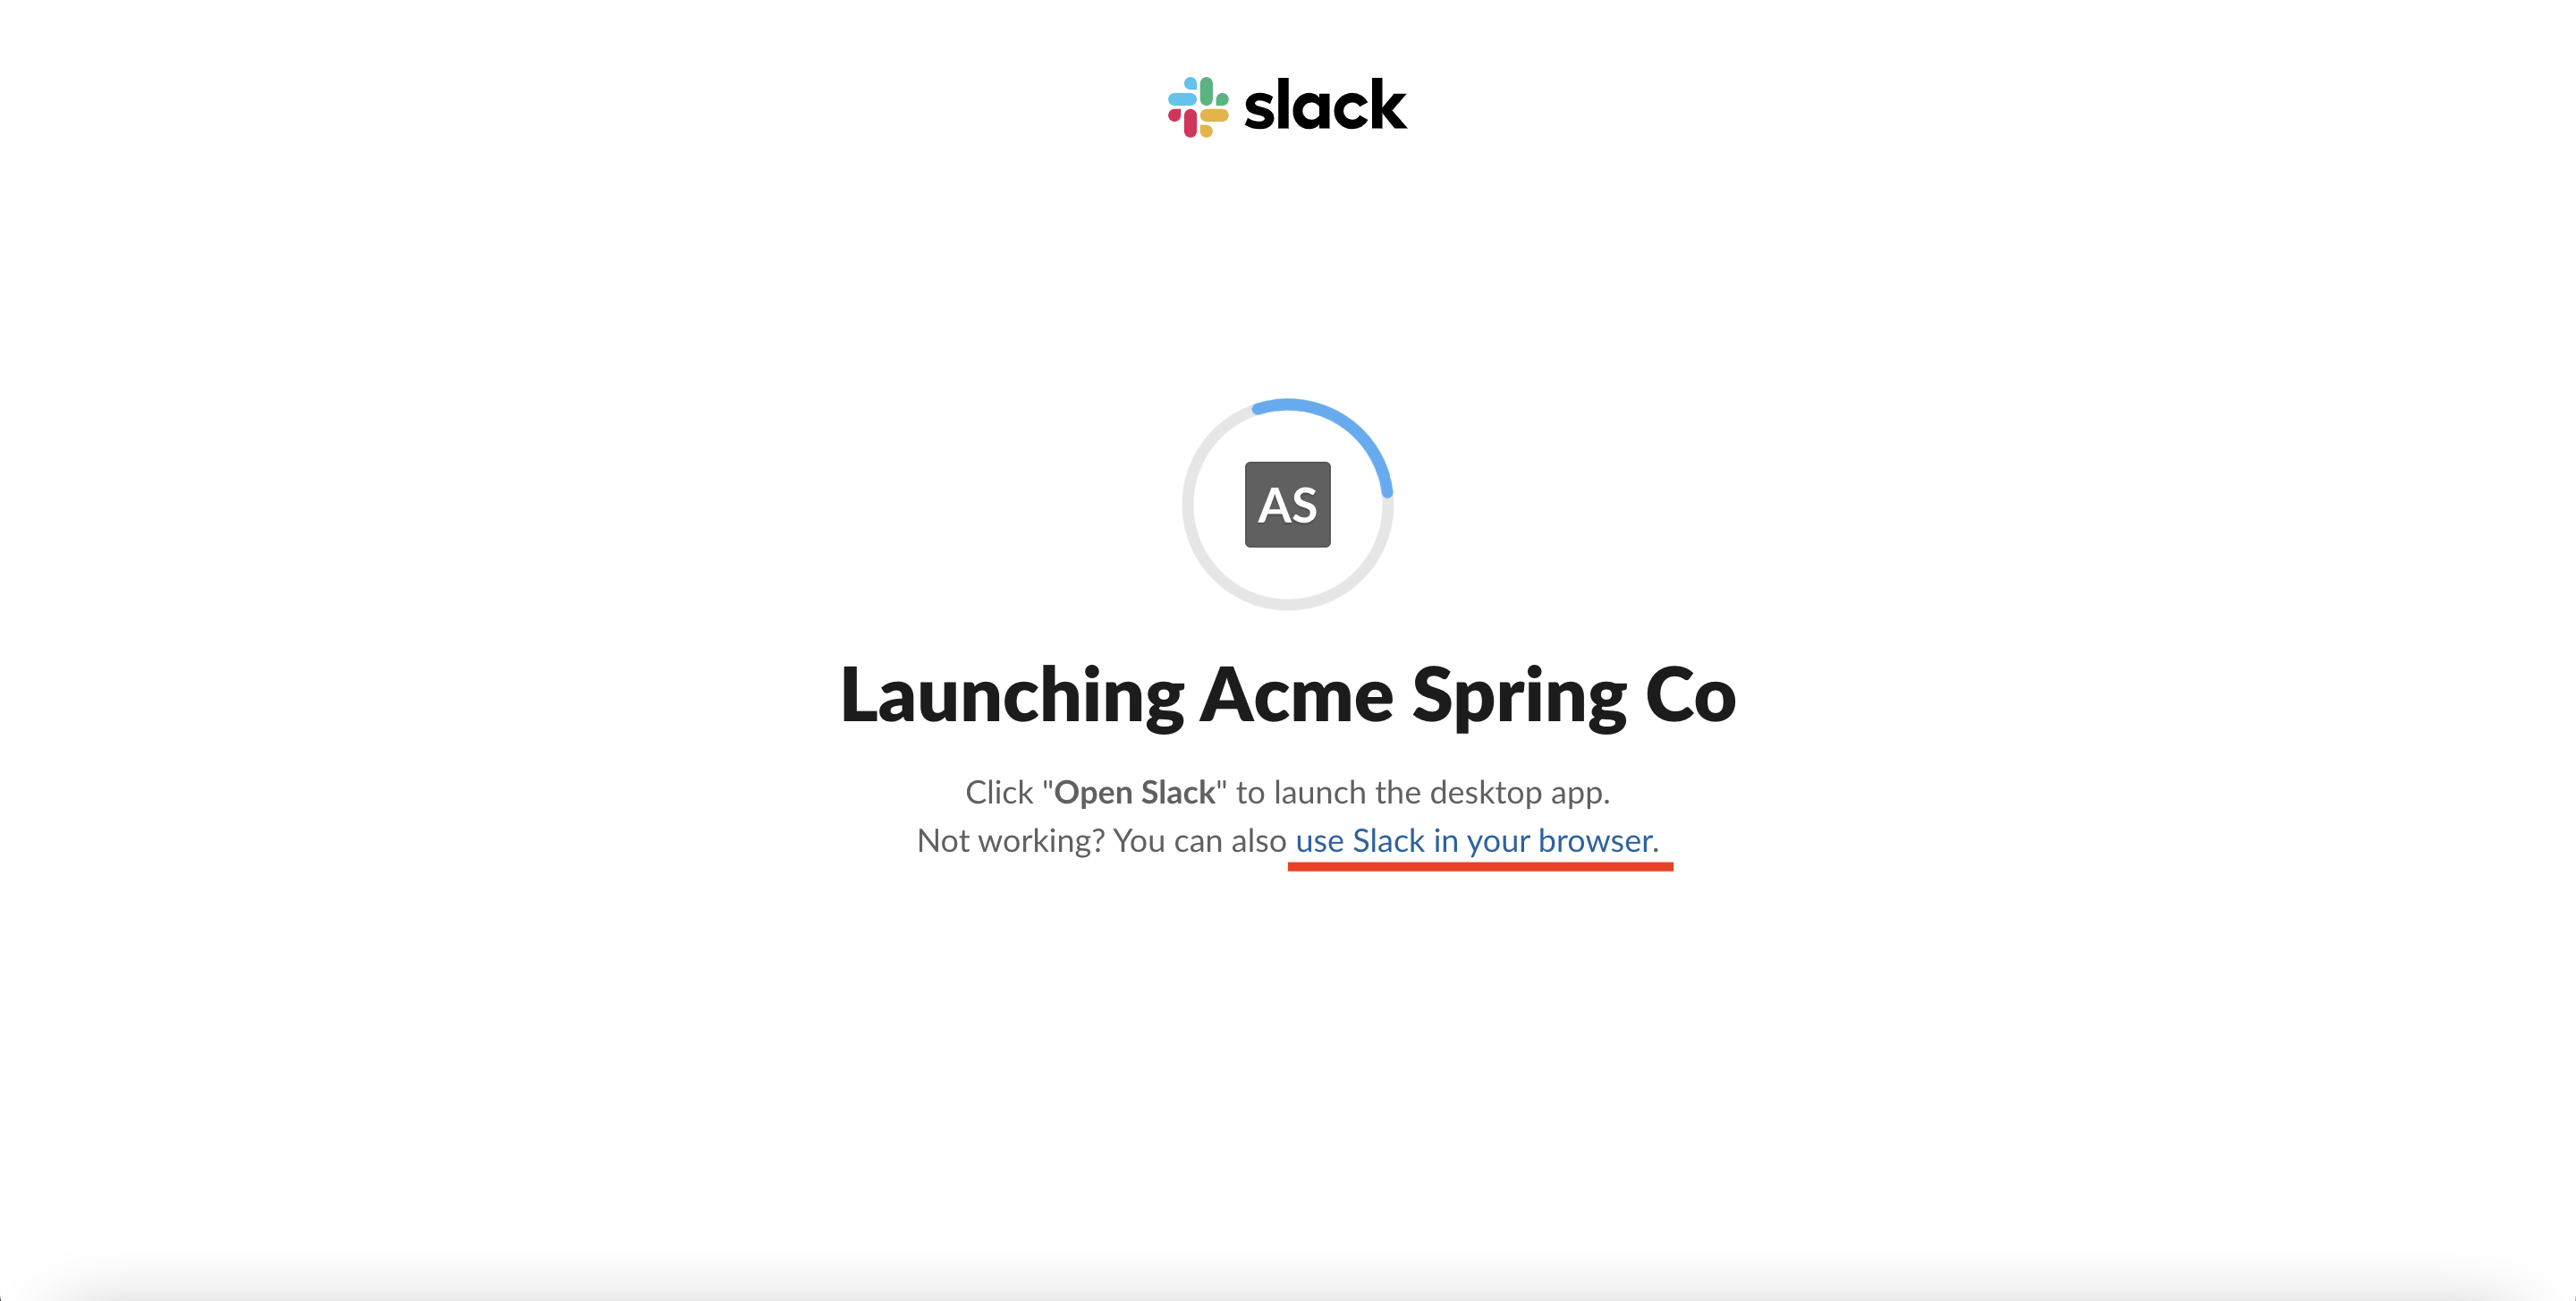
Click on "Use Slack in your browser" to continue. This will take you here:
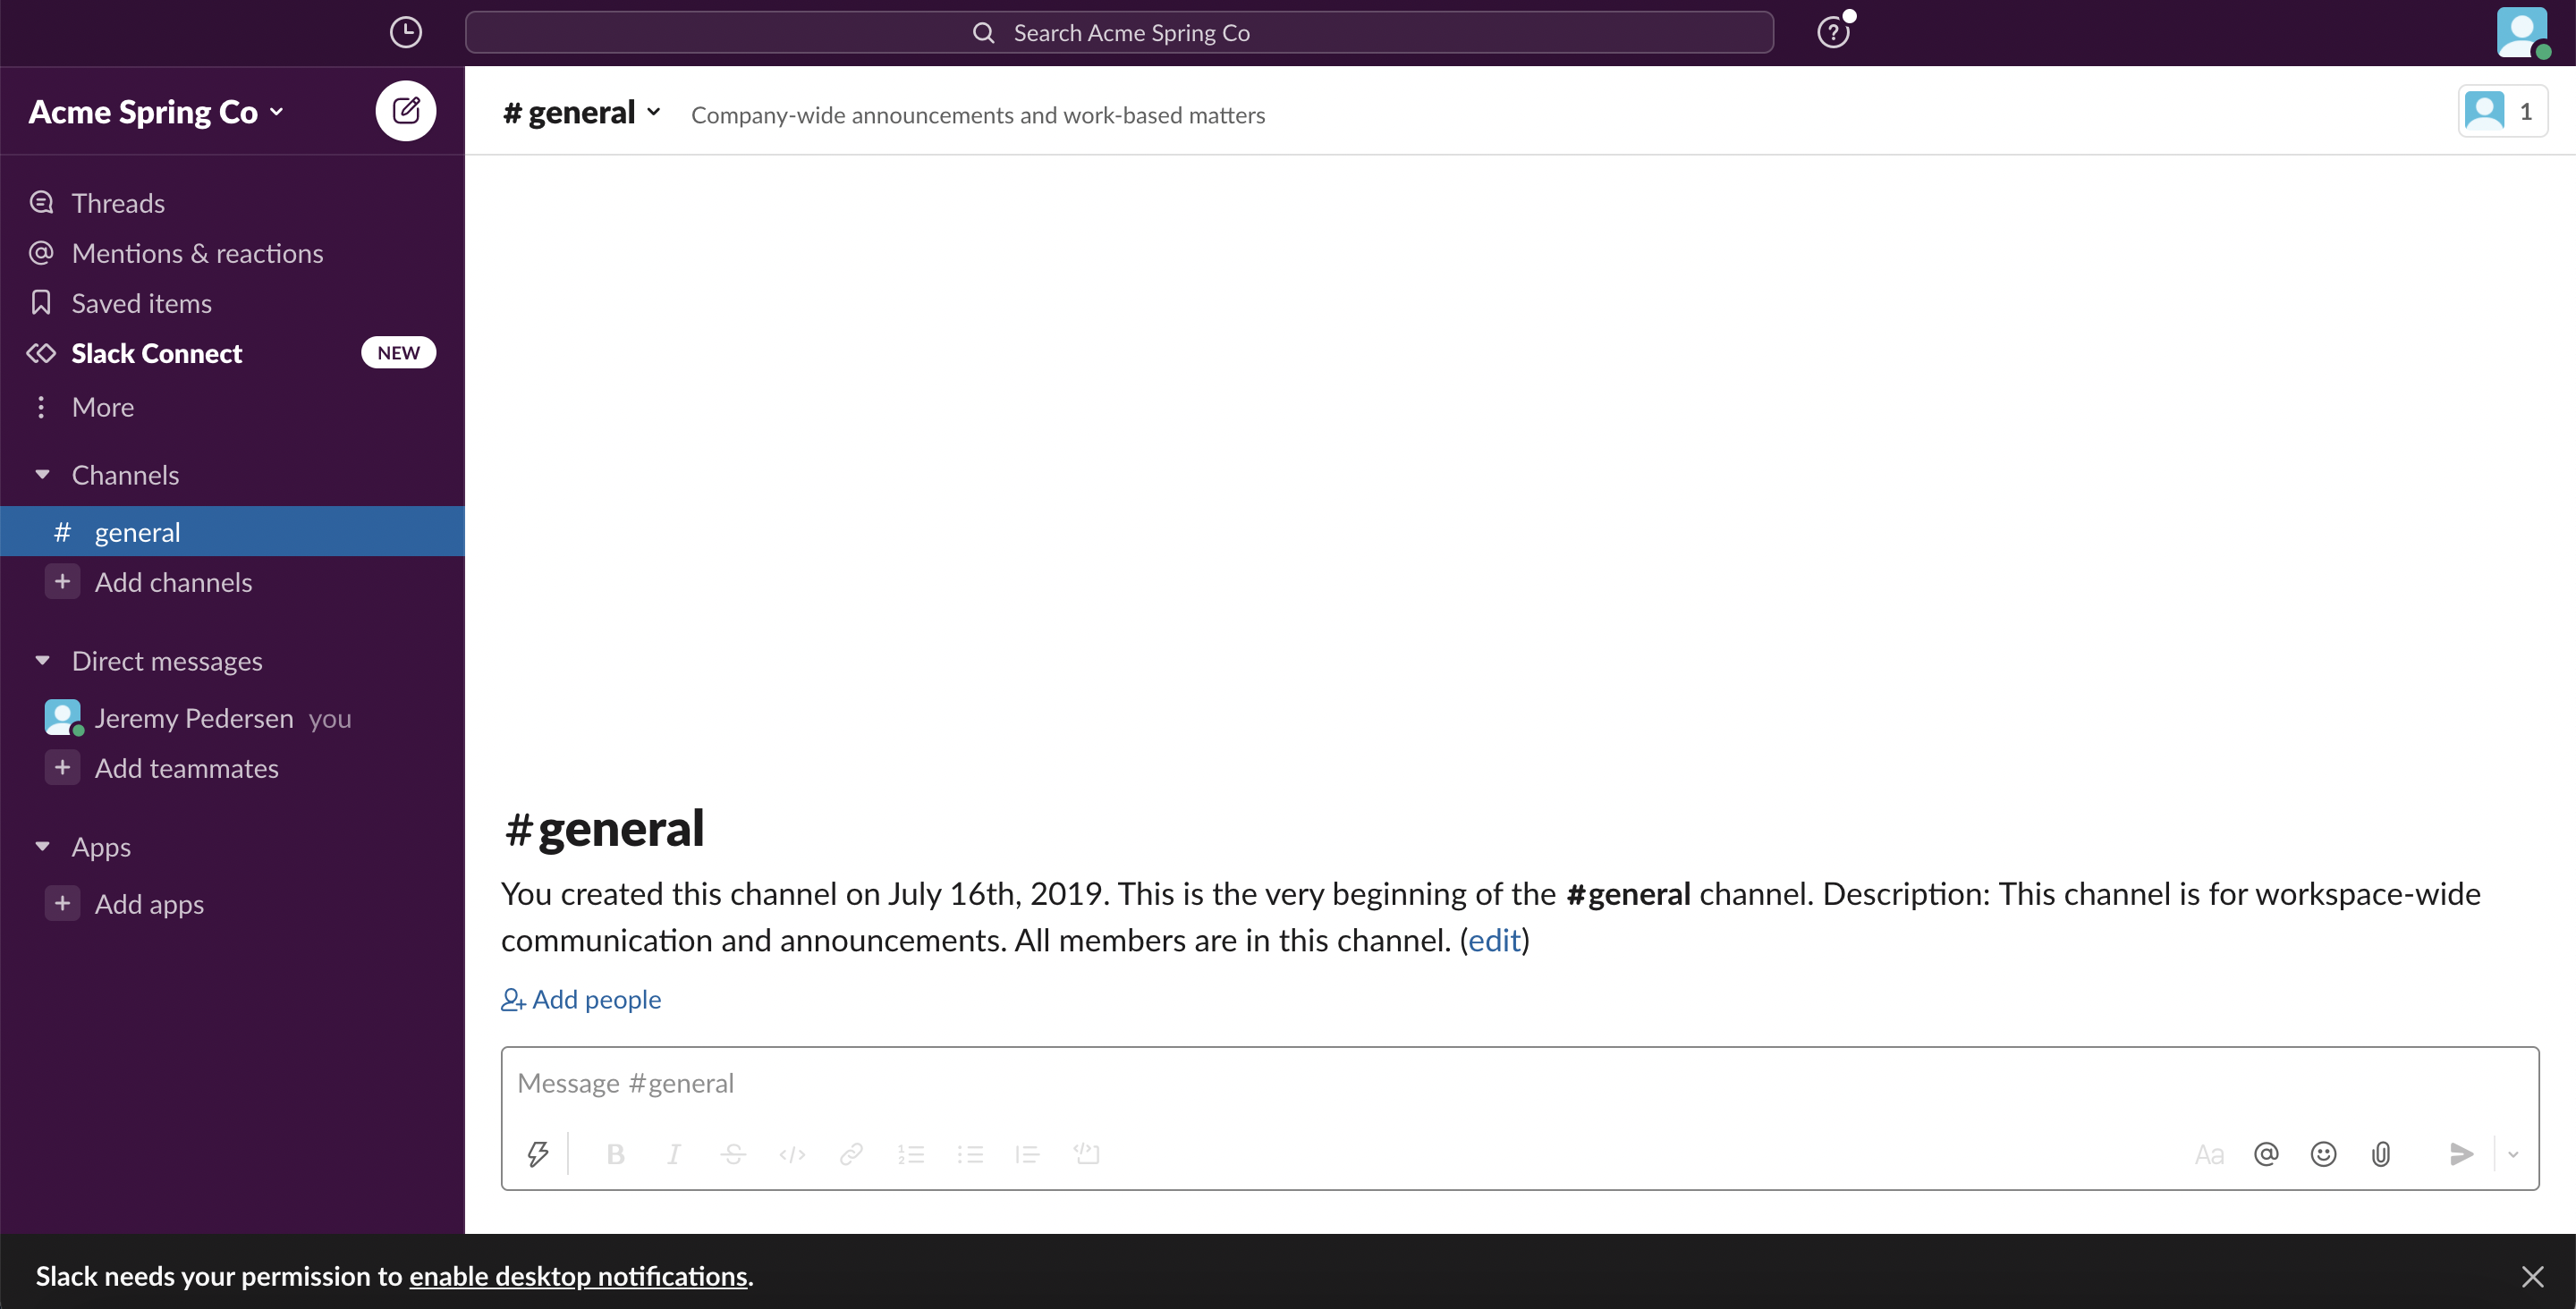
This is the #general channel. We don't want to use this one for testing, so let's start by creating a new channel. Note that you'll be prompted to add people to the channel: you can skip this if you're just testing - as the workspace admin you'll be added automatically anyway:
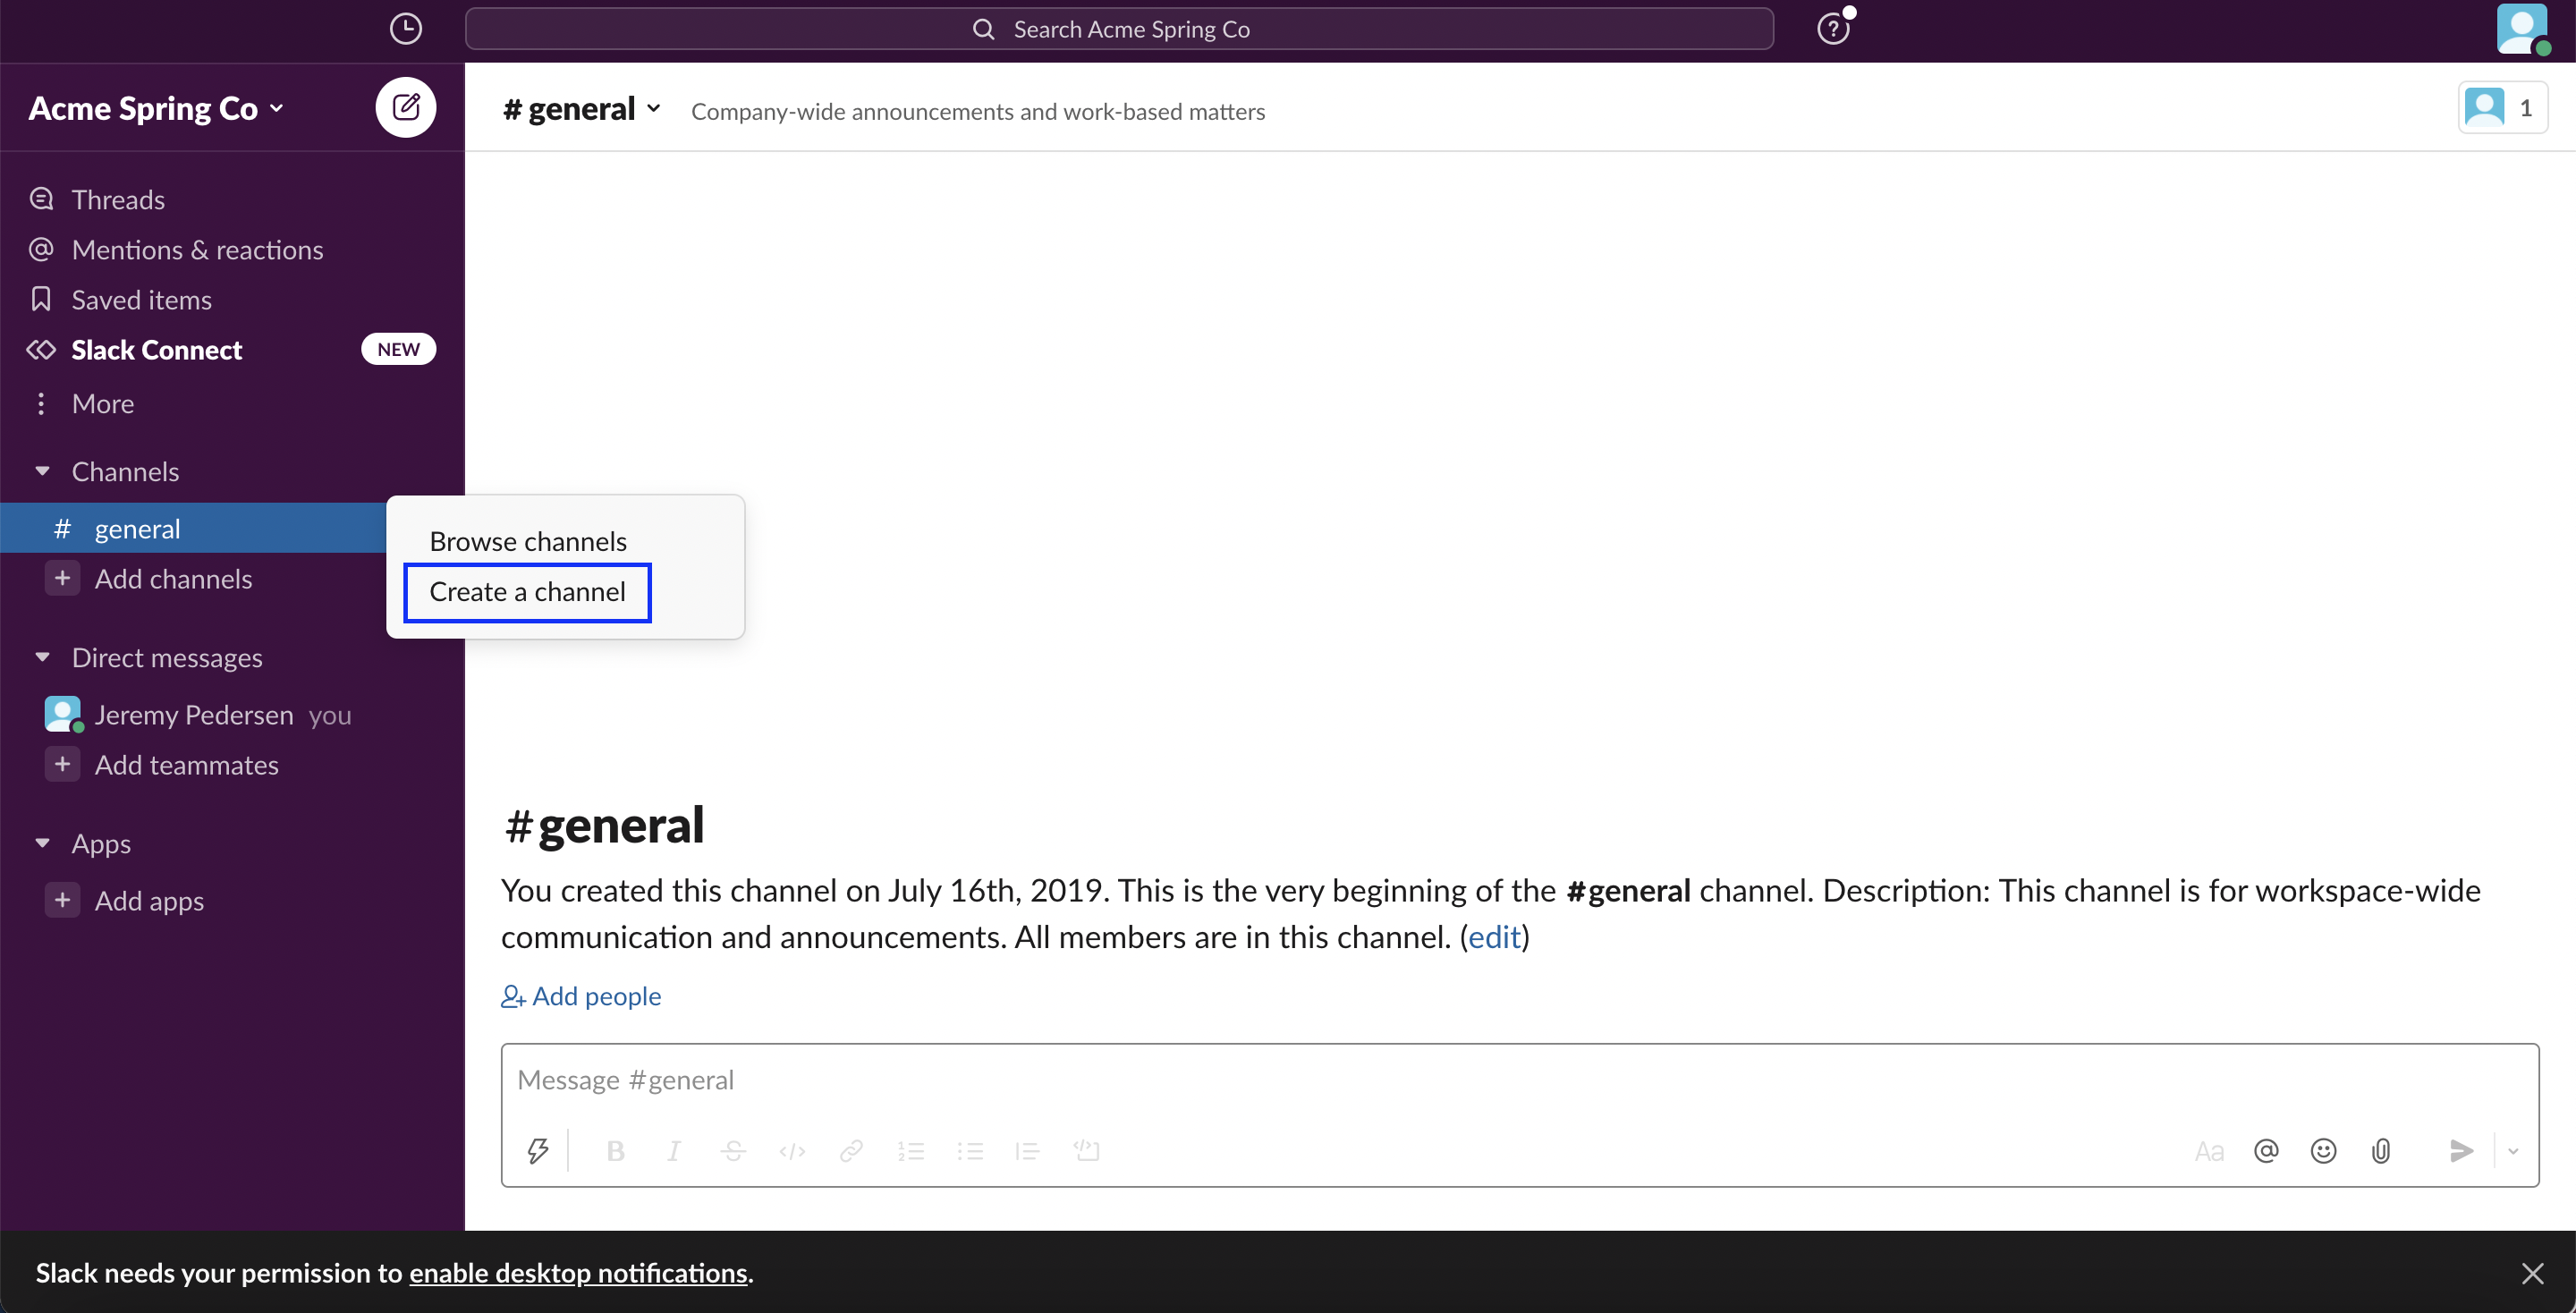
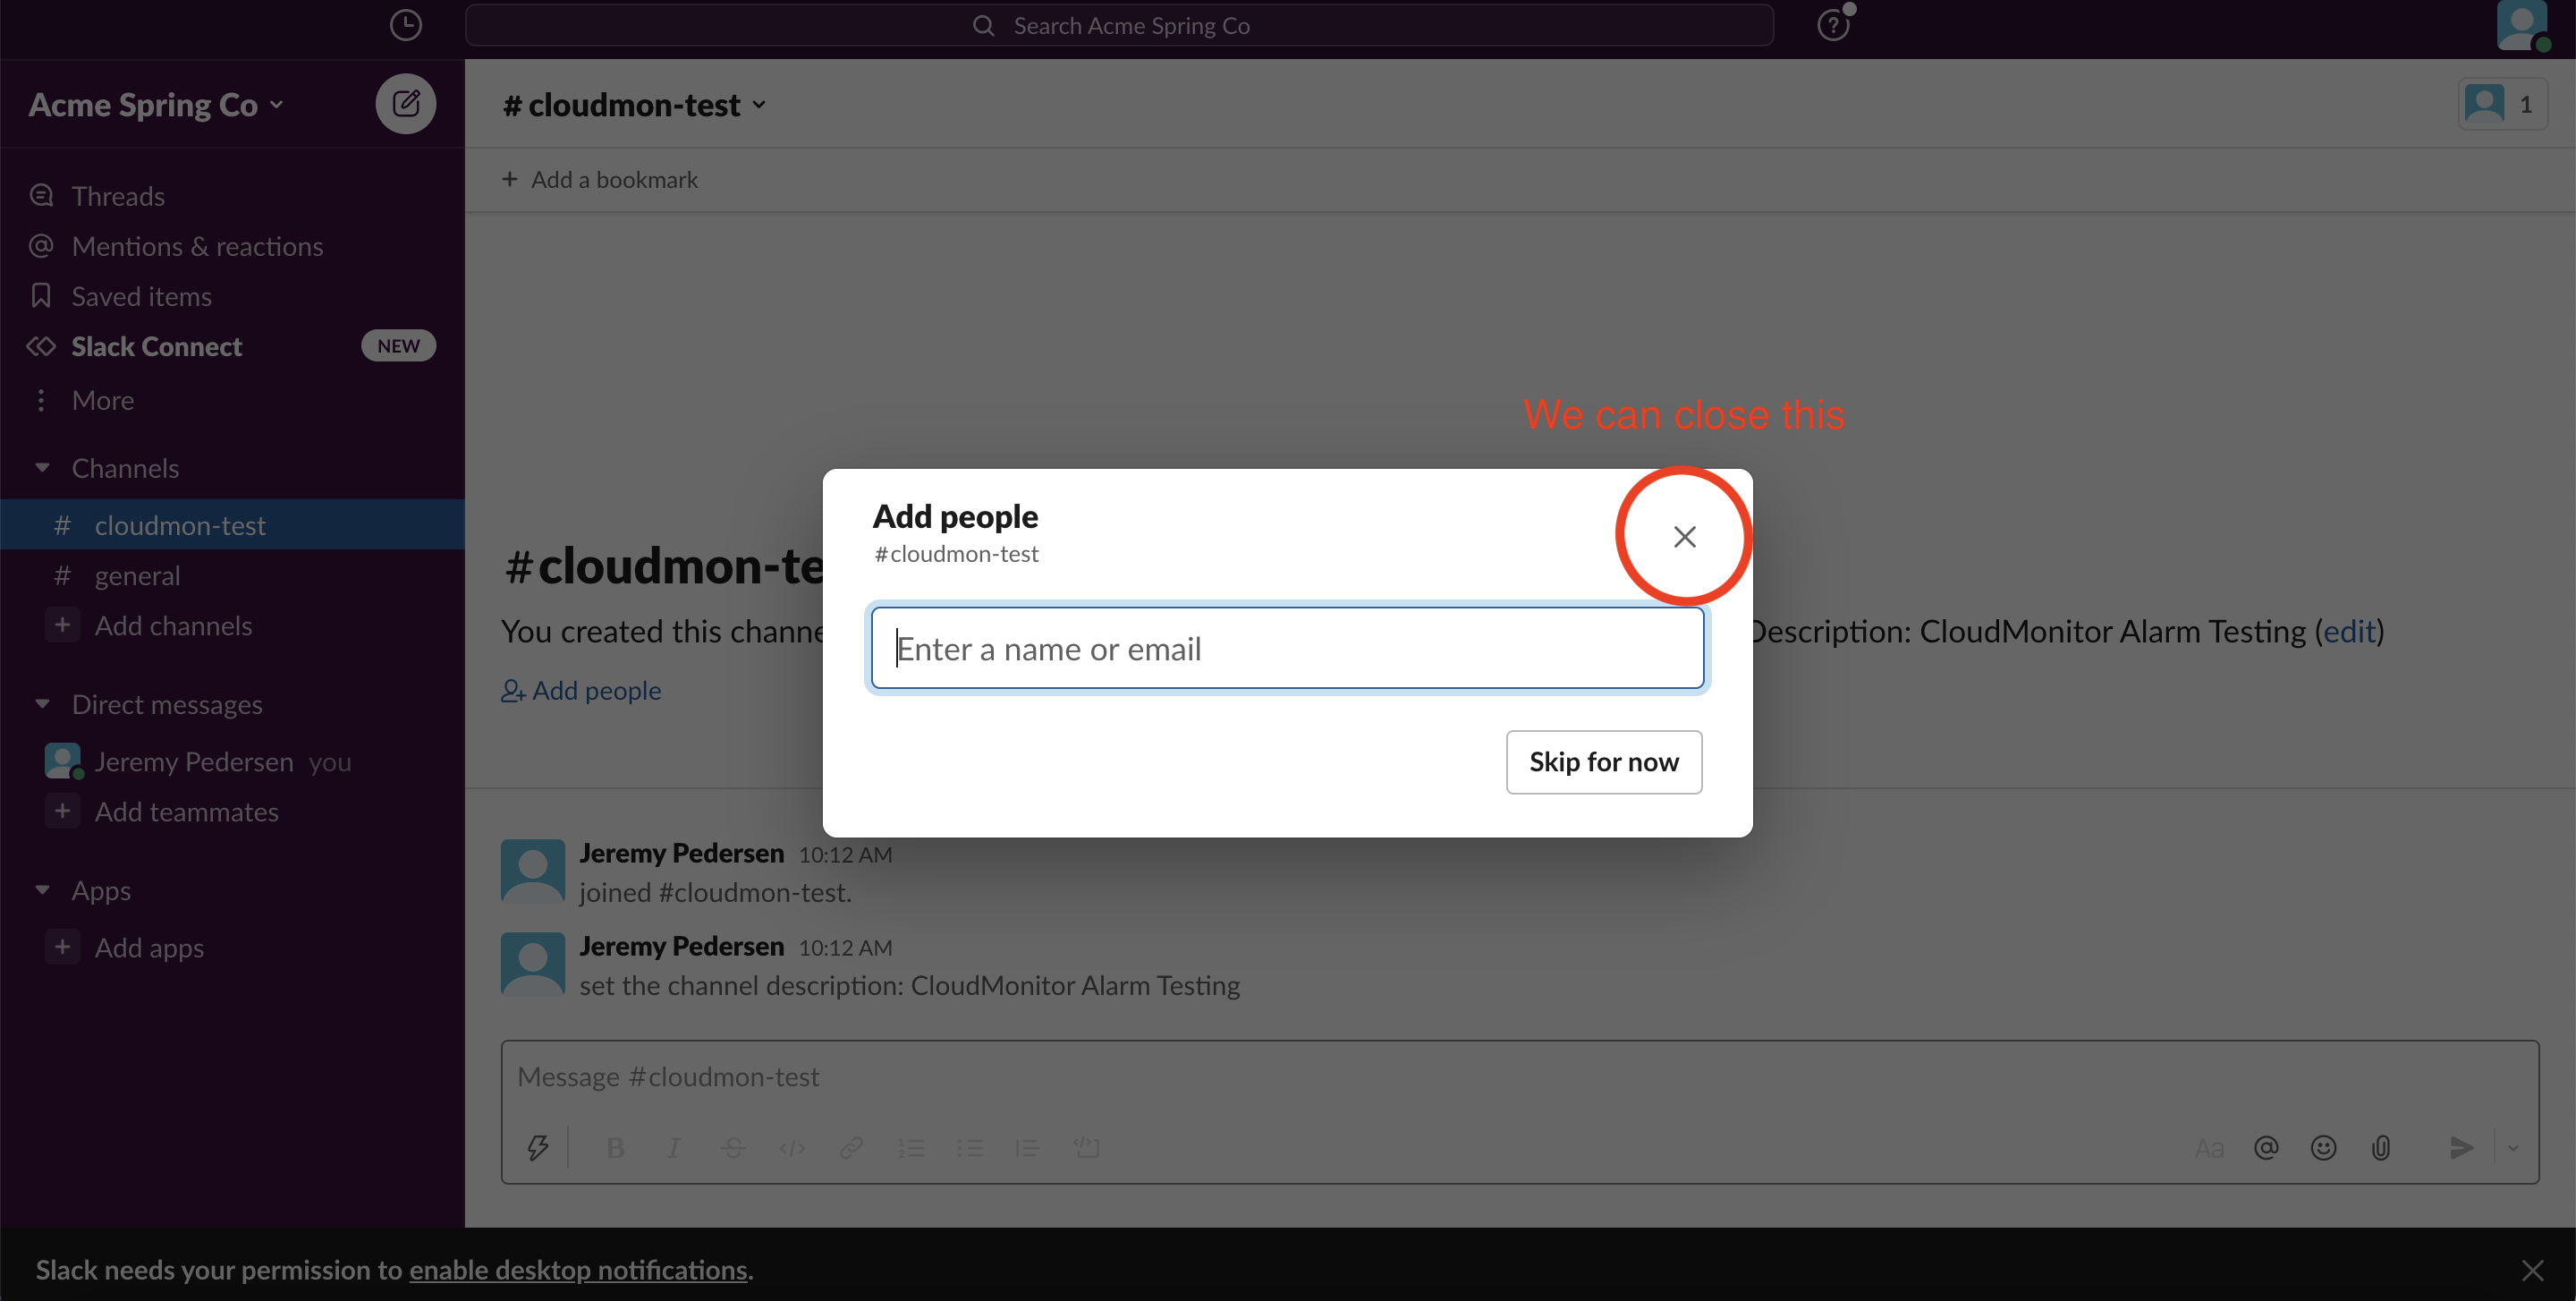
Great! Now our channel is set up. The next thing to do is to create a Slack App with an Incoming Webhook. Slack has some helpful documentation on how to do that here.
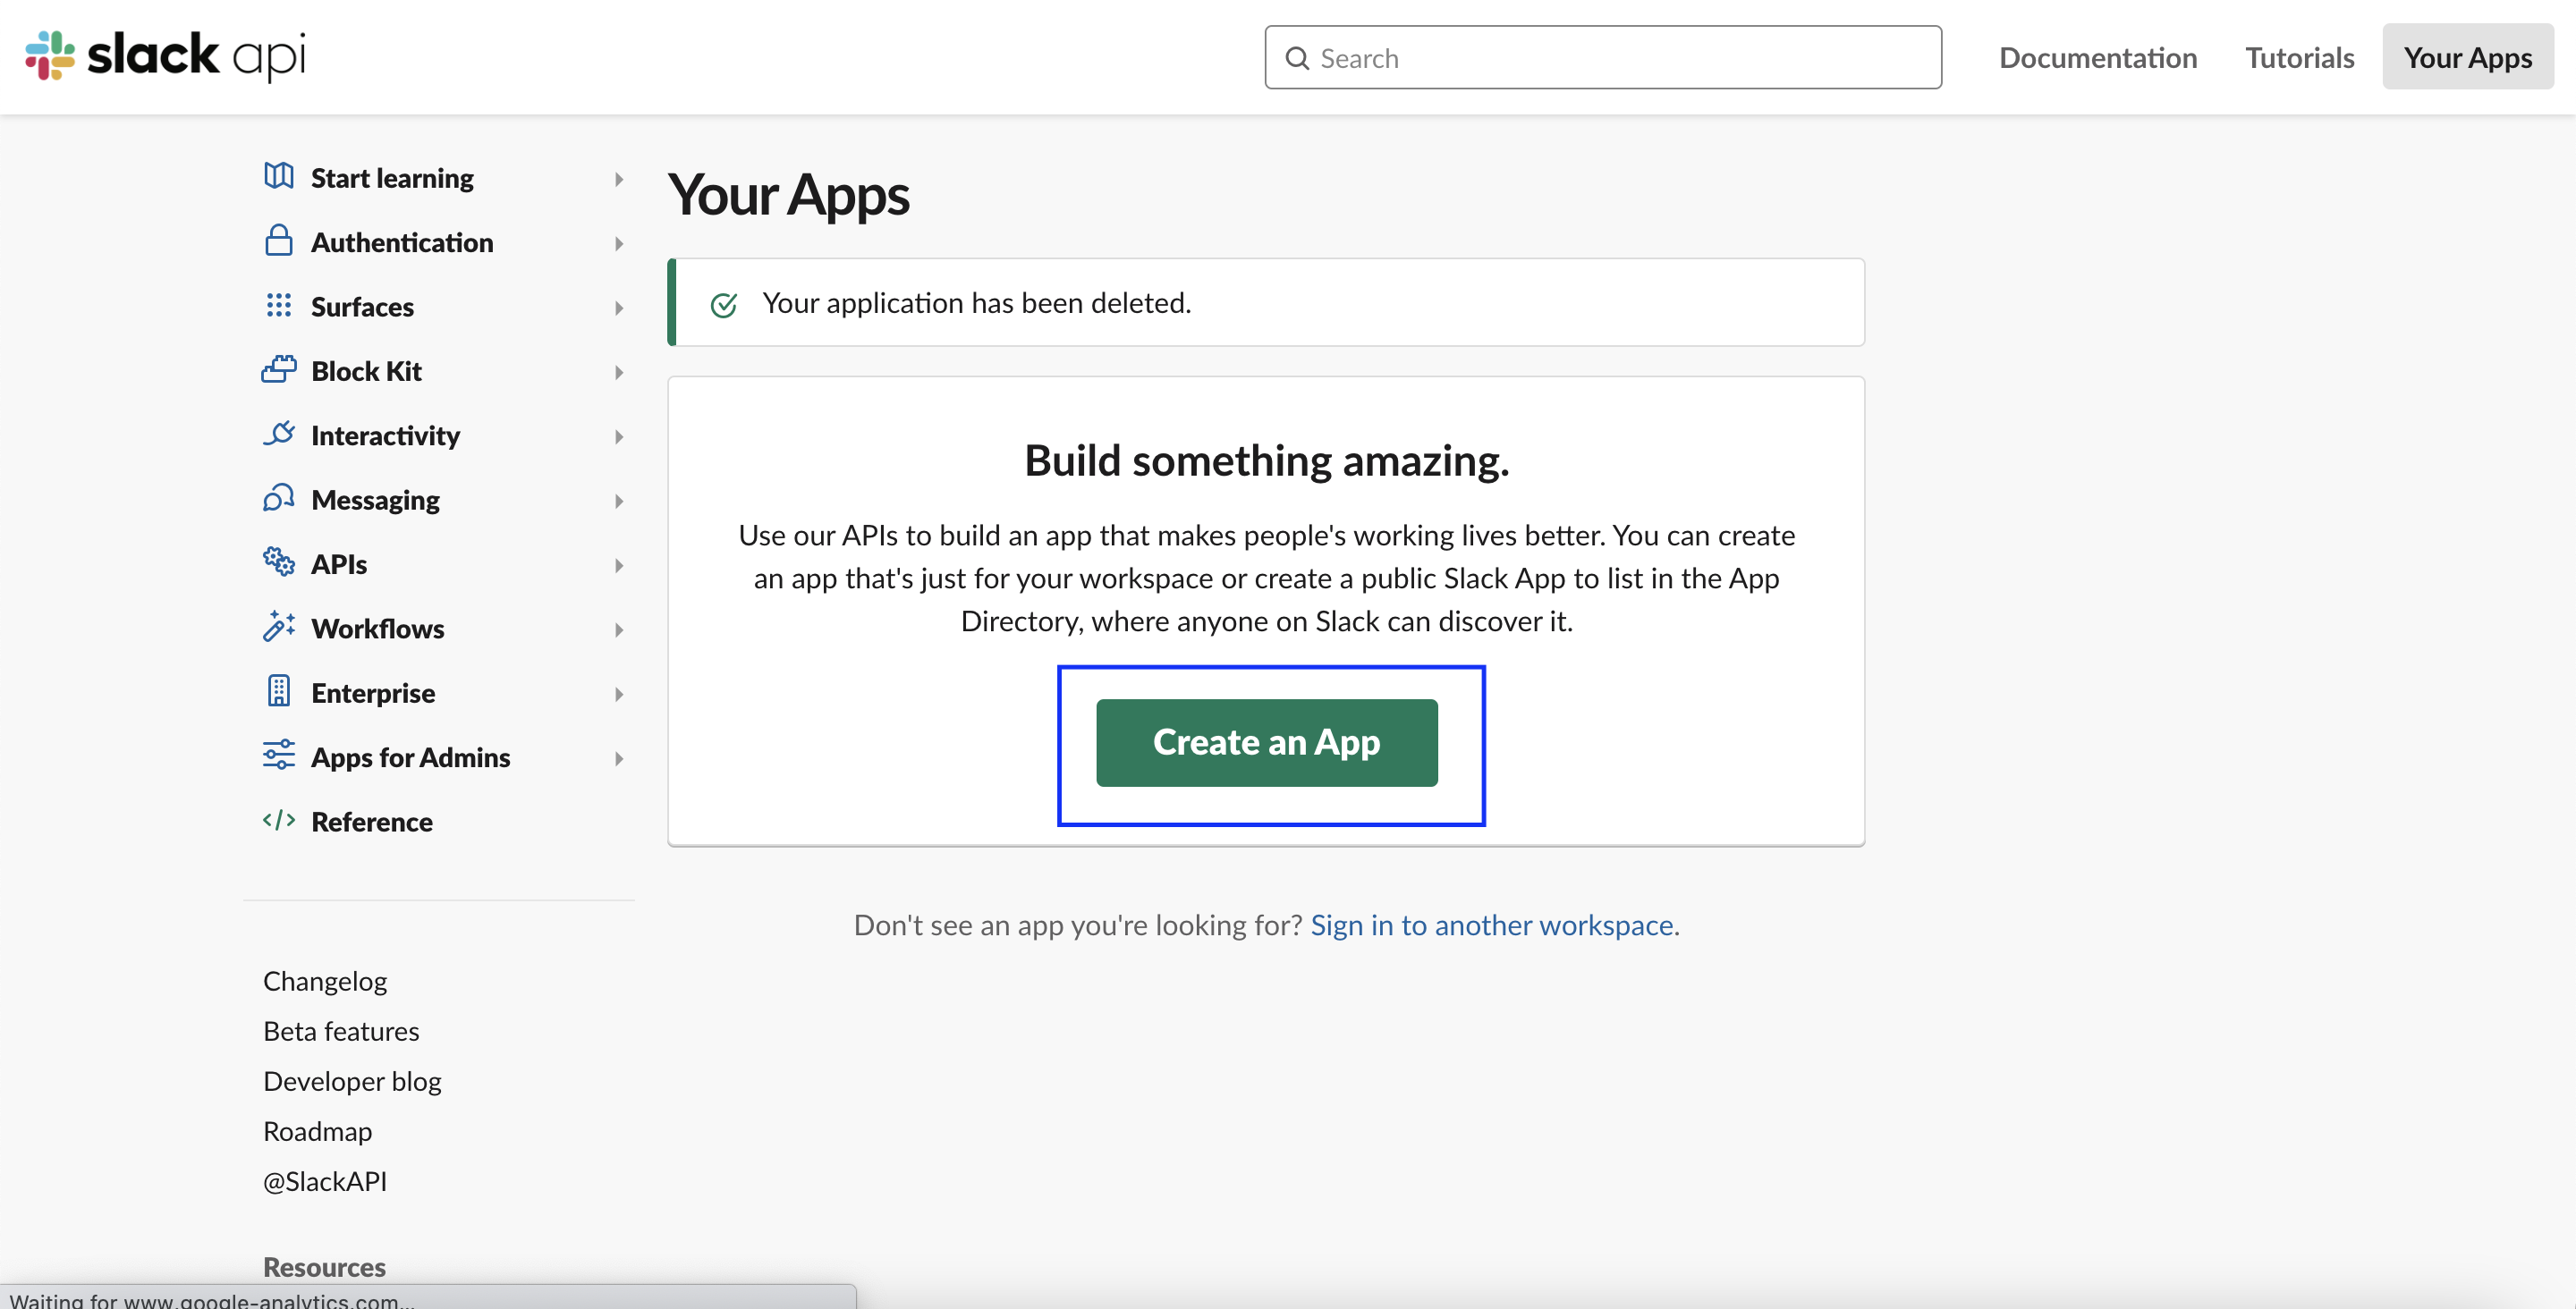
The first thing we need to do is go to the Your Apps page, and click on Create an App:
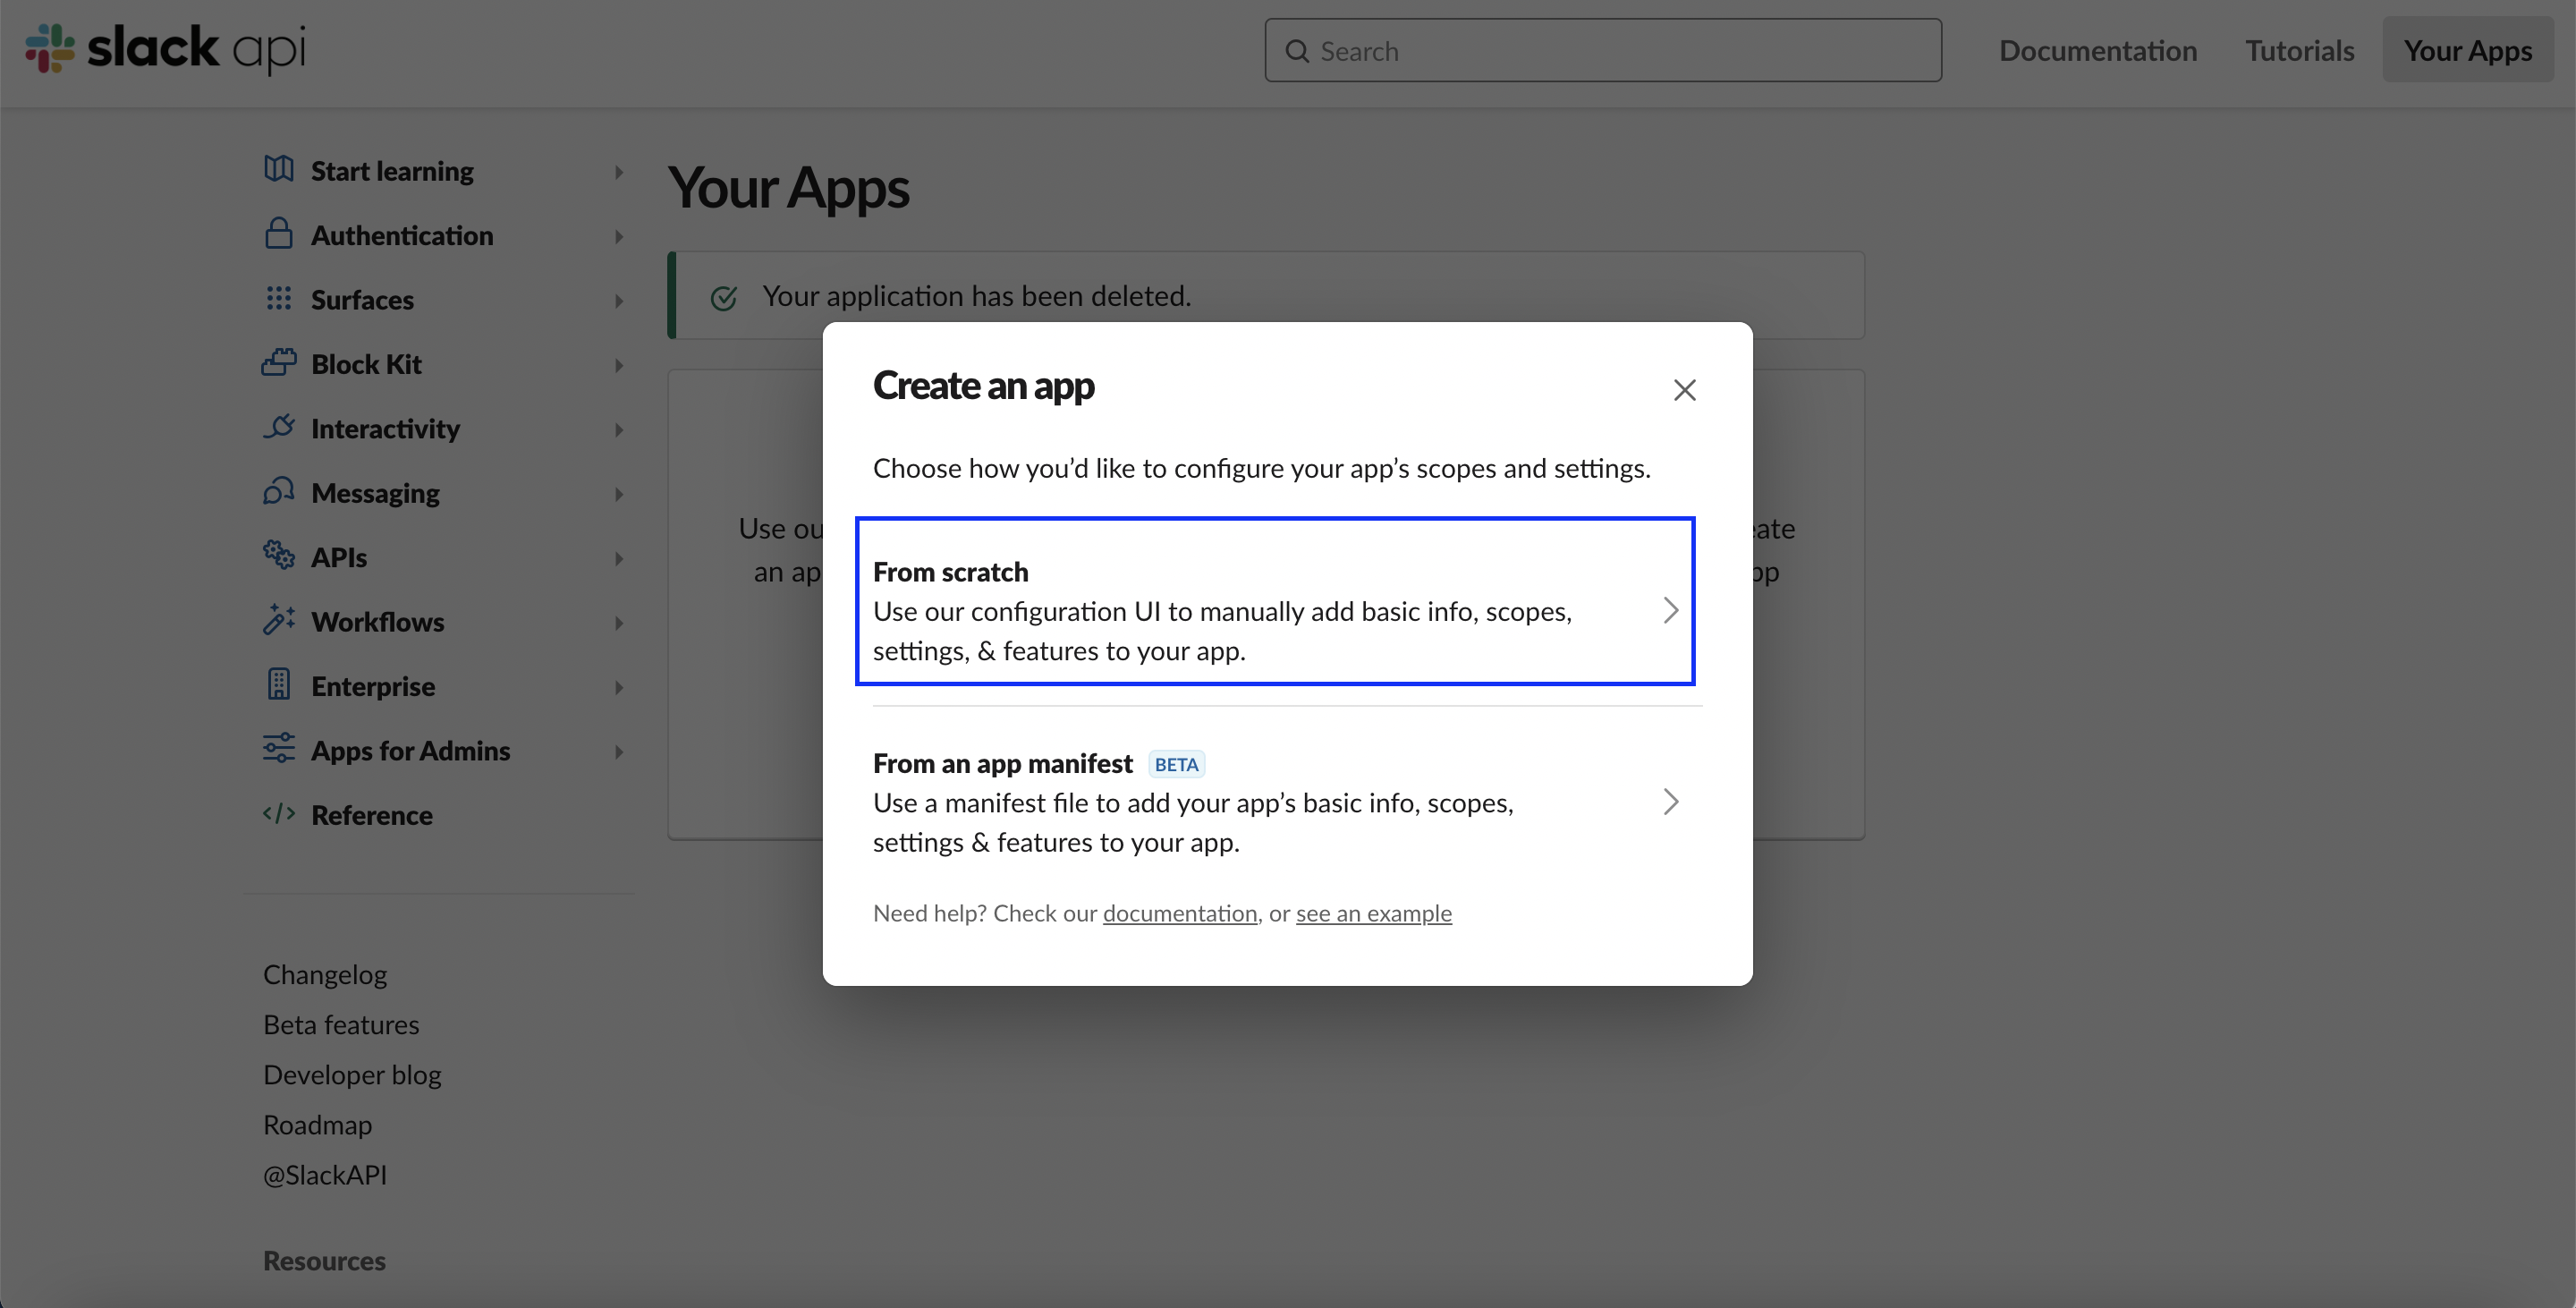
Choose "from scratch":
We then choose our workspace (Acme Spring Co., in my case), and click Create App:
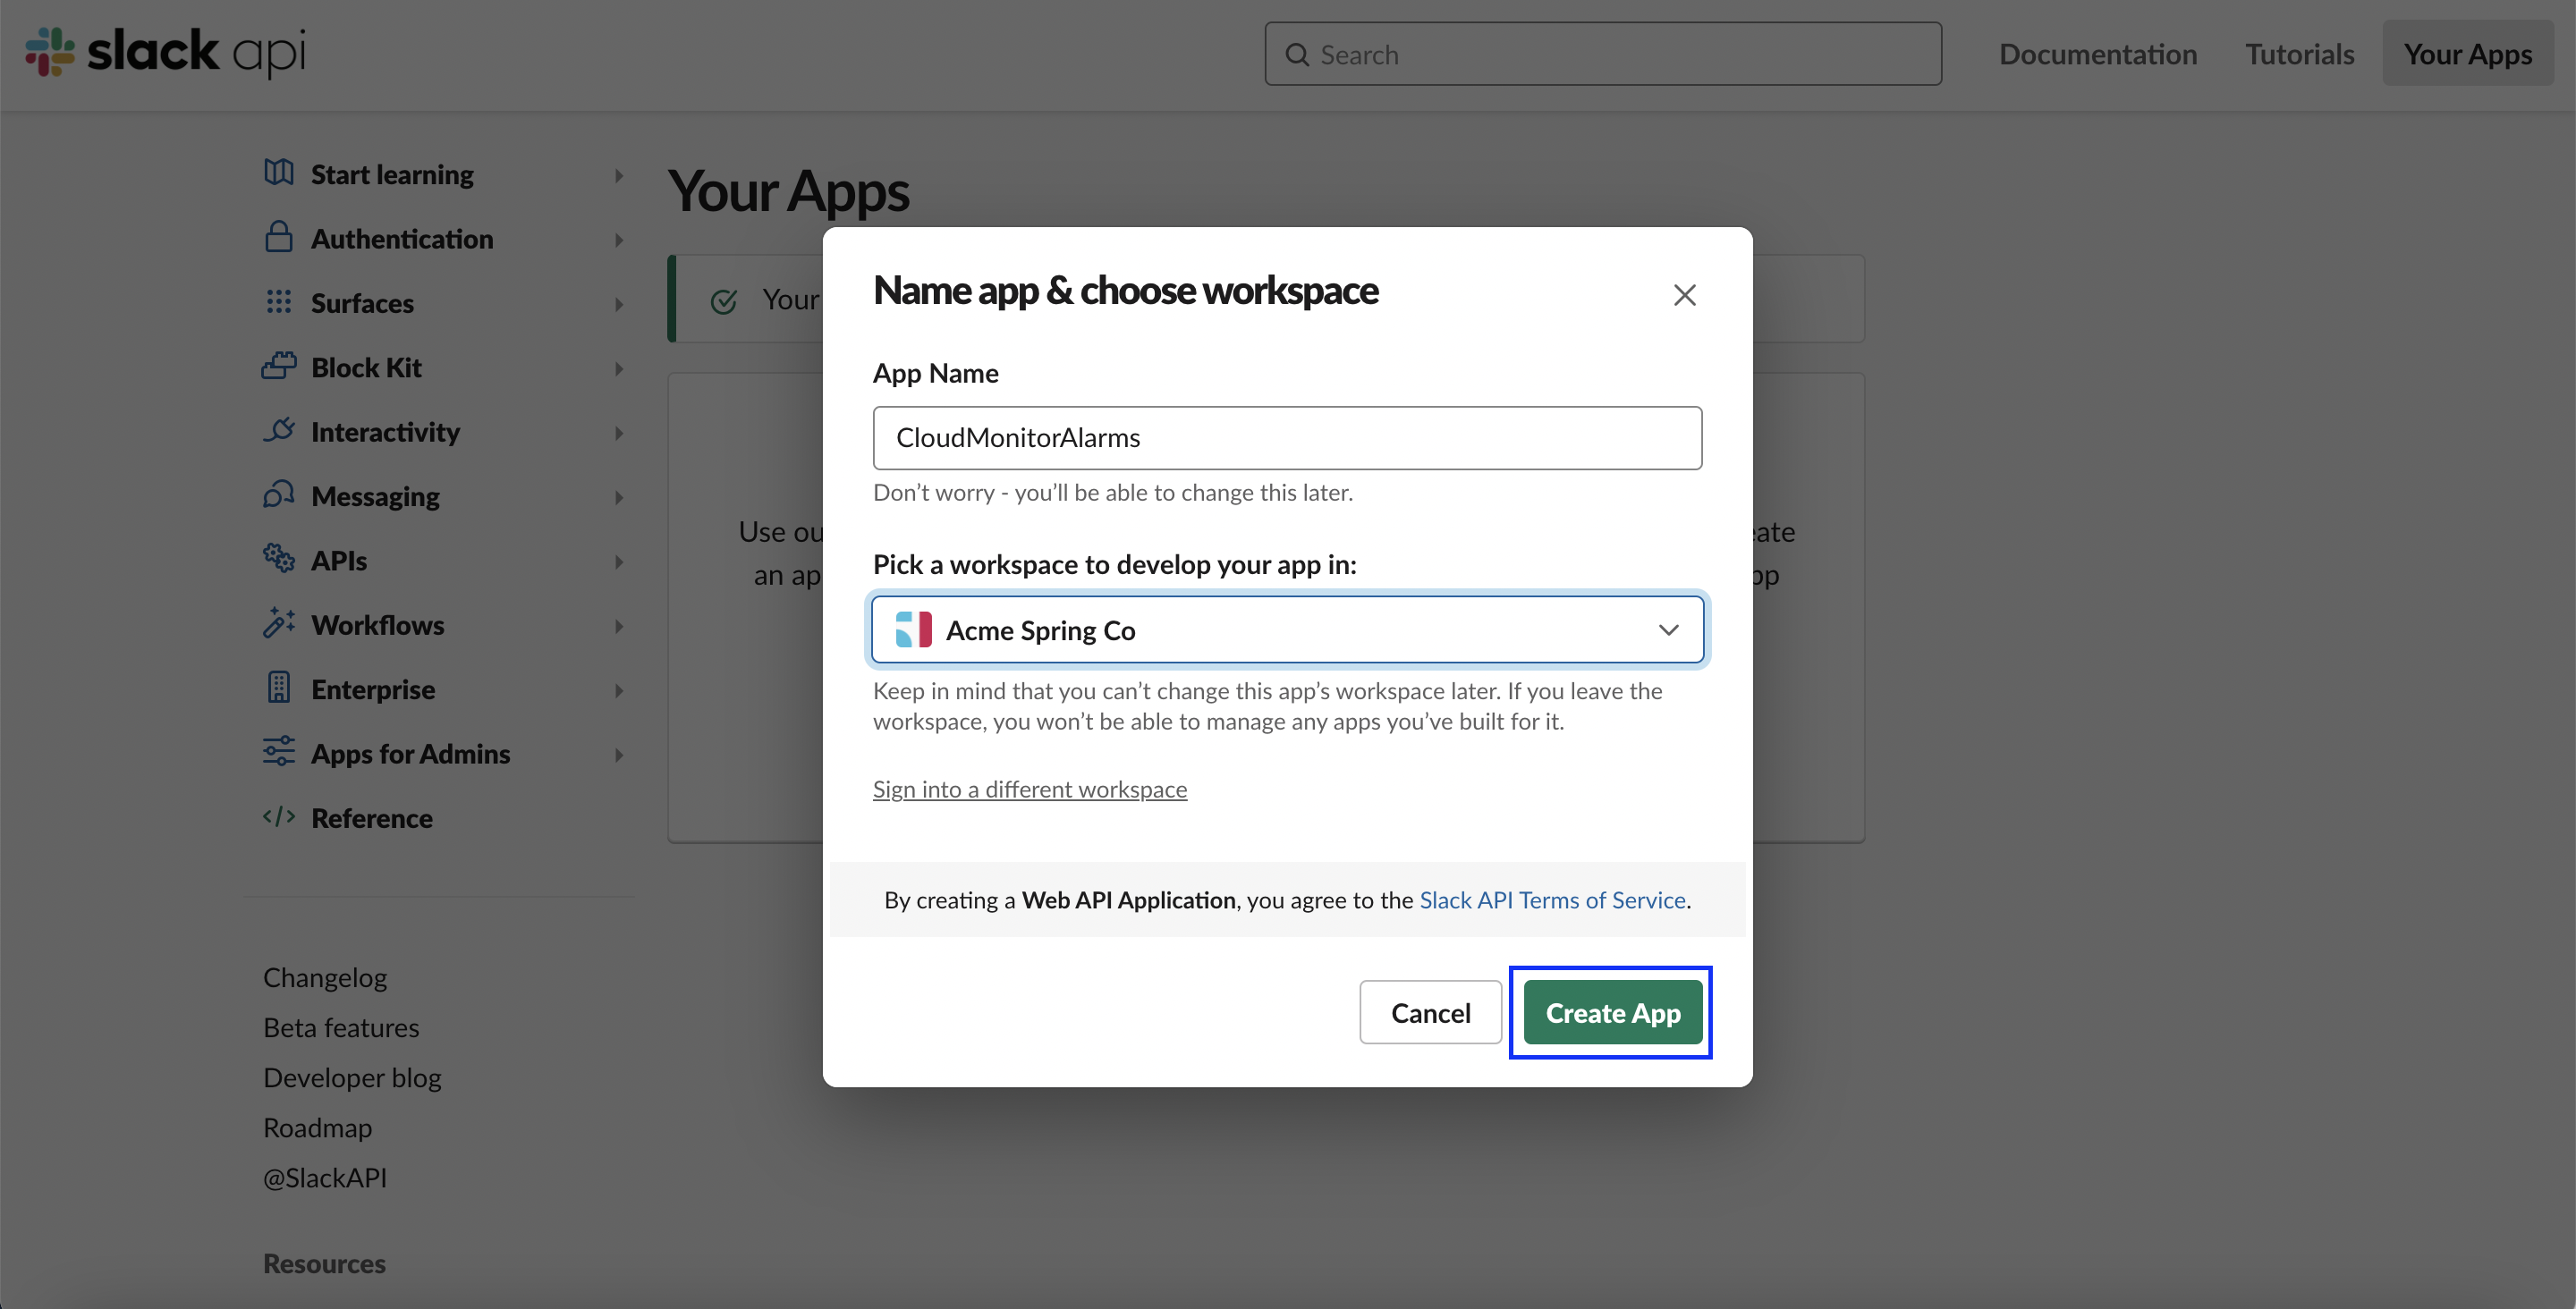
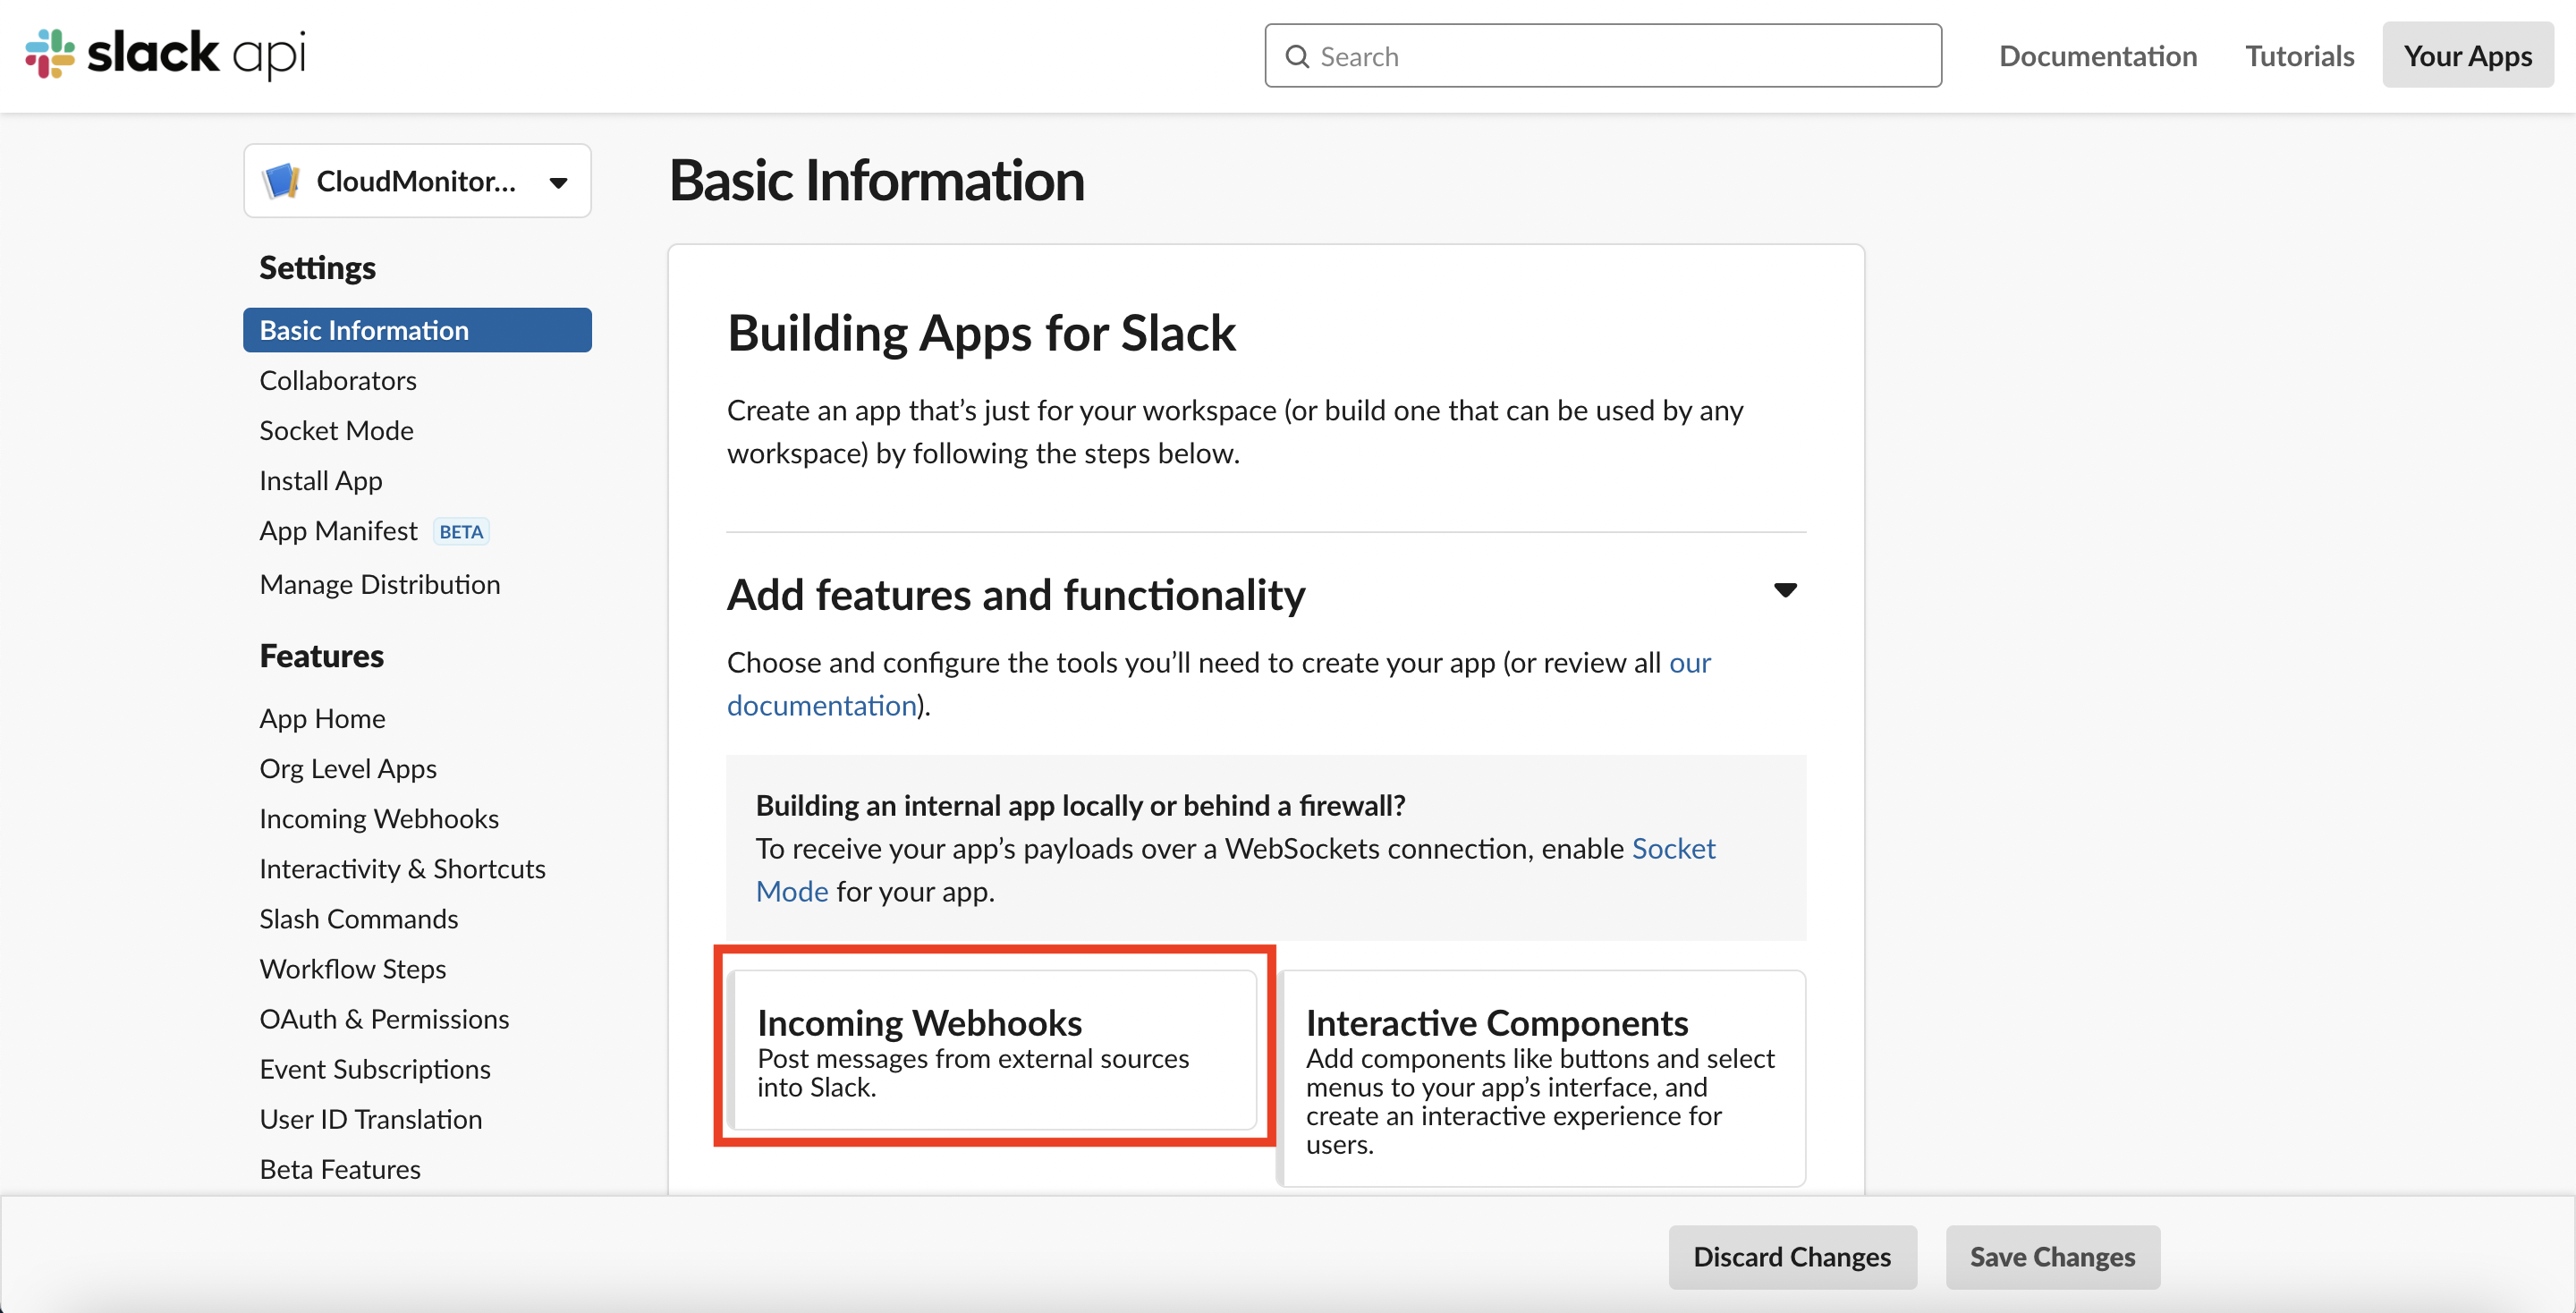
Now that our app has been created, we need to configure an Incoming Webhook:
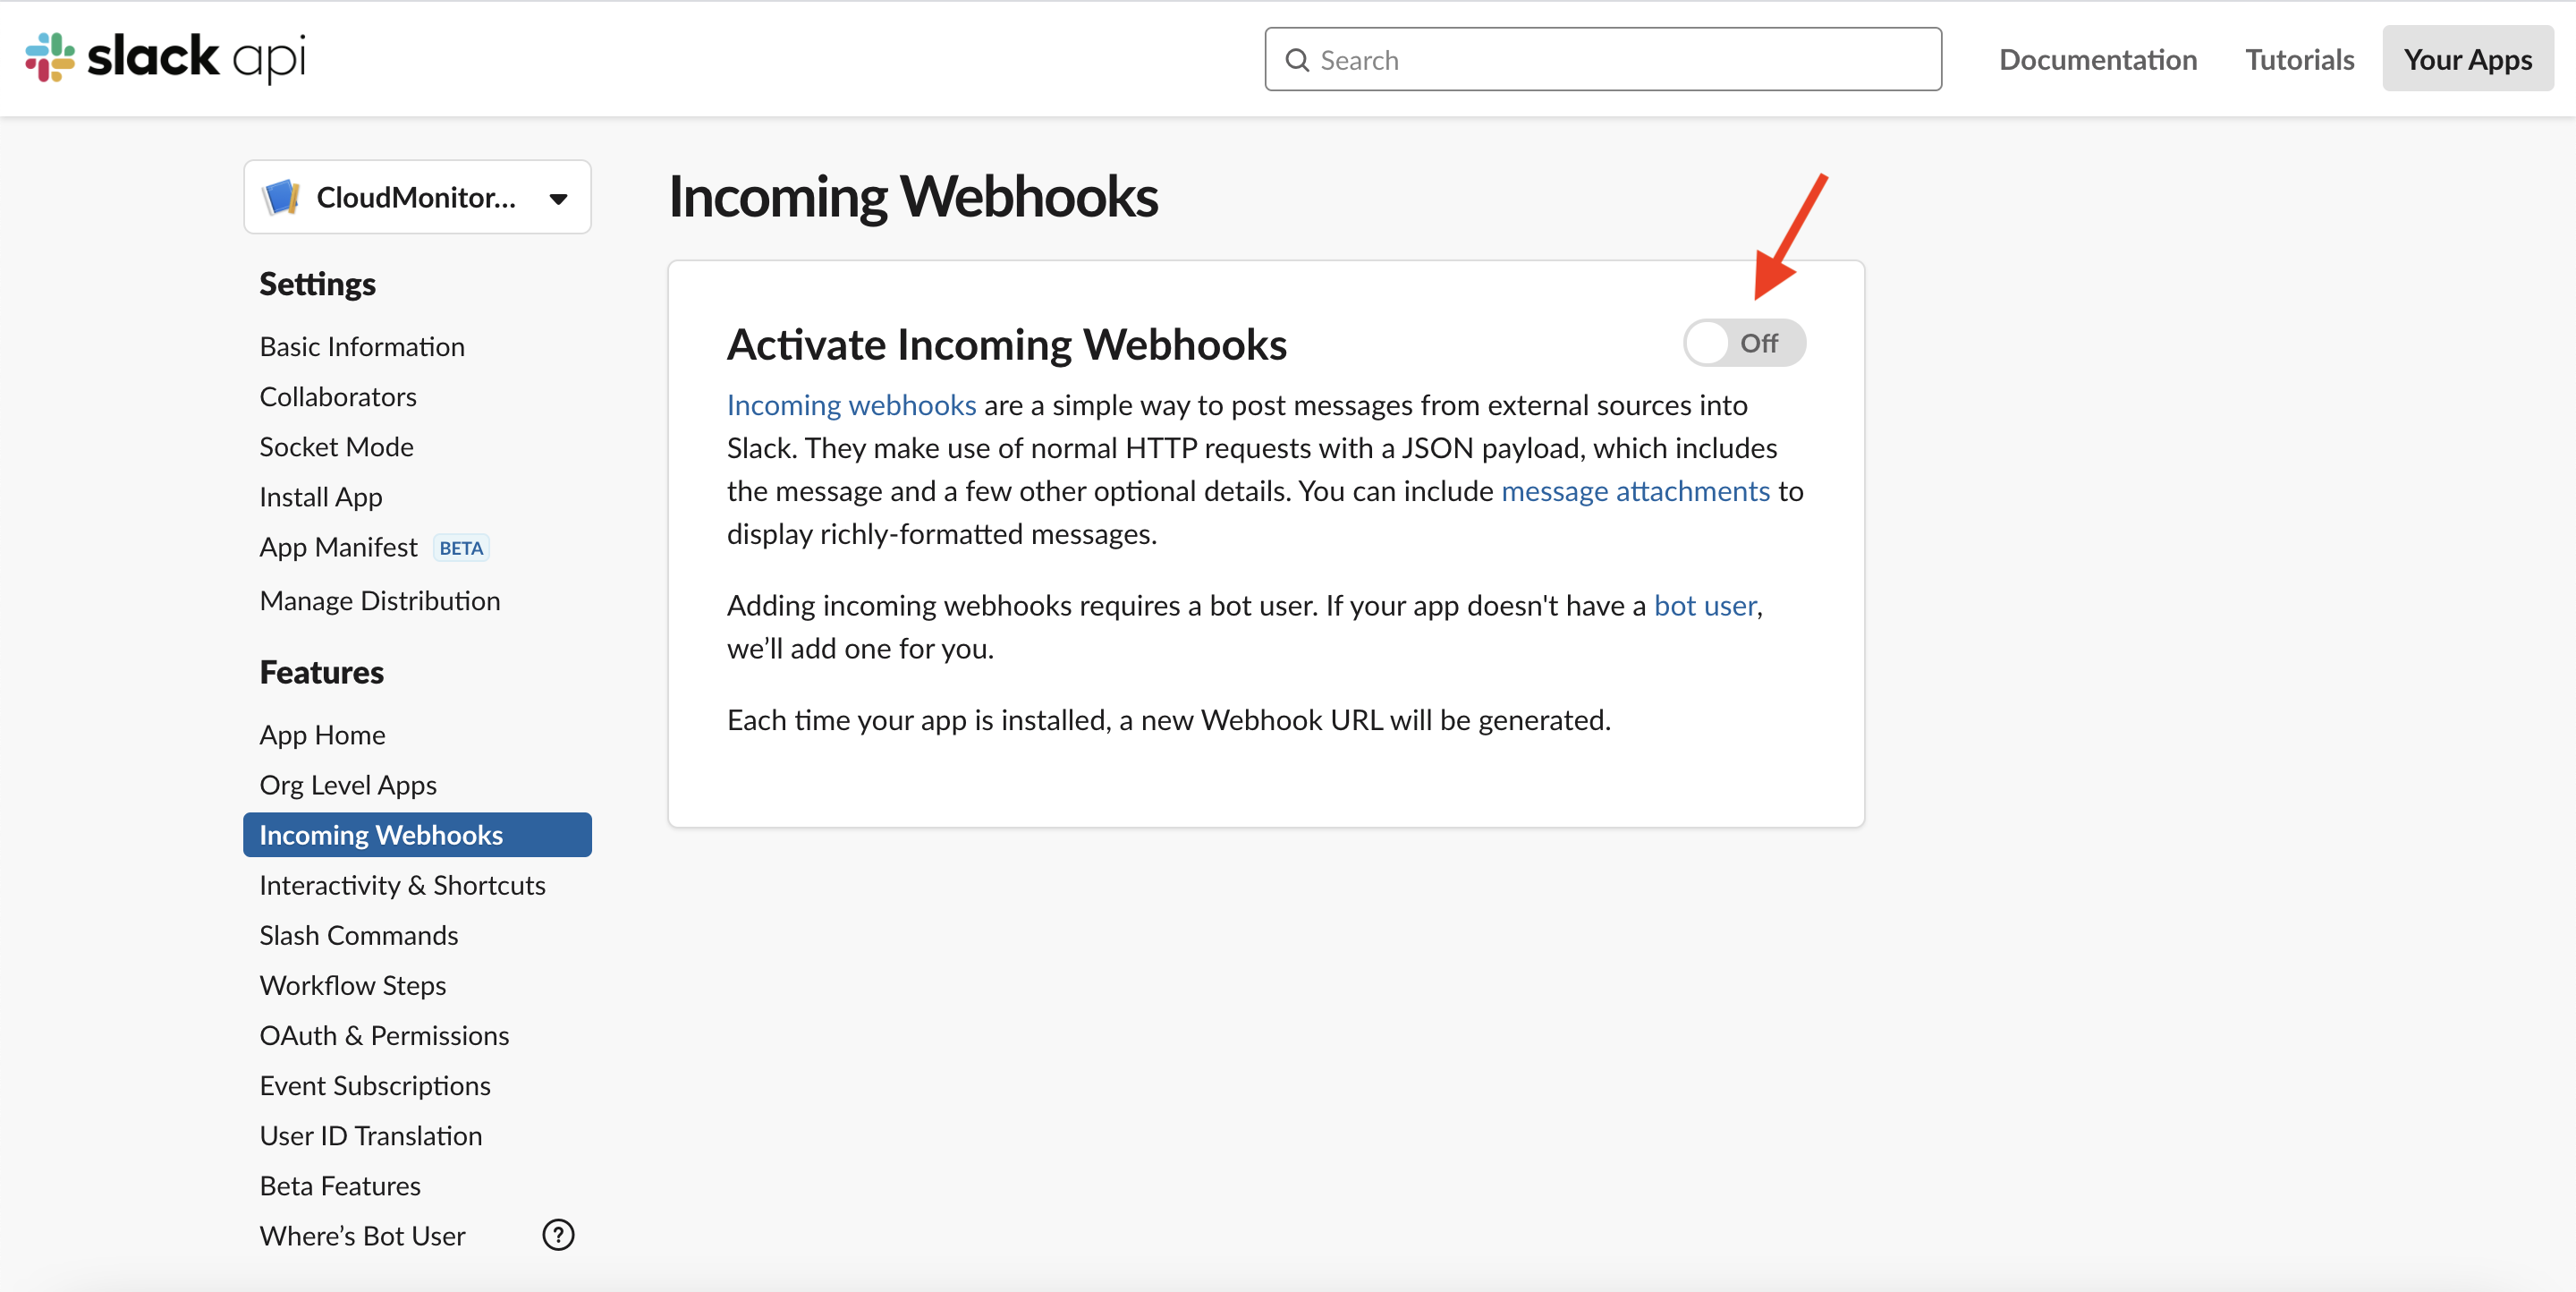
First, we enable this feature by switching the radio button to On:
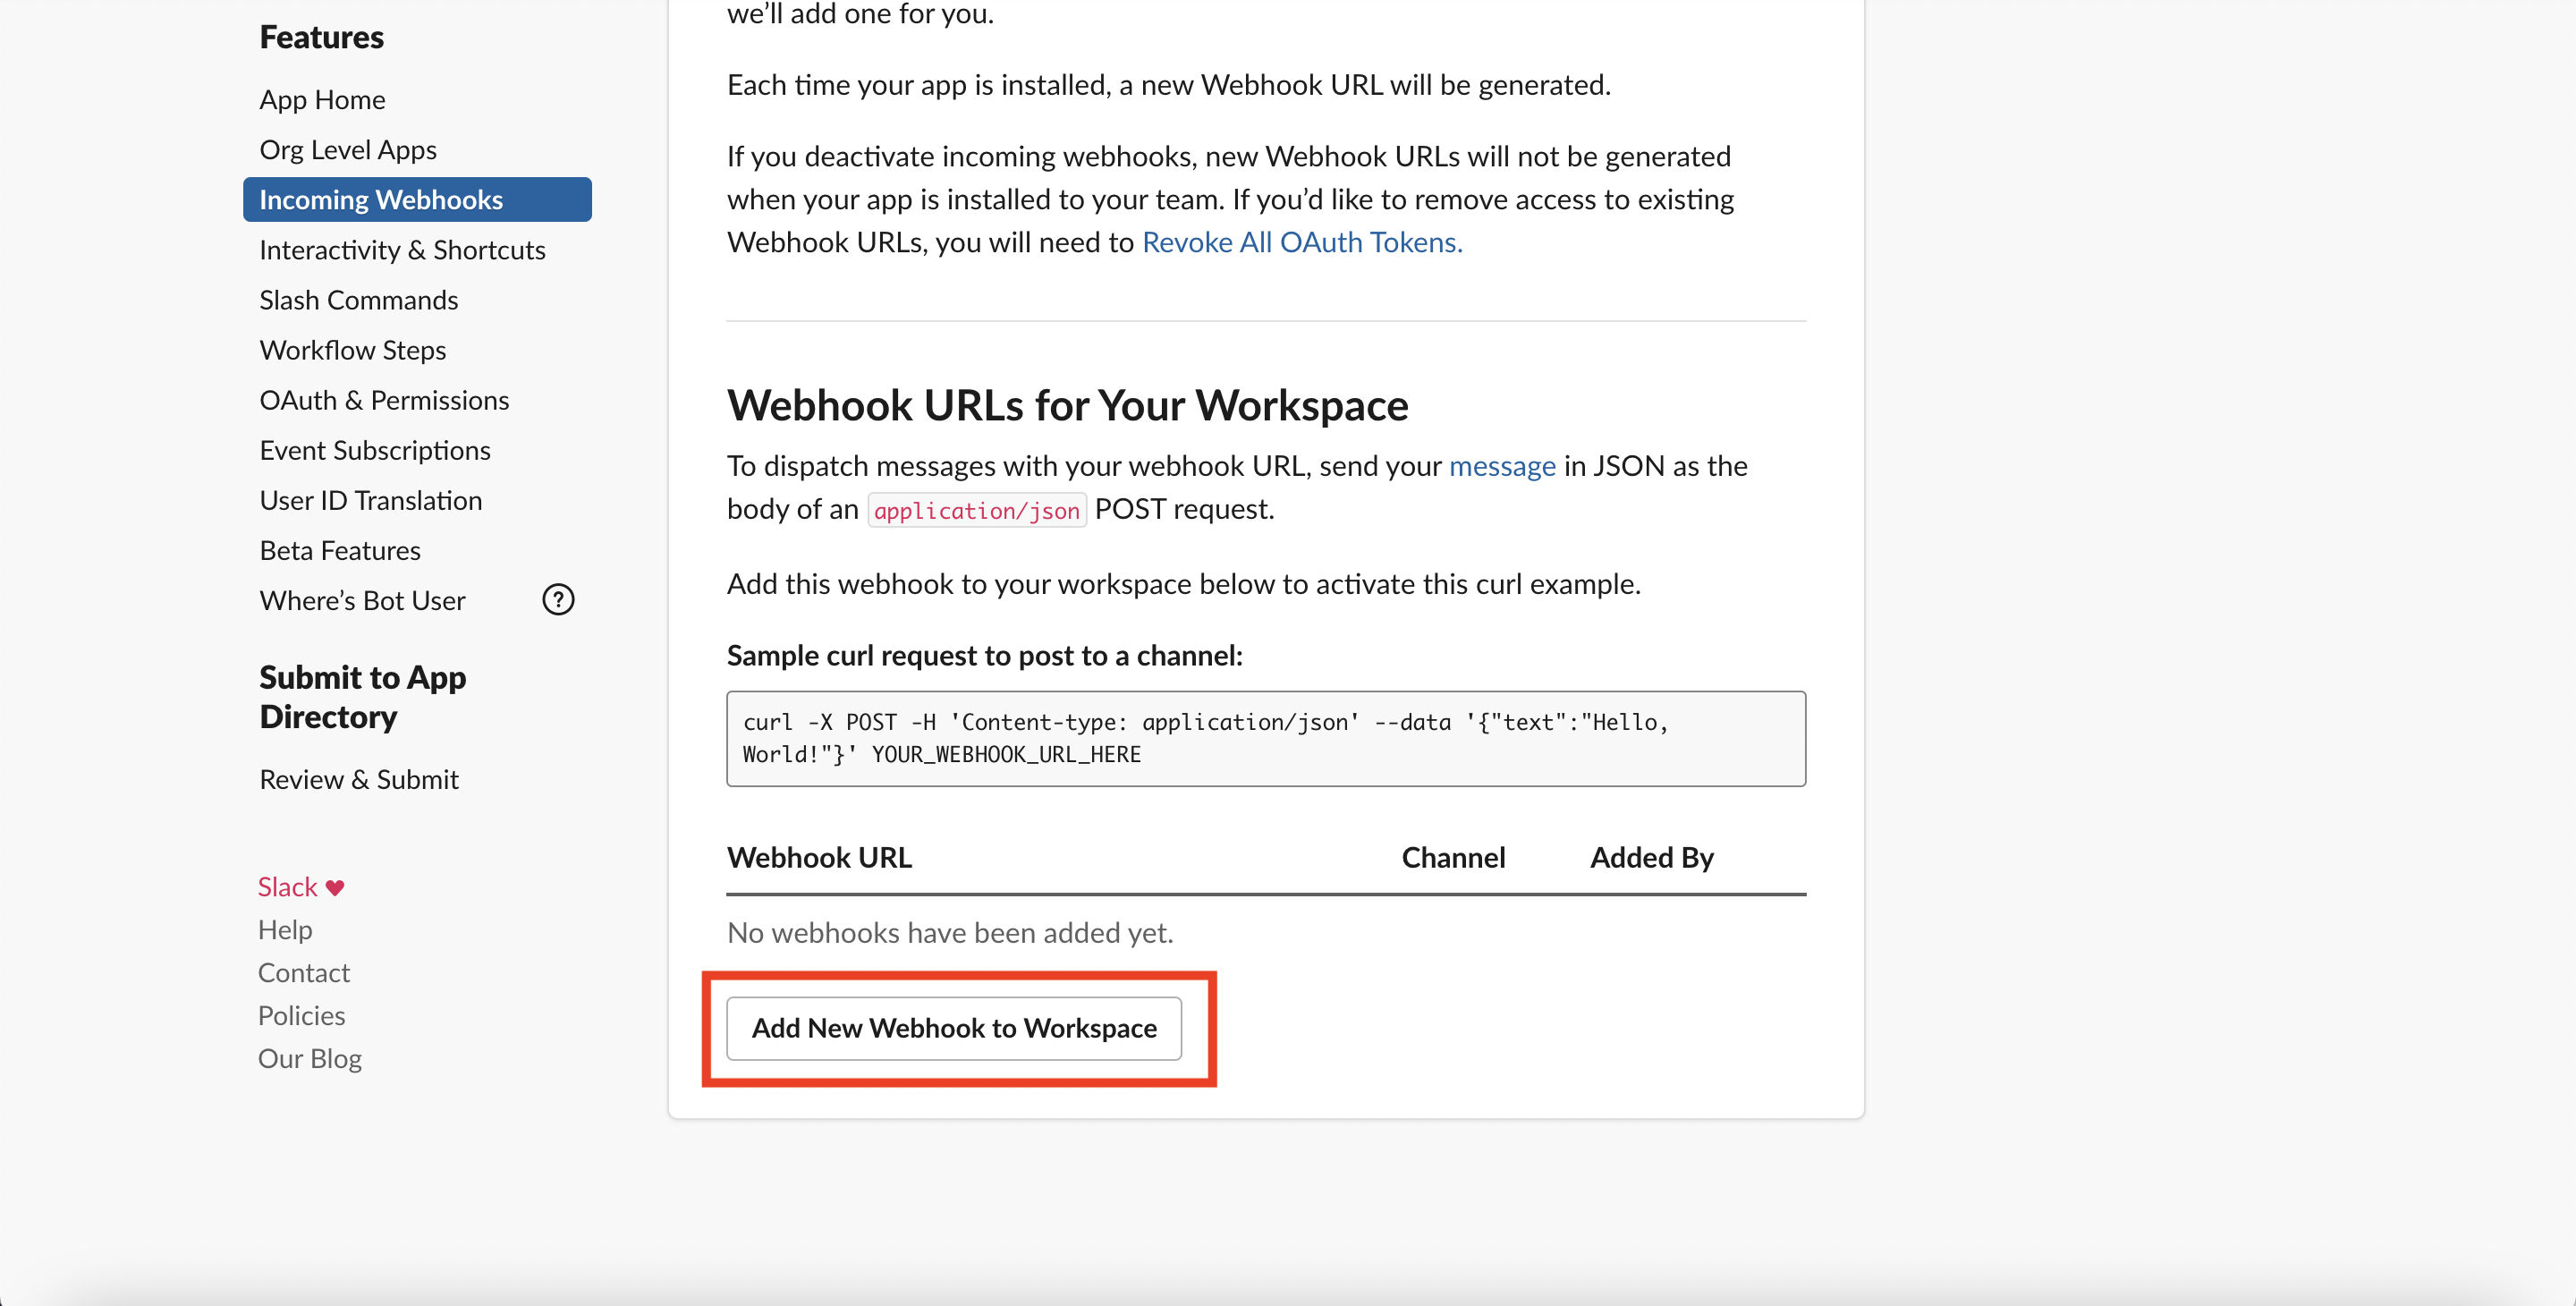
This will open up a new dialog at the bottom of the page, where we can add new webhooks to our workspace. We'll click on "Add New Webhook to Workspace" here:
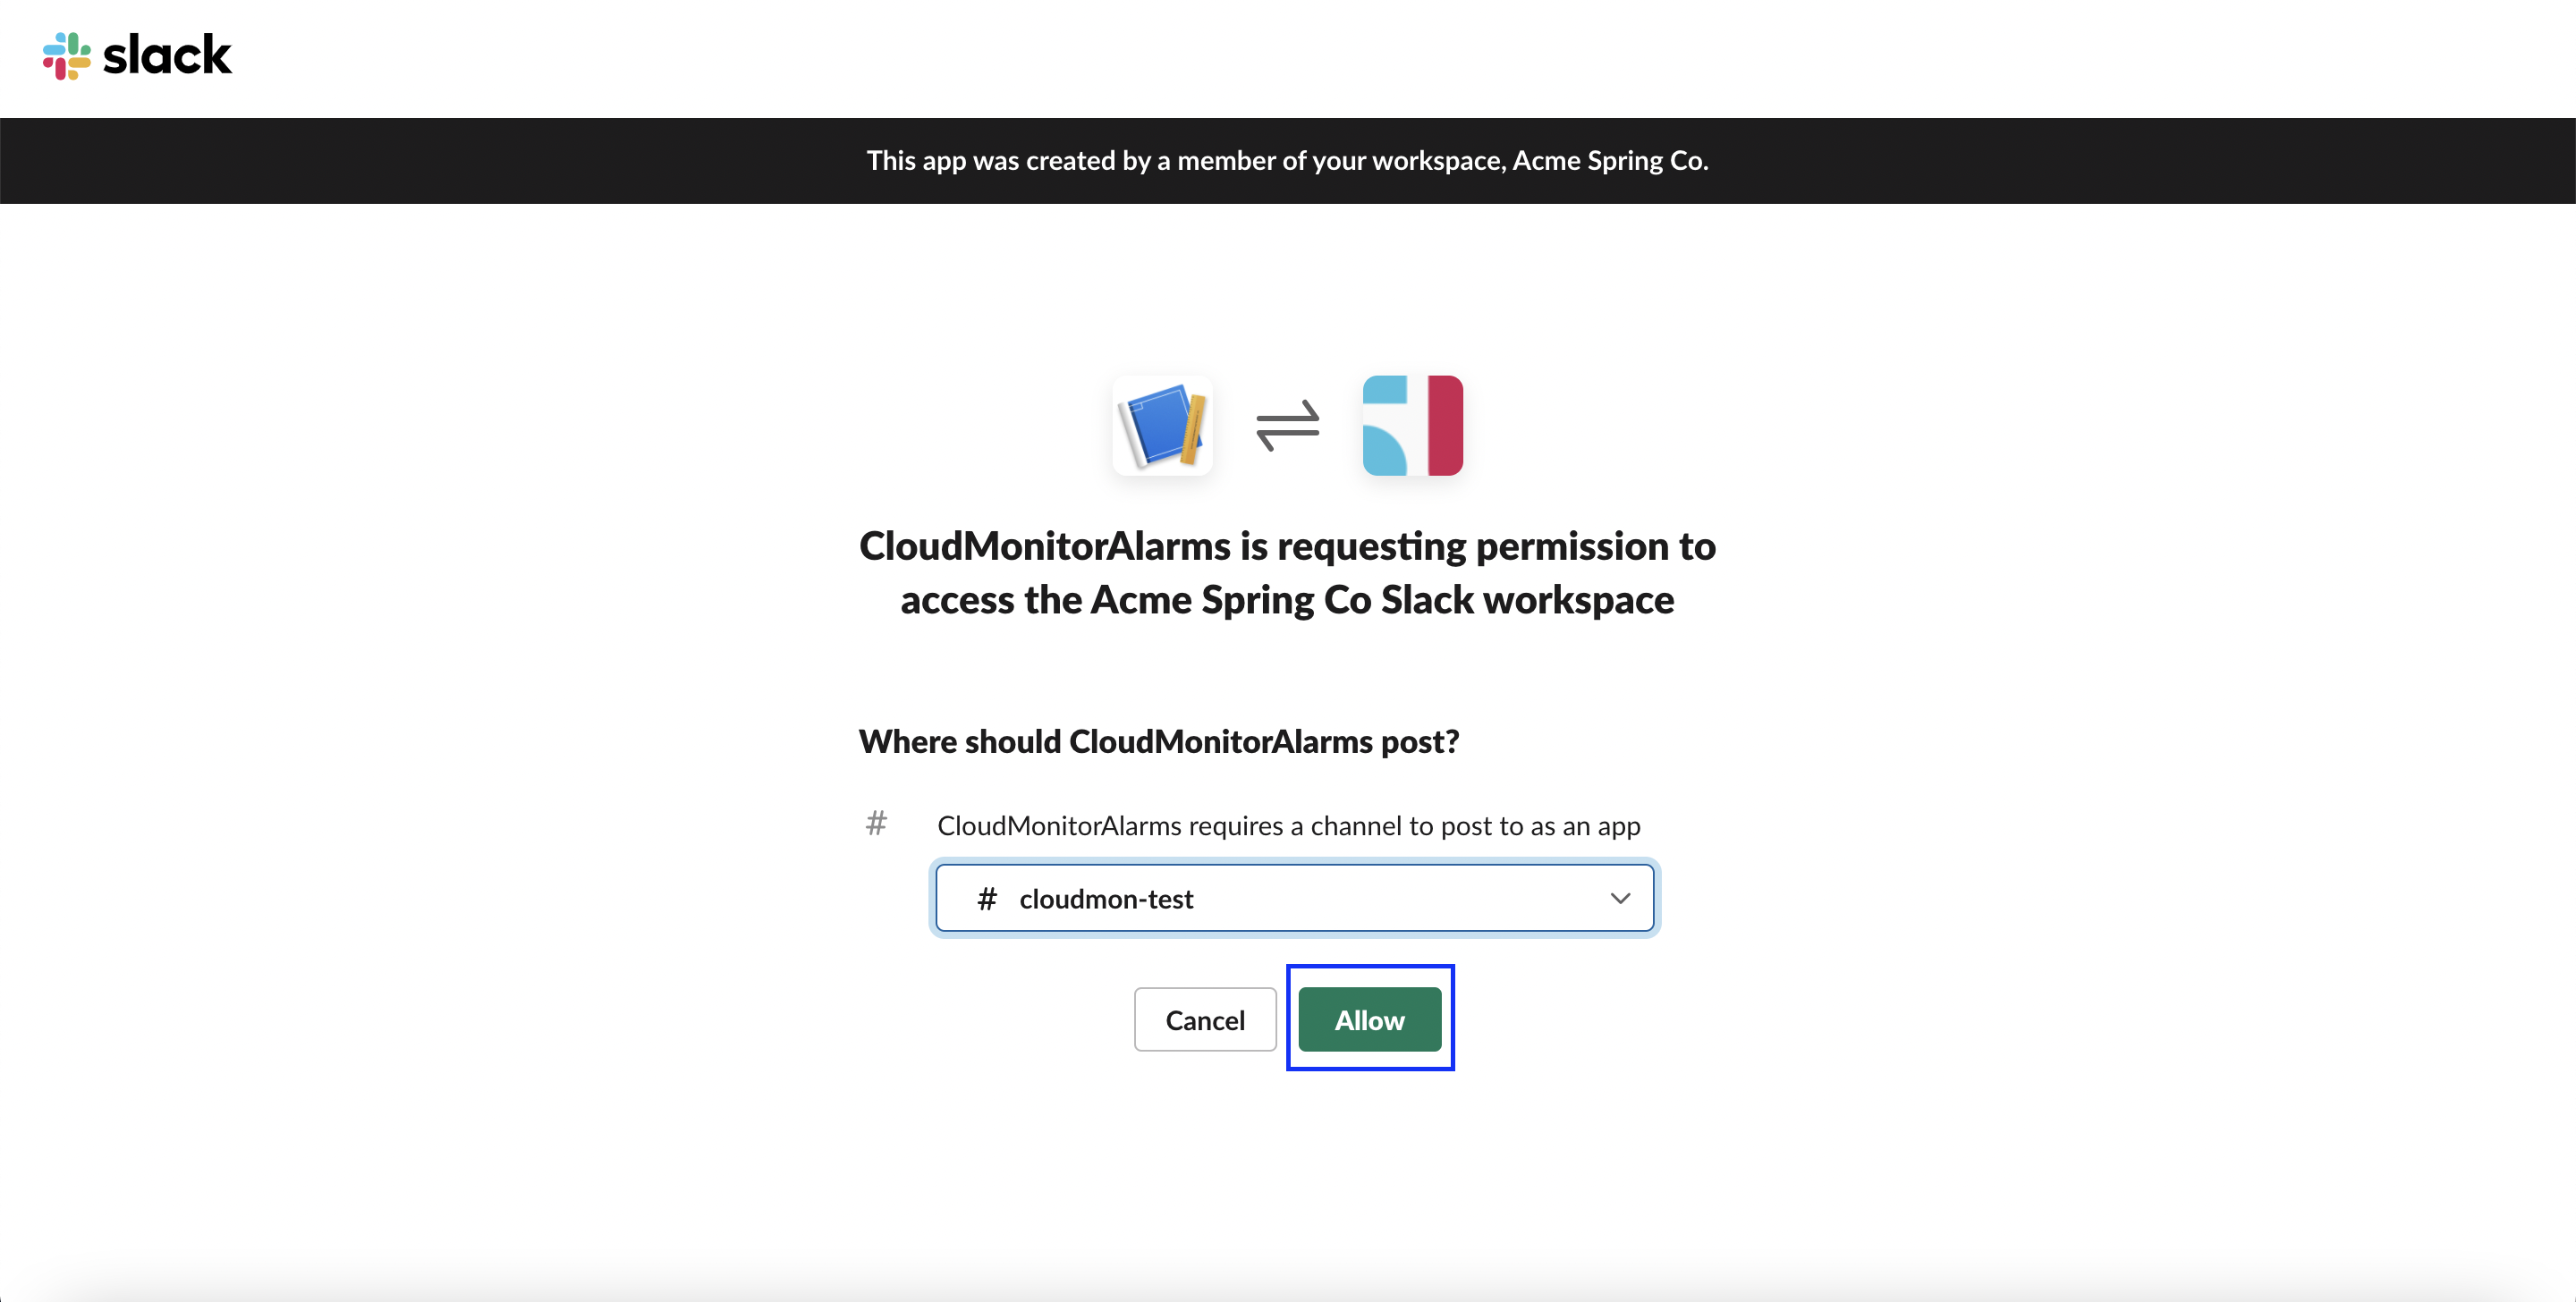
We then select the channel where we want our CloudMonitorAlarms app to be active, and click Allow:
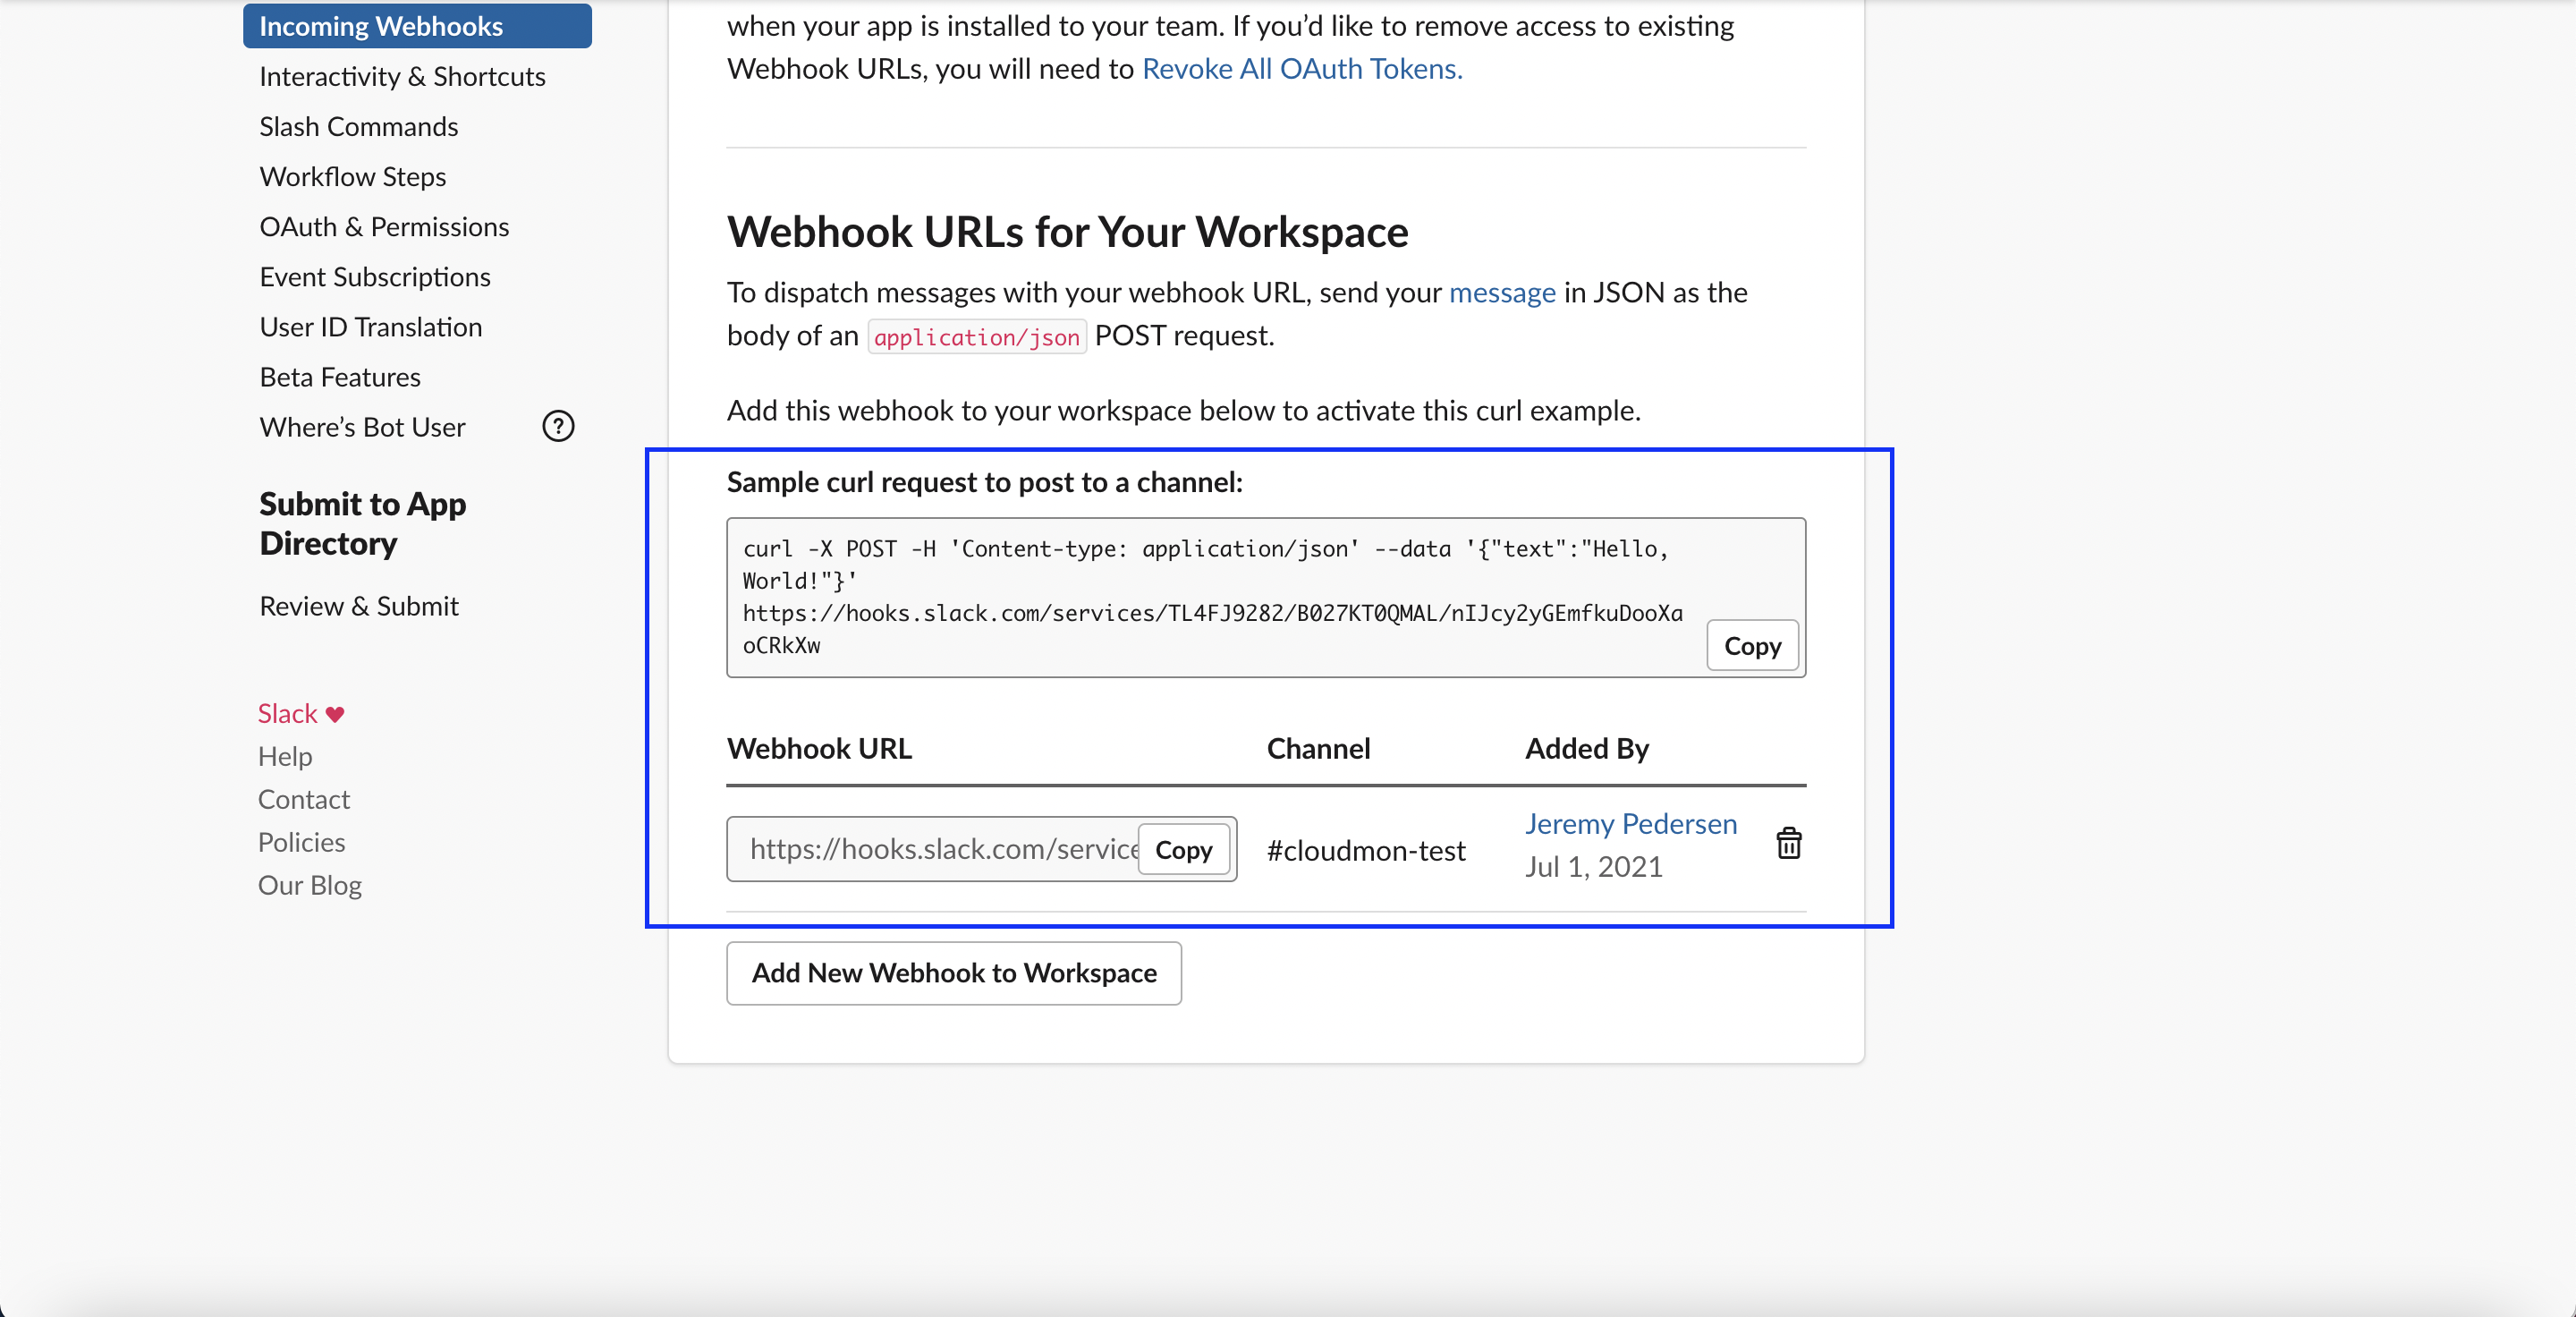
This will take us back to the webhook configuration page, where we should now see our webhook URL and a sample curl command that we can run to test things out:
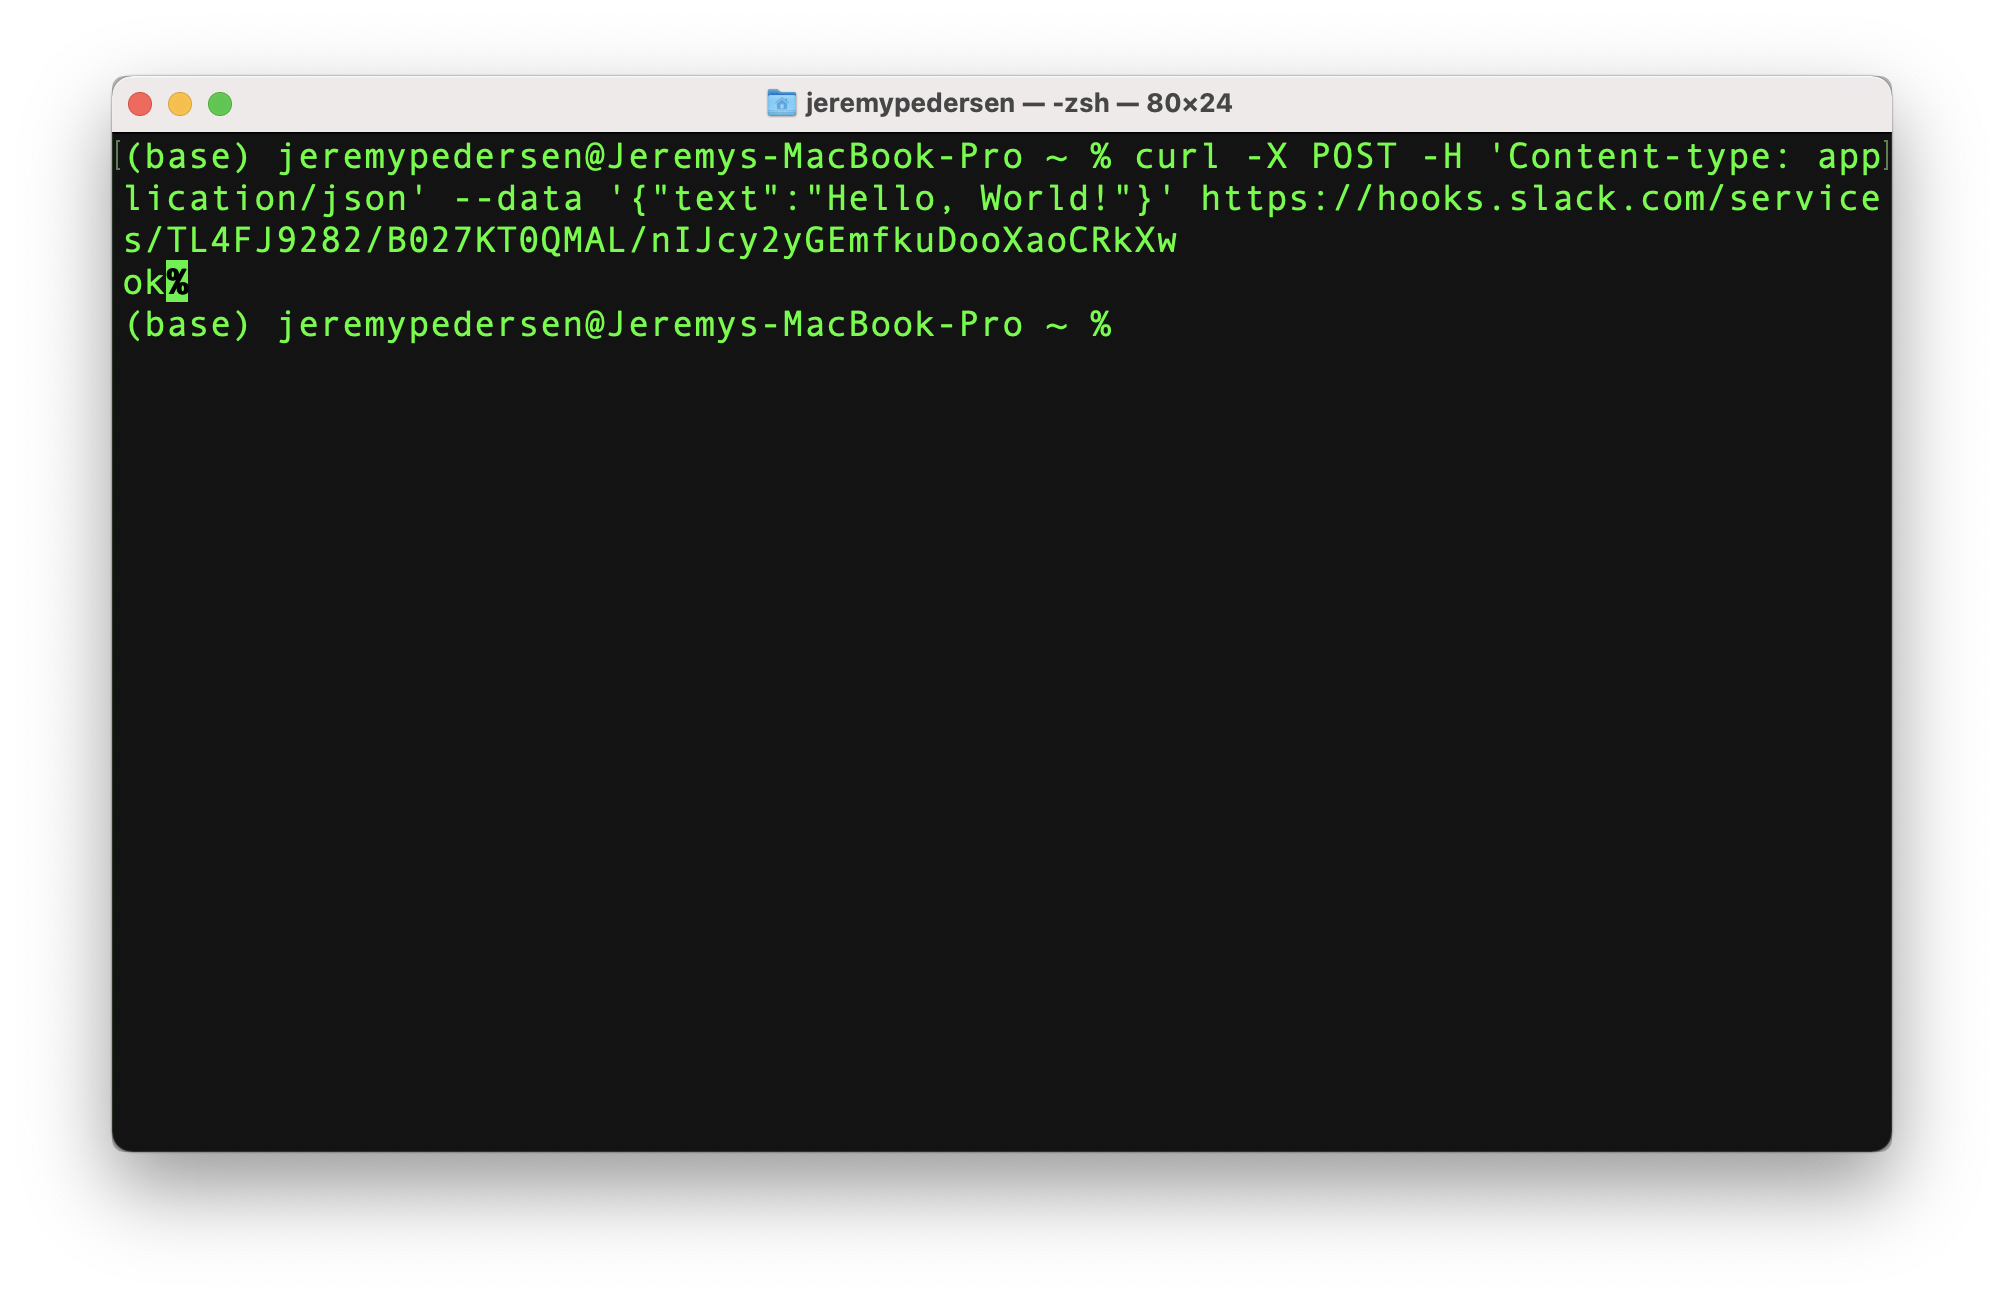
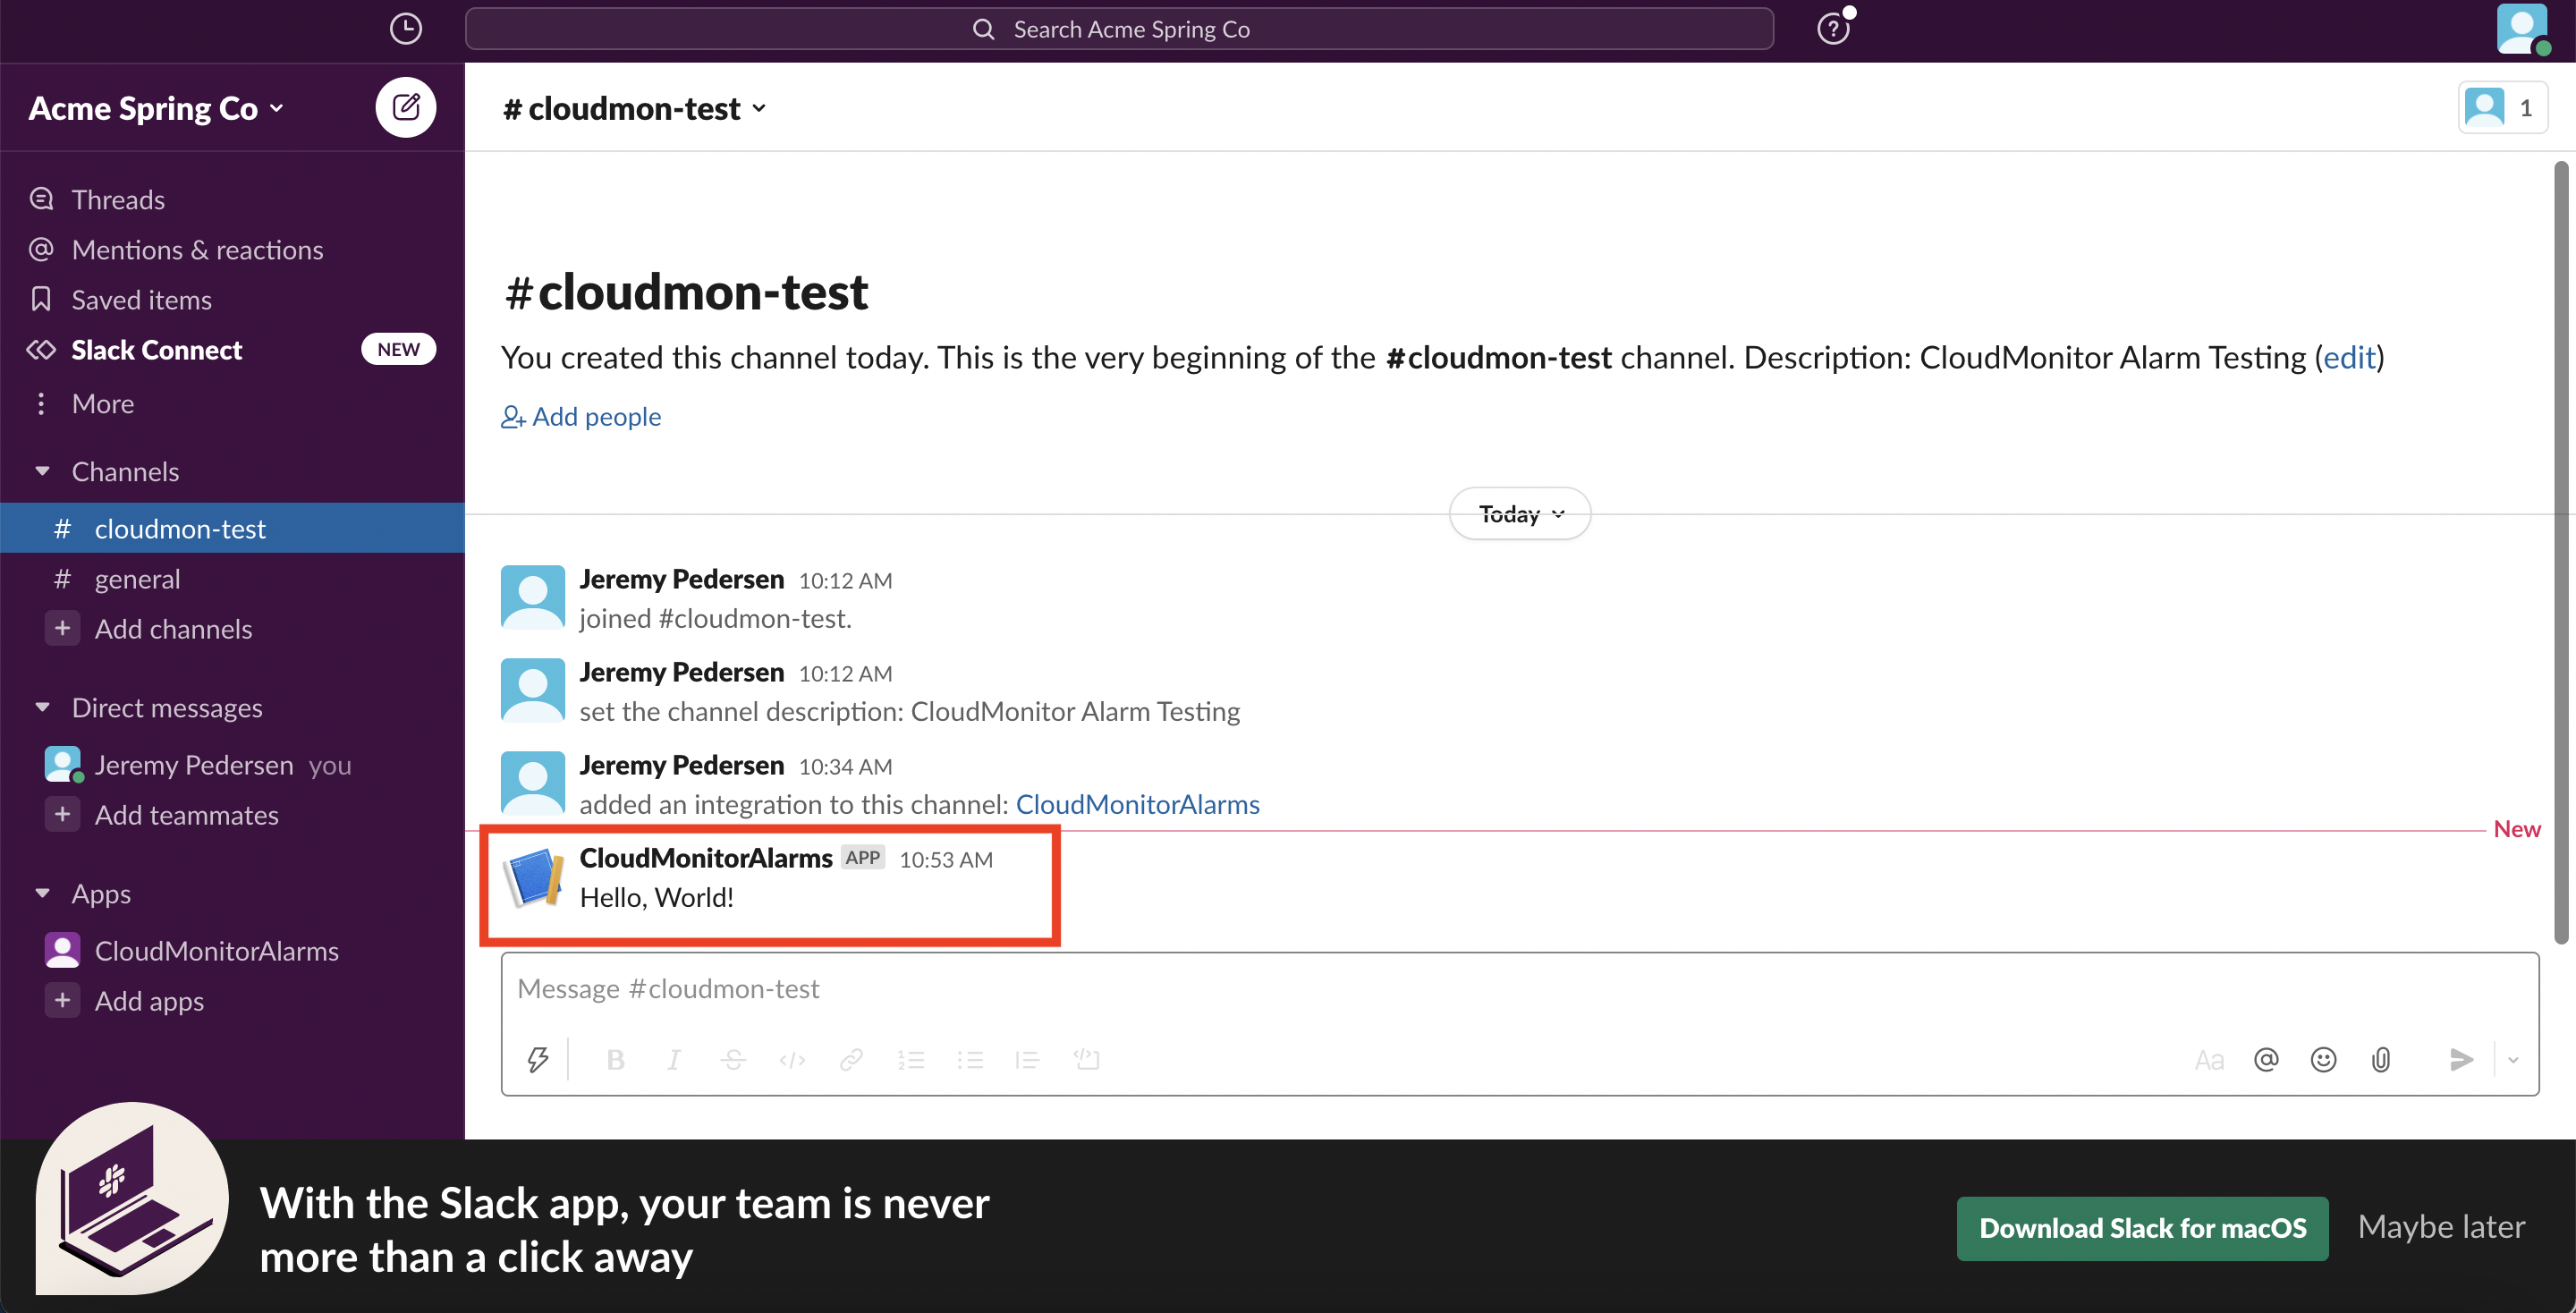
After running the curl command from a terminal window (or PowerShell on a windows machine), we should see "Hello, world" appear in our Slack Chat:
That's it! We're done with the slack side of the configuration. Now we can start setting up Function Compute. Be sure to save the Slack webhook URL, we'll need that later.
We now need to create Function Compute functions that can call our Slack webhook.
First, log in to your Alibaba Cloud account.
Next, set up a RAM user and create an Access Key that we can use to deploy our Function Compute Service and Functions. Note that the RAM user will need - at minimum - access permissions for the Function Compute service.
fun Command Line ToolYou can set up Function Compute Services and Functions using either the web console or the fun CLI tool. Although the web interface is easy to use, we'll use fun here since it makes fast, automated deployment easier.
Note that fun relies on Docker for some functionality such as fun build (used to create custom Funciton Compute runtimes). That's optional for this tutorial but I recommend you consider installing Docker anyway. It's an awesome tool.
Note that the fun command line tool is distributed using NPM so you'll need to have the node package manager (NPM) installed first, in order to install fun. If you are on a Mac, you might want to consider installing NPM through Homebrew, a handy Mac package manager. You'd do that with the brew install npm command.
After you install fun, you need to run fun configure and enter your Account ID, Access Key, Access Key Secret, and select a default Alibaba Cloud region for fun to work with. Details on configuring fun can be found on this page.
The Function Compute code we'll be using is already available on the Alibaba Cloud Academy GitHub page, in the function-compute repository.
You can clone the repository using git, like so:
git clone https://github.com/Alicloud-Academy/function-compute.gitOf, if you prefer to avoid the command line, simply download the repository as a .zip file.
Inside the function-compute repository is a folder called slack-integrator. Inside that folder are two more subfolders, cm-event-fun and cm-metric-fun. These folders both contain files called index.py: this is the Python 3 code that makes up the body of our two Function Compute functions.
We need to open both of these files up and edit them to include the Slack webhook. Both .py files contain a section of code like this:
end_url = 'your_slack_url_here'
headers = {'Content-type': 'application/json'}
We want to replace the value of end_url with the Slack webhook from earlier, then save the changes to both index.py files.
Open up a terminal and navigate to the slack-integrator folder inside the function-compute repository.
From there, simply run fun deploy to deploy our new Service and its two Functions:
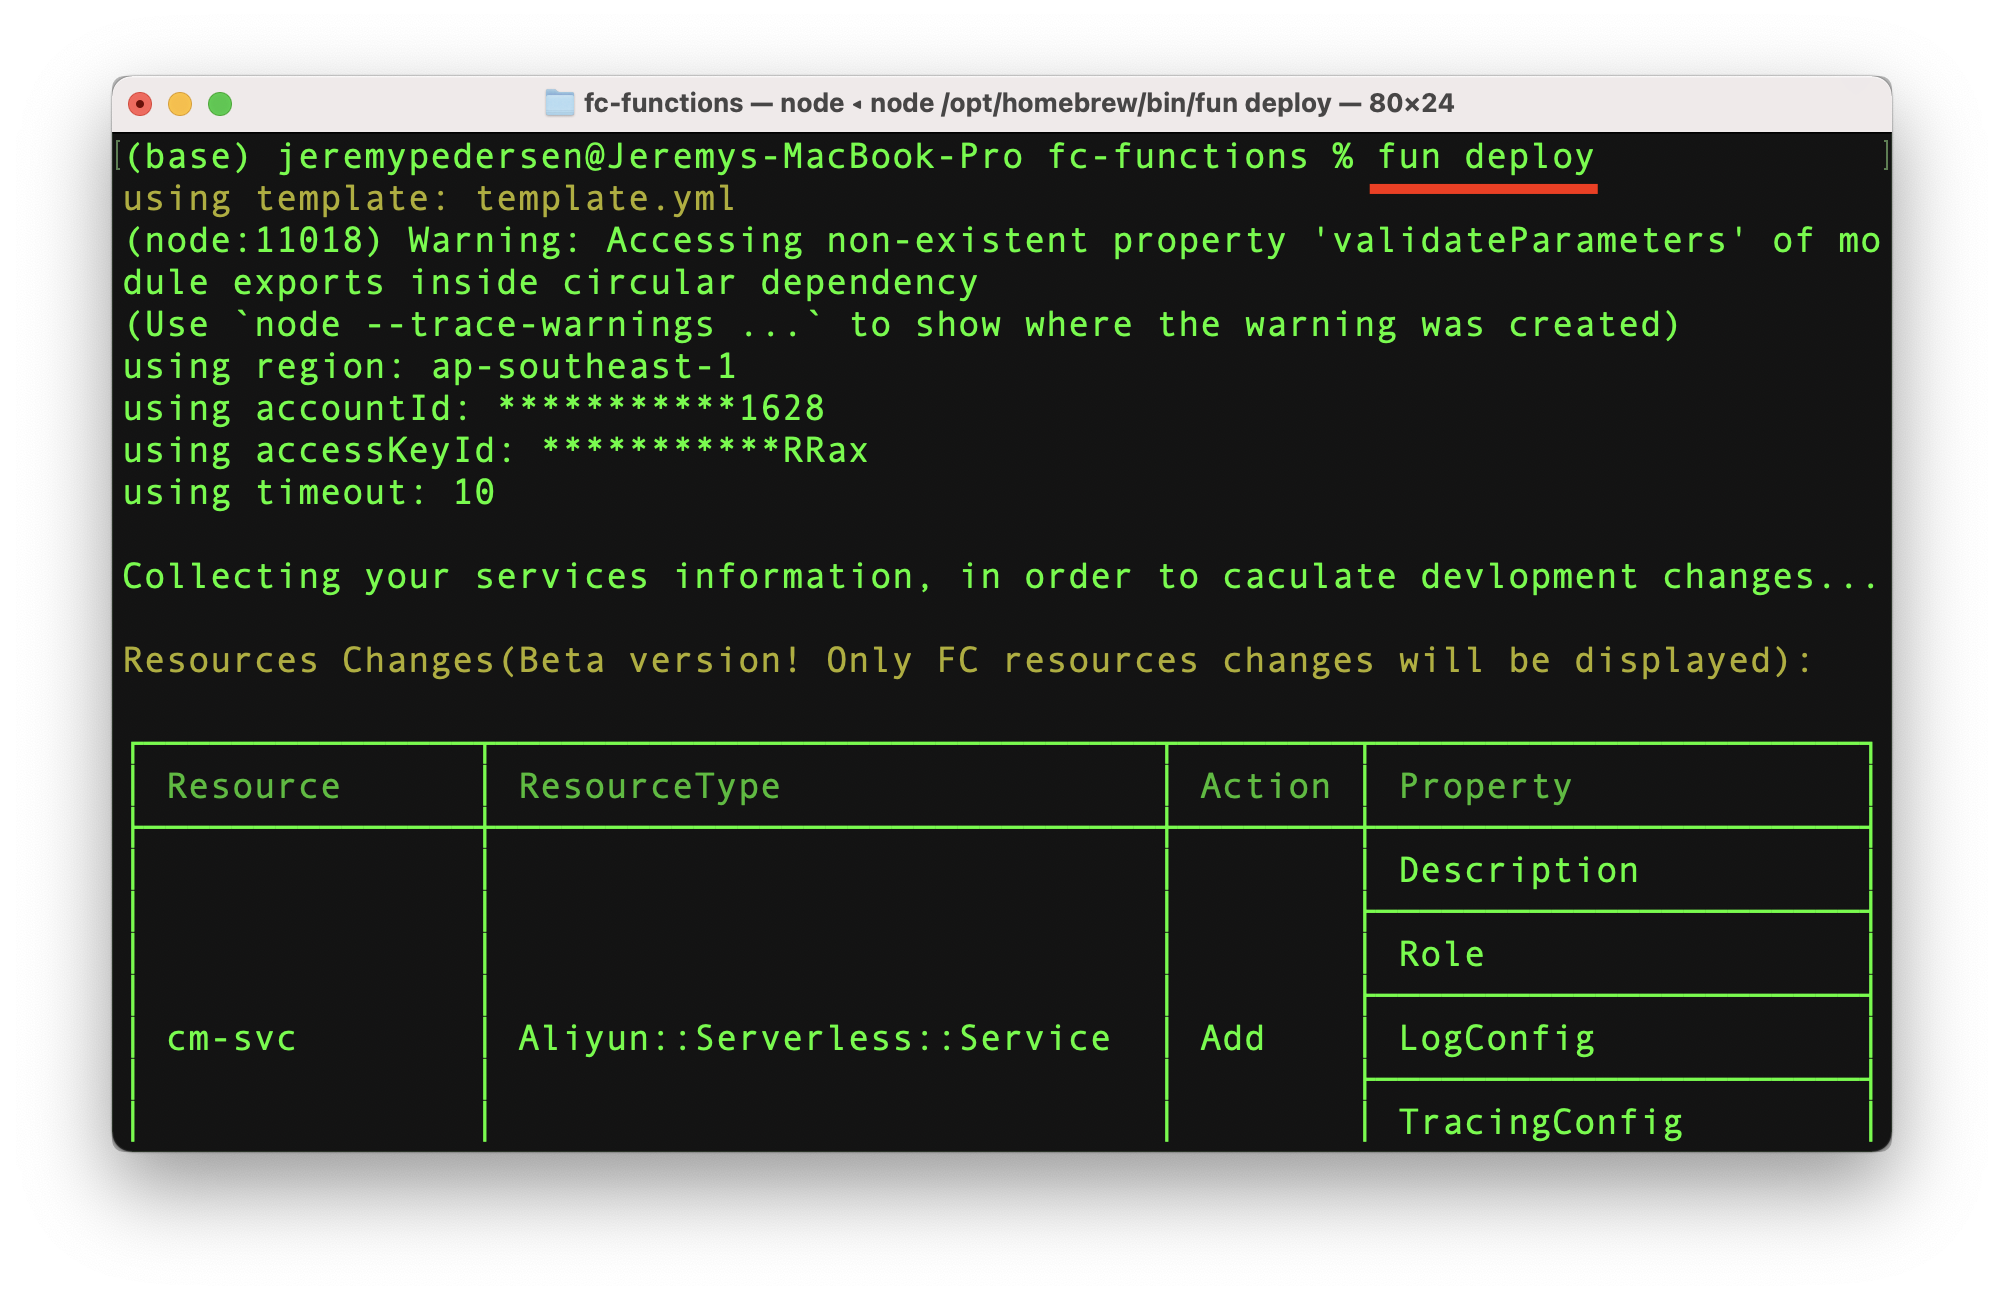
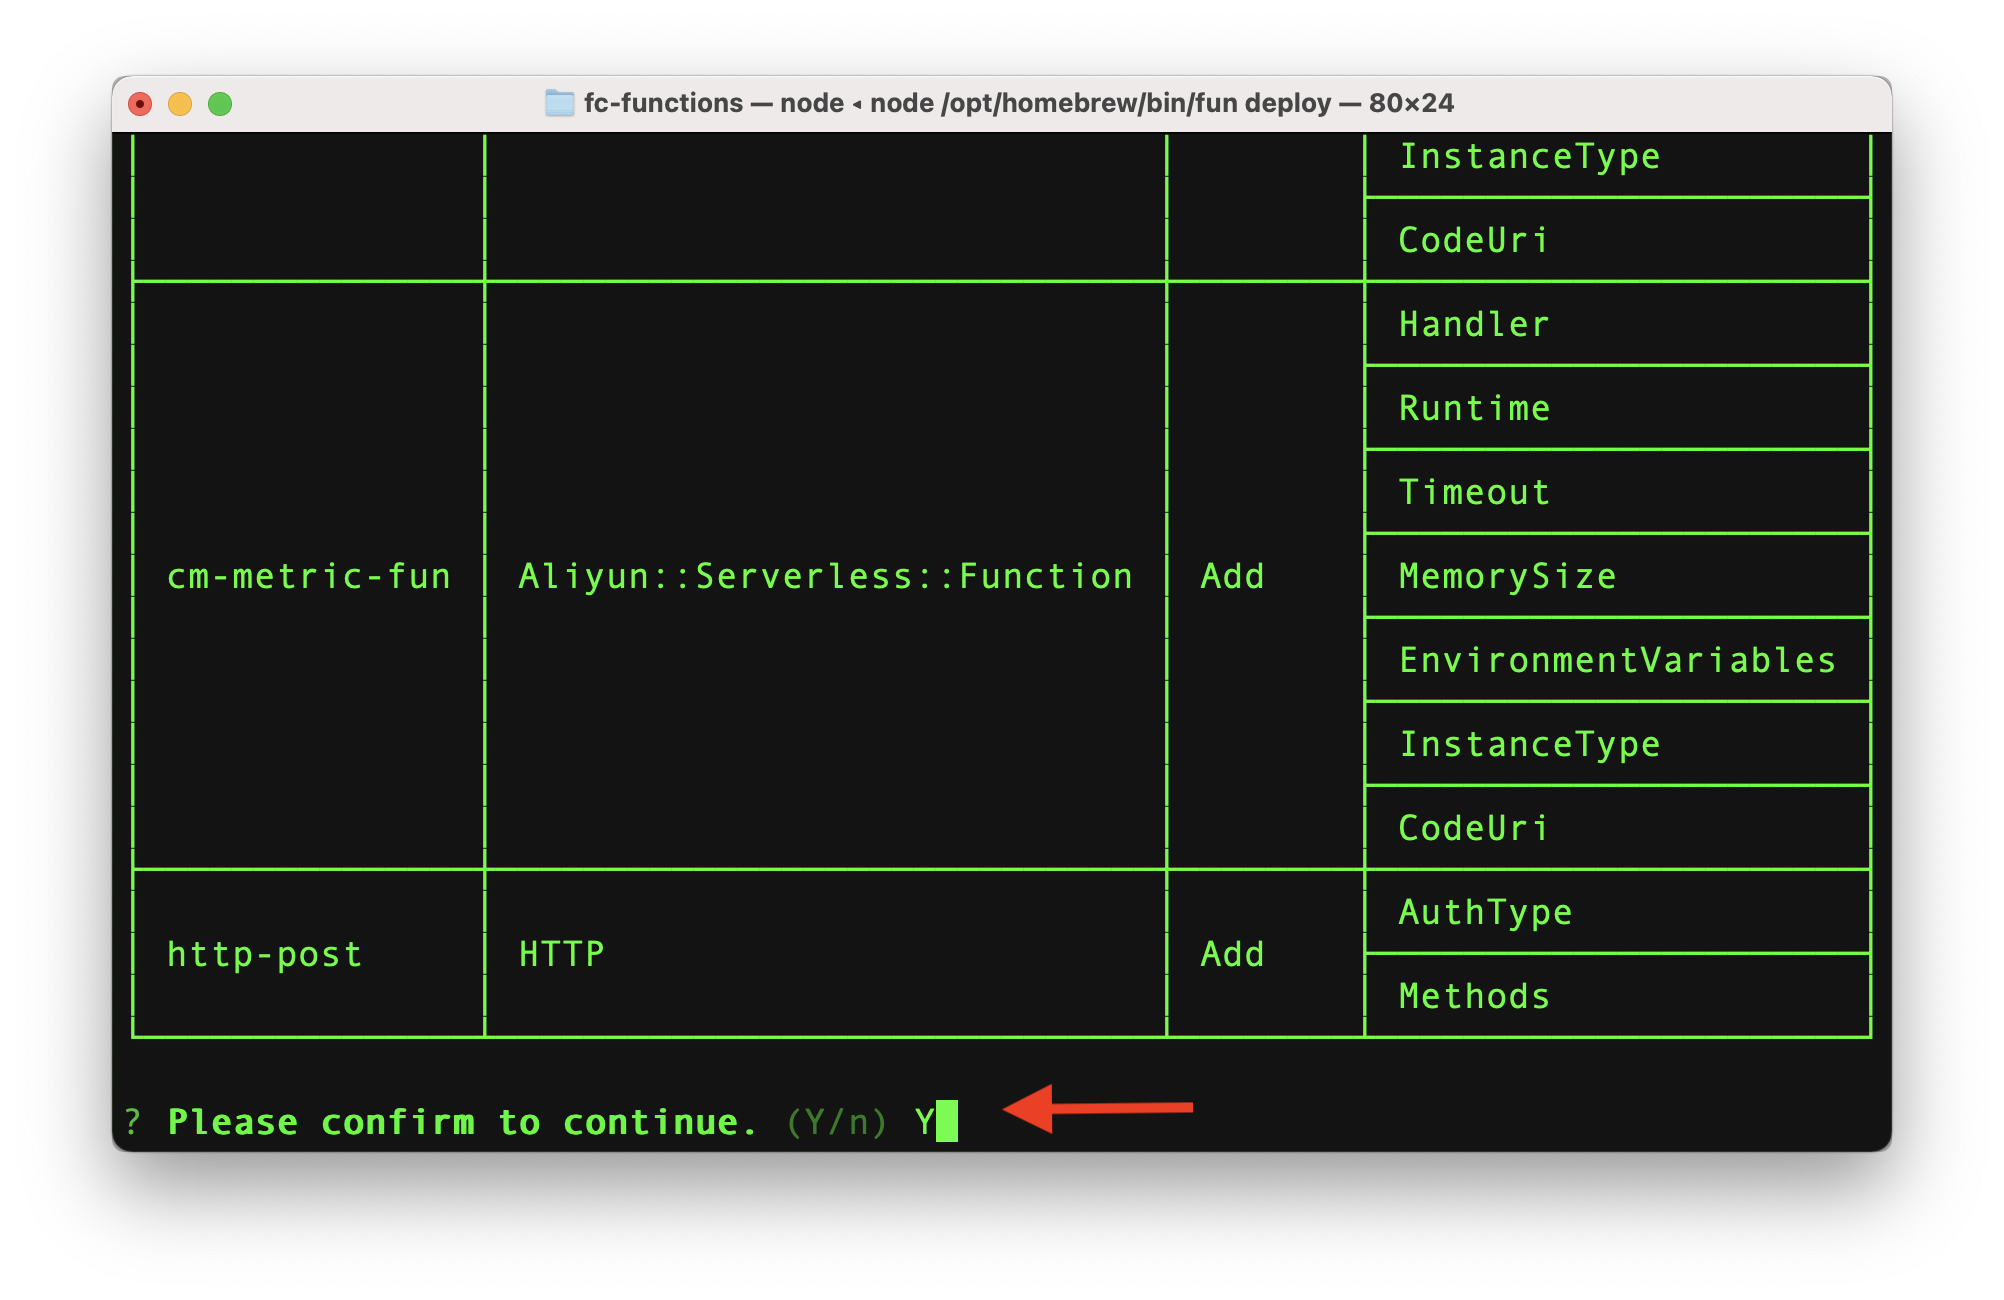
You'll have to enter "Y" to confirm that you want to complete the deployment:
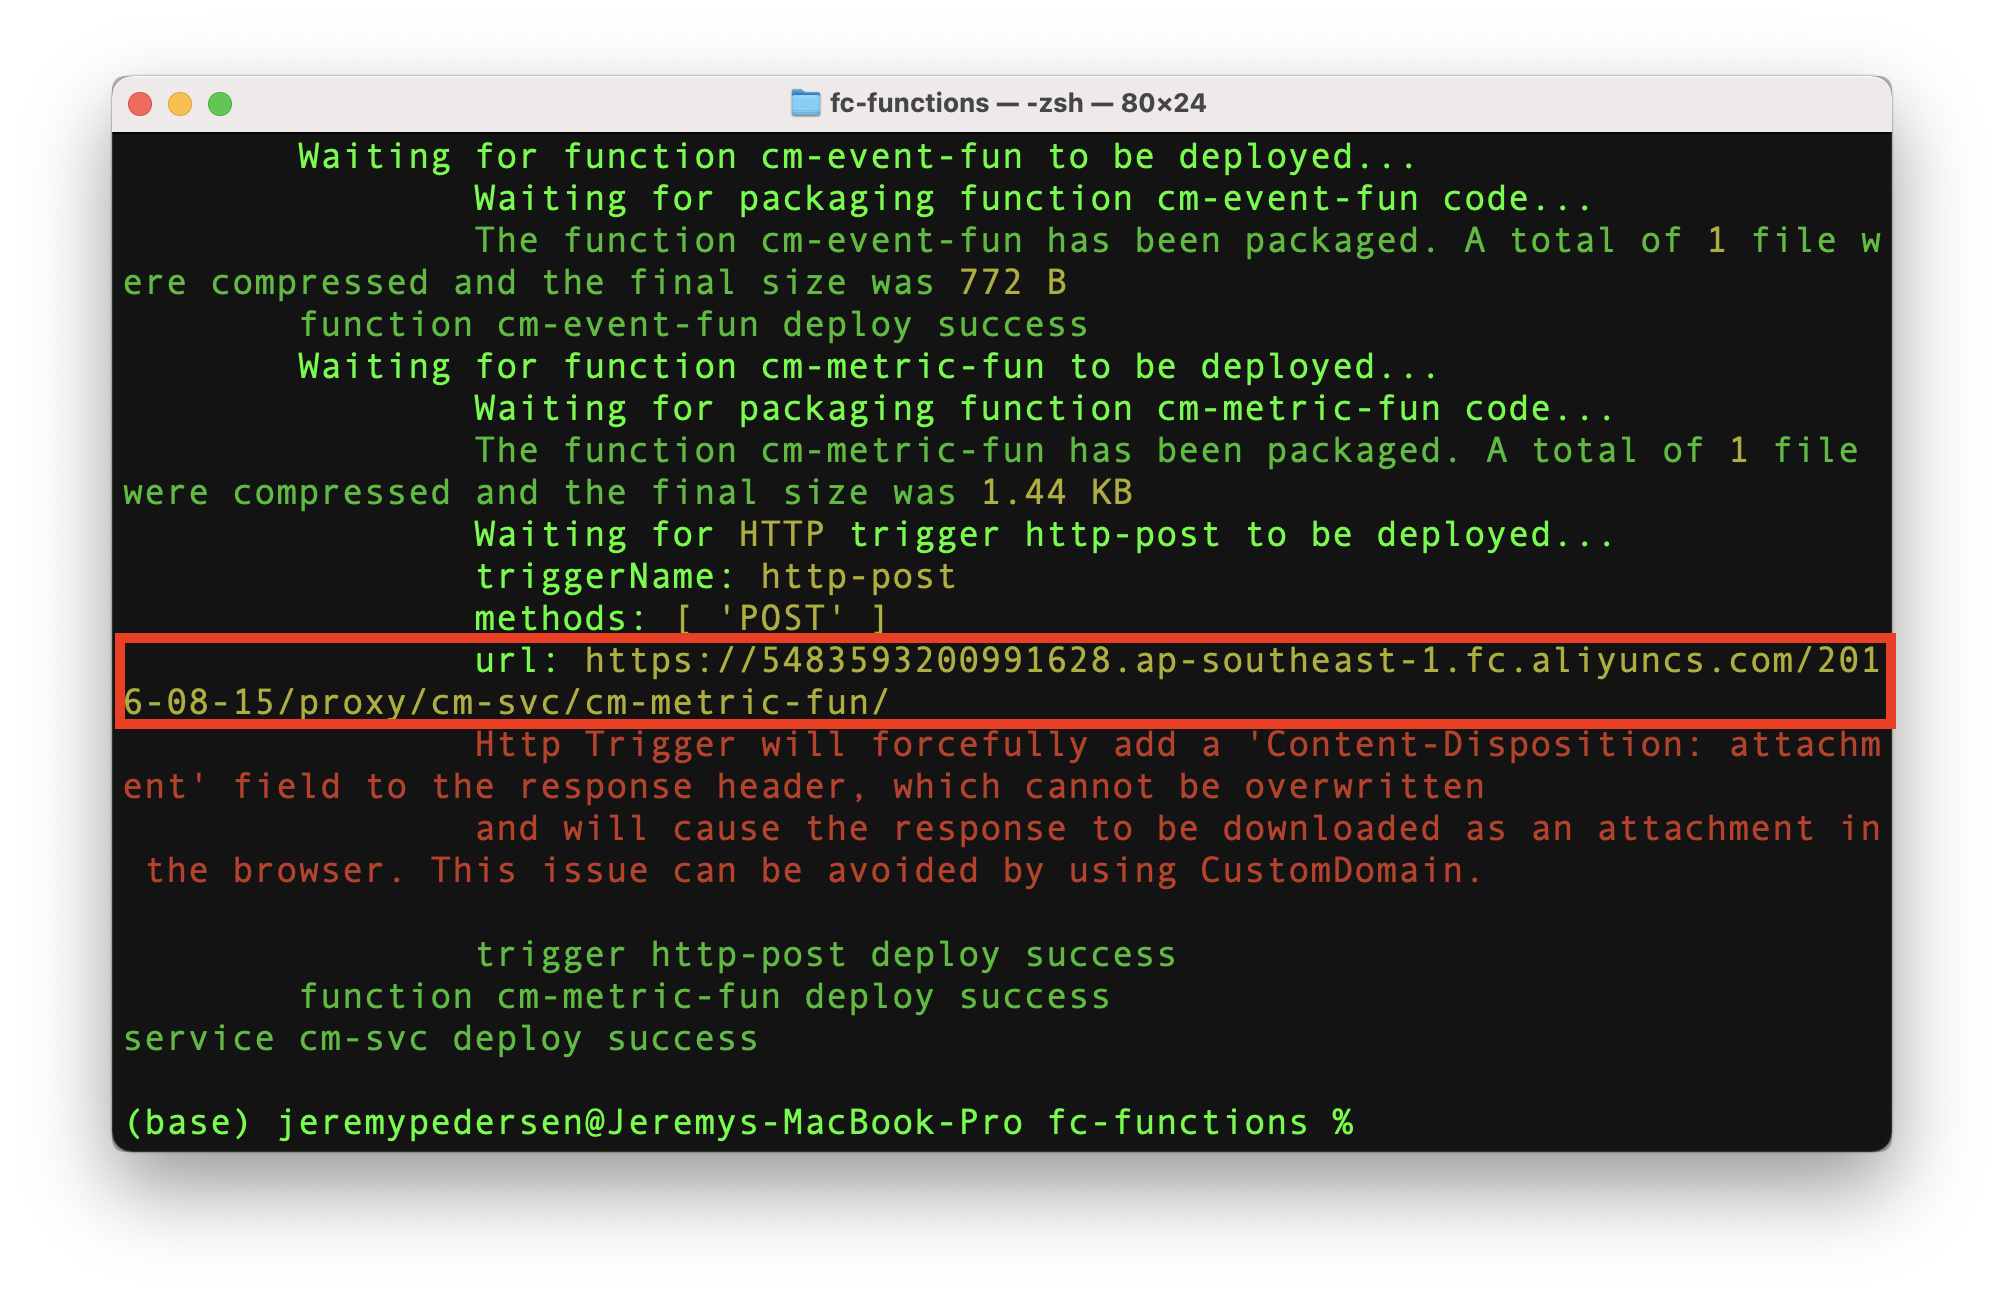
One of the two functions we deployed (cm-metric-fun) has an HTTP POST trigger configured. The output from fun deploy should include the trigger URL for that function. Make a note of this URL:
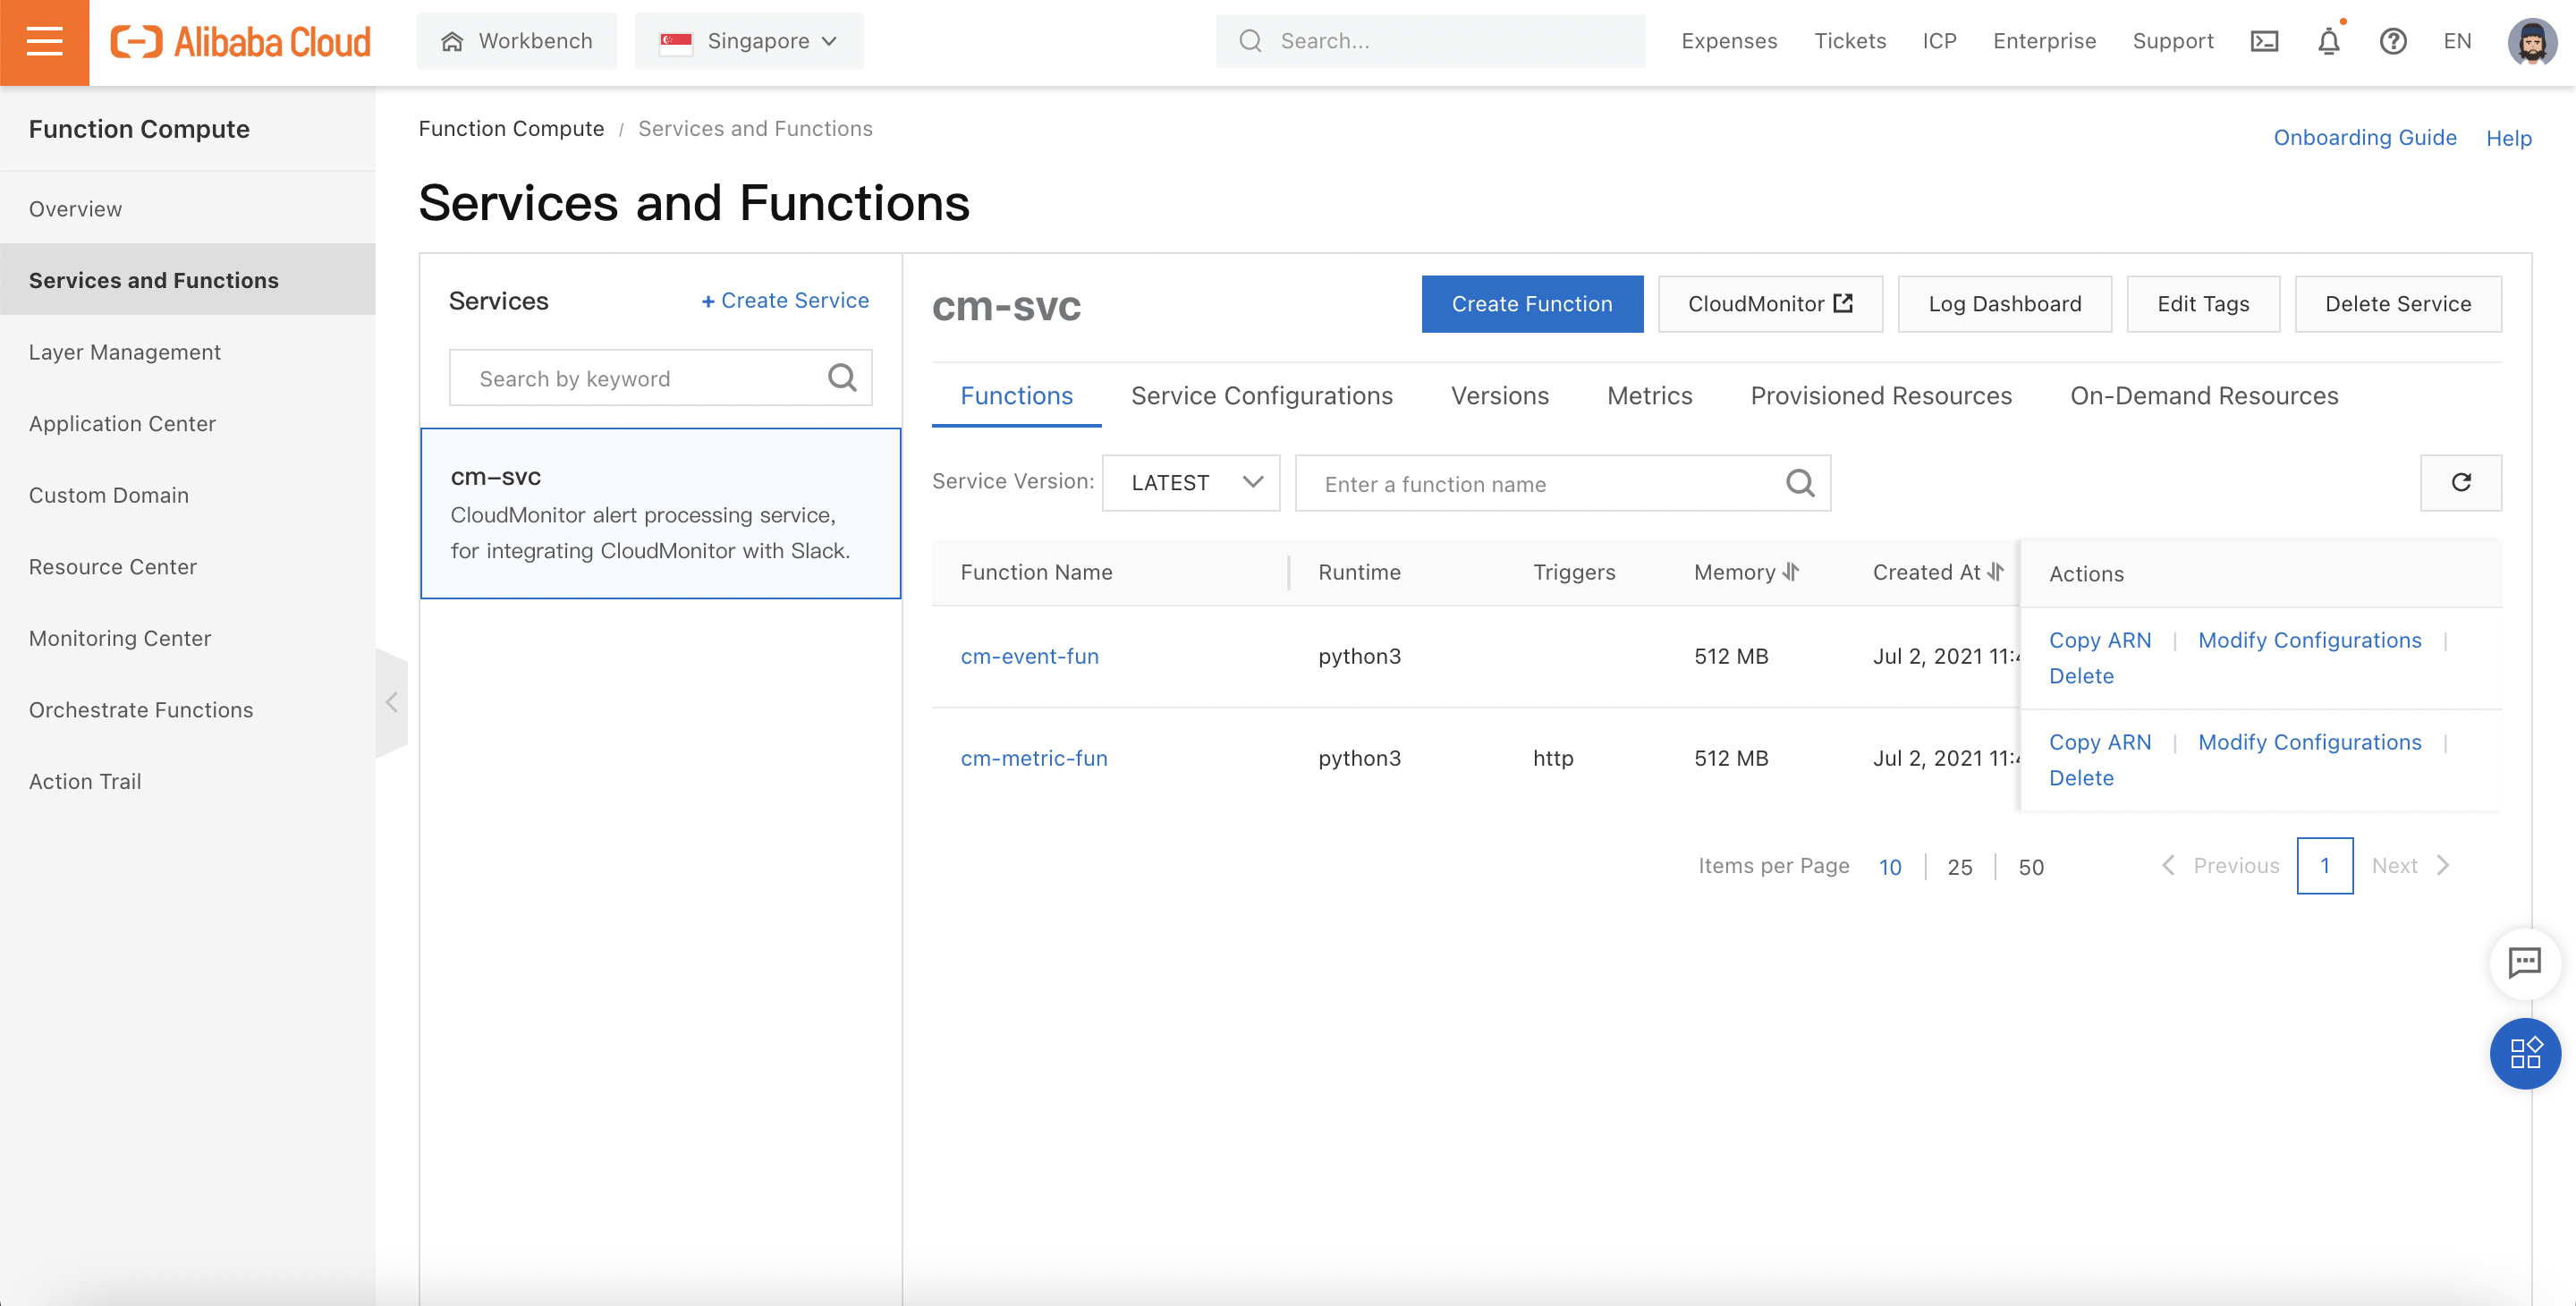
If we look in the Function Compute web console, we should see our new Function Compute Service and its two Functions:
Now, we can set up some Event-based and Metric-based Alarms in CloudMonitor, to test out our FC functions with!
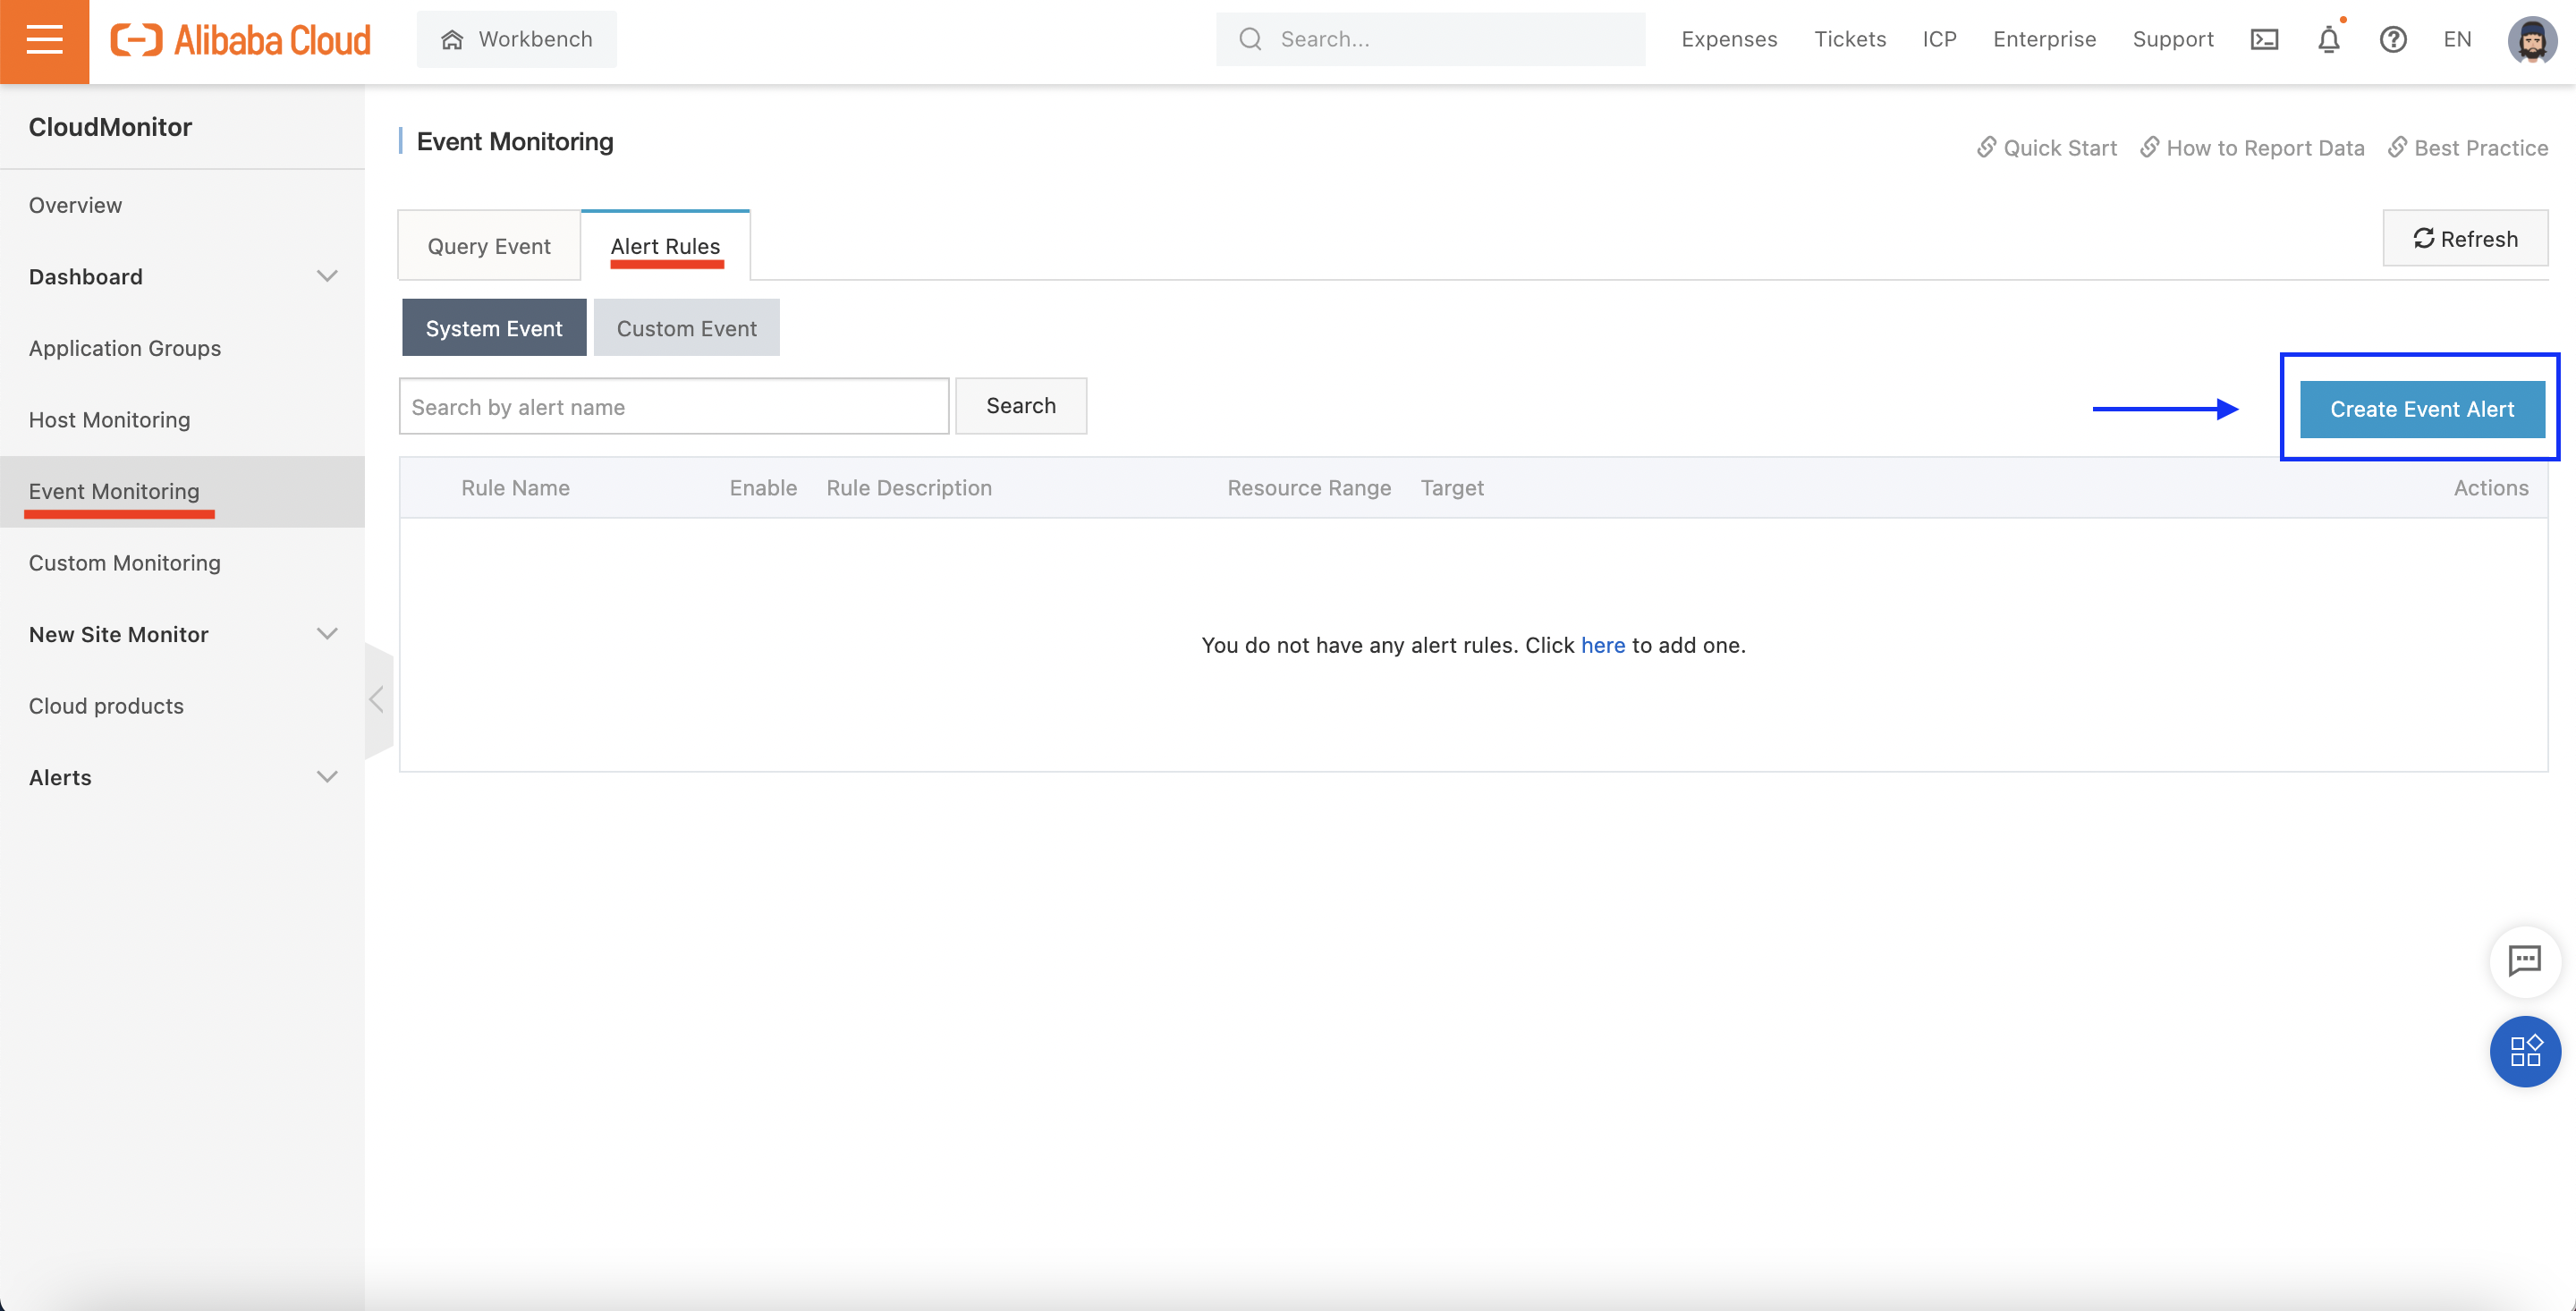
First, let's go to Event Monitoring, open the Alert Rules tab, and click on Create Event Alert:
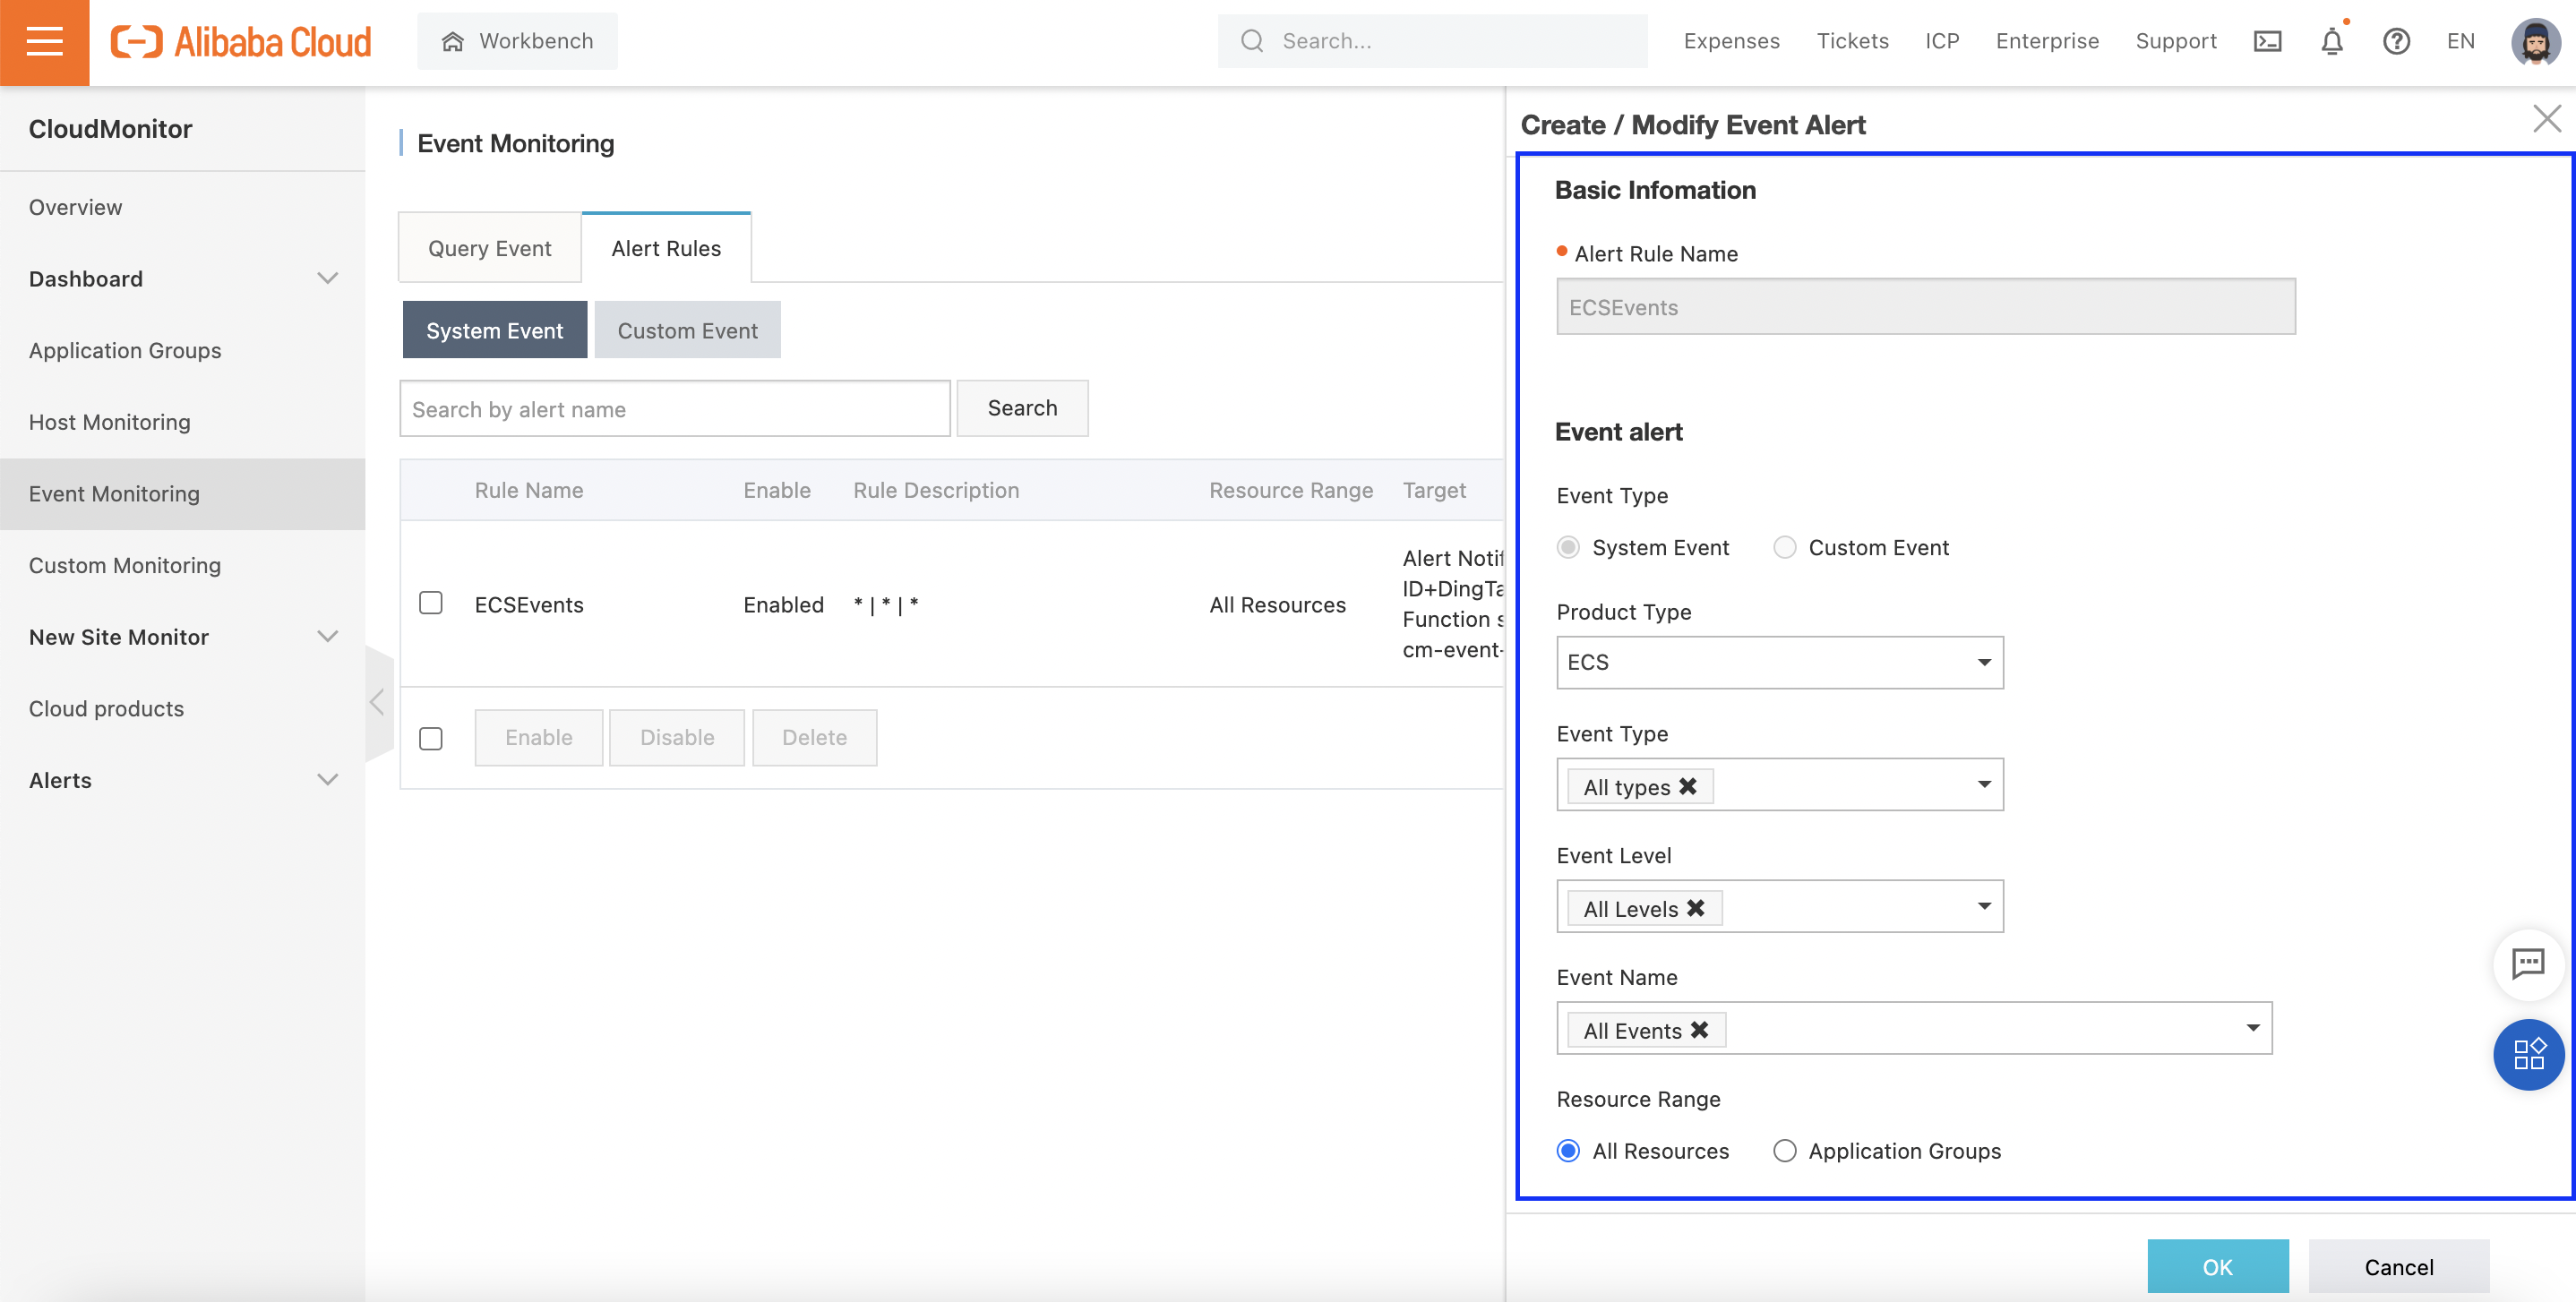
Set up the rule to trigger for any ECS-related event:
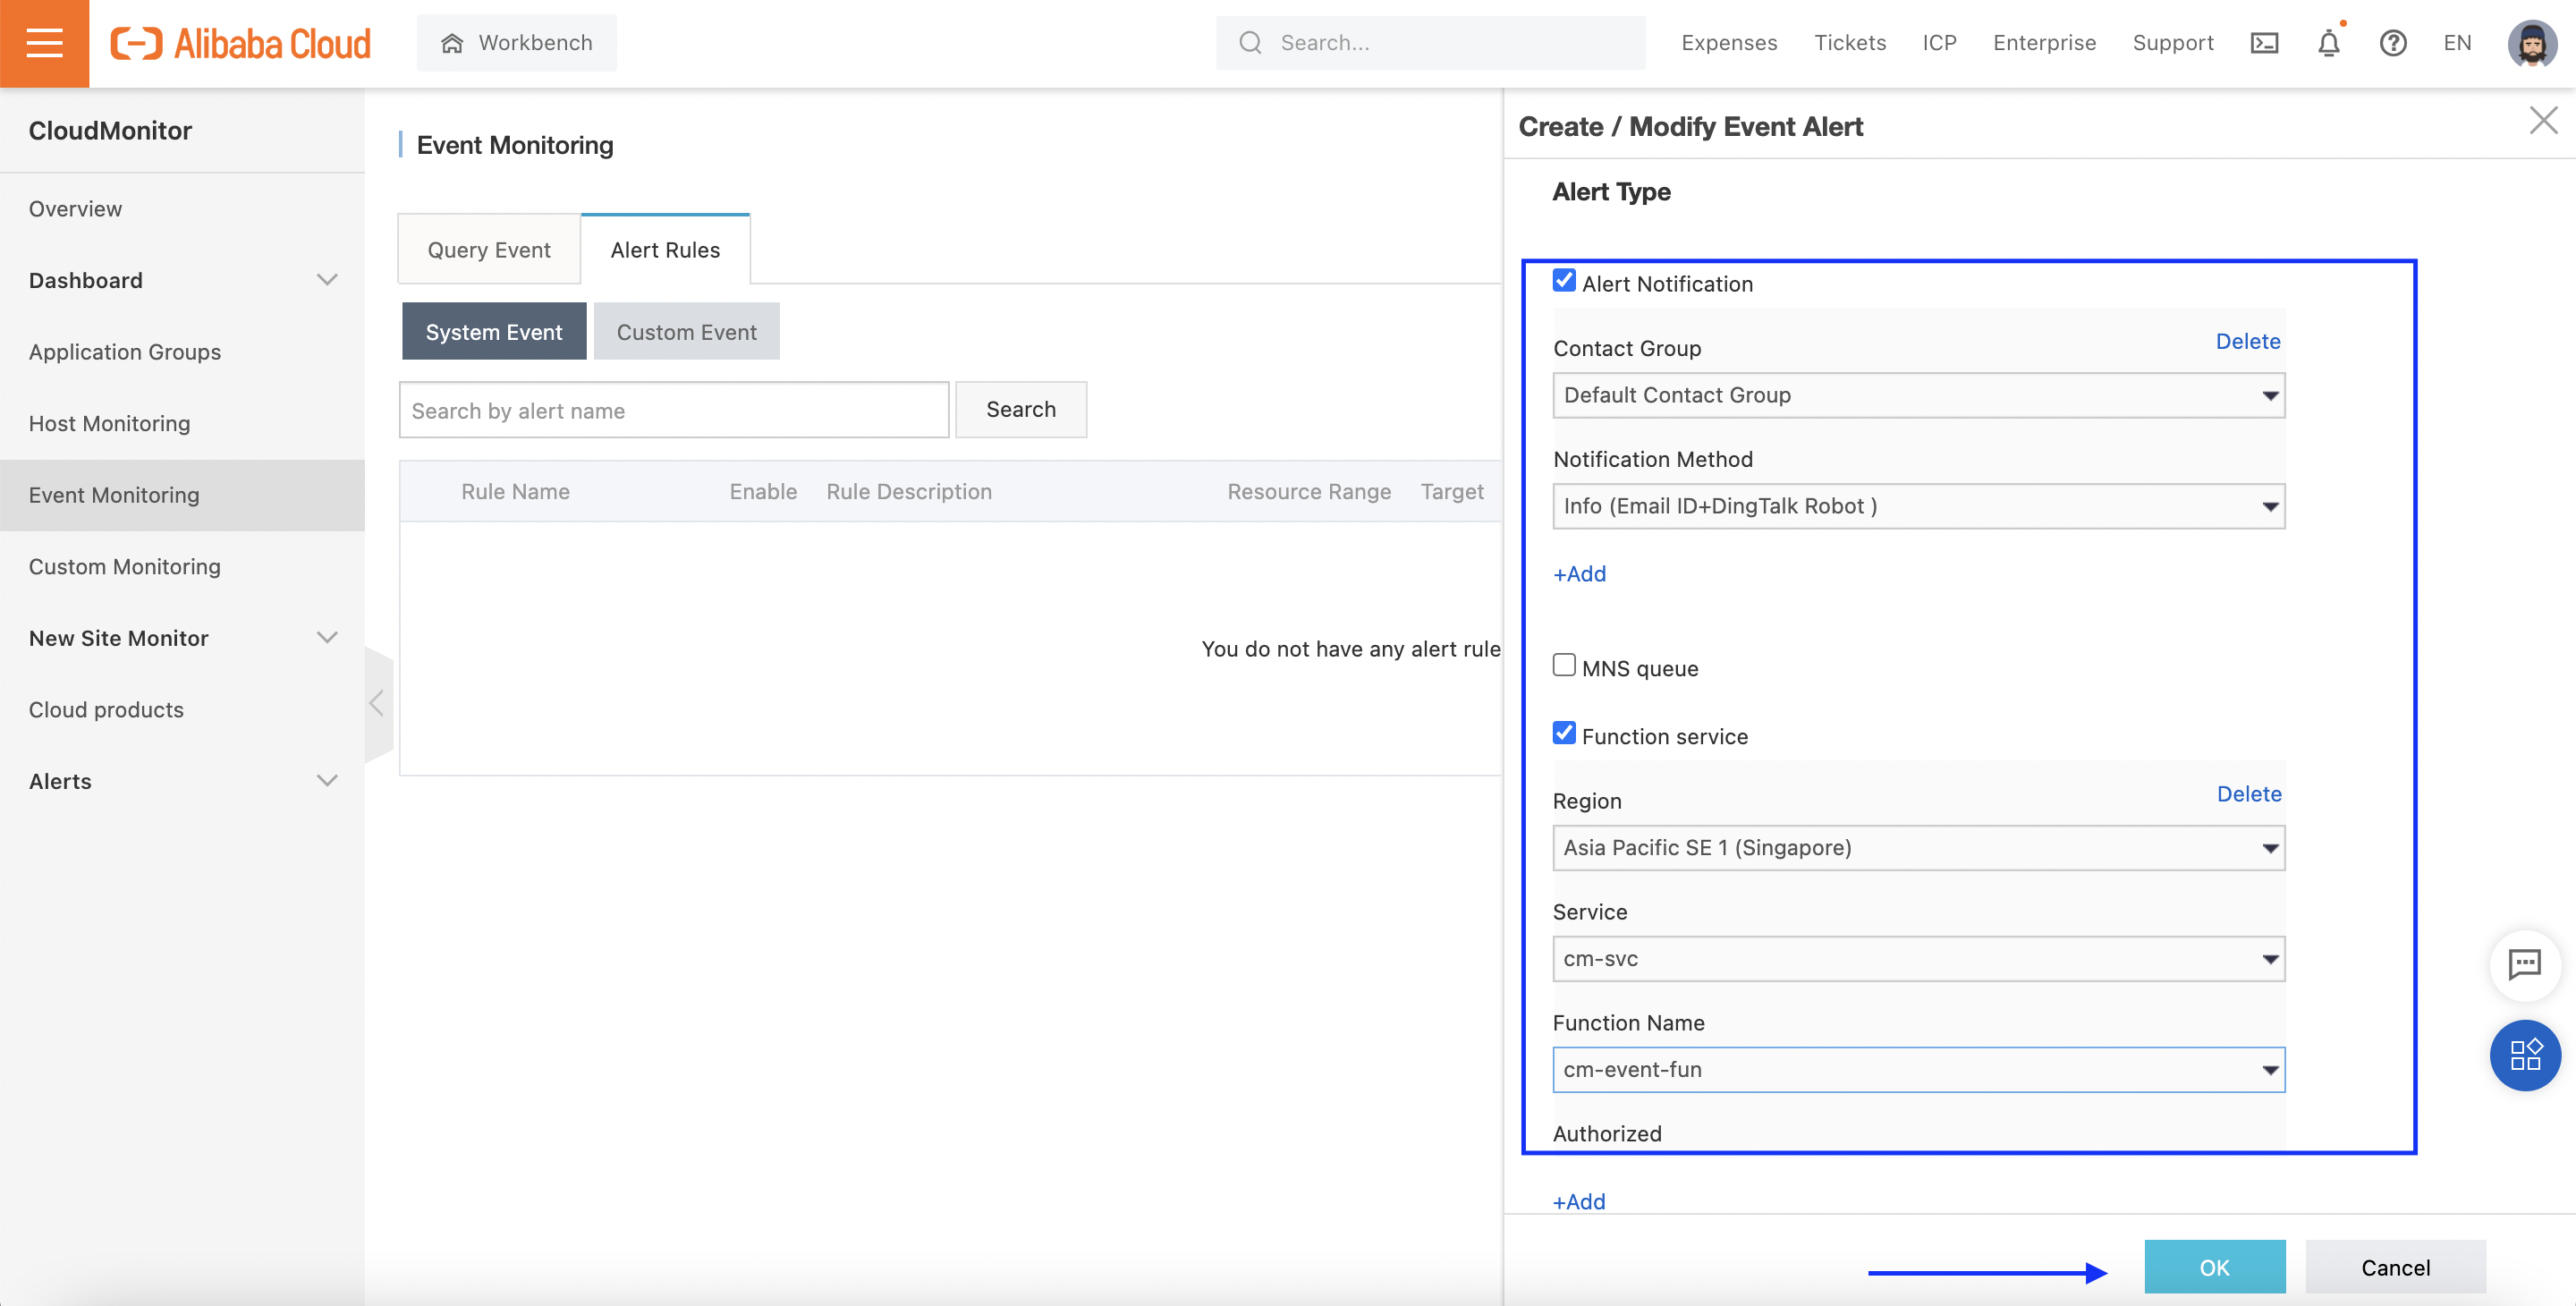
Scroll down and configure the rule to trigger our cm-event-fun FC function:
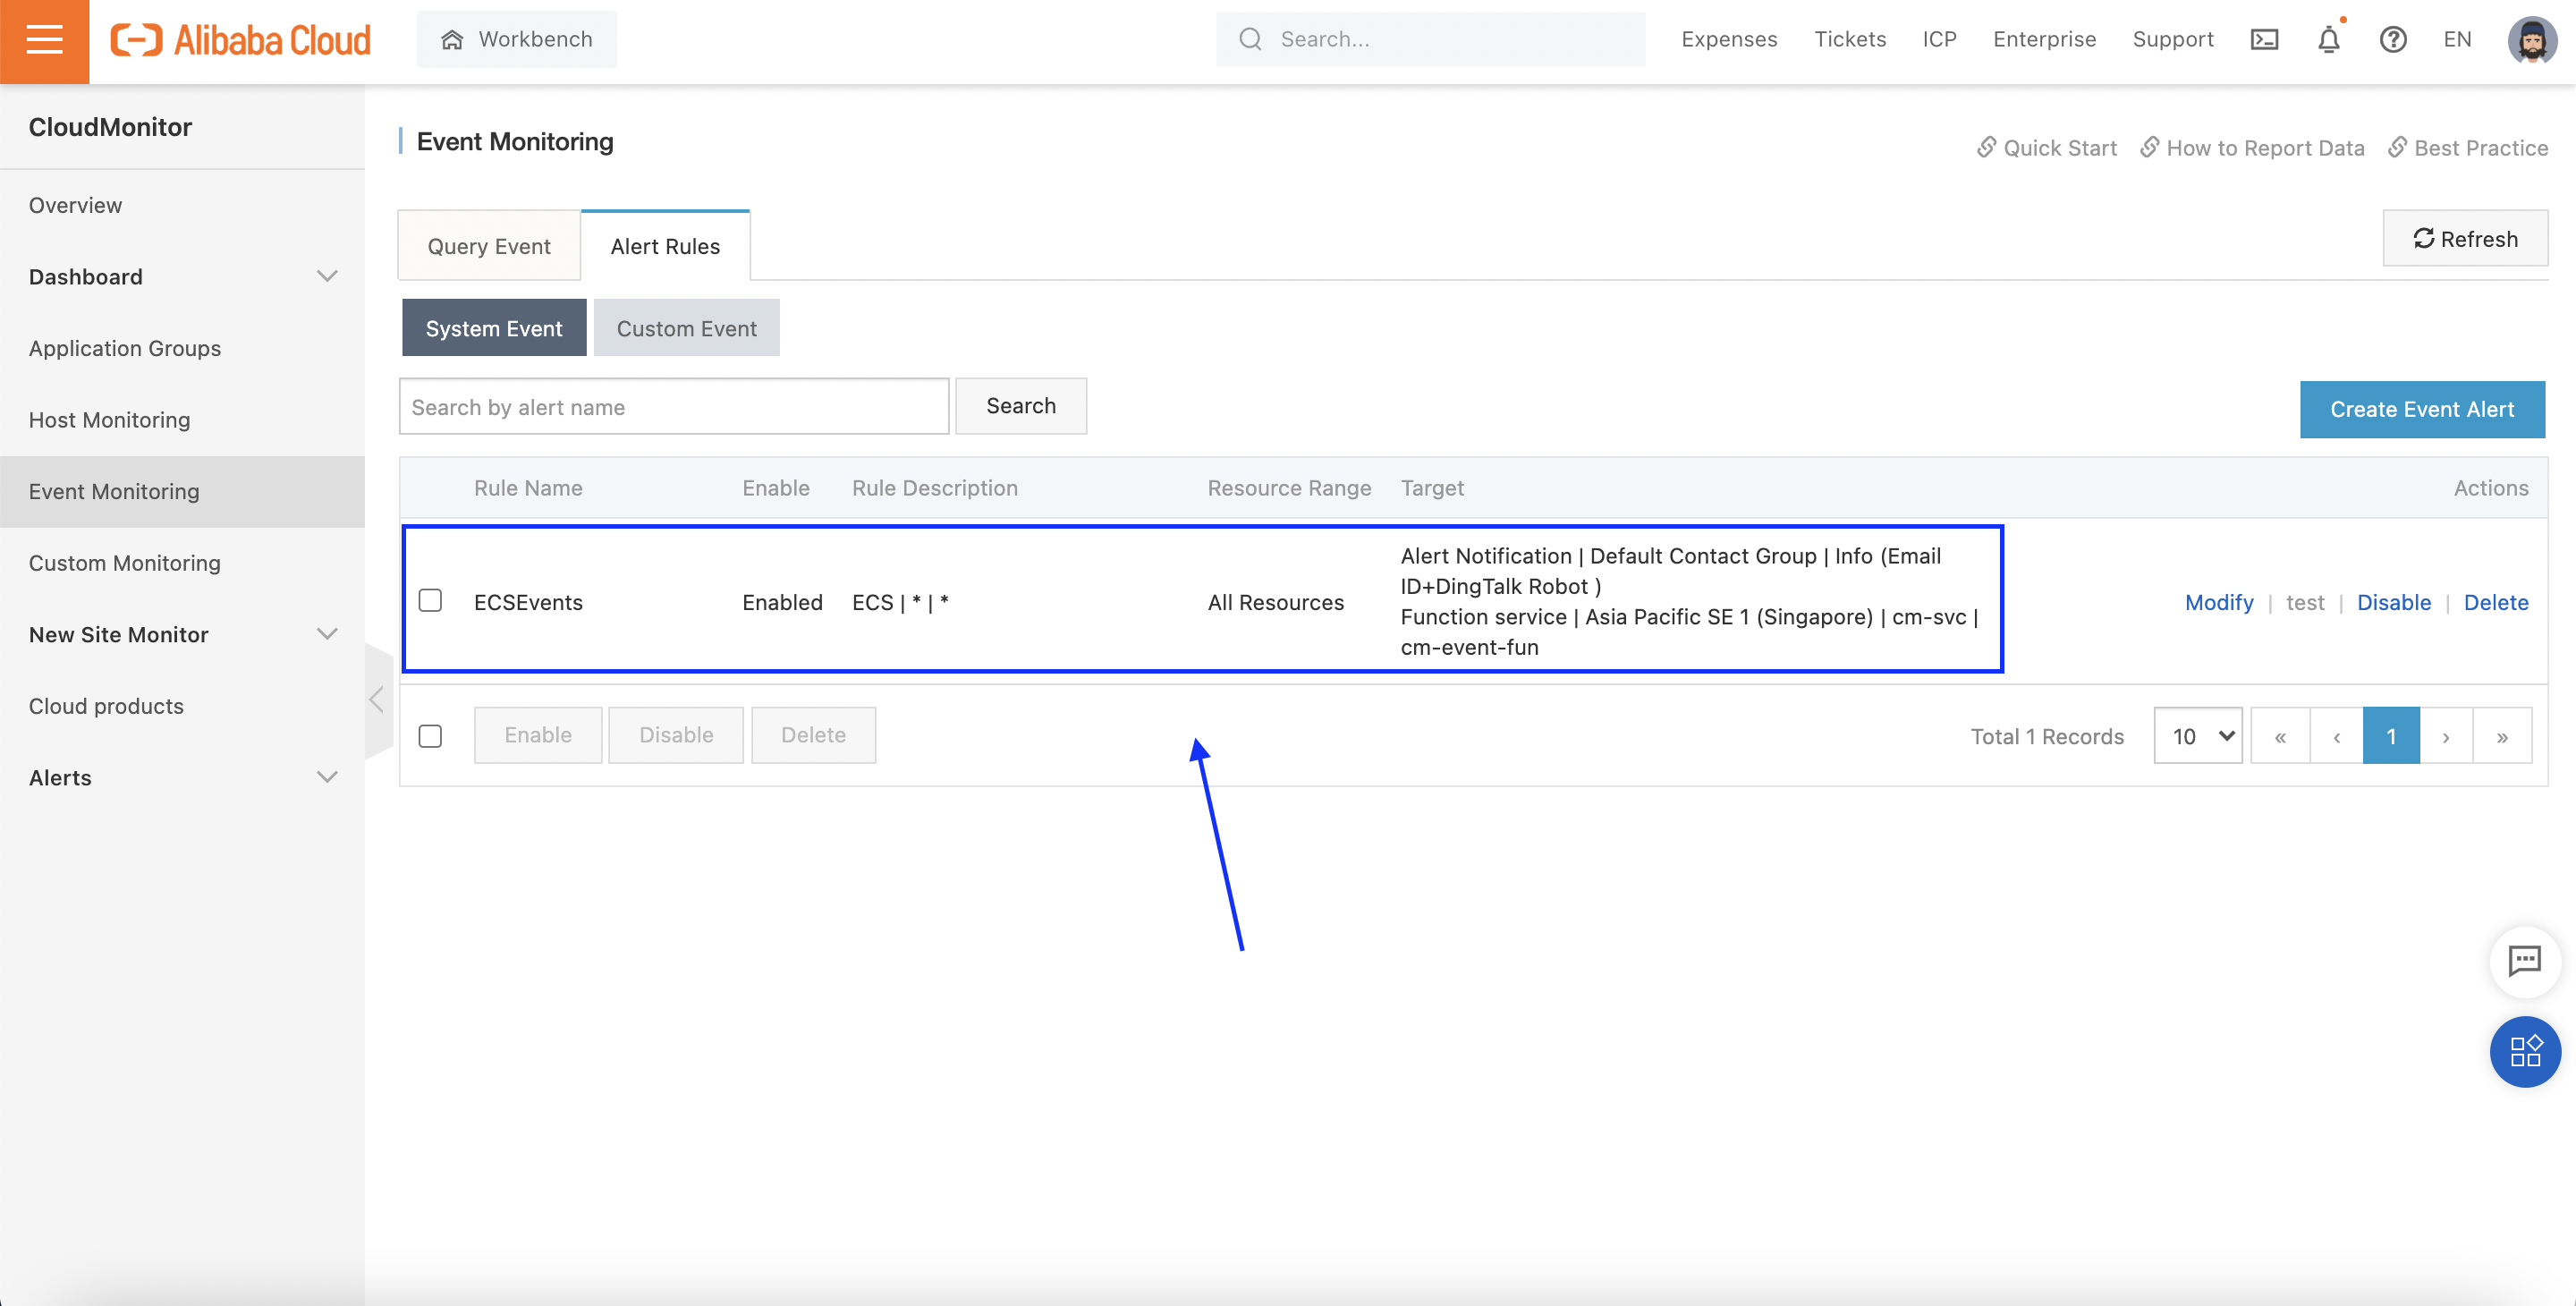
If everything worked, we should see an entry like this in the Rules window:
That's it!
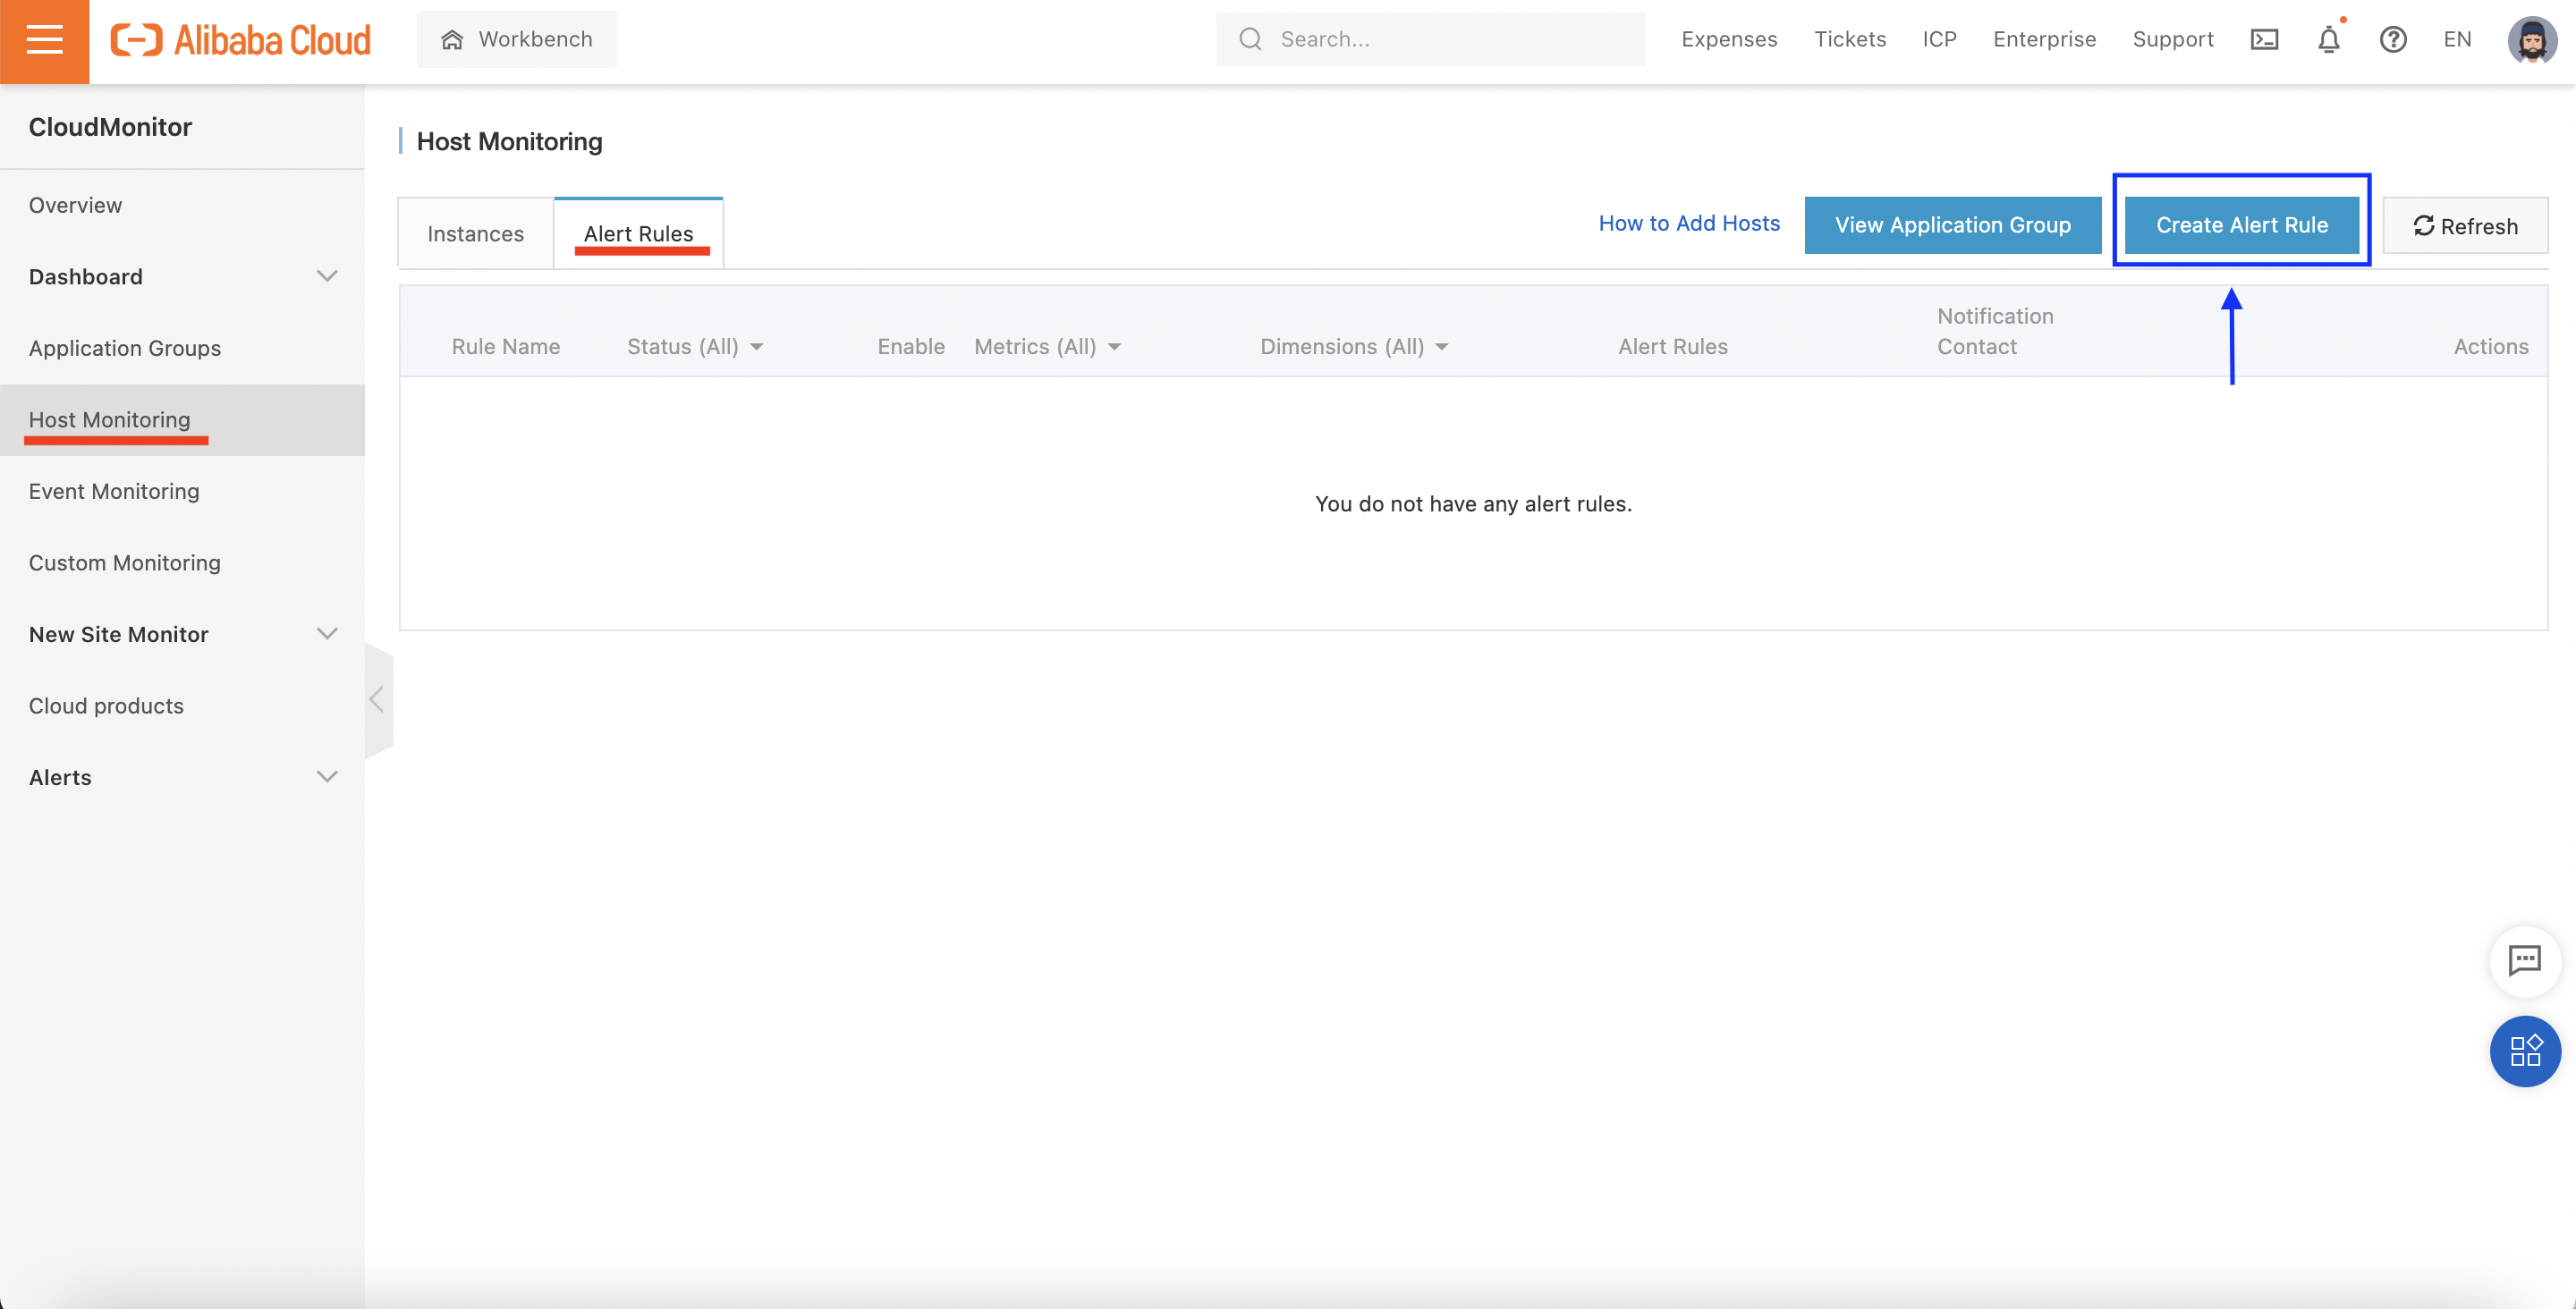
From the left-hand menu in the CloudMonitor console, click on Host Monitoring, and then Alert Rules. FInally, click on Create Alert Rule:
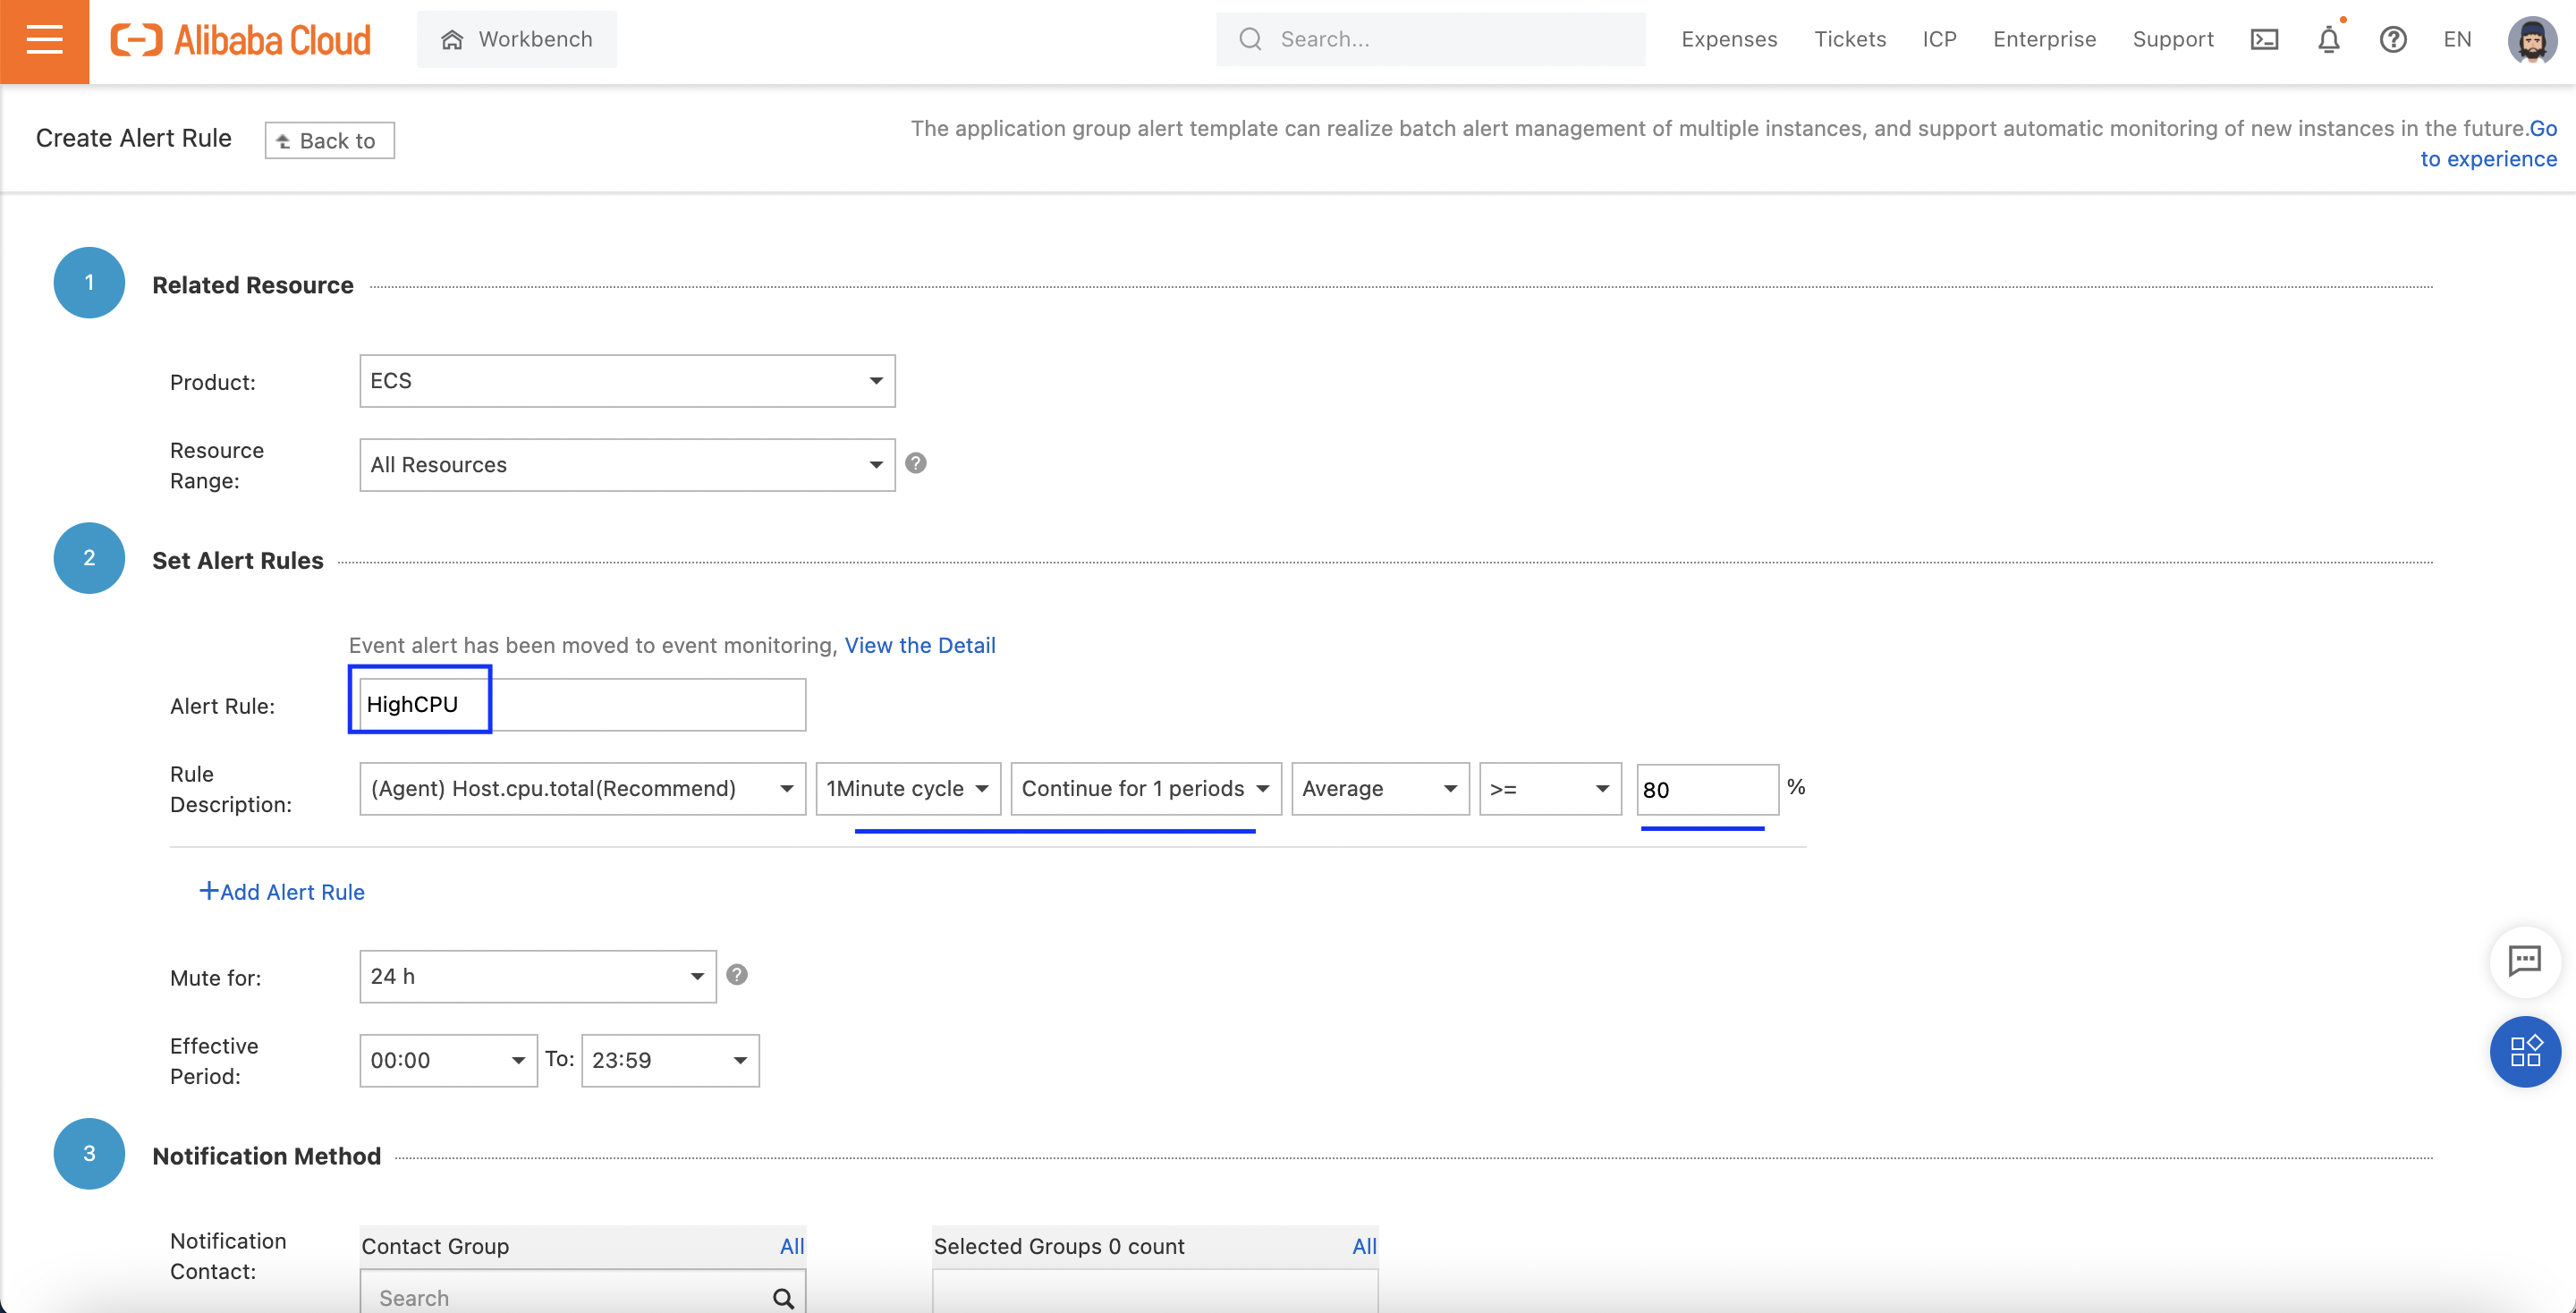
Next, configure the alarm to trigger whenever any ECS instance's CPU usage goes above 80% for more than one minute, then scroll down and paste the HTTP URL for our cm-metric-fun function into the URL callback textbox:
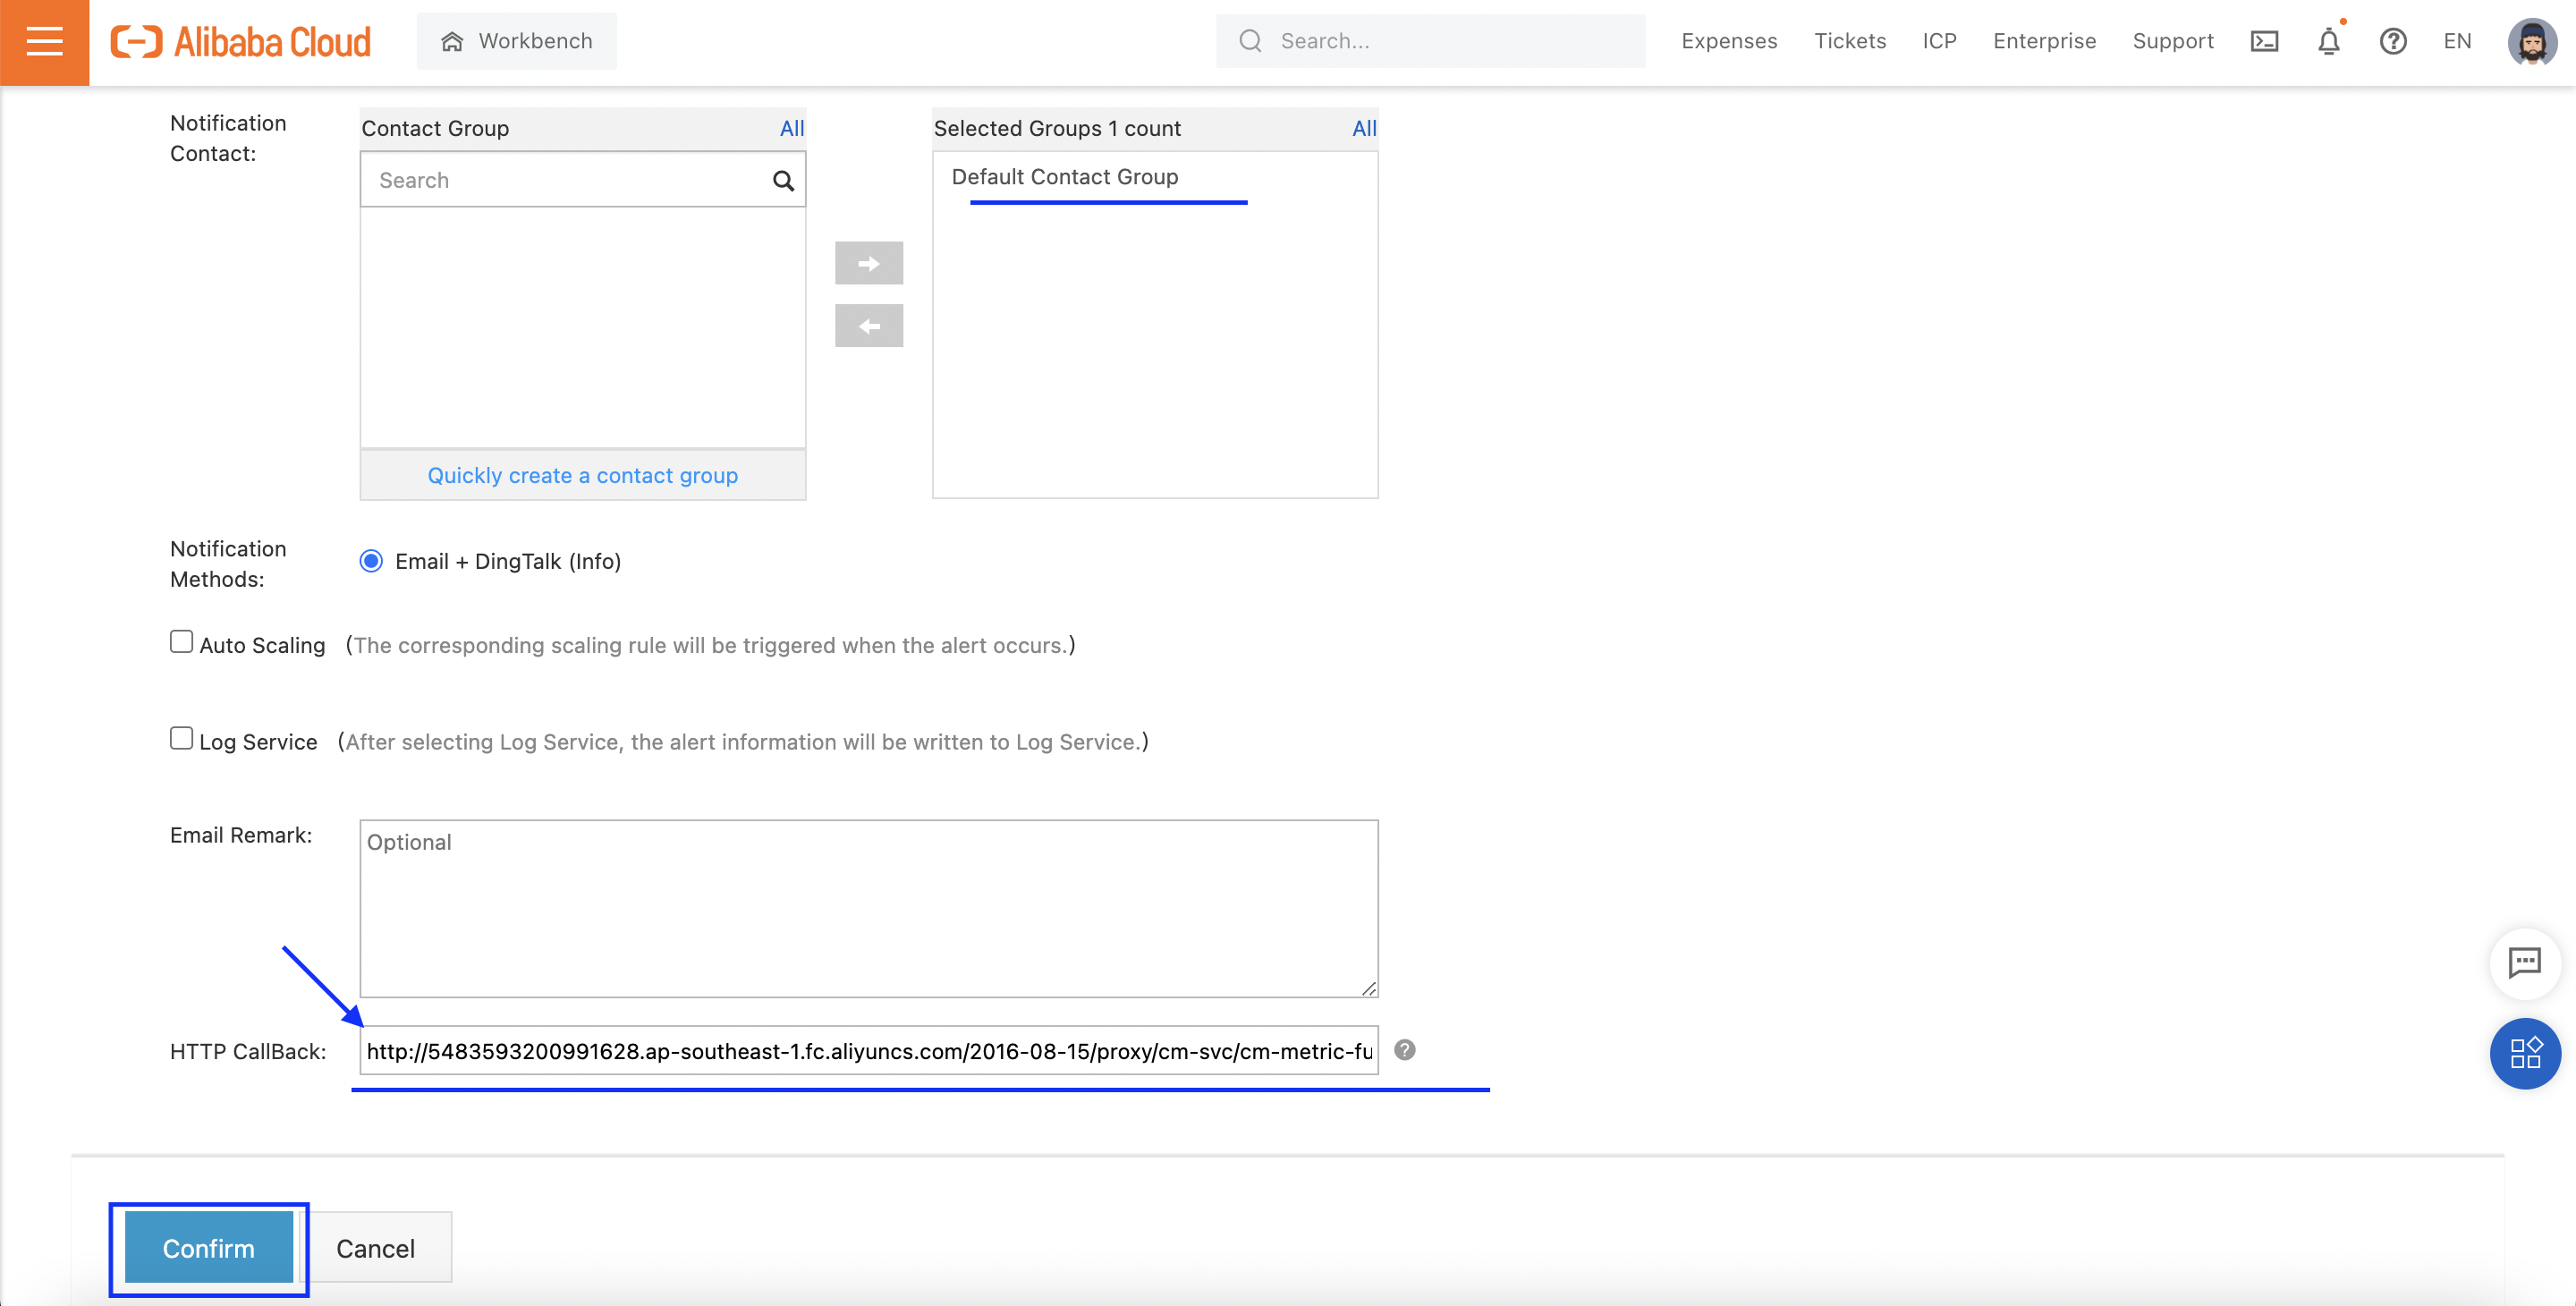
Important note: Remember to change the https:// at the beginning of the Function Compute URL to http:// intsead, as CloudMonitor doesn't currently support HTTPS.
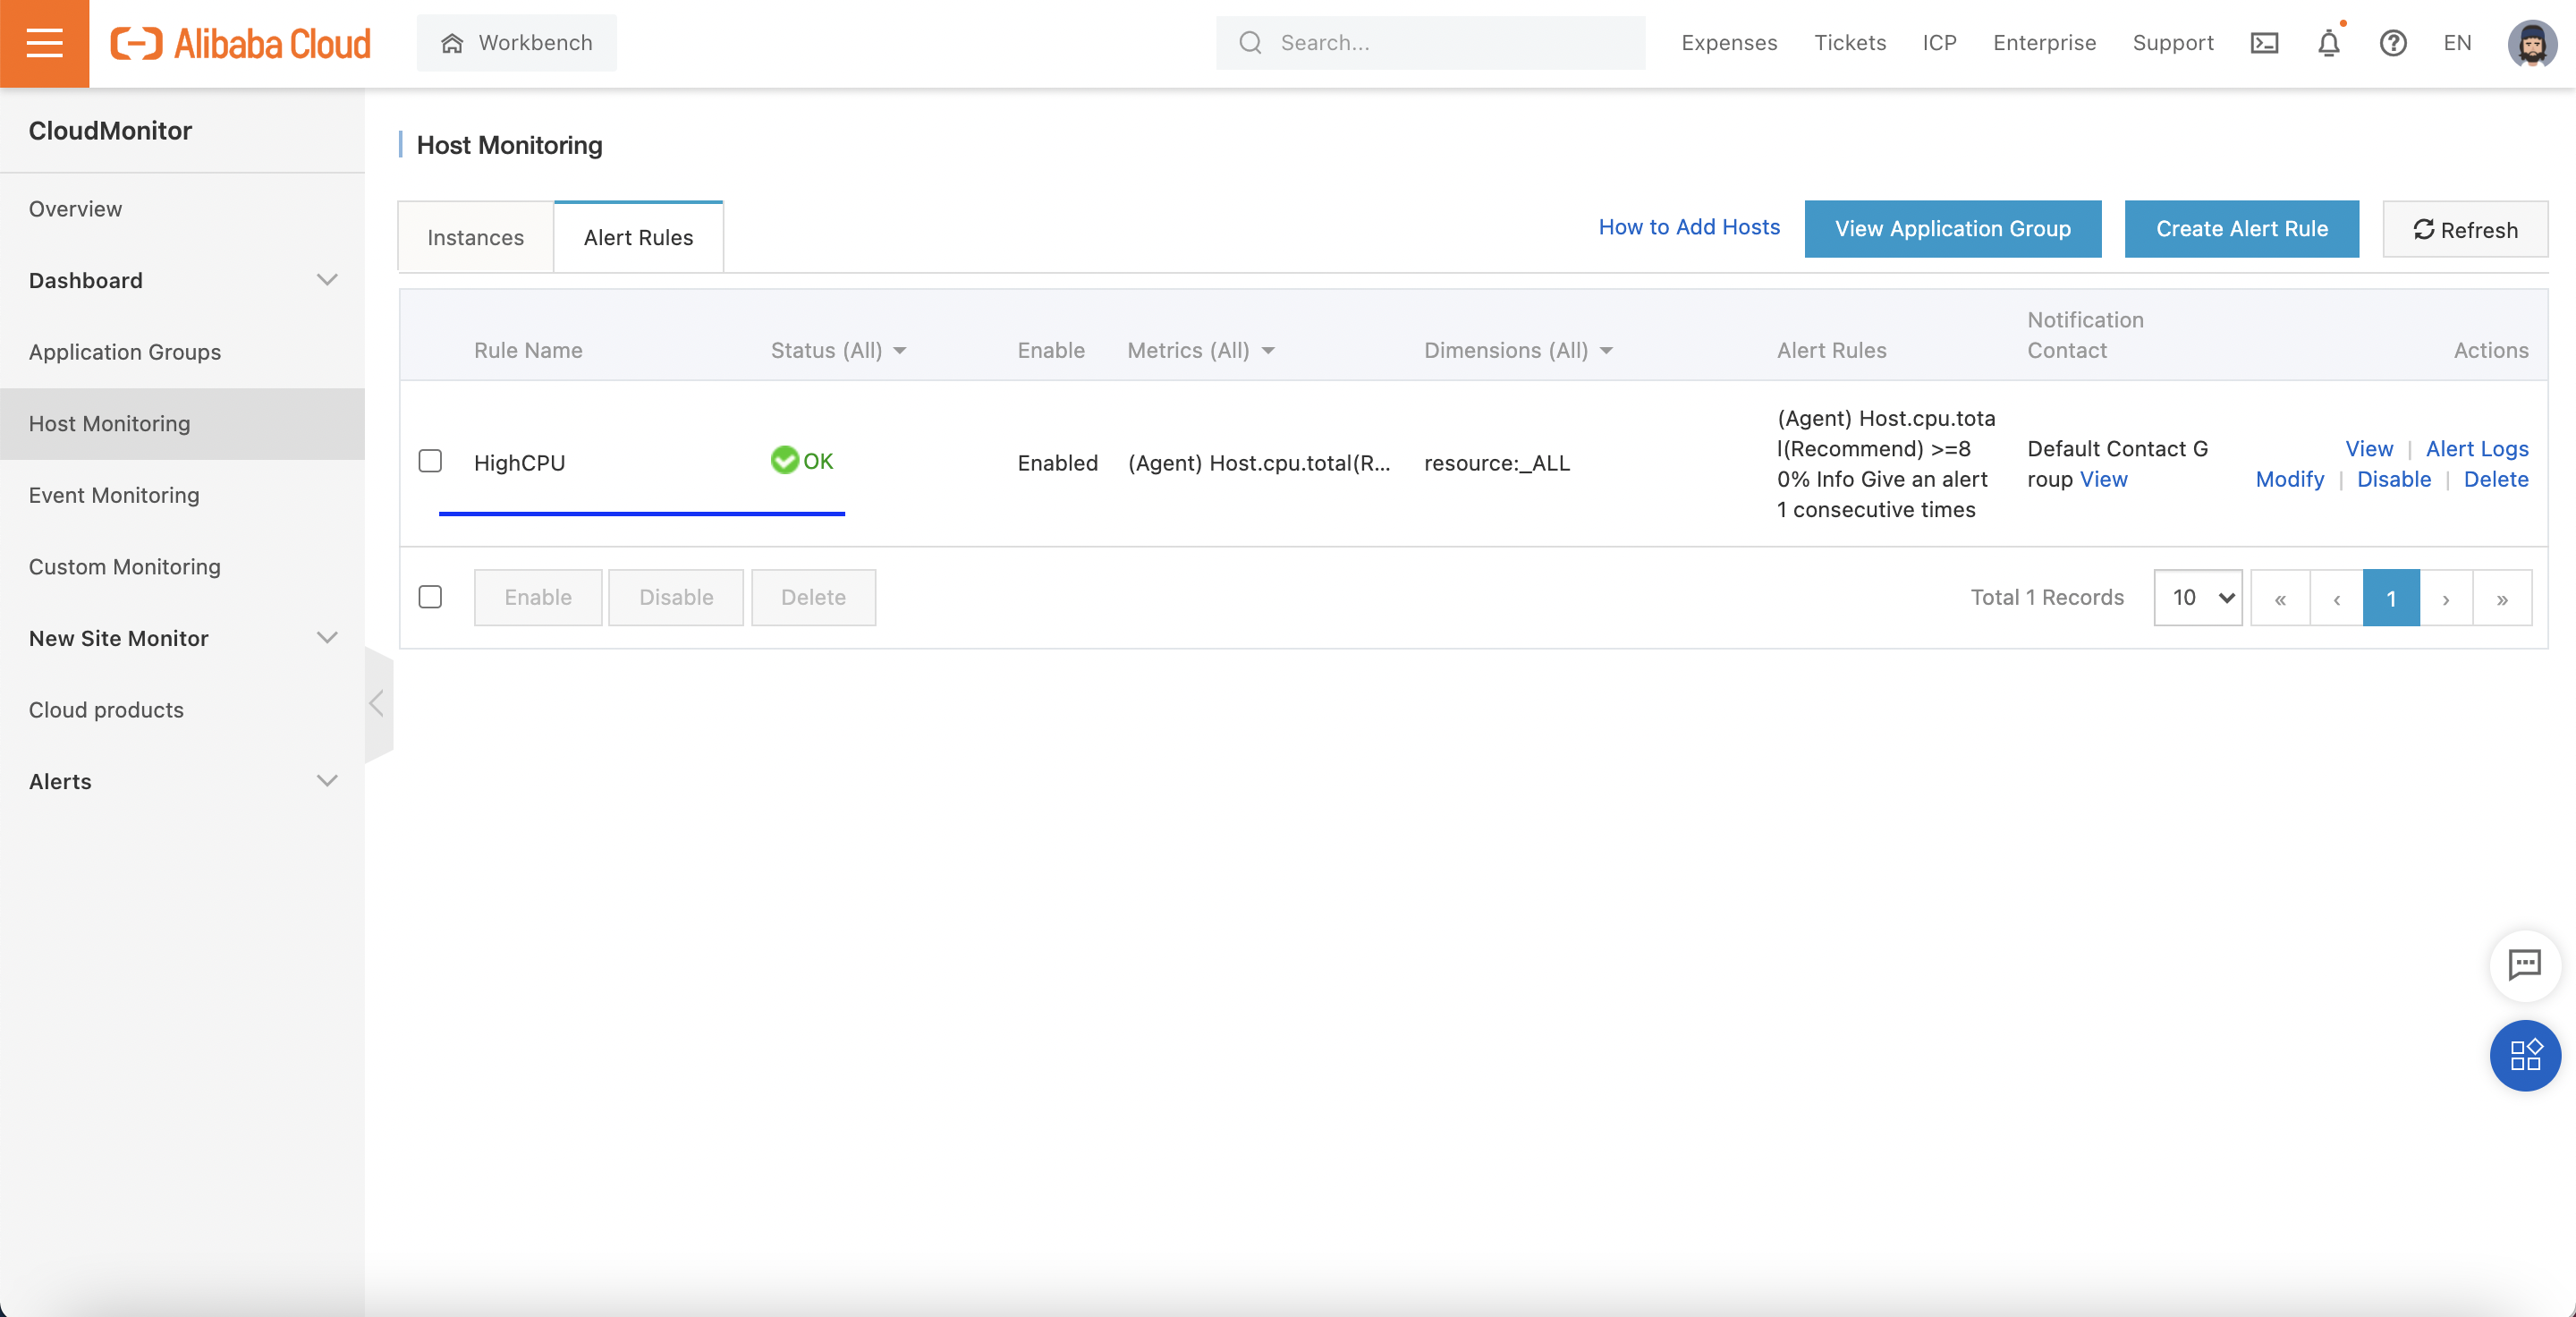
After clicking Confirm, we should see our new Rule in the Alert Rules tab:
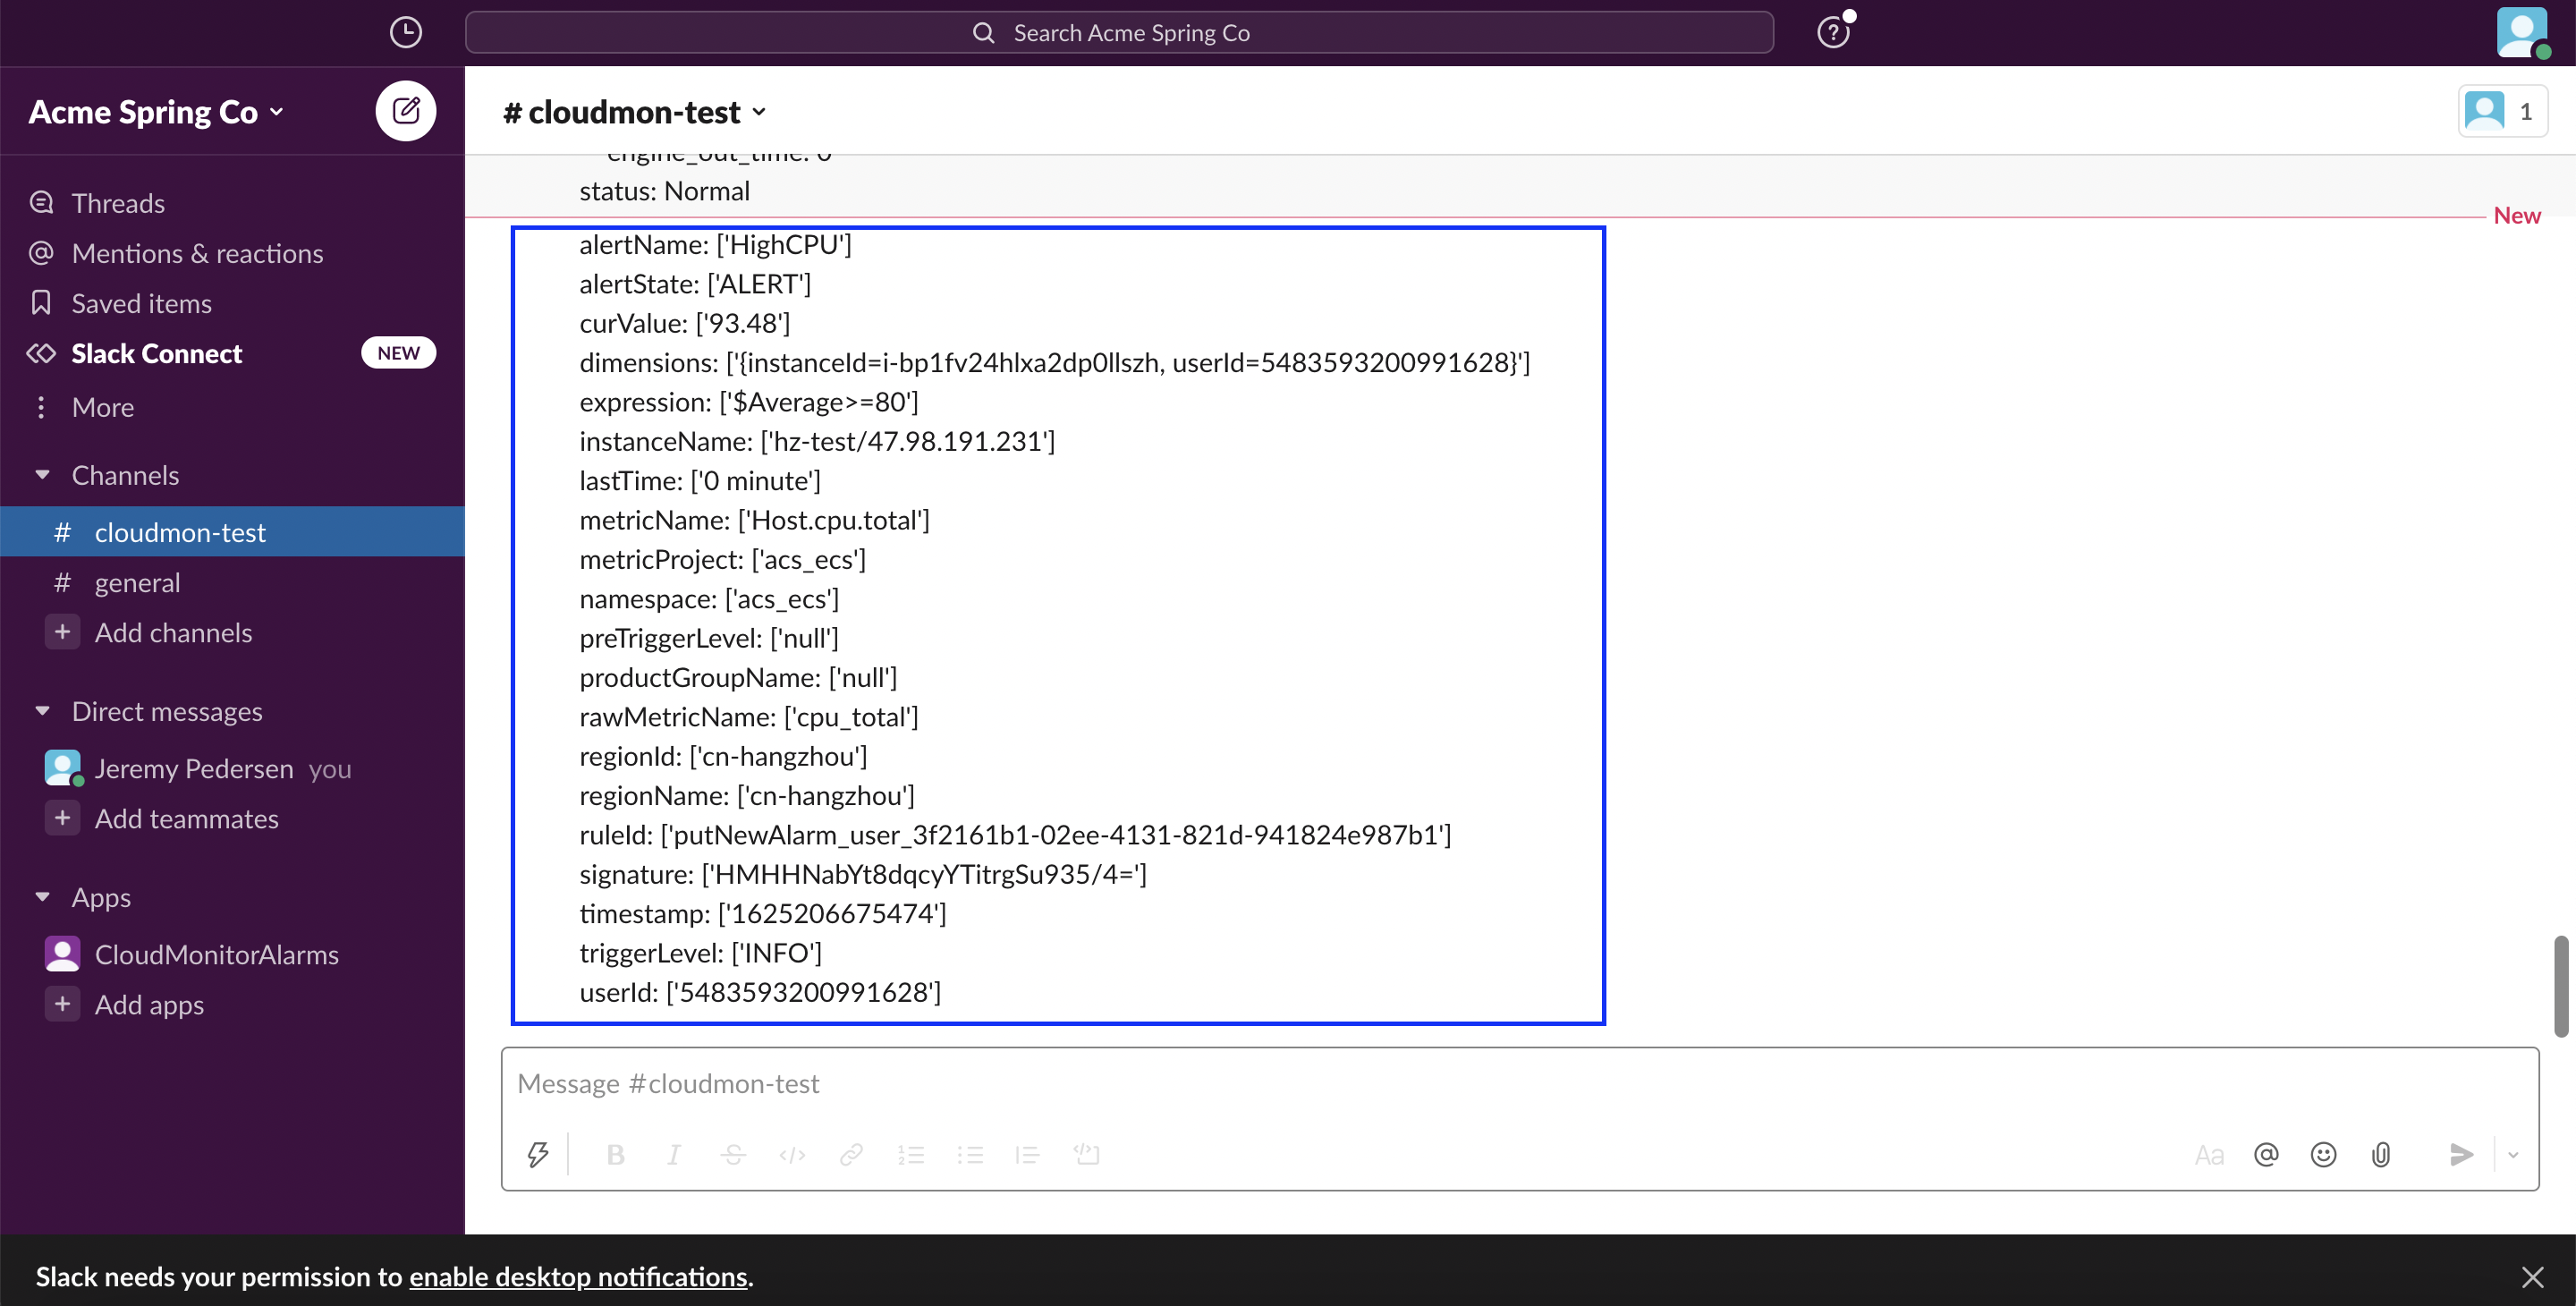
We can test the event-based alarms by creating a new ECS instance (this will trigger our Event-based Alarm), then using the stress command to raise the instance's CPU usage to 100% for 2 minutes (this will trigger our Metric-based Alarm).
If it works, we should see notifications like these showing up in our Slack chat:
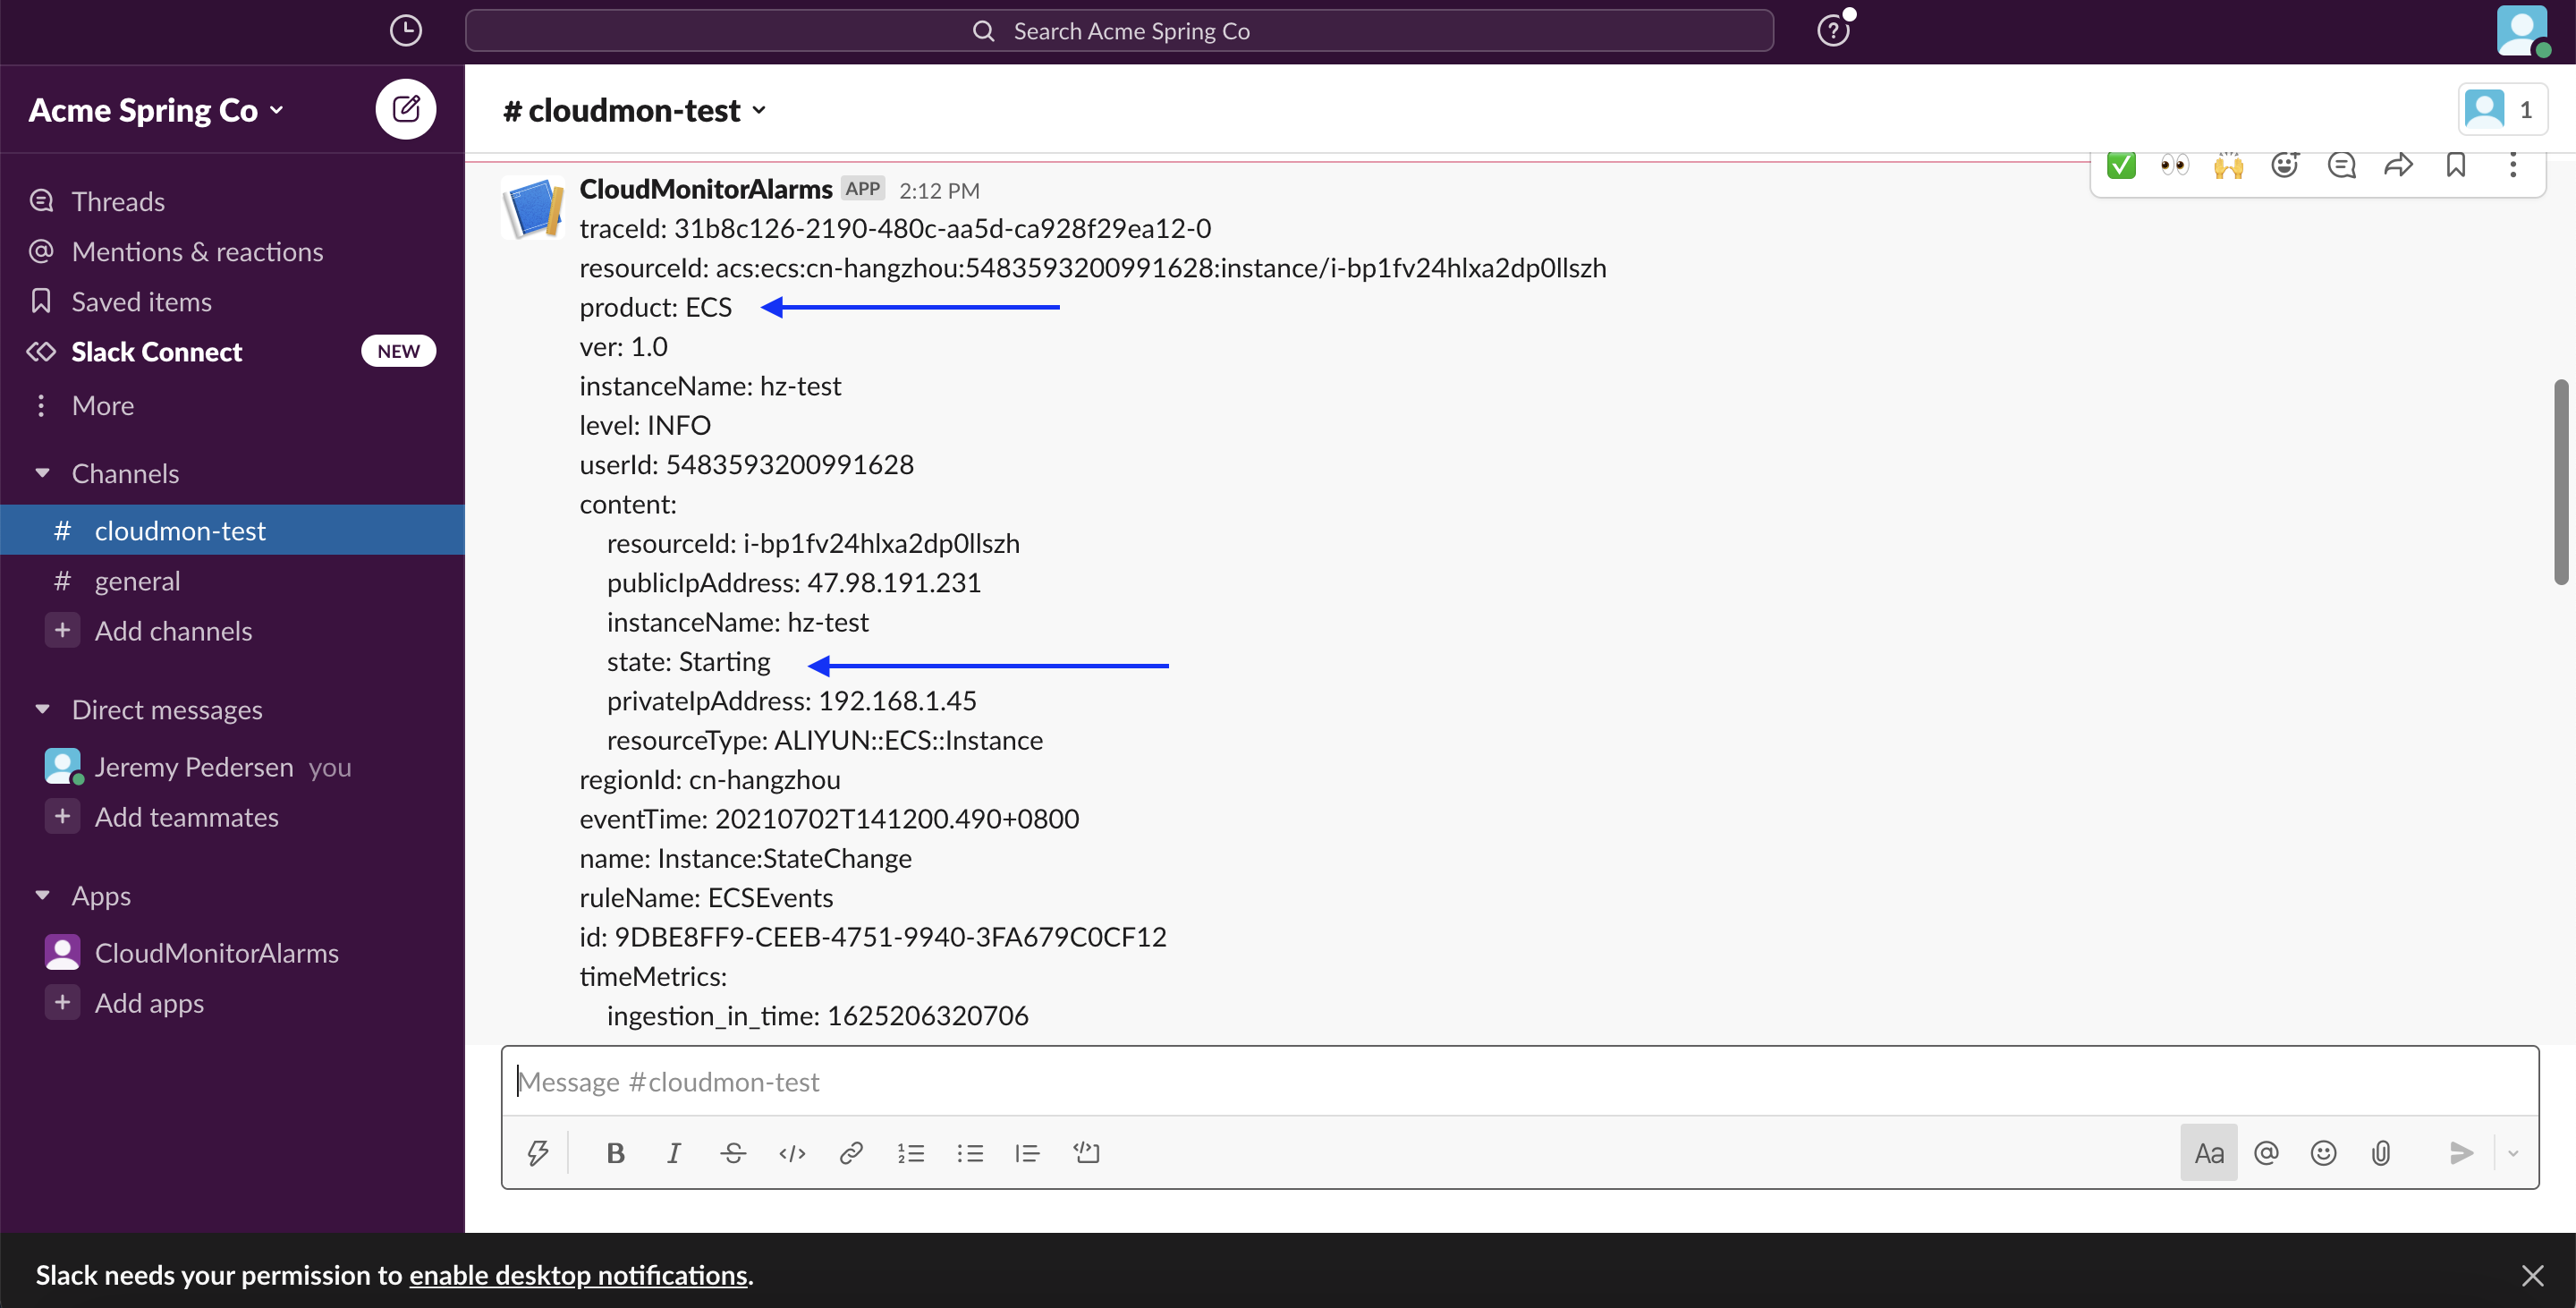
To test the "HighCPU" metric-based alarm, we need to give our ECS instance some busywork to do. If you created a Linux instance, you can use the stress command to generate a high CPU load. On Ubuntu 18.x and up, you can install it with:
apt update
apt install -y stress
Then run it like this:
stress --cpu 8 --timeout 120sThis will launch 8 processes that will do busywork for 2 minutes (120 seconds). That should be long enough to trigger our rule and send a message like this one to Slack:
That's it! See where you can take things from here. Maybe add customized functions to process particular types of events or trigger custom-formatted Slack messages? The possibilities are endless.
Great! Reach out to me at jierui.pjr@alibabacloud.com and I'll do my best to answer in a future Friday Q&A blog.
You can also follow the Alibaba Cloud Academy LinkedIn Page. We'll re-post these blogs there each Friday.
Friday Blog - Week 14 - MaxCompute UDF Functions: When SQL Just Isn't Cutting It
JDP - December 10, 2021
Alibaba Clouder - March 29, 2019
JDP - December 17, 2021
JDP - April 23, 2021
JDP - April 16, 2021
JDP - December 23, 2021
 Function Compute
Alibaba Cloud Function Compute is a fully-managed event-driven compute service. It allows you to focus on writing and uploading code without the need to manage infrastructure such as servers.
Learn More CloudMonitor
Automate performance monitoring of all your web resources and applications in real-time
Learn More Compute Nest
Cloud Engine for Enterprise Applications
Learn More Realtime Compute for Apache Flink
Realtime Compute for Apache Flink offers a highly integrated platform for real-time data processing, which optimizes the computing of Apache Flink.
Learn MoreMore Posts by JDP