By Anish Nath, Alibaba Cloud Tech Share Author. Tech Share is Alibaba Cloud's incentive program to encourage the sharing of technical knowledge and best practices within the cloud community.
FreeNAS is an open source network attached storage that is based on the FreeBSD and the OpenZFS file system. According to the official website, FreeNAS is an operating system that can be installed on virtually any hardware platform to share data over a network.
FreeNAS installation in Alibaba Cloud is an advanced level task and should be performed carefully. To begin with installation, there are several high-level steps needed to install and setting it up the FreeNAS on an Alibaba Cloud Elastic Compute Service (ECS) instance.
Make sure you have a valid Alibaba Cloud account to try out this experiment. You'll also need an Alibaba Cloud ECS instance to install FreeNAS. FreeNAS 11.1 requires a 64-bit CPU and a minimum of 8GB RAM.
FreeNAS is an operating system that can be installed on virtually any hardware platform to share data over a network.
FreeNAS is the simplest way to create a centralized and easily accessible place for your data. Use FreeNAS with ZFS to protect, store, backup, all of your data. FreeNAS is used everywhere, for the home, small business, and the enterprise.
FreeNAS 11.1 requires a 64-bit CPU and a minimum of 8GB RAM, this version can be download from here.

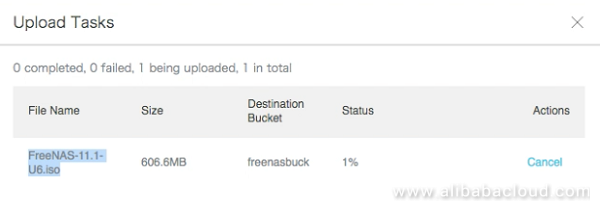
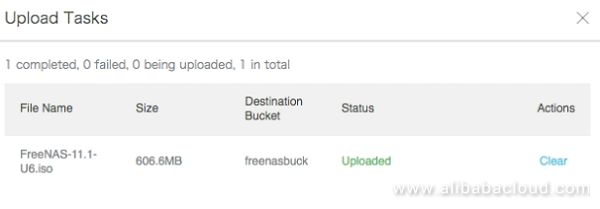
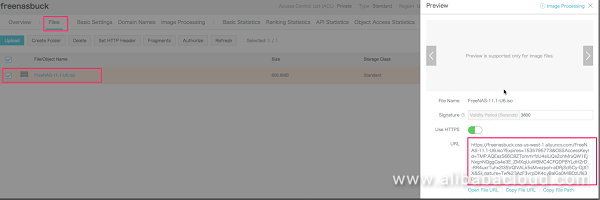
FreeNAS Custom Image Creation: In order to boot the FreeNAS, we need to create a custom image from the ISO file, this image will be used to install the FreeNAS in a disk. To create custom image, perform these steps
Go to the ECS console -> Images link and then click on Import Image, as shown in the diagram.

A popup will appear, this step require attention, we need to give permission to ECS to use OSS
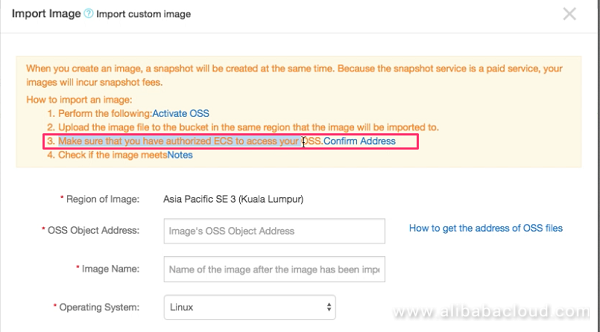
Click on Confirm Address it will present you below screen and then Confirm both Authorization policy as shown below.

Once this step is performed successfully, go back to the ECS console -> Images link and then click on Import Image again from here you need to pay close attention to the following attribute which is highlighted in red.
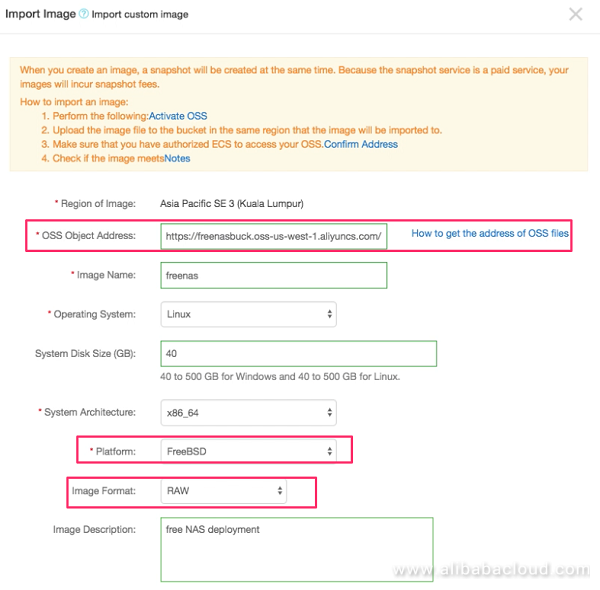
Click on OK and wait for this Custom Image to be available as shown in below.

So far, we have created a FreeNAS custom image, now let's launch this custom image through ECS console. The demo is created under the BillingMethod Pay As you Go, end user can select the billing method as per their needs.
Note: The End goal of this step is to release this Instance, as we are going to create a bootable disk once the FreeNAS installation is done and this bootable disk image will serve as FreeNAS service.

Under the Image Tab, select the custom Image tab and choose the image name from the drop down, which is uploaded in the previous step.

You don't need a public IP, make sure Assign public IP is unchecked in the Networking Page.

Under the System Configuration, skip the Log On credentials, this step will be executed when FreeNAS installation is in place.

Finally Review the Configuration and Launch the Installation

Once Everything goes well, your ECS instance should be up and running as shown in the below.

Next step is Very important, and we are going to create a disk and then mount this disk to this instance.
This disk will hold the installer data of the FreeNAS installation, to create boot disk, go to the ECS console -> Block Storage -> Disks -> Create Disk,
After the disk is created, it will be unmounted state.

Mount this disk to ECS Free NAS VM

Make sure you have performed all the steps above before executing this one. The installation of FreeNAS will be done using VNC console.
Go to your ECS instance ID and click connect

First Alibaba Cloud it will setup your VNC password, once this is done,

You will be able to connect to VNC console screen, and presented with FreeNAS installation screen
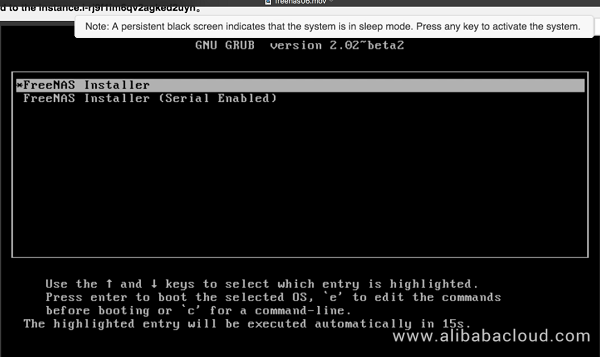
Select option#1, Install/Upgrade of FreeNAS Installation.

Choose the destination Media. This is the disk which we have setup in the previous step, select this disk where the installation files will hold and then click on OK.

On the Next step, you will be prompted to select the root password for the FreeNAS UI login,
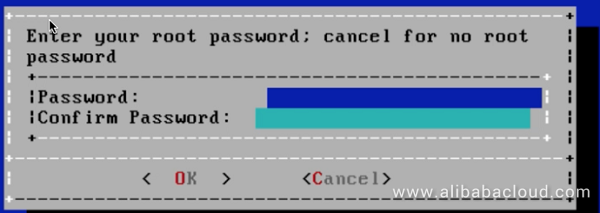
Once Everything goes well, finally you will be prompted with the message, Installation went successful, this is the time when we release the ECS instance ID, unmount and preserver the Disk.

First Unmount the Disk from the ECS instance ID, to do this perform this step
ECS Console -> Block Storage-> Disk -> (Select Disk ID) -> More -> Unmount

And Finally release the ECS Instance ID
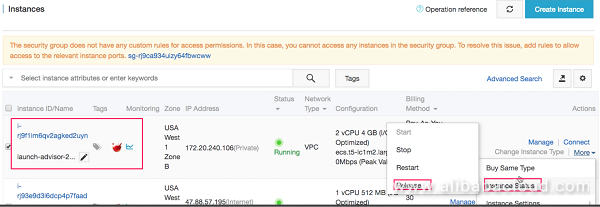
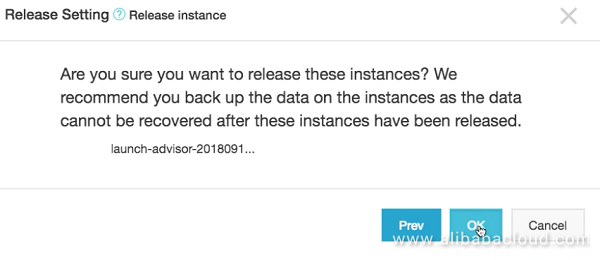
This is the final step of creating FreeNAS custom image from the Disk, which will serve as FreeNAS service and instance launch from this image will have FreeNAS service.
At first create a snapshot from the Disk, to do this perform the below step
ECS->Block Storage-> Disks -> (Select Instance ID) - > Create Snapshot

Once snapshot is created create a custom image from her, to perform this
ECS->Snapshots and Images -> Snapshots -> (Select snapshot) - > Create Custom Image

Verify the Image Status

From here onward, any ECS instance launched using this image will have FreeNAS server ready.
Announcing the 7th Batch of Global Alibaba Cloud MVP Members

2,593 posts | 791 followers
FollowAlibaba Clouder - July 6, 2020
digoal - October 18, 2022
Alibaba Clouder - August 25, 2020
JwdShah - October 15, 2024
Nick - May 6, 2019
Alibaba Clouder - February 13, 2019

2,593 posts | 791 followers
Follow ECS(Elastic Compute Service)
Elastic and secure virtual cloud servers to cater all your cloud hosting needs.
Learn More Apsara File Storage NAS
Simple, scalable, on-demand and reliable network attached storage for use with ECS instances, HPC and Container Service.
Learn More OSS(Object Storage Service)
An encrypted and secure cloud storage service which stores, processes and accesses massive amounts of data from anywhere in the world
Learn MoreMore Posts by Alibaba Clouder