By Rick Yang, Solution Architect
In a common DevOps scenario, the IT infrastructure needs to be provisioned by the IT Team first. Then, the Development Team can perform building, testing, and deploying based on it. The second part of this scenario has been automated by adopting DevOps concepts and CI/CD exercises. However, the first part may be improved by introducing GitOps combined with Infrastructure as Code (IaC), Merge Request, and automatic pipeline.
This article explains a GitOps practice using GitLab as the remote backend of the Terraform state file and saves the Terraform codes in the repository. All the change requests of the Infrastructure must be validated and approved before applying to the cloud infrastructure to maintain the single source of truth. The following diagram will elaborate on the details above.

Prerequisites:
The following objectives are listed to break down the task:
To run the Terraform commands, we need to build a custom image and push it to our image repository (like Docker Hub or Alibaba Container Repository (ACR)).
We need to create a Dockerfile containing the following contents:
FROM ubuntu:18.04

RUN apt update && apt install -y wget && apt install -y gpg

RUN apt-get update && apt-get install -y lsb-release

RUN wget -O- https://apt.releases.hashicorp.com/gpg | gpg --dearmor | tee /usr/share/keyrings/hashicorp-archive-keyring.gpg

RUN echo "deb [signed-by=/usr/share/keyrings/hashicorp-archive-keyring.gpg] https://apt.releases.hashicorp.com $(lsb_release -cs) main" | tee /etc/apt/sources.list.d/hashicorp.list

RUN apt update && apt install -y terraform

#If you encounter the error message "x509: certificate signed by unknown authority" during the TF remote backend init.
#Try to get the CA certificate chain file and update it

COPY ./ca.crt /usr/local/share/ca-certificates/

RUN update-ca-certificates

CMD ["echo", "OK!"]
Optionally, if you encounter the error message below (x509: certificate signed by unknown authority) during the TF remote backend init, try to copy the certificate chain file ('ca.crt') to the /usr/local/share/ca-certificates/ folder and update it. Check here for more details.

BUILD and PUSH the custom Docker image to your image repository
On any host with Docker installed, we will build the Docker image with the Dockerfile created in step one and push it to our favorite image repository (e.g. Docker Hub or Alibaba Container Repository (ACR)).
Let's take Docker Hub as an example. Replace YOUR_DOCKER_HUB_REPO with your Docker Hub path:
docker build -t YOUR_DOCKER_HUB_REPO/ubuntu_tf:test

docker push YOUR_DOCKER_HUB_REPO/ubuntu_tf:testTerraform is configured with a local backend for state files by default. It is stored in the local folder with the .tf files.
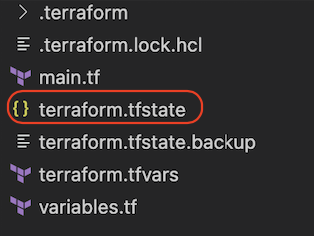
It's fine for a single user that has full control of the Terraform codes. However, if a team wants to collaborate on IT infrastructure management, it's difficult to share these files among the team with the consistency of the codes and states.
The solution to this requirement is a Git repository for codes and a remote backend for the Terraform state file. We use GitLab in this article to achieve that.
Log into the GitLab and create a blank project, give the project a name, and leave other parameters as default.
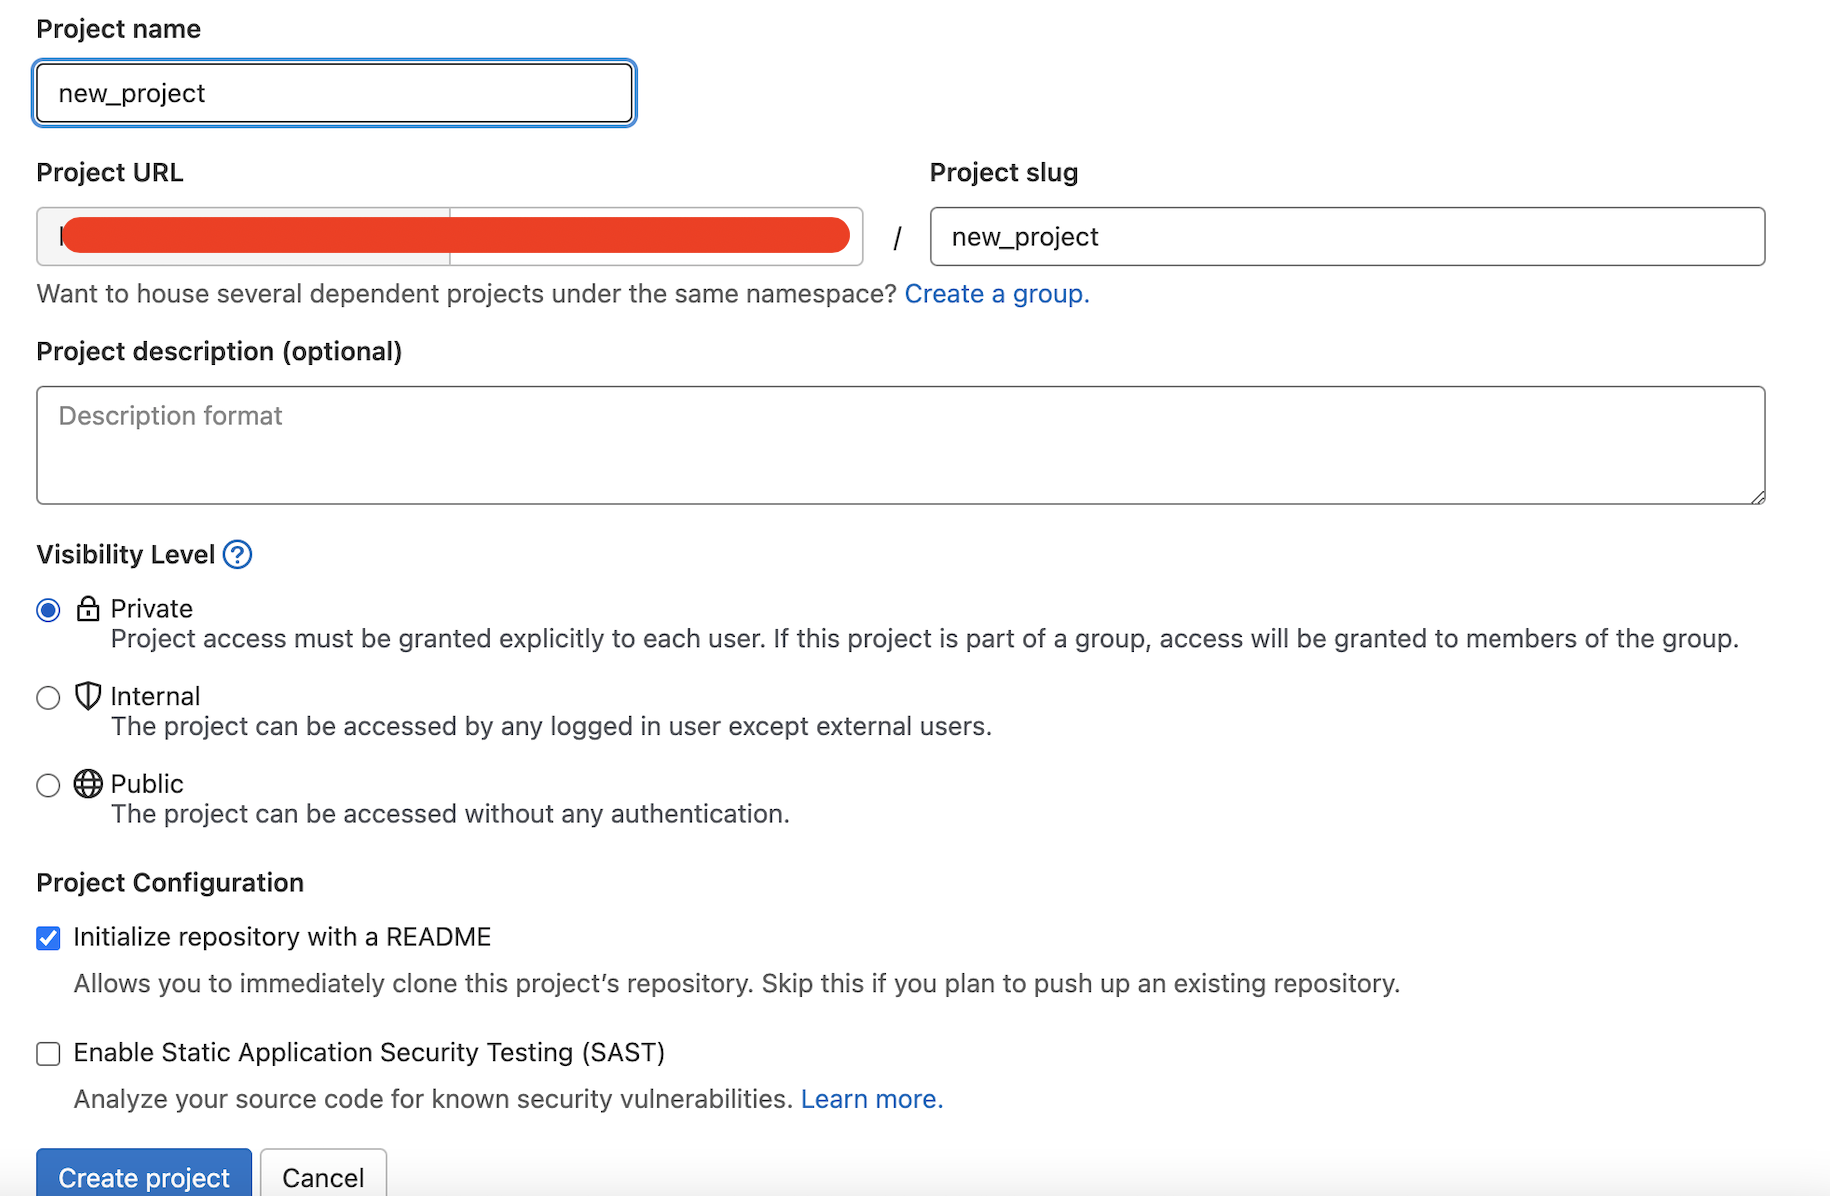
Write down the Project ID when it's created:

The TF_USERNAME and TF_PASSWORD must be defined in the following steps to access the remote state file on GitLab:
Create the Access Tokens and save the token string in a secure place:
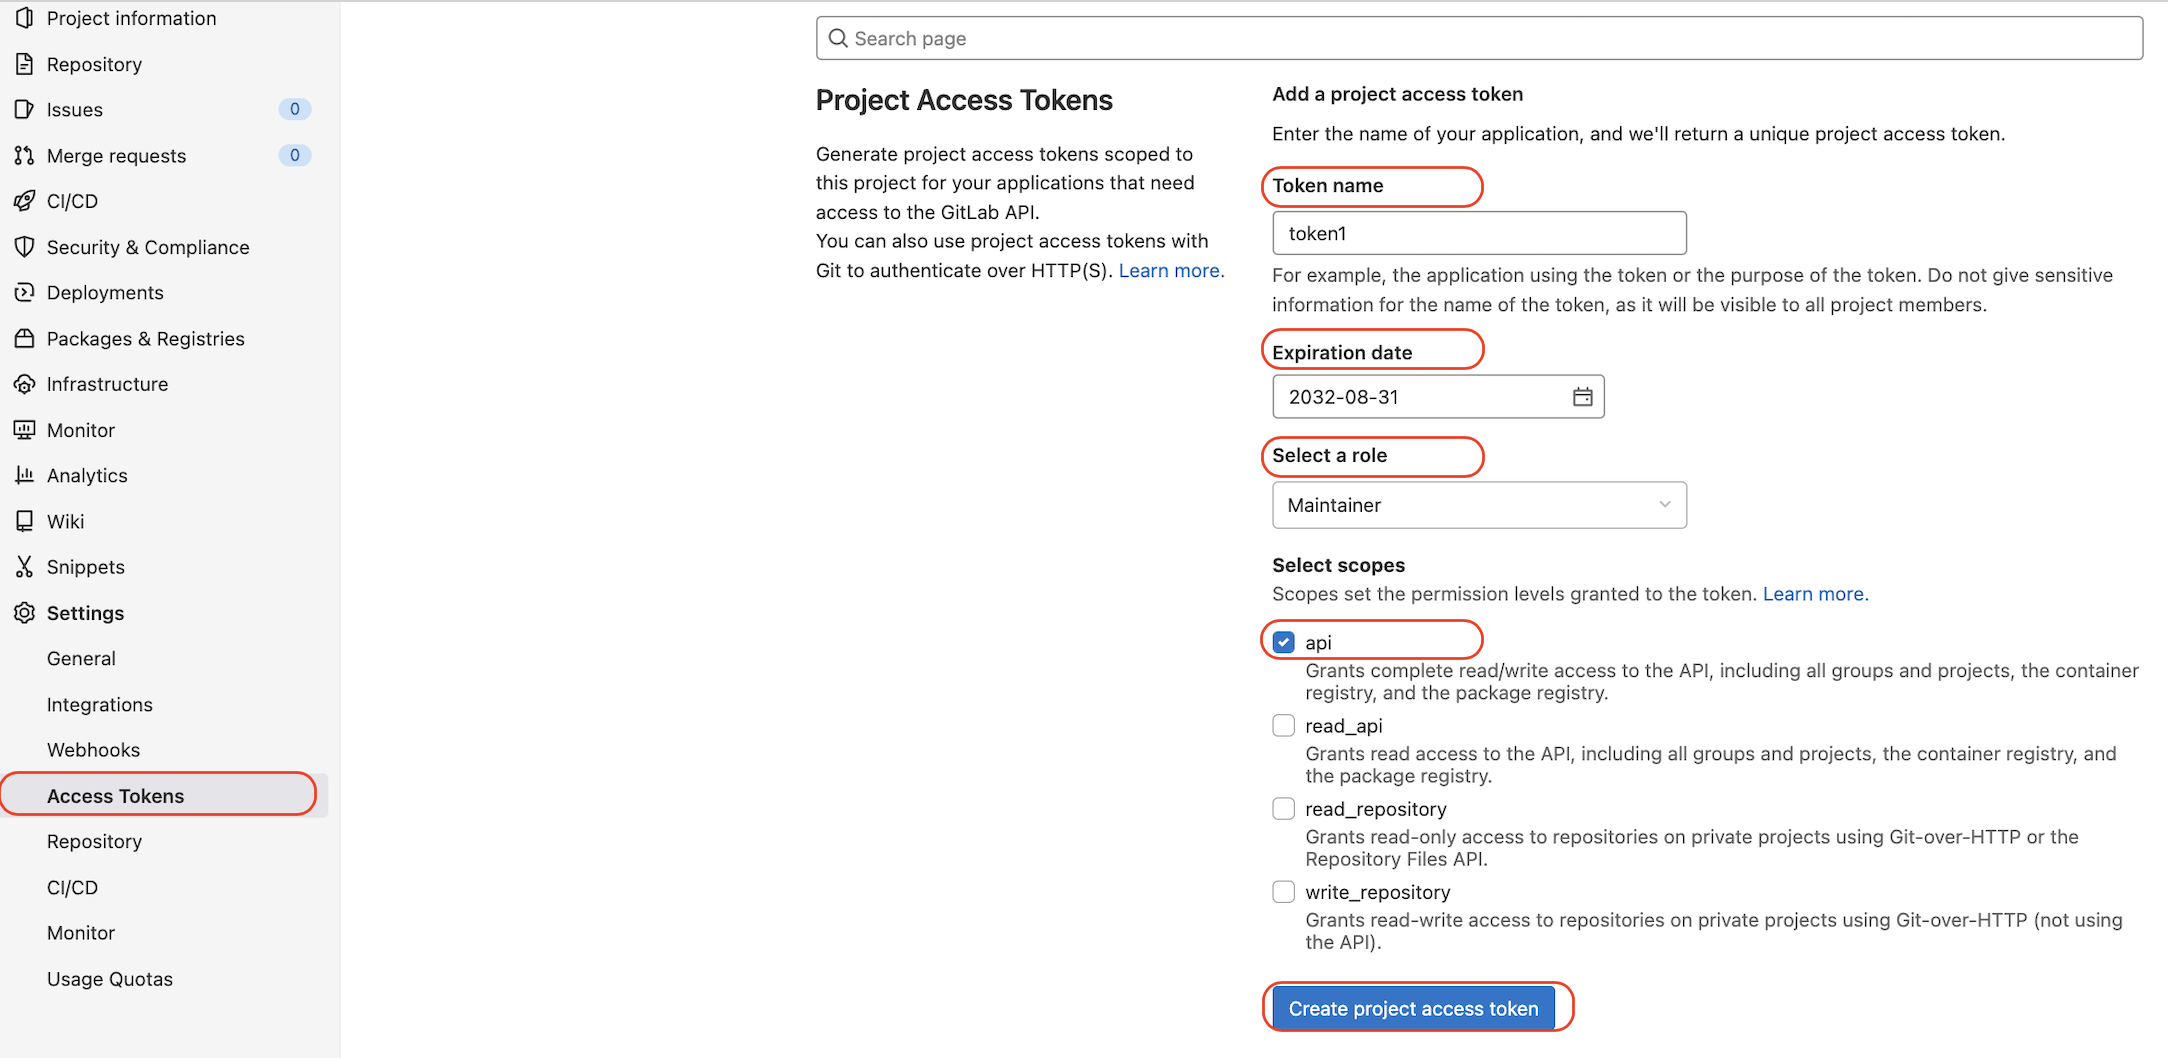
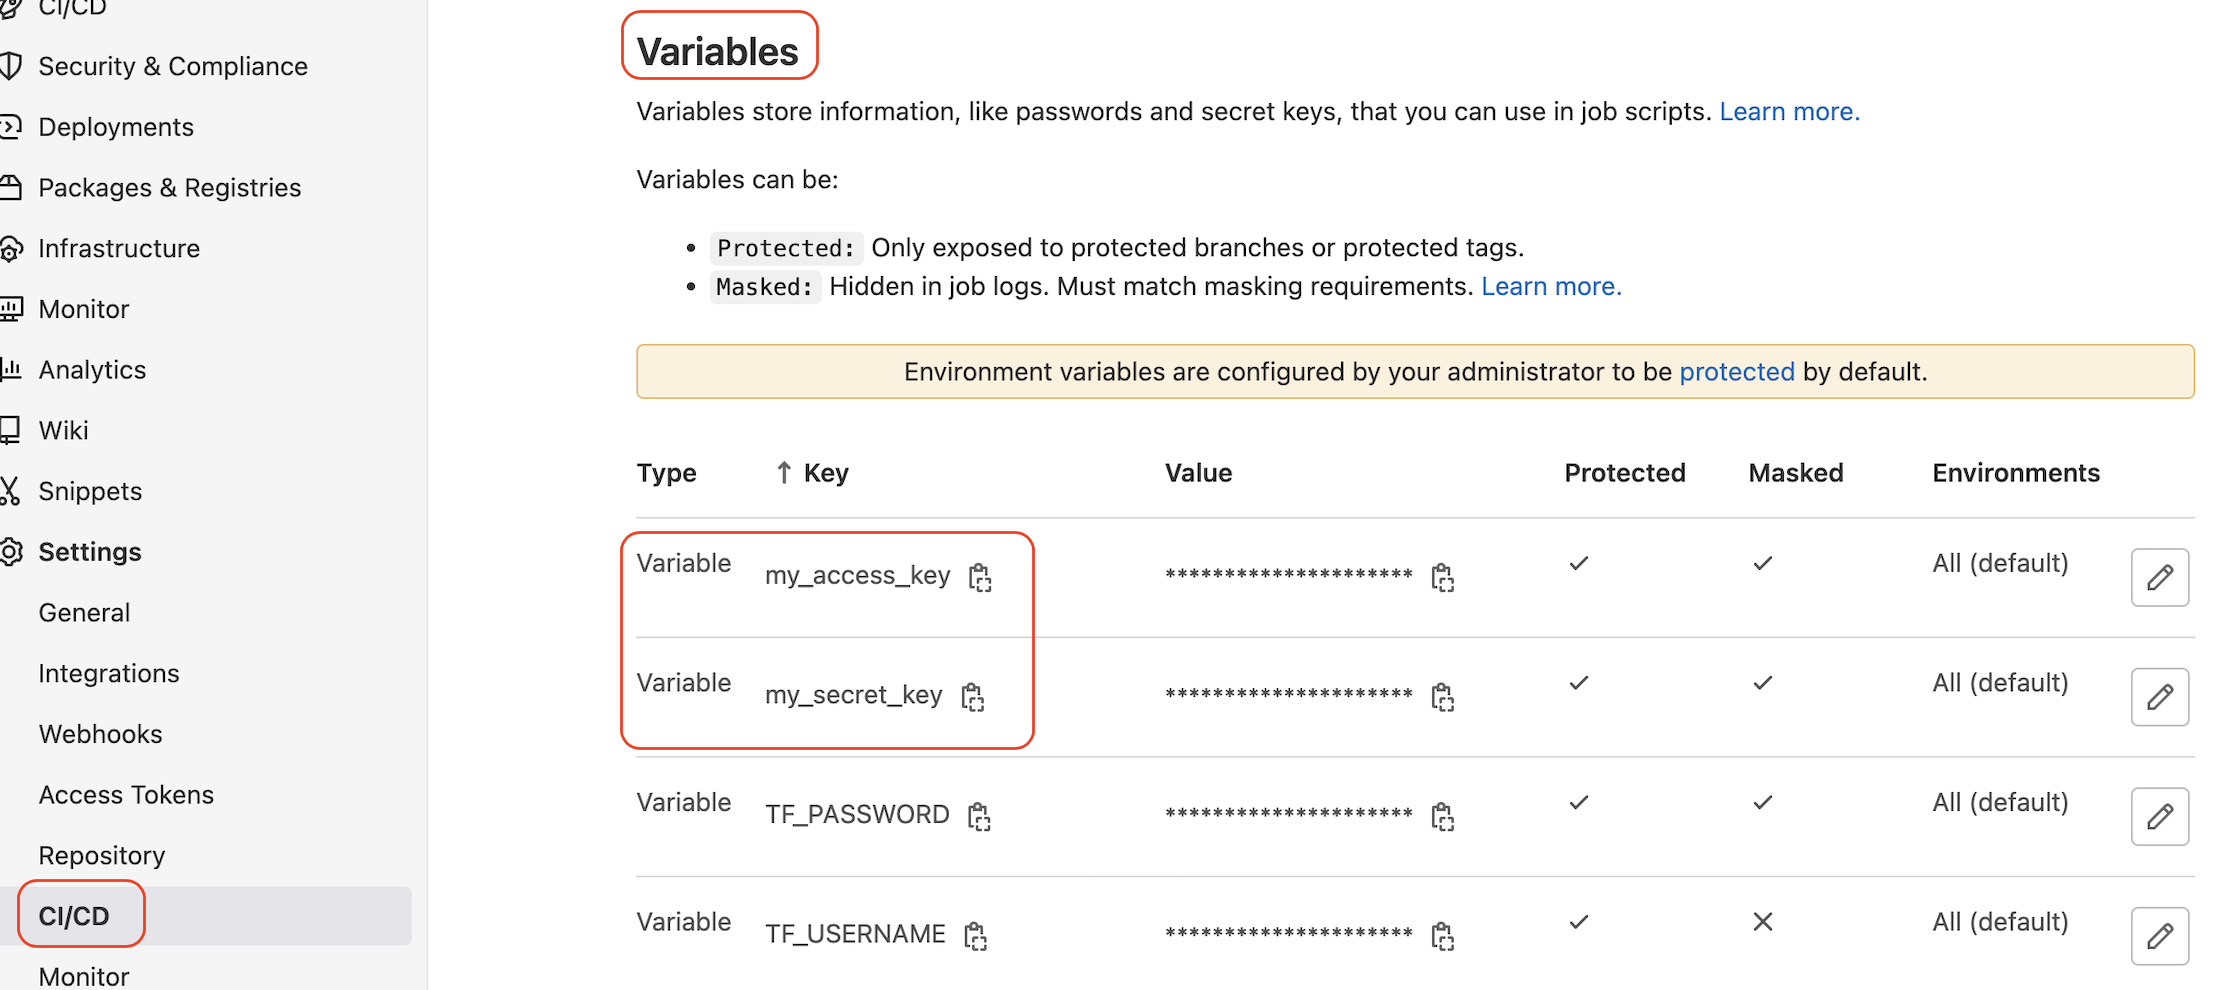
Add TF_USERNAME and TF_PASSWORD variables on the CI/CD settings page. The values are account name and access token string. Check protected and masked to avoid unauthorized CI/CD pipeline execution and sensitive secrets showing in the logs:
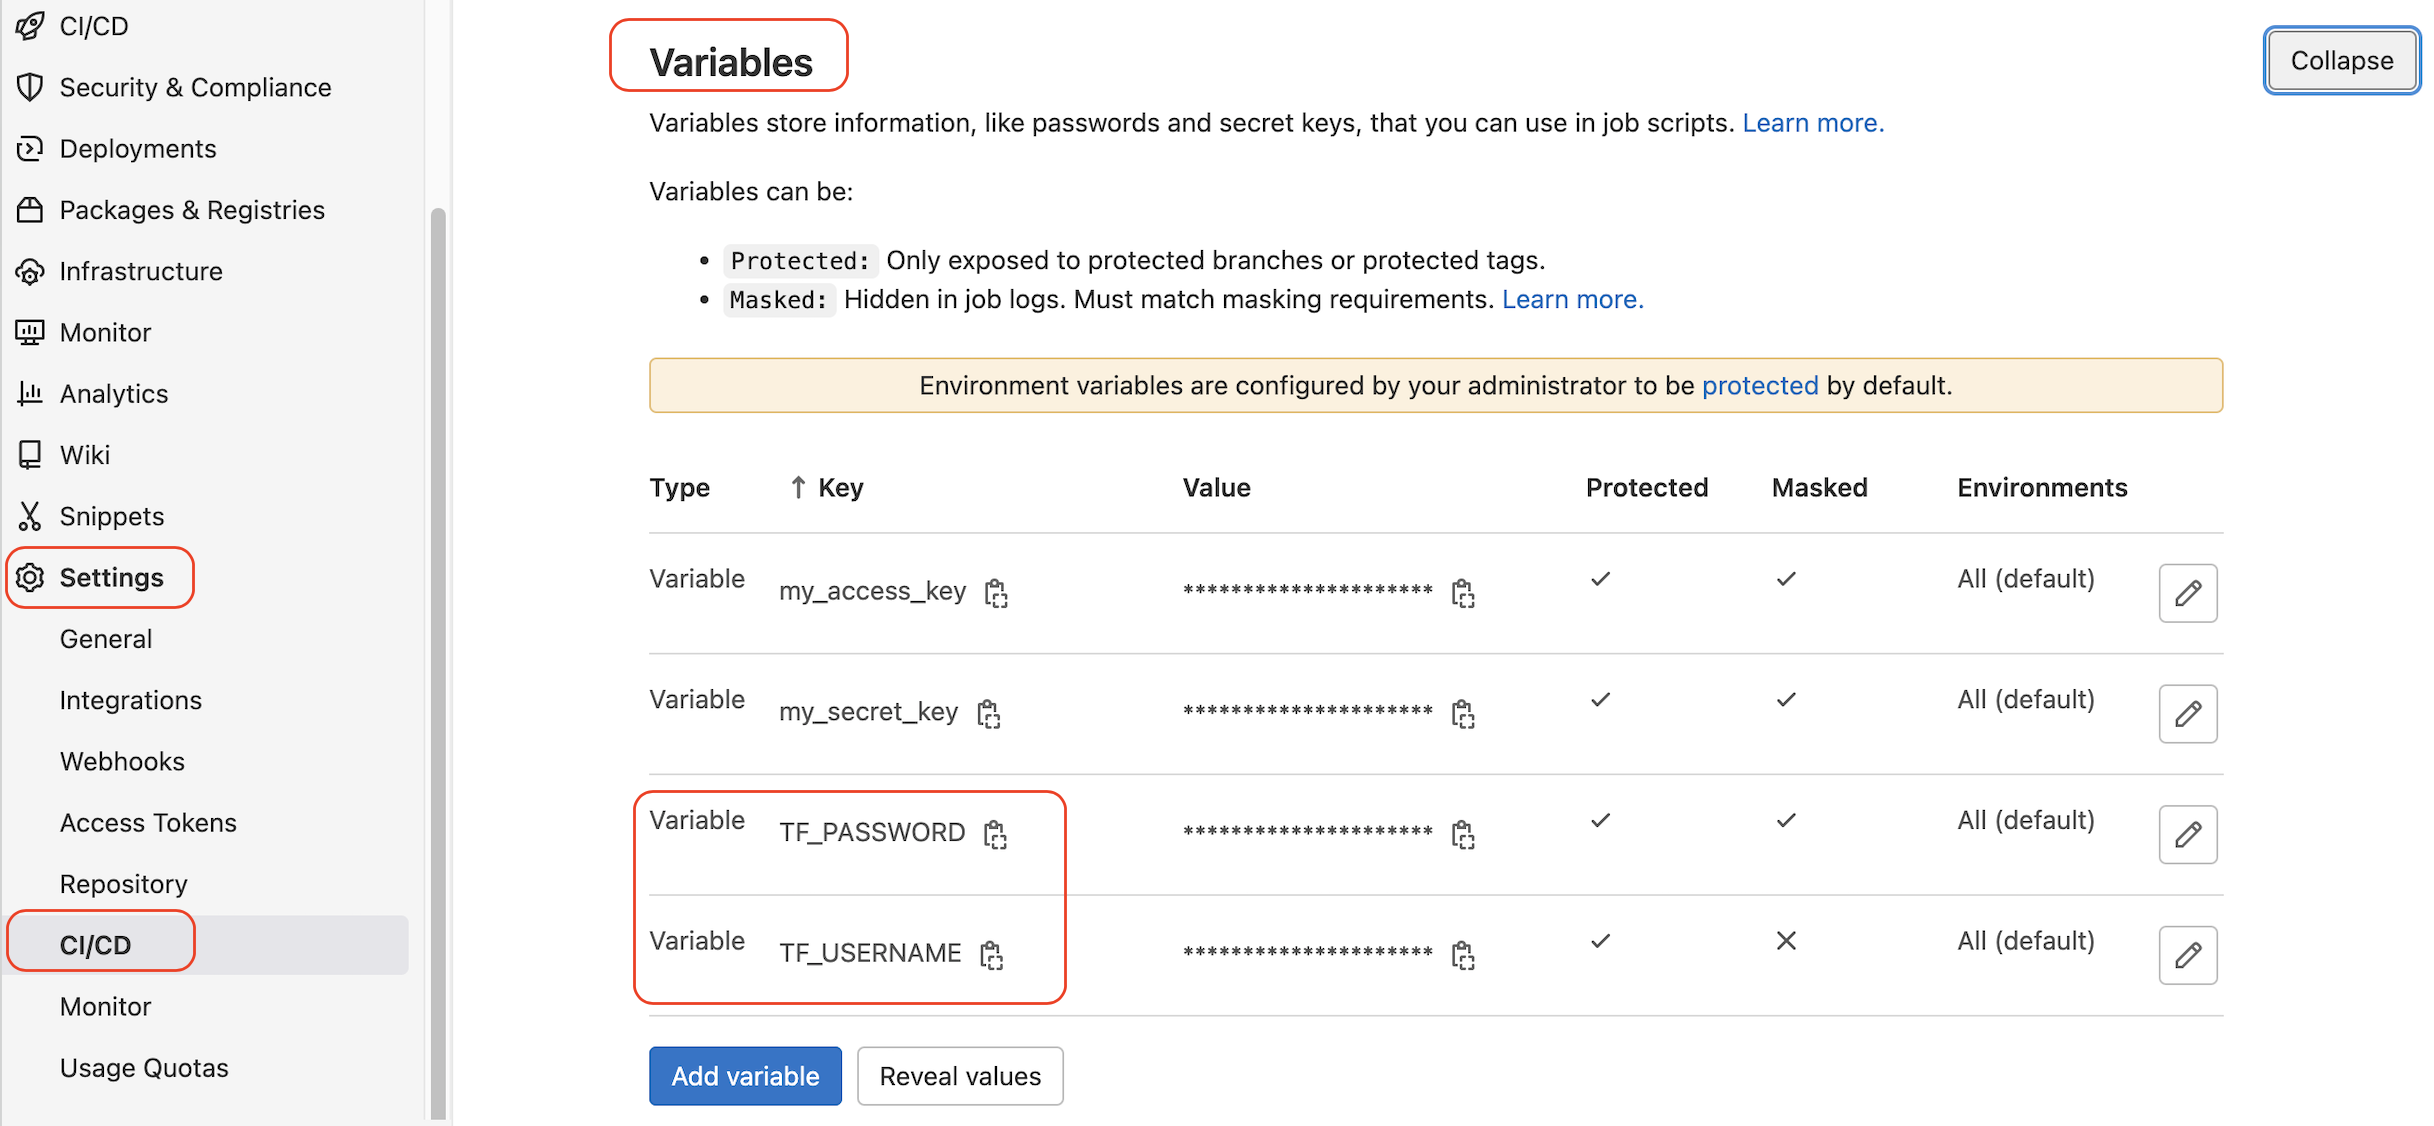
Create a bash script file and name it init_file with the following contents and save it in the GitLab repository. Replace YOUR_PROJECT_ID, YOUR_GitLab_Domain, and YOUR_State_File with your values.
#! /bin/bash
PROJECT_ID="YOUR_PROJECT_ID" \
TF_USERNAME=${TF_USERNAME} \
TF_PASSWORD=${TF_PASSWORD} \
TF_ADDRESS="https://YOUR_GitLab_Domain/api/v4/projects/YOUR_PROJECT_ID/terraform/state/YOUR_State_File" \

terraform init \
  -backend-config=address=${TF_ADDRESS} \
  -backend-config=lock_address=${TF_ADDRESS}/lock \
  -backend-config=unlock_address=${TF_ADDRESS}/lock \
  -backend-config=username=${TF_USERNAME} \
  -backend-config=password=${TF_PASSWORD} \
  -backend-config=lock_method=POST \
  -backend-config=unlock_method=DELETE \
  -backend-config=retry_wait_min=5
When you commit the changes, you can add [skip ci] in the commit message to avoid the auto-pipeline execution being triggered.

You may wonder where this state file is stored and how to configure it. For GitLab.com, it is managed by GitLab, and for self-managed GitLab, please check here for the settings. Next, we will generate the state file with some Terraform codes.
Create main.tf and variables.tf with the following contents and save them into the repository with the init_file
In the main.tf file, within the Terraform {}, we add backend "http" to enable the remote backend access:
//setup of providers
terraform {
  required_providers {
    alicloud = {
      source = "aliyun/alicloud"
      version = "1.177.0"
    }
  }
 backend "http" {

  }
}

//1) setup of alicloud RAM account with resource permisions and obtain the access_key and access_key_secret
provider "alicloud" {
  access_key = var.my_access_key
  secret_key = var.my_secret_key
  region     = var.my_region
}

data "alicloud_zones" "abc_zones" {}

//2) setup of VPC
resource "alicloud_vpc" "test_vpc" {
  vpc_name   = var.my_vpc
  cidr_block = var.my_vpc_cidr_block
}
In the variables.tf, we include the necessary variables to create a VPC on Alibaba Cloud. The values of the access key and secret key to access Alibaba Cloud are empty here and will be defined in the CI/CD Variables accordingly.
variable "my_access_key" {
  description = "RAM user access_key"
  sensitive   = true
}

variable "my_secret_key" {
  description = "RAM user secret_key"
  sensitive   = true
}

variable "my_region" {
  default = "cn-hongkong"
}

variable "my_vpc" {
  default = "gitlab_tf_vpc2"
}

variable "my_vpc_cidr_block" {
  default = "10.91.0.0/16"
}
When you commit the changes of these two files, you can add [skip ci] in the commit message to avoid the auto-pipeline execution being triggered.

Now, let's create the .gitlab-ci.yml to define the pipeline of Terraform init, validate, plan, and apply.
Three stages are defined for this pipeline: validate, plan, and apply.
The Docker image is the one we built and pushed in the first section.
Please Note: We need to export the access key and secret key for Alibaba Cloud access in the plan and apply stages. The environment var must be defined with a TF_VAR_ prefix like TF_VAR_my_access_key=${my_access_key} and TF_VAR_my_secret_key=${my_secret_key}.
To ensure everything is good before deploying the cloud infrastructure, we use when: manual to trigger the last stage manually.
stages:
- validate
- plan
- apply

image:
    name: YOUR_DOCKER_HUB_REPO/ubuntu_tf:test

validate:
    stage: validate
    script:
        - chmod +x init_file
        - ./init_file
        - terraform validate

plan:
    stage: plan
    before_script:
        - export TF_VAR_my_access_key=${my_access_key}
        - export TF_VAR_my_secret_key=${my_secret_key}
    script:
        - chmod +x init_file
        - ./init_file
        - terraform plan

apply:
    stage: apply
    before_script:
        - export TF_VAR_my_access_key=${my_access_key}
        - export TF_VAR_my_secret_key=${my_secret_key}
    script:
        - chmod +x init_file
        - ./init_file
        - terraform apply --auto-approve
    when: manual
With this file ready, we can commit the changes to trigger the pipeline.
Navigate to the CI/CD — Pipeline and notice the pipeline is in running status.

If everything is set up correctly, the validate and plan stages will be executed automatically. Then, we can check the logs of each stage:
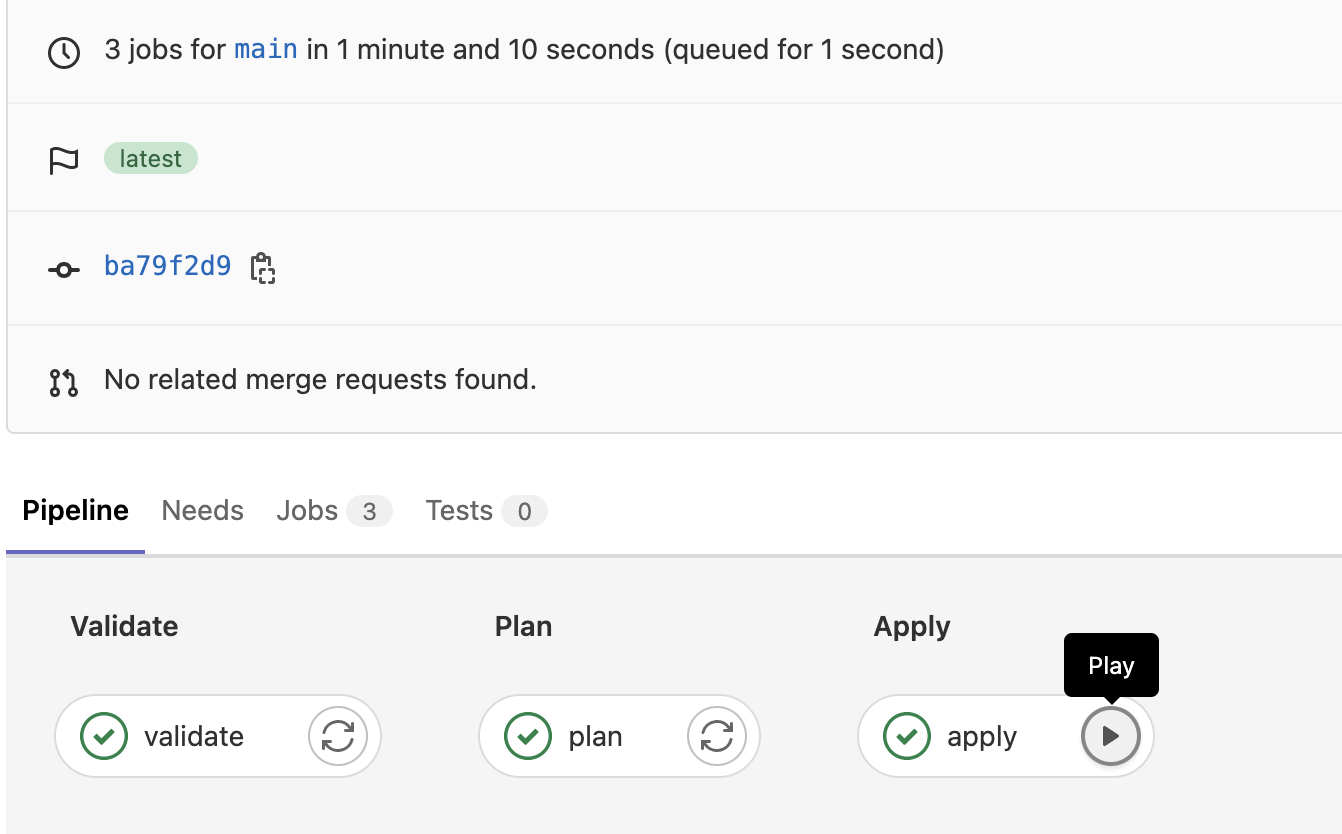
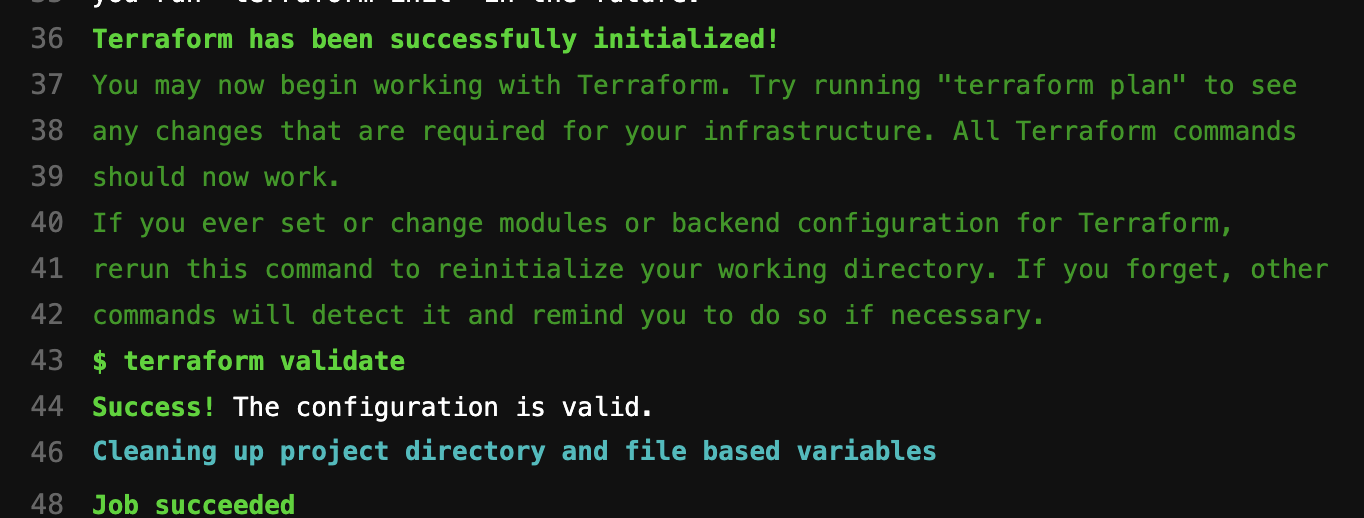
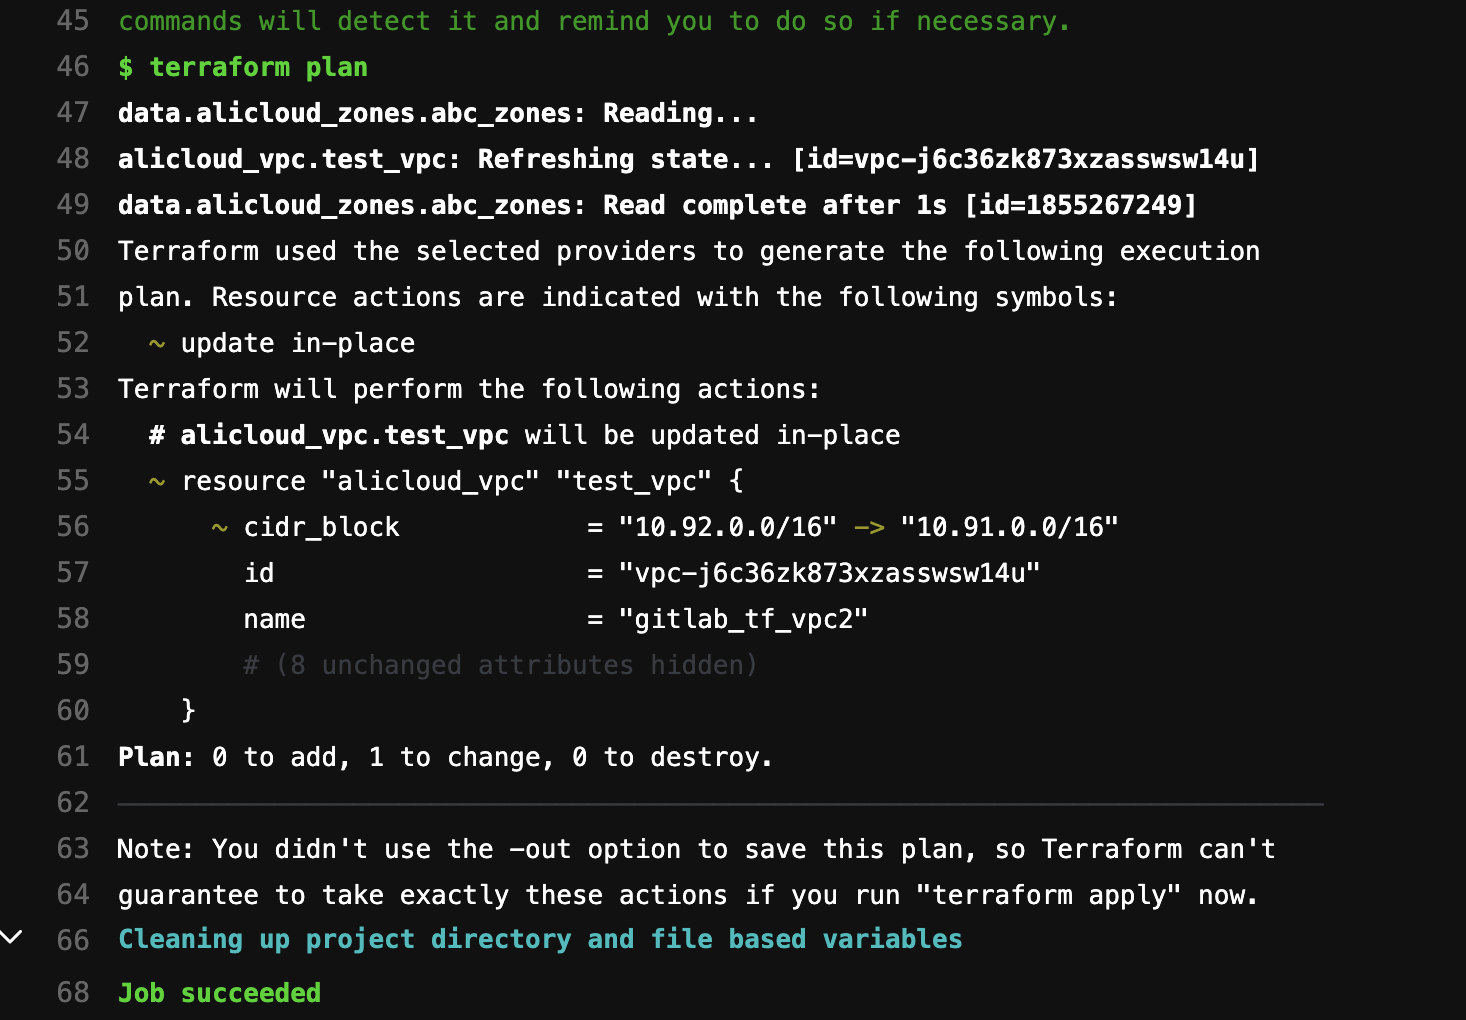
We can continue with the final stage apply by clicking the  play button.
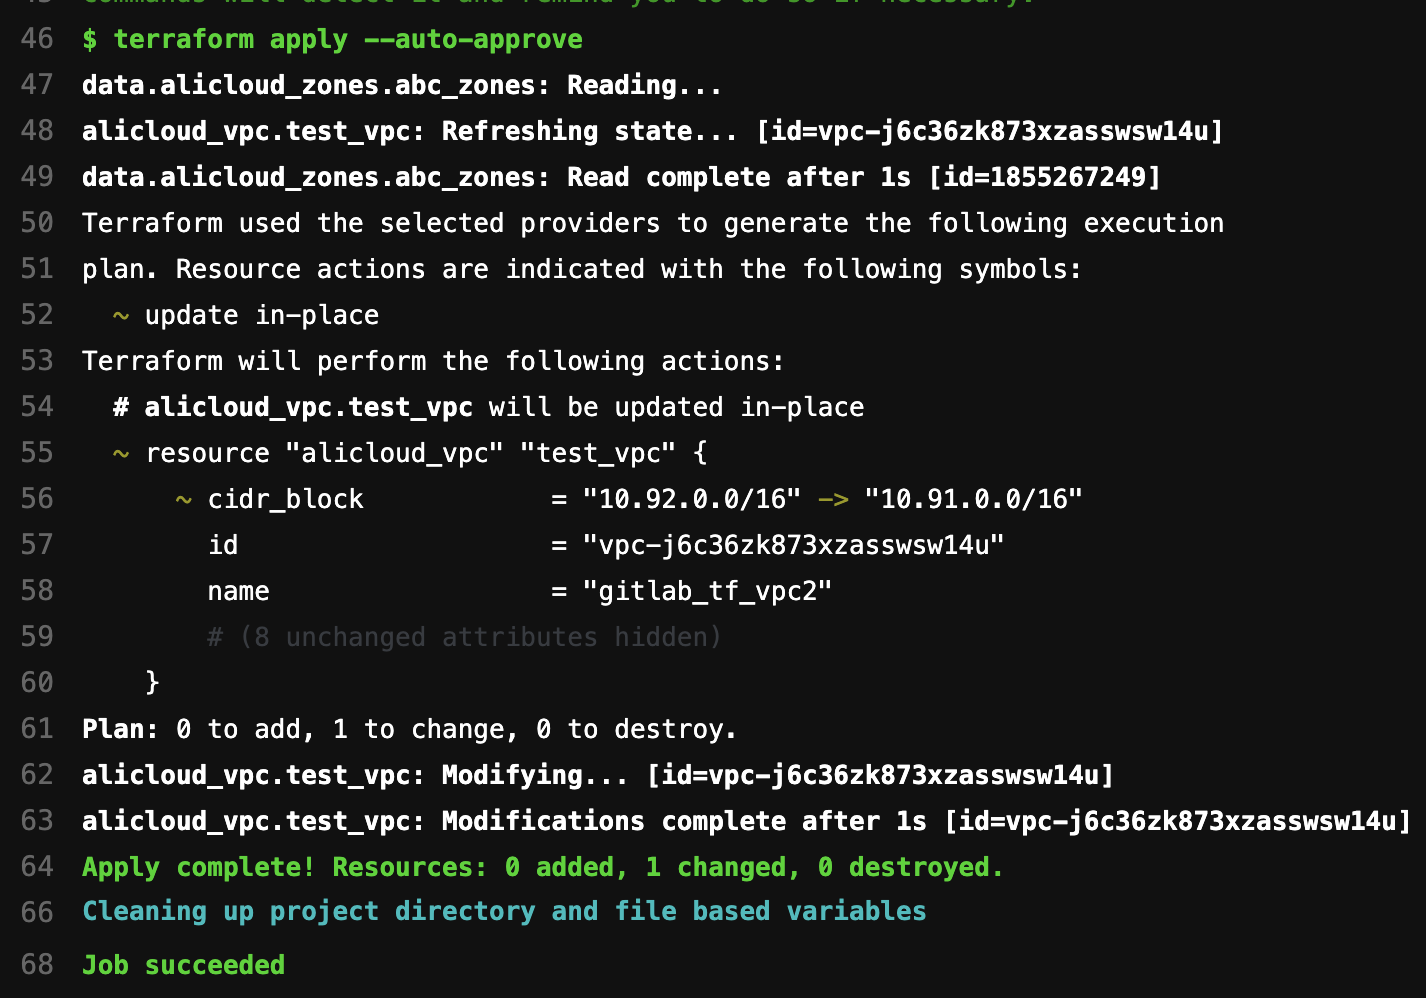
When this stage is also successfully executed, we can check the state file and Alibaba Cloud VPC instance.
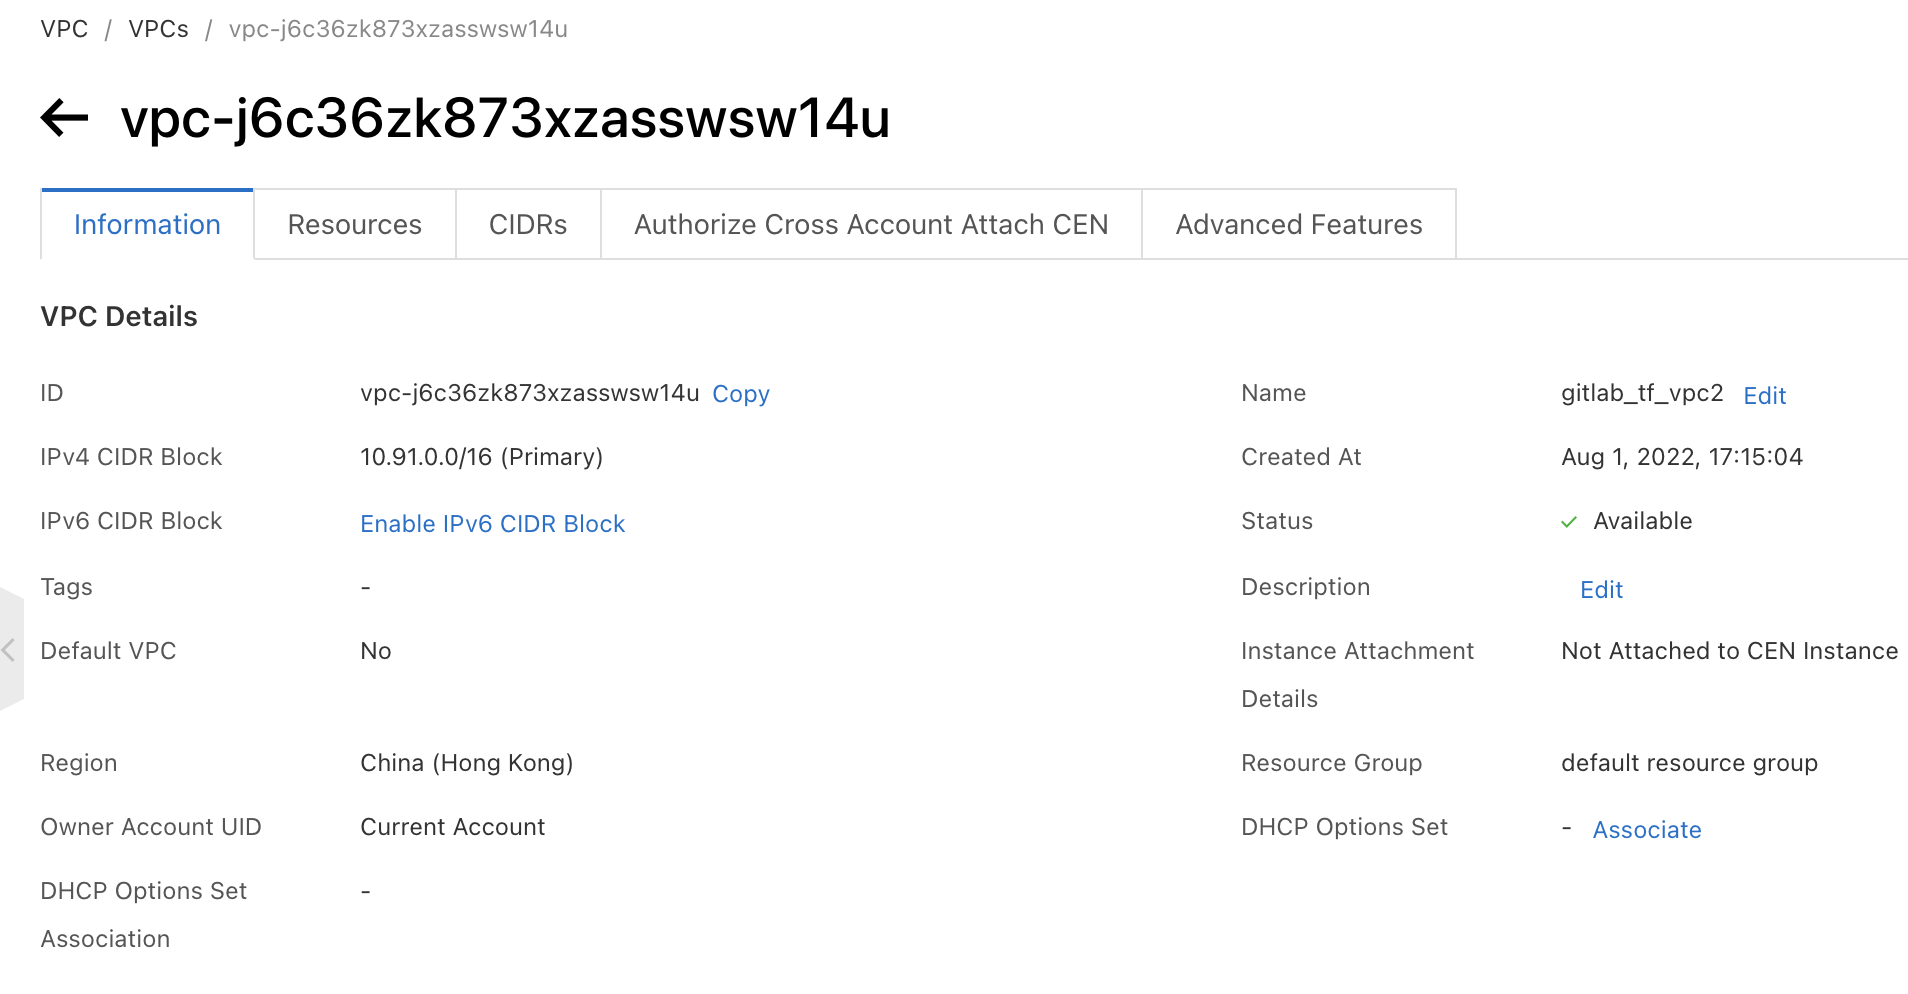
We can see the VPC is successfully created on the Alibaba Cloud VPC console:
We can also see the Terraform state file has been created under the GitLab Infrastructure—Terraform menu:

Now, we have four files under our GitLab project repository. If we update the contents of any of them and commit the changes without [skip ci] in the commit message, the pipeline will be triggered.
 --.gitlab-ci.yml
|
 --init_file
|
 --main.tf
|
 --variables.tf
As mentioned at the beginning of this article, GitOps is valuable for team collaboration rather than single user contribution.
Ee will simulate a real-life GitOps scenario to demonstrate: A junior engineer updates the Terraform codes and sends the merge request to the team leader for approval before deploying the updates to the cloud infrastructure.
Let's create a new GitLab user and invite them to our project as a developer role.
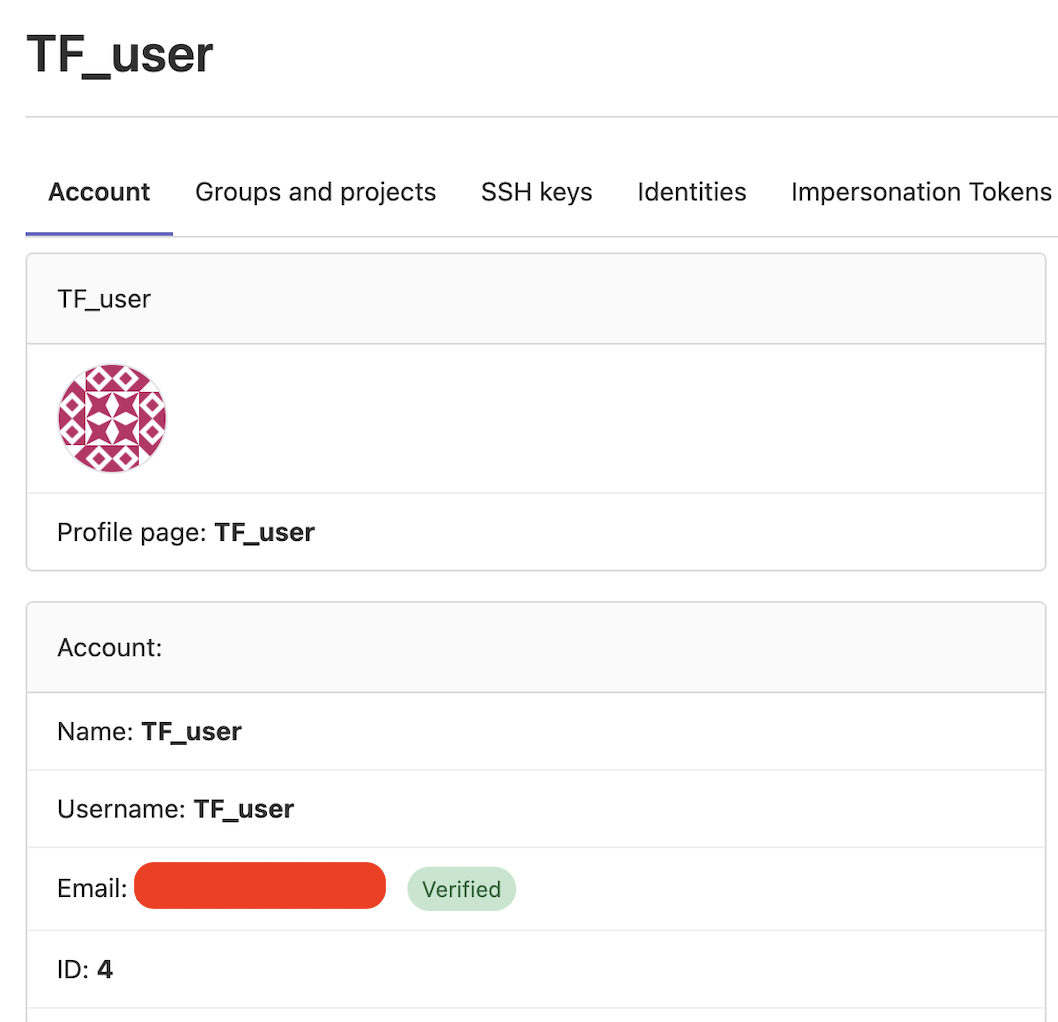
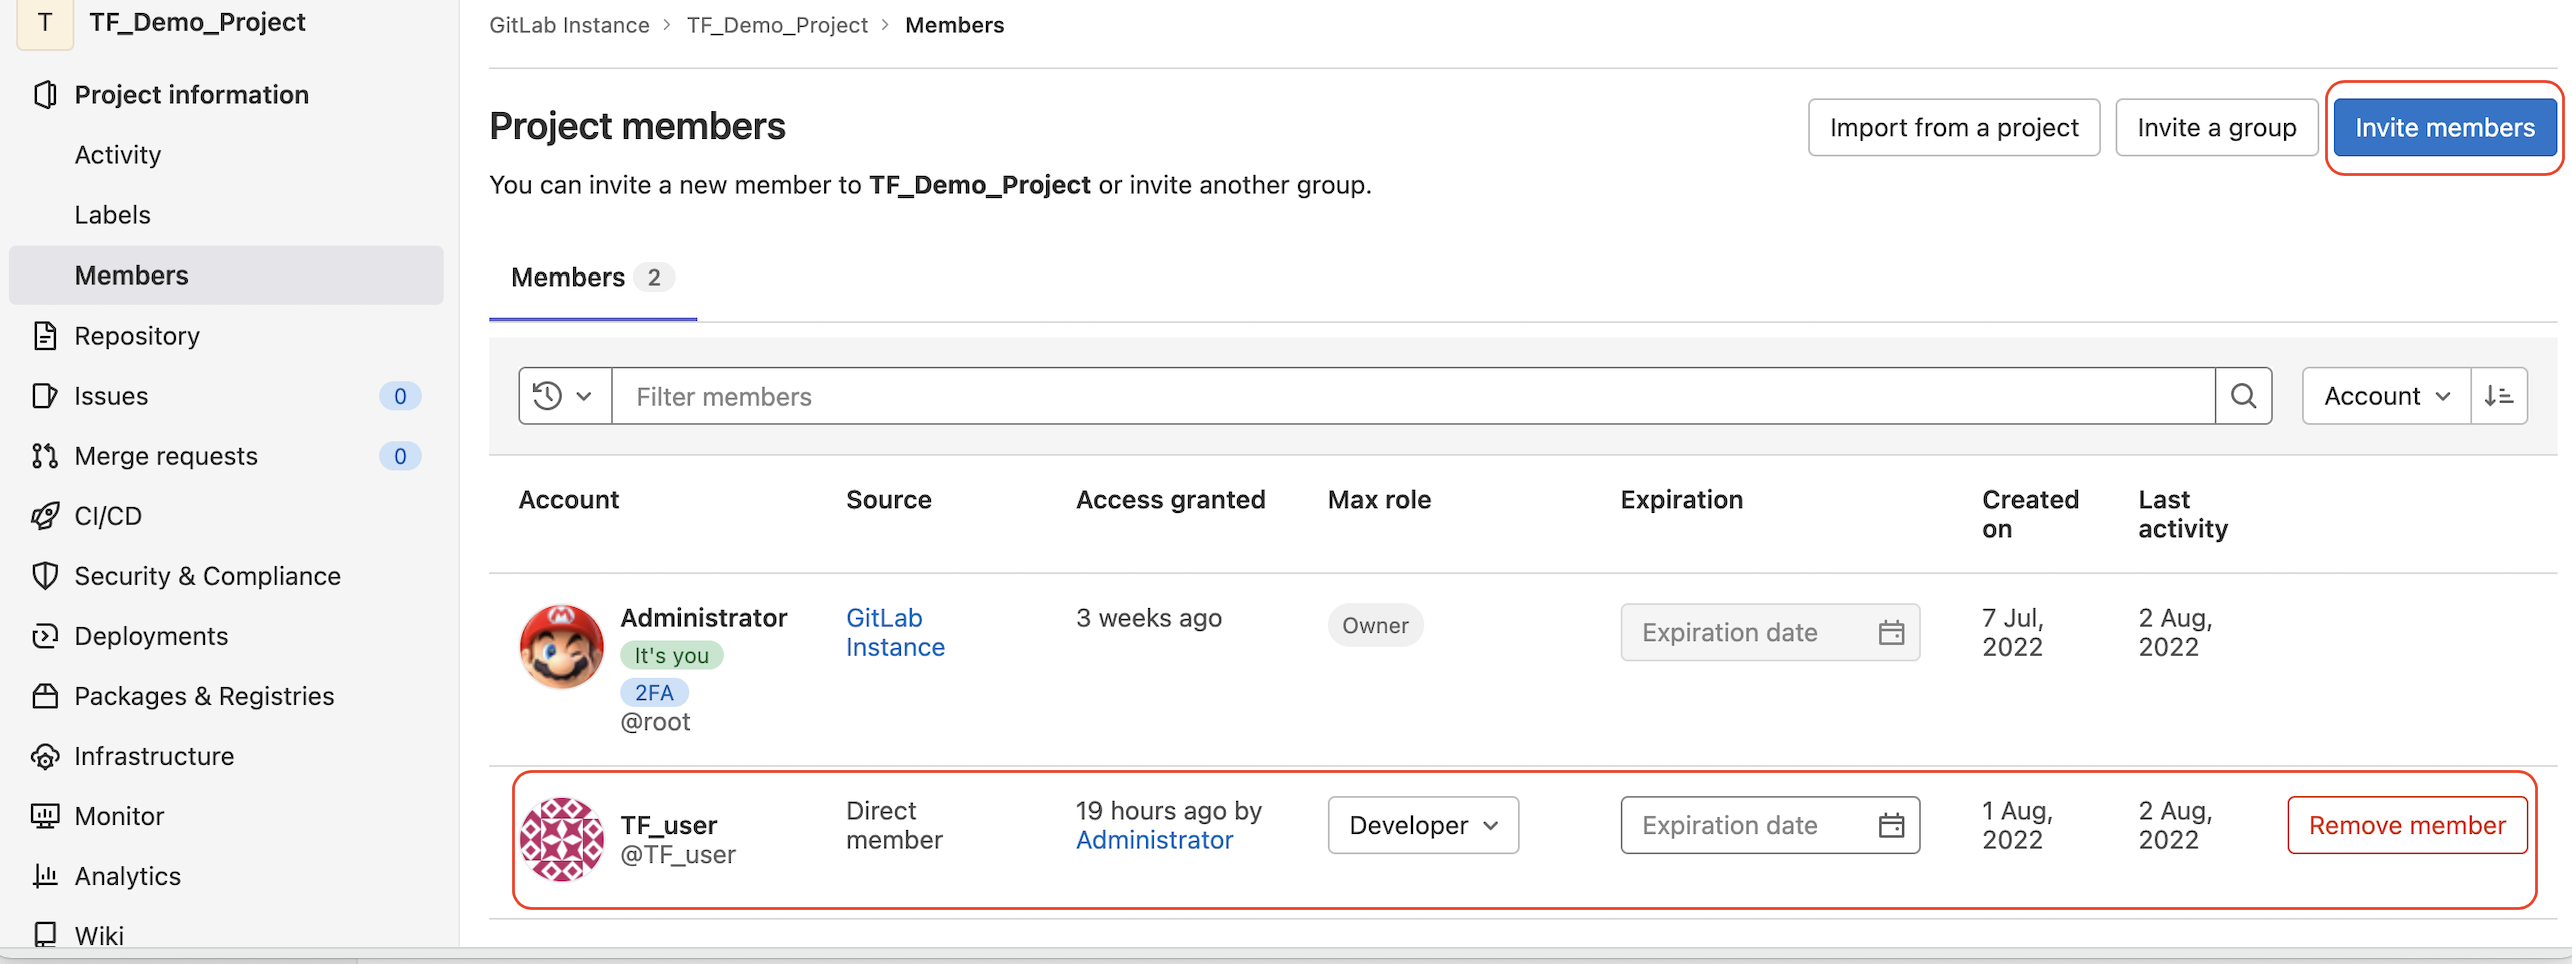
We can create a new branch of this project for other team members to work with using Administrator.

To enable the pipeline stages, validate and plan defined in the .gitlab-ci.yml can be successfully run in the branch. We also need to set the protected status of the branch. Otherwise, our protected CI/CD variables will be invalid.
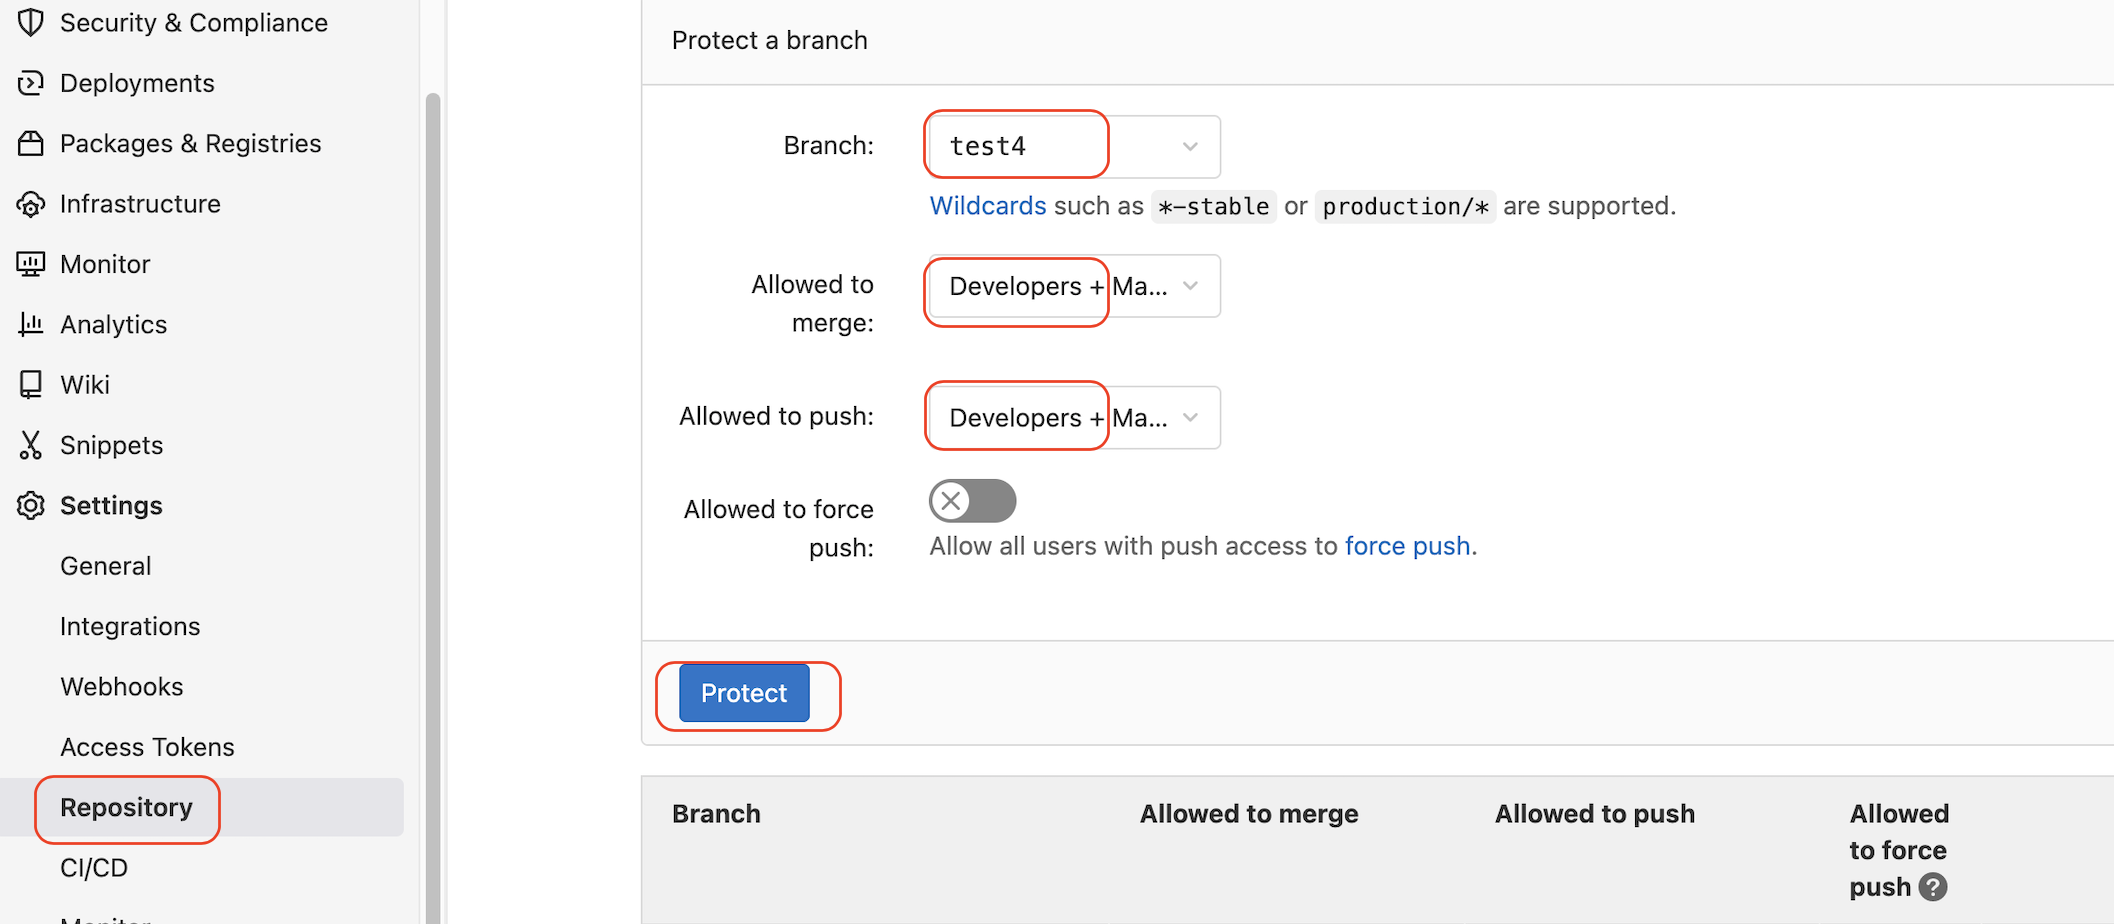
Once the new branch is ready, the TF_user can log in to the project and switch to the branch for development.

If something needs to be updated, TF_user can commit the change in the current branch with necessary validation and planning and send the merge request to the Administrator.
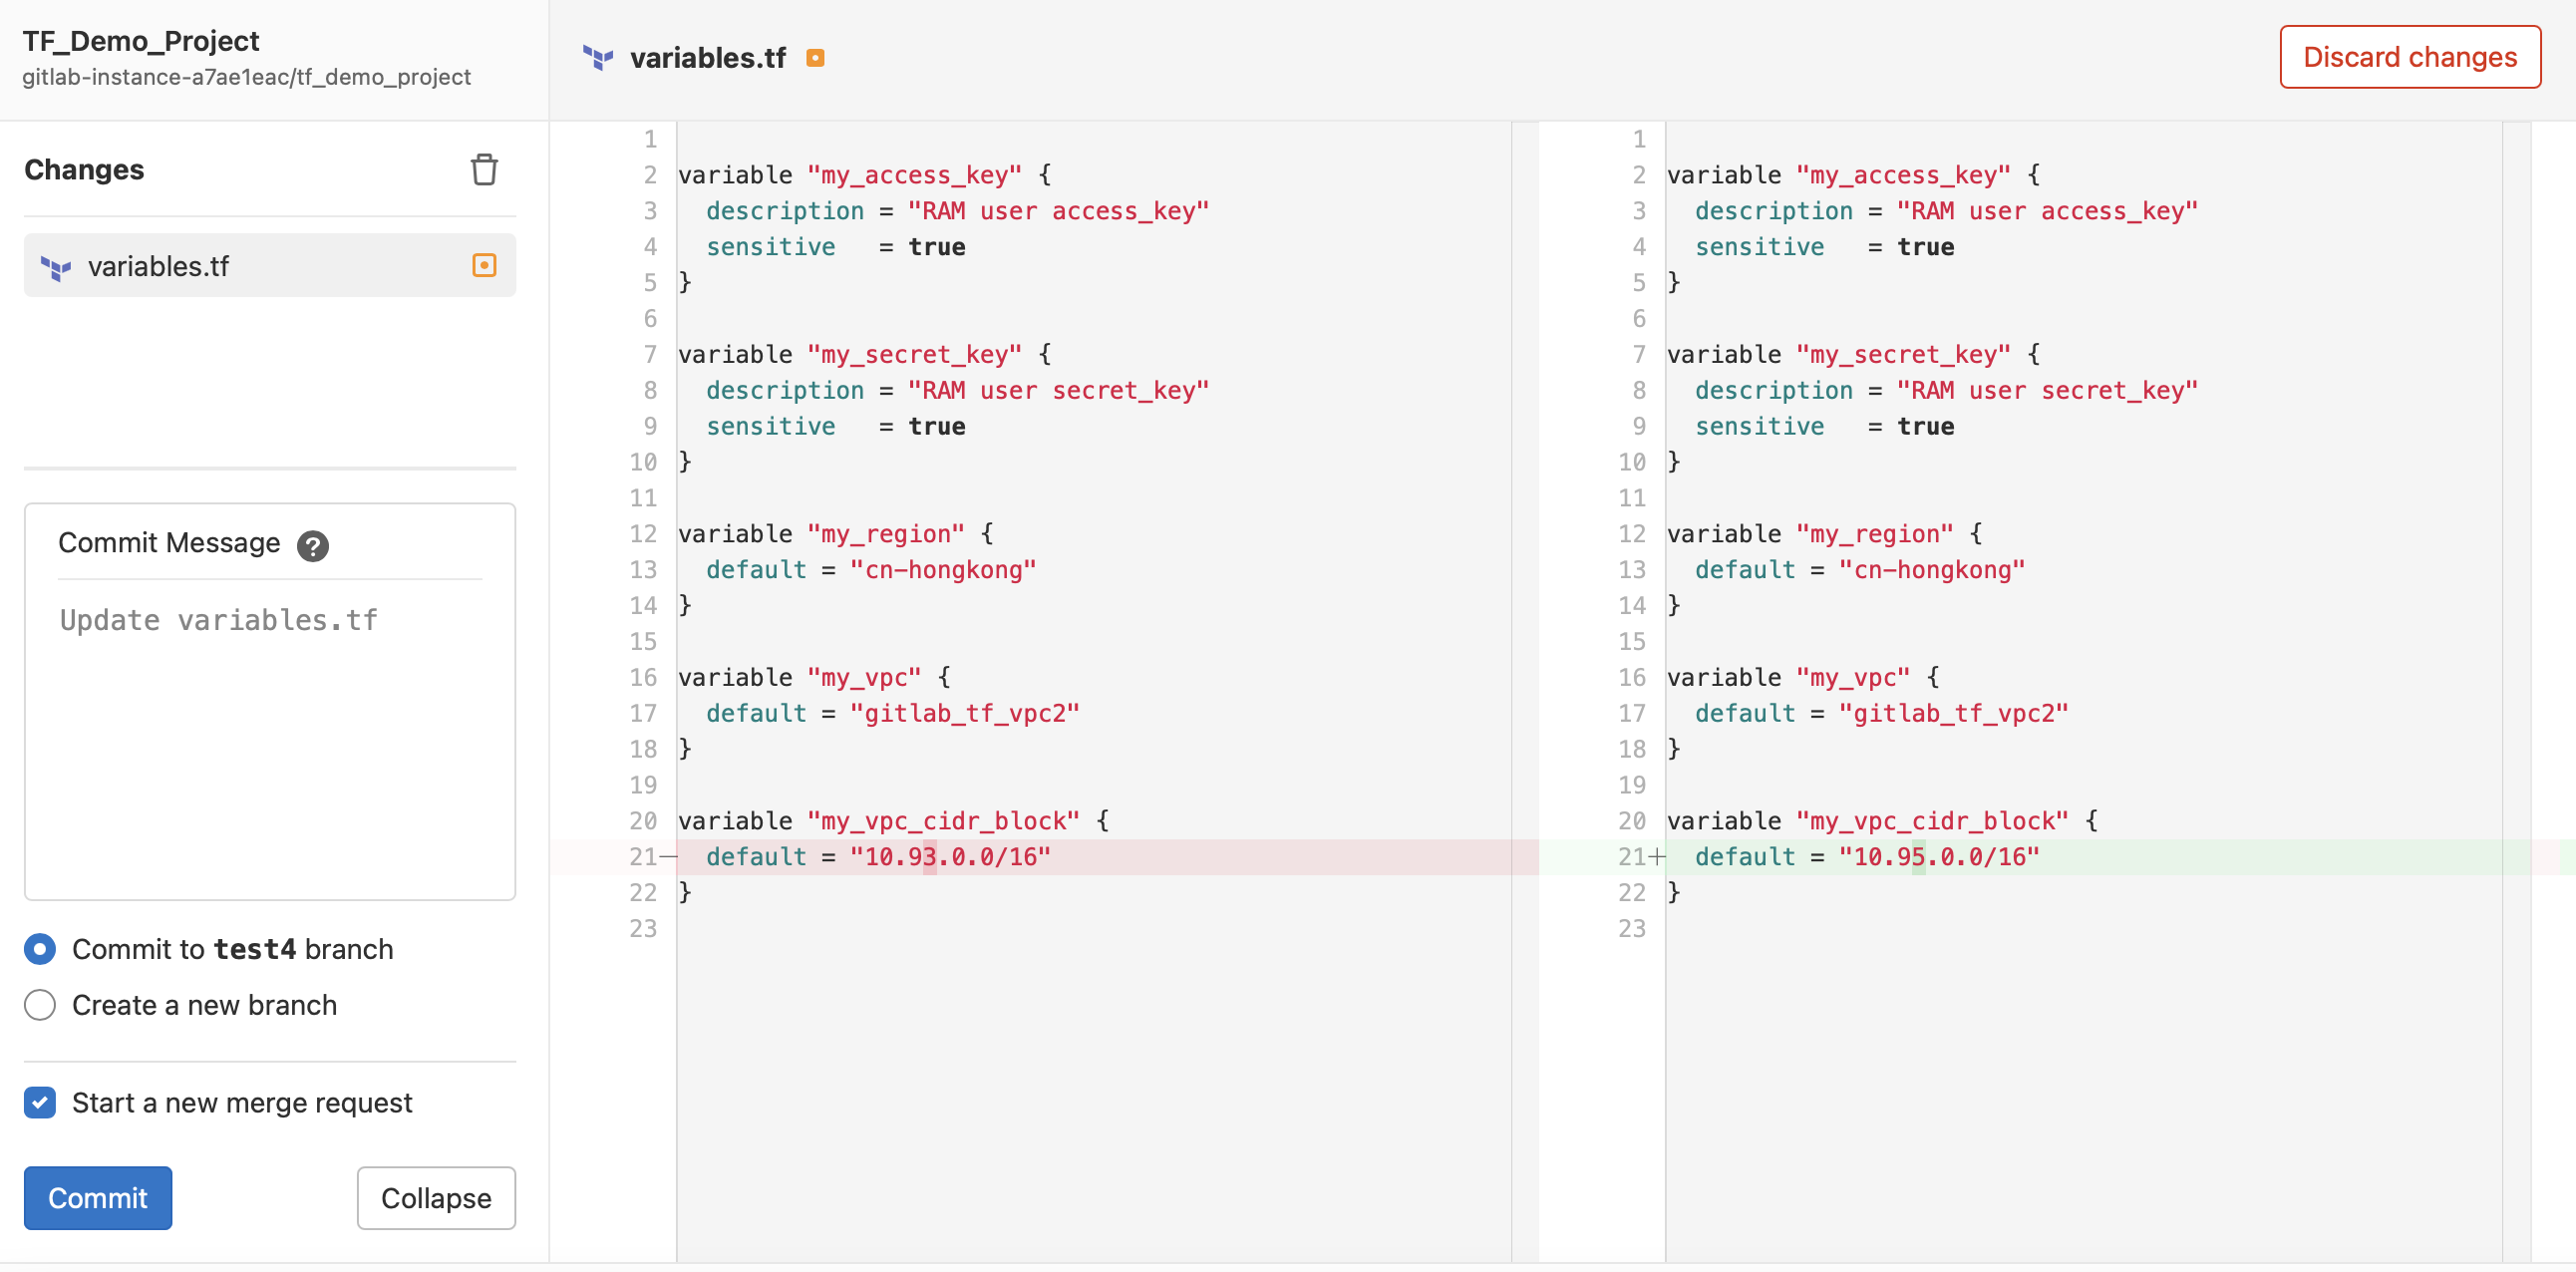
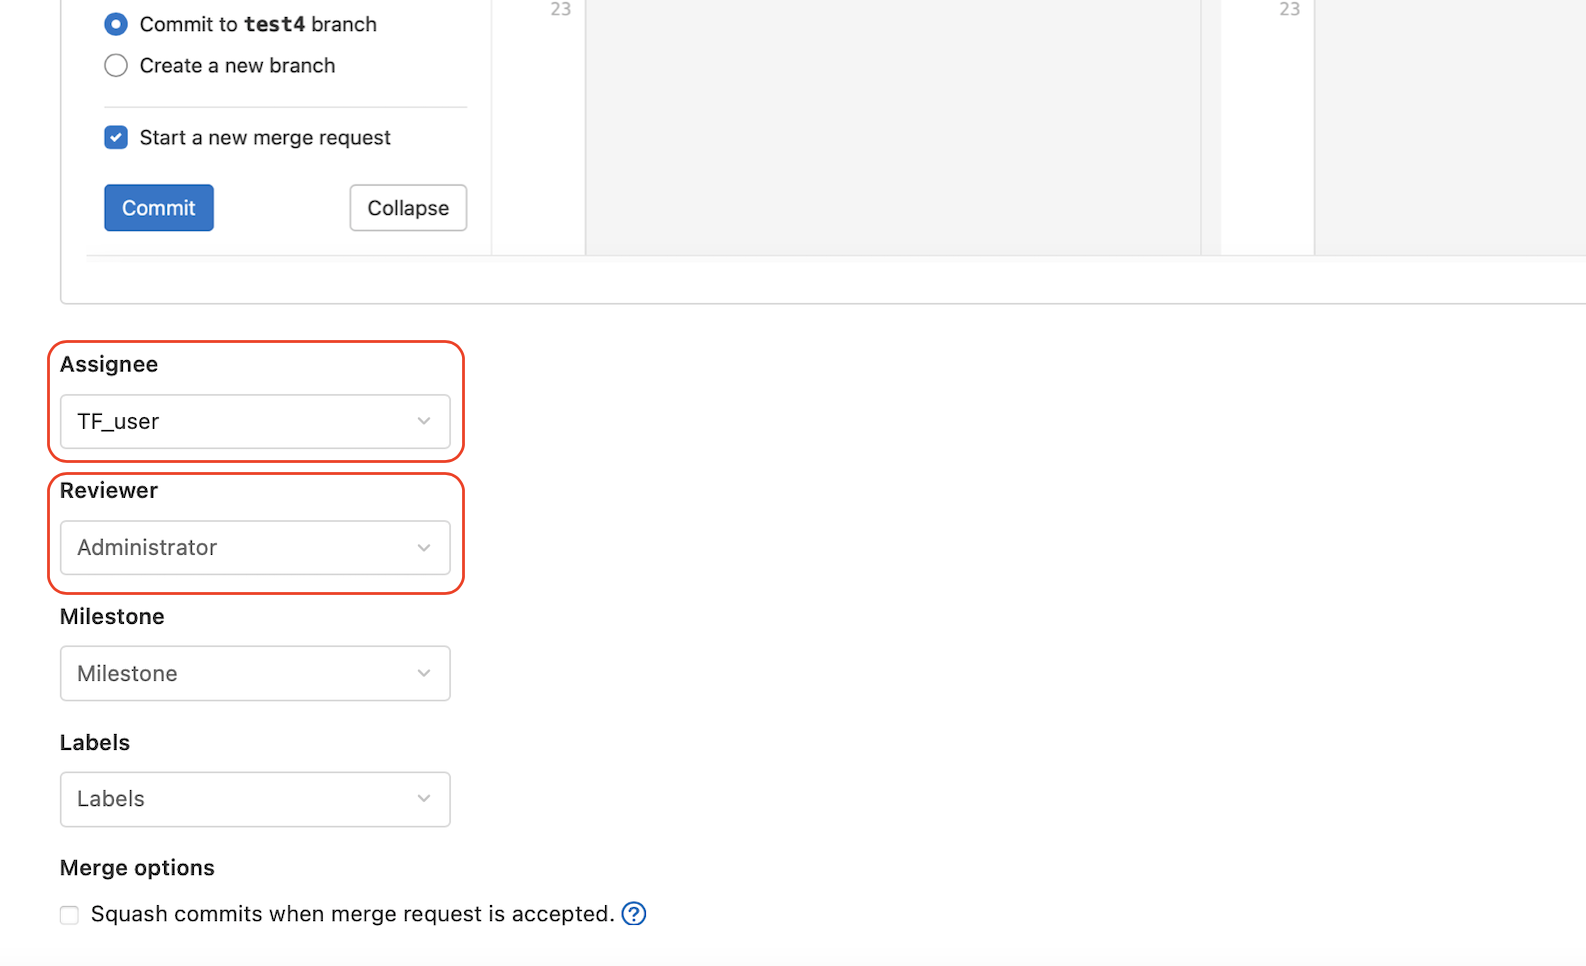
Log in with the Administrator account to see the notification of the merge request.

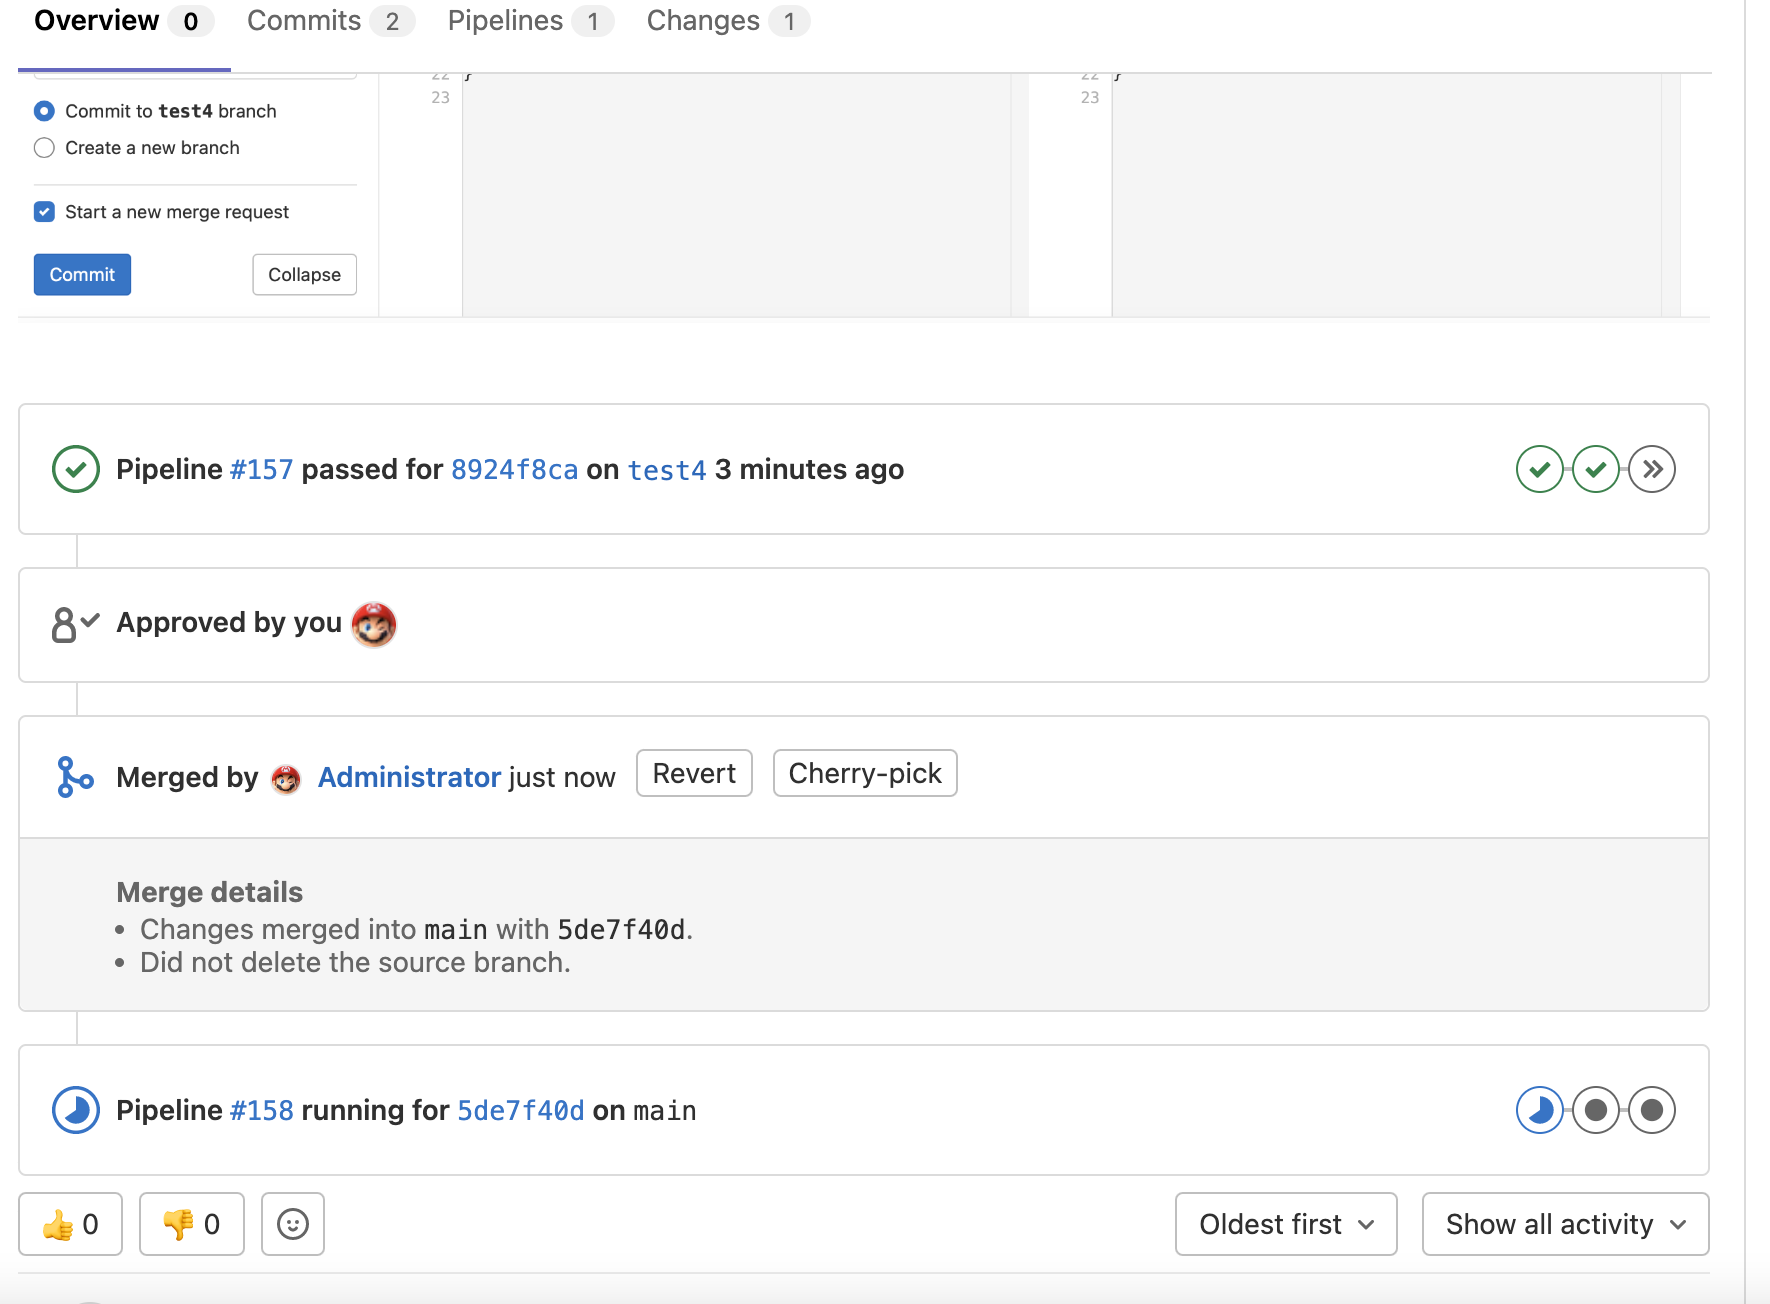
When going through the merge request details, the Administrator can approve and merge the changes to the main branch, which will deploy the changes to the cloud infrastructure.

1,345 posts | 475 followers
FollowAlibaba Cloud Community - August 5, 2022
Alibaba Cloud Community - July 18, 2022
JDP - July 31, 2020
Tran Phuc Hau - April 23, 2023
Alibaba Clouder - October 3, 2018
Alibaba Cloud MVP - September 29, 2021

1,345 posts | 475 followers
Follow DevOps Solution
Accelerate software development and delivery by integrating DevOps with the cloud
Learn More Alibaba Cloud Flow
An enterprise-level continuous delivery tool.
Learn MoreMore Posts by Alibaba Cloud Community