By: Jeremy Pedersen
Welcome back for another Fantastic Friday blog! This week, we set up our own VPN Gateway, giving us simple and secure access to our VPC from anywhere.
What we'll do:
Let's get started!
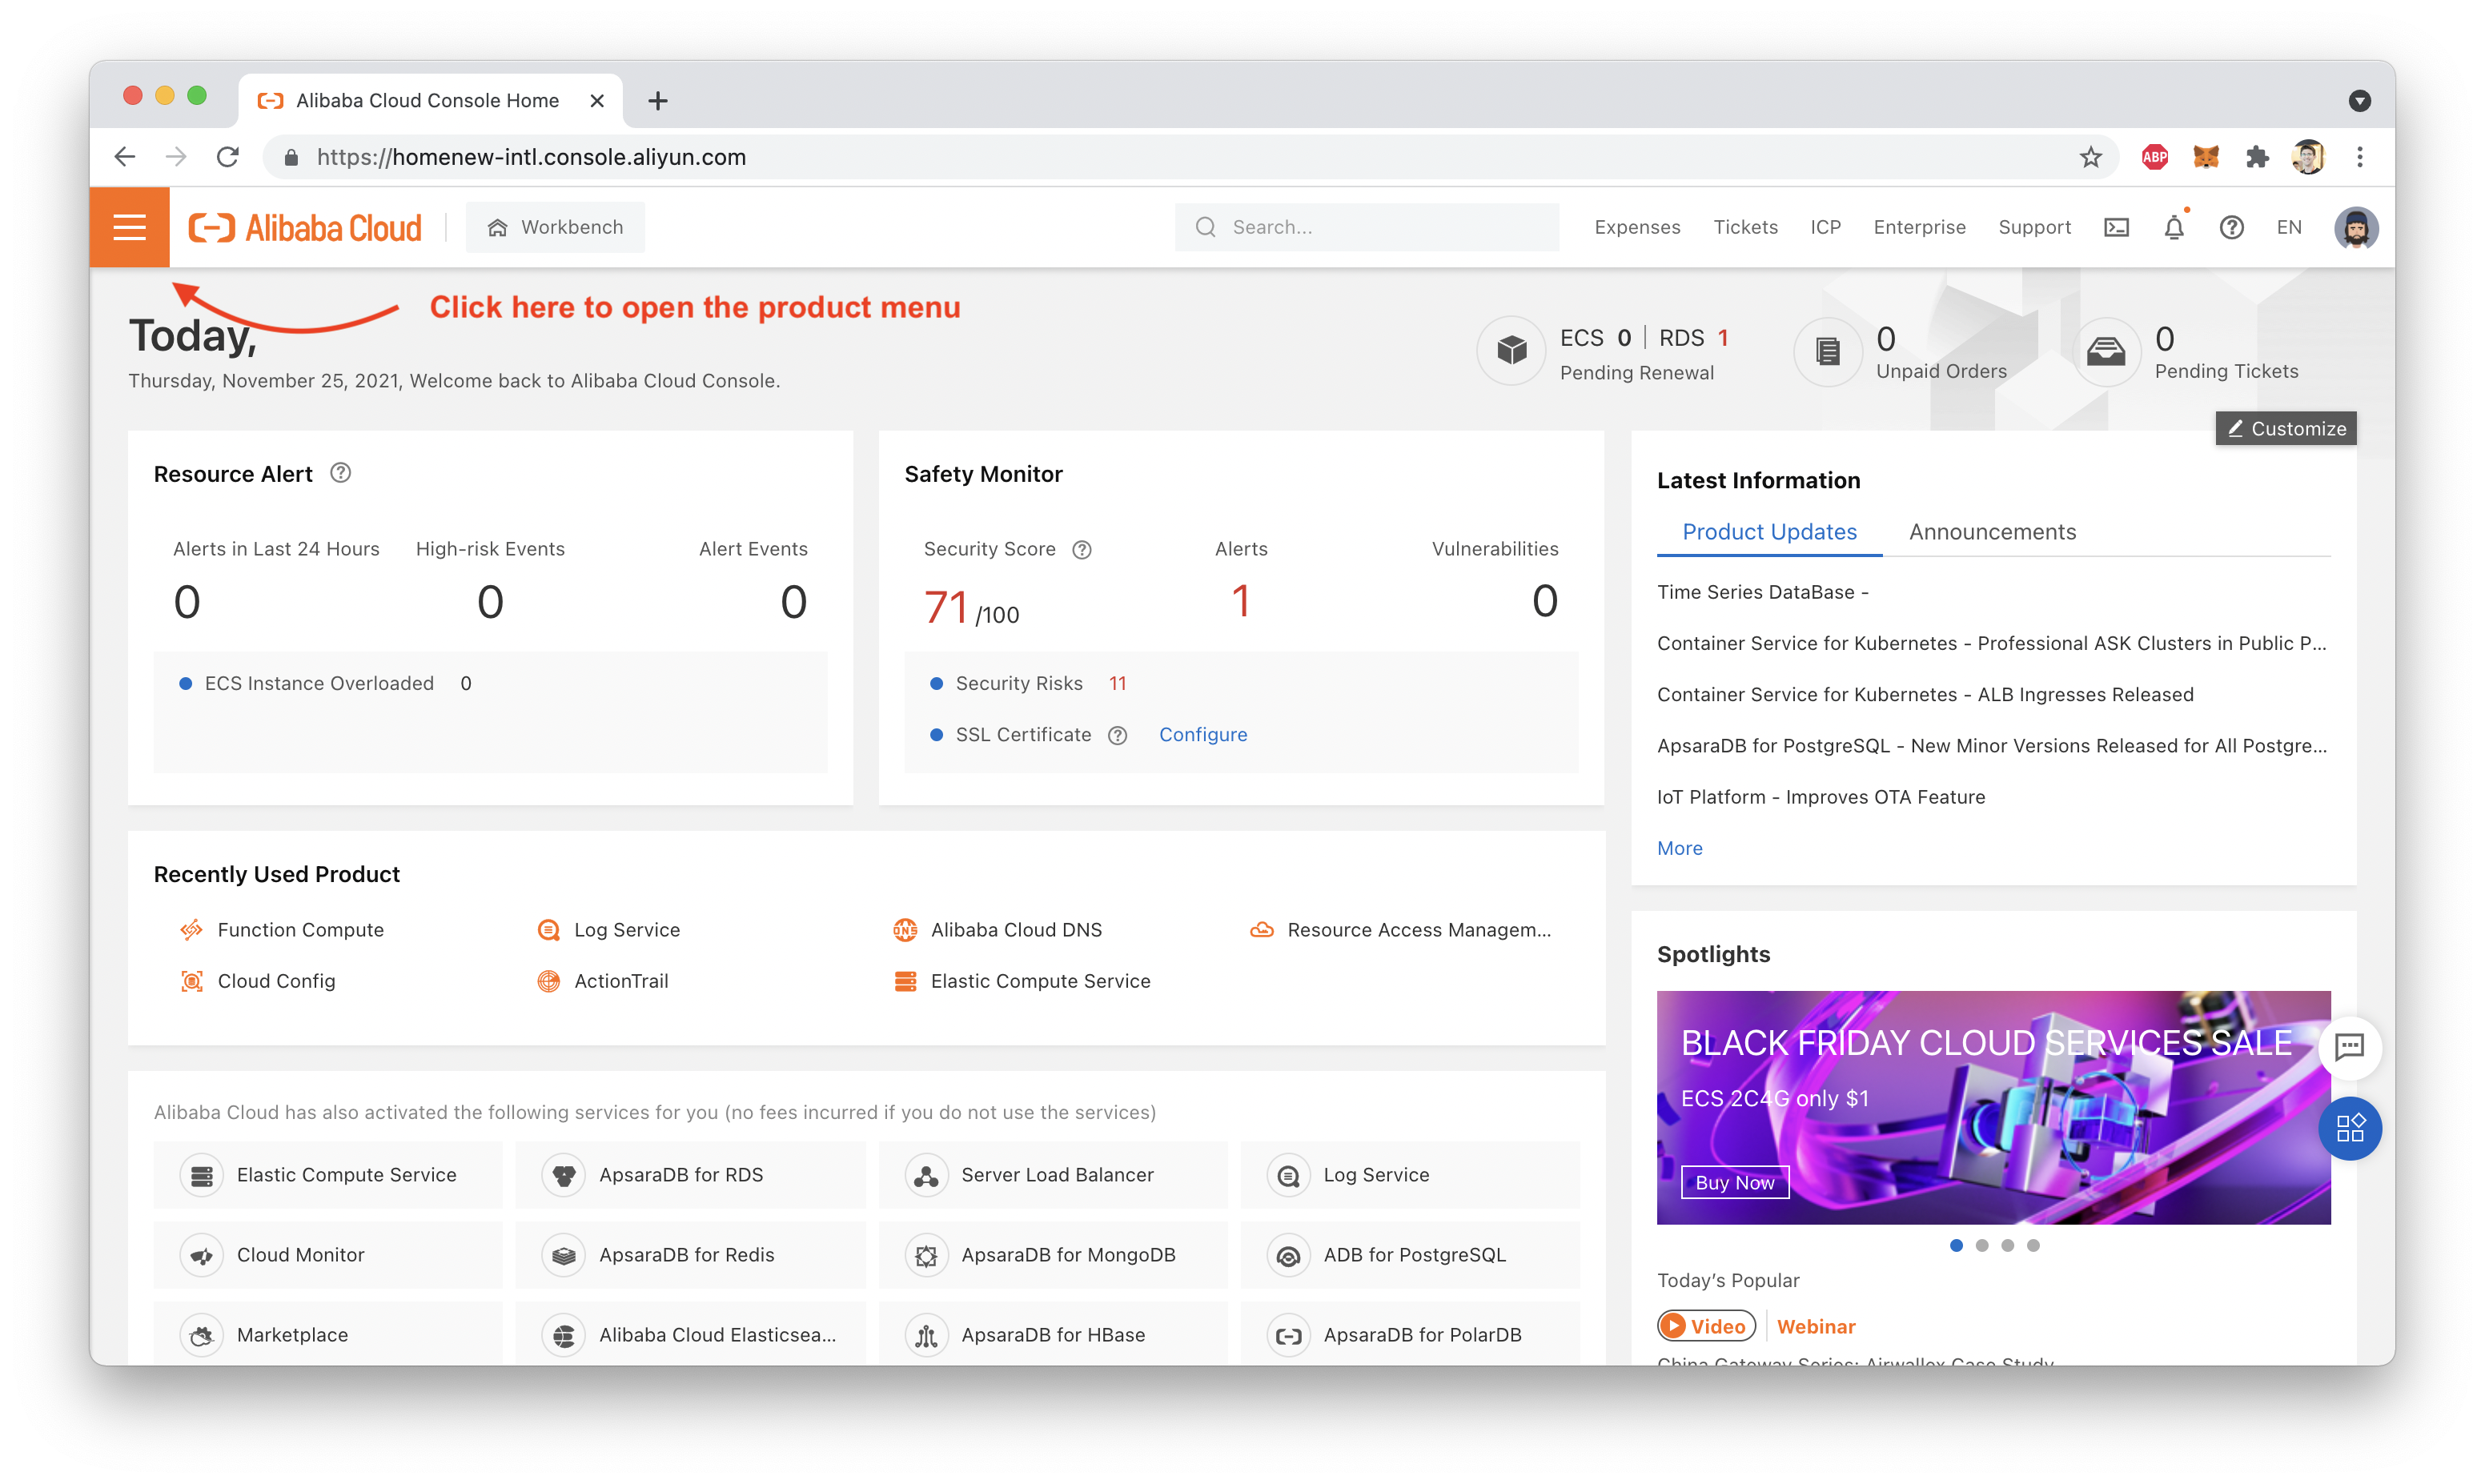
First, of course, you'll need to log into your Alibaba Cloud account and log into the web console. From there, open the products menu:
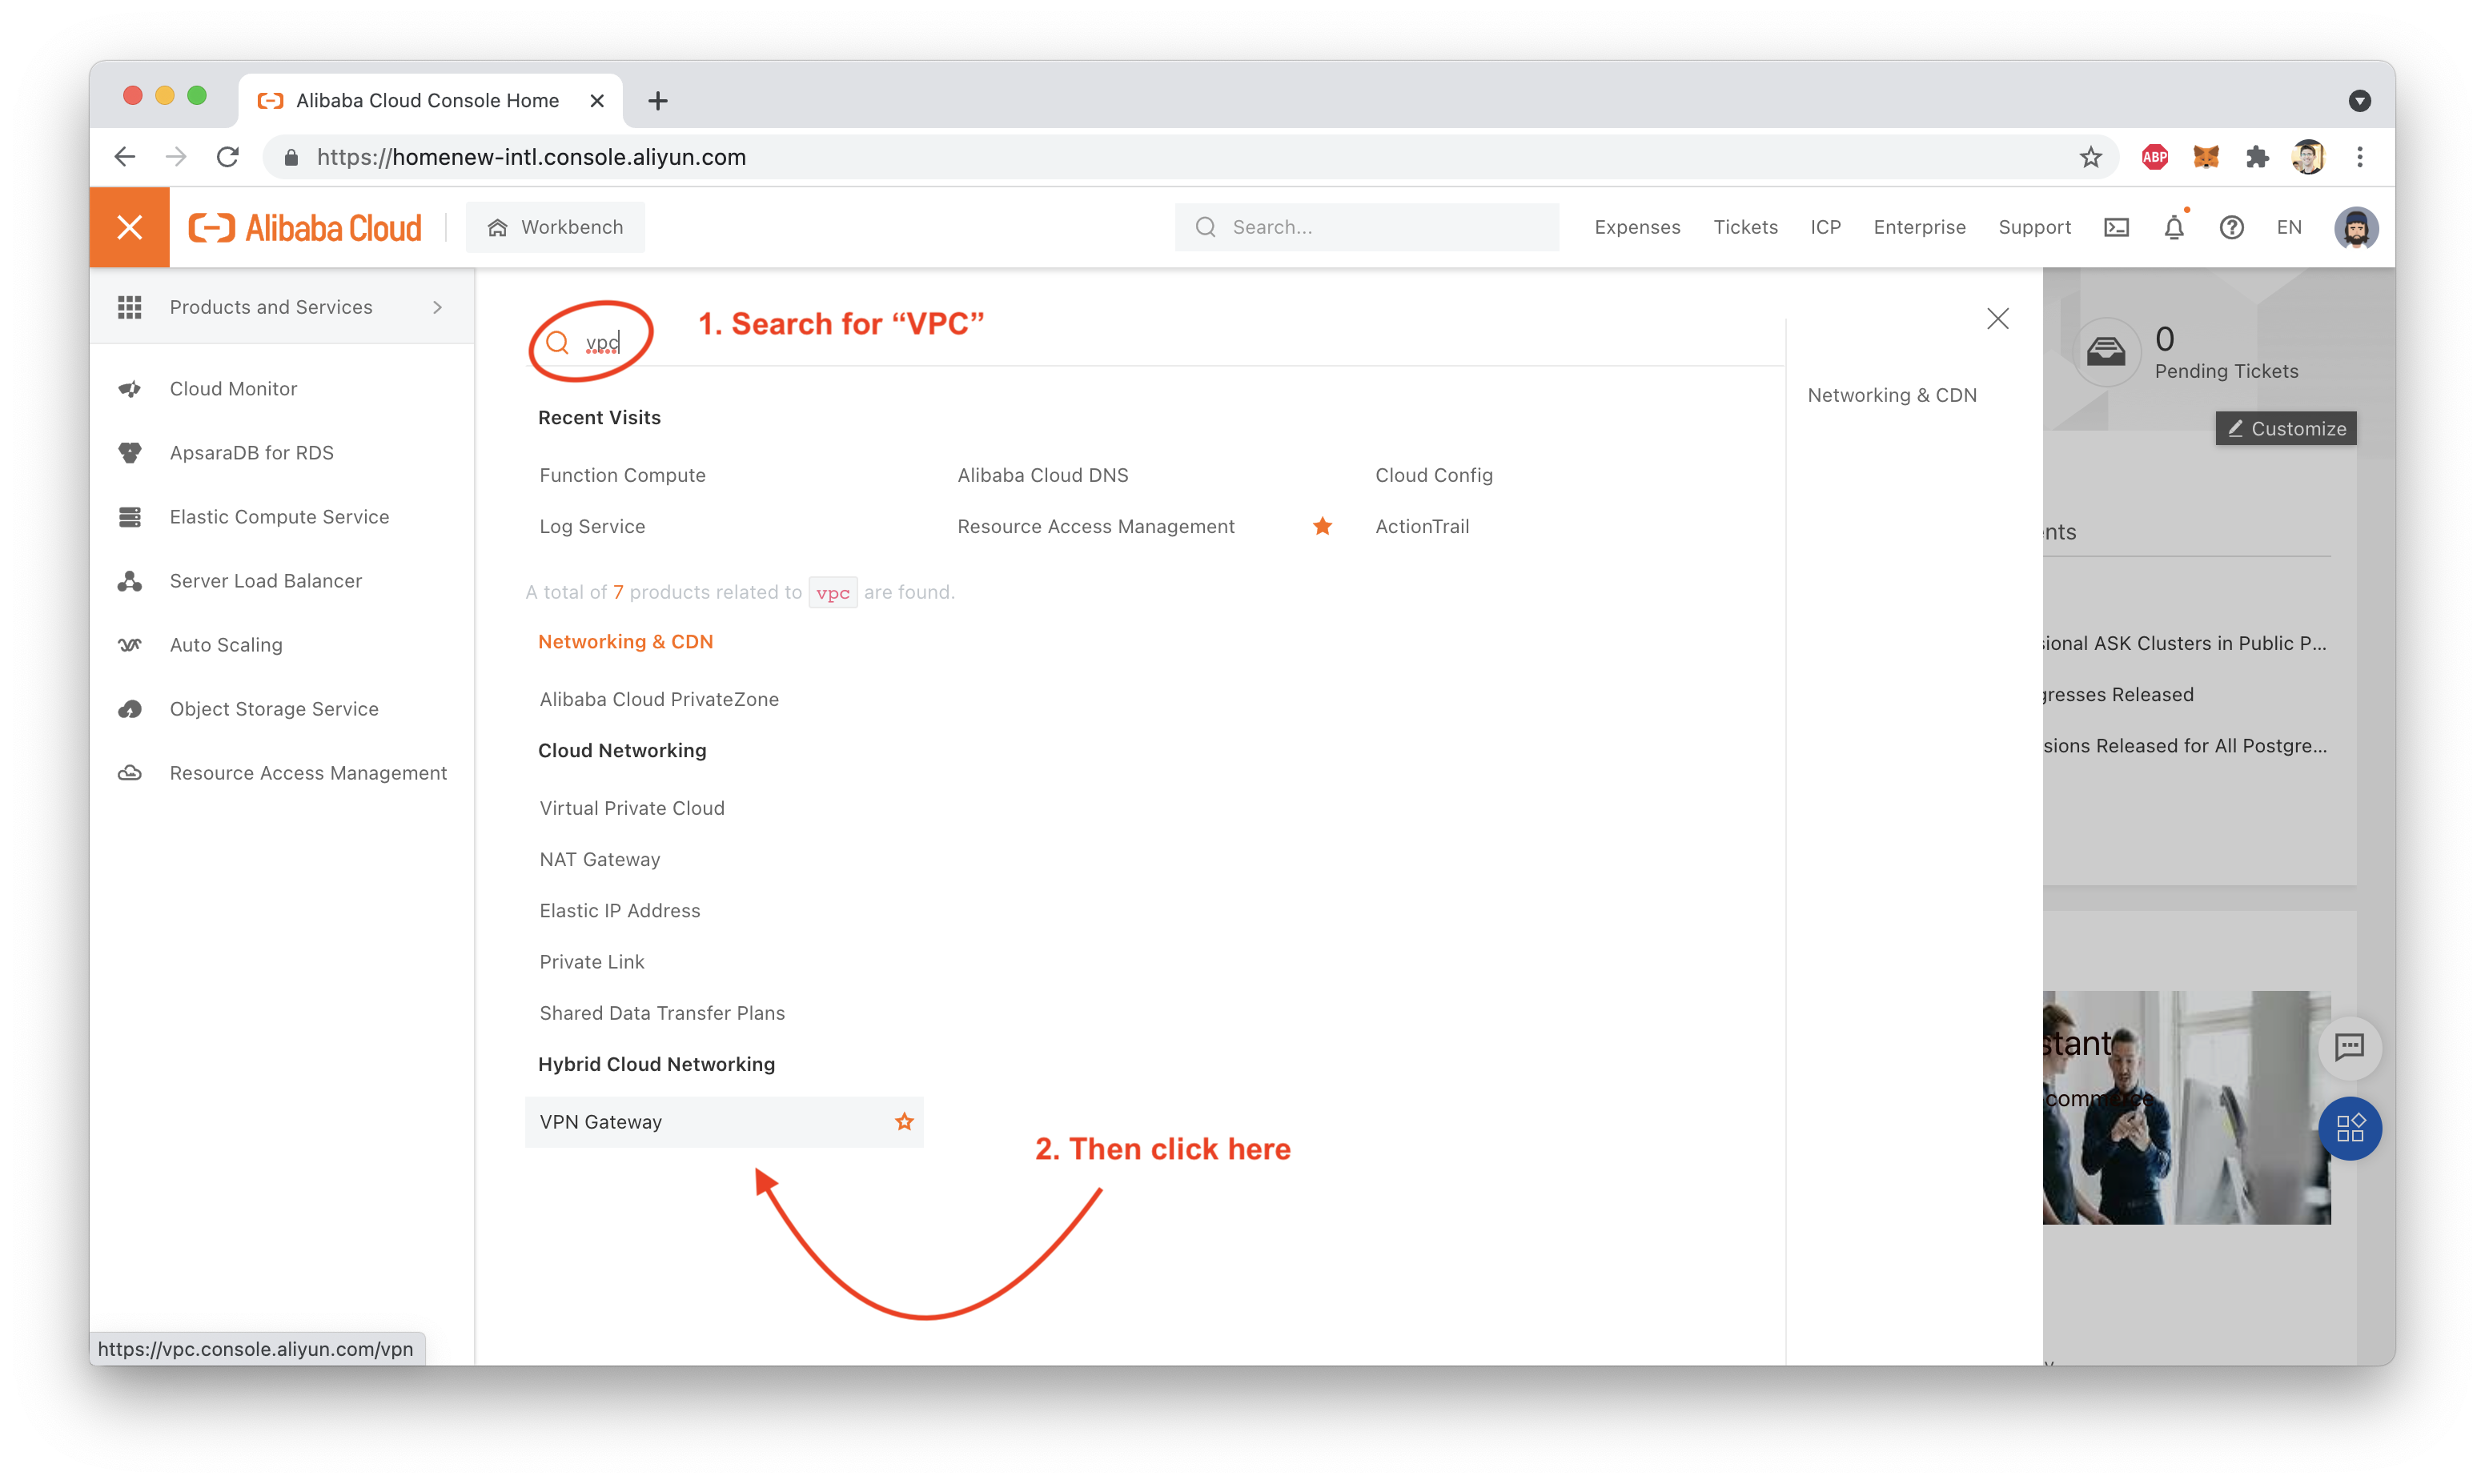
Then, search for "VPC":
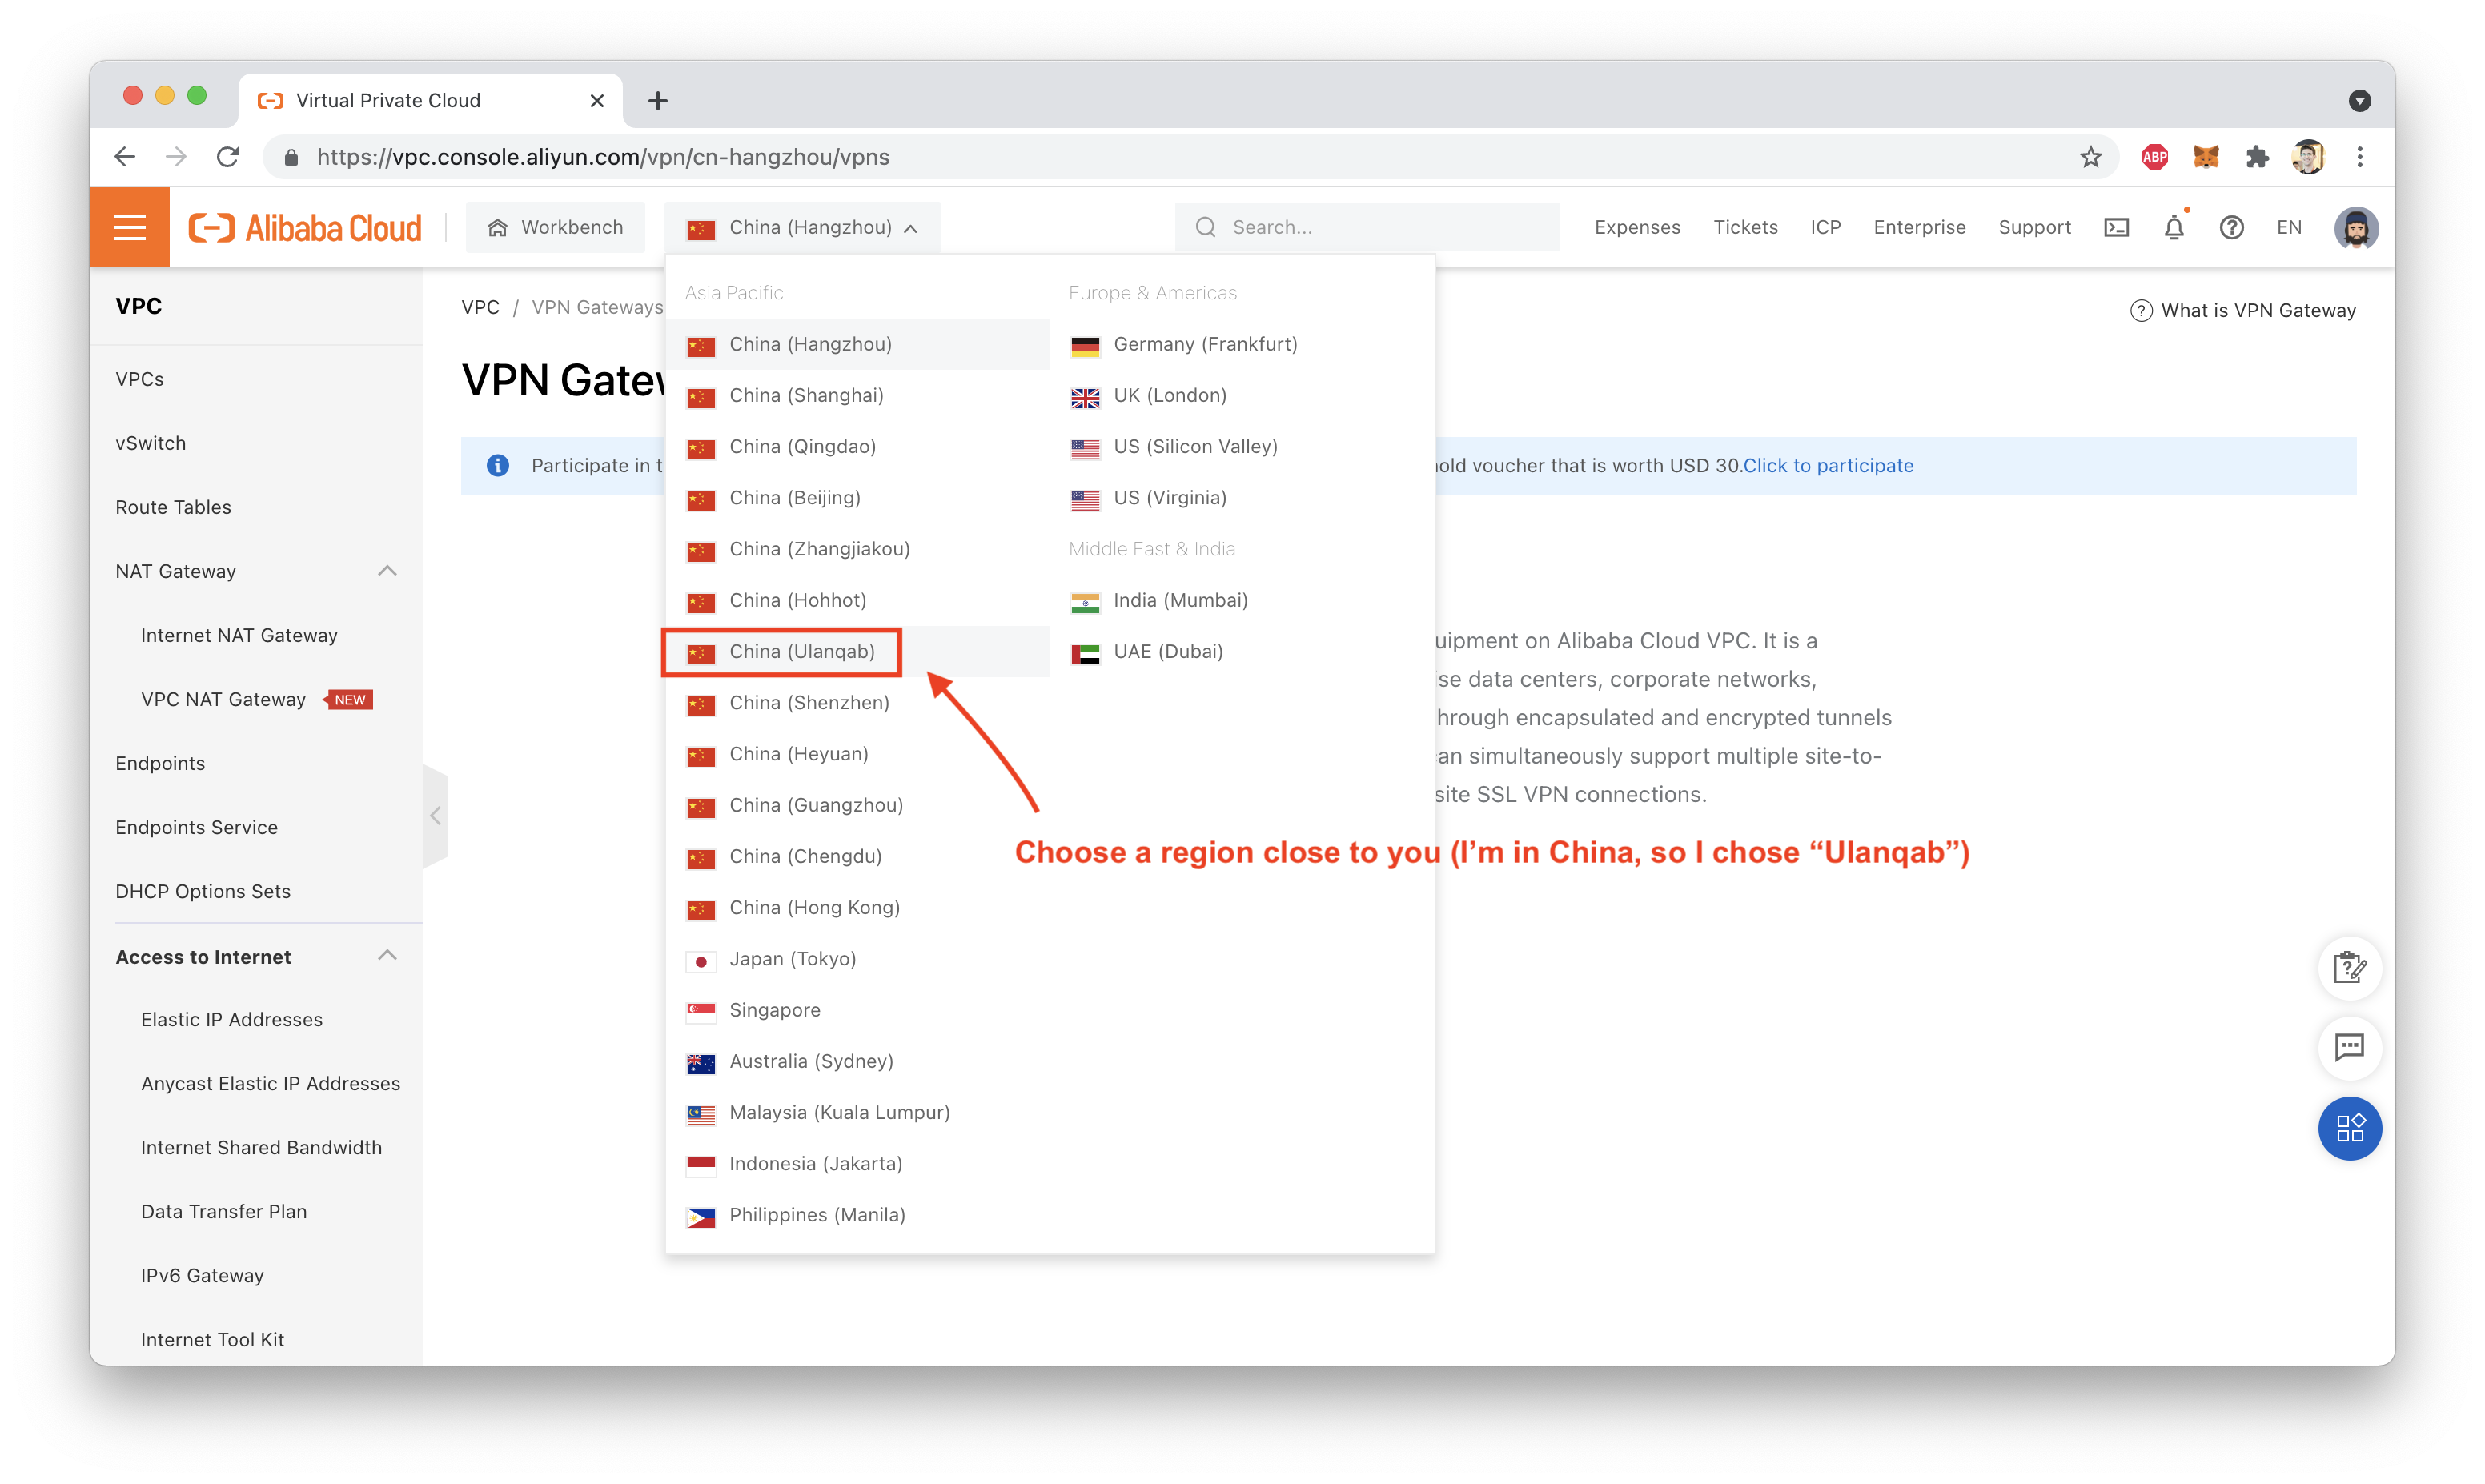
Next, choose a region. I chose a Chinese region since I'm based in China:
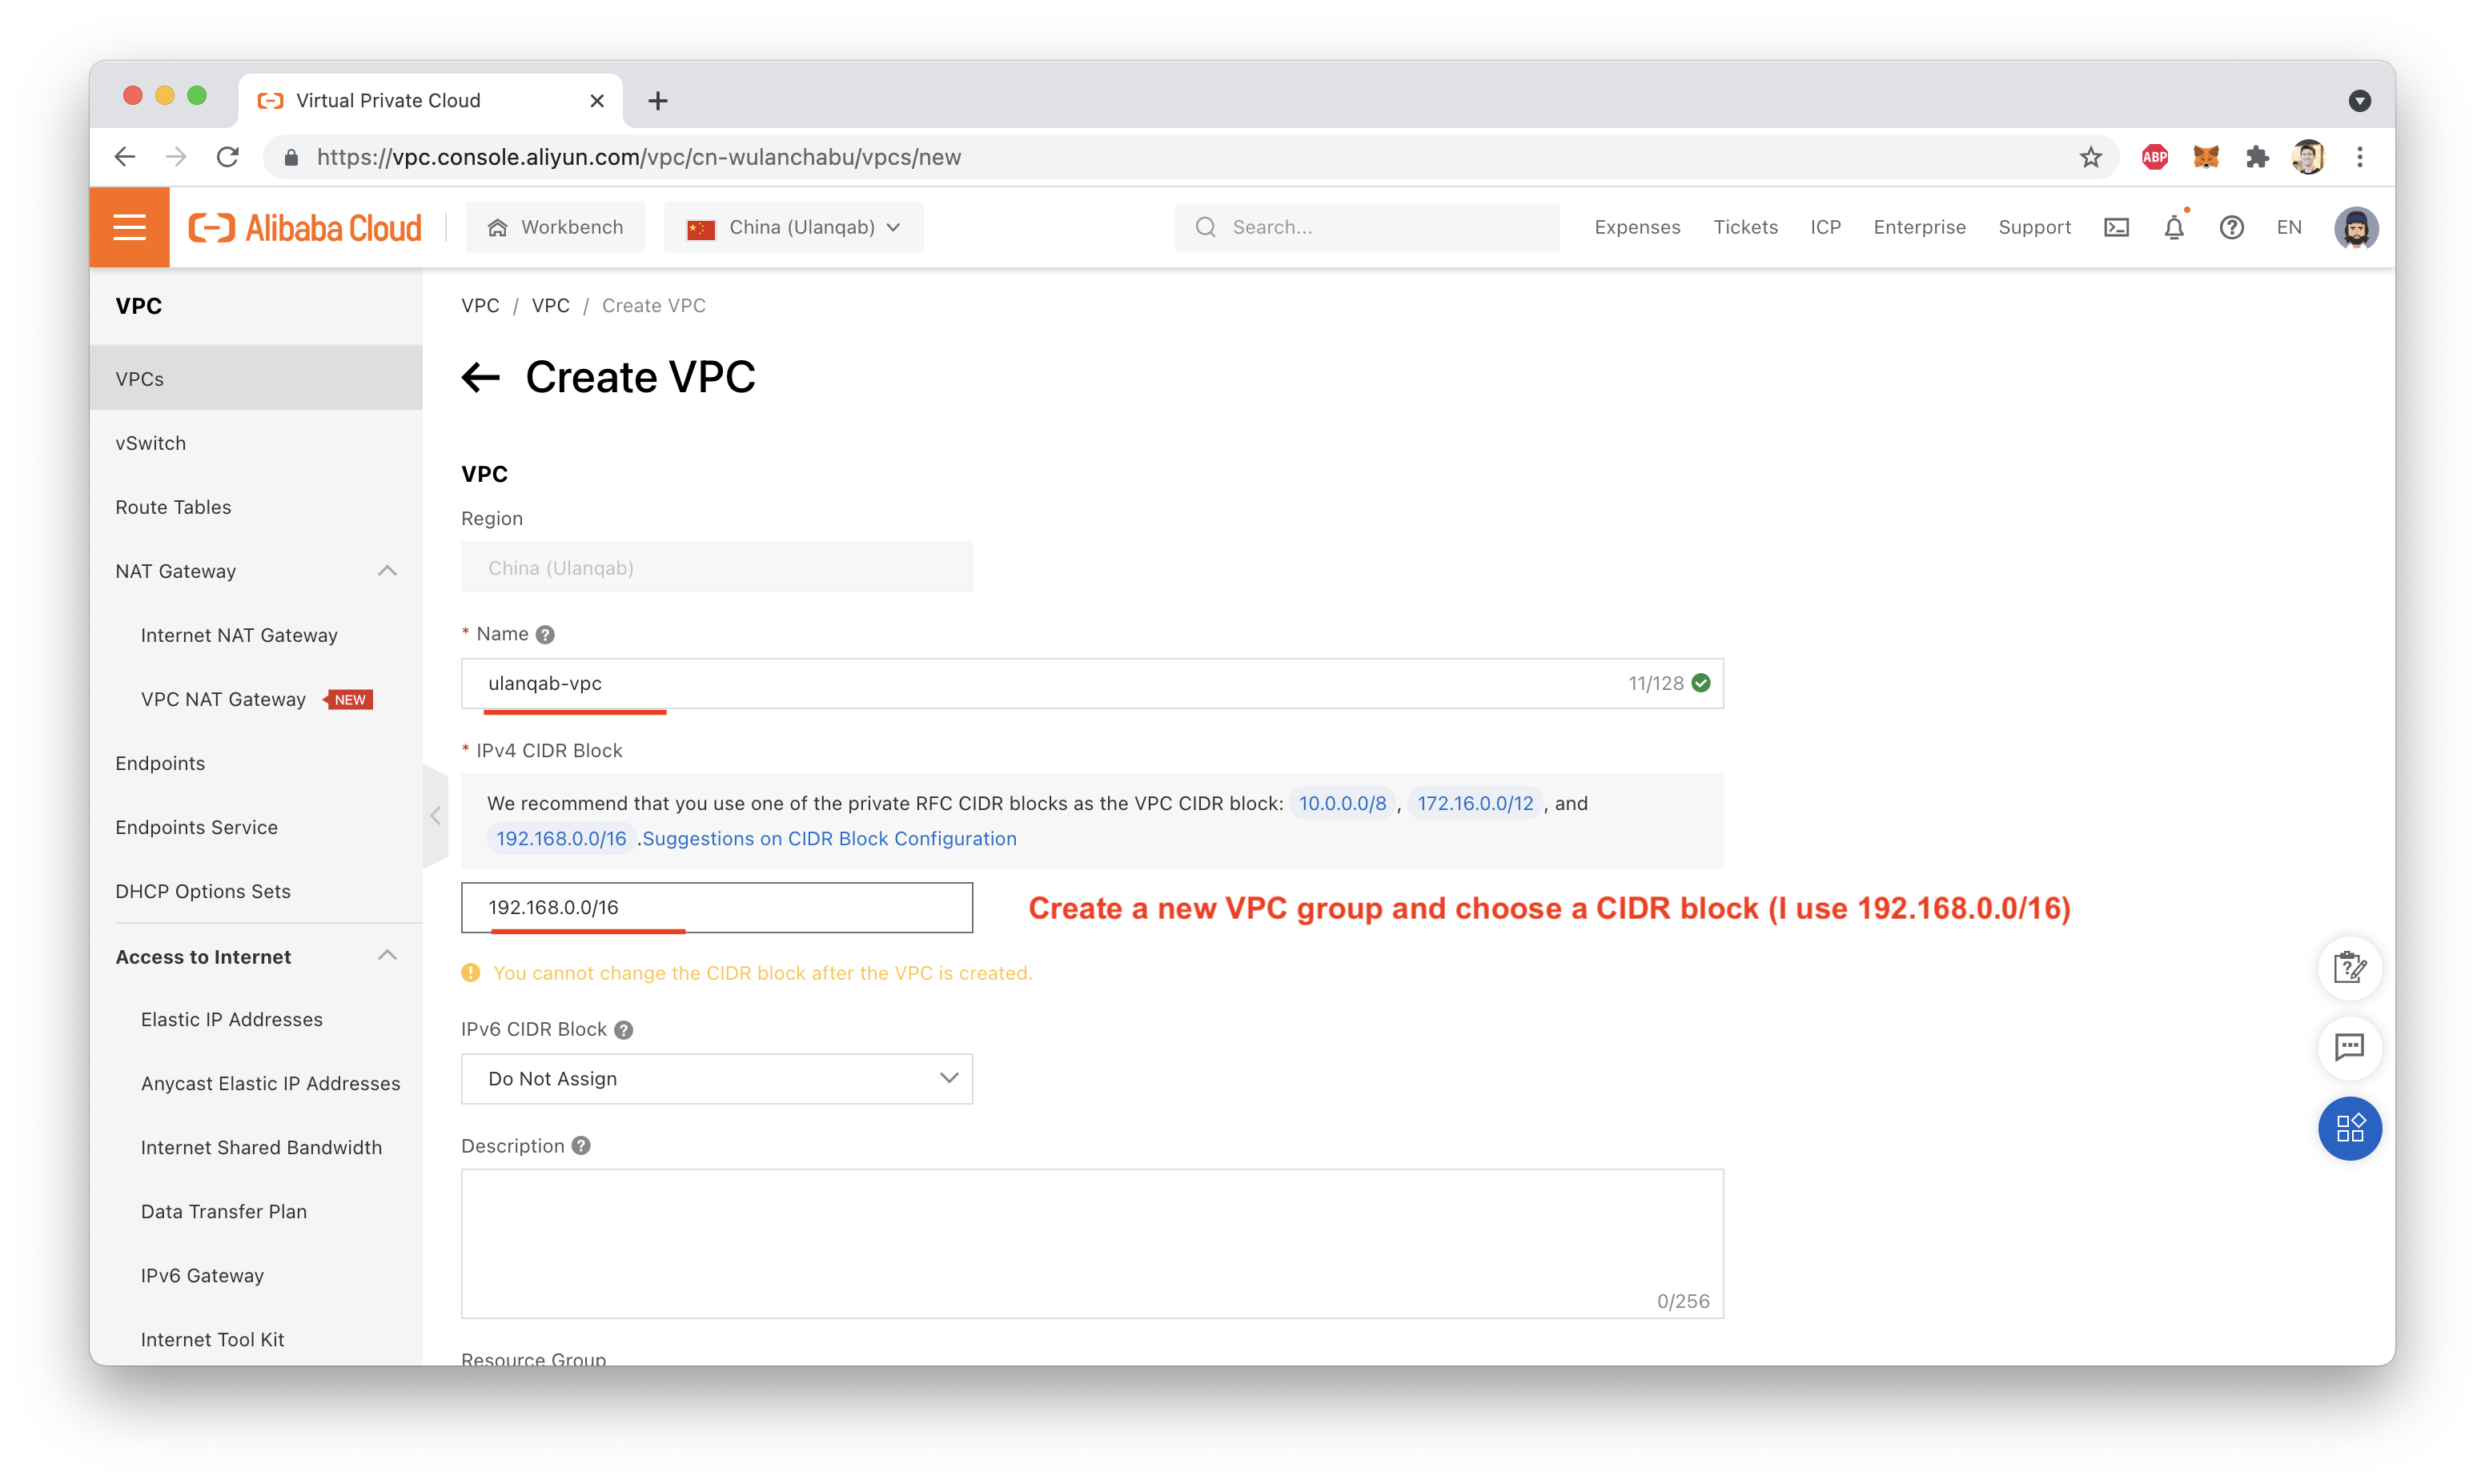
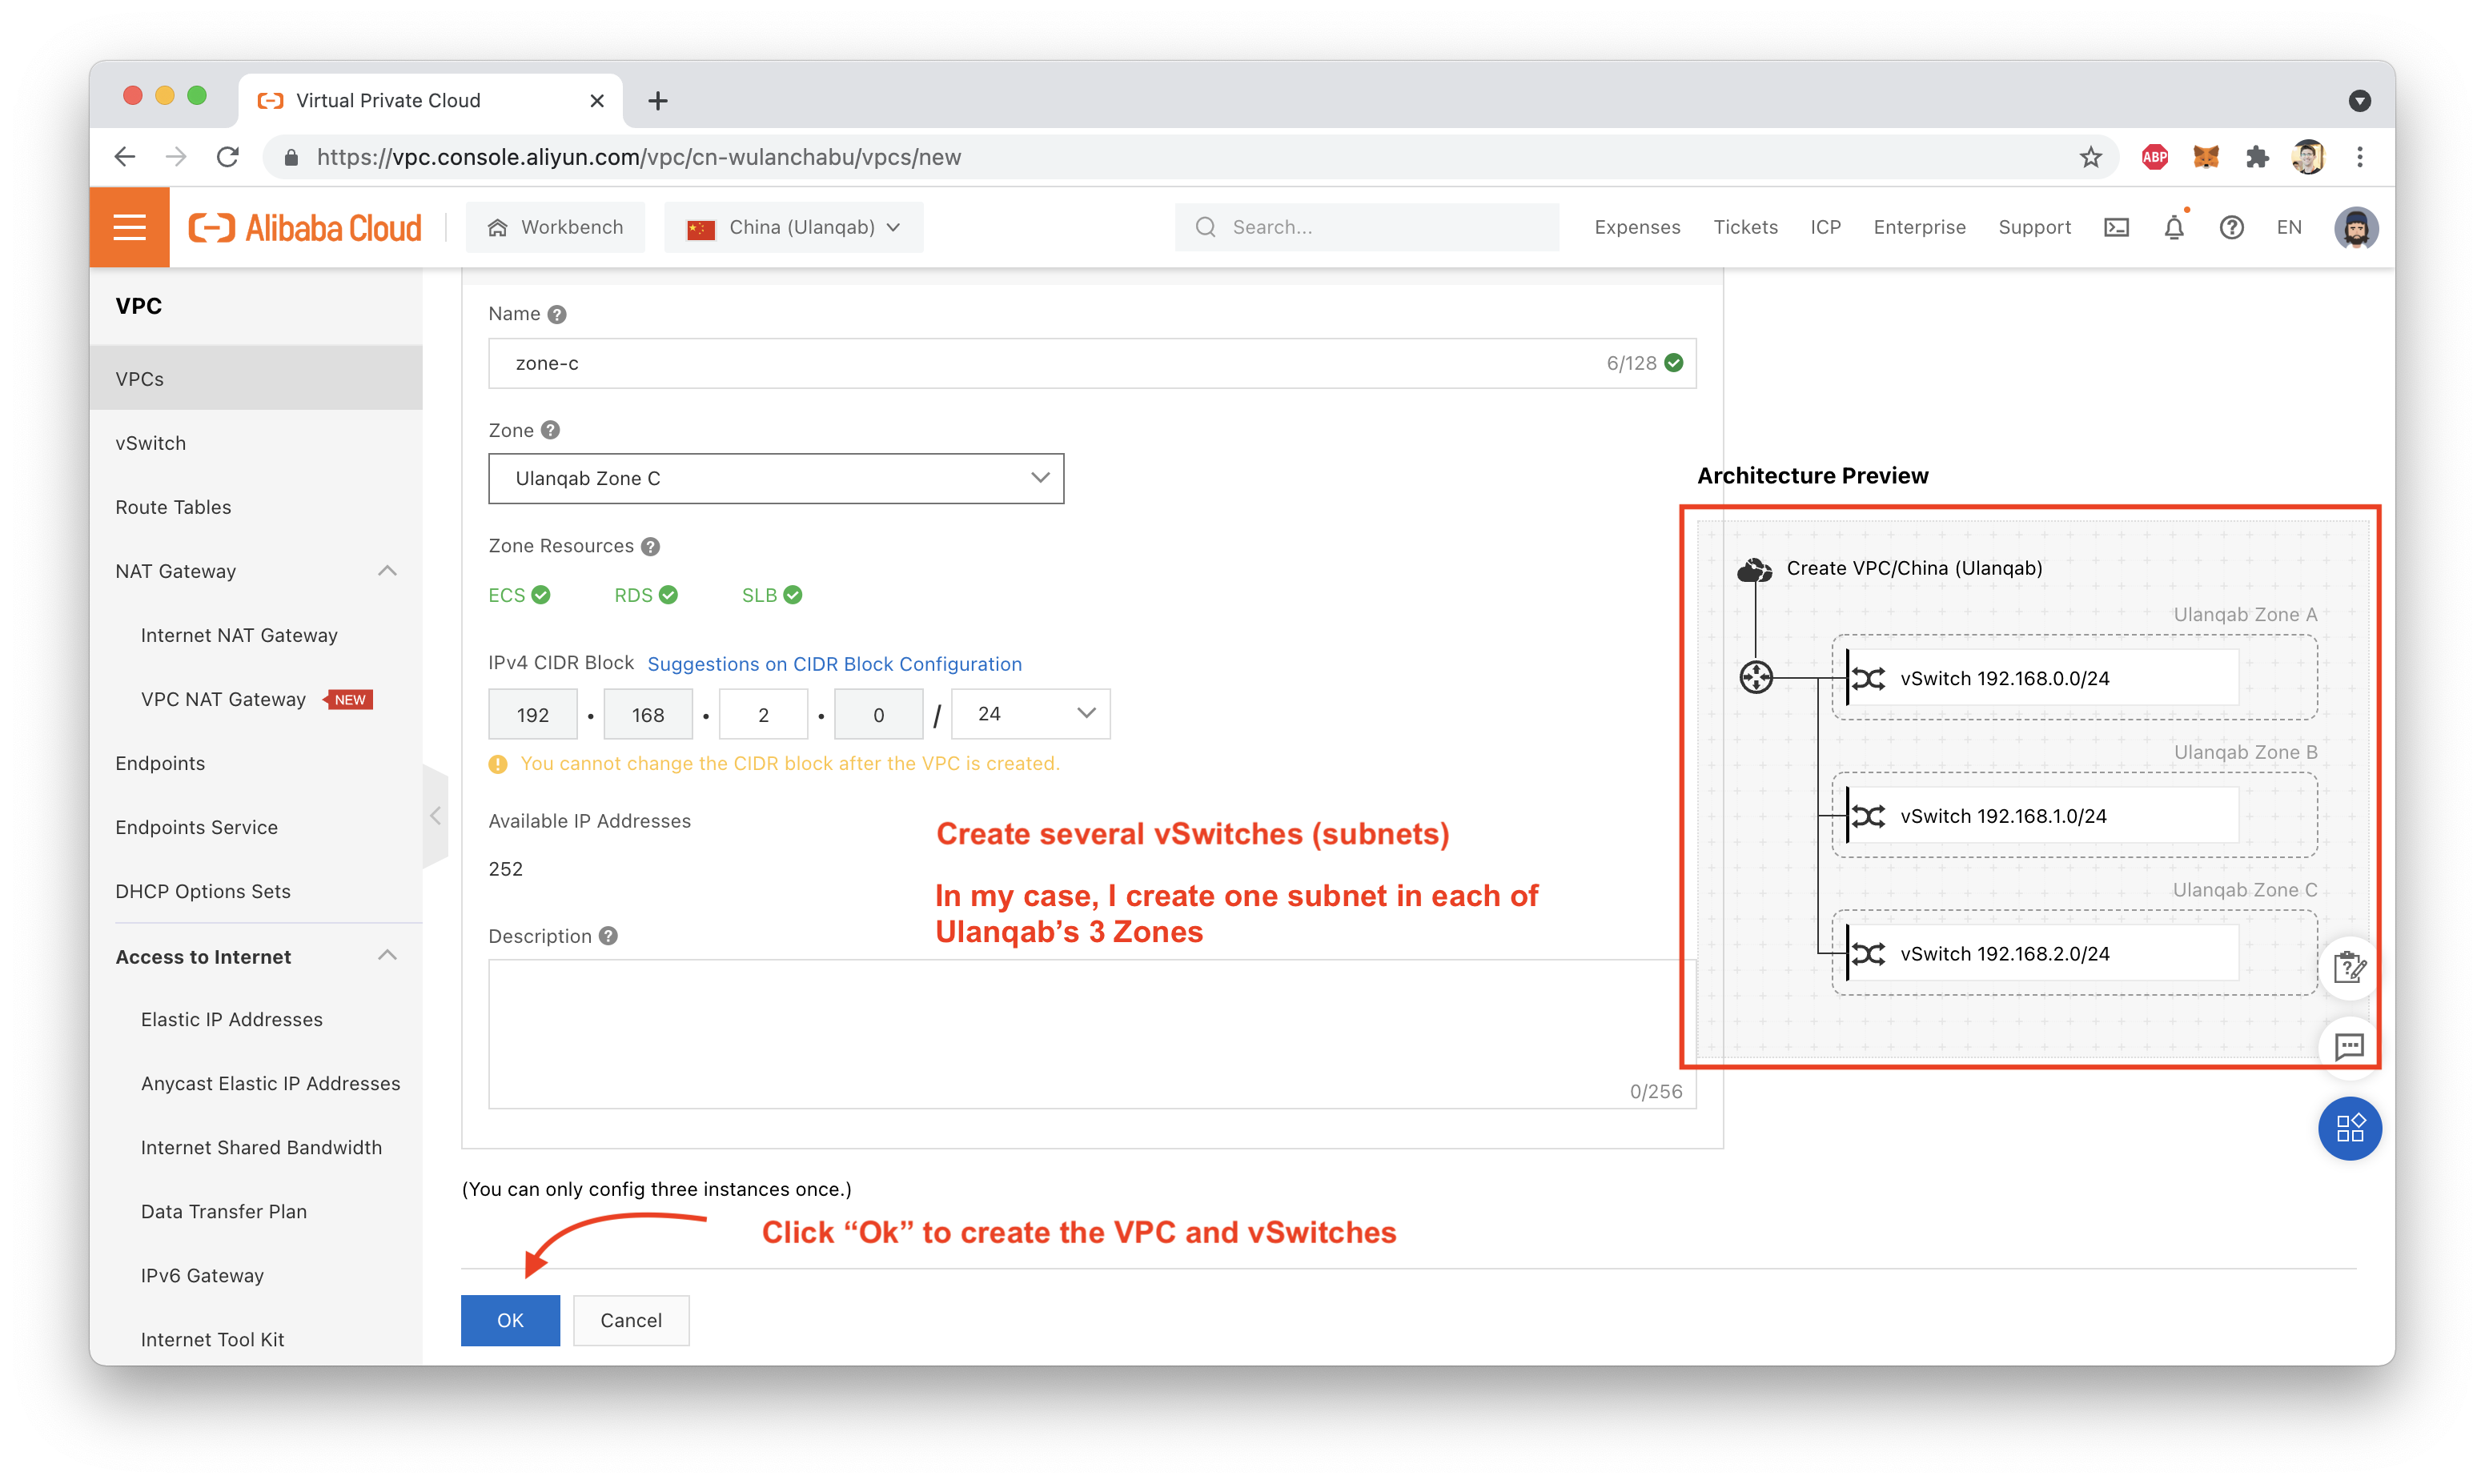
Create a new VPC group with at least one subnet (I created 3 subnets: one for each of the three Zones in the Ulanqab Region):
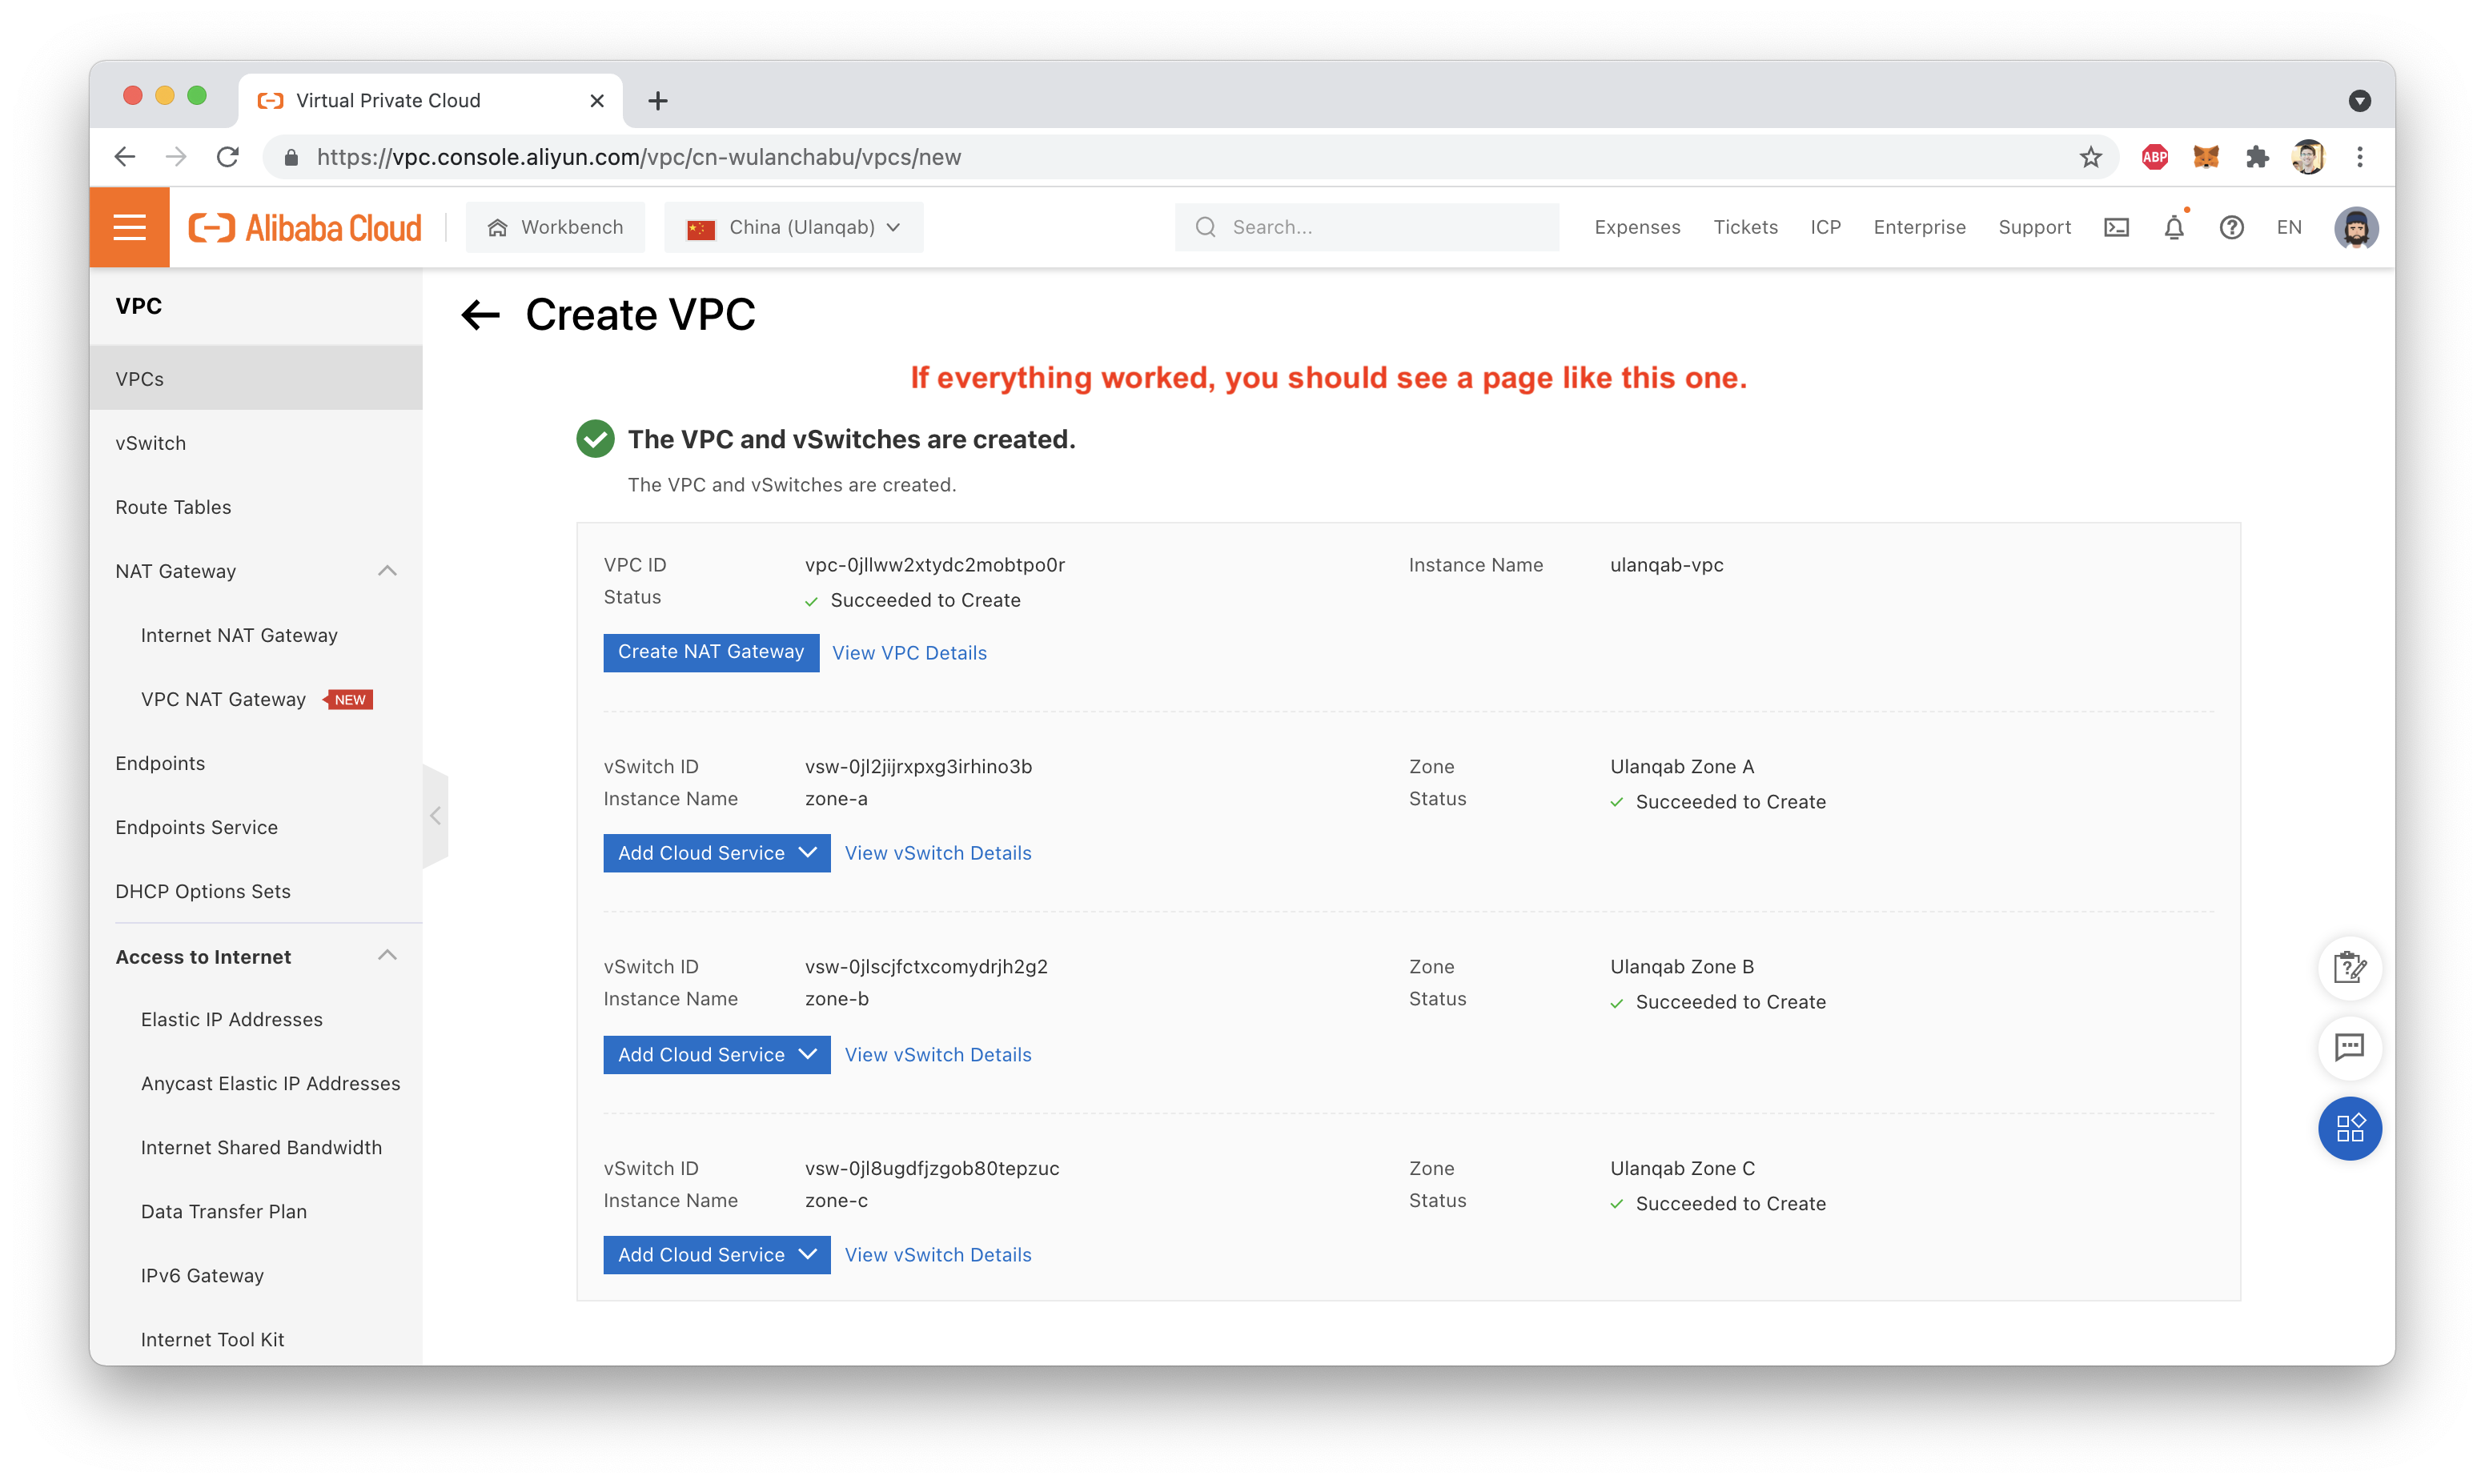
If everything worked, you should see something like this:
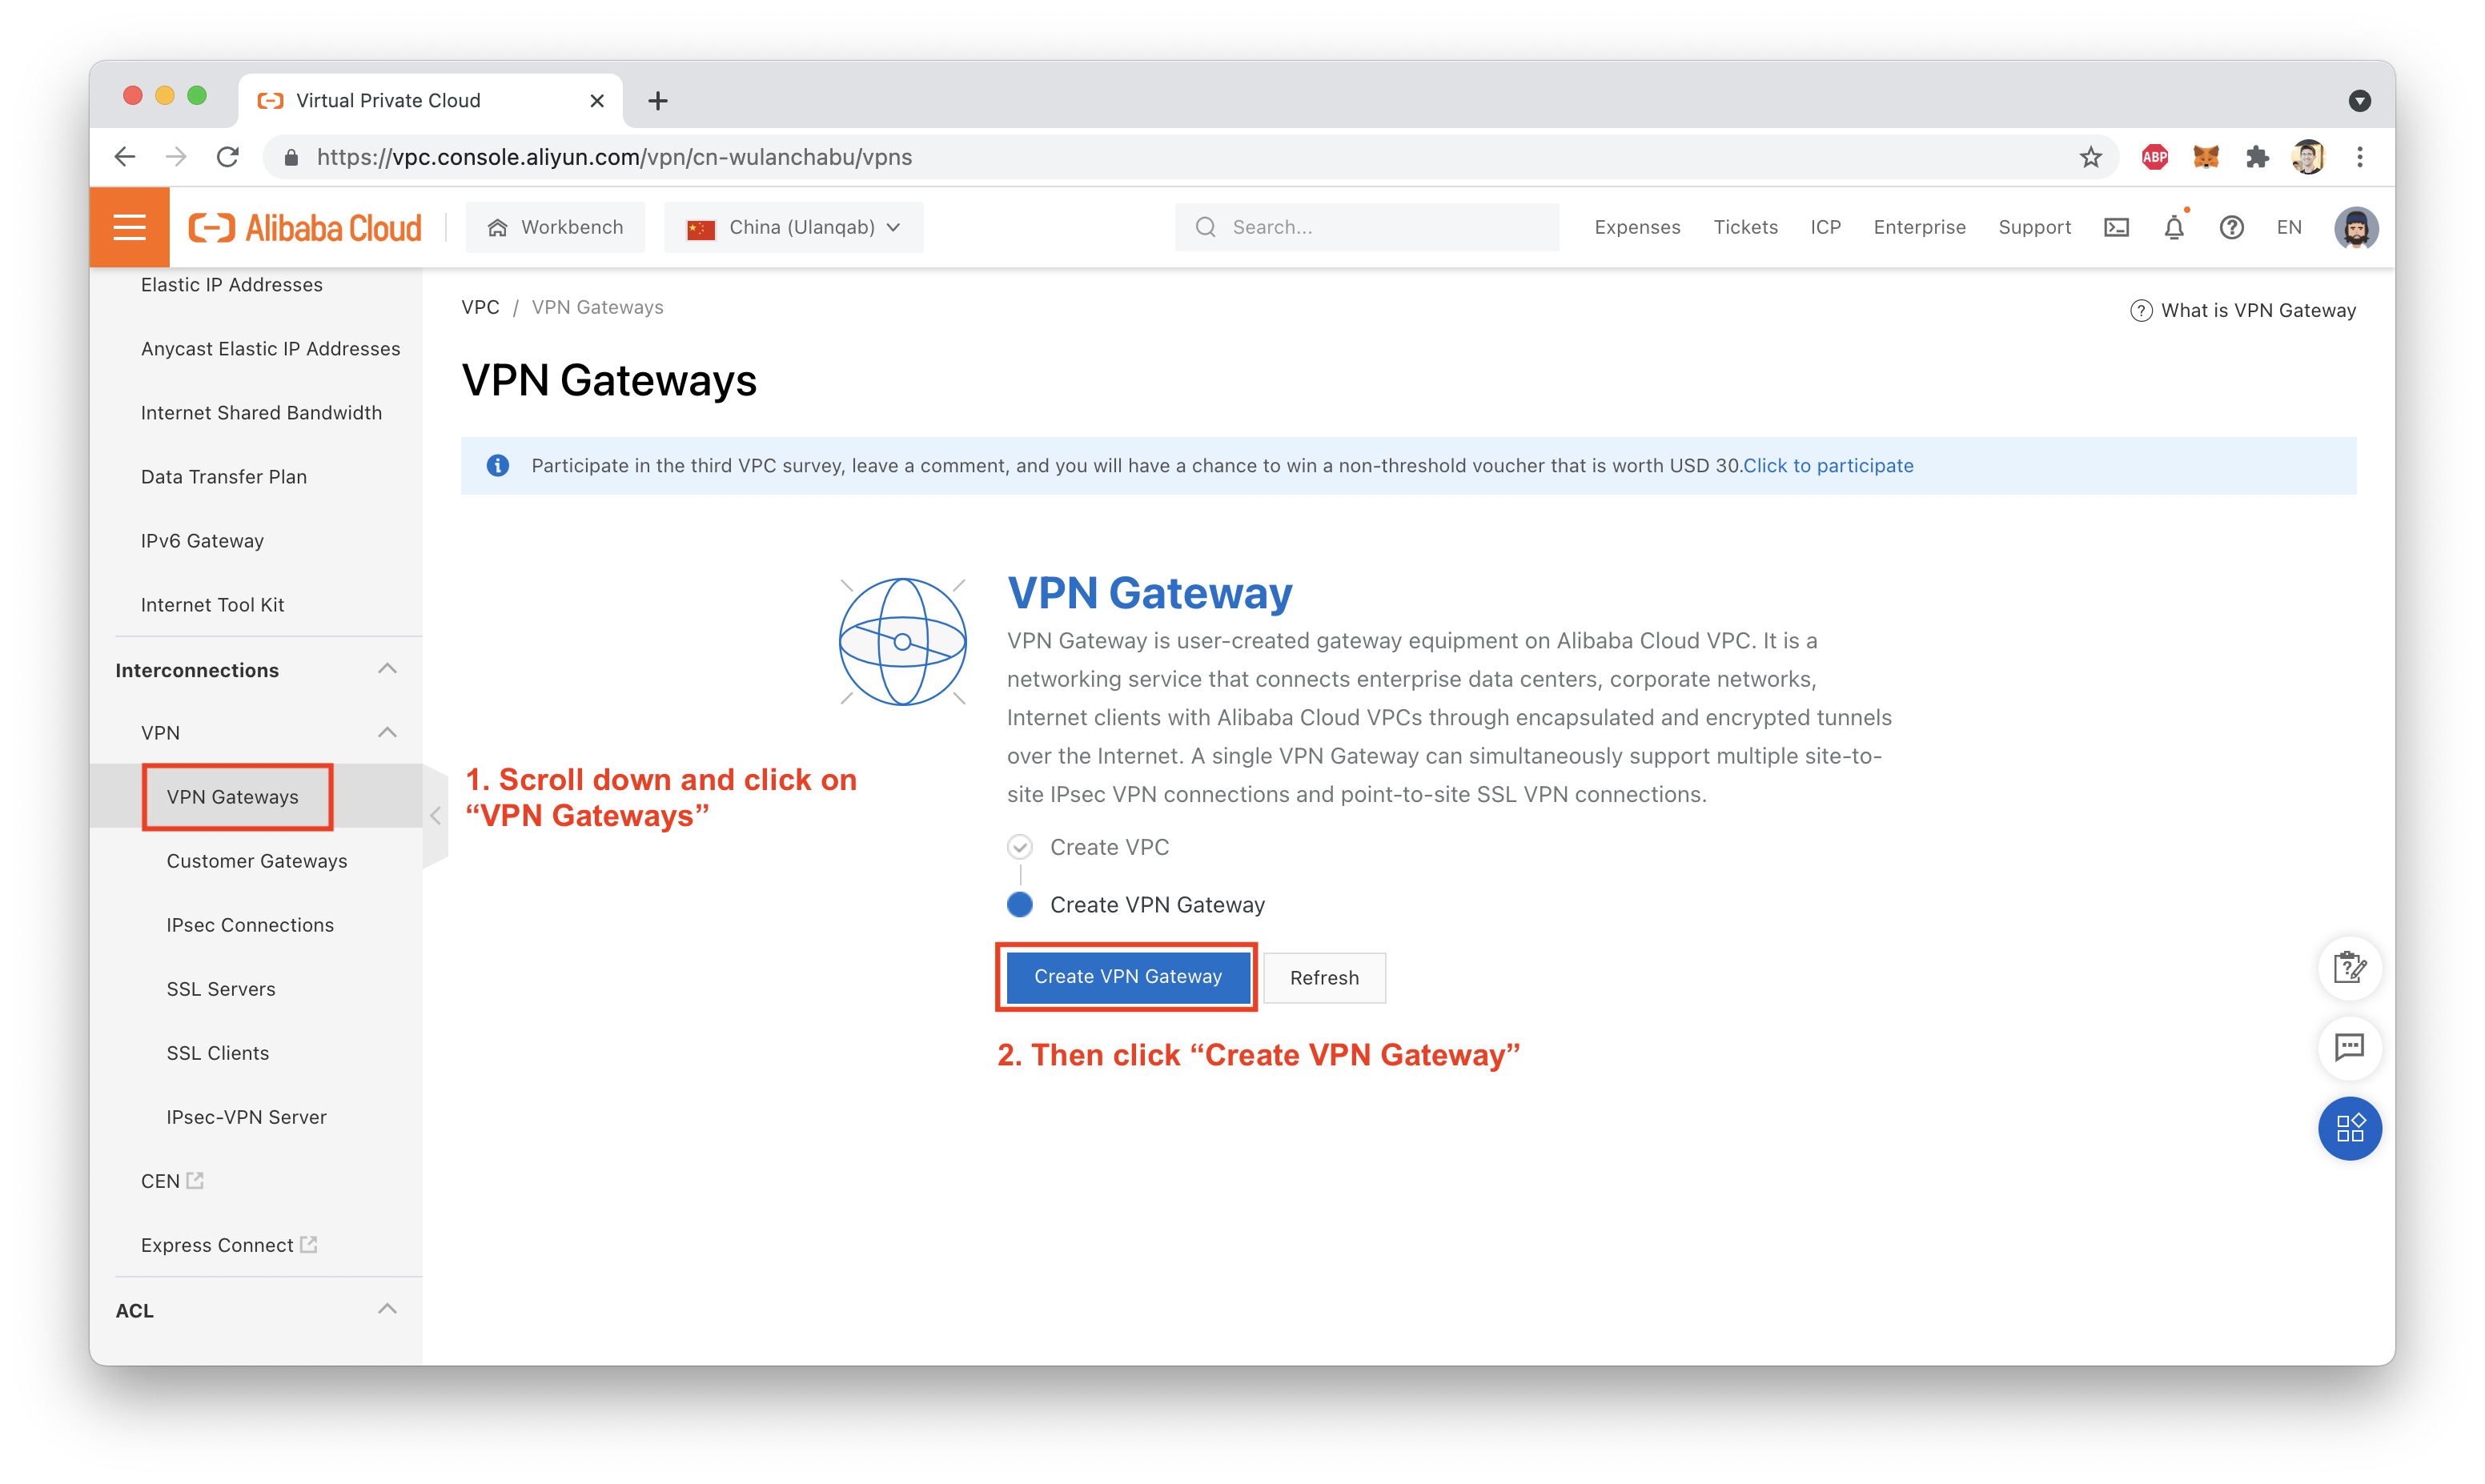
Now, scroll the left-hand menu until you see the "VPN Gateway" option. Click on that, then click on "Create VPN Gateway":
This should take you to the purchase page (double check which Region is selected here, sometimes the buy page resets to a default region setting):
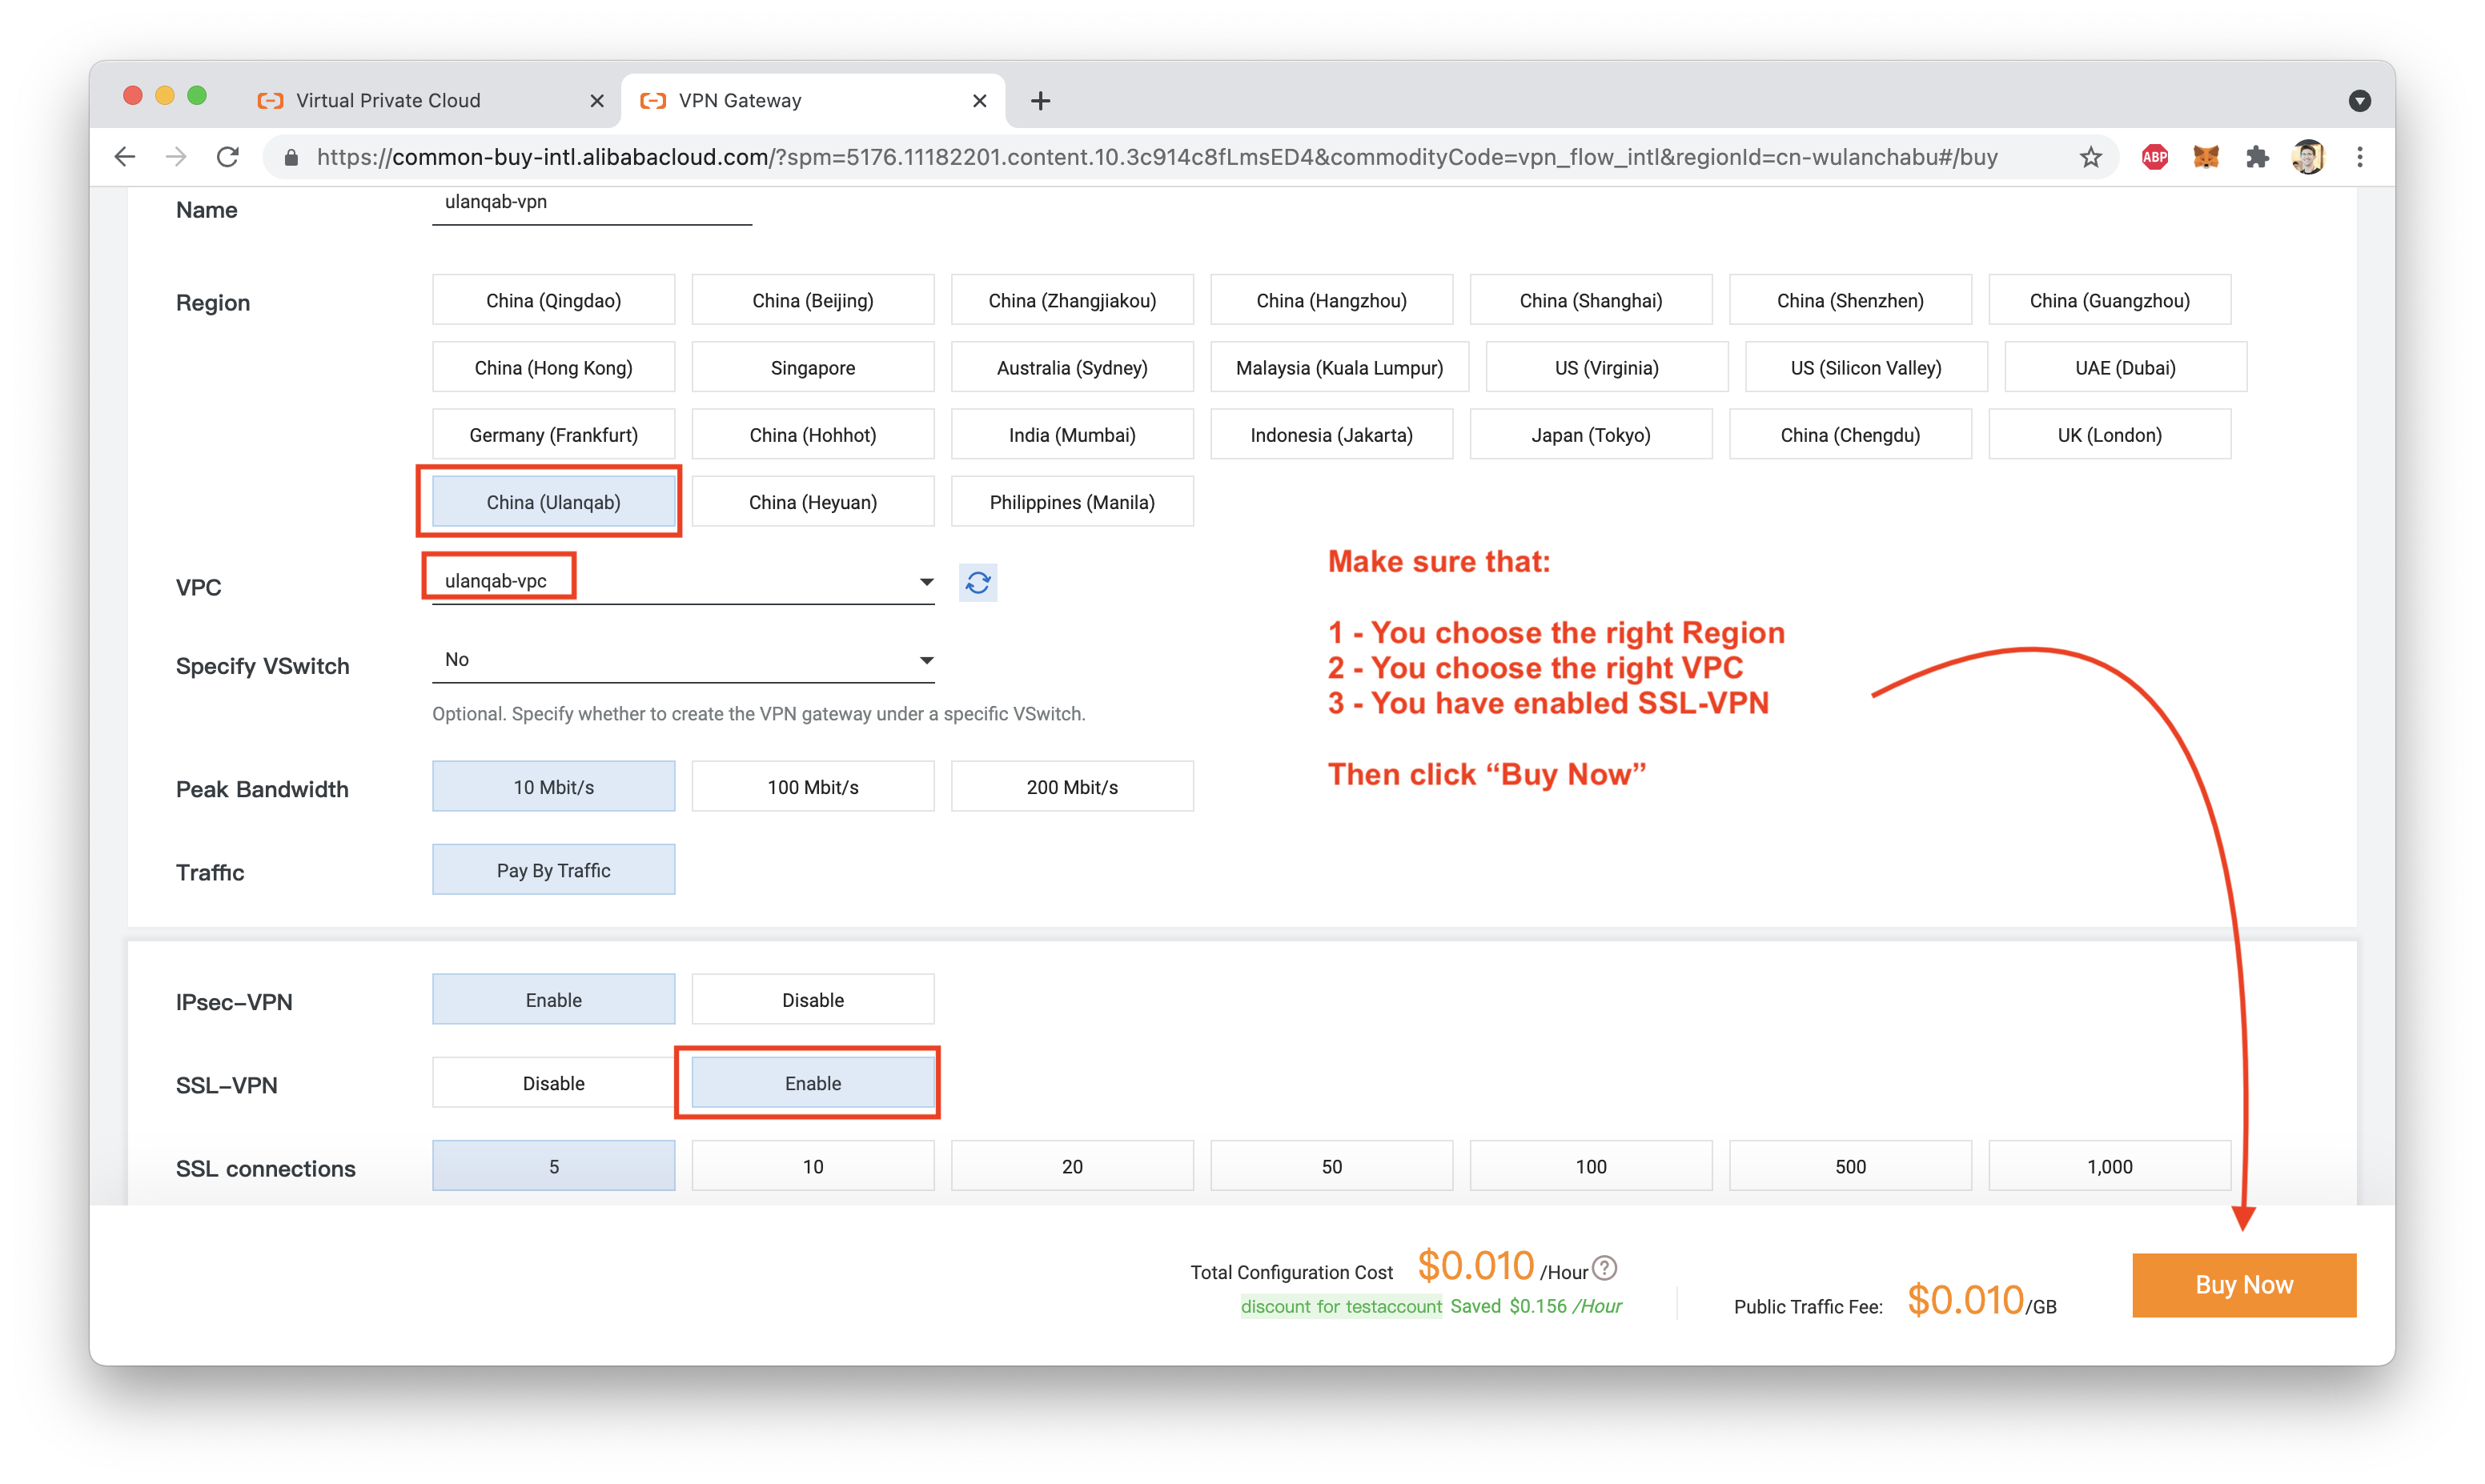
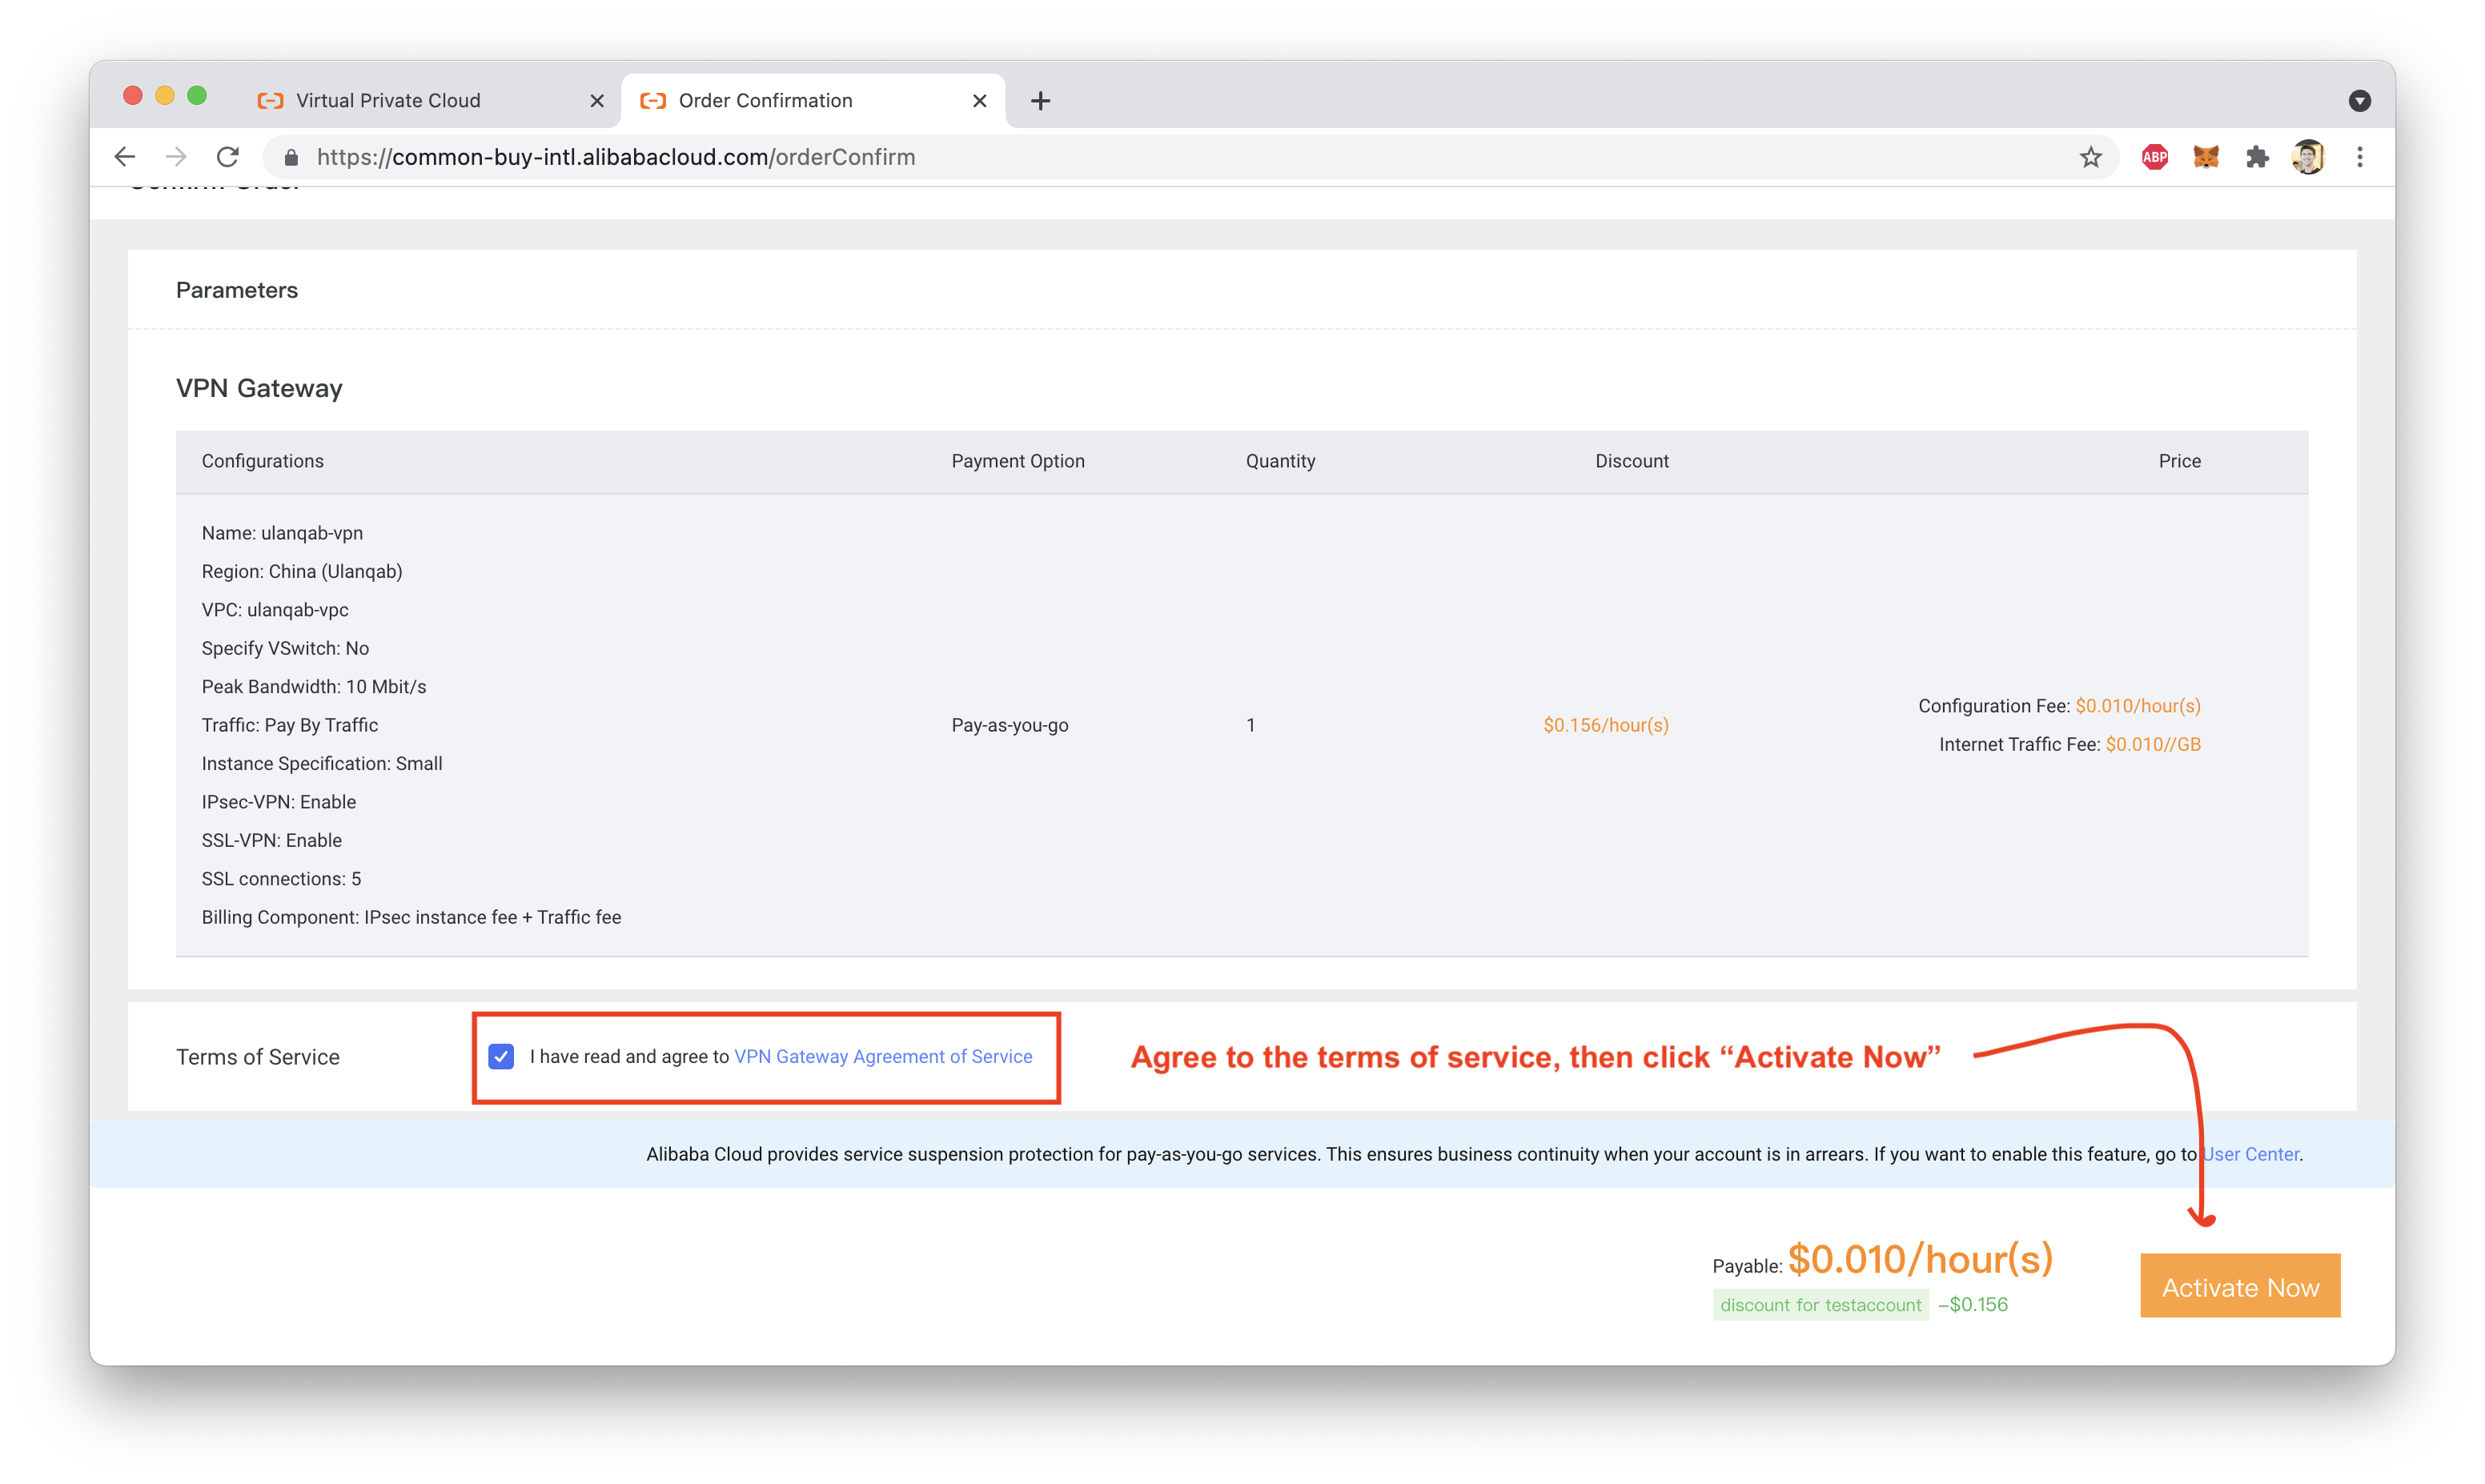
Confirm your purchase (this is the part of the tutorial where things start costing money! so be sure to delete any resources you've created, once you are done testing):
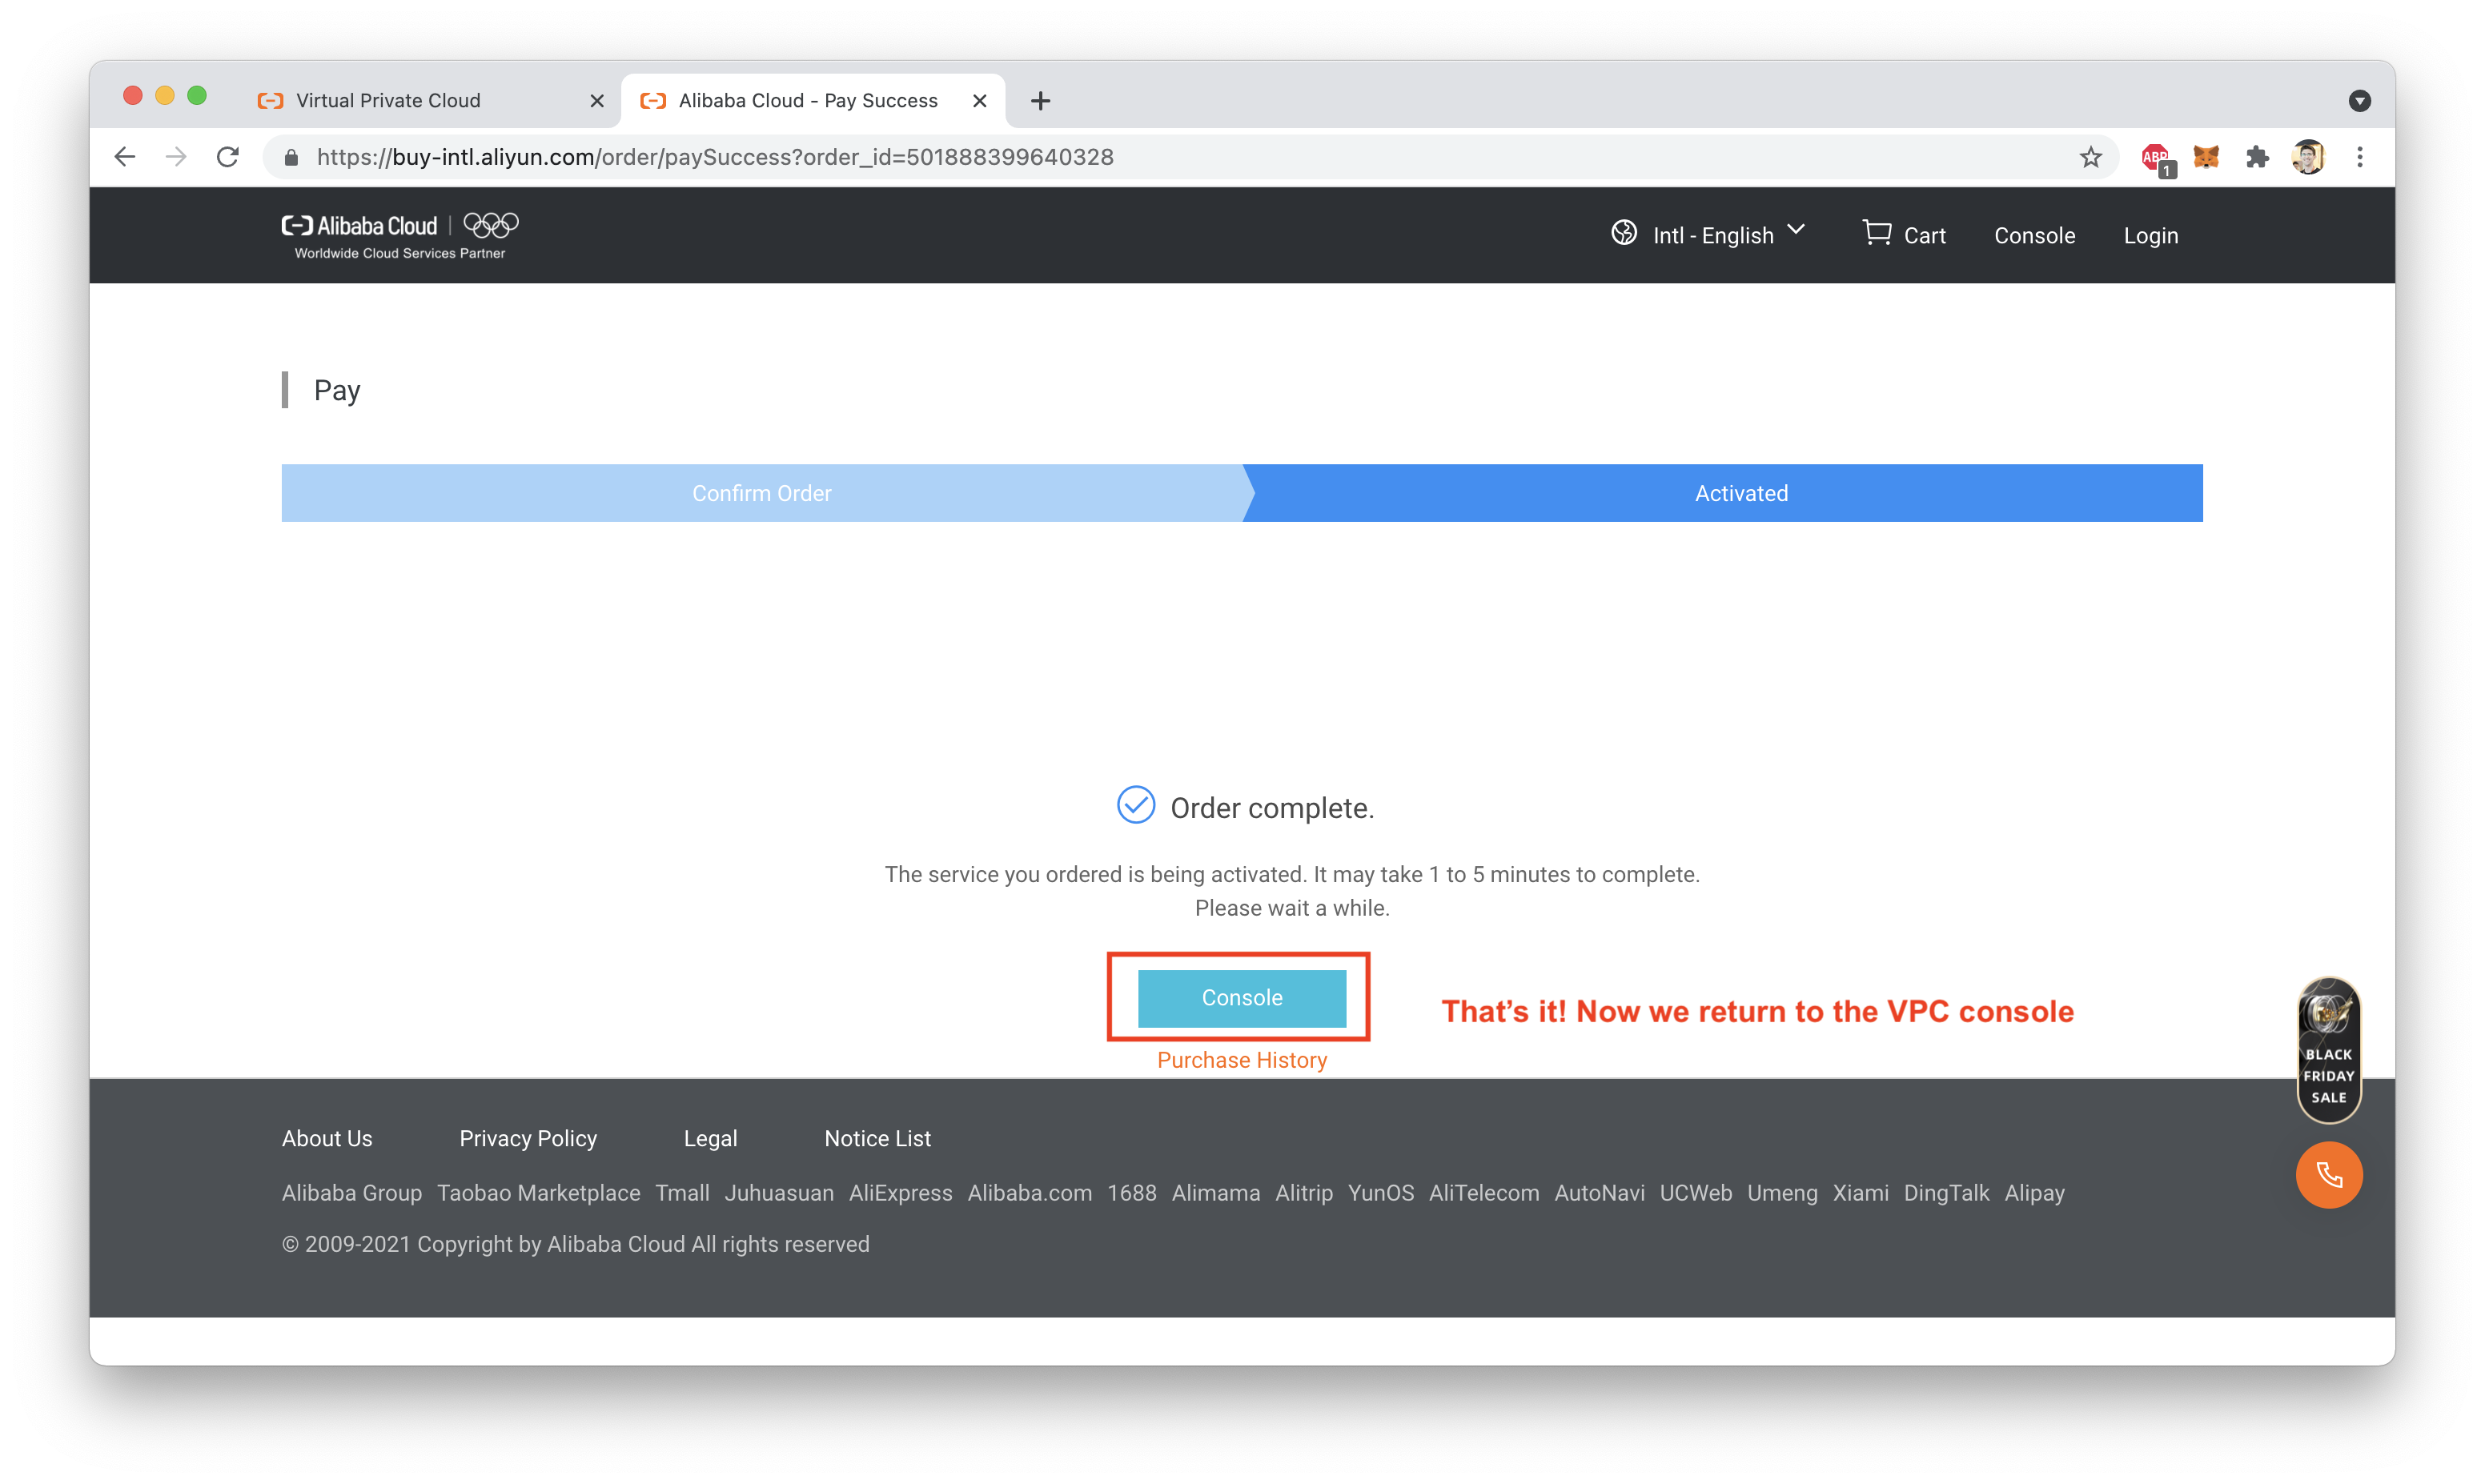
Return to the VPN Gateway console, and wait for the VPN to initialize. Once the status is "Normal", the VPN Gateway is ready to use:
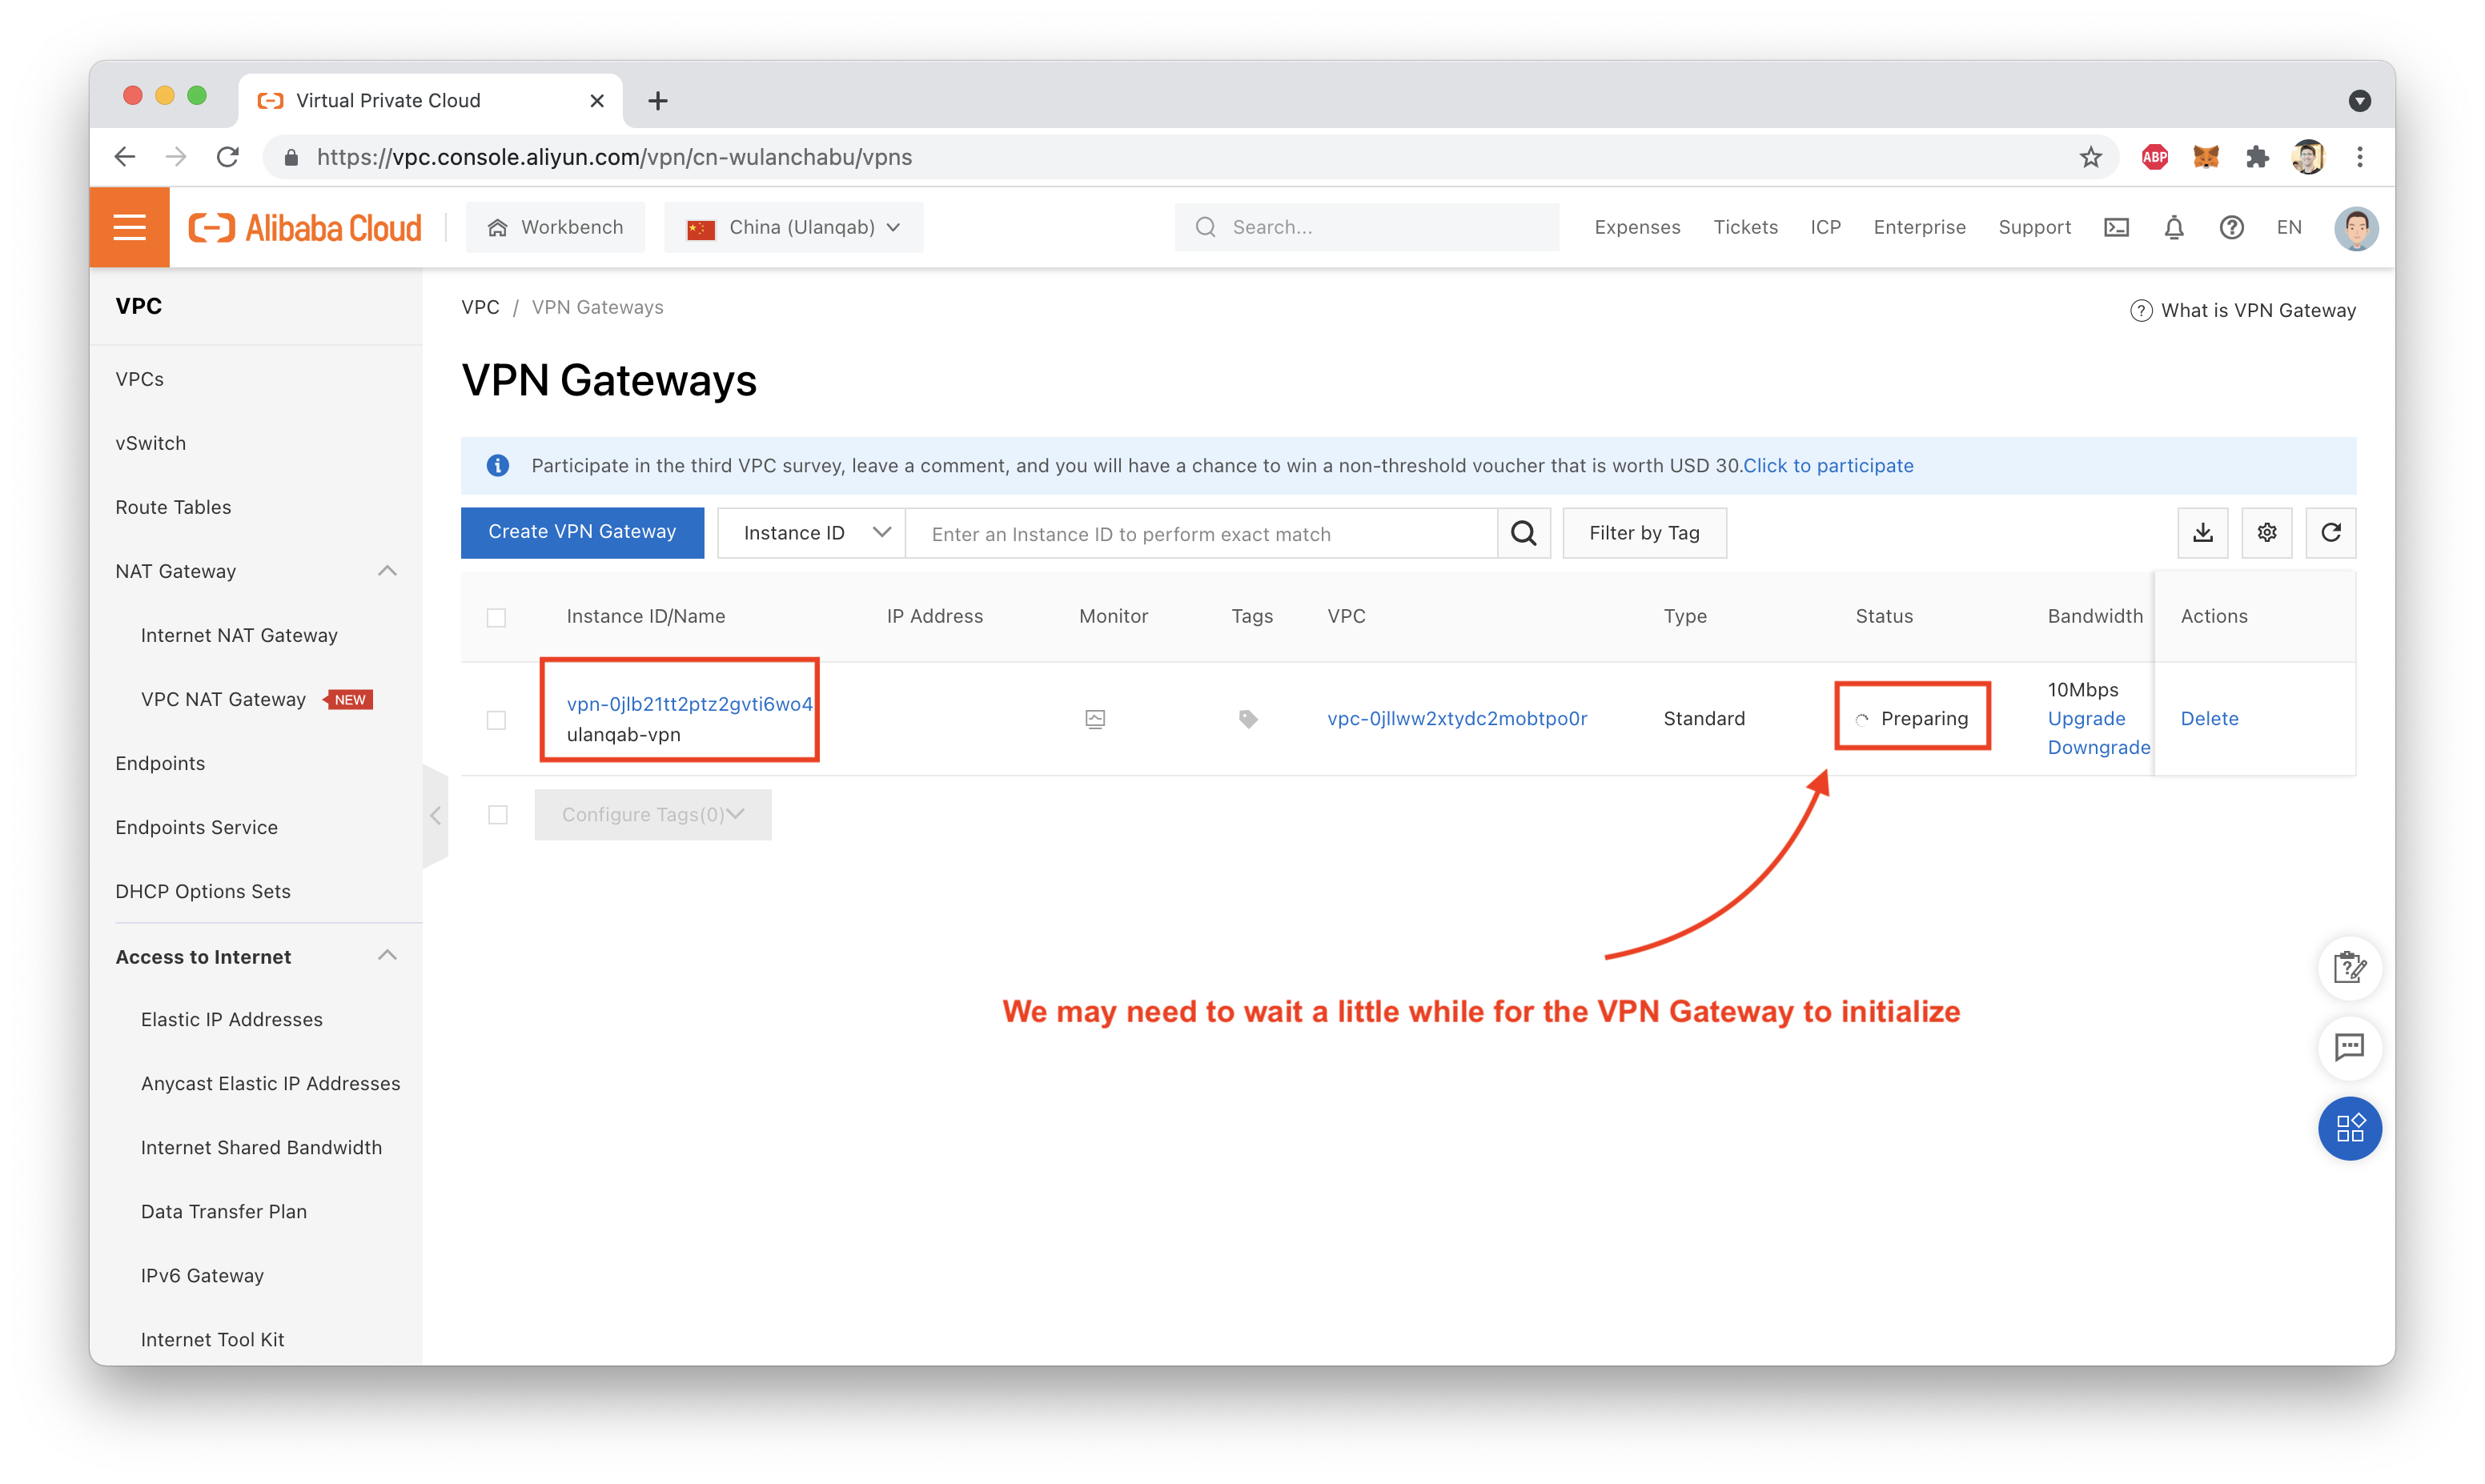
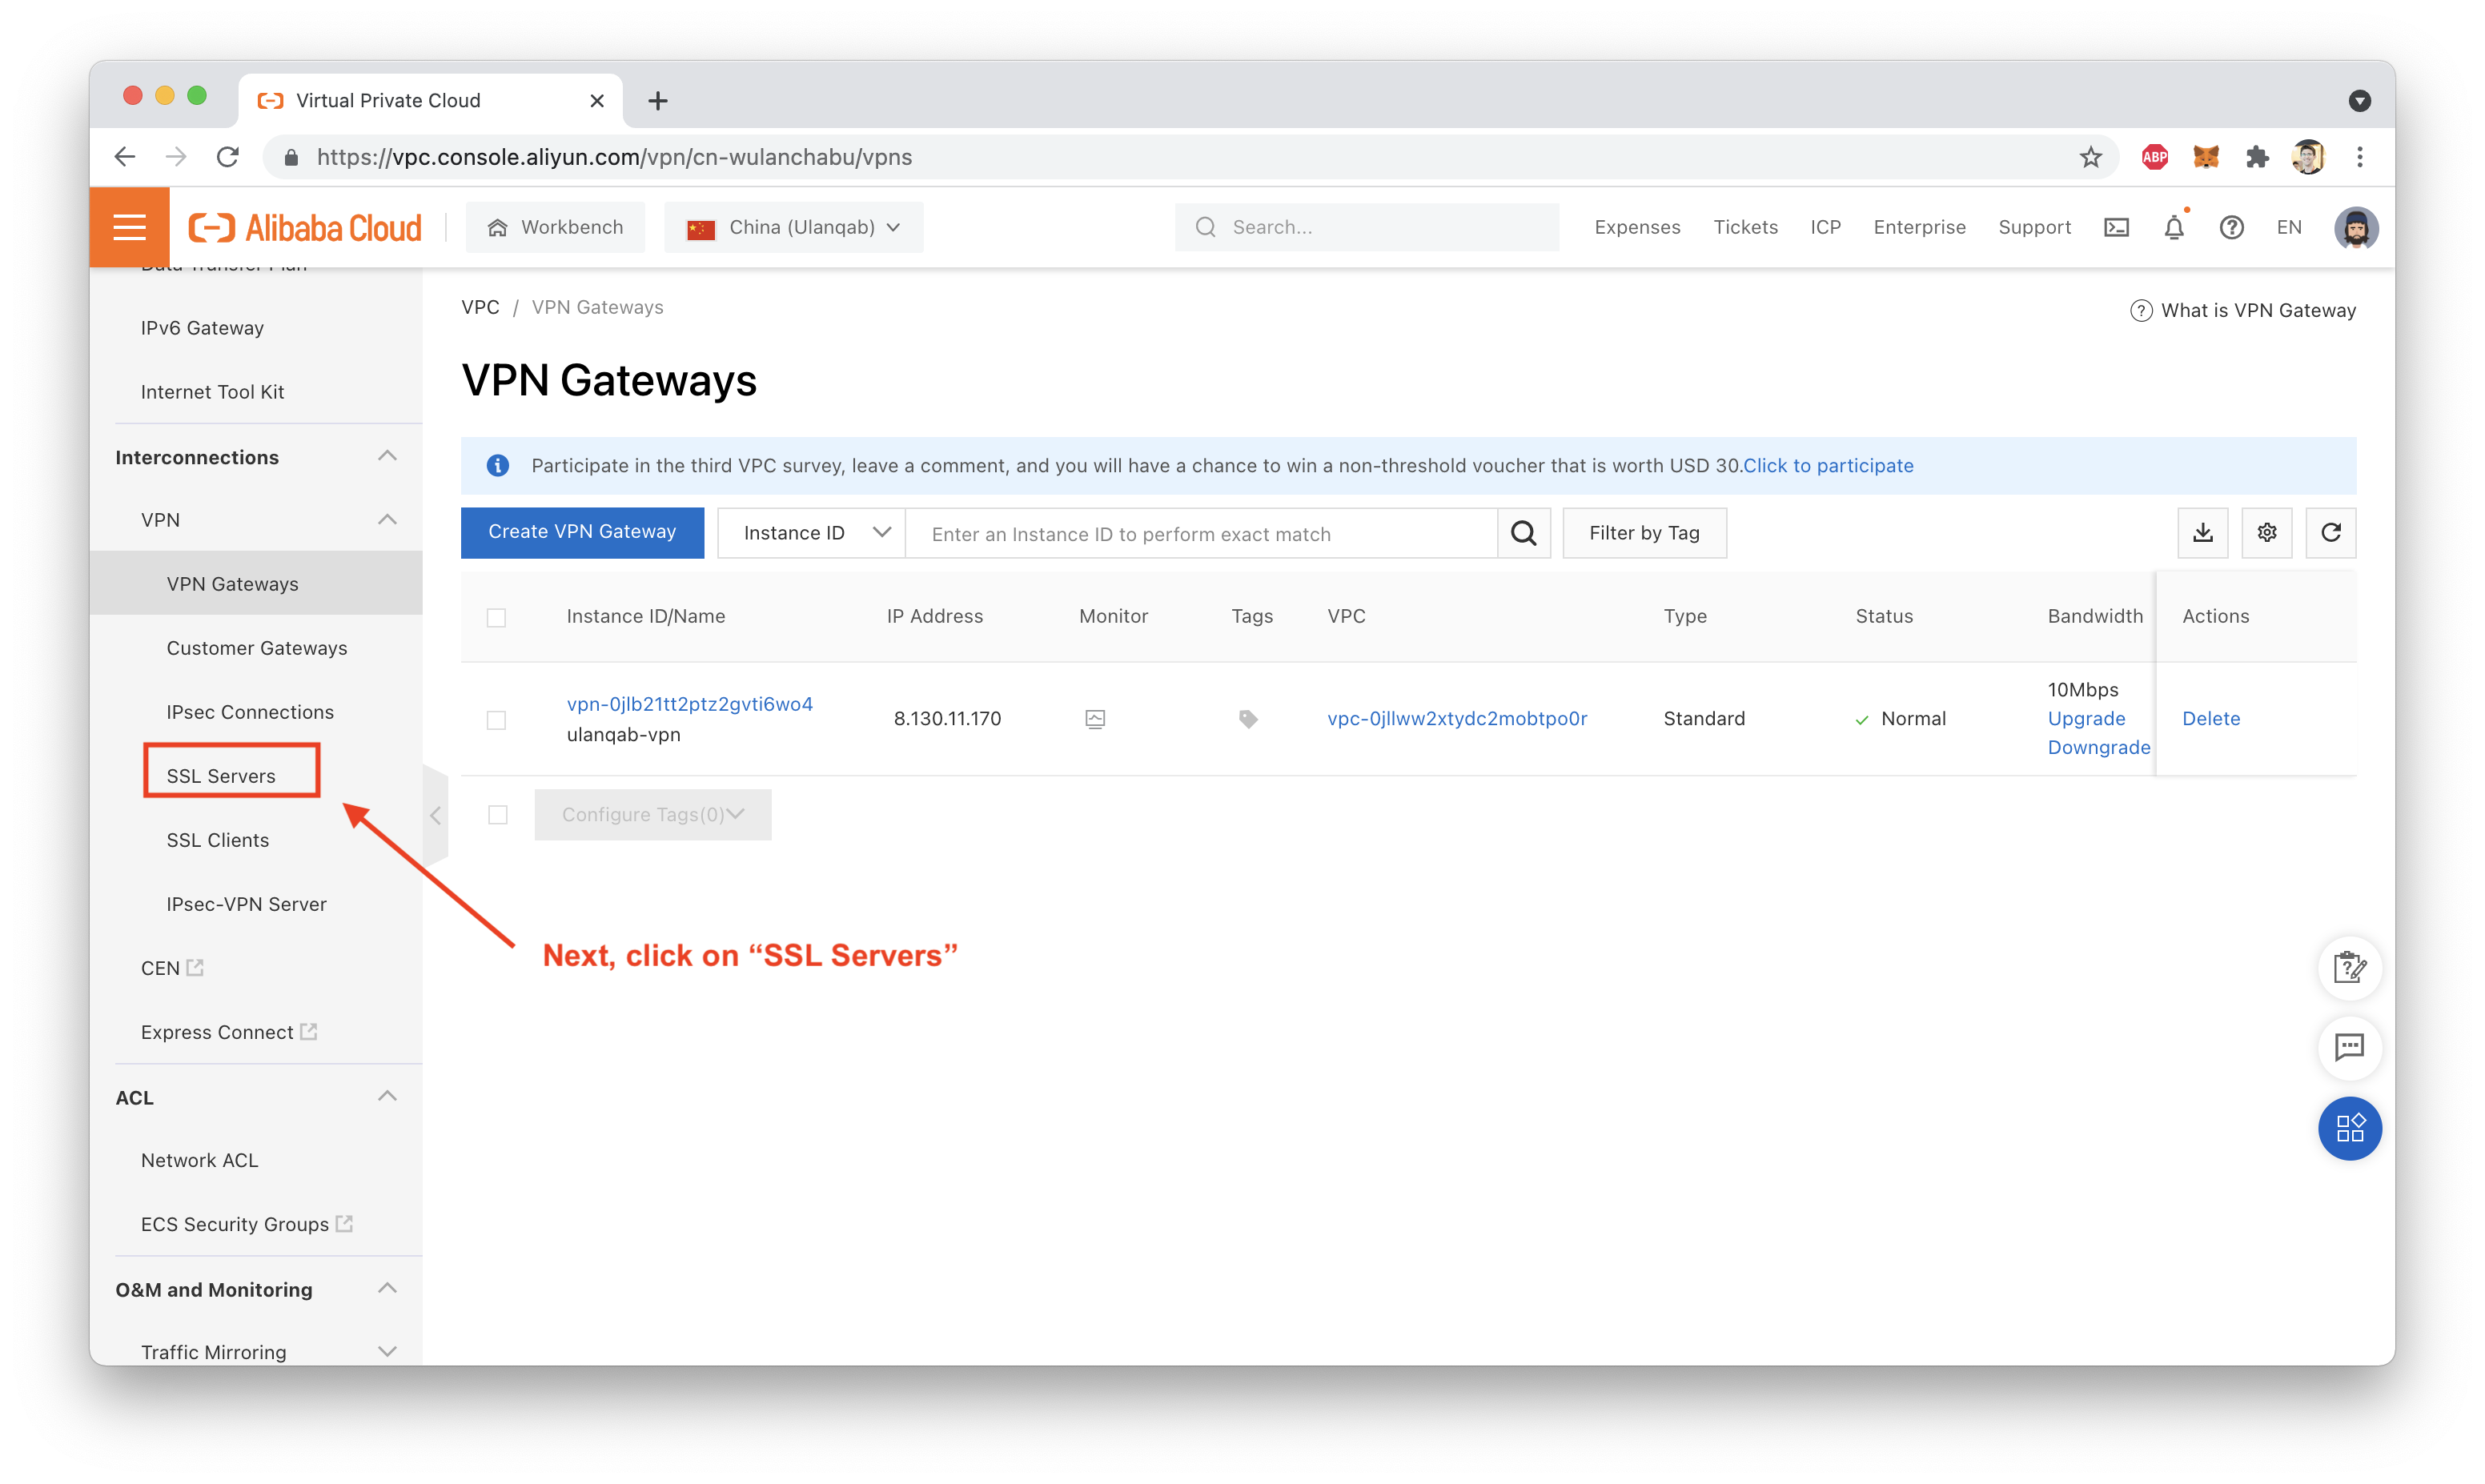
We'll test our VPN Gateway by setting up an SSL VPN. Why? Mostly because it's easier than setting up an IPsec VPN, and because I'm testing from a laptop. ^_^
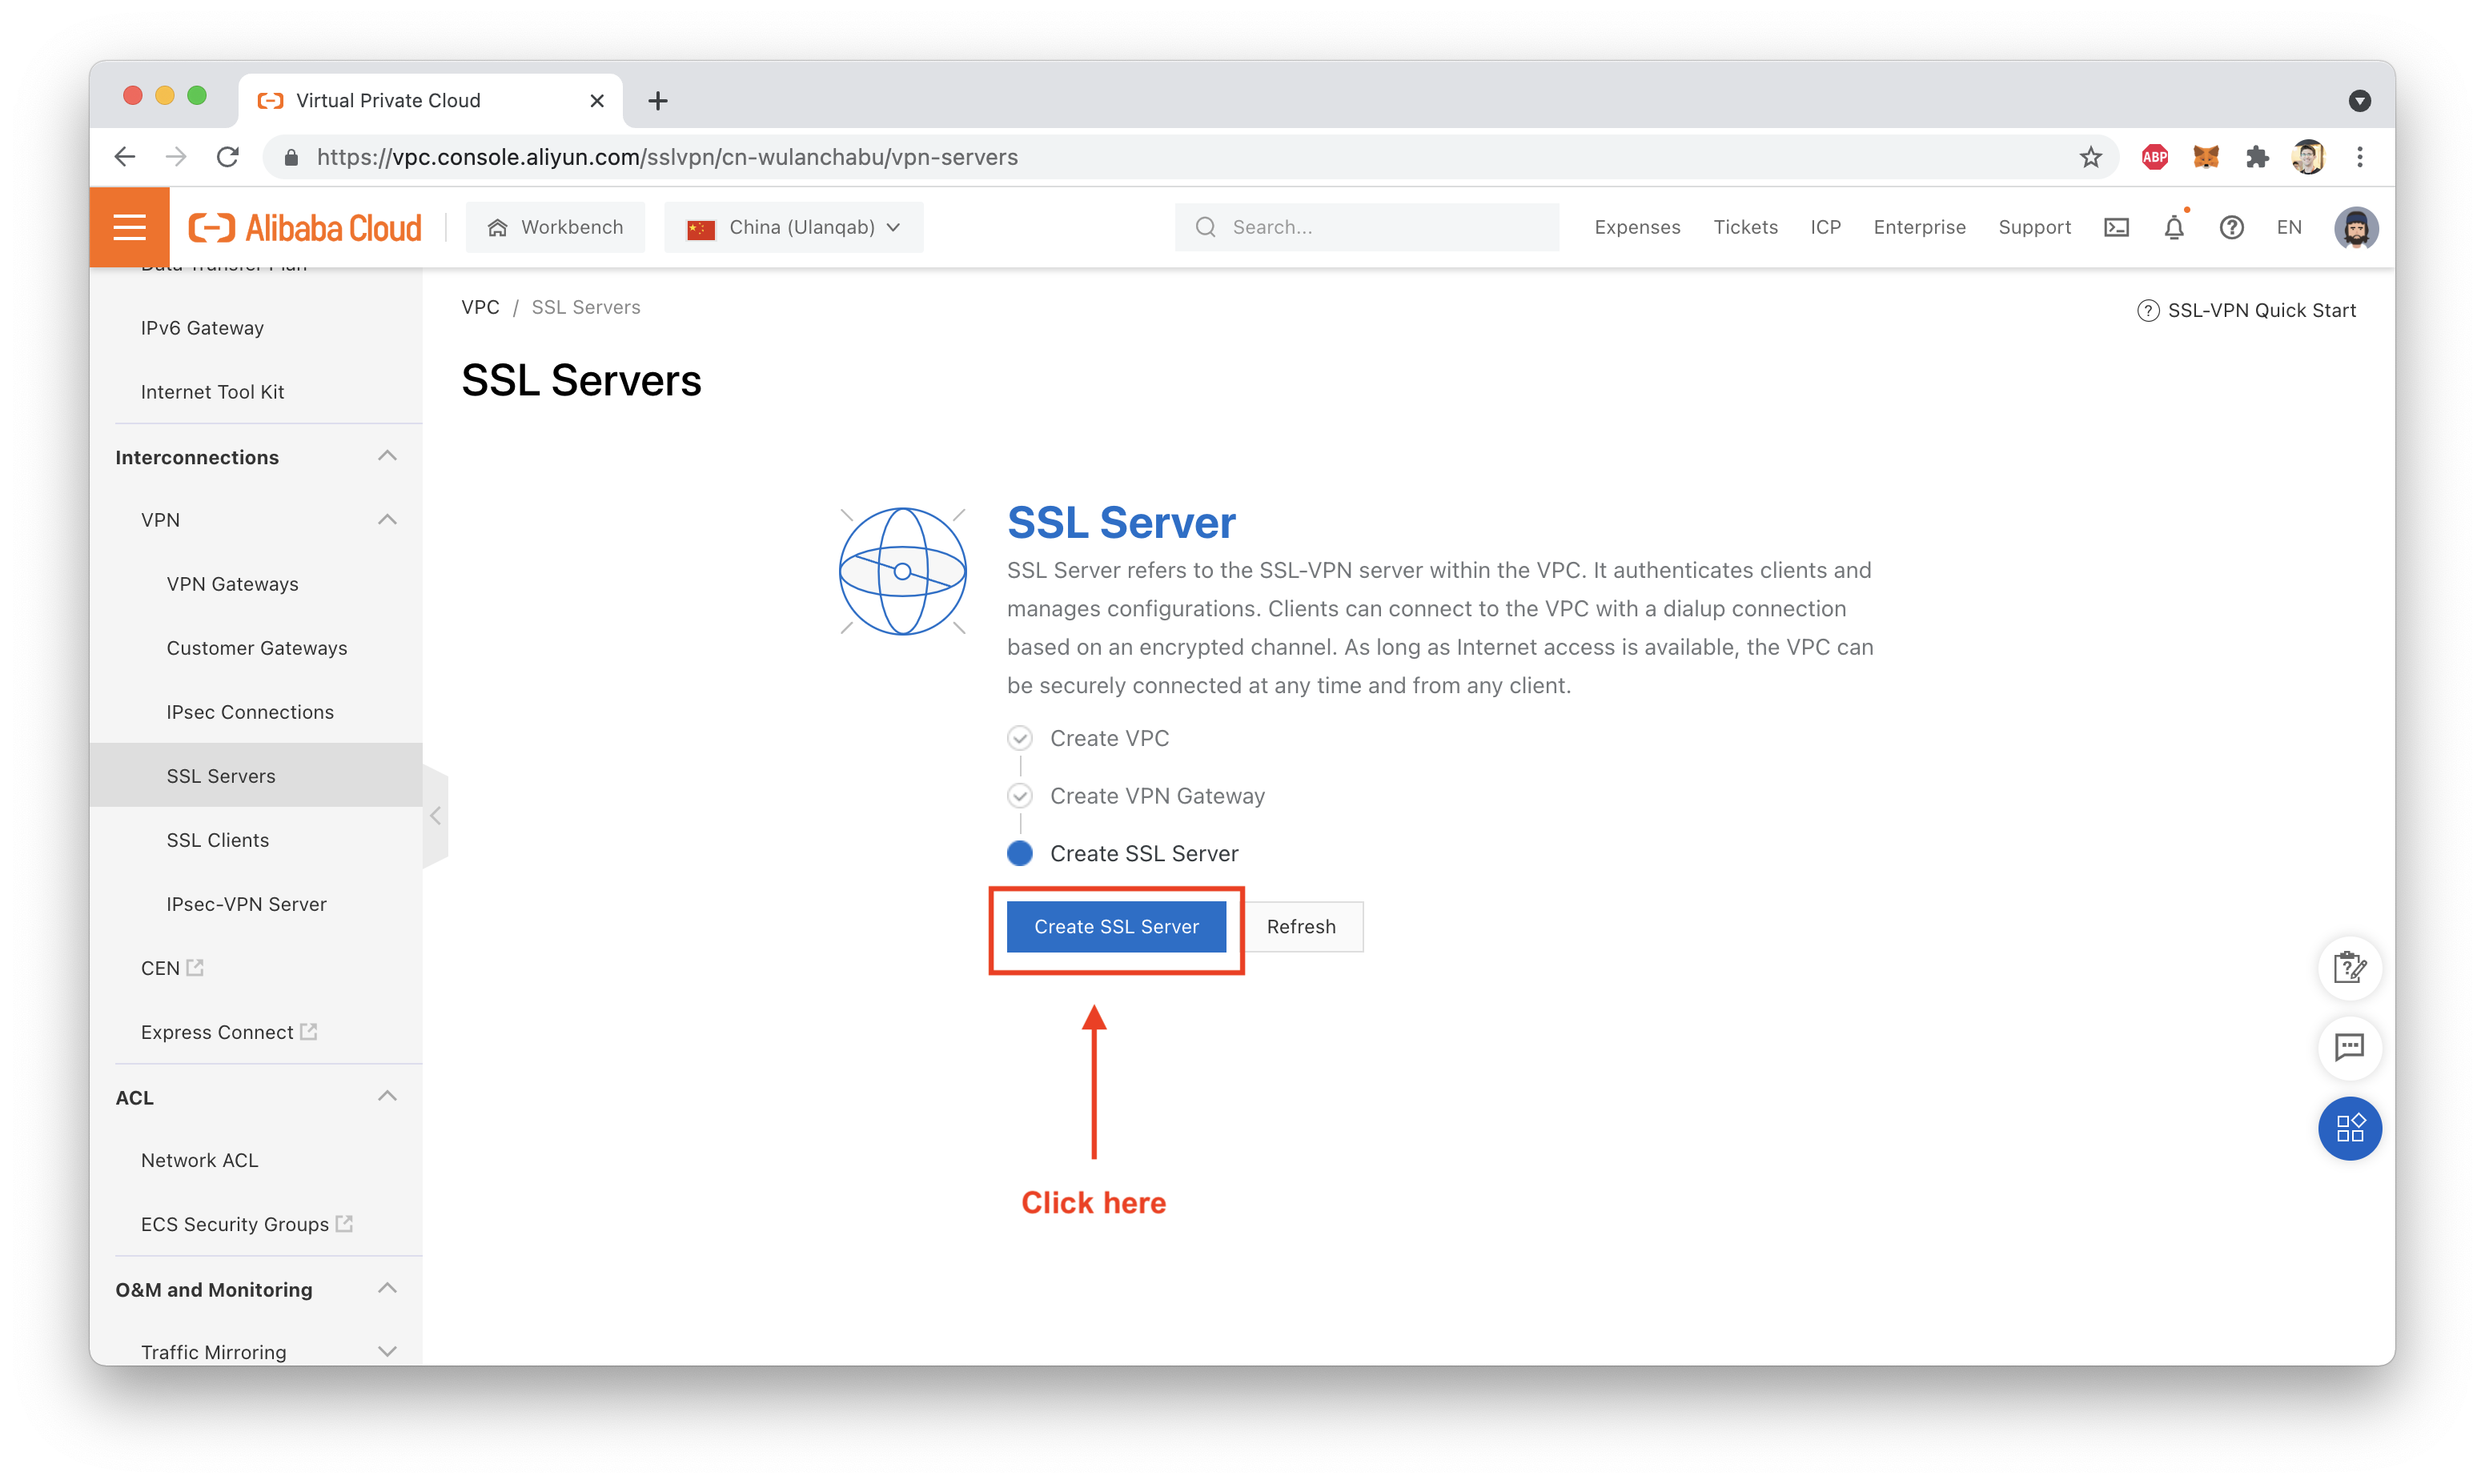
First, create an SSL Server:
Pay close attention to the network address ranges you use (see screenshot below for details):
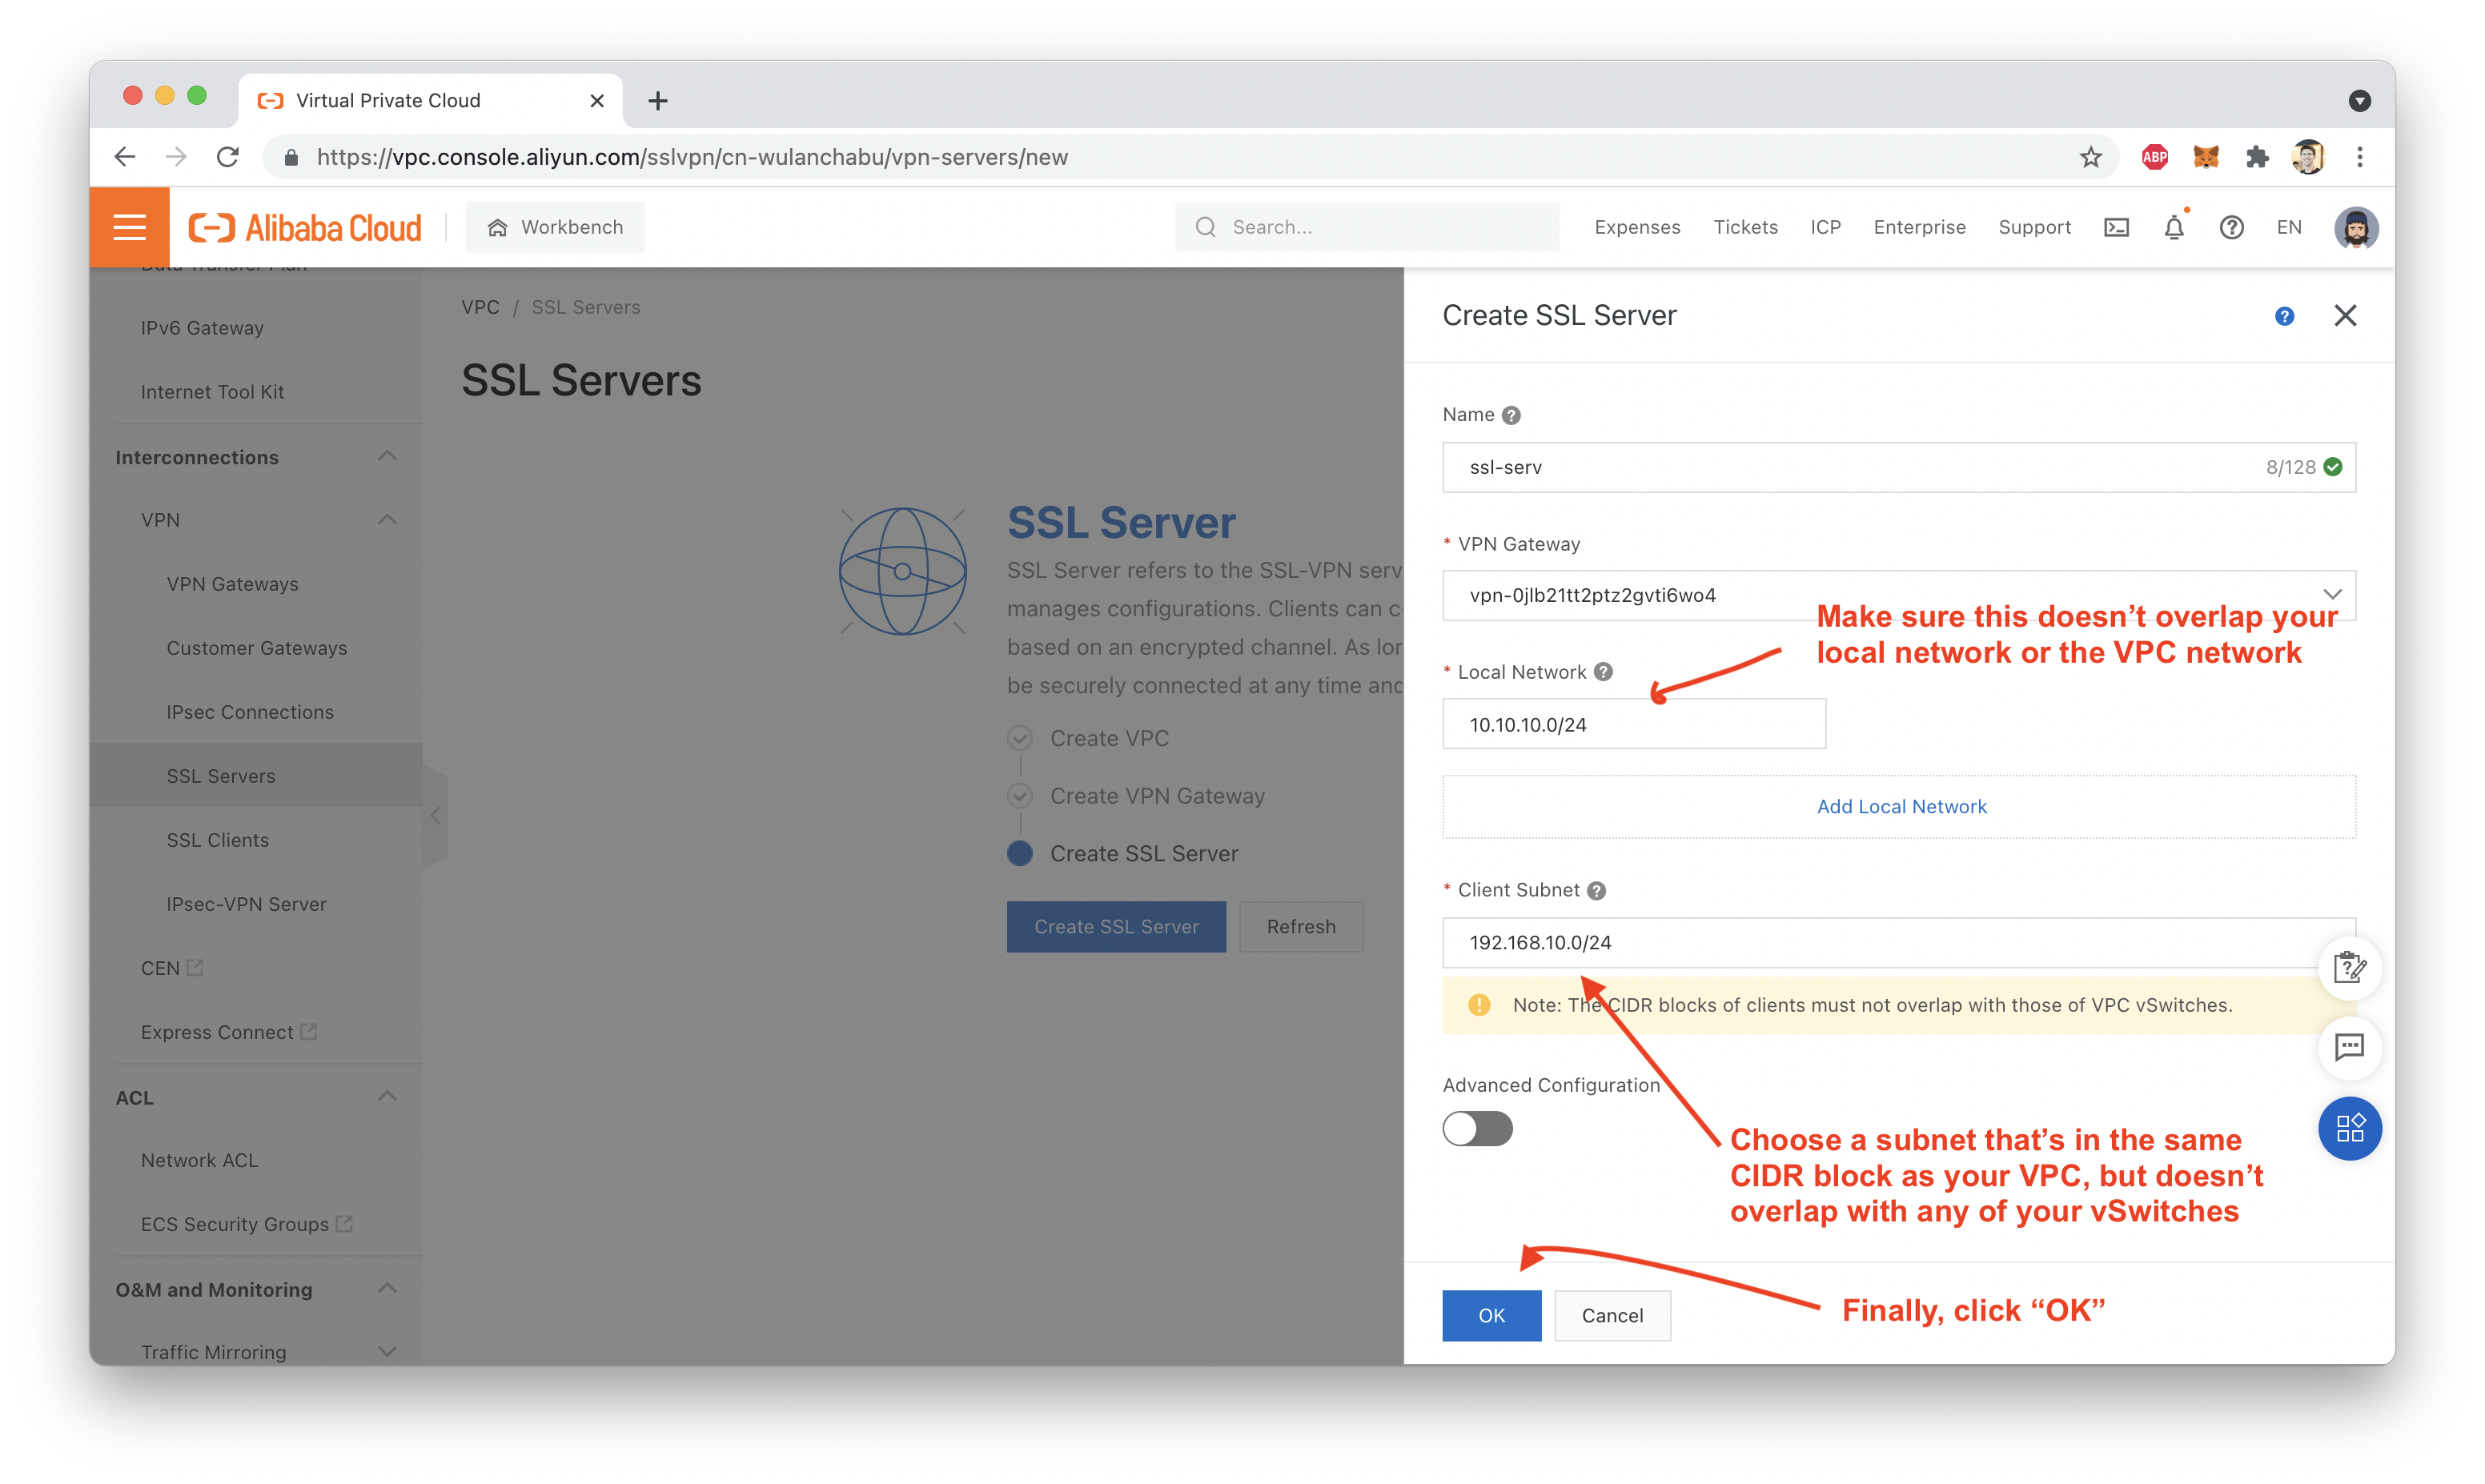
In general, it's a good idea to choose a "local network" IP address range that doesn't overlap your VPC address range, and choose a "client subnet" address which is in the same CIDR block as your VPC, but does not overlap with your vSwitches.
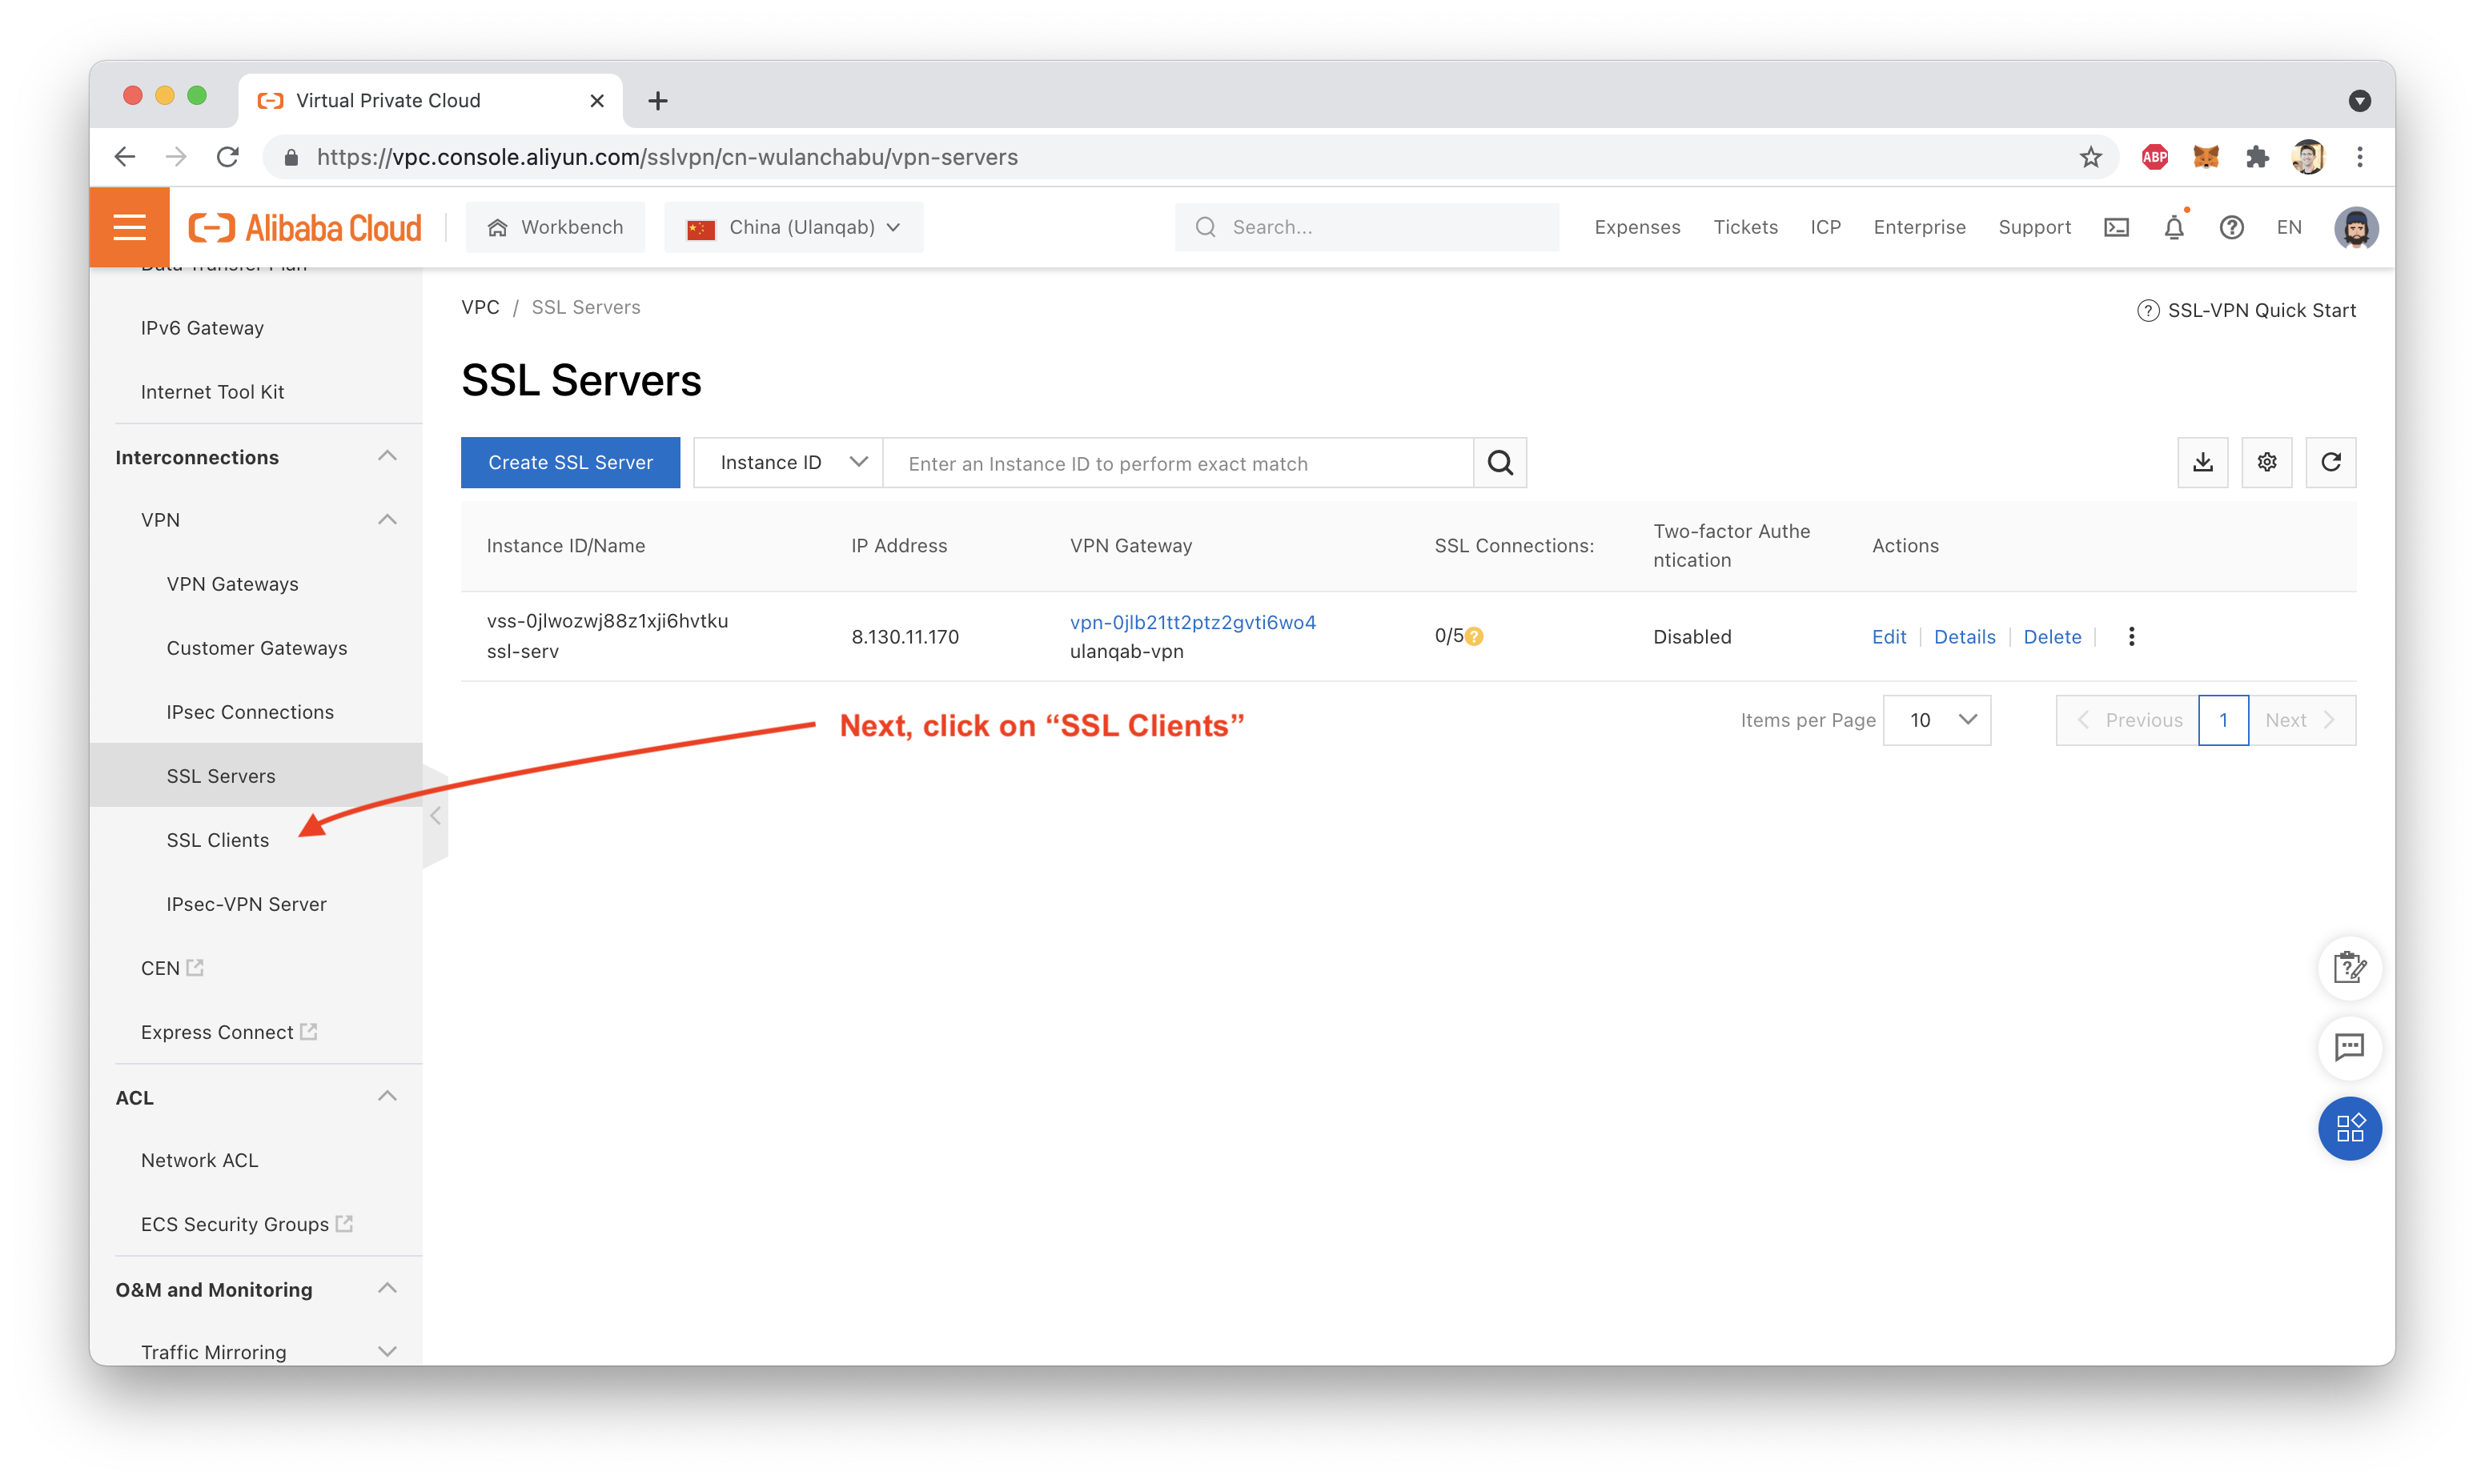
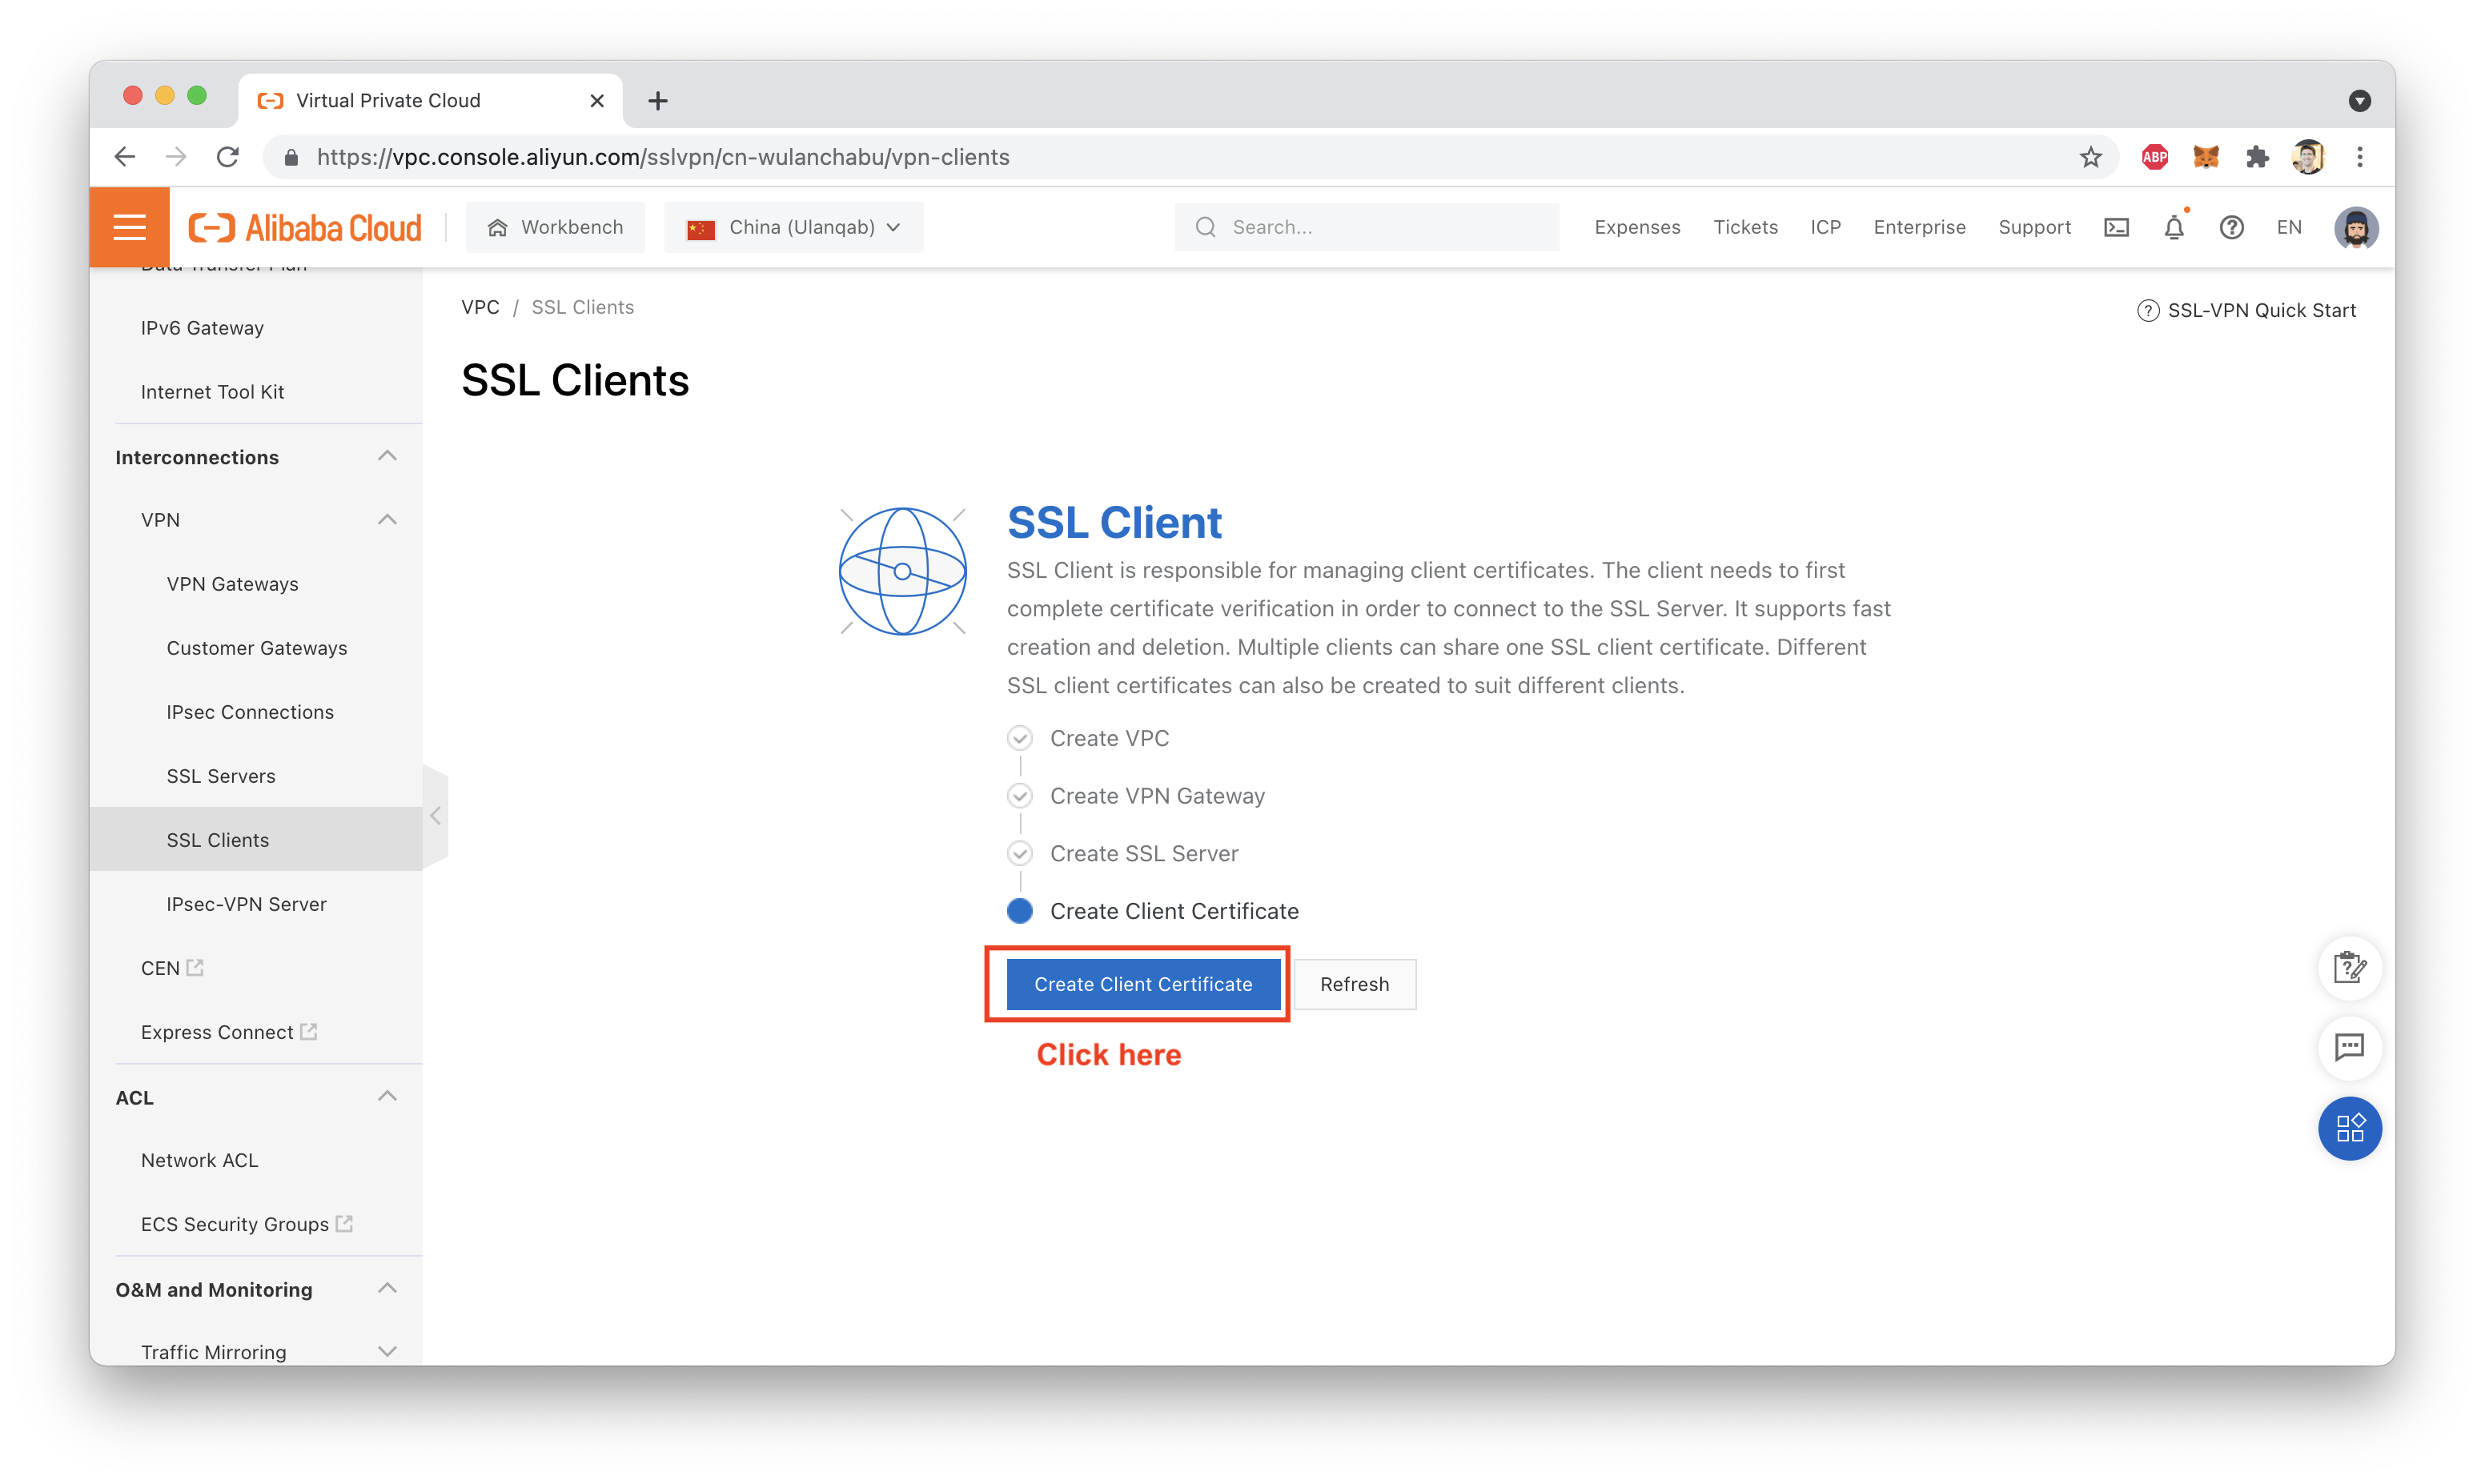
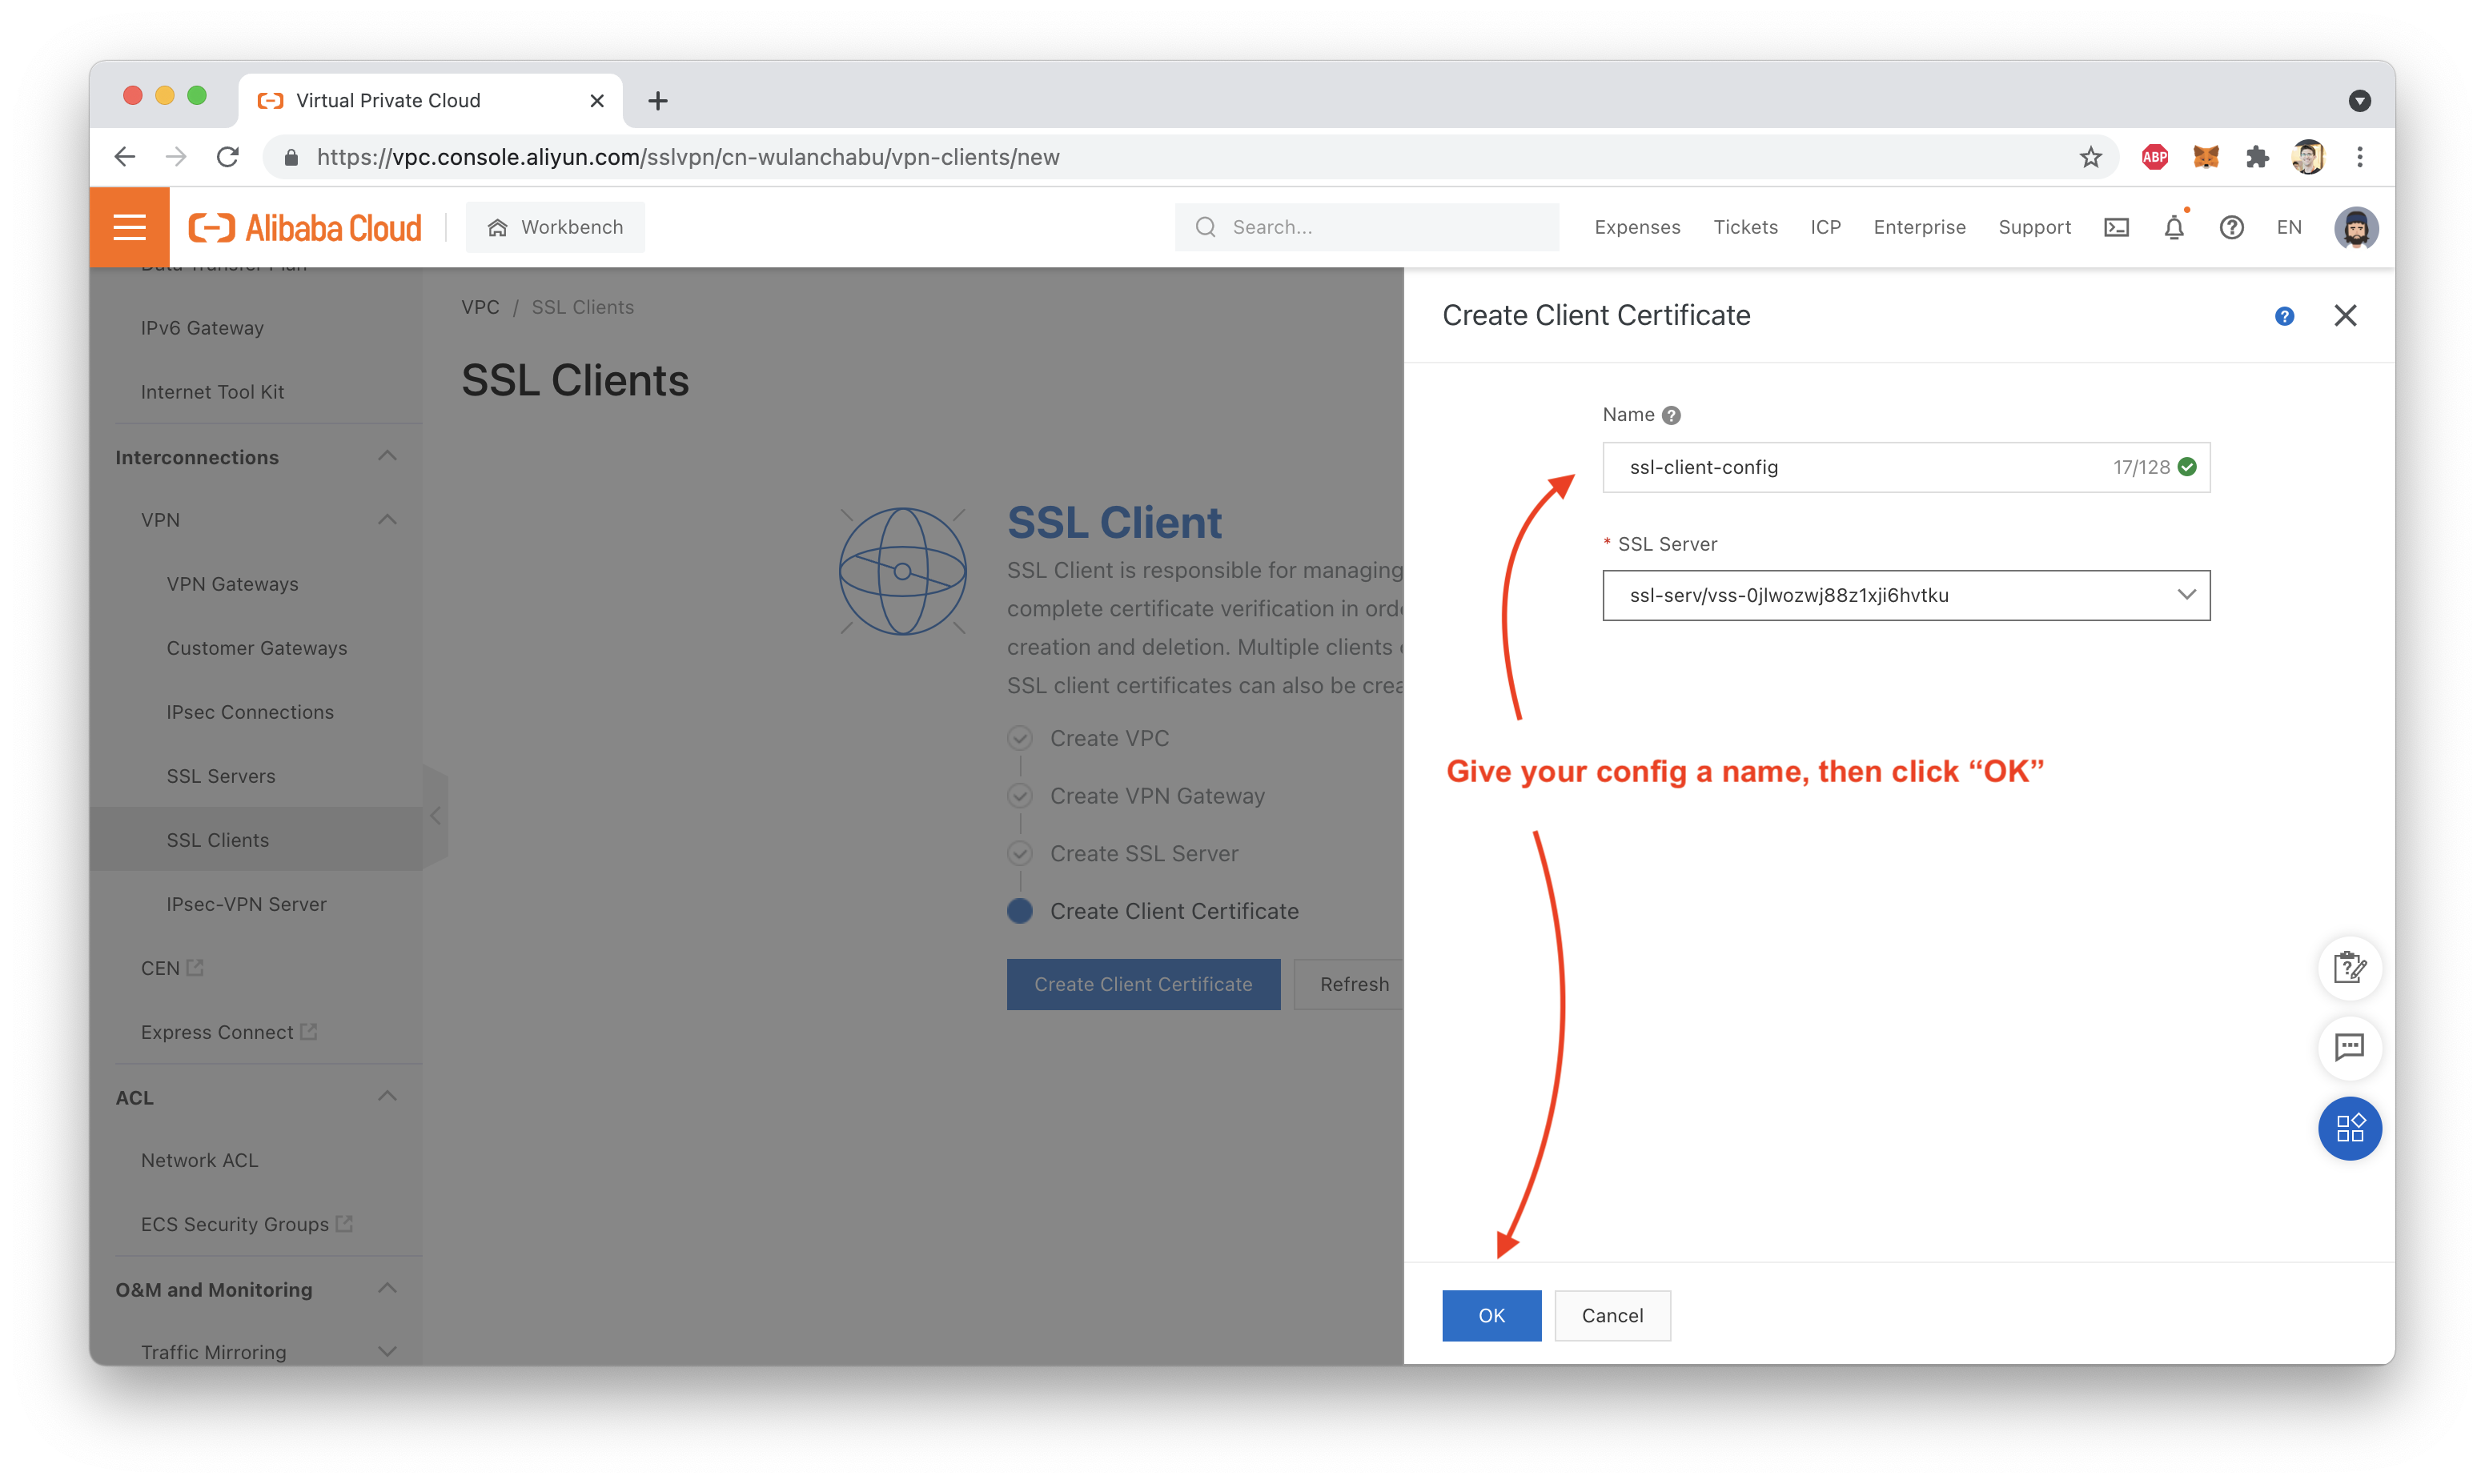
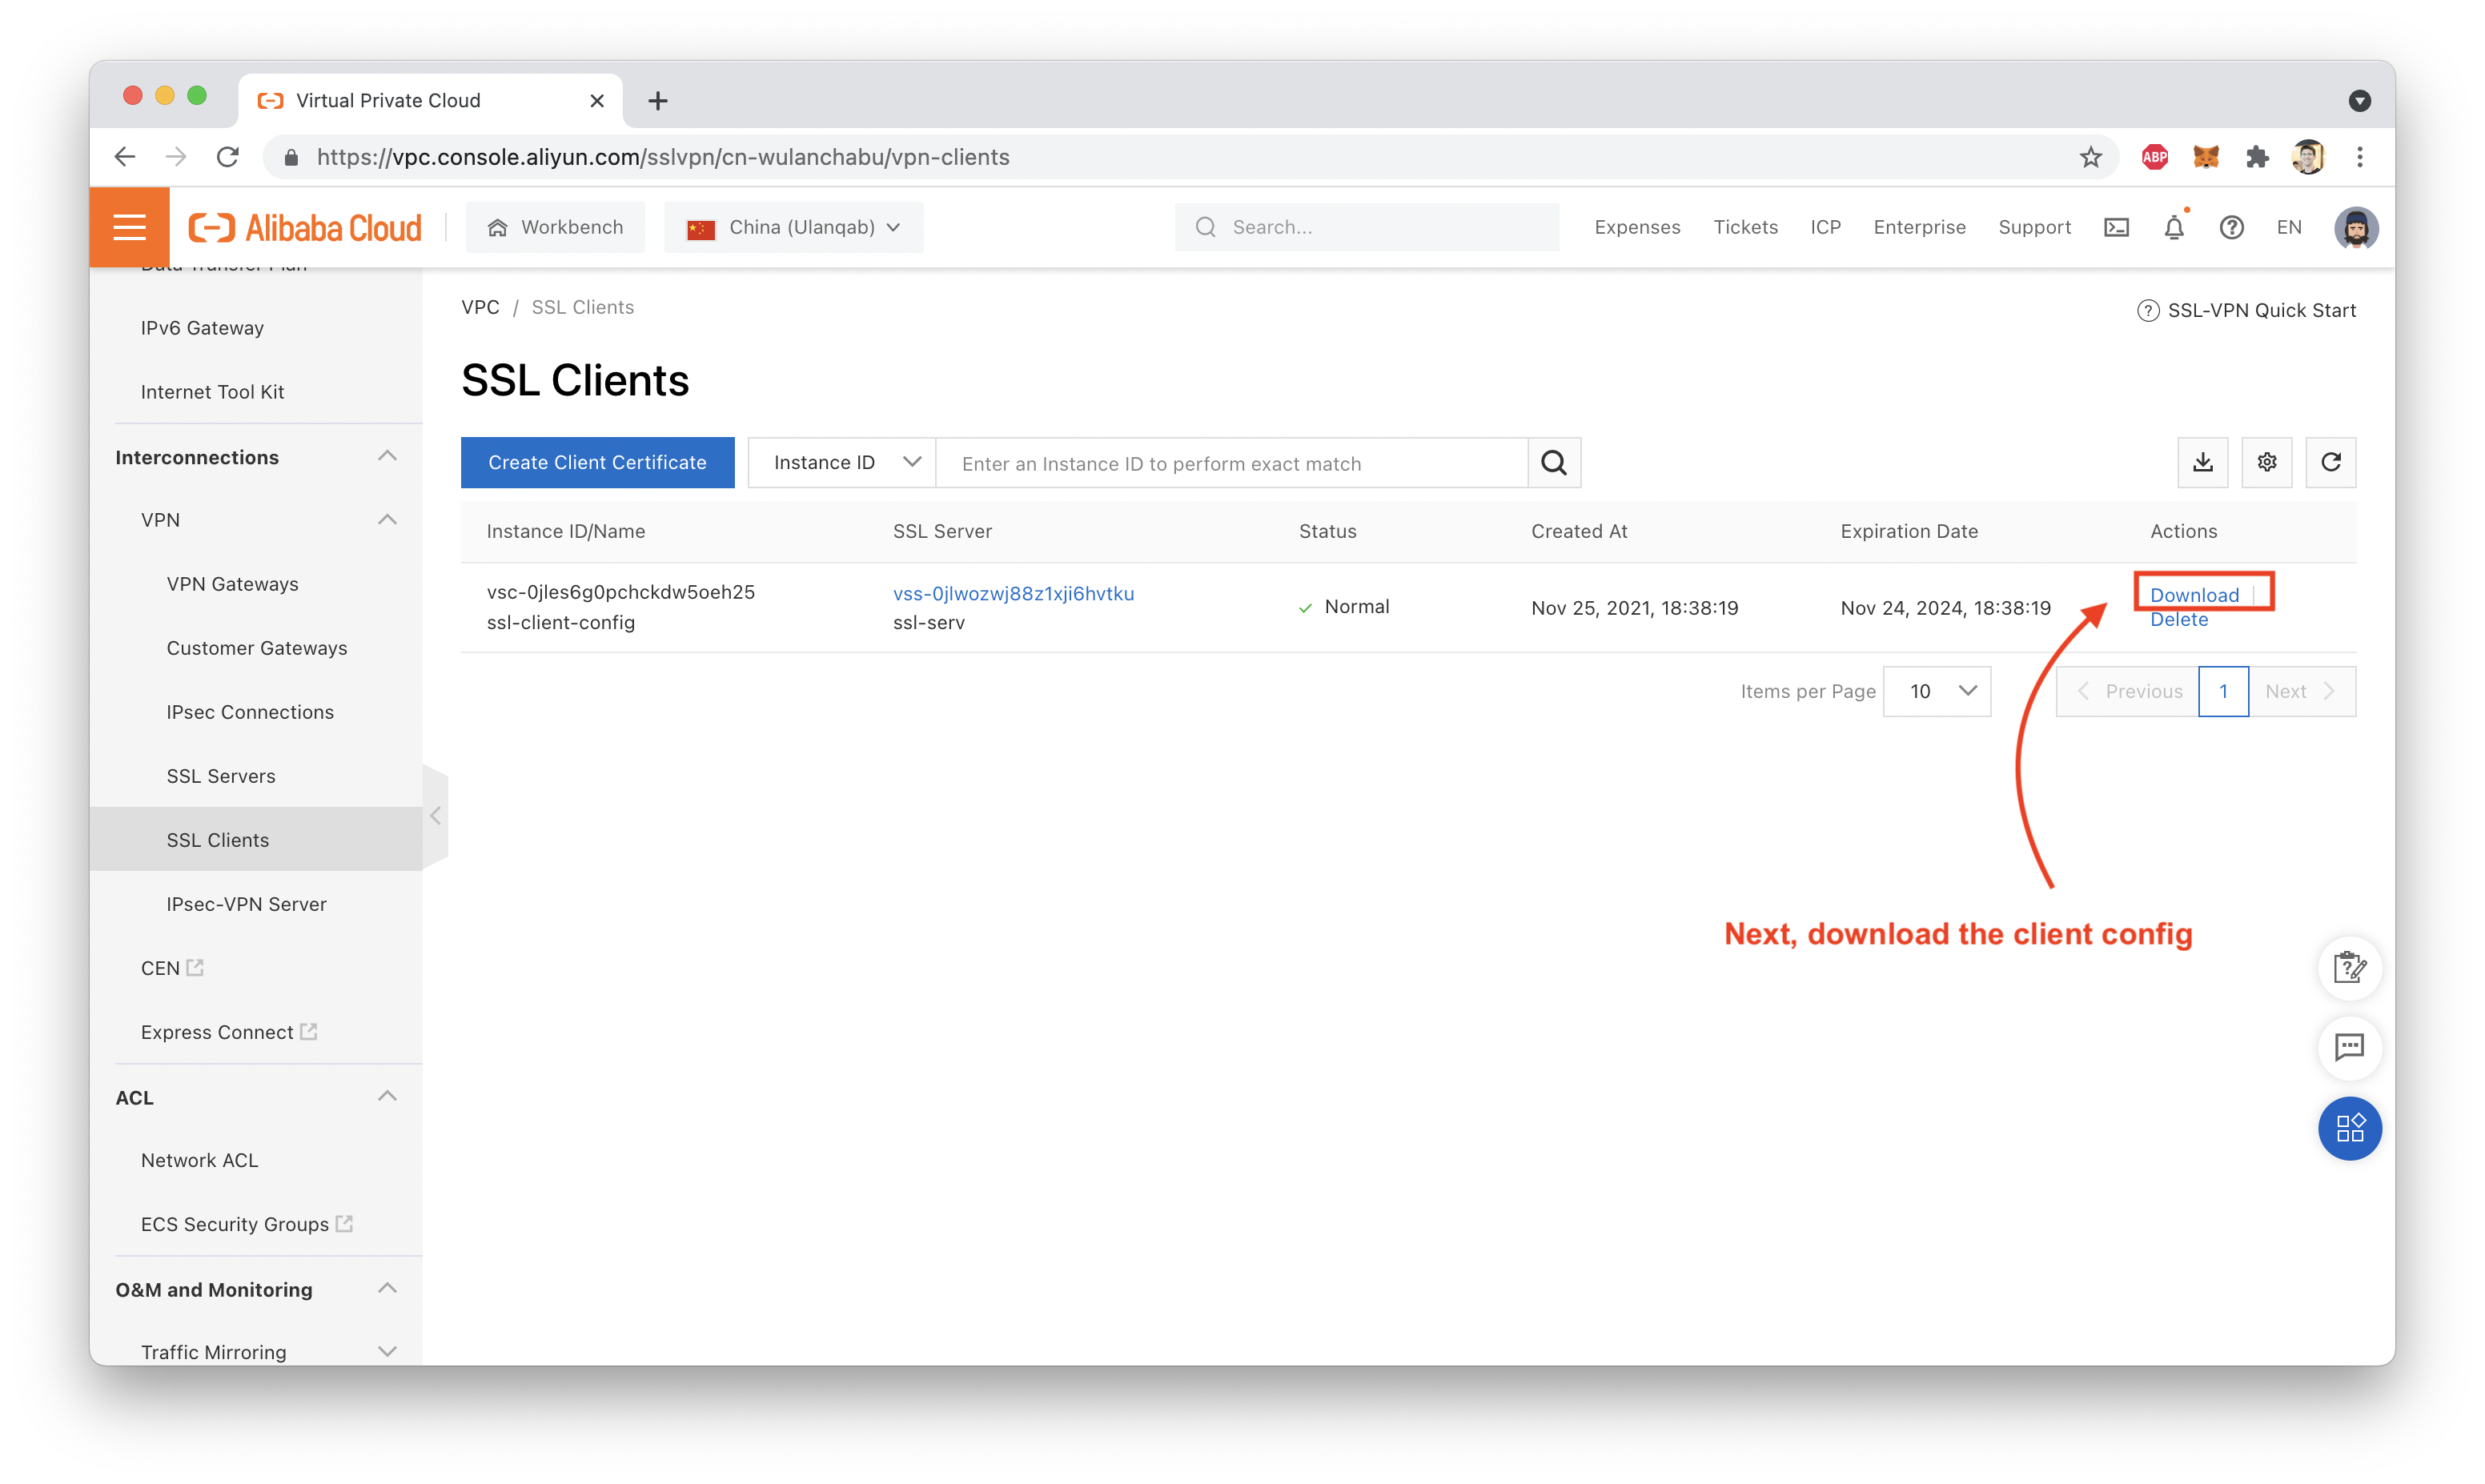
Next, we need to set up our SSL "client configuration", which will generate a certificate file and .ovpn VPN client configuration file, which we can download as a zipfile:
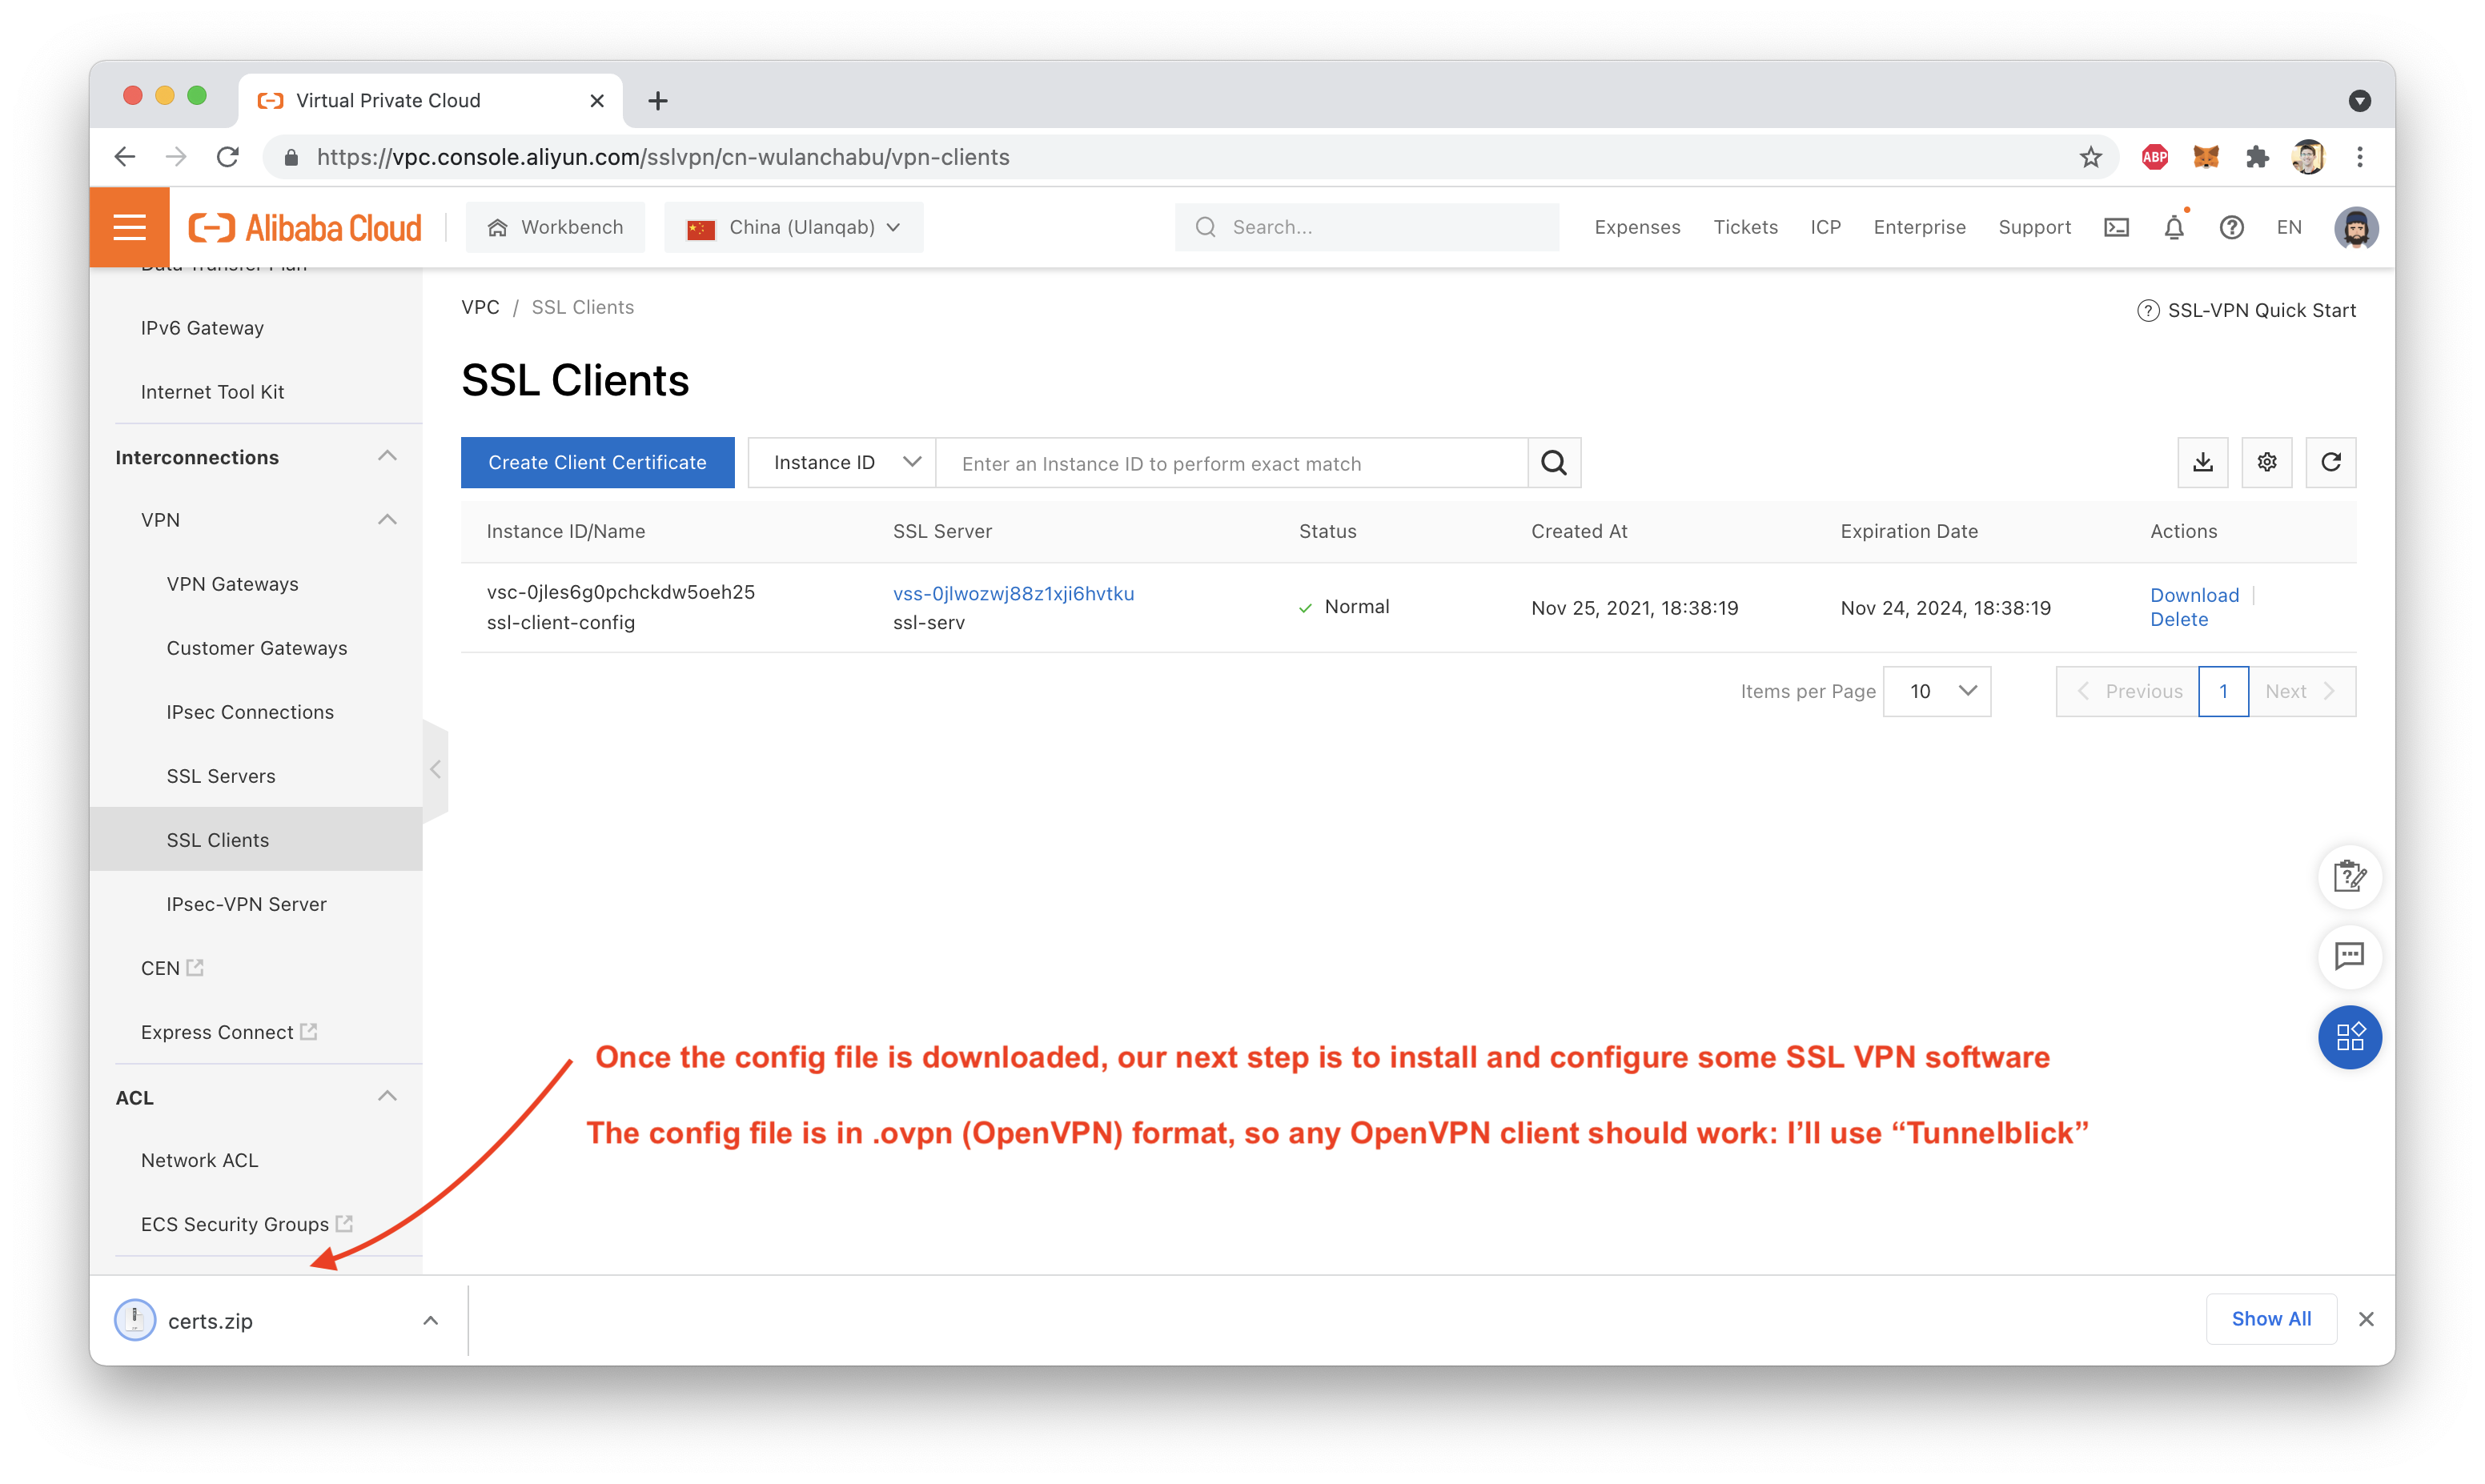
We need local SSL VPN client software, if we want our local device (be it a desktop, laptop, or phone) to be able to connect to the VPN Gateway.
I'm using a mac, so I will demonstrate this using the free and open source Tunnelblick VPN tool.
Clicking the link above should take you to the Tunnelblick homepage, where you can get the most recent version from "Downloads":
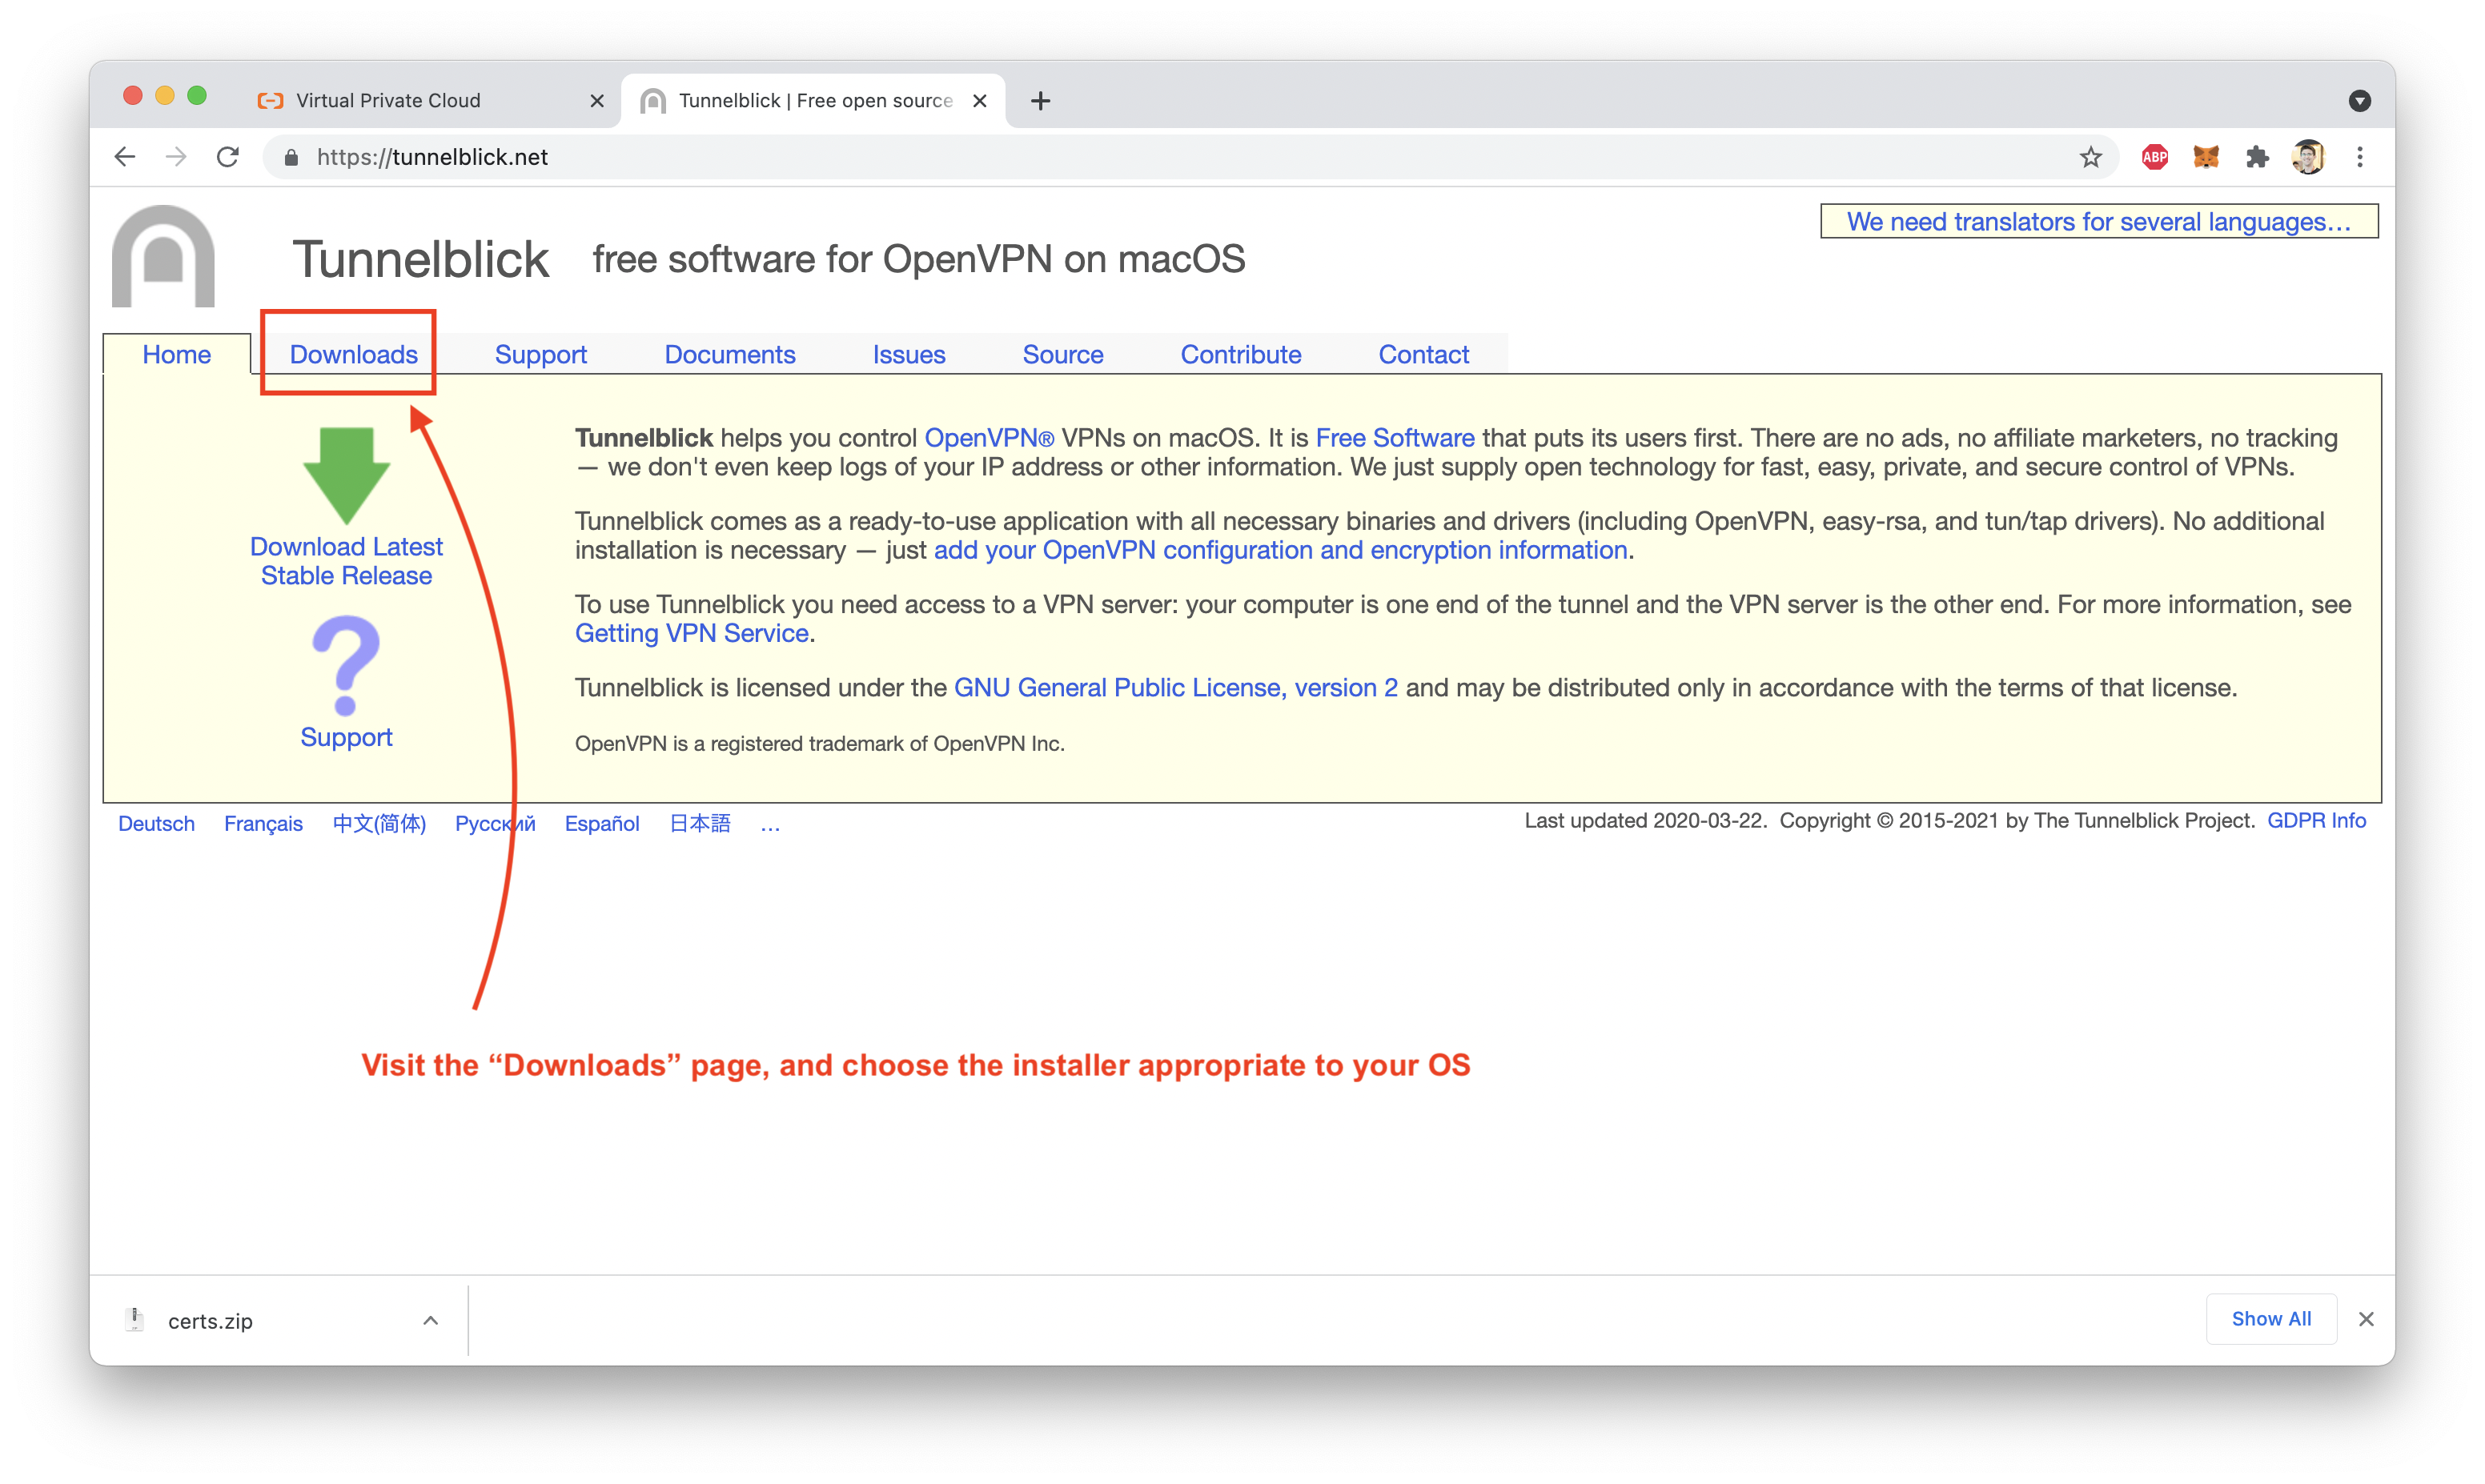
I won't go through all the steps involved in installing Tunnelblick: it's very straightforward.
Once you have a local VPN client installed, the next step is to configure a VPN connection, using the .ovpn file inside the config.zip archive we downloaded from the Alibaba Cloud console earlier.
In Tunnelblick, you do this by dragging the .ovpn file onto Tunnelblick, then following along with the prompts:
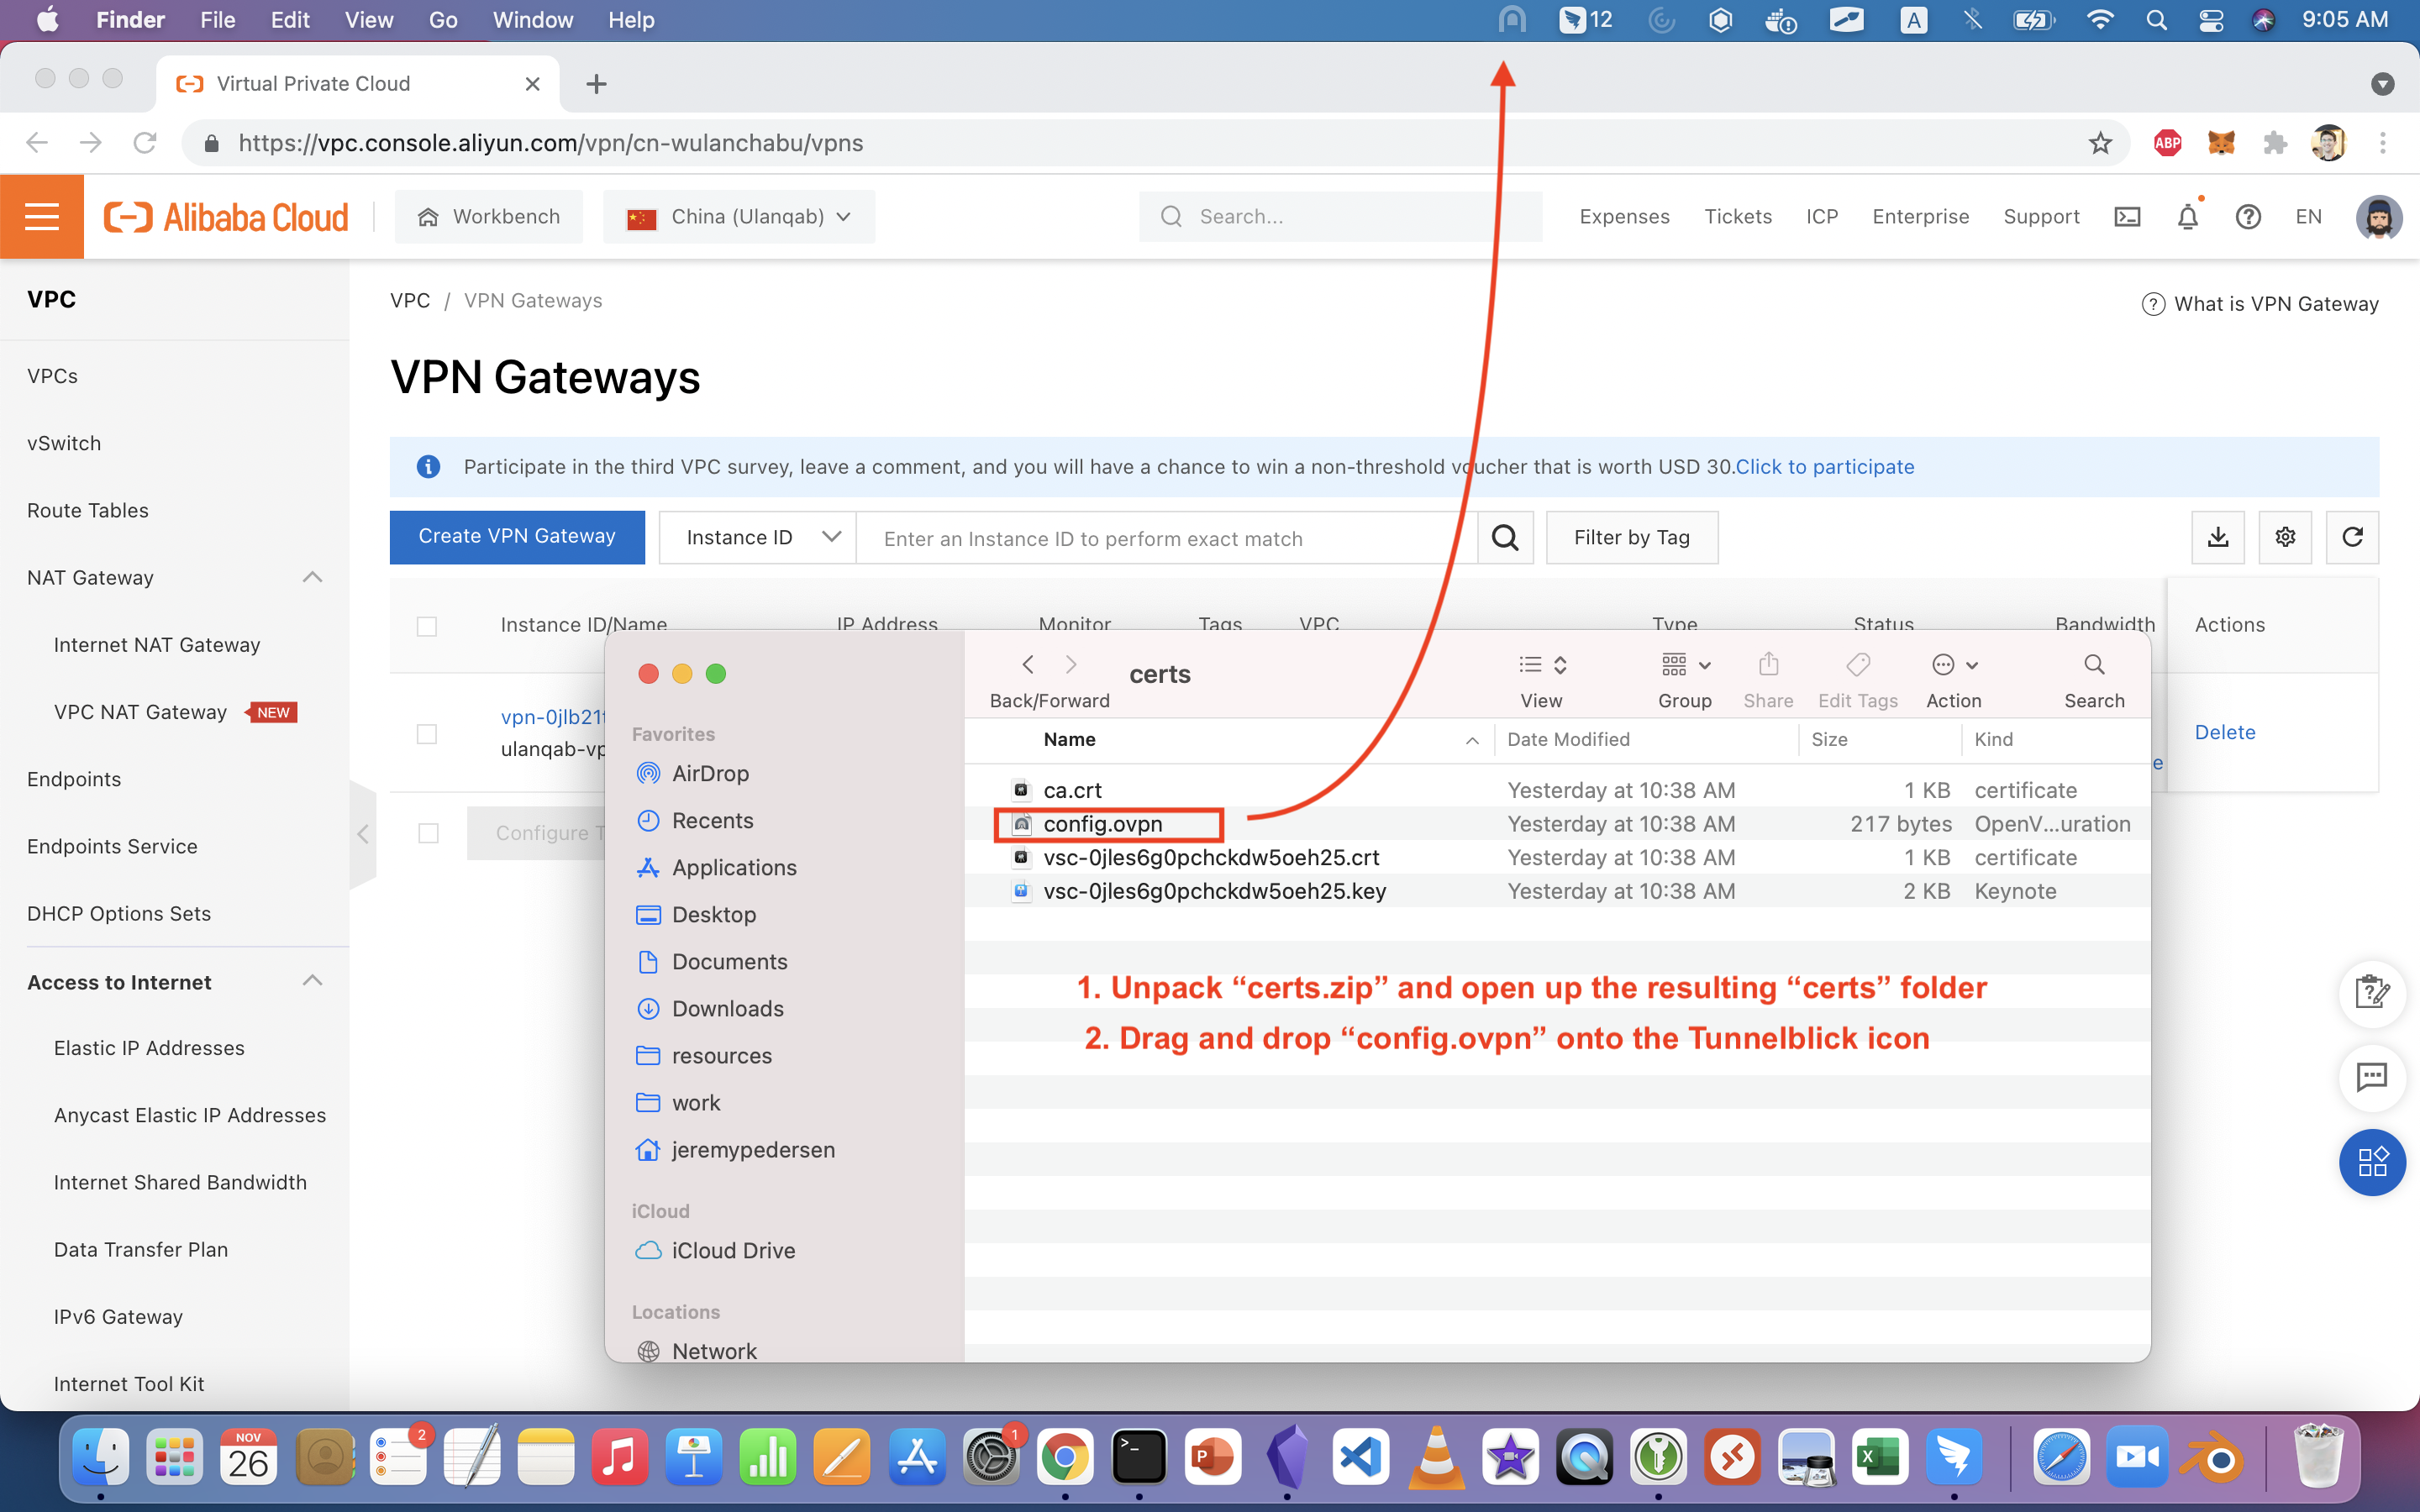
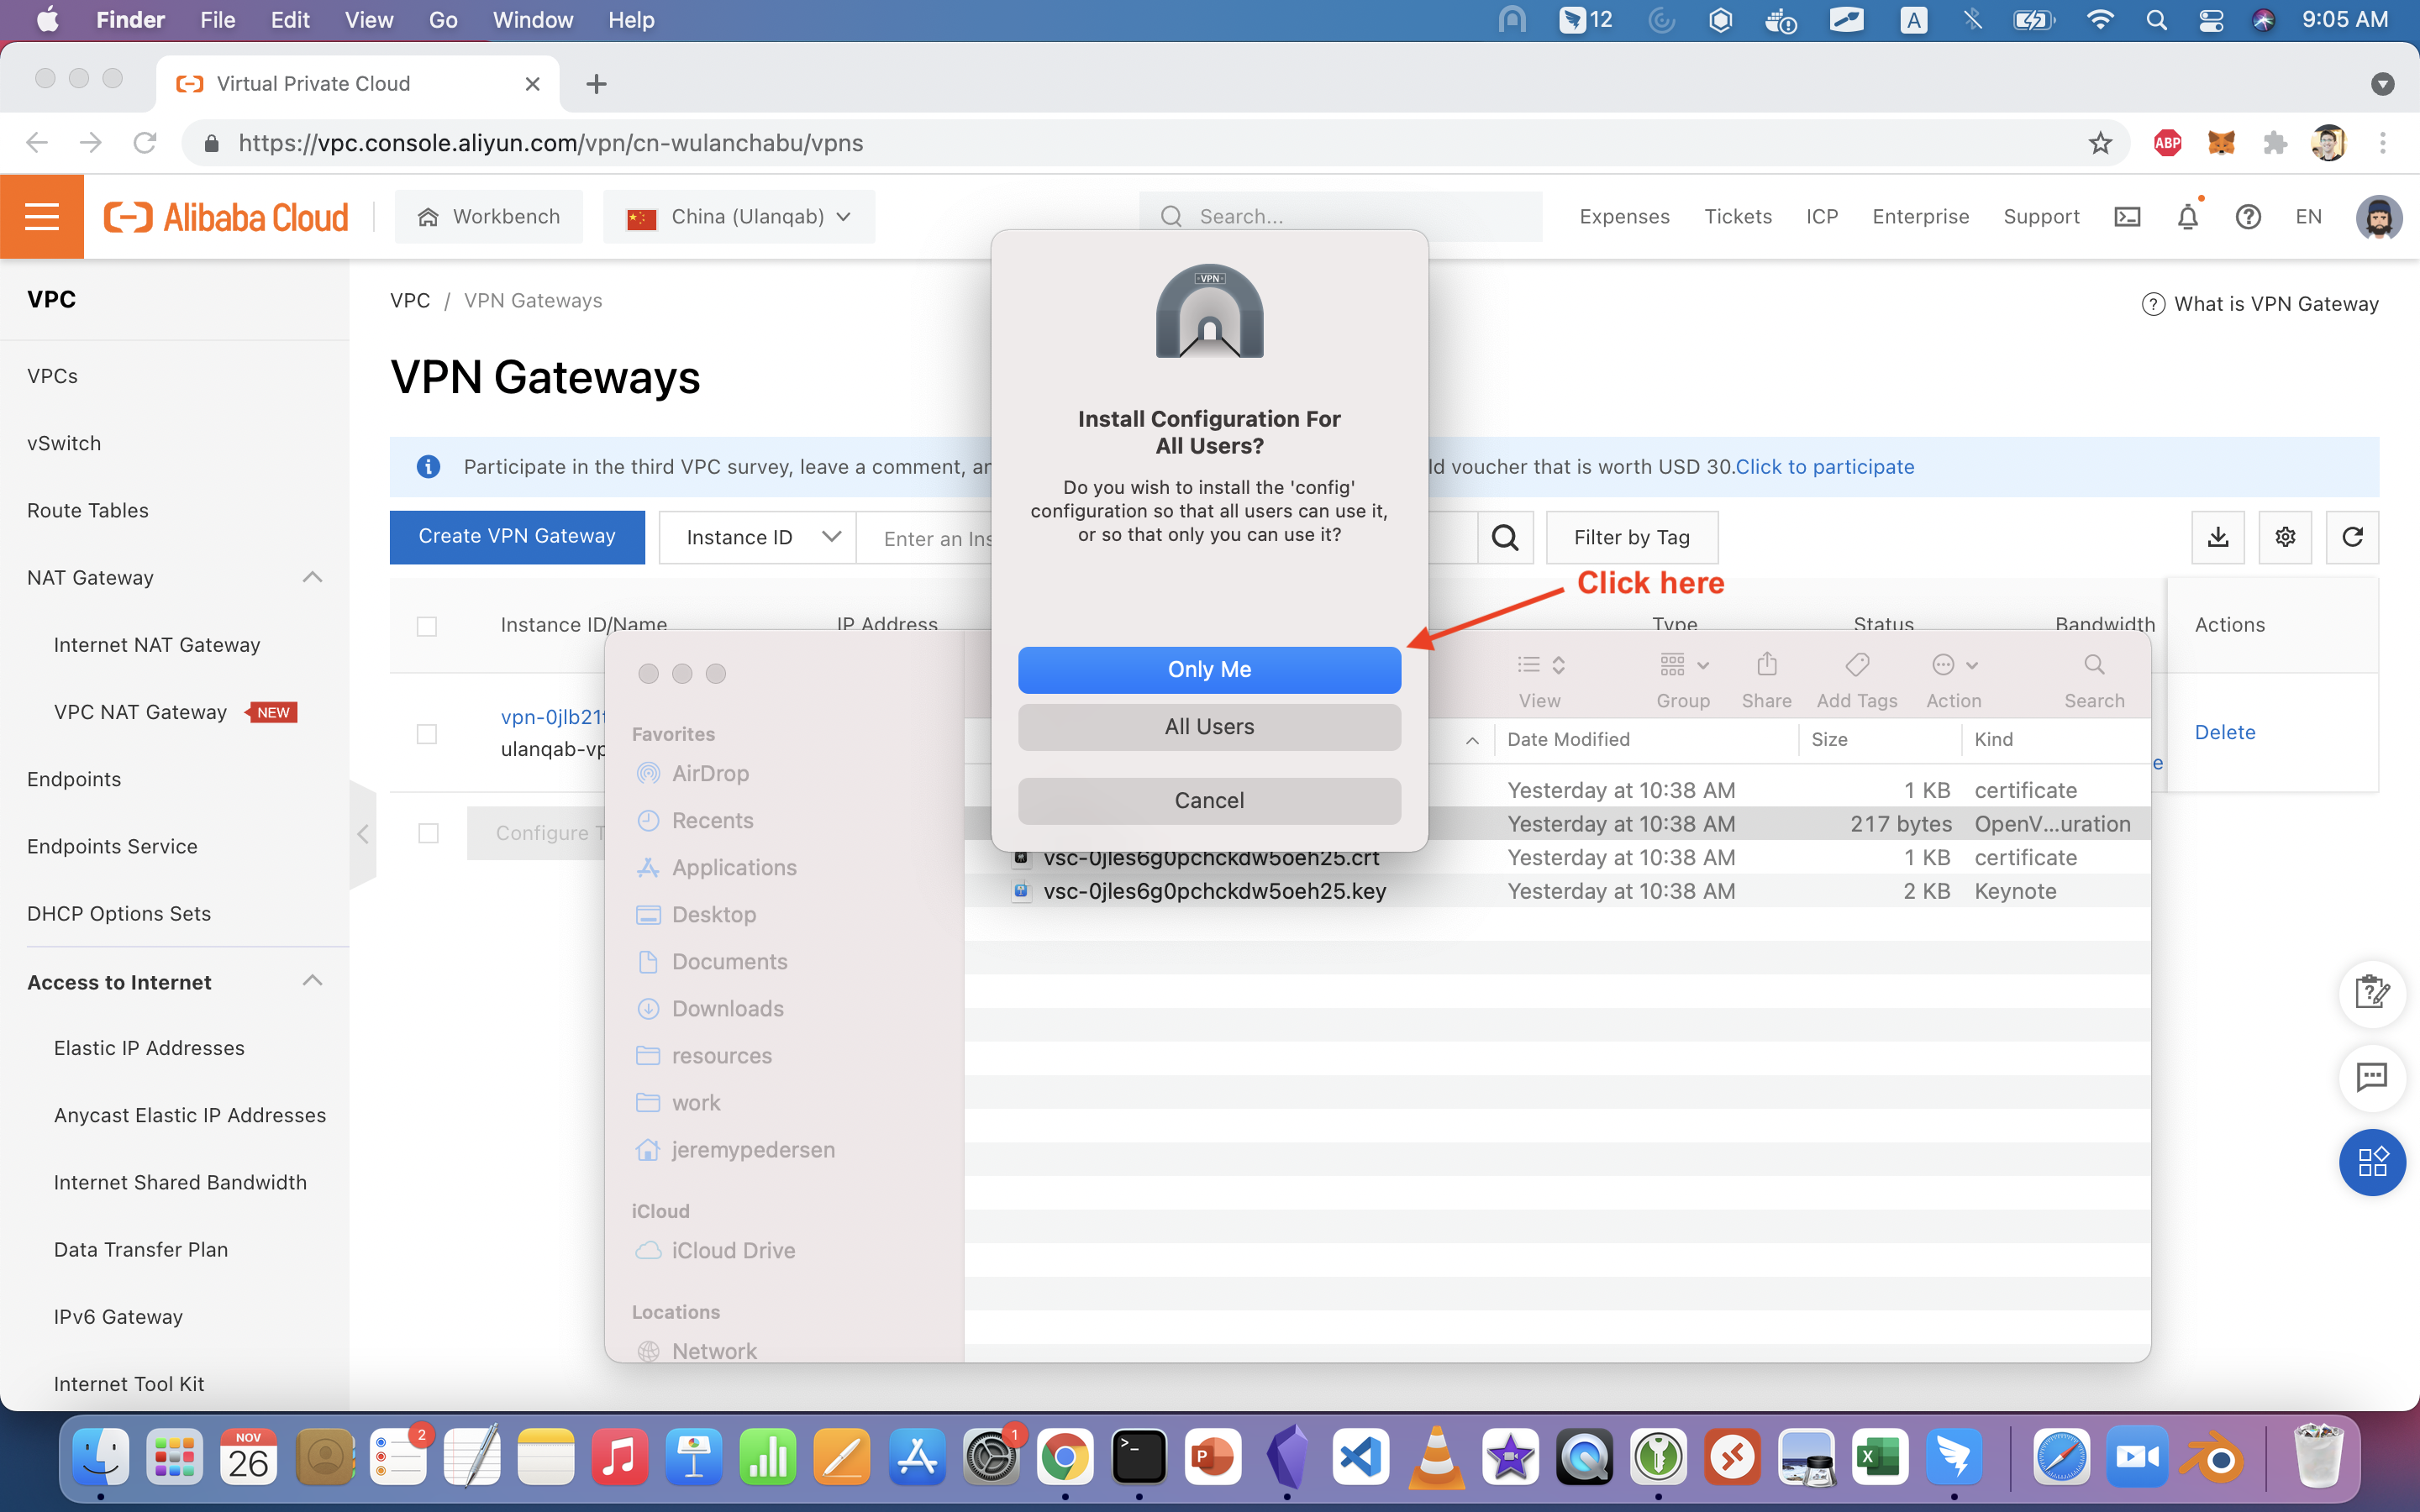
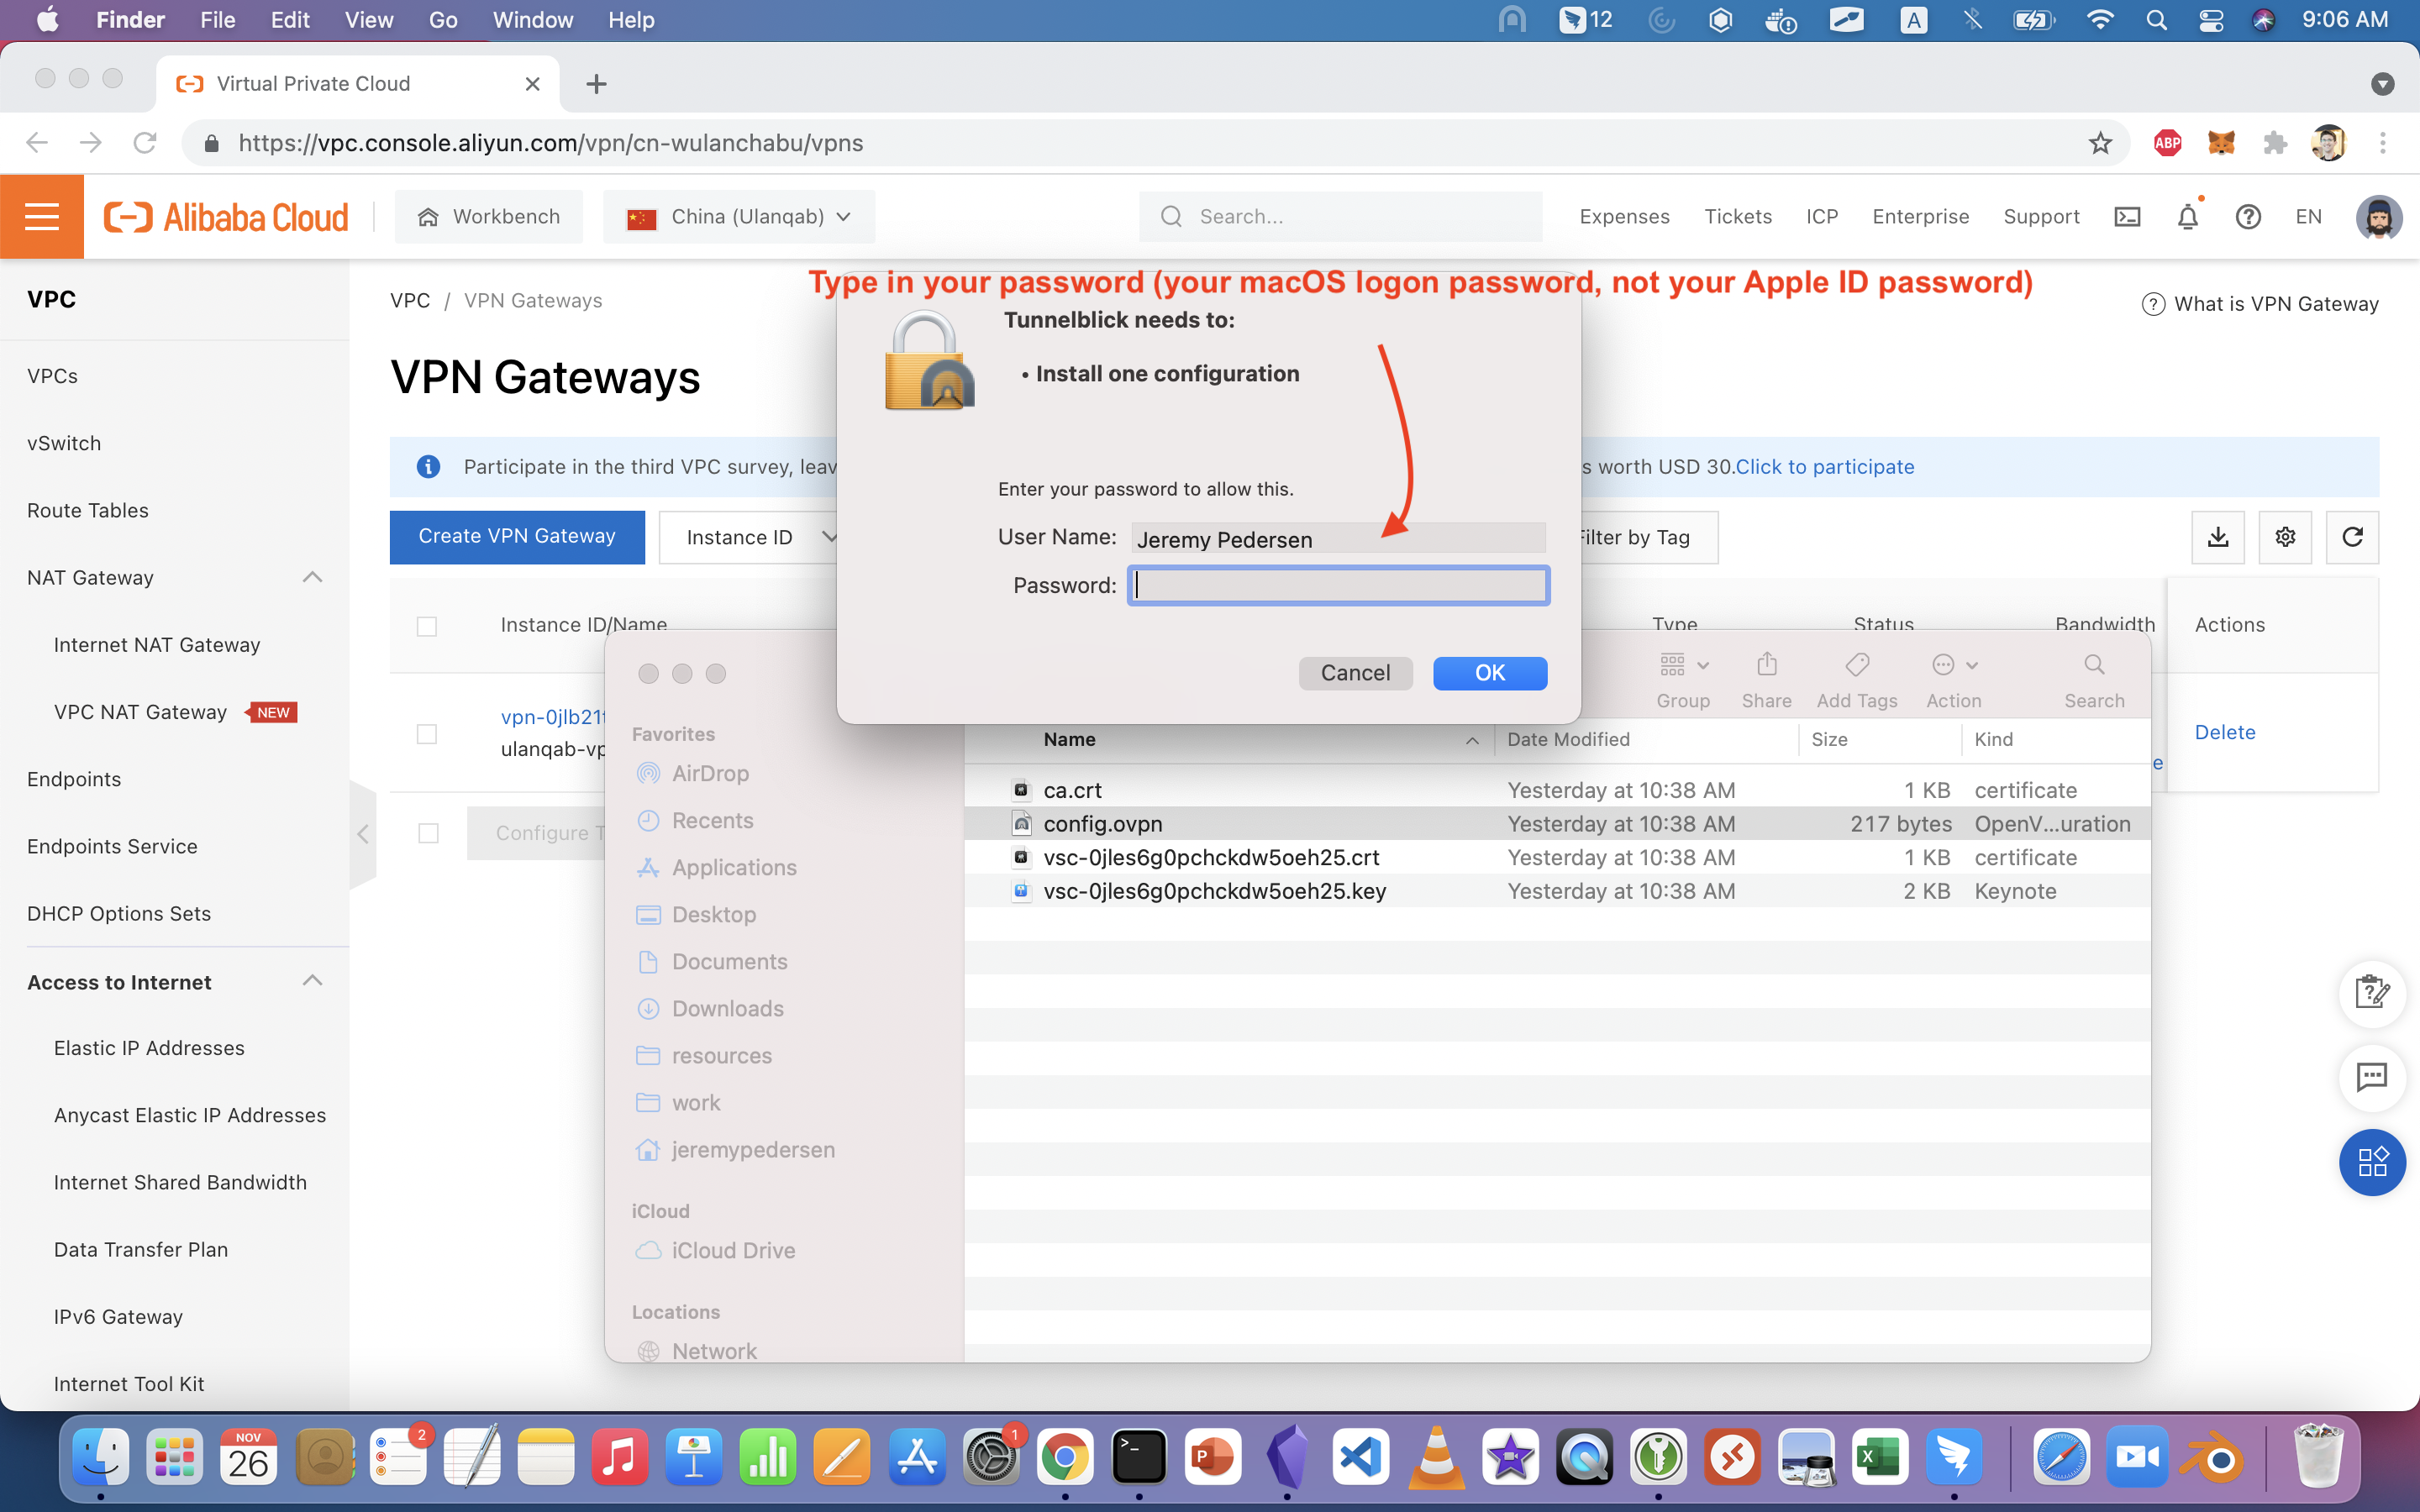
We need to make some final touches to the configuration by clicking on "VPN Details", then switching over to "Settings", as shown here:
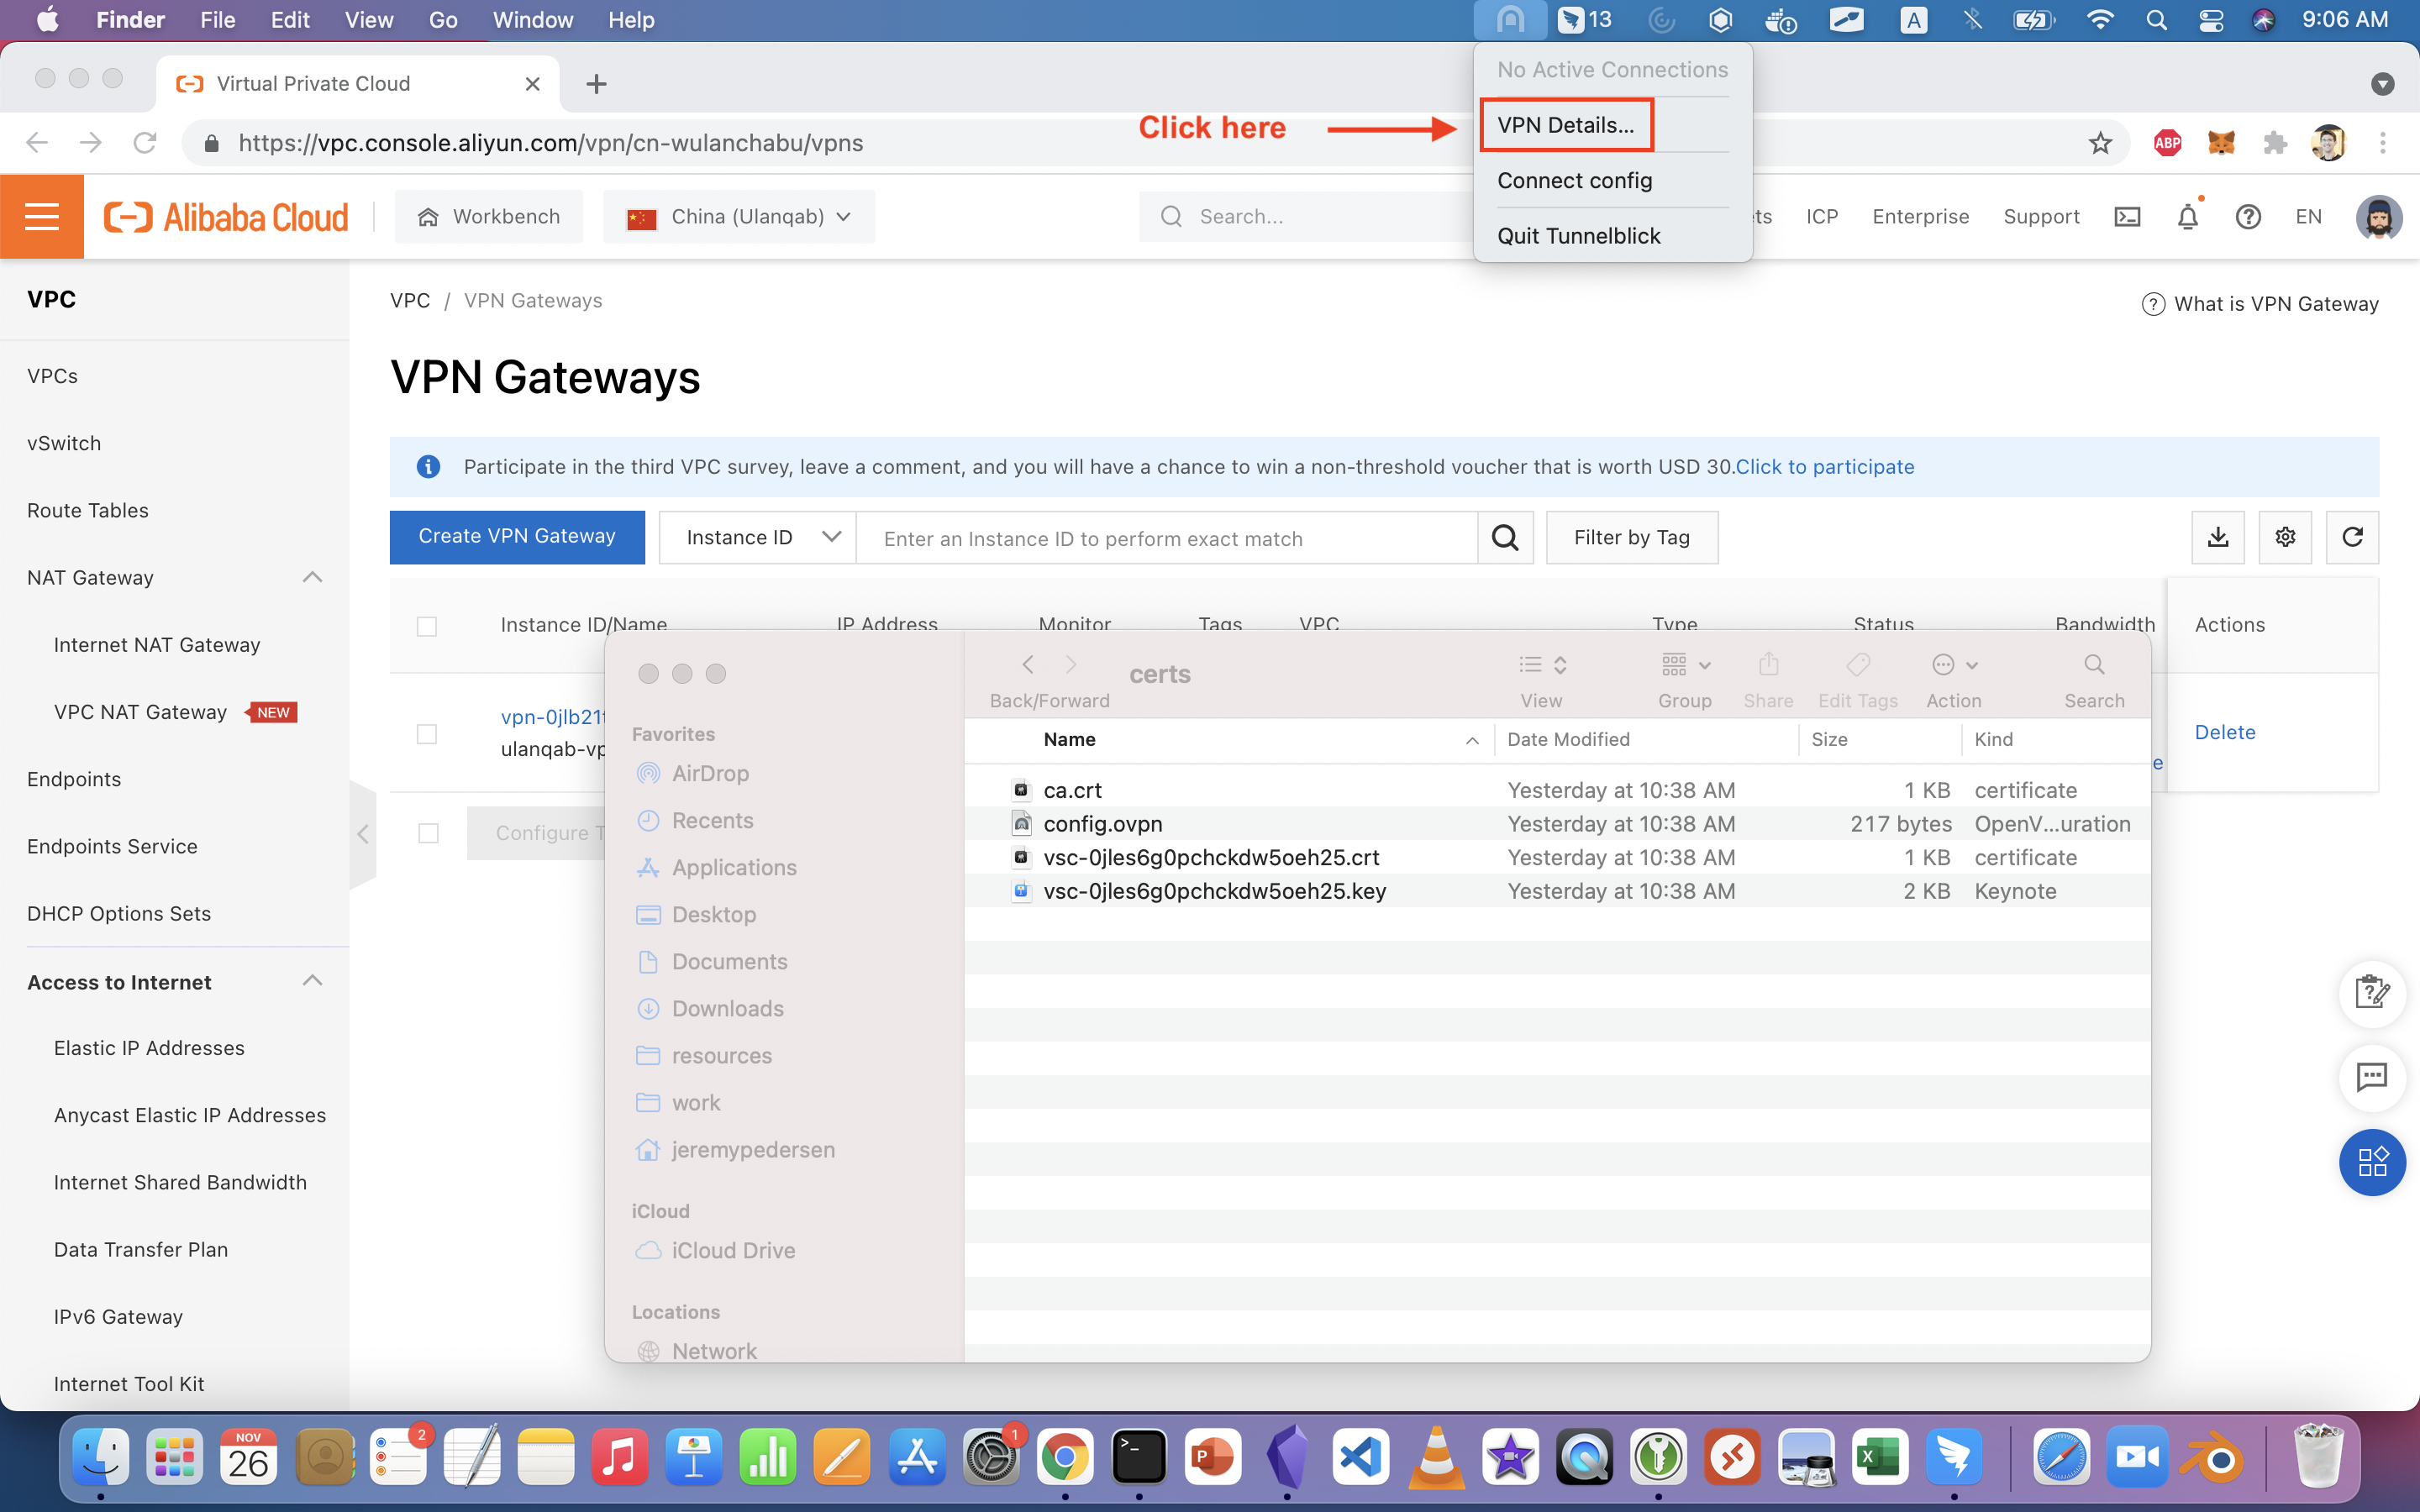
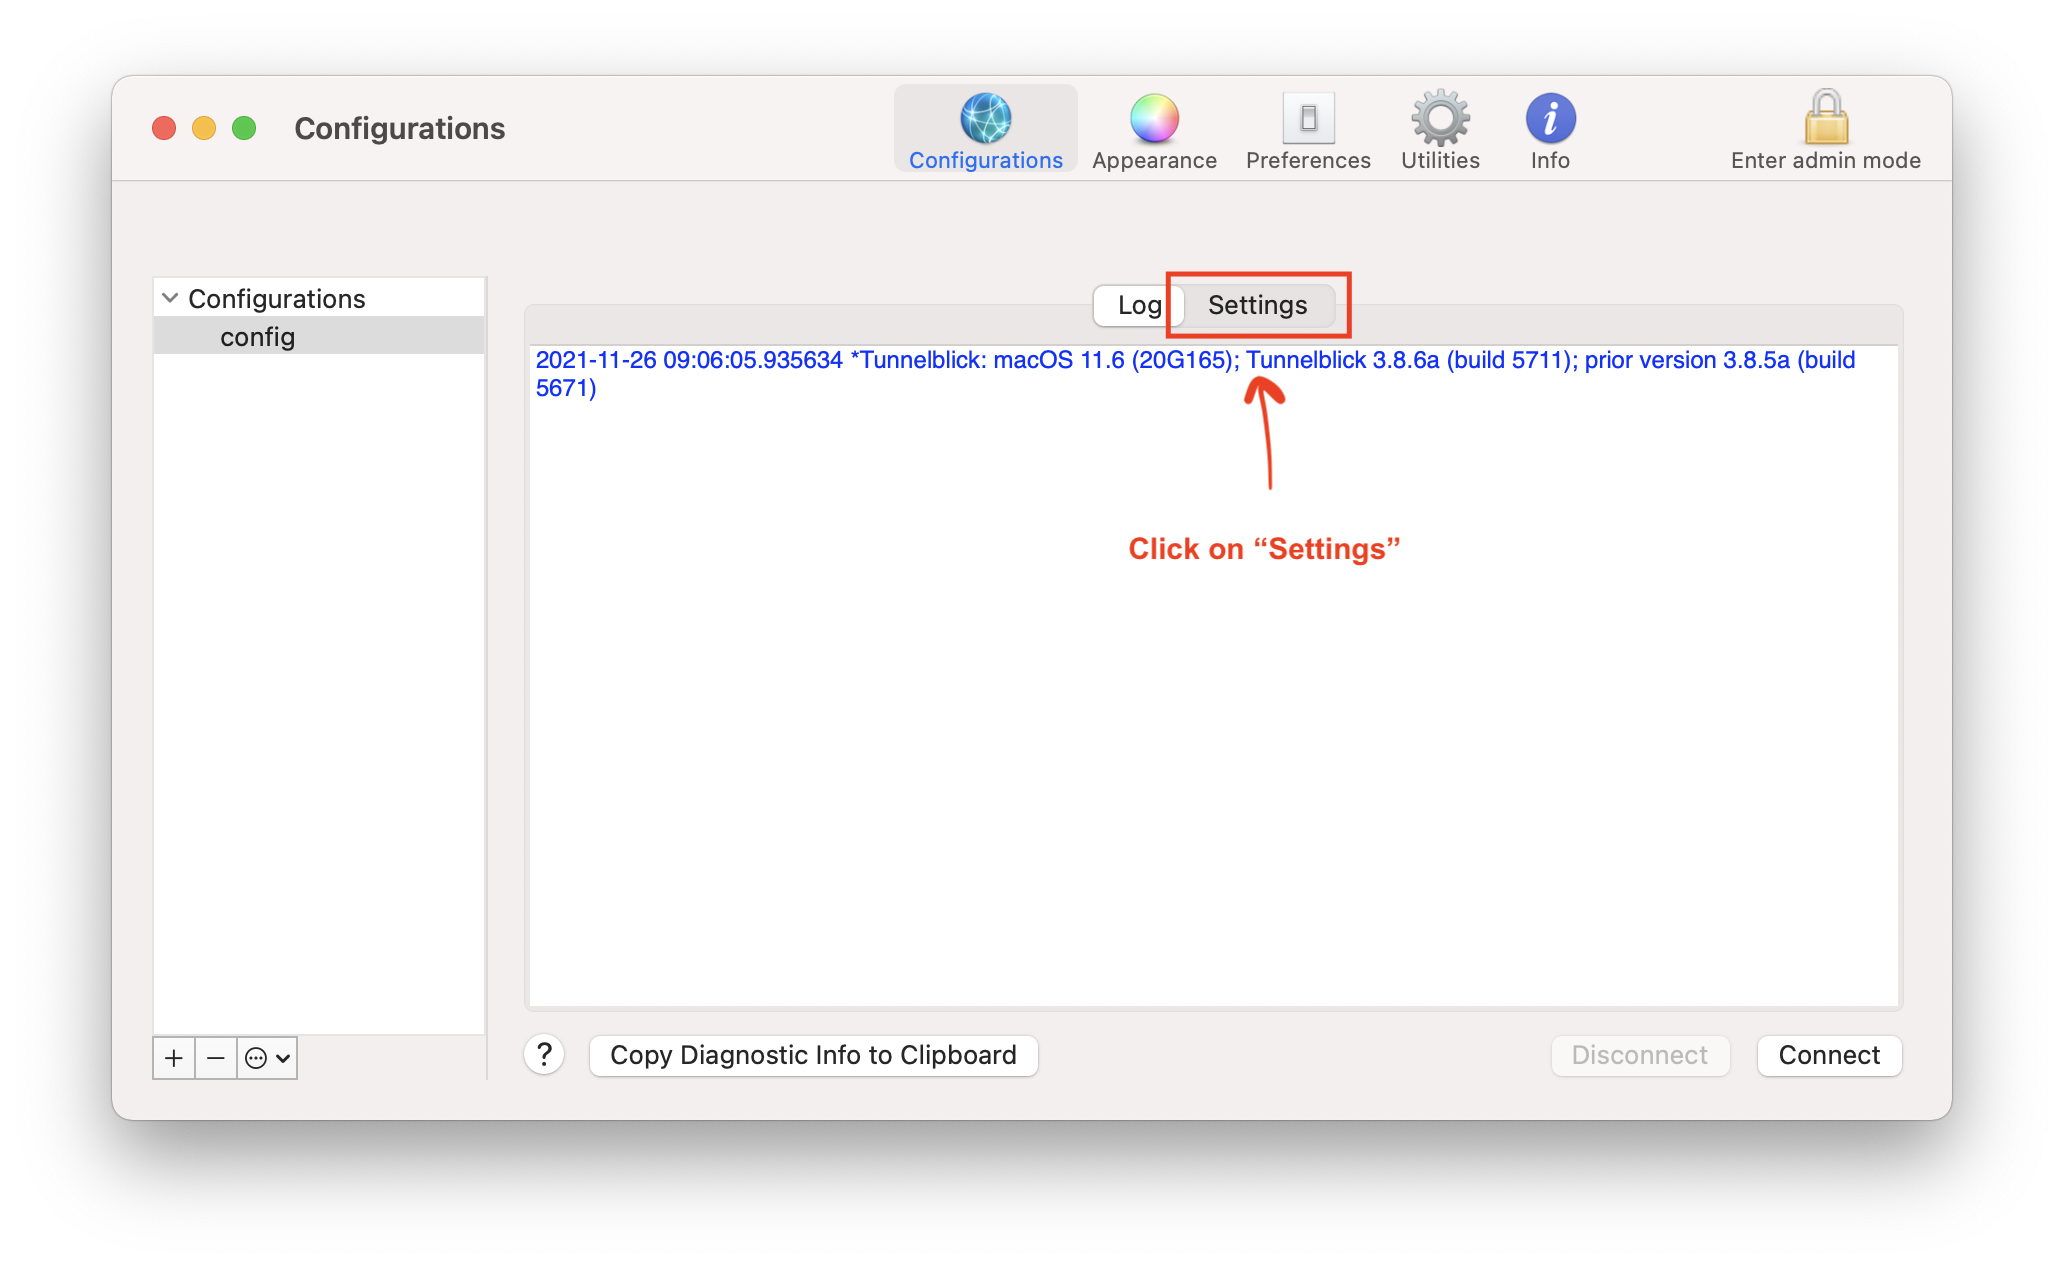
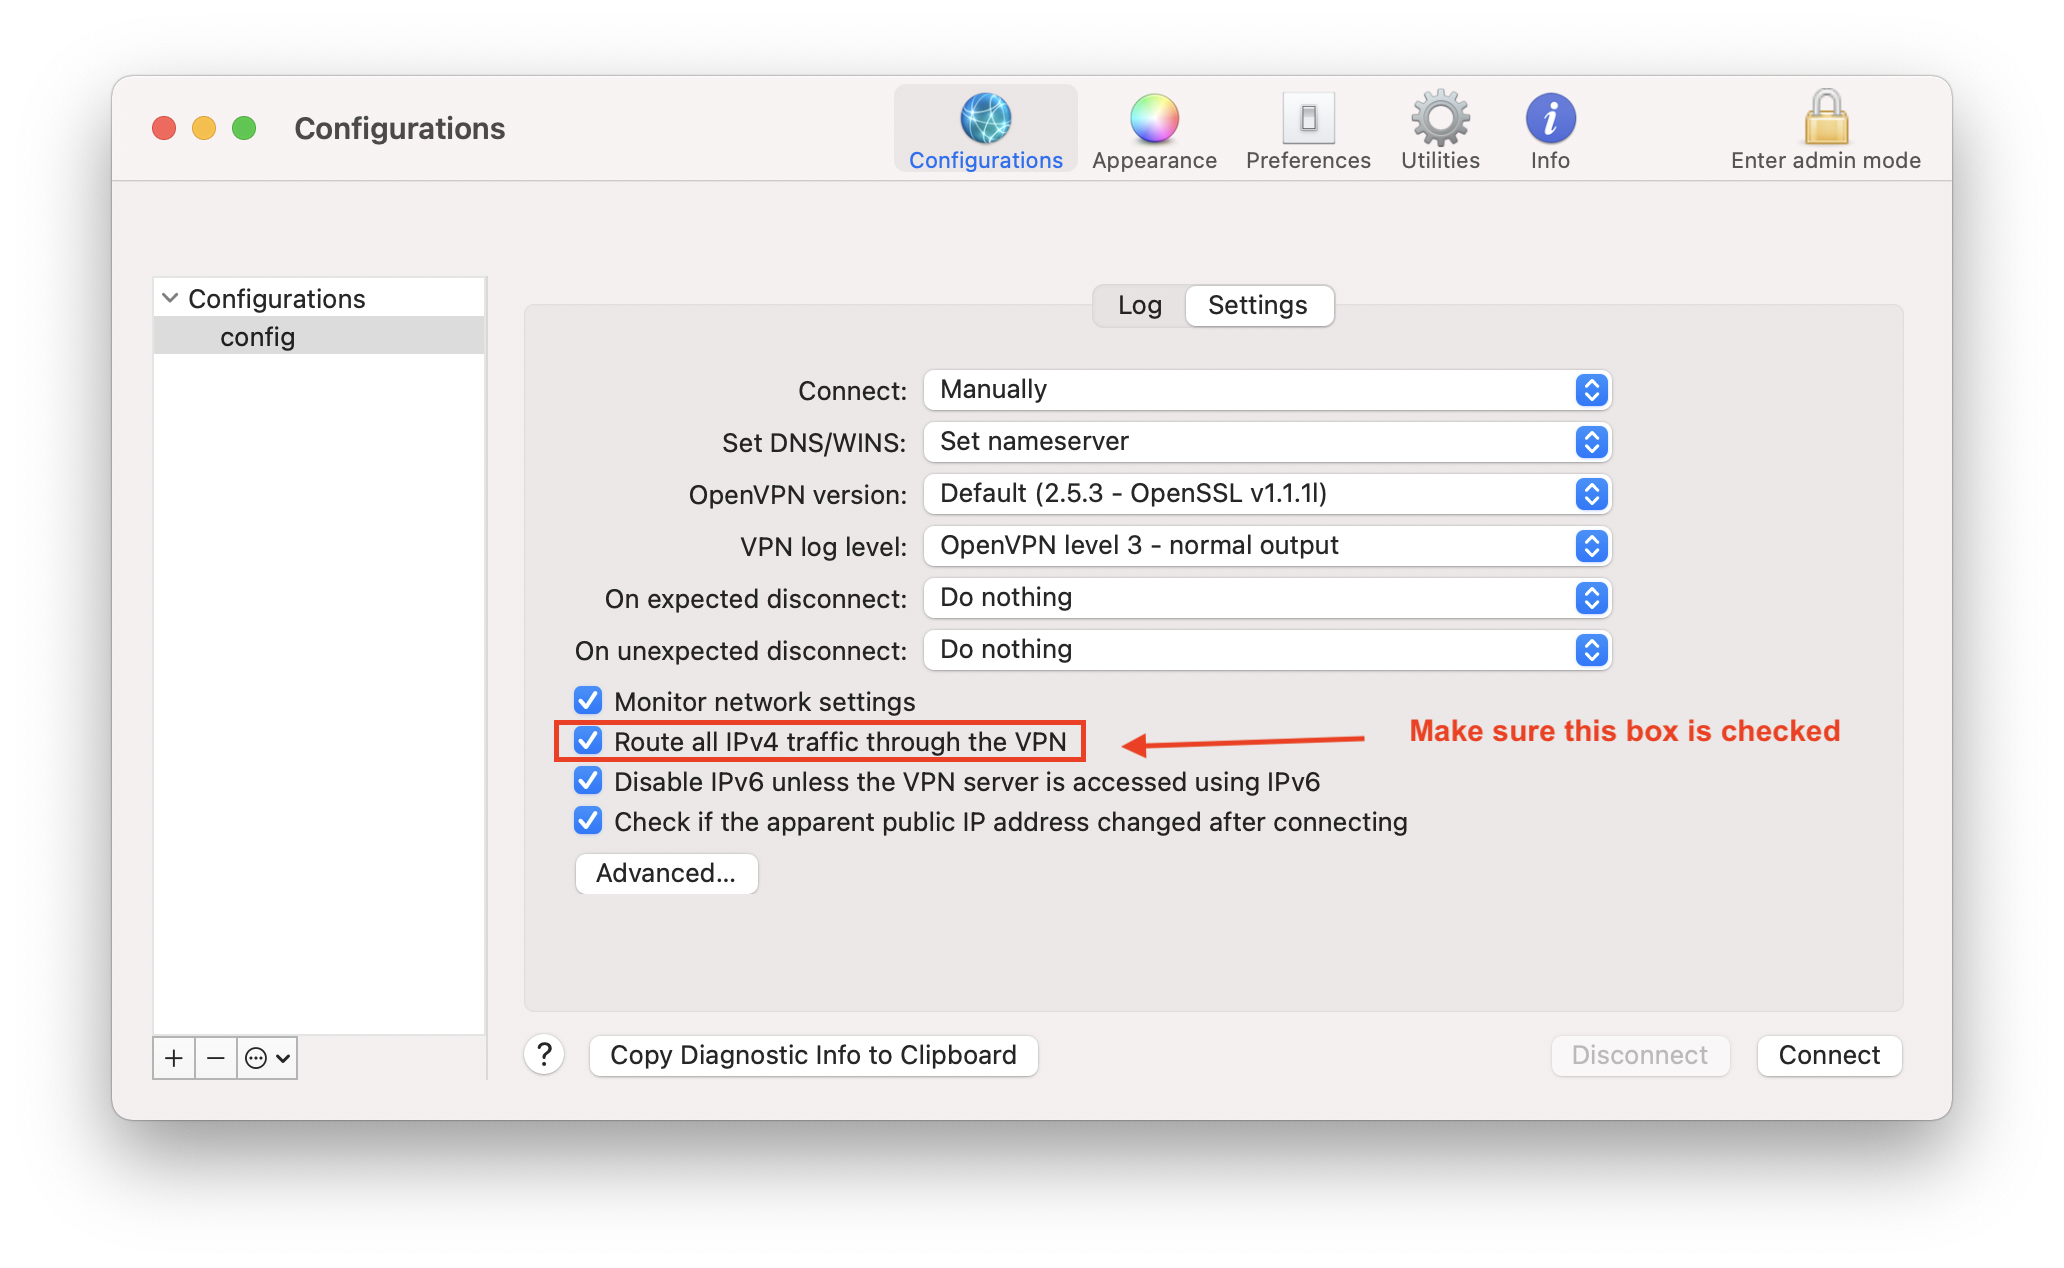
We need to make sure all traffic will traverse the VPN, so that the SSH and ping tests we run later will work properly.
In order to test all of this out, we now need to create an ECS instance inside the VPC to which our VPN Gateway is attached, then try connecting to it.
Setting up an ECS instance is easy, just follow along with the screenshots below:
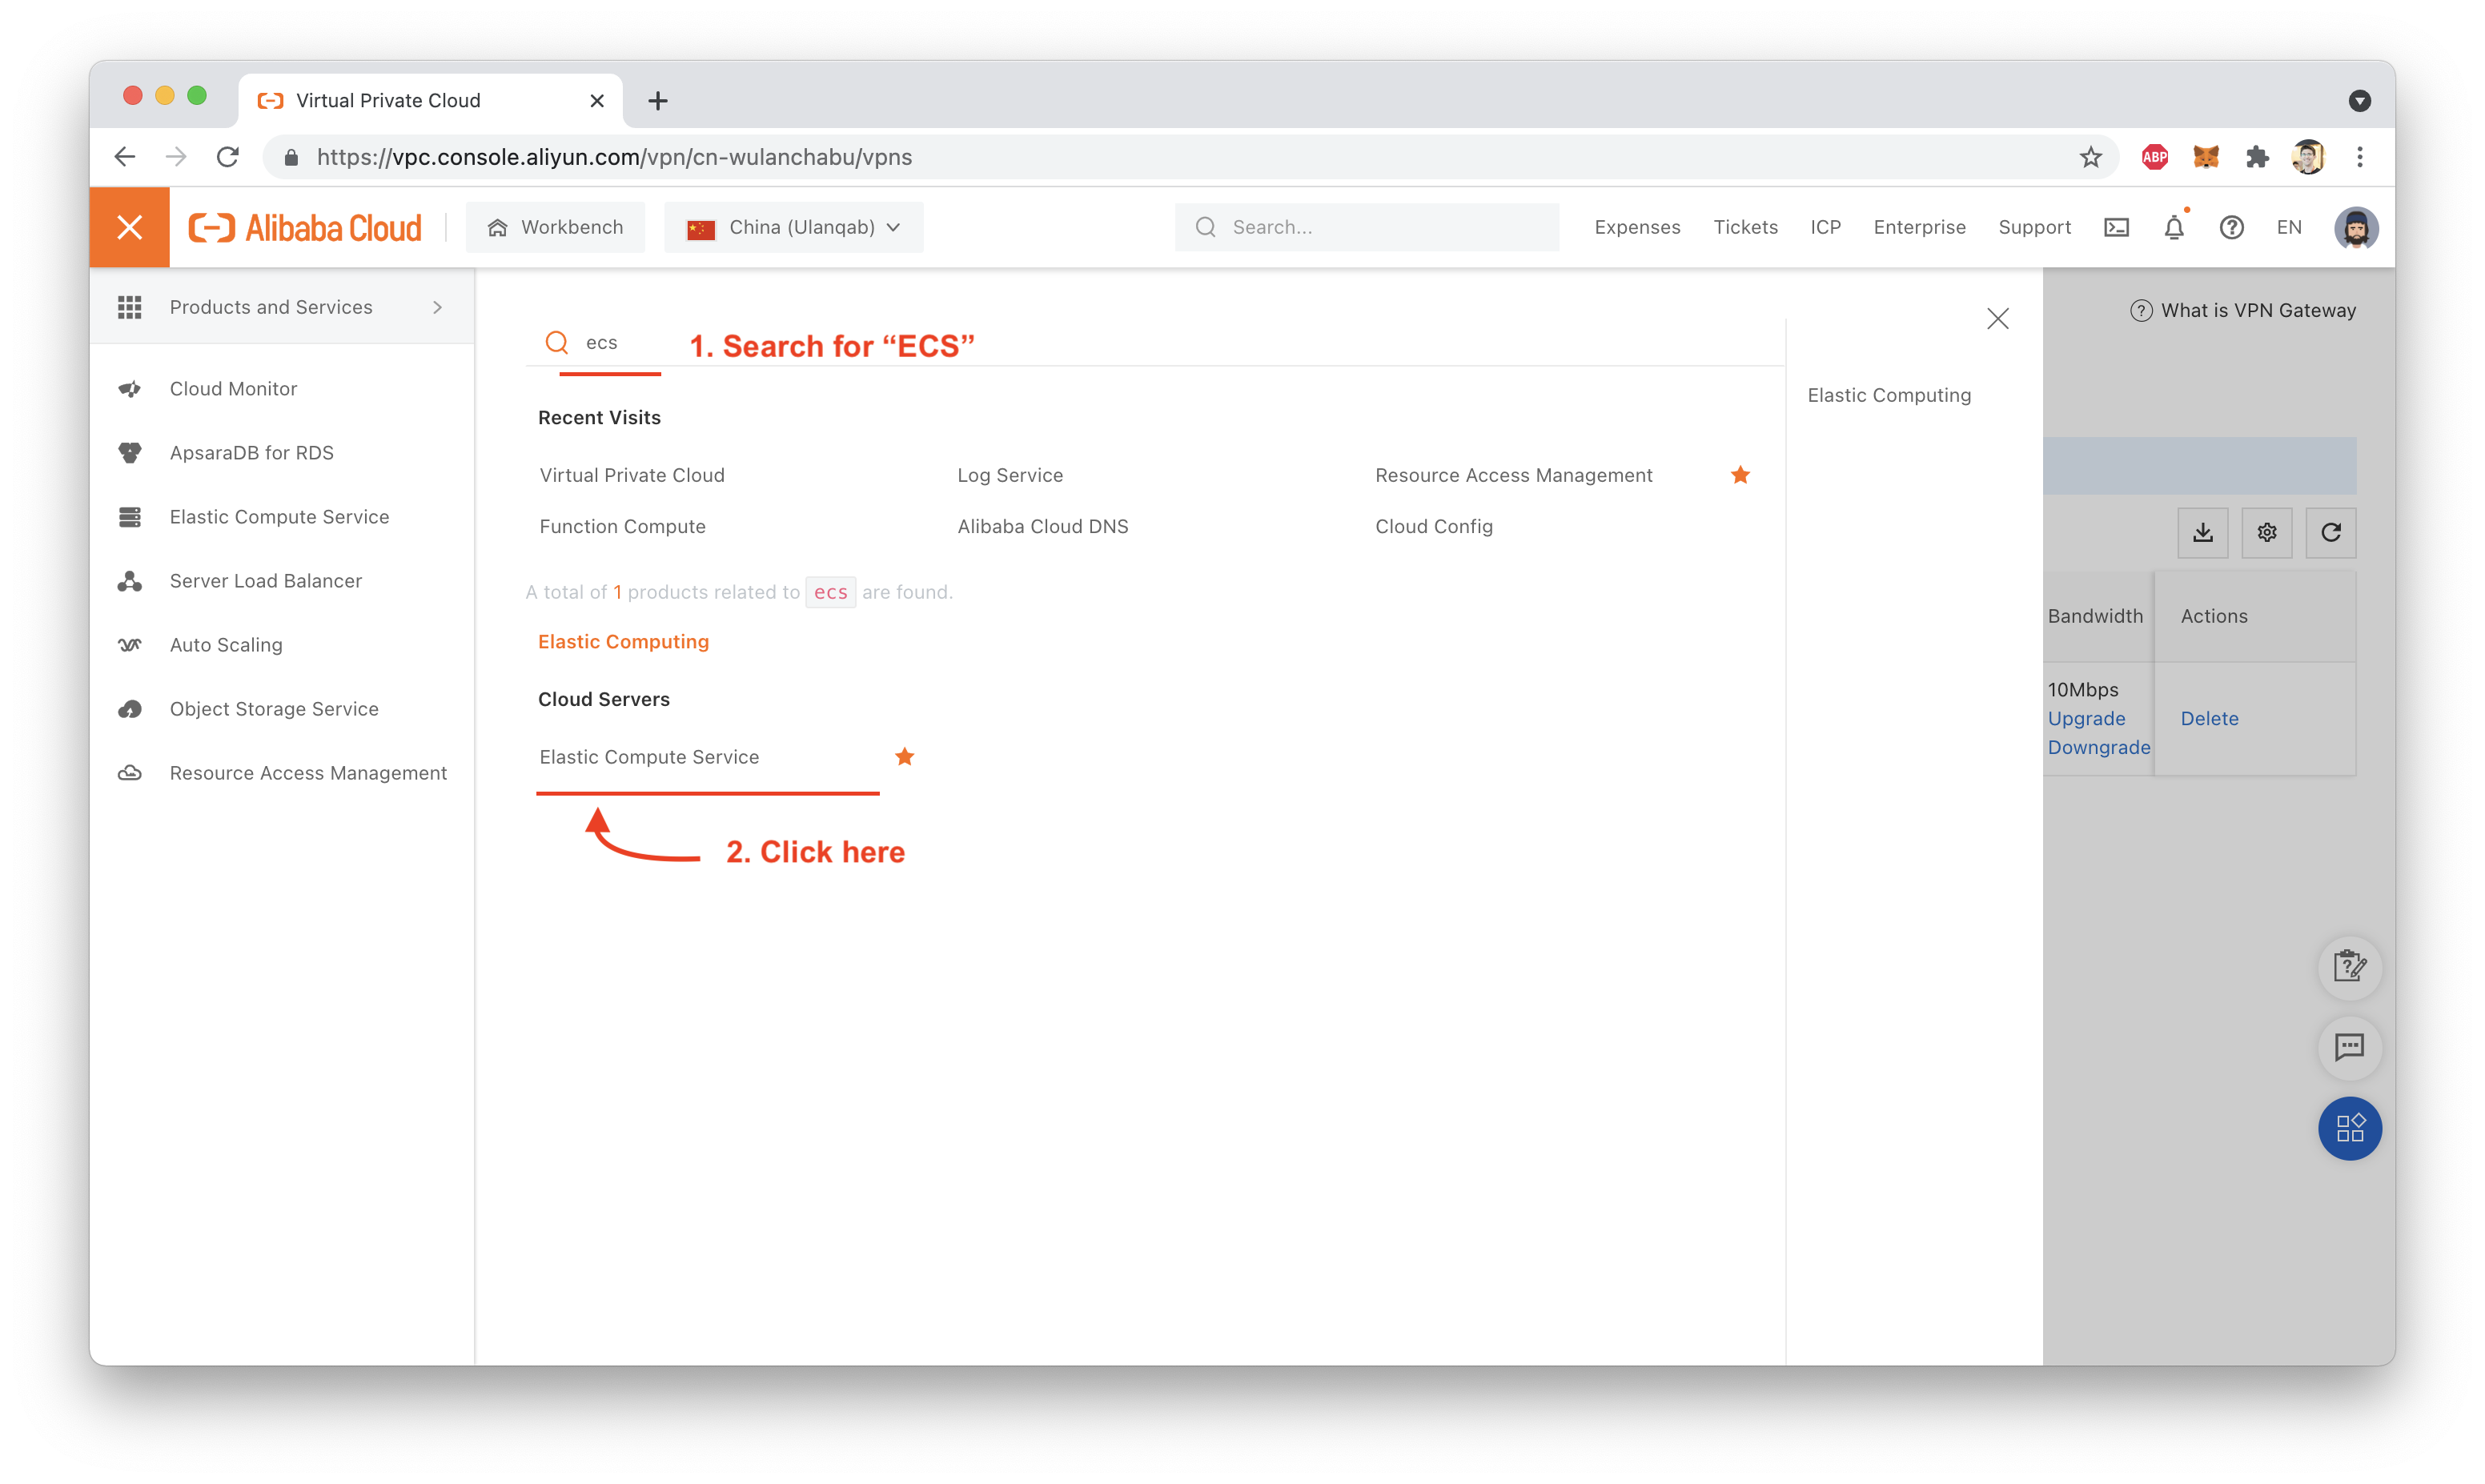
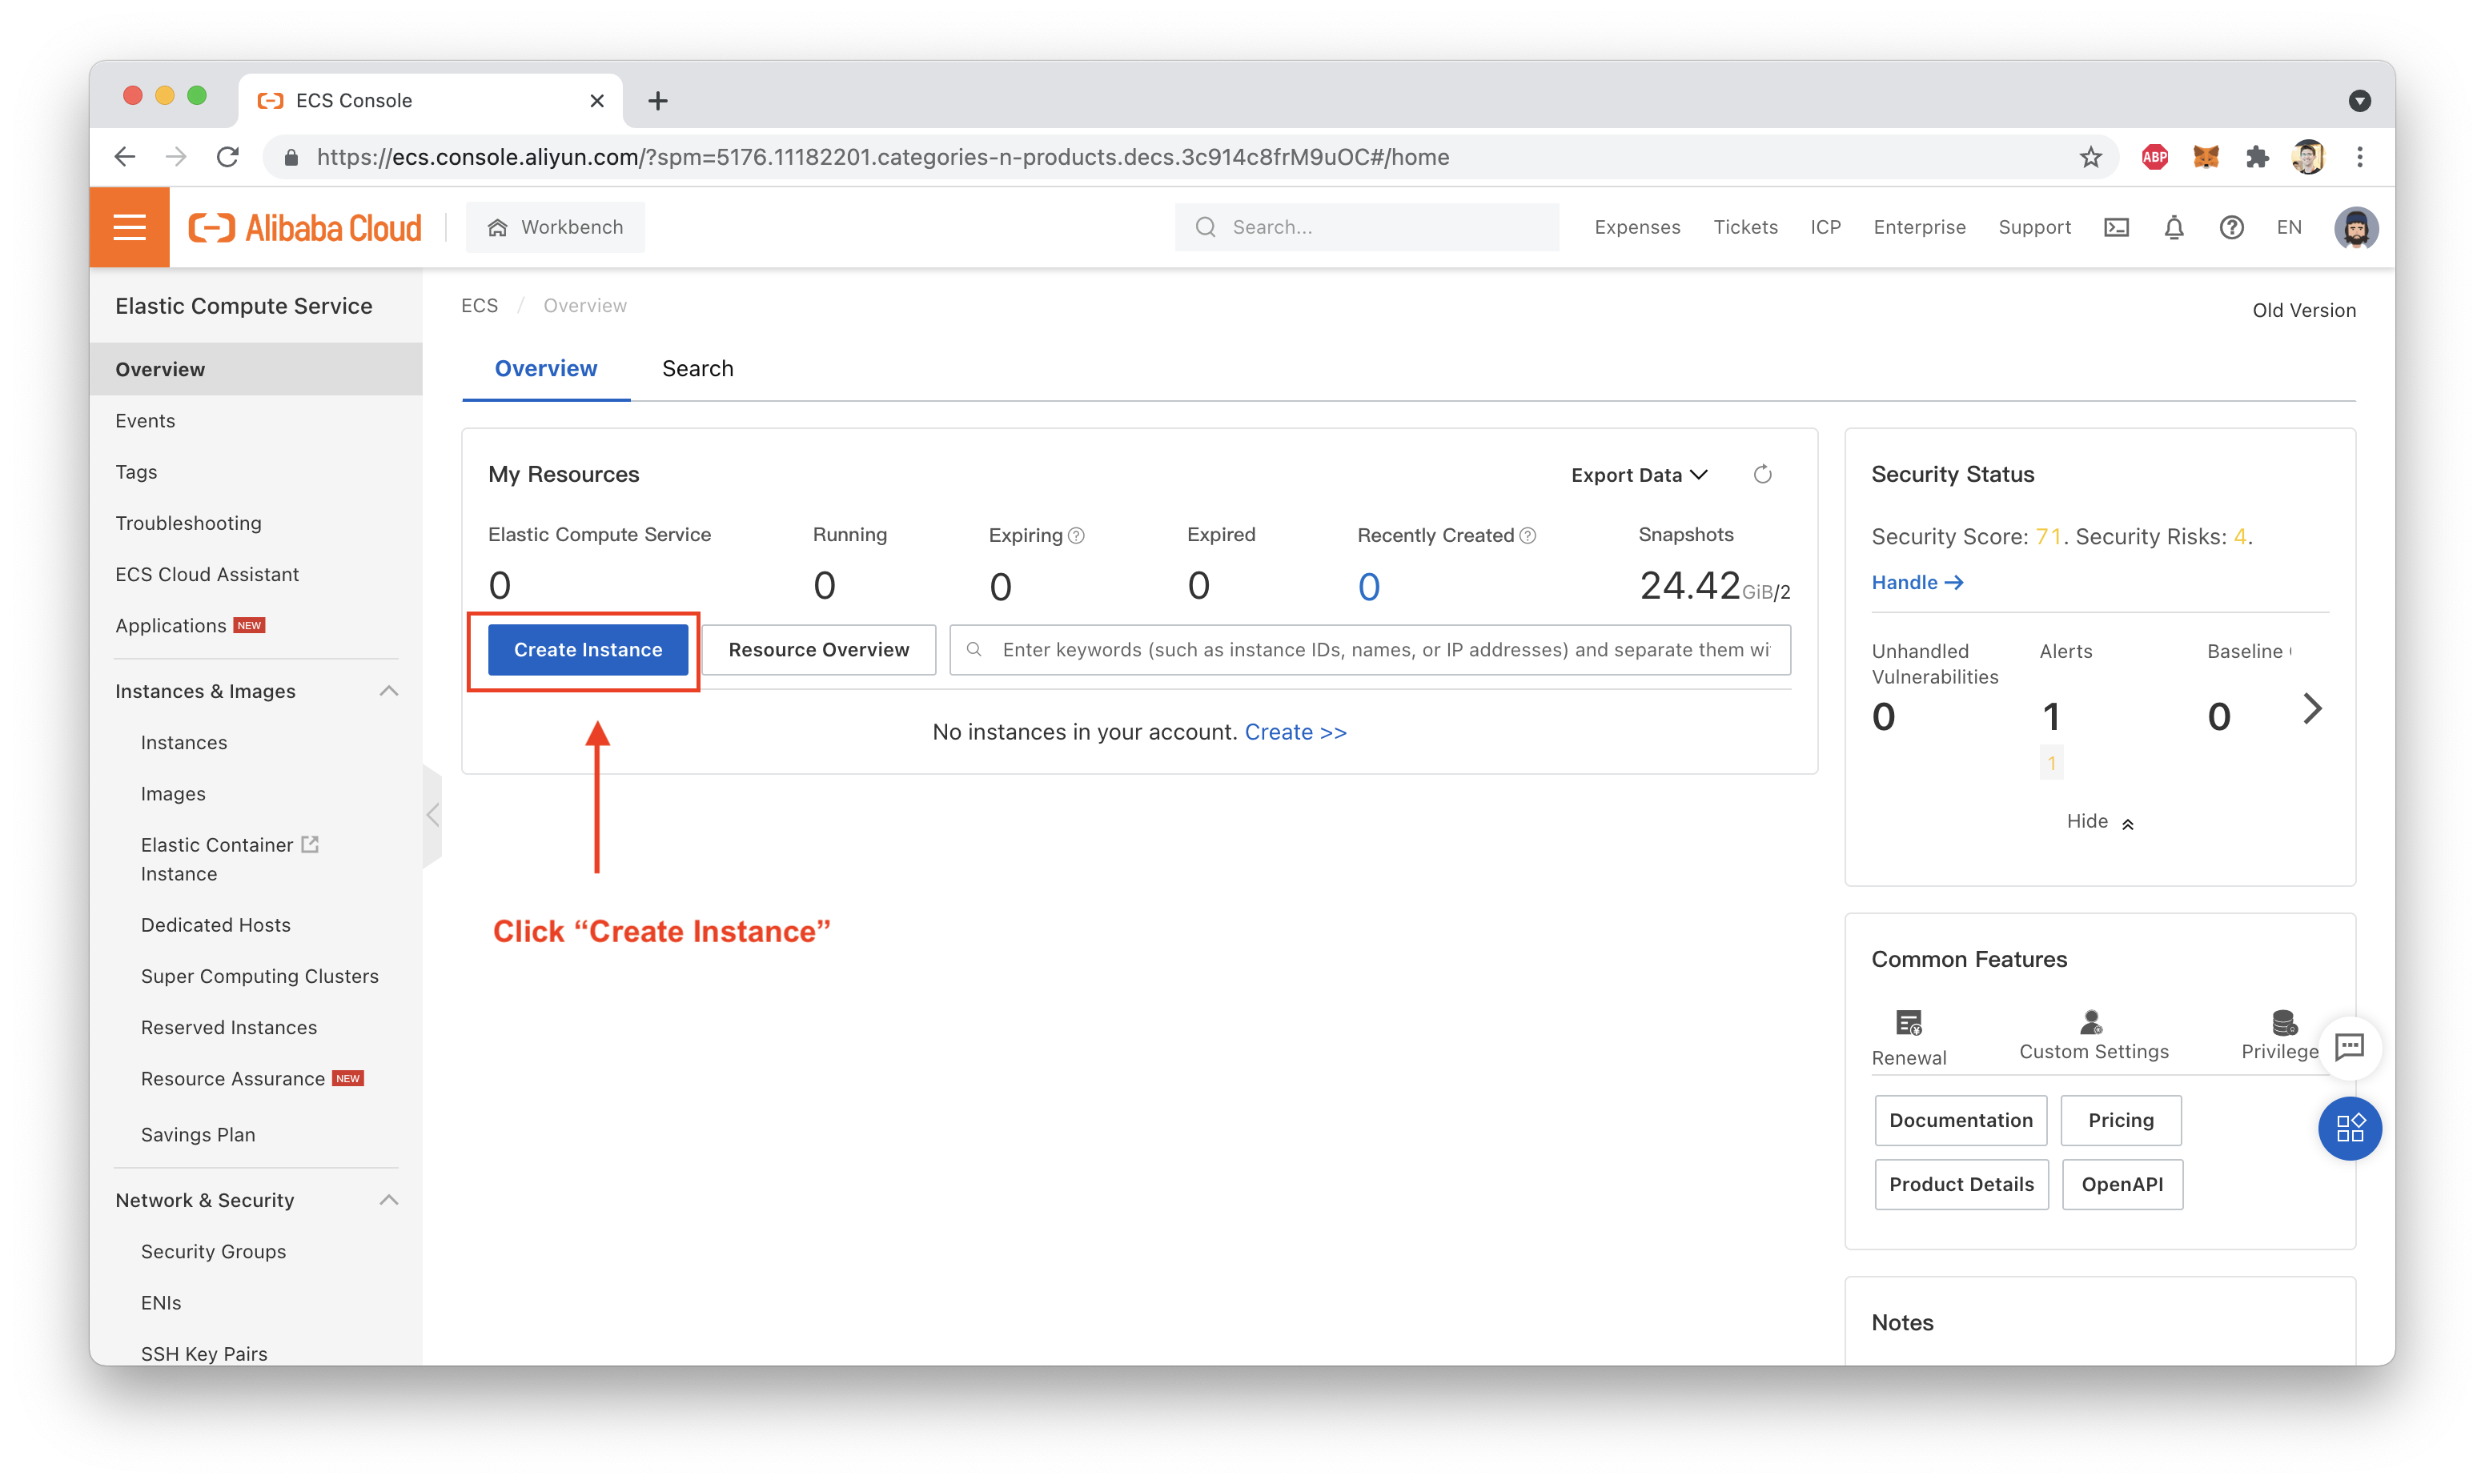
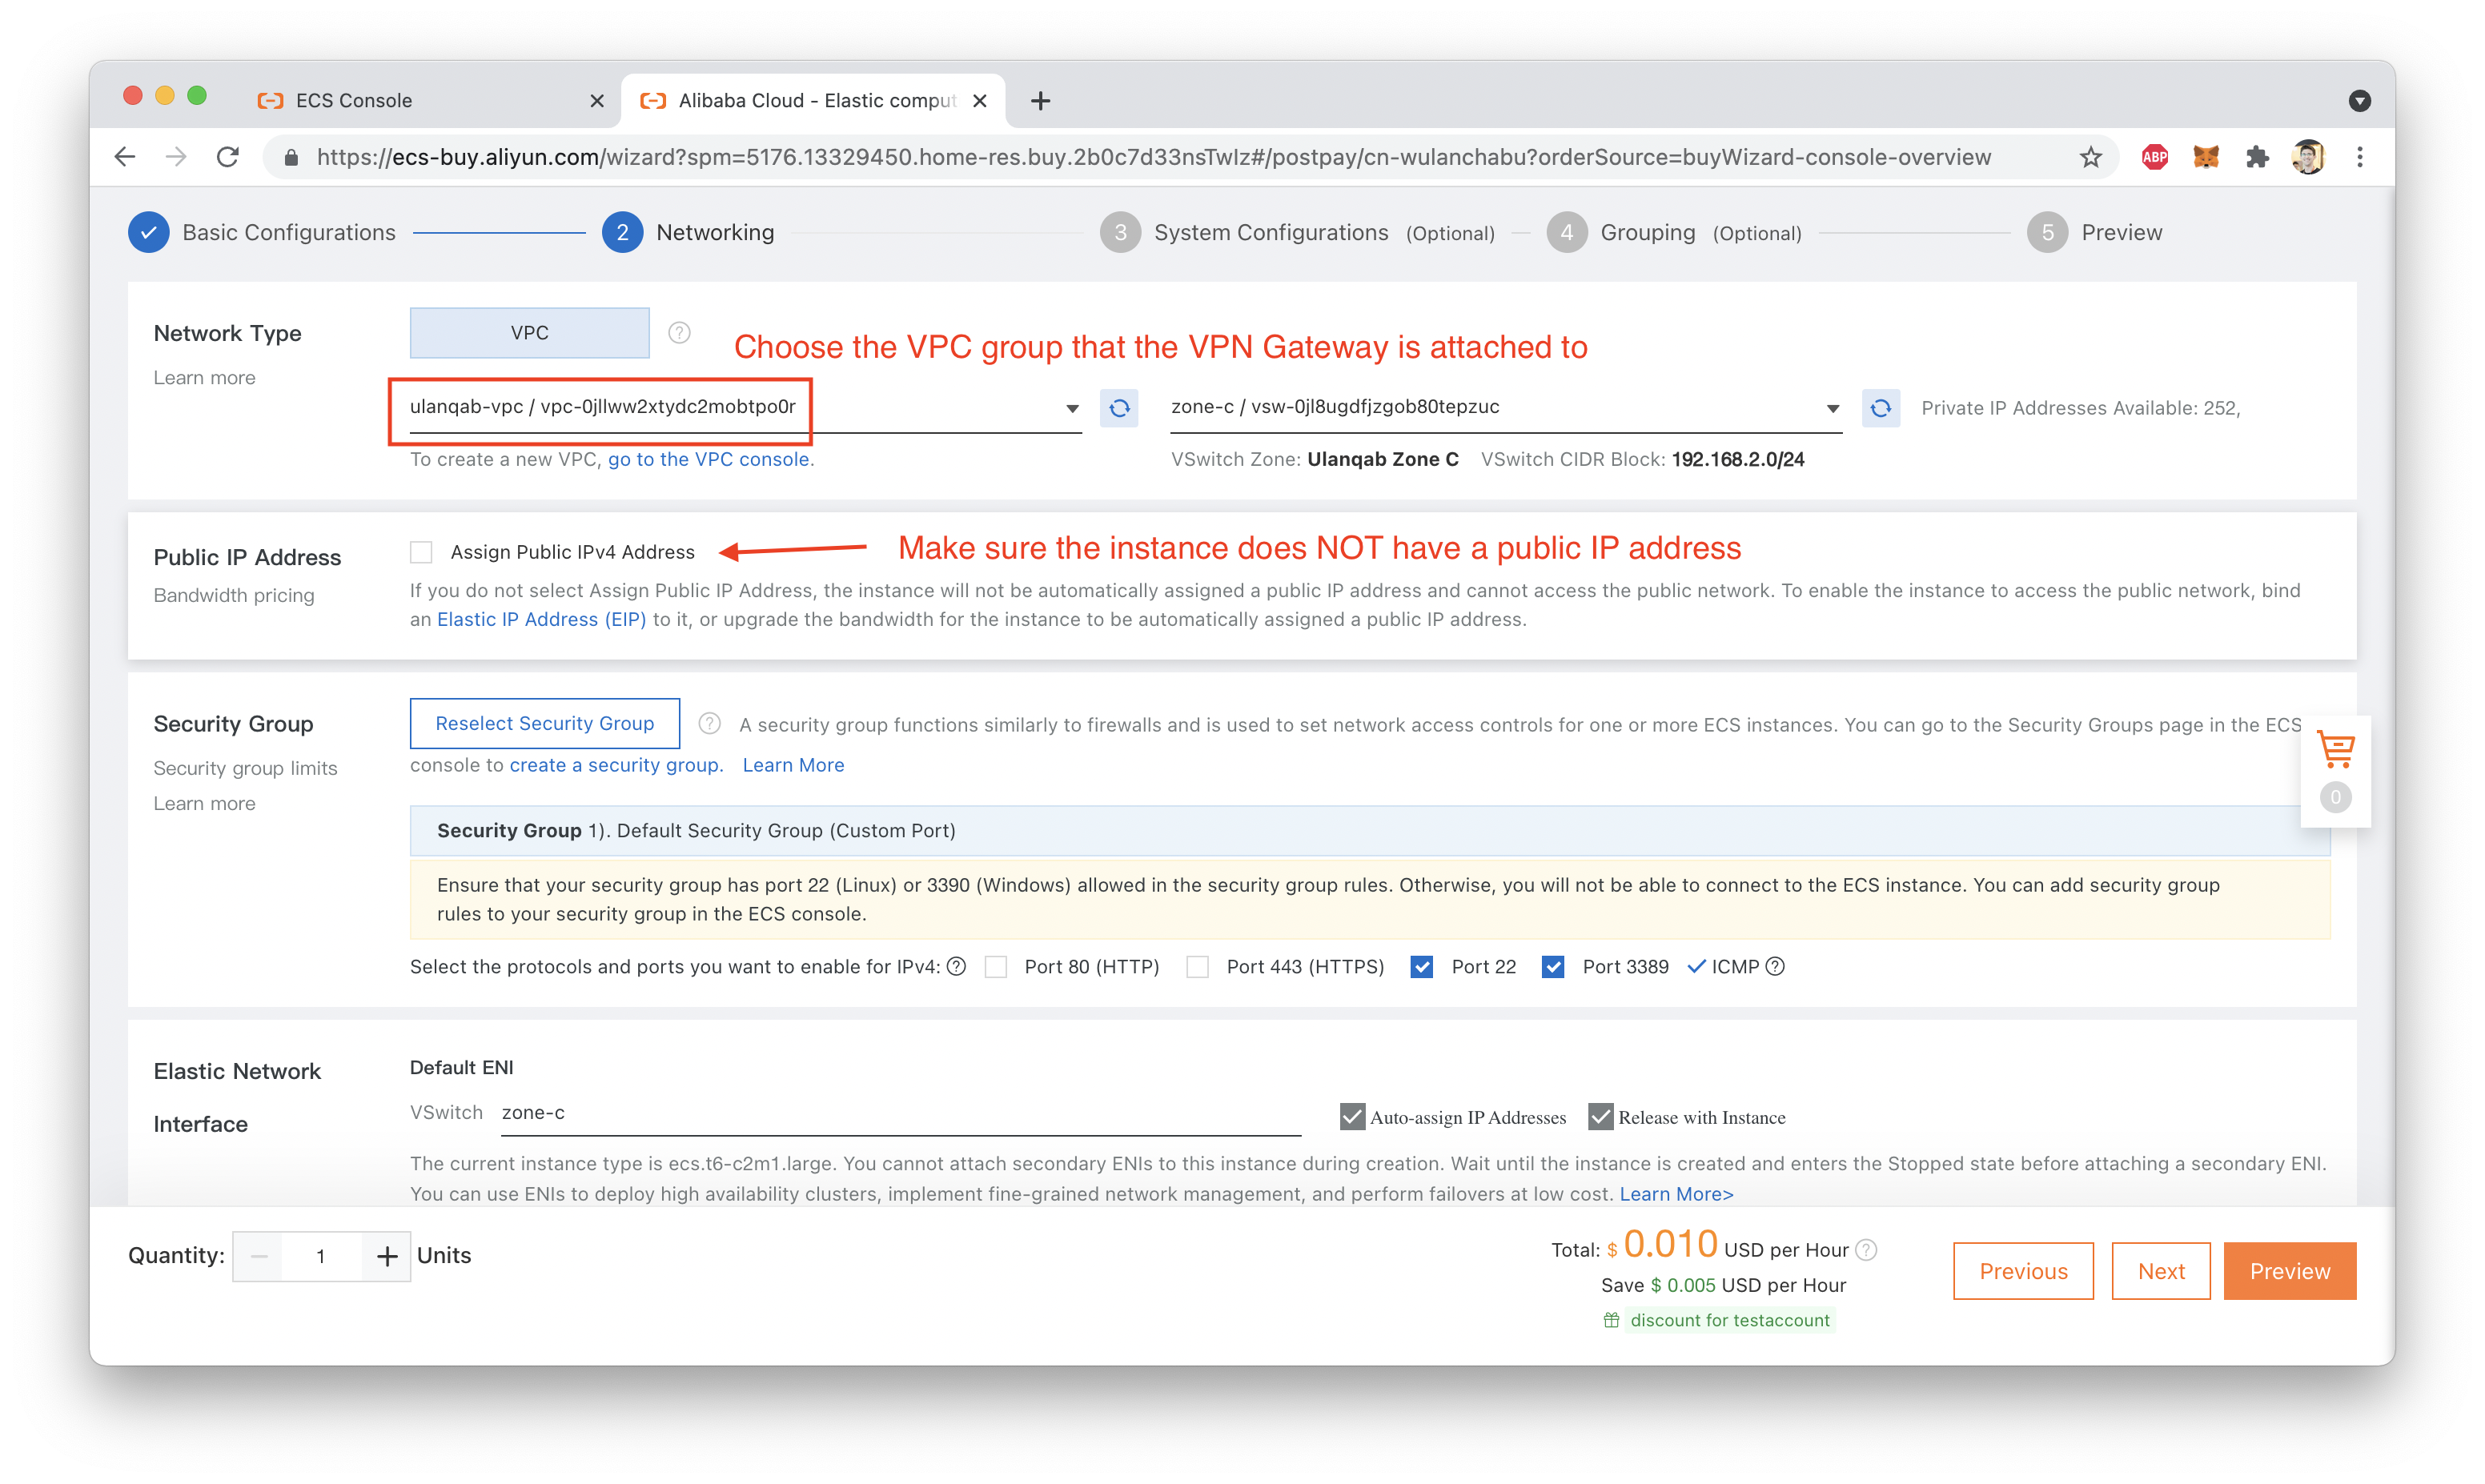
Make sure you choose the correct Region and correct VPC:
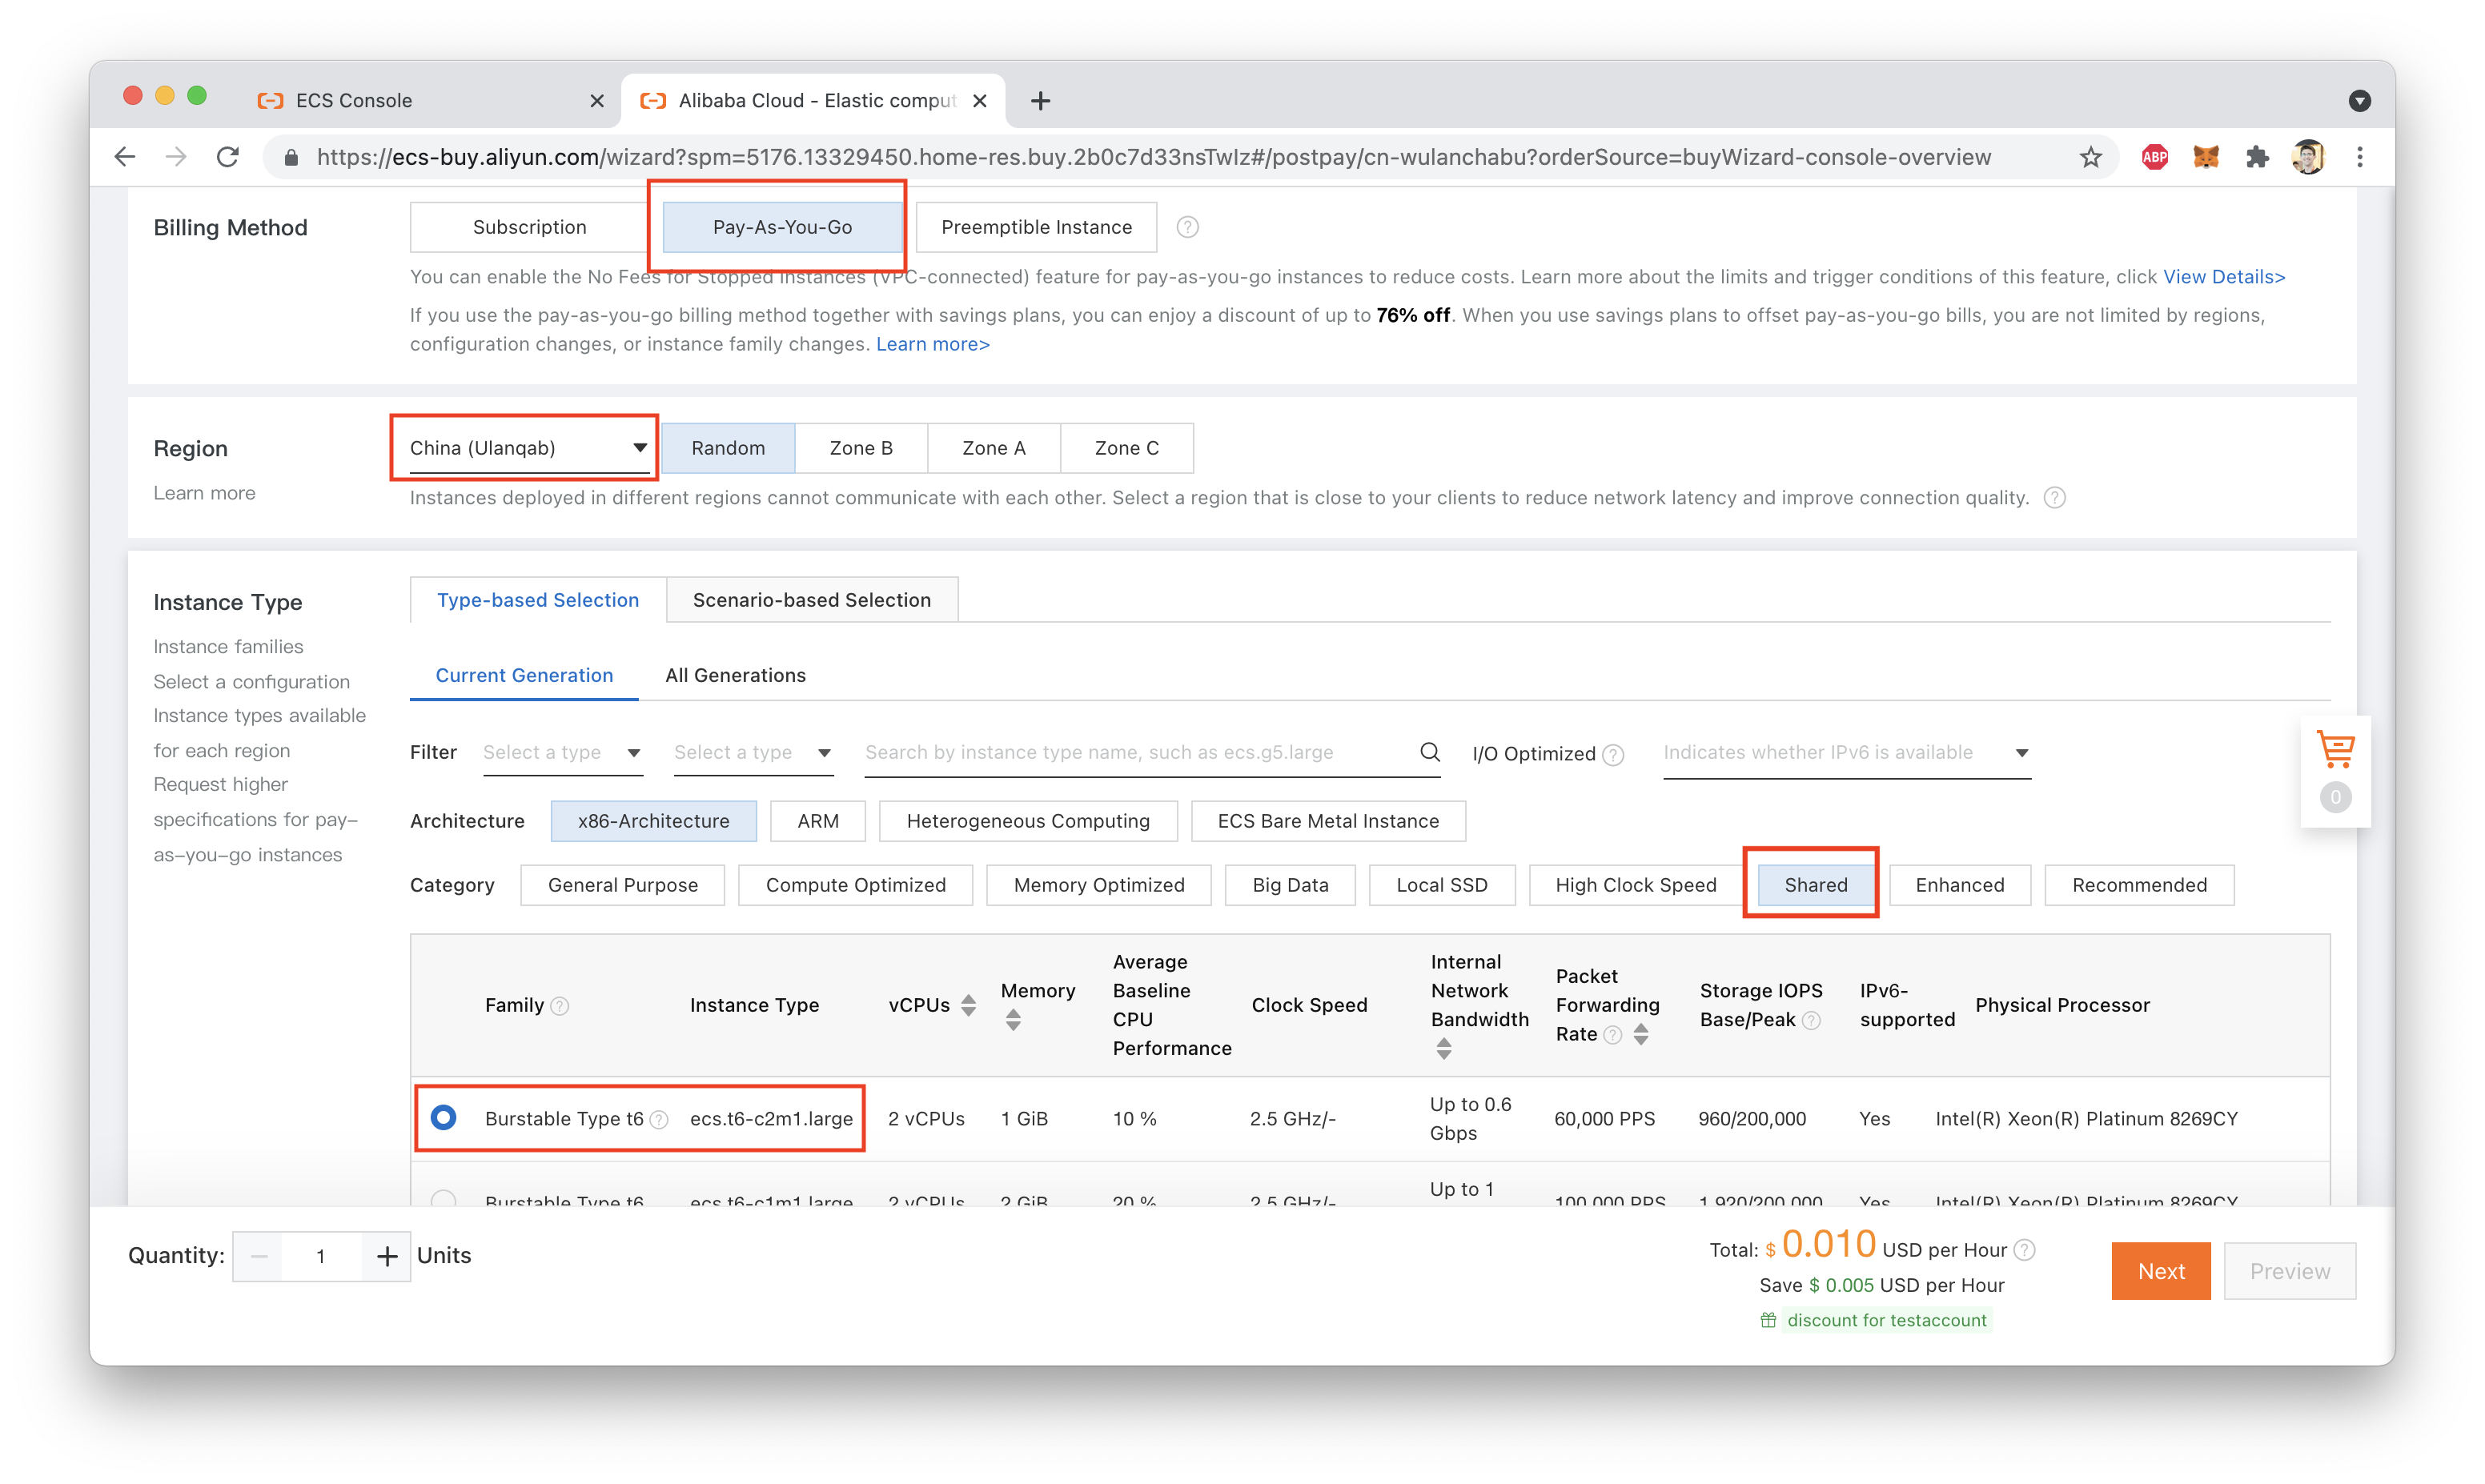
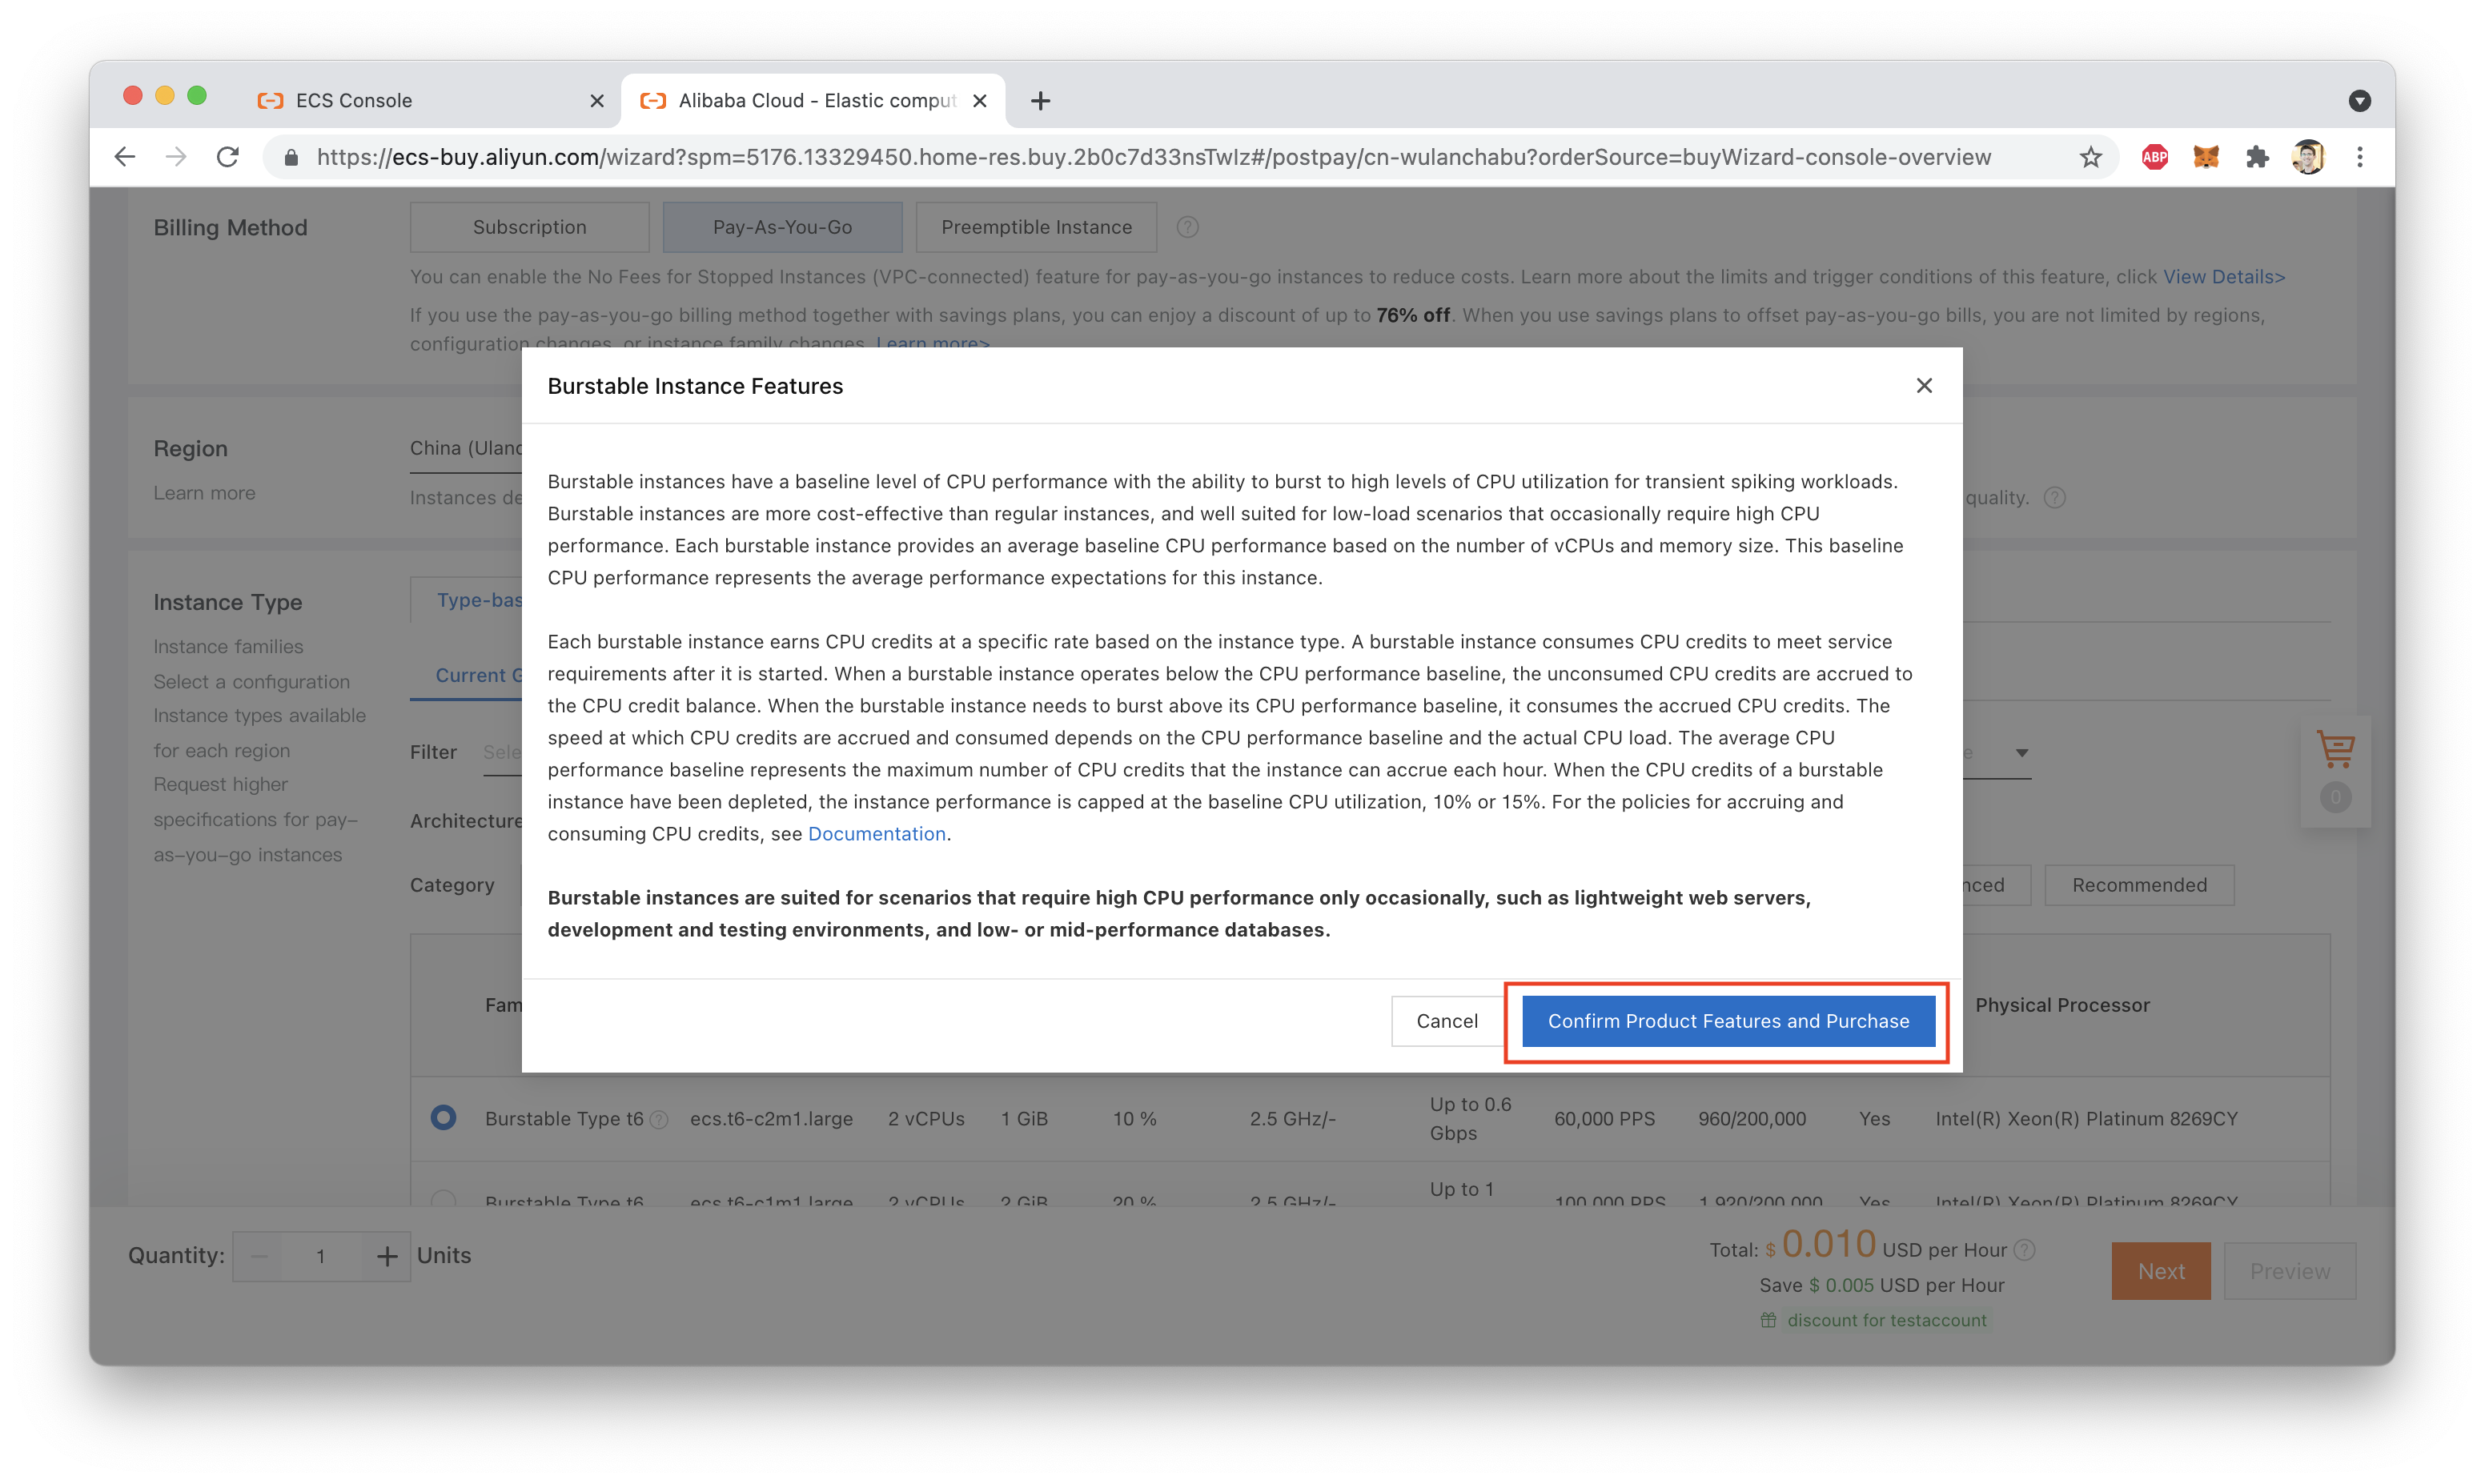
Note that because we are using a "Shared" instance type, we have to confirm that we're aware of the CPU Credit system that is used to control CPU usage on this instance type, as shown here:
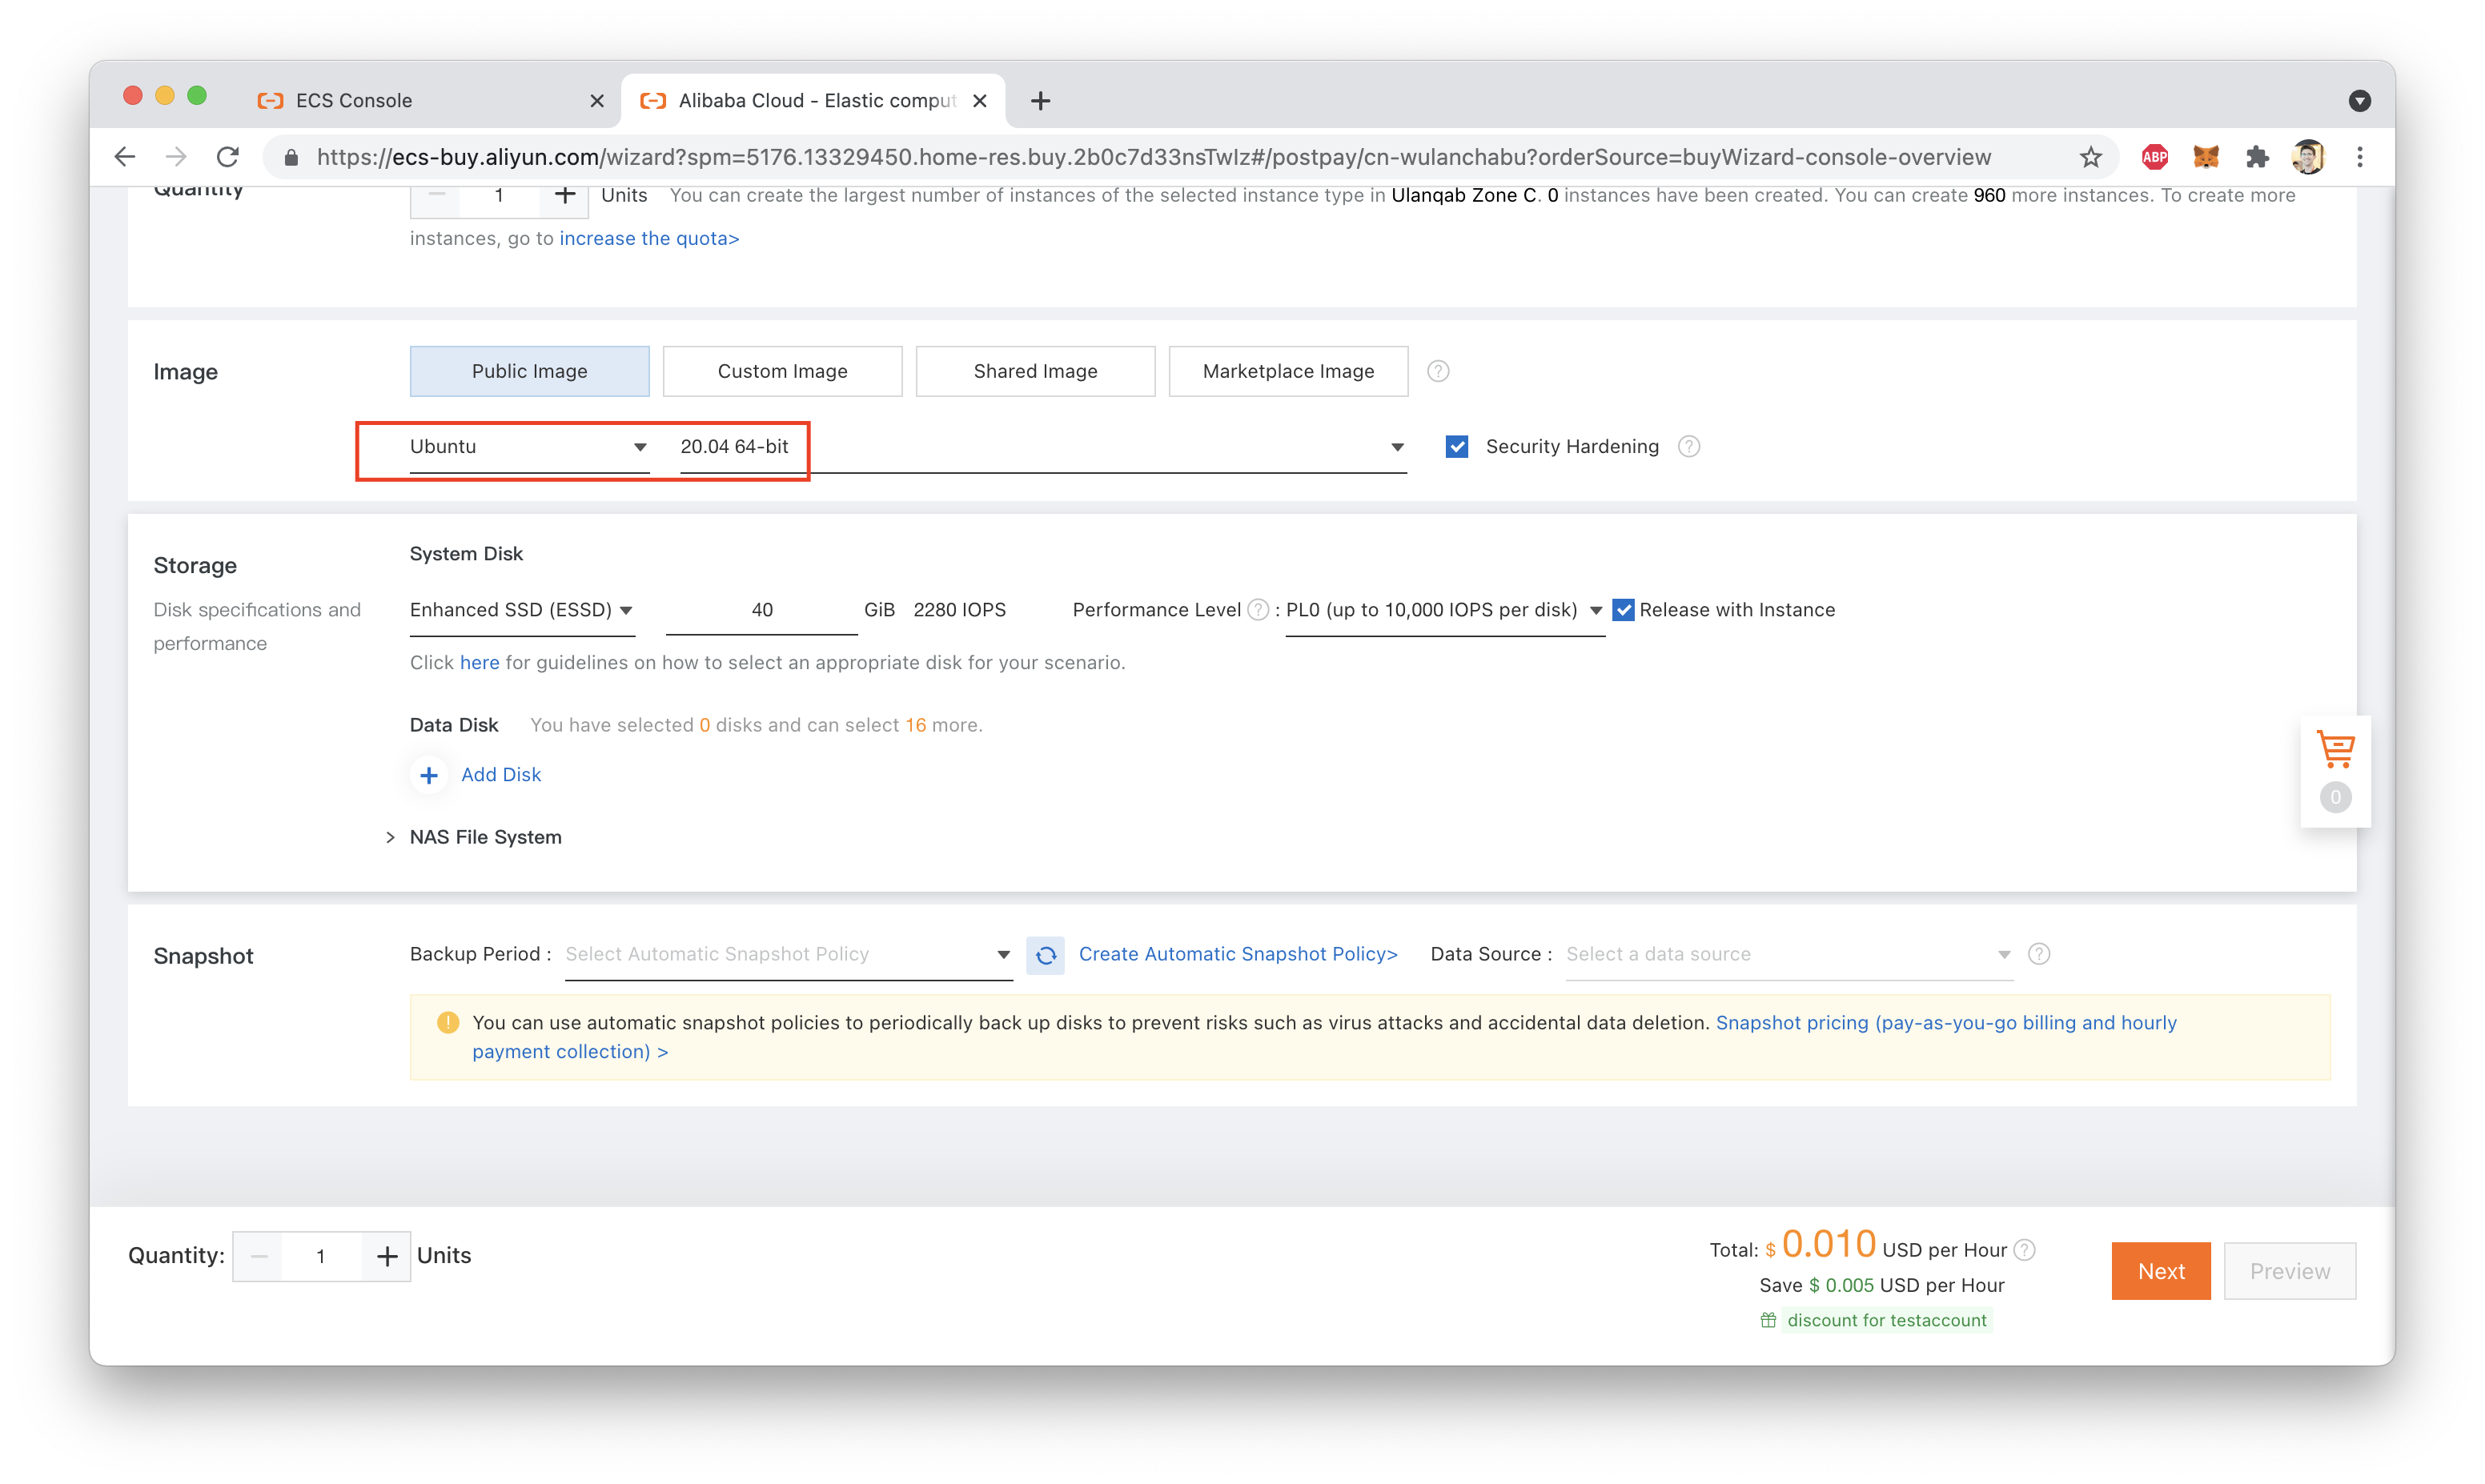
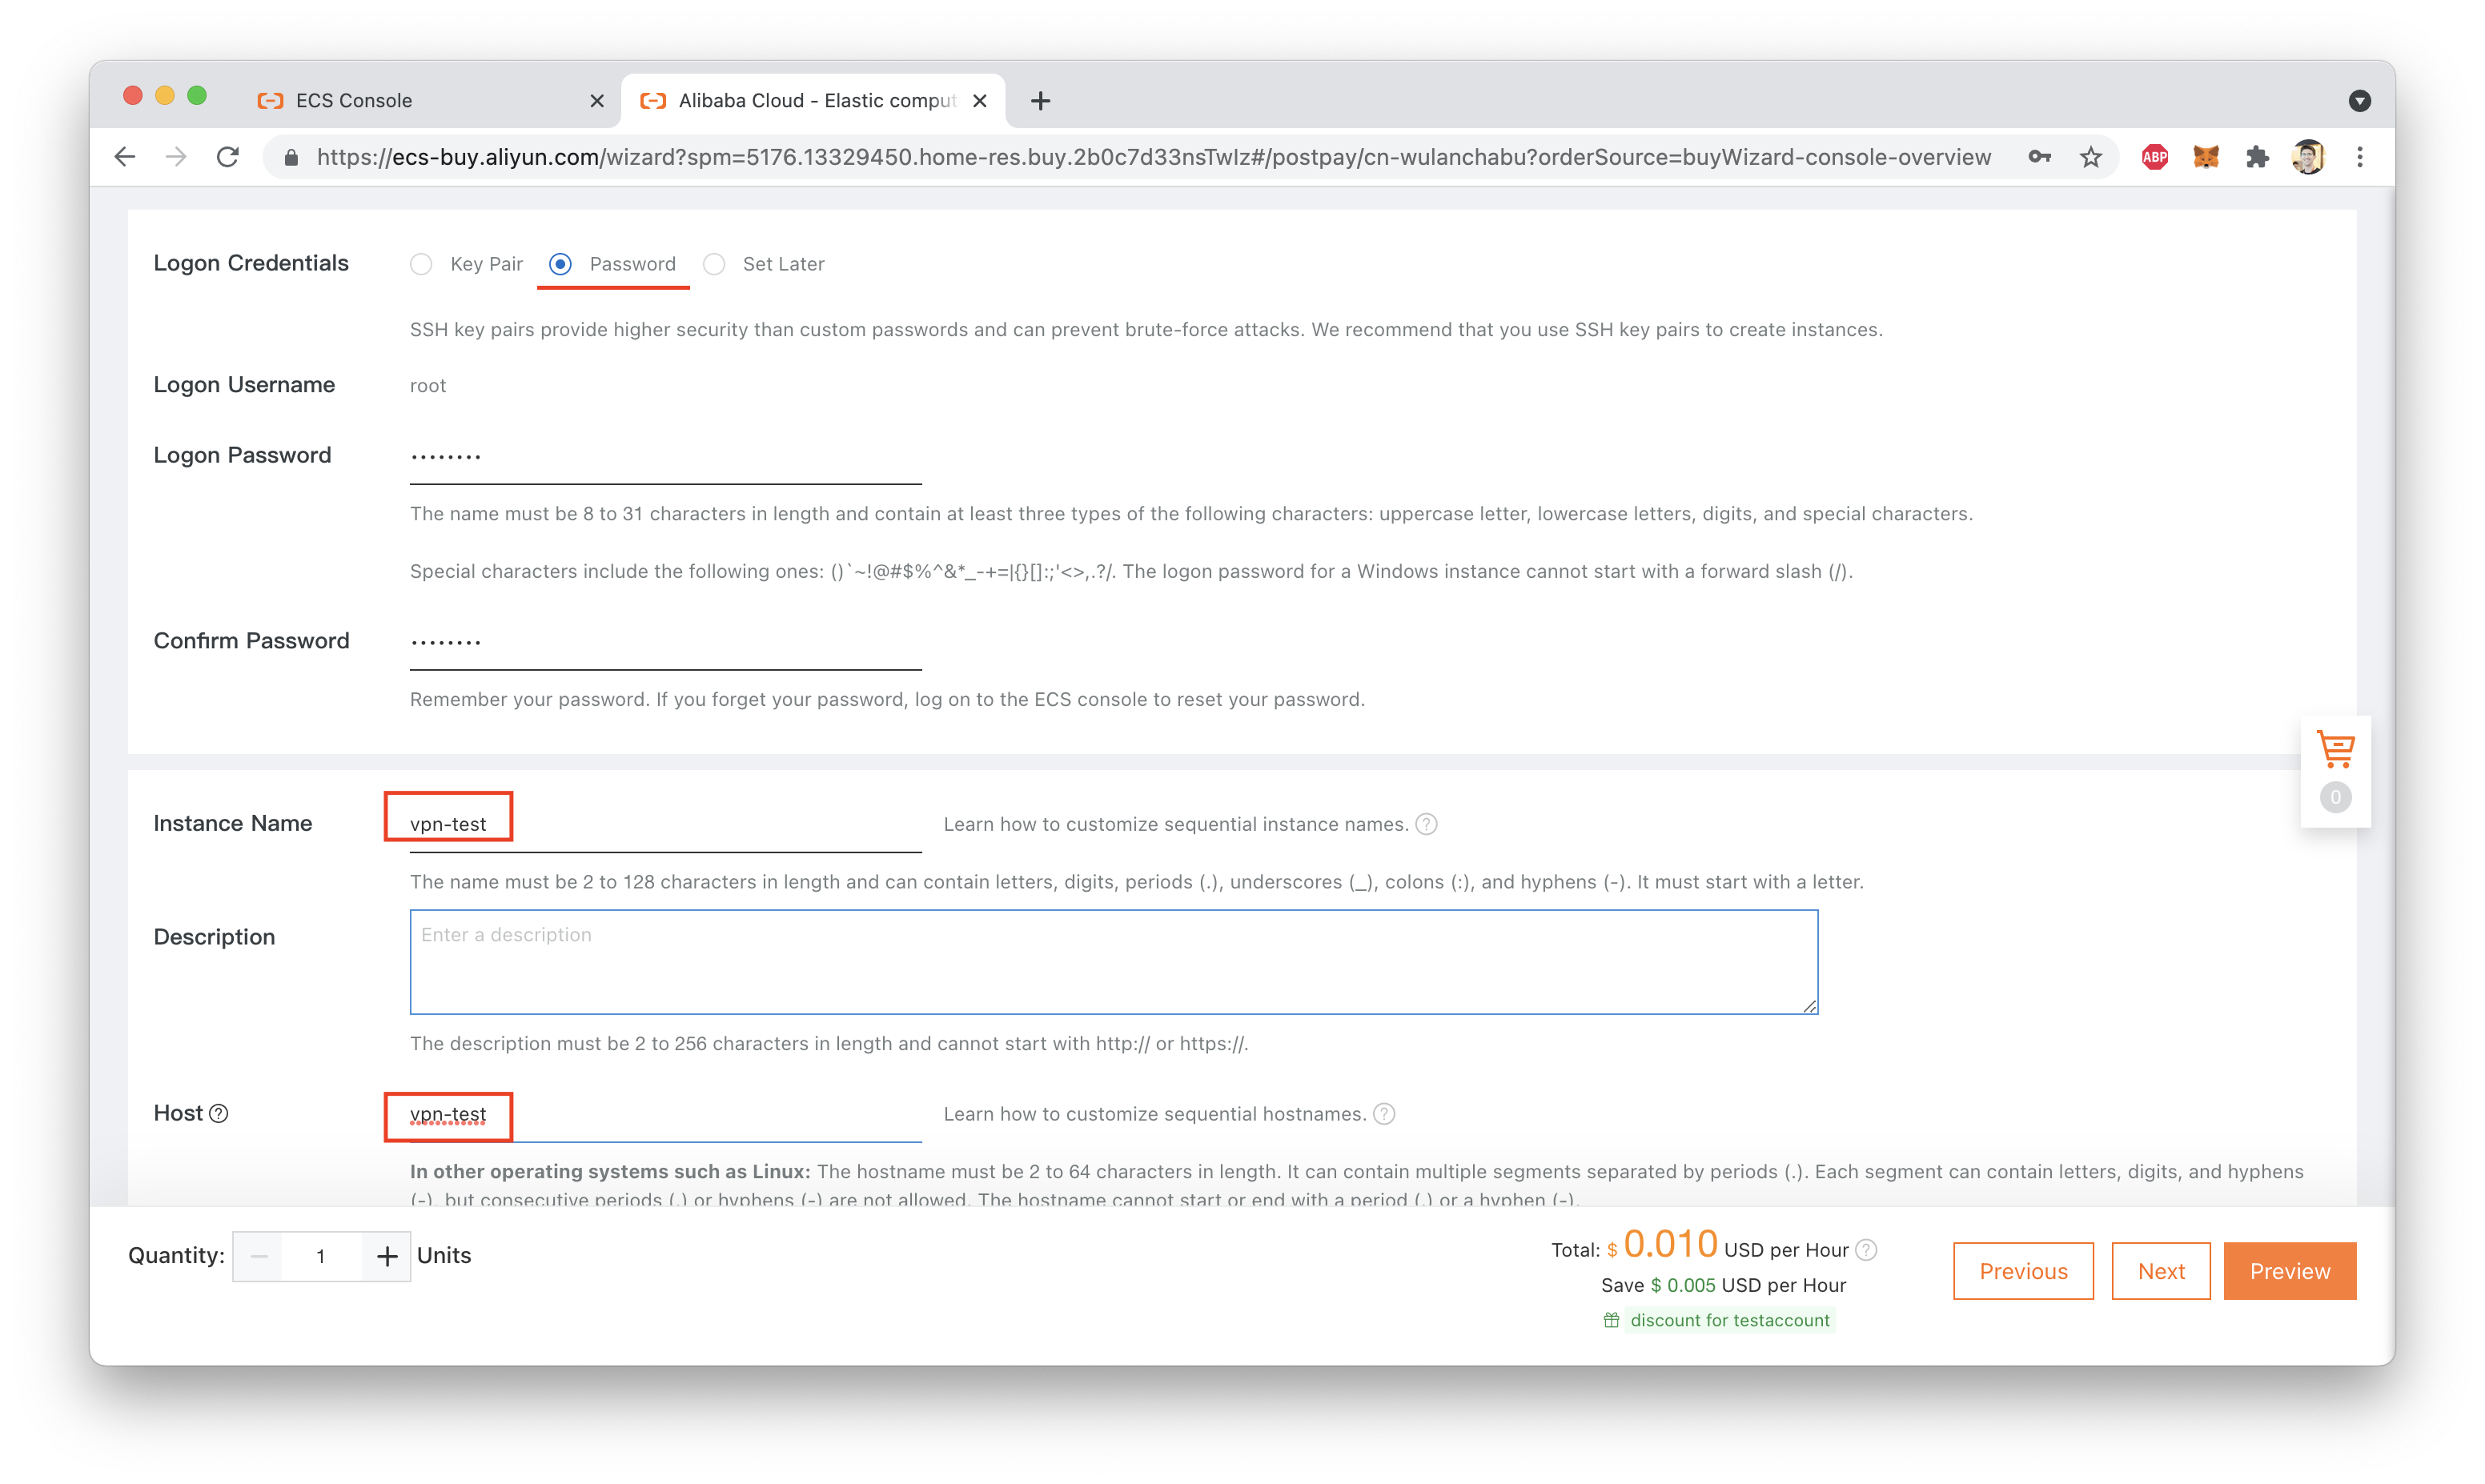
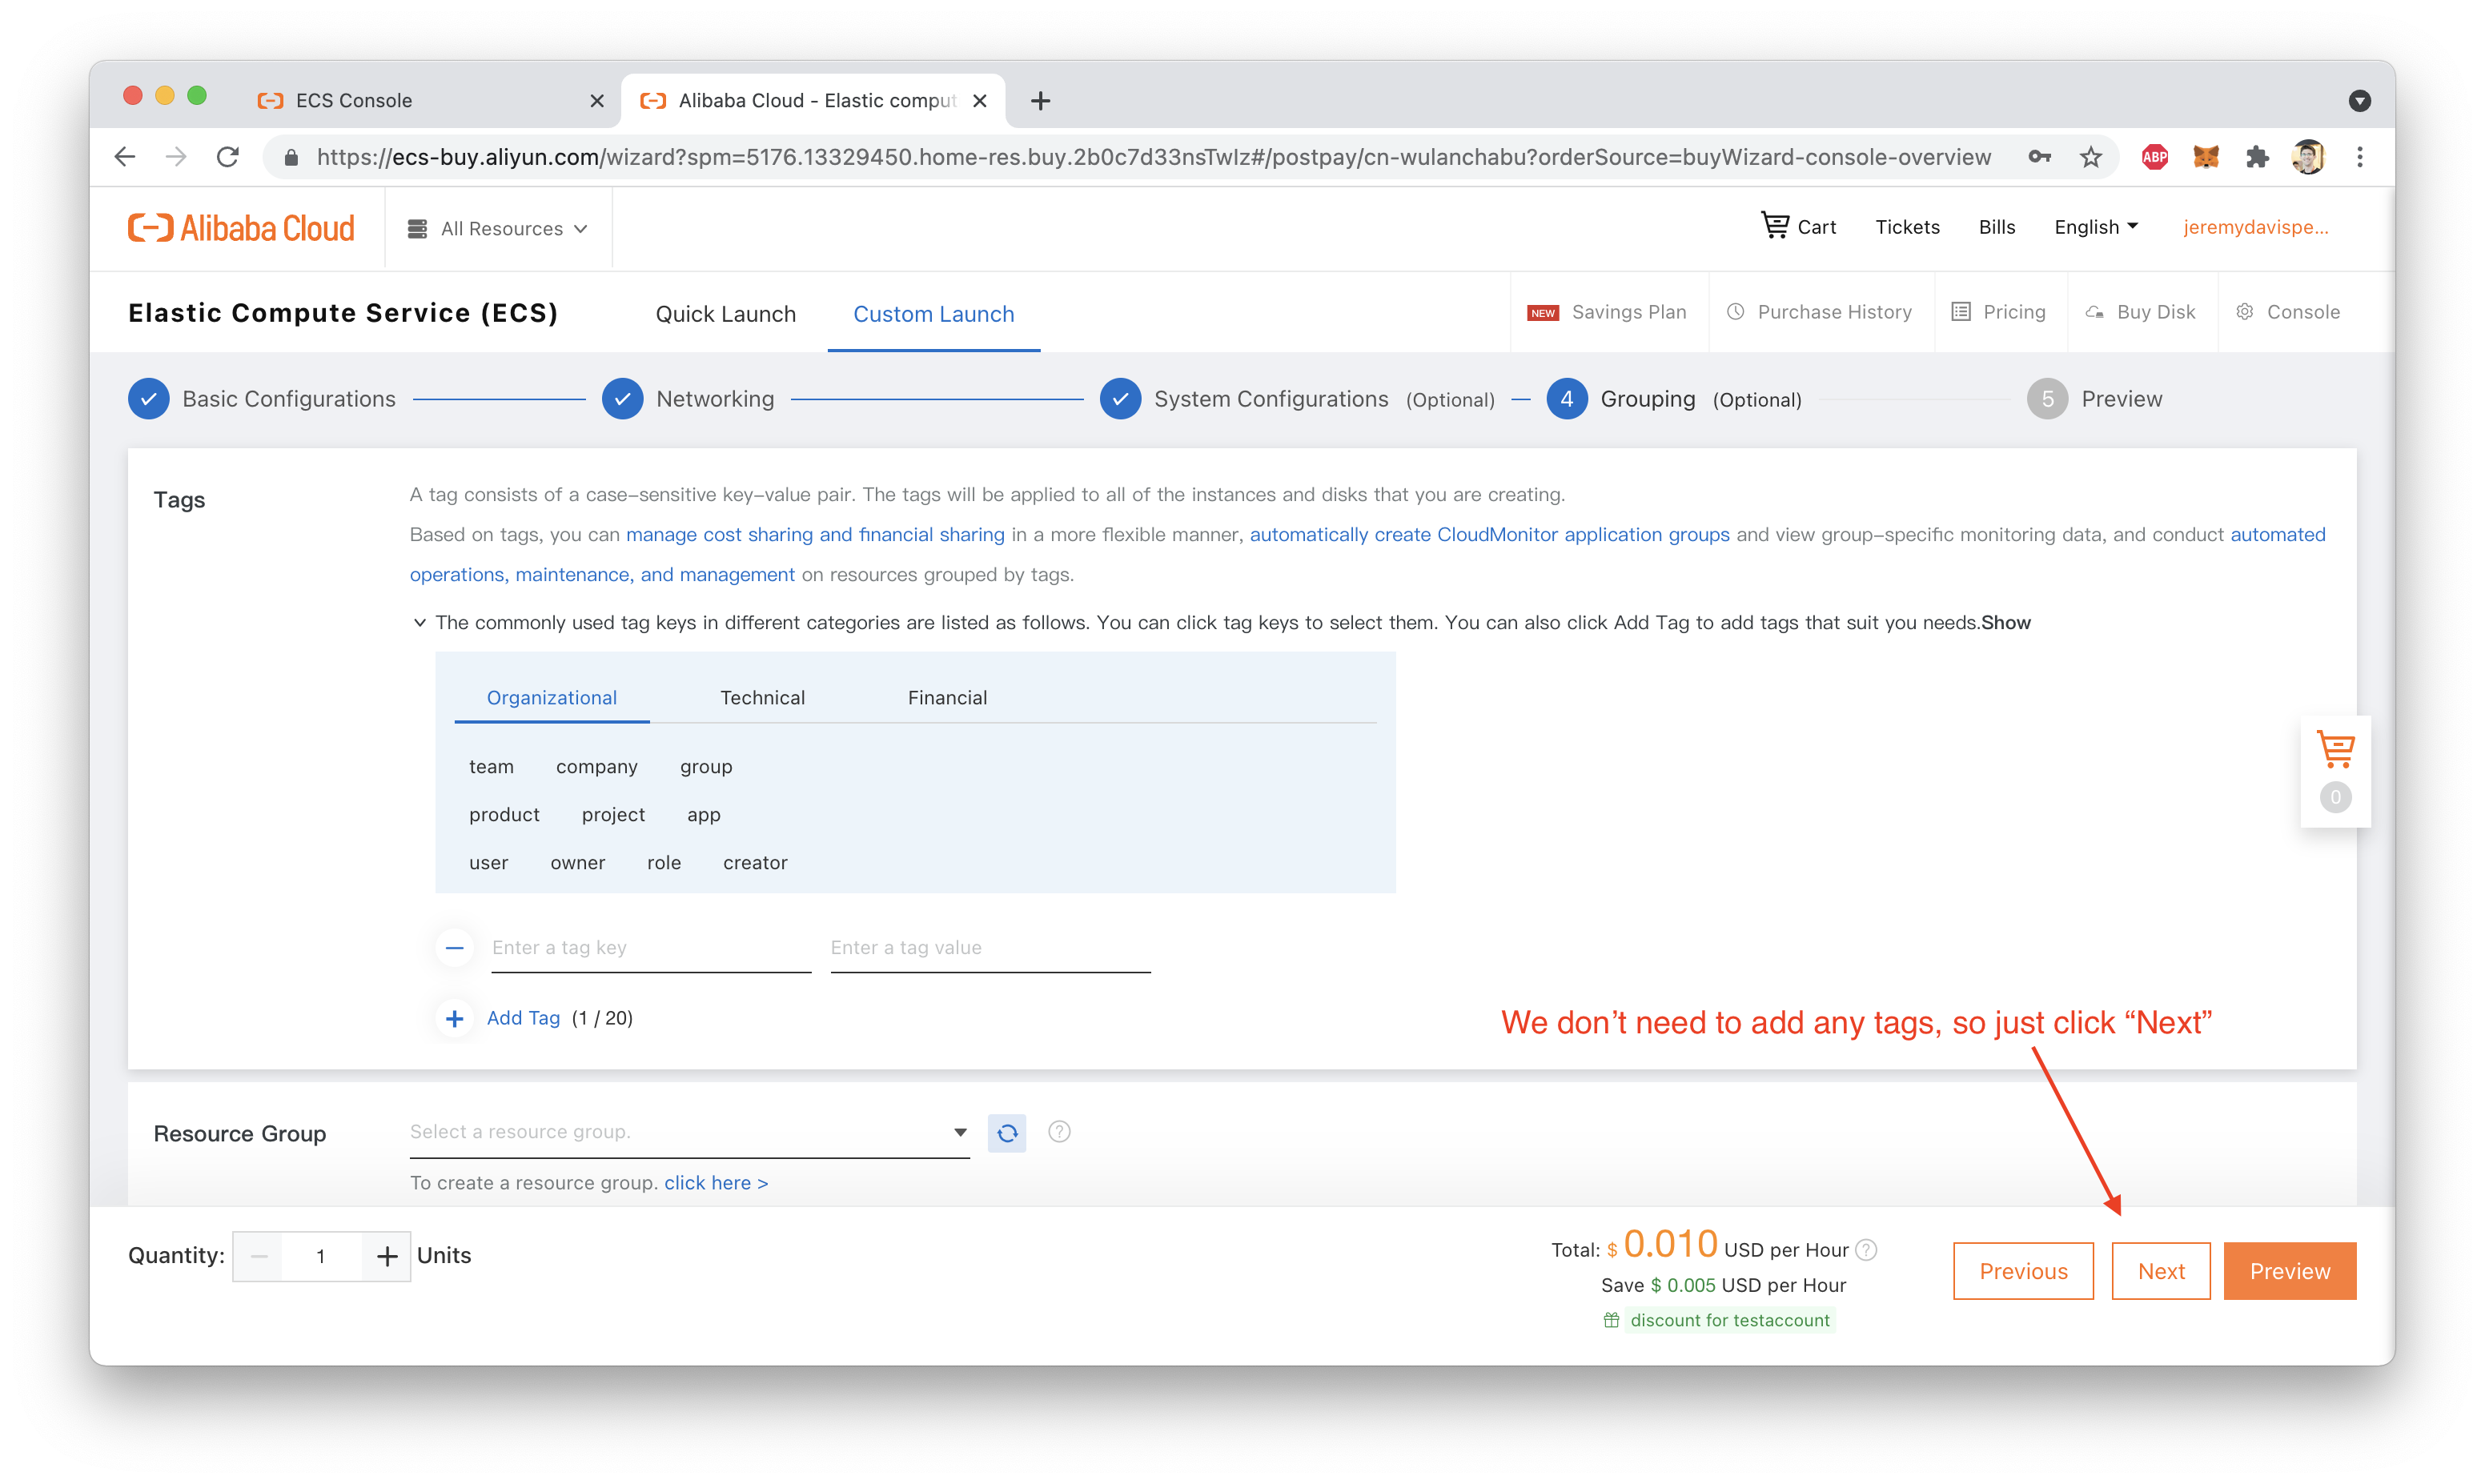
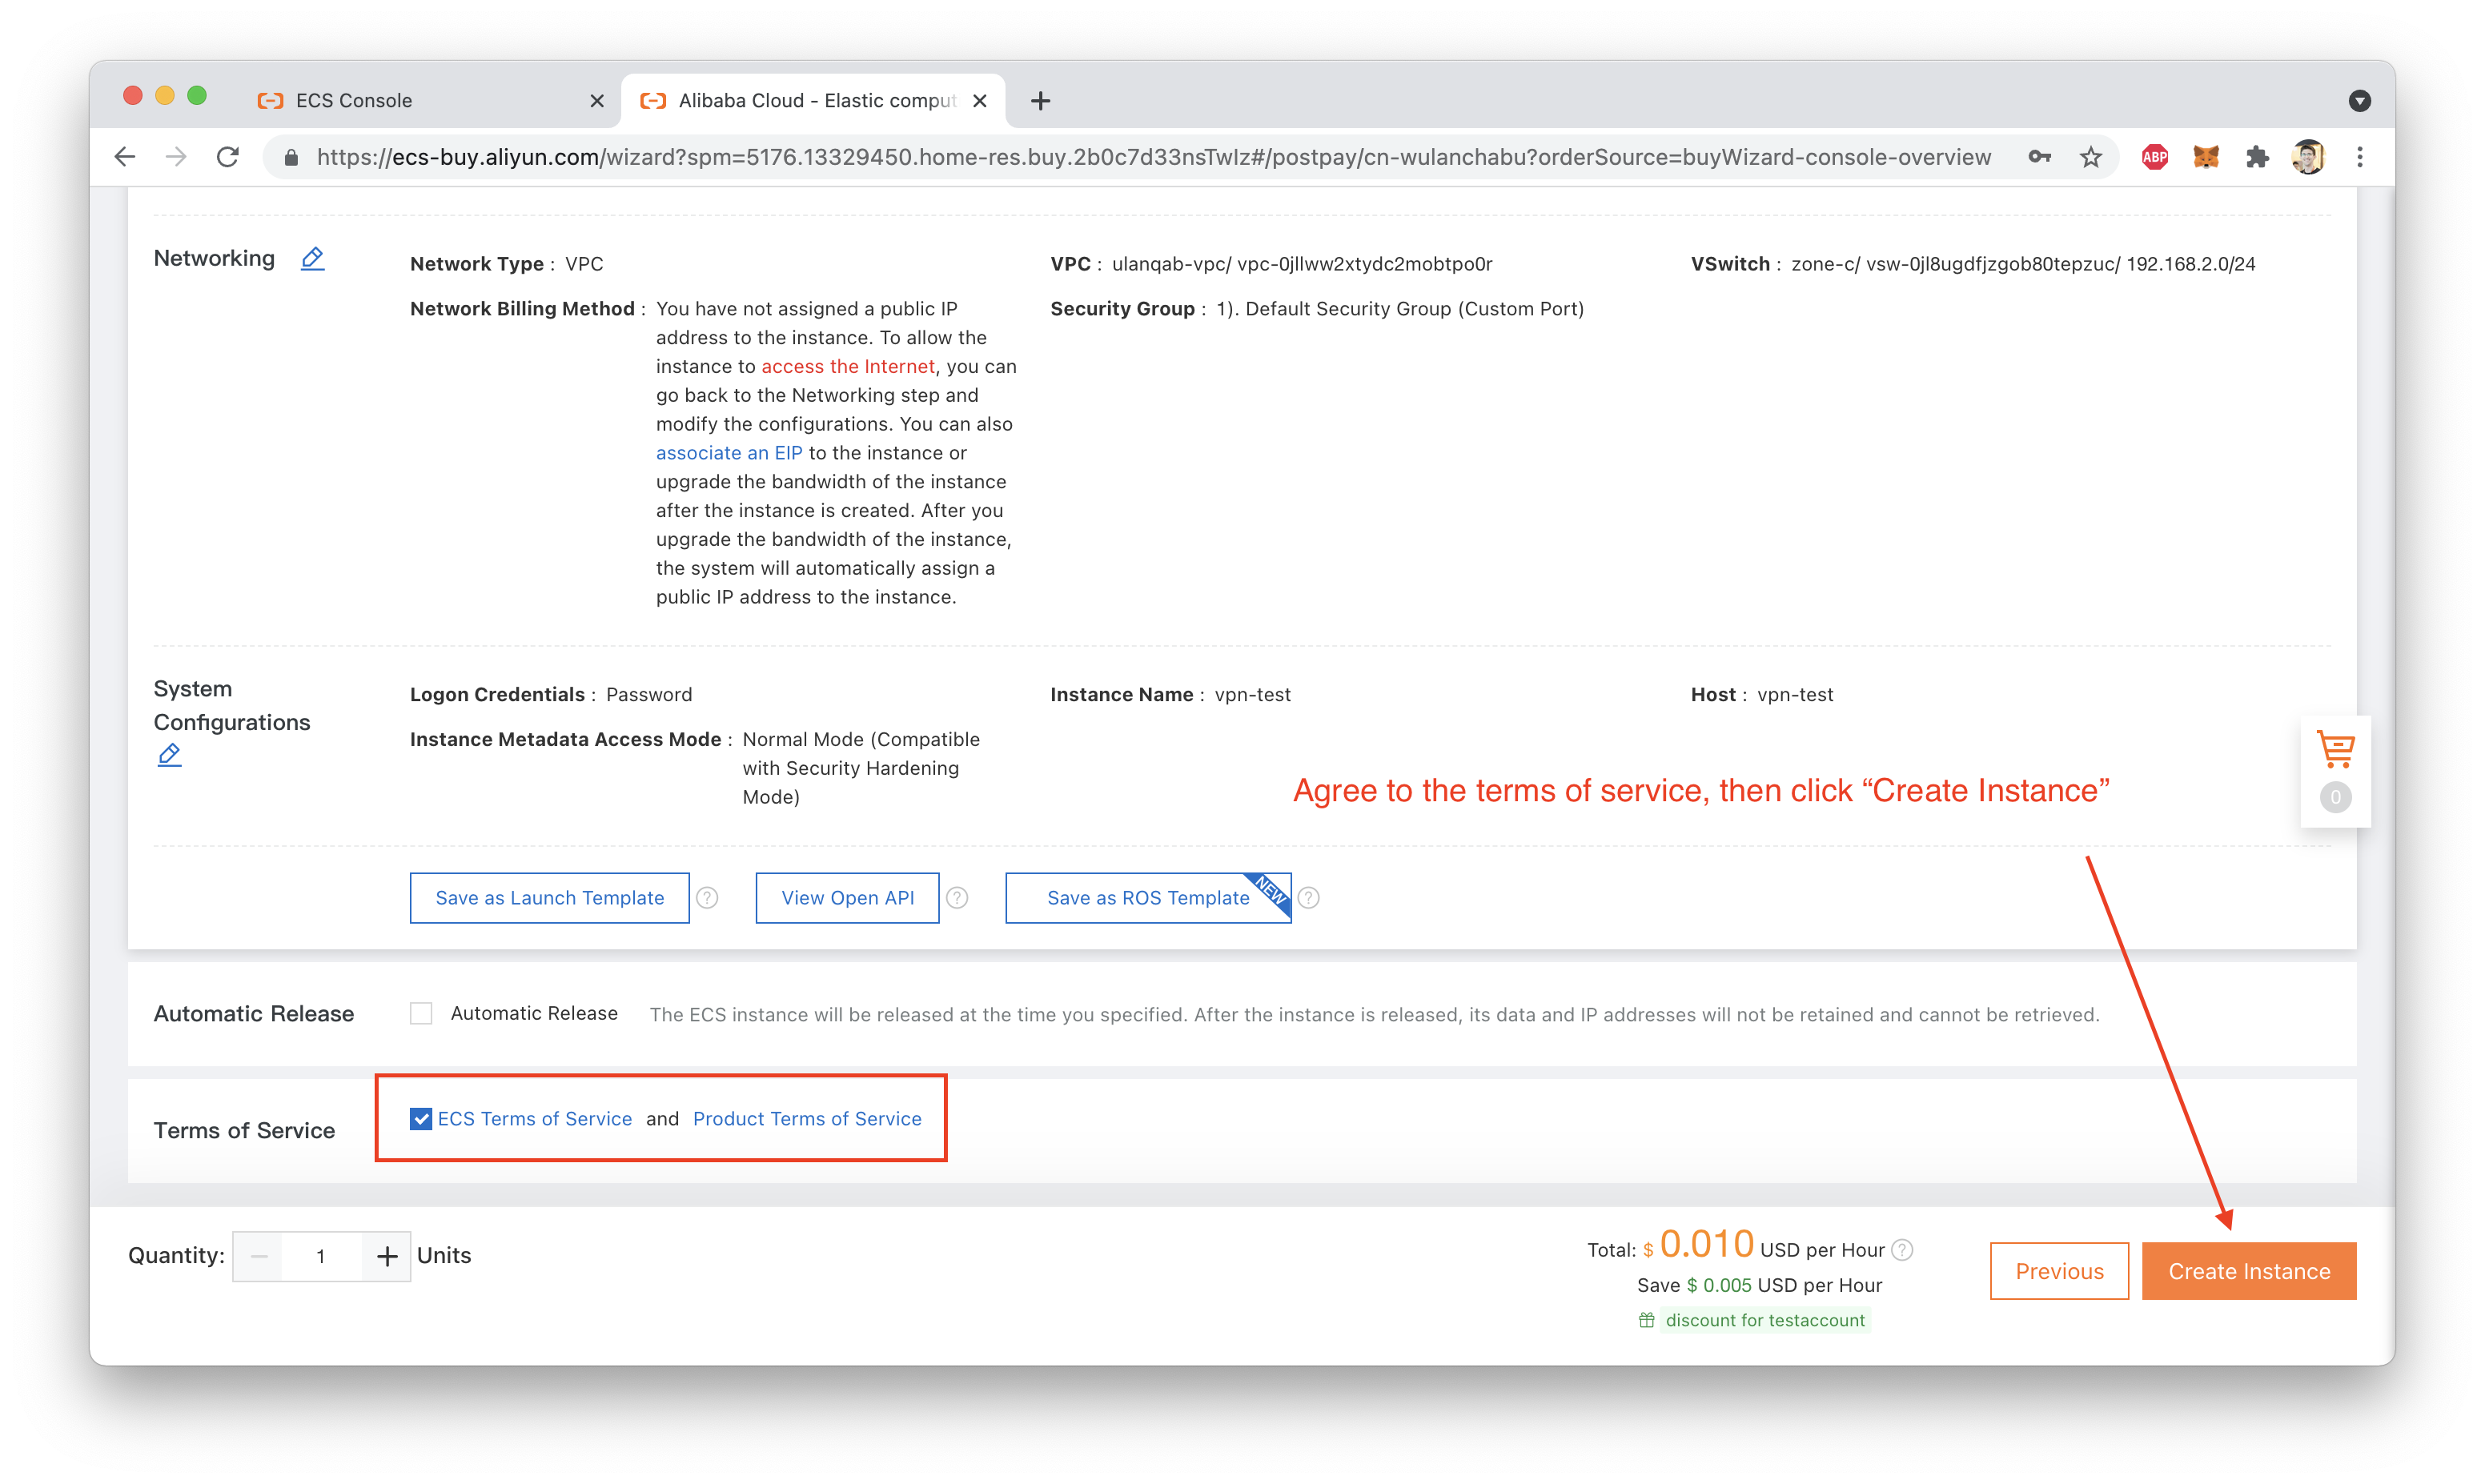
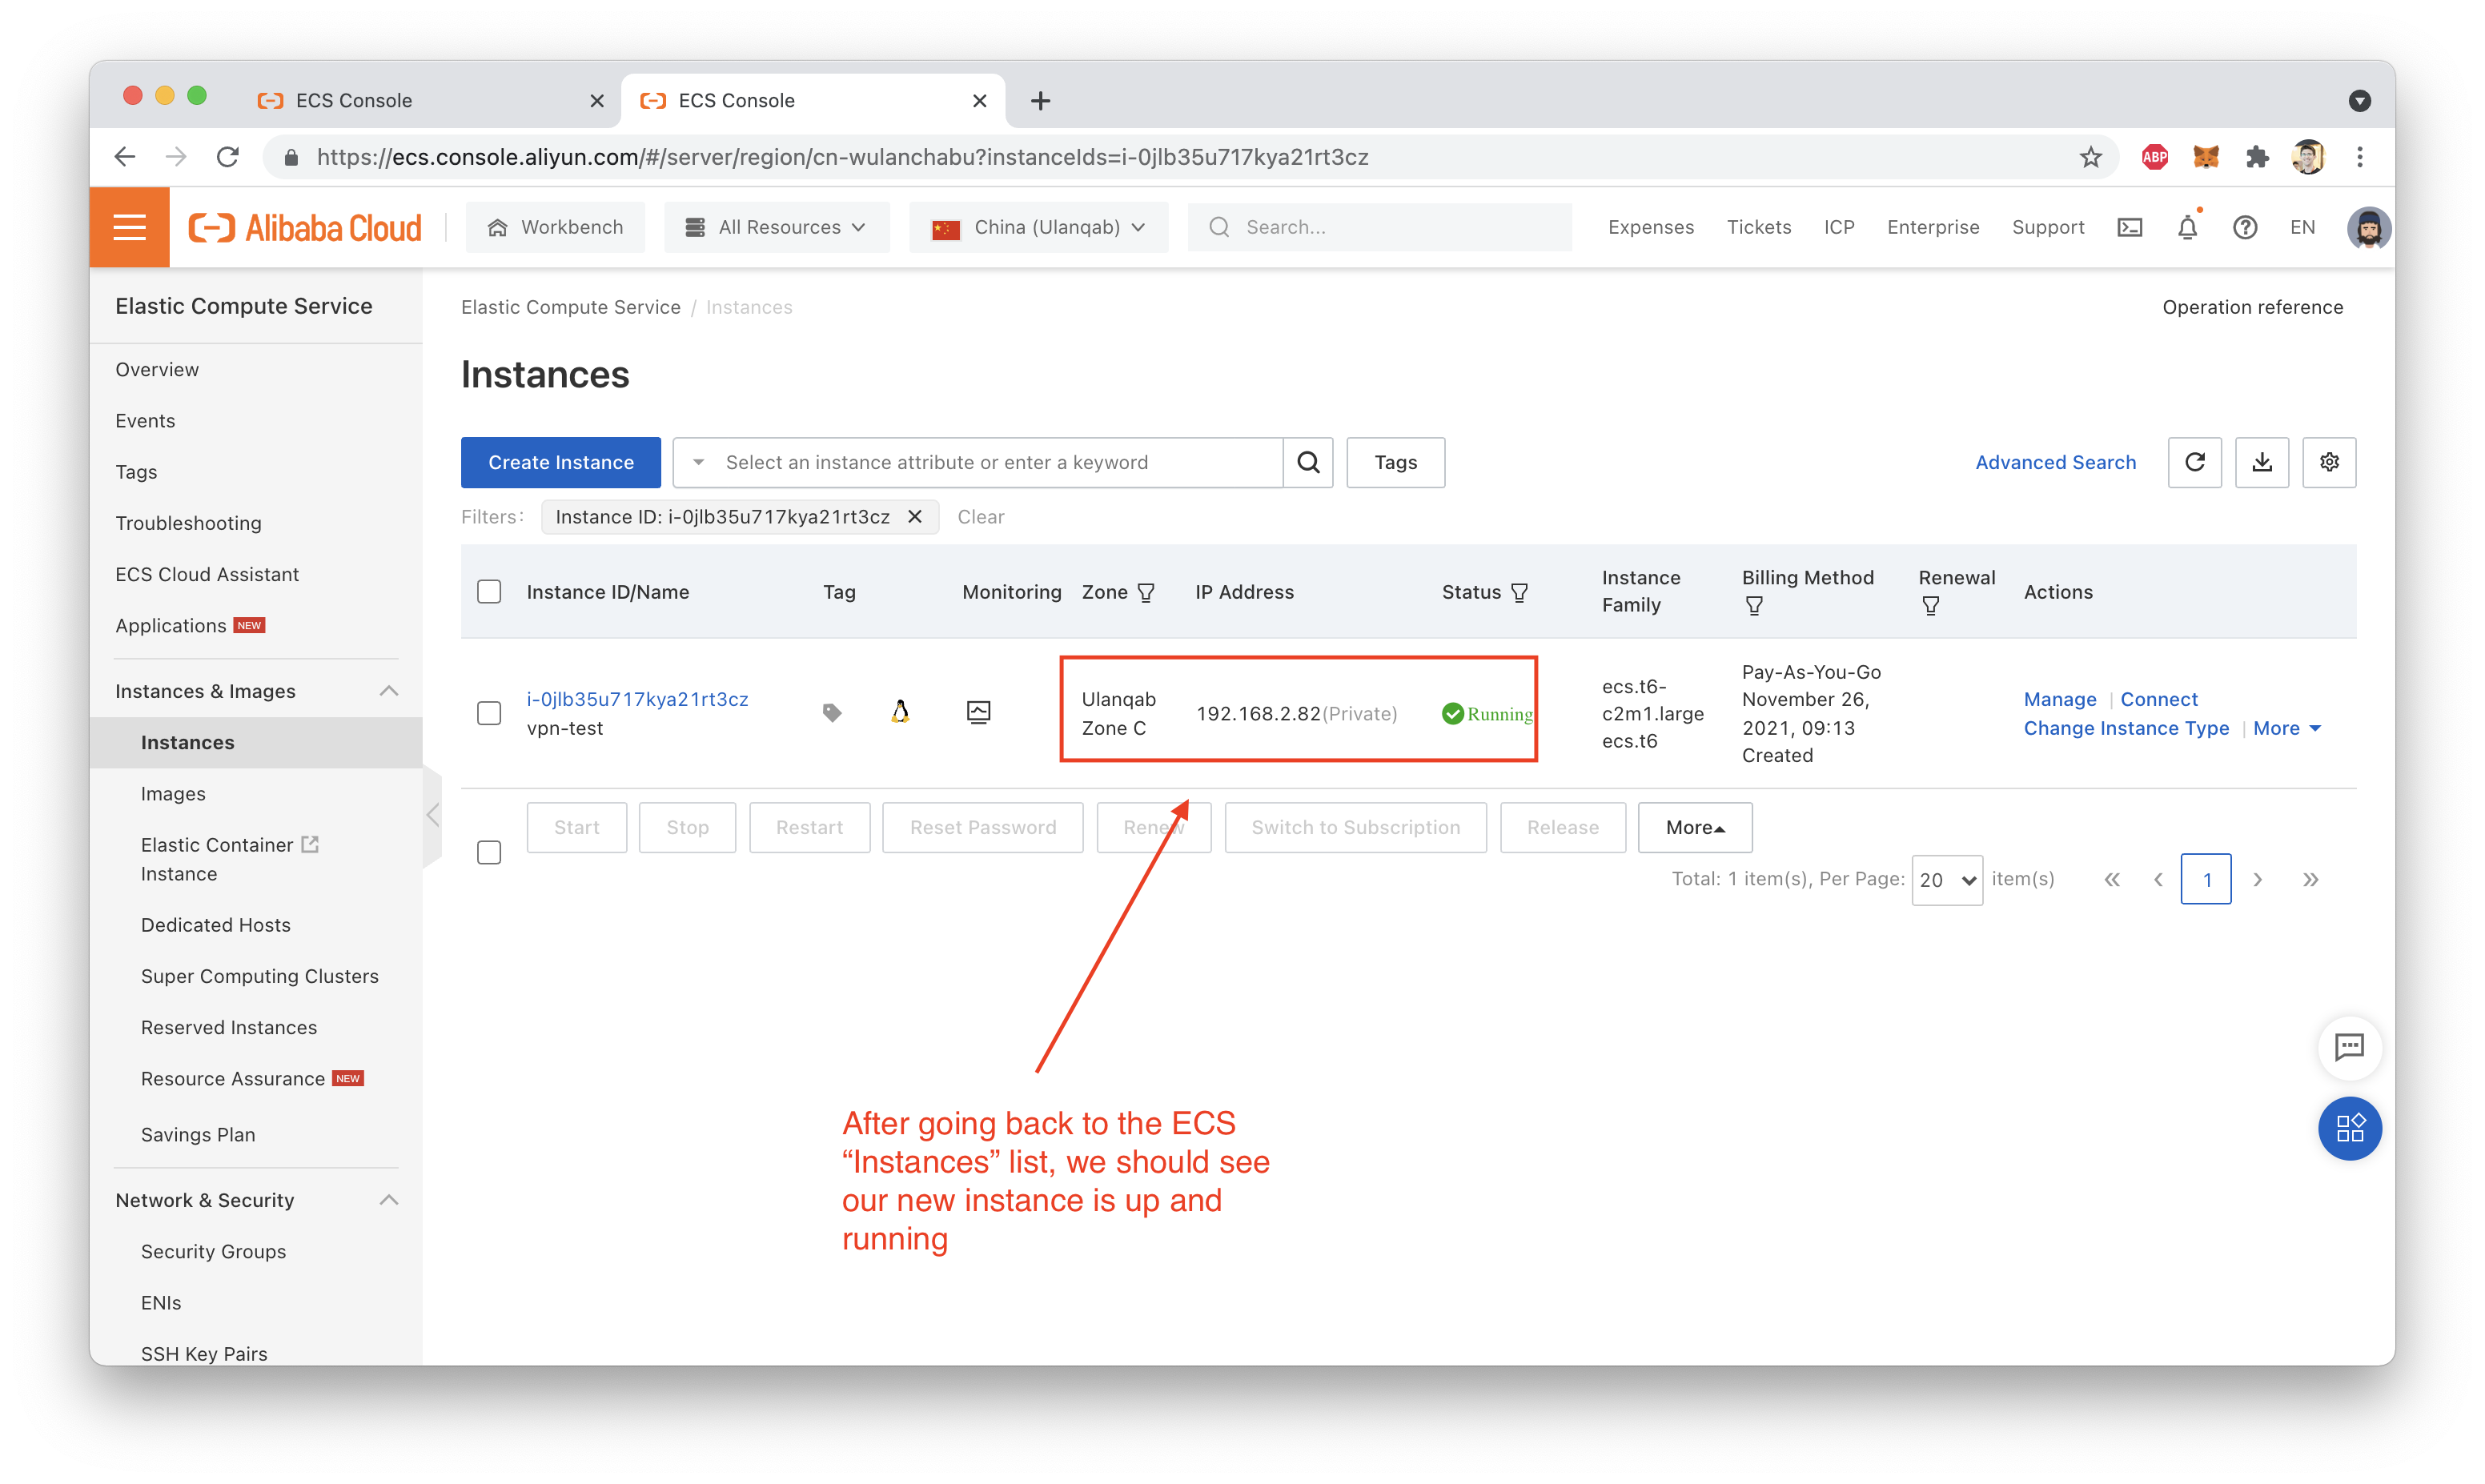
That's it! You should now have a running ECS instance inside your VPC Group, like this:
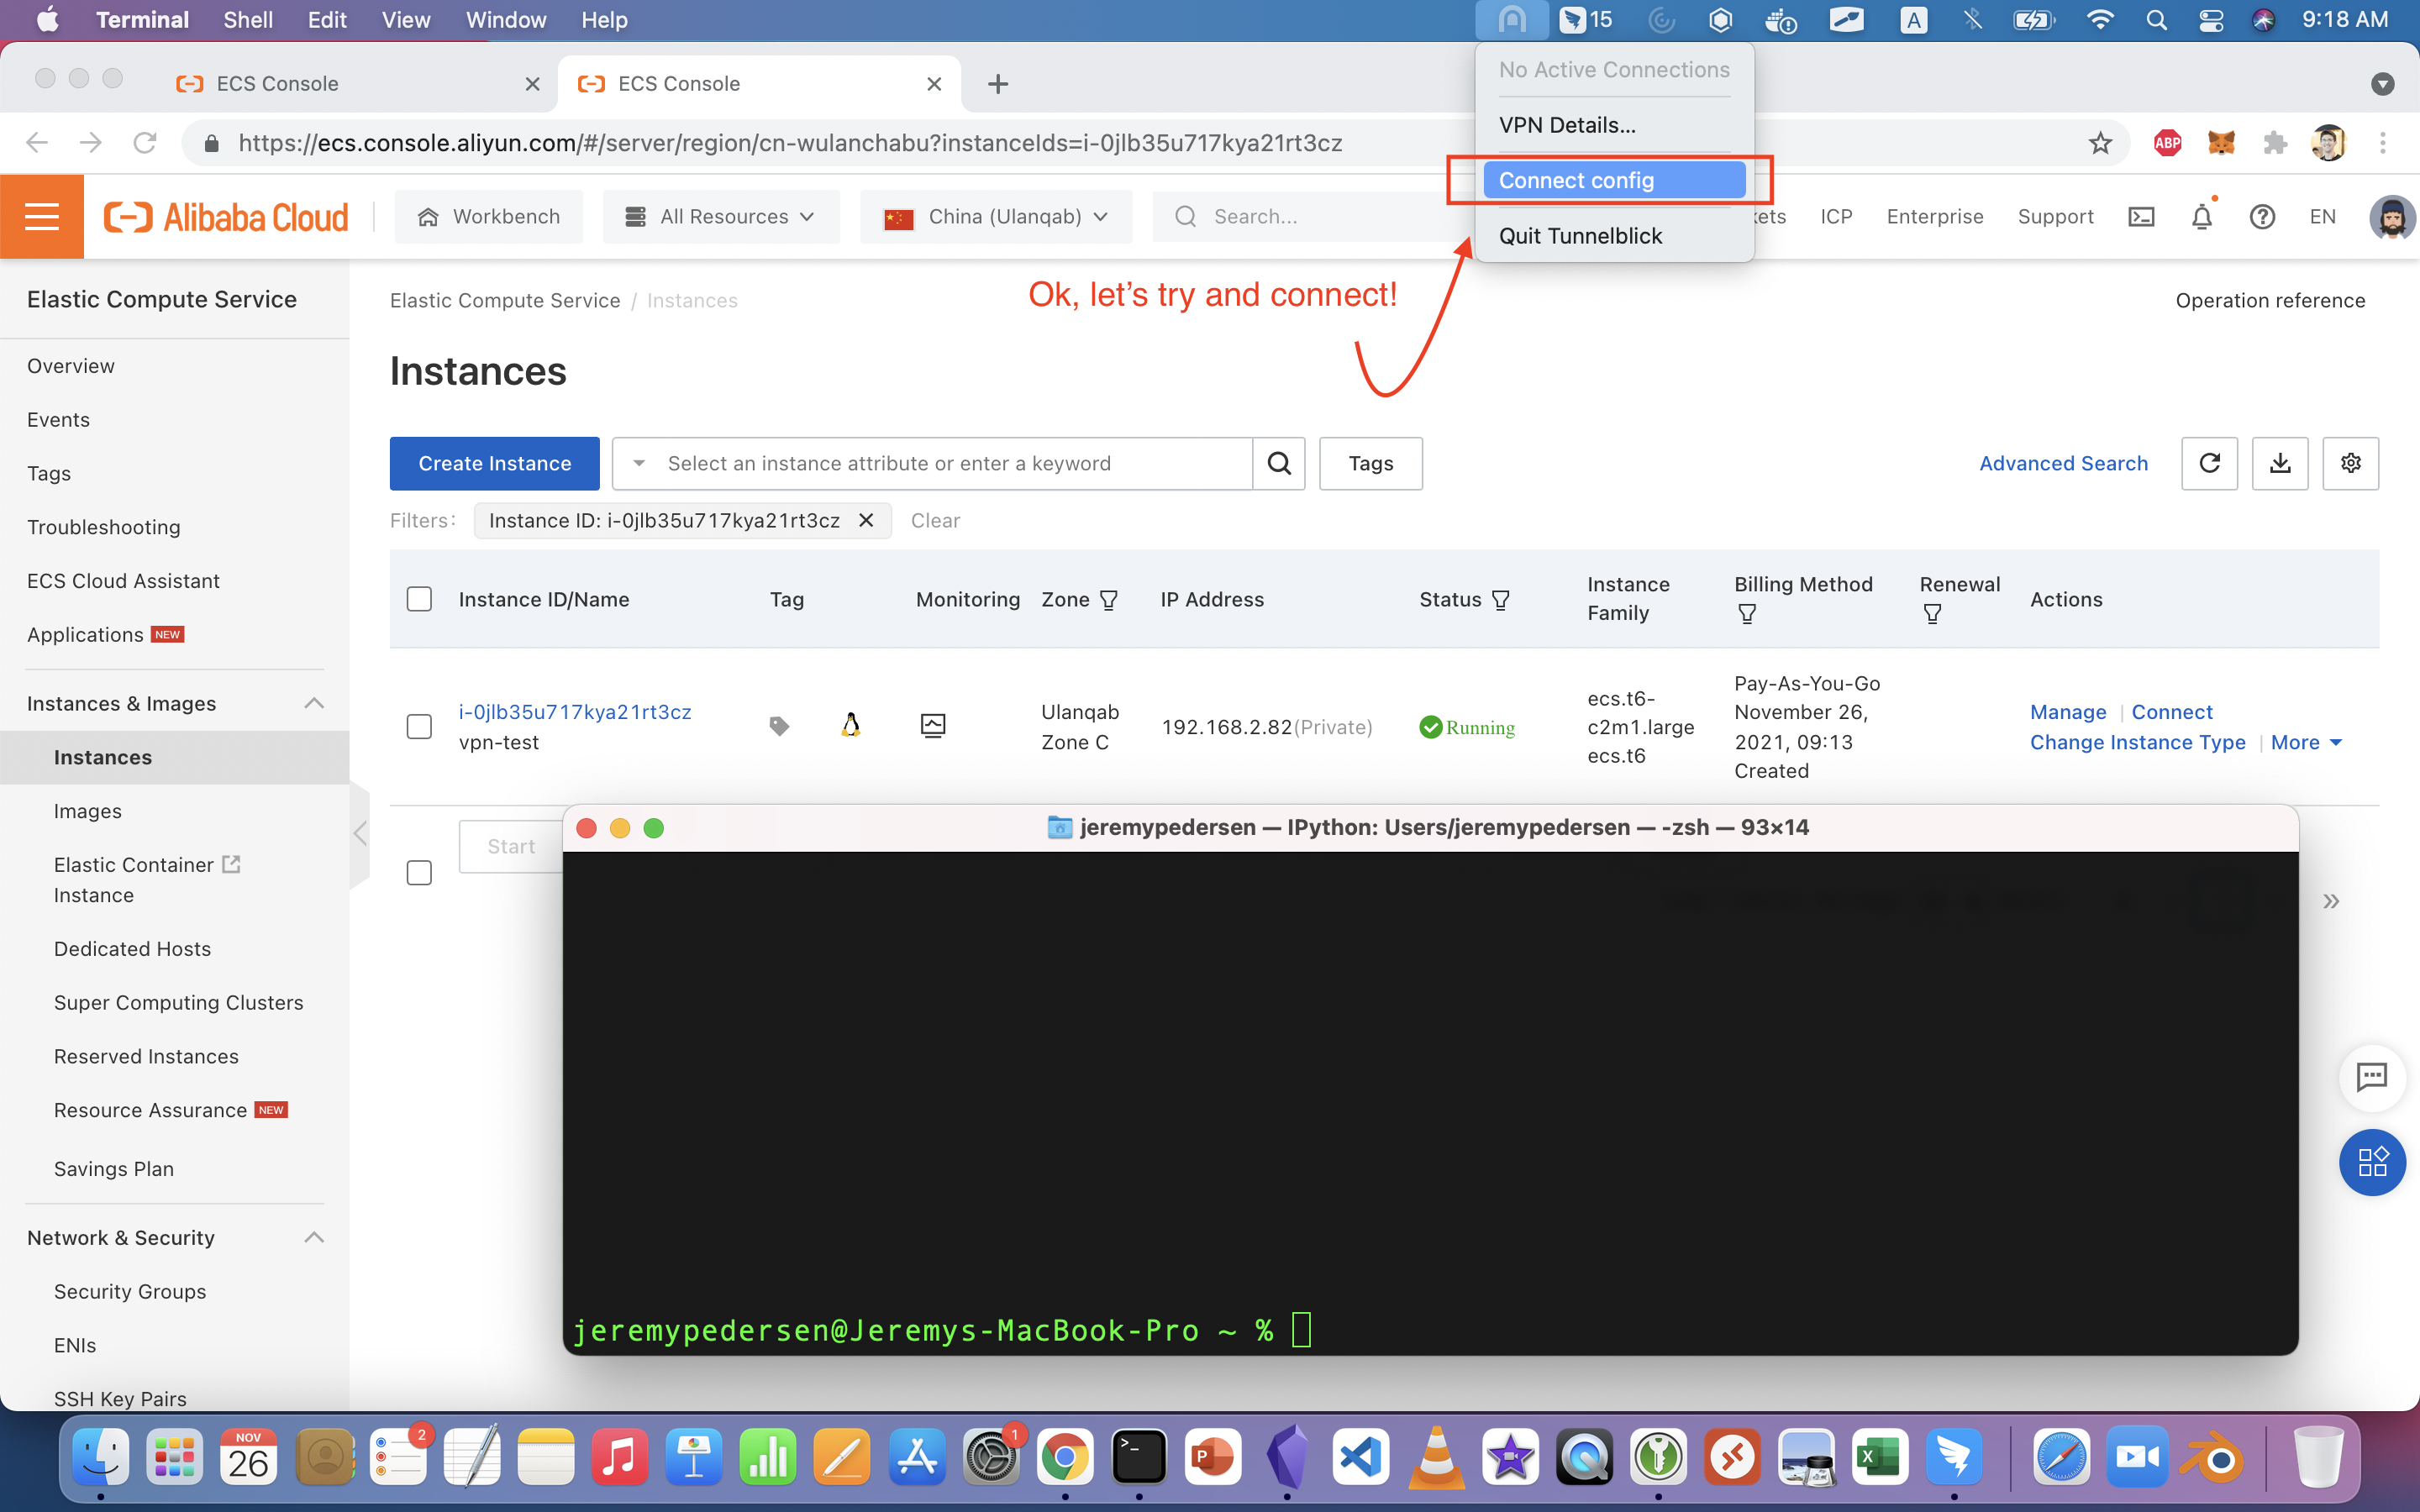
Let's try connecting to the VPN Gateway using Tunnelblick.
Warning: Our VPC group doesn't have any kind of transit routing set up, so connecting will kill your Internet connection. Remember, we told Tunnelblick we want to forward all traffic to the VPN Gateway, even Internet traffic. Since our VPC has no path to the public Internet (like a NAT Gateway), traffic to public sites is going to "dead end" at the VPC.
Maybe that's a topic for another blog post!
In any case, if everything works, you should see something like this:
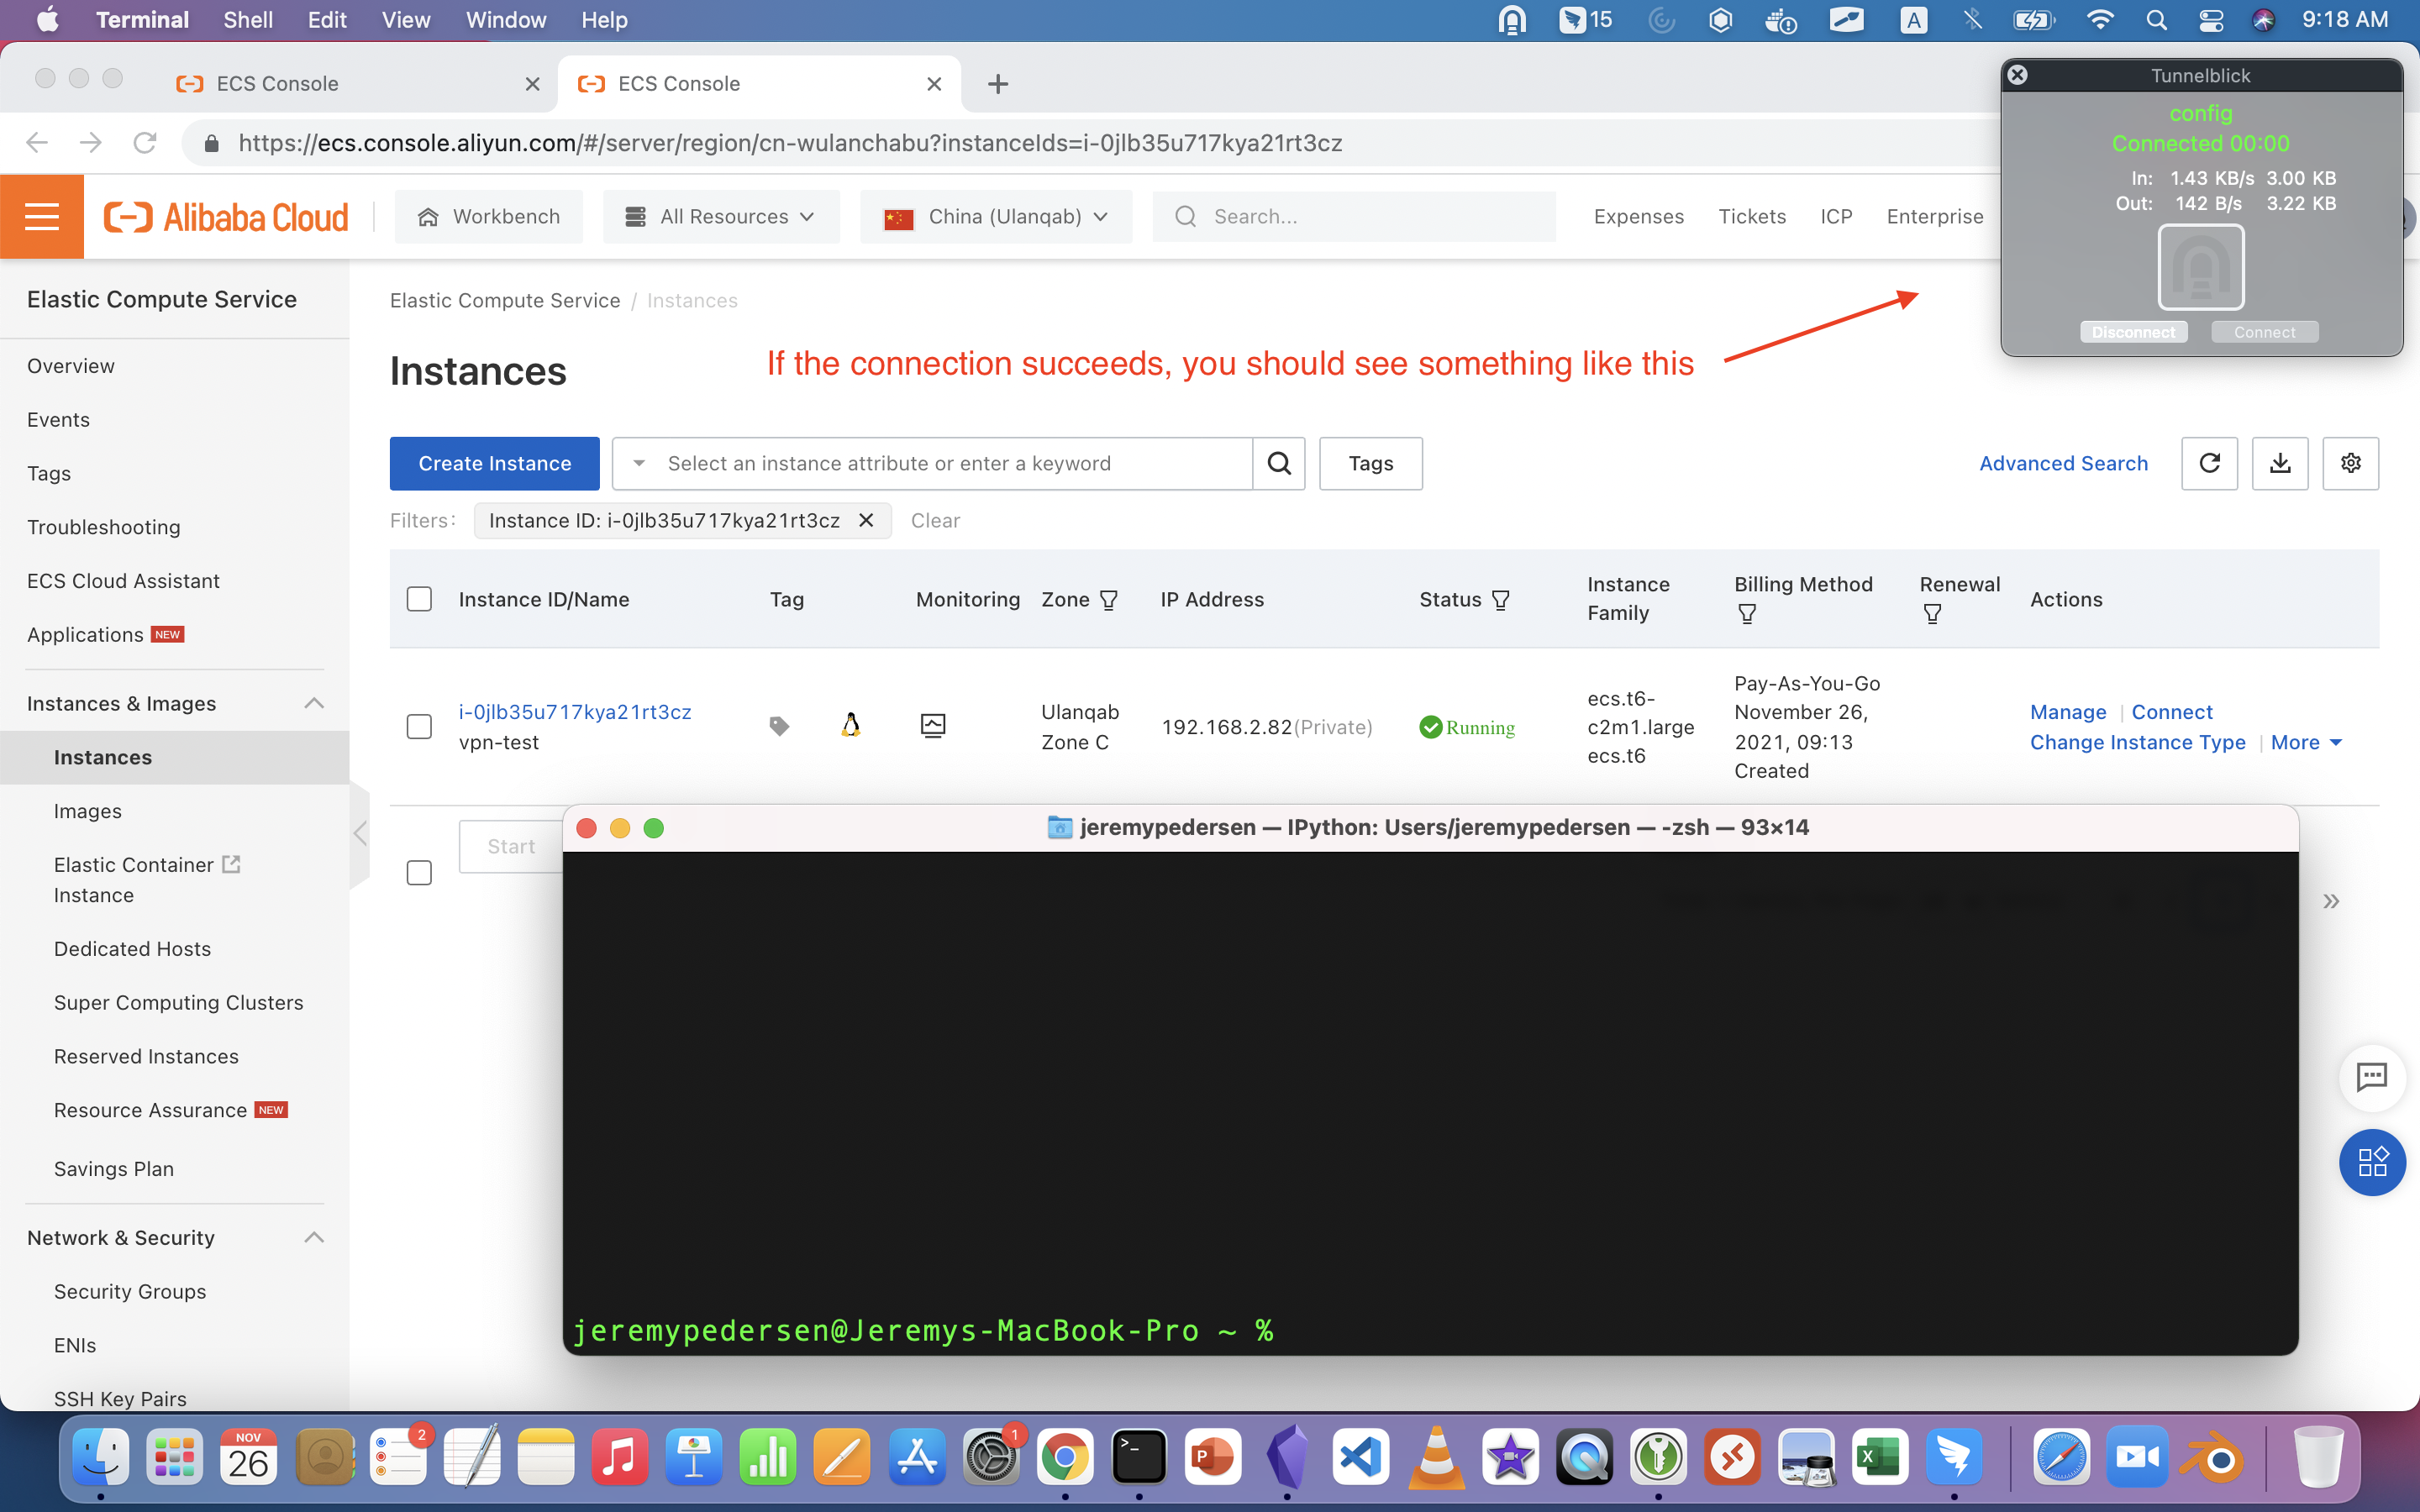
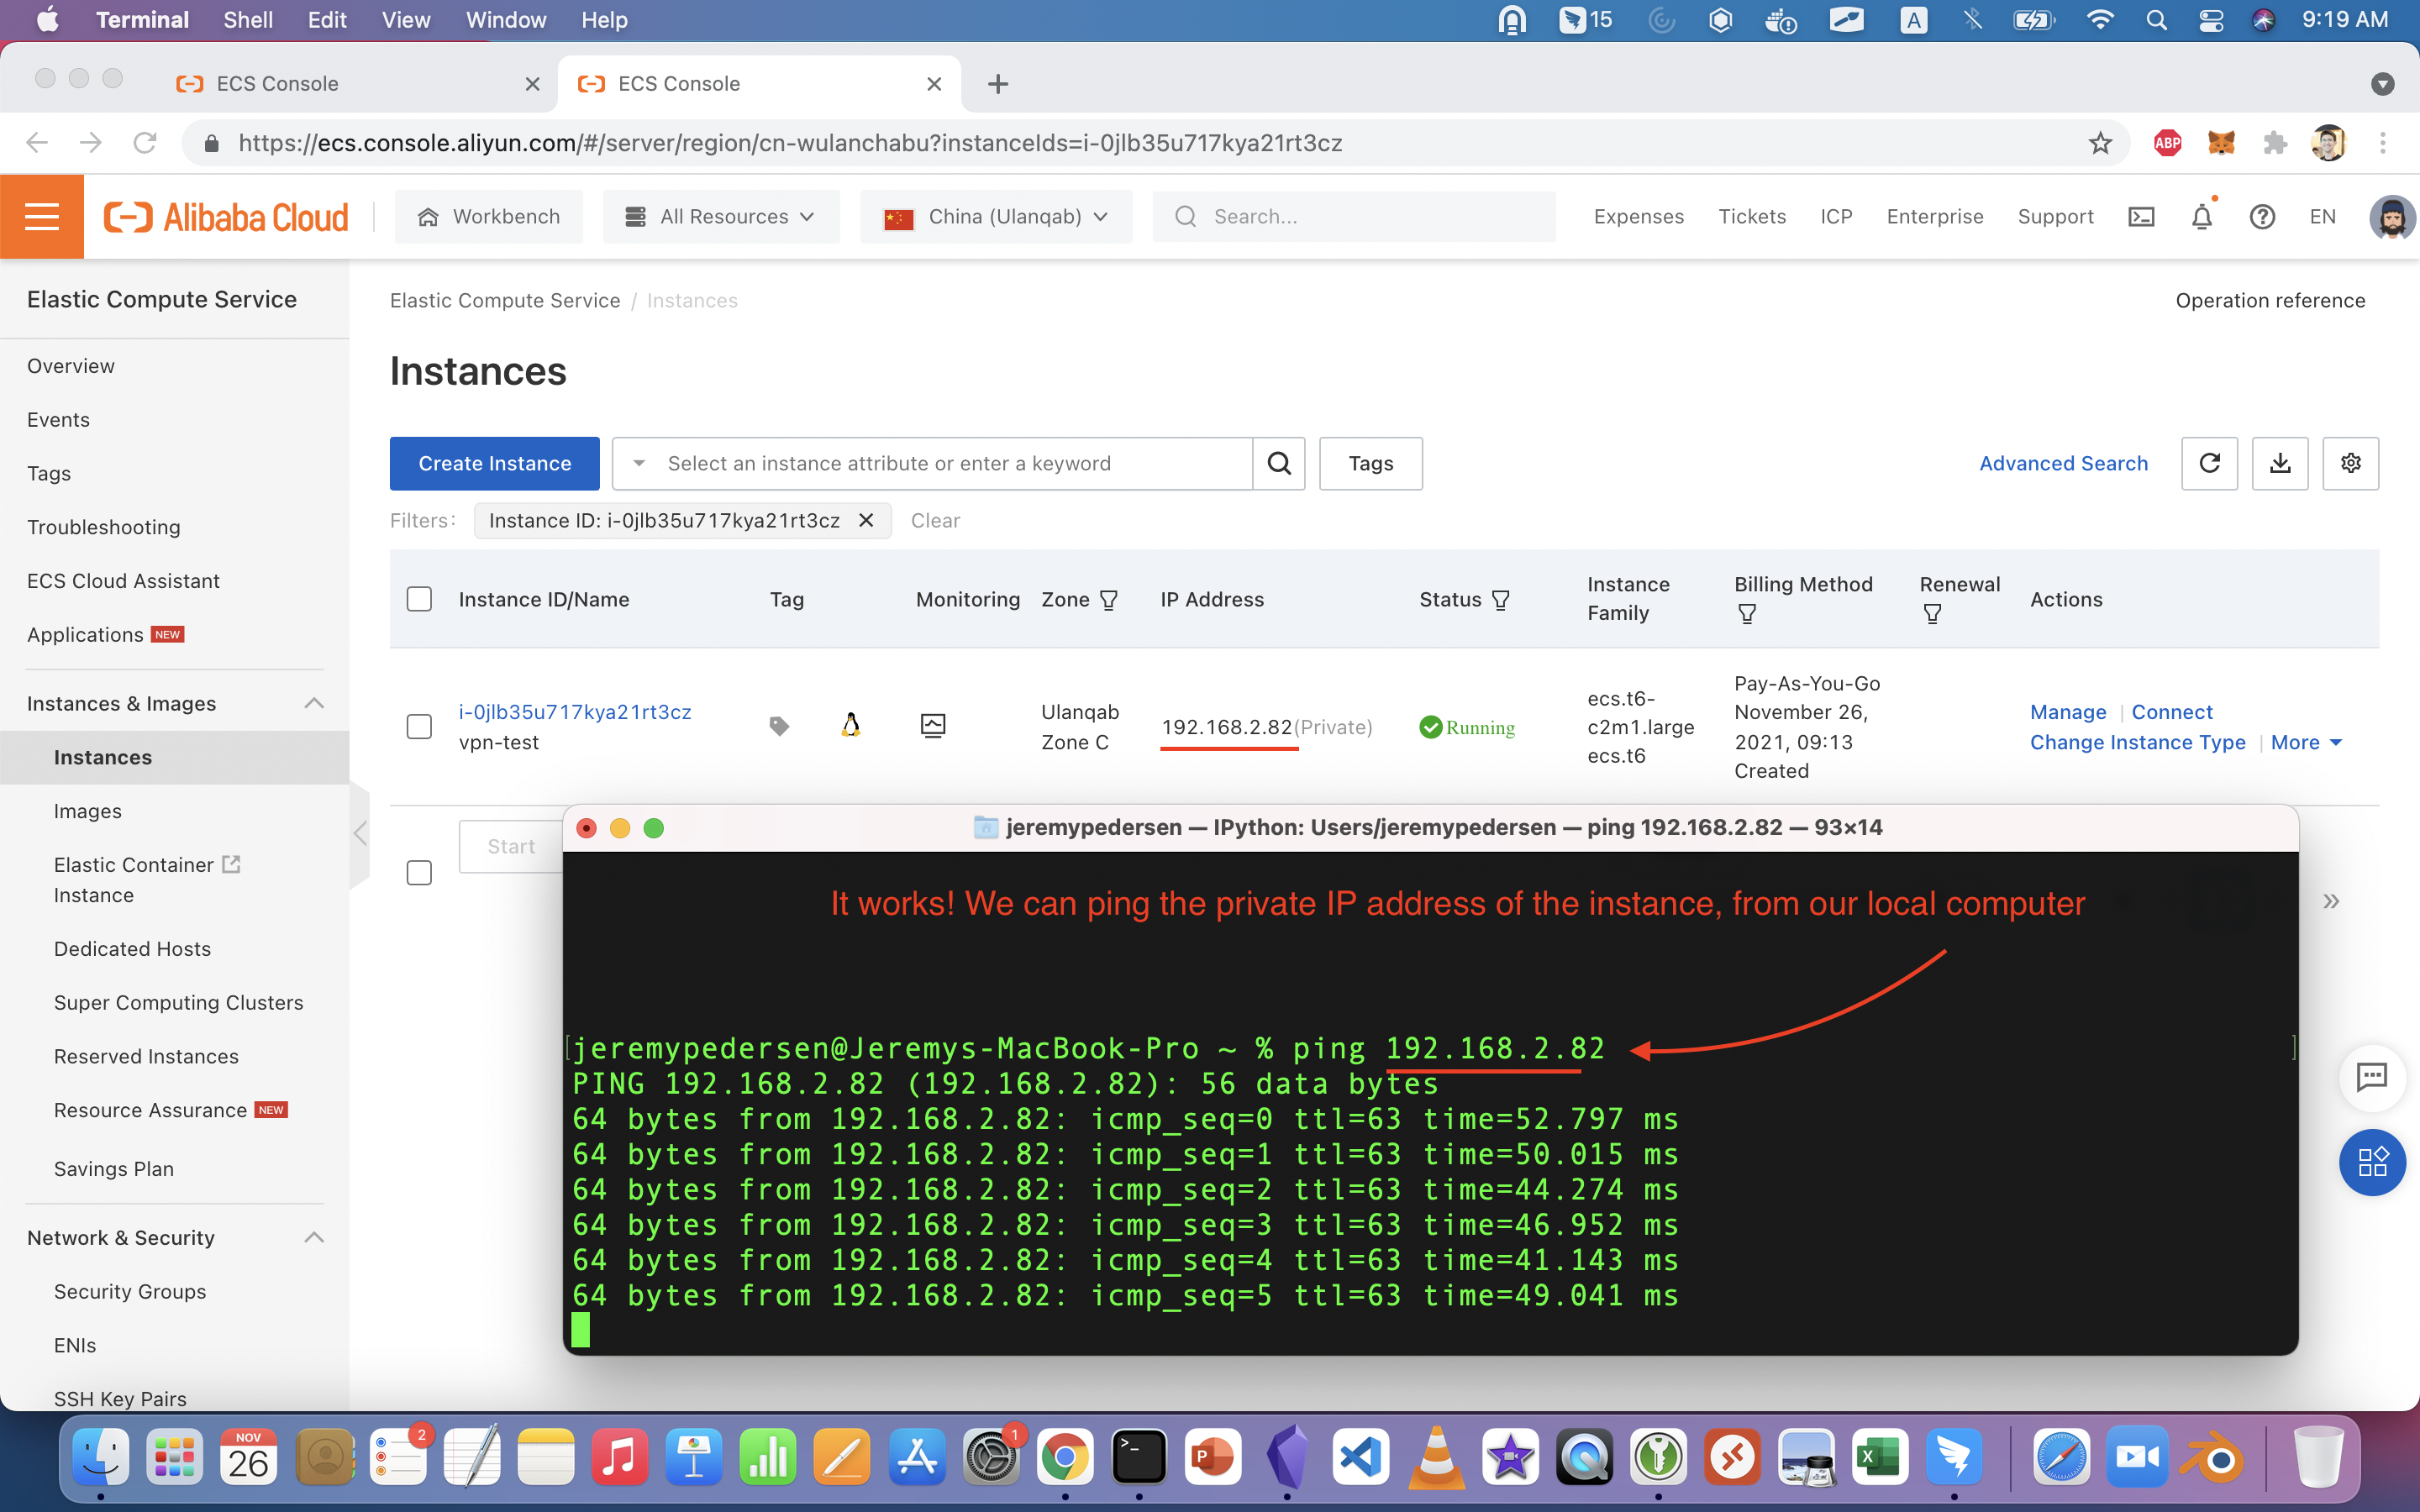
Now, we can try to ping our ECS instance, using its private IP address. We can see that it works:
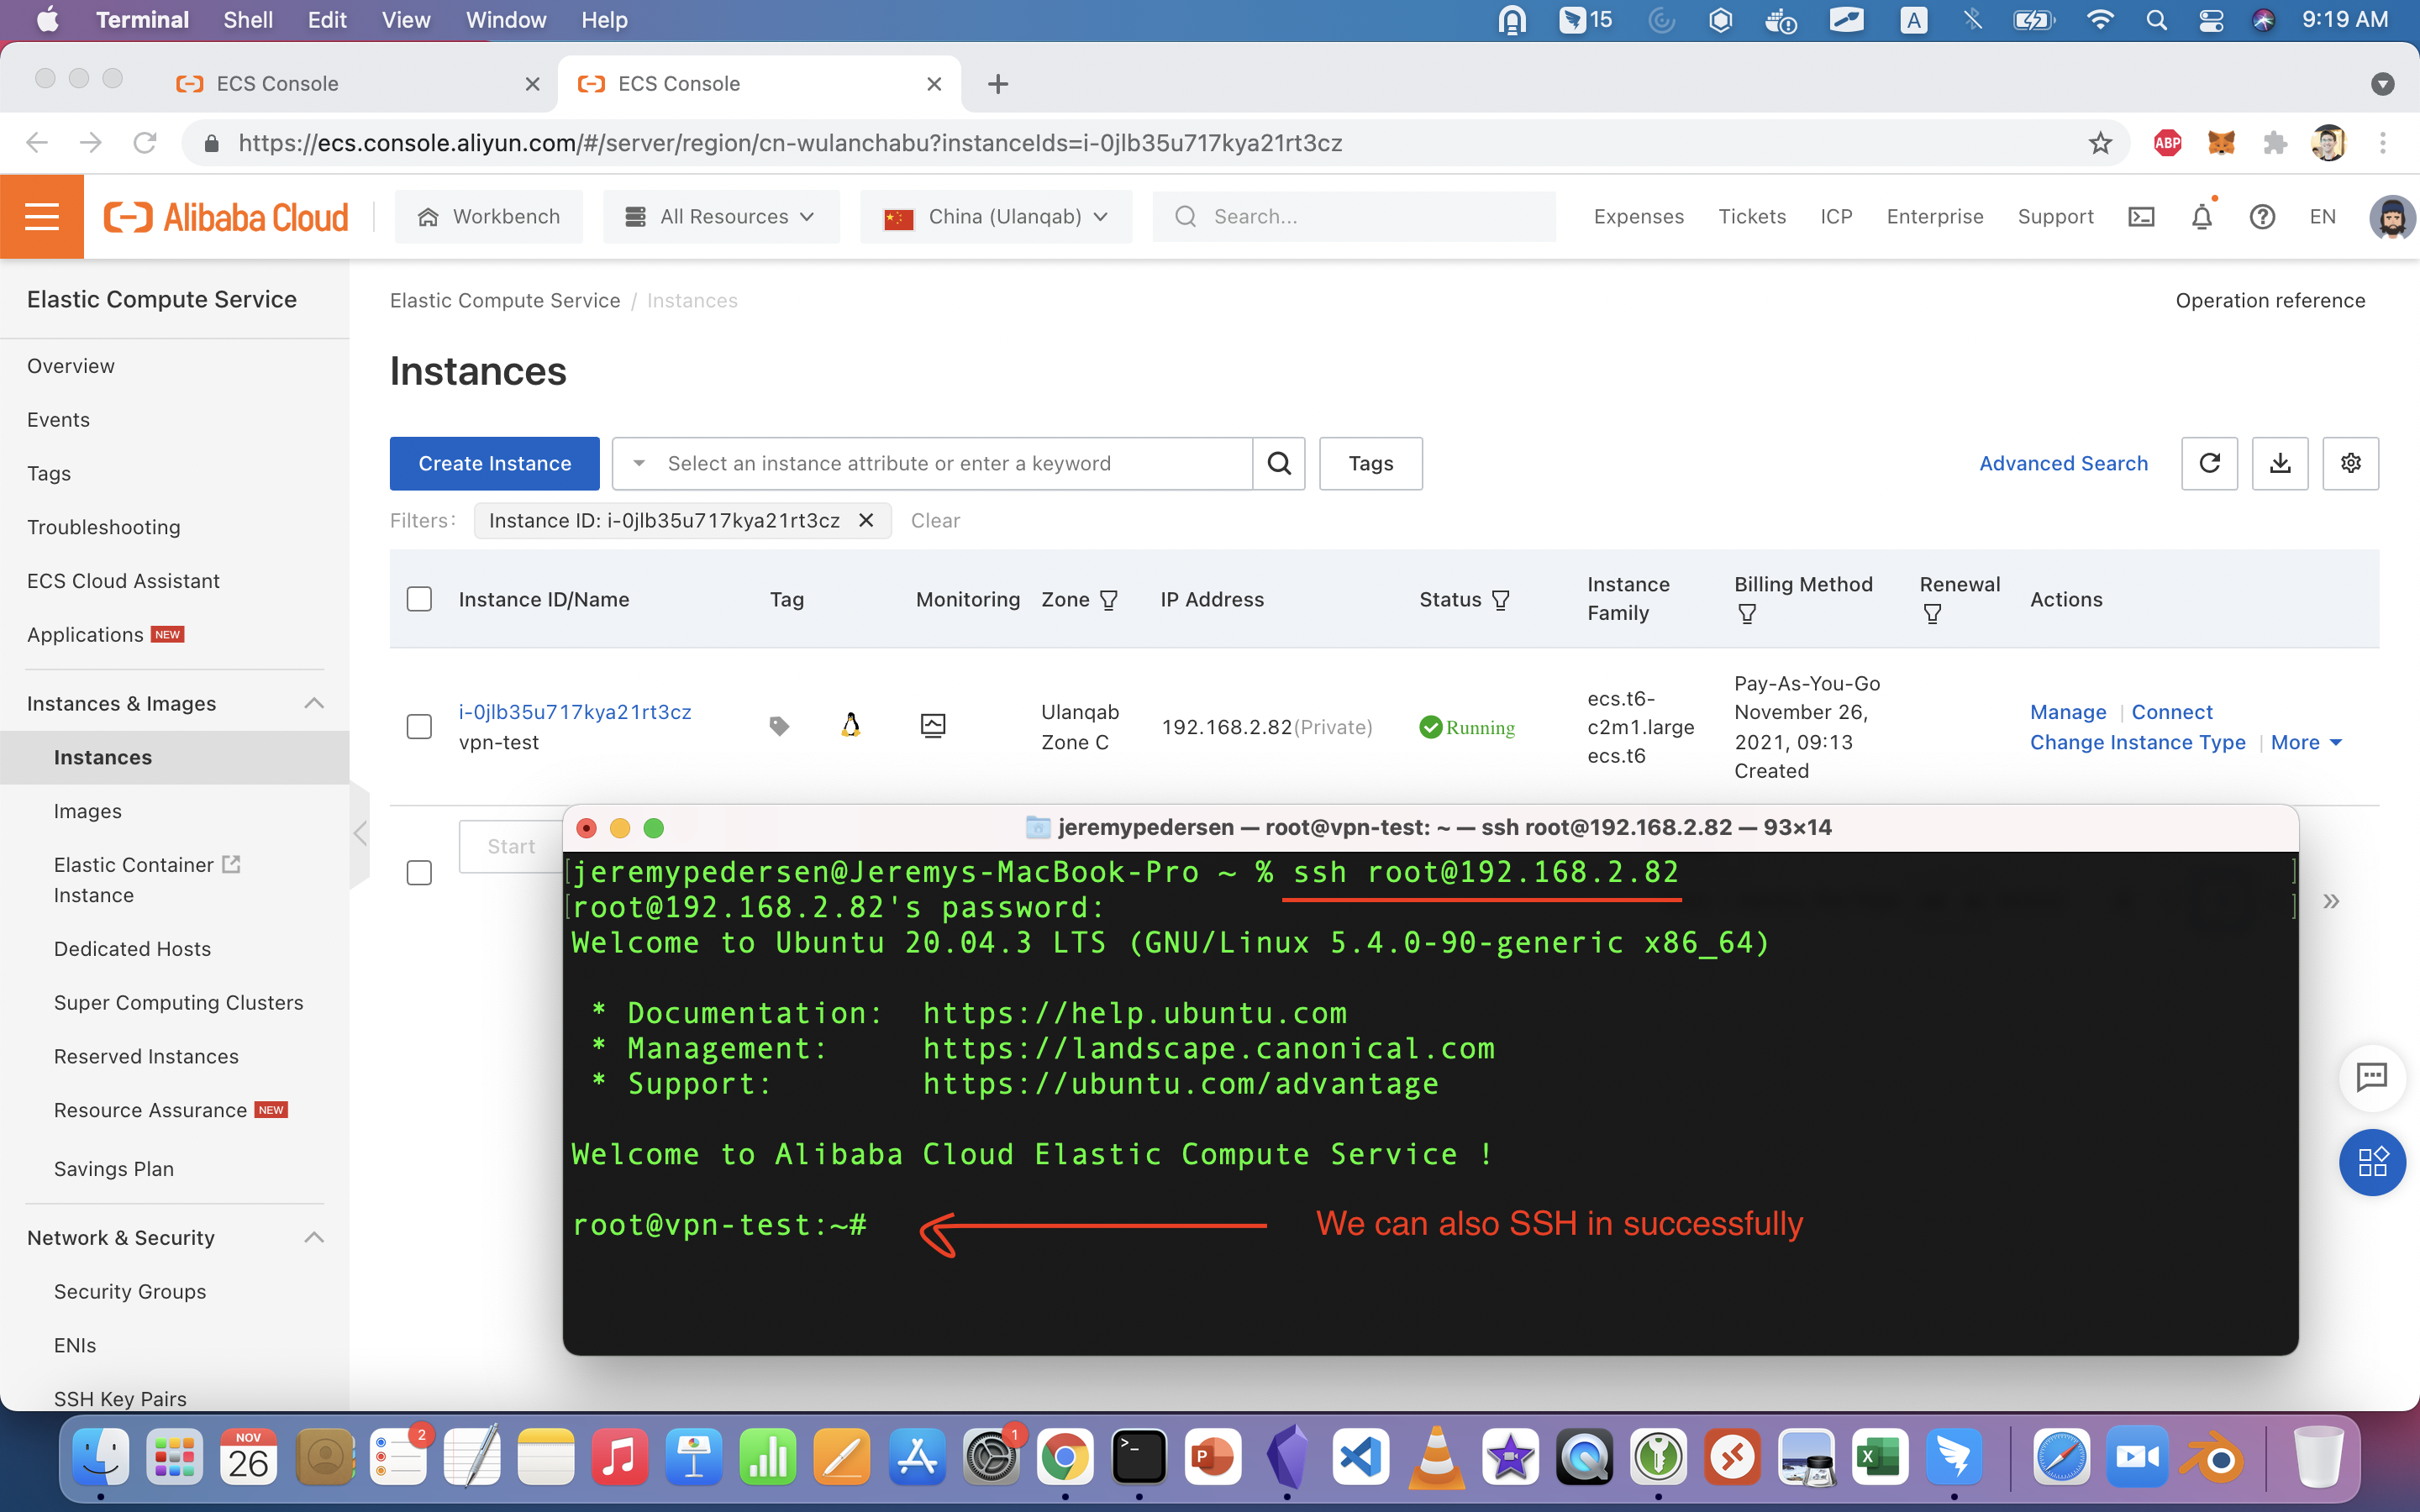
SSH should also work just fine:
Finally, we disconnect from the VPN Gateway and try to ping the instance again:
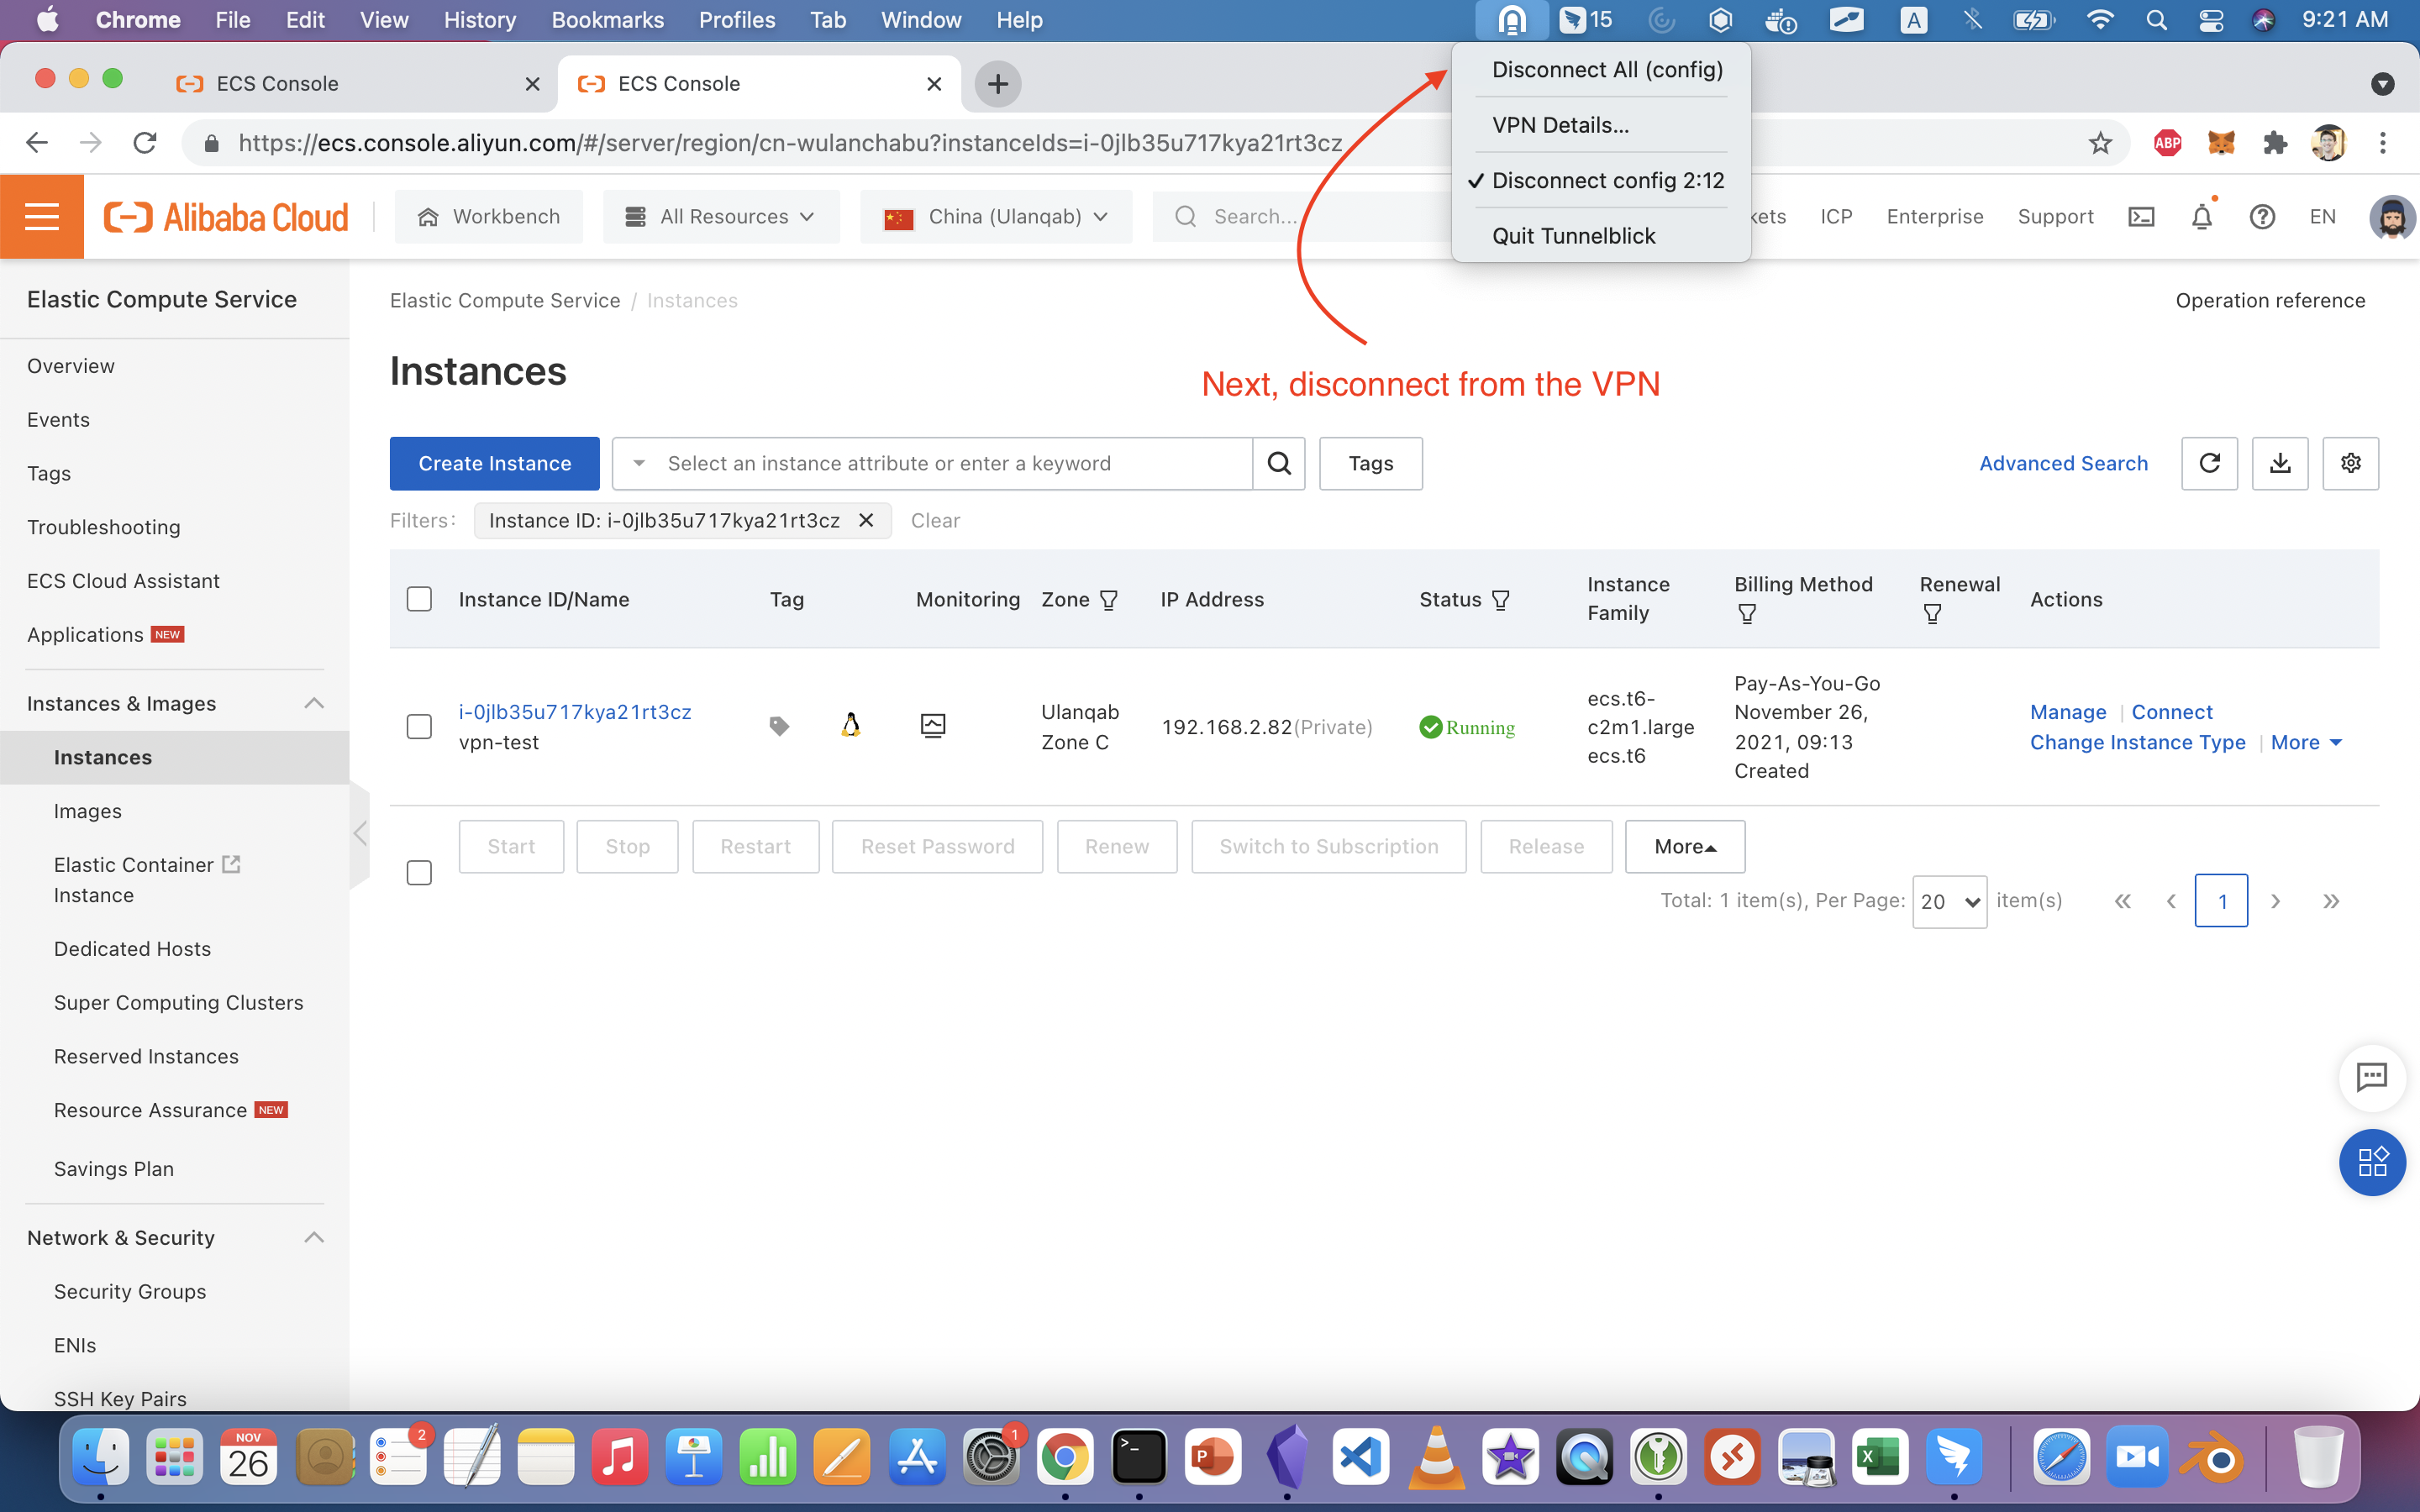
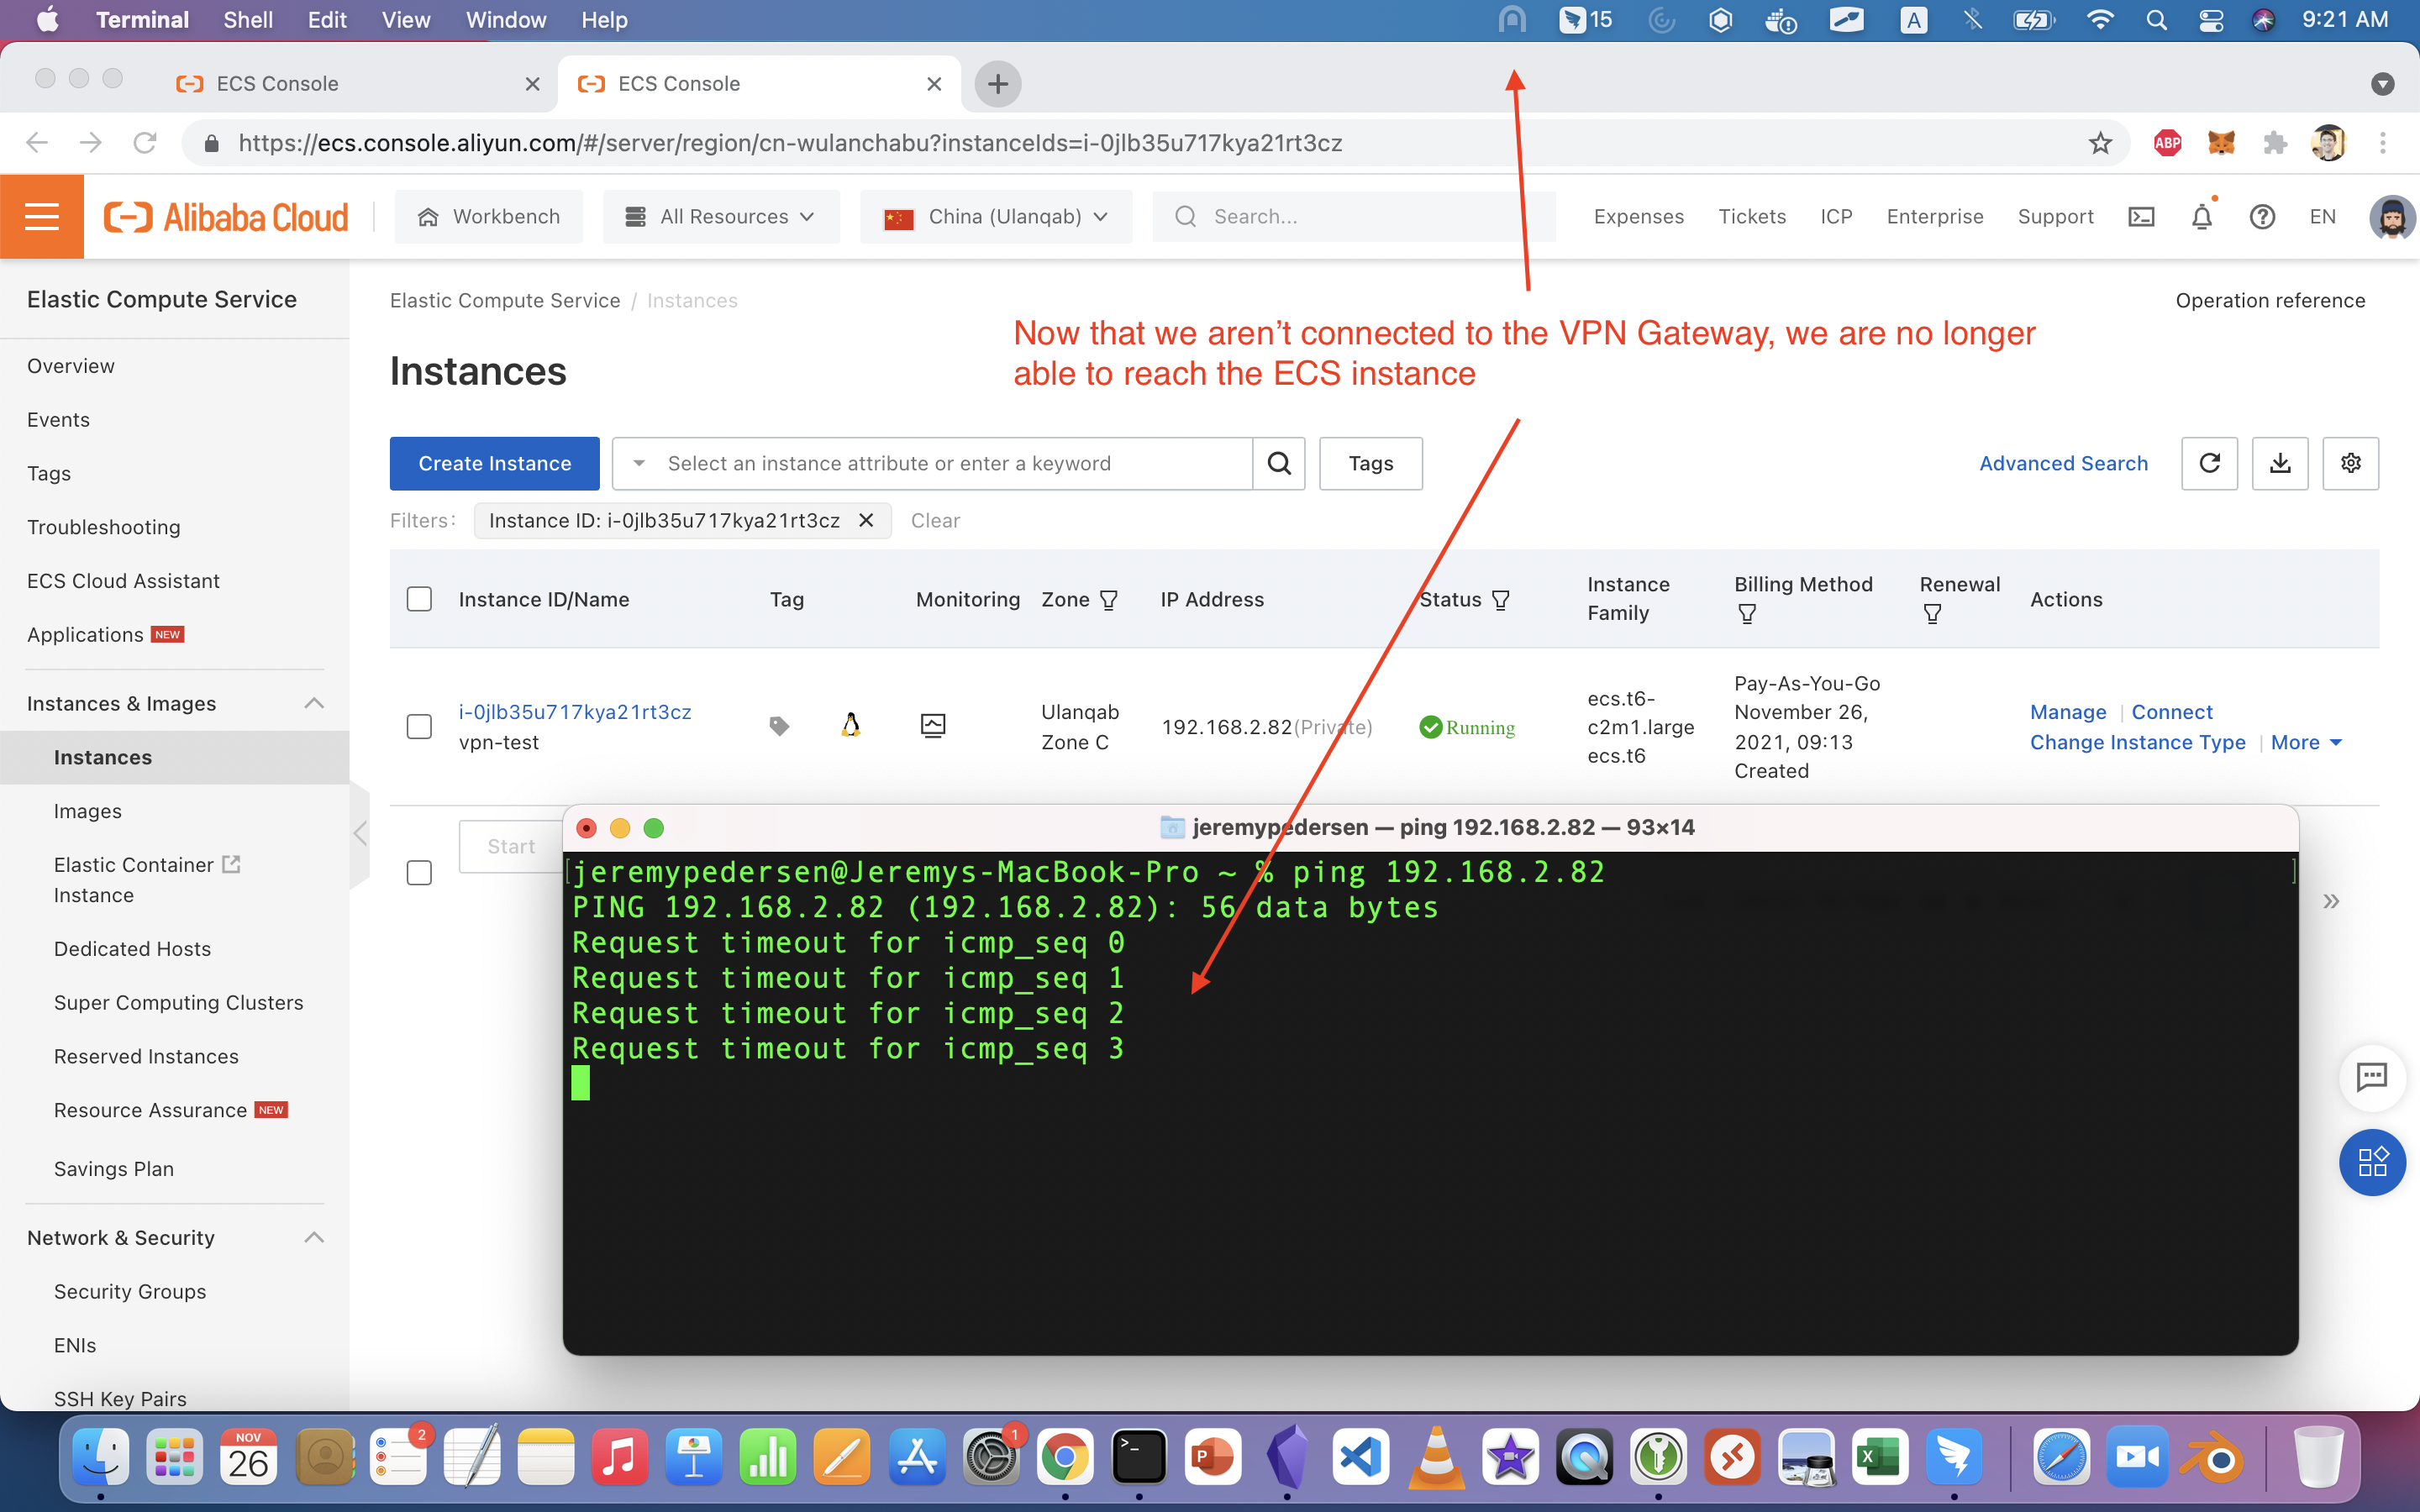
Not surprisingly, it fails! This is what we expect: the ECS instance's private IP is not reachable directly from the public Internet, only via the VPN tunnel we set up with VPN Gateway.
That's it! Now you now how to create and manage your own VPN Gateway into any Alibaba Cloud VPC!
Great! Reach out to me at jierui.pjr@alibabacloud.com and I'll do my best to answer in a future Friday Q&A blog.
You can also follow the Alibaba Cloud Academy LinkedIn Page. We'll re-post these blogs there each Friday.
Friday Blog - Week 35 - "The Price Is Right": Understanding CDN Pricing on Alibaba Cloud
JDP - April 22, 2022
Alibaba Cloud Community - December 30, 2021
Alibaba Clouder - April 30, 2020
JDP - February 10, 2022
Alibaba Cloud MVP - November 15, 2019
JDP - April 29, 2022
 VPN Gateway
VPN Gateway is an Internet-based service that establishes a connection between a VPC and your on-premise data center.
Learn More Security Center
A unified security management system that identifies, analyzes, and notifies you of security threats in real time
Learn More Security Solution
Alibaba Cloud is committed to safeguarding the cloud security for every business.
Learn More Edge Security Acceleration (Original DCDN)
Edge Security Acceleration (ESA) provides capabilities for edge acceleration, edge security, and edge computing. ESA adopts an easy-to-use interactive design and accelerates and protects websites, applications, and APIs to improve the performance and experience of access to web applications.
Learn MoreMore Posts by JDP
vunny December 10, 2021 at 5:21 am
Great documentation!!